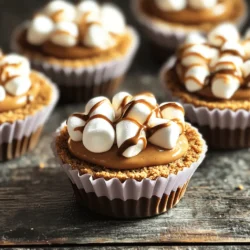
Peanut Butter S’mores Cups
Indulge in the ultimate dessert with these easy Peanut Butter S’mores Cups! Perfect for any occasion, this delicious treat combines the classic flavors of graham crackers, creamy peanut butter, and gooey marshmallows, all topped with rich chocolate. Follow our simple step-by-step recipe to create these mouthwatering cups that your friends and family will love. Click through to discover the full recipe and satisfy your sweet cravings!