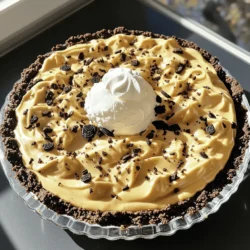
No-Bake Peanut Butter Oreo Pie
Indulge in a decadent No-Bake Peanut Butter Oreo Pie that's sure to impress! With a creamy peanut butter filling nestled in a crunchy Oreo crust, this dessert is easy to make and requires no baking. Perfect for gatherings or a sweet treat at home, this recipe takes just 20 minutes of prep. Click to discover how to whip up this irresistible dessert and make your next gathering unforgettable!