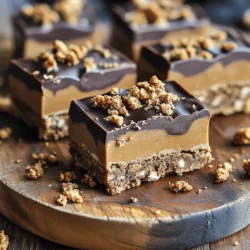
No-Bake Cookies and Cream Protein Bars
Satisfy your sweet tooth with these delicious No-Bake Cookies and Cream Protein Bars! Packed with rolled oats, protein powder, and cookie goodness, these treats are quick to make and perfect for a healthy snack. In just 15 minutes of prep, you can enjoy a nutritious indulgence that’s easy to customize. Click through to discover the full recipe and learn how to make these irresistible bars today!