Get ready to impress with Strawberry Shortcake Cake Jars! This fun, layered dessert brings together fresh strawberries, fluffy shortcake, and creamy whipped topping, all in a jar. Perfect for any event or a sweet treat at home, you’ll learn how to create this delightful recipe step-by-step, including tips for perfecting texture and presentation. Join me as we dive into a yummy world of cake jars that will leave your taste buds cheering!
Ingredients
Here is what you need to make Strawberry Shortcake Cake Jars:
– 1 cup all-purpose flour
– 1 teaspoon baking powder
– 1/2 teaspoon baking soda
– 1/4 teaspoon salt
– 1/4 cup unsalted butter, softened
– 1/2 cup granulated sugar
– 1 large egg
– 1/2 teaspoon vanilla extract
– 1/2 cup buttermilk
– 2 cups fresh strawberries, hulled and sliced
– 2 tablespoons sugar (for macerating strawberries)
– 1 cup heavy cream
– 3 tablespoons powdered sugar
– 1 teaspoon vanilla extract (for whipped cream)
– Mint leaves for garnish (optional)
Each ingredient plays a key role. The flour gives structure, while the sugar adds sweetness. Fresh strawberries bring a burst of flavor. The heavy cream makes a light and fluffy whipped topping.
Step-by-Step Instructions
Preparation of Strawberries
To prepare the strawberries, start by hulling and slicing them. In a small bowl, mix the sliced strawberries with 2 tablespoons of sugar. This process is called maceration. Let them sit for at least 30 minutes. The sugar pulls out the natural juices. This step is crucial. The juices add flavor and moisture to your dessert. You will have a sweet, syrupy mix that enhances every bite.
Making the Shortcake
Now, let’s make the shortcake. First, preheat your oven to 350°F (175°C). Grease a small baking dish or line it with parchment paper. In a medium bowl, whisk together the flour, baking powder, baking soda, and salt. This ensures even rising.
In a large bowl, beat the softened butter and granulated sugar together. Mix until it looks light and fluffy, which takes about 3-4 minutes. Next, add the egg and vanilla extract. Mix in well. Now, alternate adding the dry mixture and buttermilk to the butter mixture. Start and end with the dry ingredients. Mix just until combined. Do not overmix, as this can make the cake tough. Pour the batter into the prepared dish and bake for 20-25 minutes, or until a toothpick comes out clean. Let the cake cool completely.
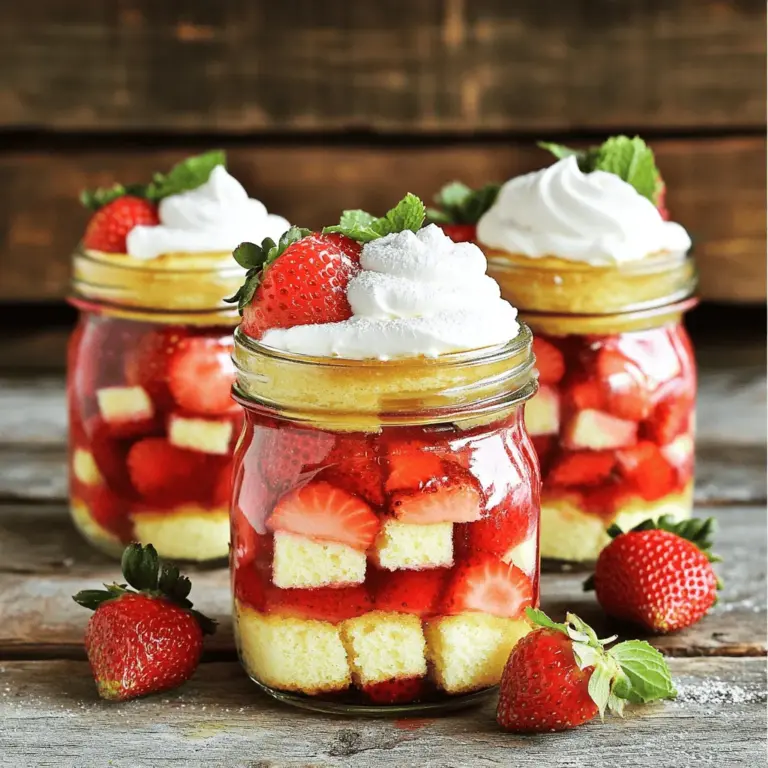
Assembling the Jars
Once the cake has cooled, cut it into small cubes. Now for the fun part: assembling the jars! In clean jars, layer the cake cubes, macerated strawberries (make sure to include the juices), and whipped cream. Repeat the layers until the jars are full. Finish with a dollop of whipped cream on top. This makes each jar look beautiful and inviting. If you want, add fresh mint leaves for a pop of color and flavor. Each layer should be visible for a stunning presentation. For the best effect, use clear jars so everyone can see the layers. Enjoy your delightful dessert!
Tips & Tricks
Perfecting the Texture
How do I avoid overmixing the batter?
To avoid overmixing, mix the wet and dry ingredients just until combined. Look for a few lumps. If you mix too much, the cake can become tough. Remember, a gentle hand keeps your cake soft and fluffy.
What is the ideal consistency for whipped cream?
The perfect whipped cream should hold soft peaks. This means when you lift the beaters, it forms a gentle curl. To get this, beat the cream until it thickens but still looks creamy.
Presentation Ideas
What are some creative garnishing options?
You can add fresh mint leaves for a pop of color. Sliced strawberries on top also work well. A sprinkle of crushed cookies can add texture too.
How can I set up the jars for a visually appealing look?
Layering is key! Start with cake cubes, then strawberries, and finish with whipped cream. Repeat these layers. Use clear jars so everyone can see the beautiful colors inside.
Serving Suggestions
What are some good pairing ideas for the dessert?
Serve your jars with a scoop of vanilla ice cream for extra creaminess. A cup of tea or coffee pairs nicely too. This dessert also shines at picnics or summer parties.
What suggestions do you have for themed events?
For a summer event, use bright tablecloths and fresh flowers. For a birthday, add colorful sprinkles to the top. You can also label each jar with fun names for guests to enjoy!

Variations
Flavor Adjustments
You can play with flavors in many fun ways. Instead of strawberries, try blueberries or raspberries. Both fruits add a nice twist to your cake jars. For whipped cream, you can mix in different flavors. Try adding a splash of almond extract or some cocoa powder for a chocolate treat. These small changes can create new favorites.
Dietary Adaptations
If you need a gluten-free option for the cake, use almond flour or a gluten-free mix. These will still give you a great texture. For whipped cream, you can use coconut cream or a vegan whipped topping. Both options taste amazing and keep the dessert light and fluffy.
Make-Ahead Variations
You can prep your cake jars in advance. Make the cake and whipped cream a day before. Just store them separately until you are ready to assemble. Keep the jars in the fridge to keep them fresh. For best taste, serve them within three days. This way, you save time and still enjoy a delightful dessert.
Storage Info
Storing the Cake Jars
To keep your Strawberry Shortcake Cake Jars fresh, store them in the fridge. Use airtight containers or jars with lids. This way, they stay moist and tasty. If you stack jars, place parchment paper between them to avoid squishing the layers.
These cake jars last for about 3 to 5 days in the fridge. The strawberries may soften over time, but the flavor remains great. Just make sure to enjoy them before they lose their freshness.
Freezing Options
You can freeze individual jars for later. To do this, let the jars cool completely first. Then, seal them tightly with a lid or plastic wrap. This helps prevent freezer burn.
When you’re ready to eat, take a jar out and let it thaw in the fridge overnight. For quicker thawing, place the jar in cool water for about an hour. Avoid using a microwave, as this can change the texture of the cake and cream.
Signs of Spoilage
To ensure the dessert is safe to eat, check for signs of spoilage. If the cake smells off or the strawberries look mushy, it’s best to toss them. Also, if you see any mold, do not eat it.
Always look for a change in texture or smell. If you keep good storage habits, you can enjoy your Strawberry Shortcake Cake Jars with peace of mind.
FAQs
What can I use instead of buttermilk?
You can use milk and vinegar as a buttermilk substitute. Mix 1 cup of milk with 1 tablespoon of white vinegar. Let it sit for 5 minutes. This creates a similar tangy taste and texture. Other options include yogurt or sour cream mixed with water. Each gives your cake a nice moisture.
Can I use frozen strawberries?
Yes, you can use frozen strawberries. They work well in cake jars. However, fresh strawberries taste best. They add a bright flavor and nice texture. If using frozen, let them thaw and drain excess juice. This keeps your cake jars from getting soggy.
Is it possible to buy pre-made cake jars?
Yes, many stores sell pre-made cake jars. You can find them in bakeries or grocery stores. They are a handy option if you’re short on time. Just check the labels for quality ingredients. This can save you time but may lack the freshness of homemade.
How long does preparation take?
The prep time is about 20 minutes. After baking, let the cake cool for about 1 hour. This brings the total time to around 2 hours. You need time for the cake to cool before assembling the jars. Don’t rush; let the flavors meld for the best taste.
You learned how to make delicious strawberry shortcake jars. We went through each step from the ingredients to tips for perfect texture and presentation. Remember to layer carefully and choose fresh fruits or dietary options as you prefer. This dessert is versatile, making it great for any occasion. Enjoy making and sharing these sweet creations, and don’t hesitate to experiment with flavors. With the right techniques, your strawberry shortcake jars will impress everyone. Happy baking!

