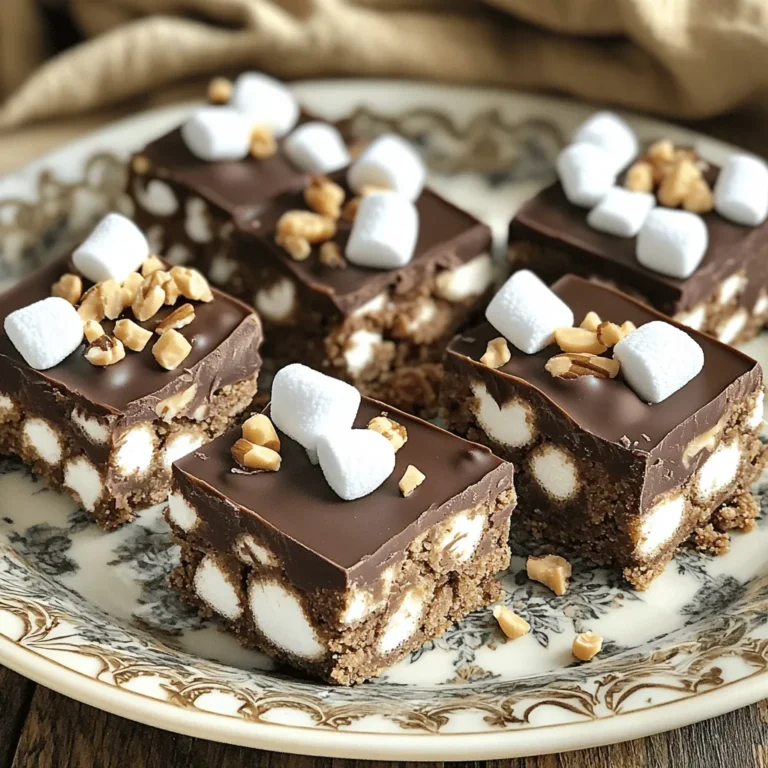
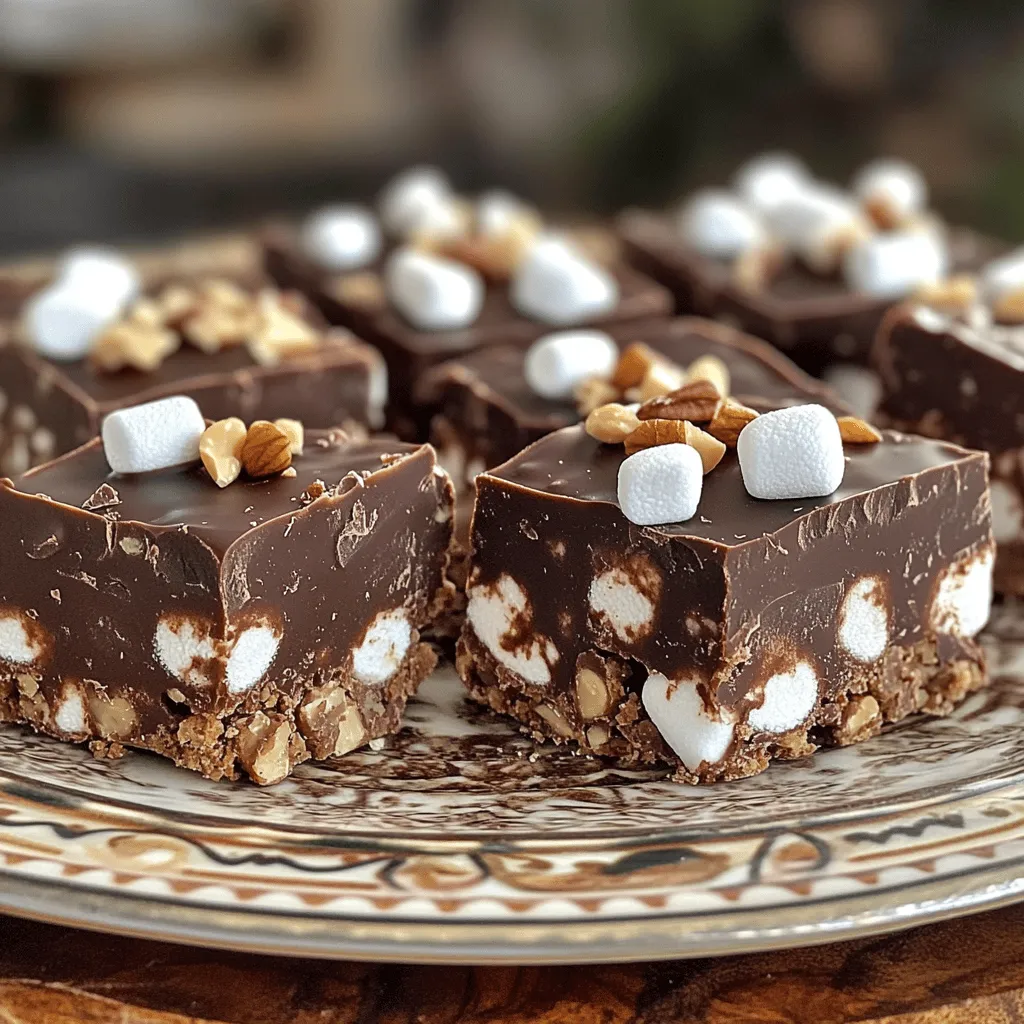
If you love sweet treats, you’re in for a real joy! Today, I’m sharing my recipe for Chocolate Marshmallow Rocky Road. This delightful dessert blends rich chocolate, fluffy marshmallows, and crunchy nuts into a perfect bite. It’s easy to make and fun to share with family and friends. Ready to bring some joy to your kitchen? Let’s dive into the ingredients and whip up this tasty treat together!
Ingredients
Detailed Ingredient List
To make Chocolate Marshmallow Rocky Road, you’ll need these simple ingredients:
– 200g dark chocolate, chopped
– 100g milk chocolate, chopped
– 100g unsalted butter
– 150g digestive biscuits, crushed
– 100g mini marshmallows
– 50g nuts (such as walnuts or almonds), roughly chopped
– 2 tablespoons golden syrup or honey
– A pinch of sea salt
Each ingredient adds a unique flavor and texture. The dark and milk chocolate gives a rich taste. The butter helps create a smooth mixture. Crushed digestive biscuits add crunch. Mini marshmallows are soft and sweet. Nuts give a nice bite. Golden syrup or honey adds sweetness and helps bind everything together. The sea salt enhances all the flavors.
Ingredient Substitutions
You can switch some ingredients if needed. Here are a few ideas:
– Use semi-sweet chocolate instead of dark chocolate for a milder flavor.
– Swap milk chocolate for white chocolate if you like it sweeter.
– For a gluten-free version, replace digestive biscuits with gluten-free cookies.
– Instead of nuts, you can use seeds like pumpkin or sunflower for a nut-free treat.
– Maple syrup can replace golden syrup or honey for a different sweetness.
These swaps keep the recipe fun while tailoring it to your taste.
Necessary Equipment
You don’t need fancy tools to make this treat. Here’s what you’ll need:
– A 9-inch square baking pan
– Parchment paper for easy removal
– Microwave-safe bowl for melting chocolate
– Mixing bowls for blending ingredients
– A spatula for folding and mixing
– A sharp knife for cutting the squares
Having these tools ready will make your cooking experience smooth and enjoyable.
Step-by-Step Instructions
Preparation and Melting Chocolate
Start by greasing a 9-inch square baking pan with butter. Line it with parchment paper, leaving some paper hanging over the edges. This helps when you remove the rocky road later. In a microwave-safe bowl, add the dark chocolate, milk chocolate, and unsalted butter. Microwave it in short bursts of 20 seconds. Stir after each time until everything melts and mixes well. This step is key to getting a smooth chocolate mix.
Mixing Dry Ingredients
In a large mixing bowl, combine the crushed digestive biscuits, mini marshmallows, and chopped nuts. The biscuits add crunch, while marshmallows bring fluffiness. Nuts add a nice texture and flavor. Make sure to mix them well so every piece is ready for the chocolate.
Combining and Setting the Mixture
Once the chocolate is smooth, stir in the golden syrup or honey. Pour this melted mix over the dry ingredients. Use a spatula to gently fold everything together until all pieces are coated in chocolate. You should see no dry bits. Add a pinch of sea salt for extra flavor, and then mix again. Transfer this mixture into the prepared baking pan. Spread it out evenly, pressing it down lightly. This helps it set better. Put the pan in the fridge for at least 2-3 hours. Once it’s firm, lift it out using the parchment paper. Cut it into squares or bars. Enjoy your homemade chocolate marshmallow rocky road treat!
Tips & Tricks
How to Achieve the Perfect Texture
To get the right texture for your chocolate marshmallow rocky road, focus on melting the chocolate correctly. Use a microwave, but heat it in short bursts. Stir after each 20 seconds. This helps prevent burning.
When you mix the dry ingredients, don’t crush the biscuits too fine. You need some chunks for a nice crunch. Fold the melted chocolate with care. Don’t stir too hard; this keeps air in the mix. This air makes the rocky road light and fluffy.
Common Mistakes to Avoid
One big mistake is not greasing the pan. If you skip this step, your rocky road will stick. Another error is overcooking the chocolate. This can make it grainy. Always stir gently and watch closely.
Don’t forget the salt! A pinch adds depth to the flavor. Also, don’t skimp on the cooling time. If you cut it too soon, it will fall apart. Patience is key for a great treat.
Presentation Tips
For a stunning finish, serve your chocolate rocky road on a colorful platter. Add some extra mini marshmallows and nuts on top. This makes it look festive and inviting.
Cut the rocky road into even squares for a nice look. You can also wrap the squares in clear bags tied with a ribbon. This turns them into sweet gifts.
Variations
Adding Flavors (e.g., peanut butter, mint)
You can make chocolate marshmallow rocky road even better by adding flavors. Peanut butter adds a rich, nutty taste. Just swirl in some creamy peanut butter after melting the chocolate. Mint extract gives a fresh twist. Use about a teaspoon for a light minty flavor. Experiment with these ideas until you find your favorite.
Alternative Mix-Ins (e.g., dried fruits, different nuts)
Mix-ins can change the whole taste of your treat. Try adding dried fruits like cranberries or cherries. They bring a sweet and tangy flavor. Different nuts, like pecans or hazelnuts, add crunch and flavor. You can also use seeds like sunflower or pumpkin for a nut-free option. Choose what you love!
Gluten-Free and Vegan Options
You can make this recipe gluten-free by using gluten-free biscuits. Look for brands that fit your diet. For a vegan version, swap butter for coconut oil and use dairy-free chocolate. Make sure your marshmallows are vegan too. These swaps keep the delicious taste while fitting different diets. Enjoy your chocolate marshmallow rocky road in any way you like!
Storage Info
How to Store Rocky Road
To keep your chocolate marshmallow rocky road fresh, store it in an airtight container. You can keep it at room temperature for up to a week. If you live in a warm area, it’s best to store it in the fridge. This helps the chocolate stay firm and tasty.
Freezing Instructions
You can freeze rocky road if you want to save some for later. Cut it into squares first. Then, wrap each square in plastic wrap. Place the wrapped pieces in a freezer-safe bag or container. Rocky road can stay fresh in the freezer for up to three months. Just thaw it in the fridge before enjoying.
Best Practices for Freshness
To keep rocky road fresh, avoid exposing it to heat or moisture. Keep it away from sunlight and warm places. If you notice any signs of melting, place it in the fridge right away. For the best flavor and texture, enjoy your rocky road within one week of making it.
FAQs
What is the origin of Rocky Road?
Rocky Road began in Australia during the Great Depression. Bakers wanted to create a sweet treat. They combined chocolate with nuts and marshmallows. This mix made a fun dessert that was easy to share. The name “Rocky Road” reflects its bumpy texture, like a rough road. It became popular in many places, especially in America.
Can I make this recipe ahead of time?
Yes, you can make this recipe ahead of time. Prepare the rocky road and let it set in the fridge. You can store it for up to a week. This makes it perfect for parties or family treats. Just remember to keep it in an airtight container. That way, it stays fresh and tasty.
How long does Rocky Road last?
Rocky Road stays good for about one week at room temperature. If you keep it in the fridge, it lasts longer. You can also freeze it for up to three months. Make sure to wrap it tightly to avoid freezer burn. When you’re ready to eat it, just let it thaw at room temperature.
Can I use different types of chocolate?
Absolutely! You can mix different types of chocolate. Try using white chocolate for a sweeter taste. You can also use milk chocolate for creaminess or dark chocolate for a richer flavor. Feel free to experiment with your favorite chocolates. This will make your Rocky Road even more special!
This guide covers everything you need for making Rocky Road treats. We listed the key ingredients and substitutions, plus the tools you’ll need. Next, I shared step-by-step instructions to help you prepare and perfect your mix. I added tips for getting the best texture and avoiding common mistakes. Explore fun ways to change up the flavors and ingredients too. Finally, I explained how to store your treats, keeping them fresh.
By following these tips, you can enjoy delicious Rocky Road any time!

