
Looking for a quick and tasty dinner? You’re in the right place! This Instant Pot Honey Garlic Chicken is simple and delicious, making it perfect for busy nights. With just a few ingredients like honey, soy sauce, and chicken thighs, you’ll have a meal that the whole family loves. In this post, I’ll walk you through each step to create this flavorful dish effortlessly. Let’s get started!
Ingredients
List of Ingredients
– 2 pounds boneless, skinless chicken thighs
– 1/2 cup honey
– 1/4 cup soy sauce (low sodium preferred)
– 4 cloves garlic, minced
– 1 tablespoon fresh ginger, grated
– 1 tablespoon cornstarch
– 2 tablespoons water
– 1 tablespoon sesame oil
– 1/2 teaspoon red pepper flakes (optional)
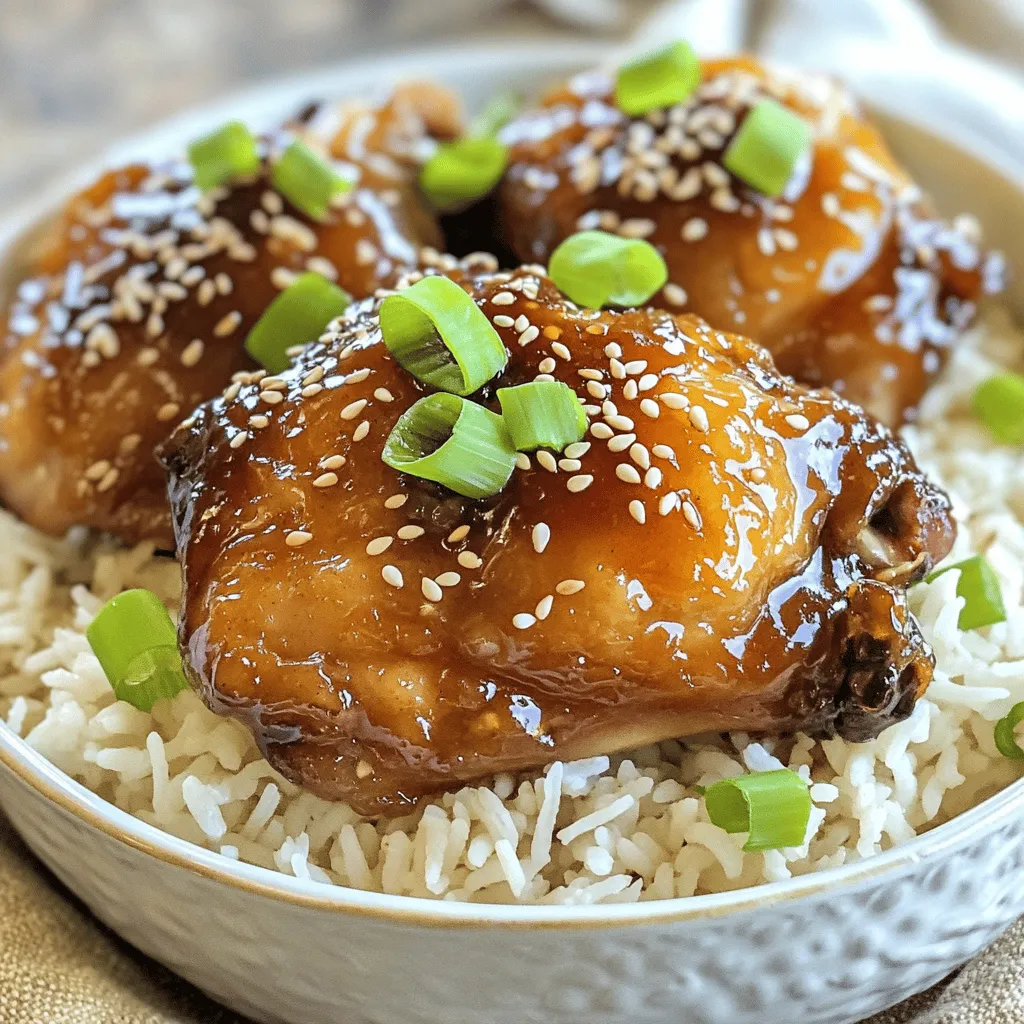
– 3 green onions, sliced (for garnish)
– Sesame seeds (for garnish)
To make Instant Pot Honey Garlic Chicken, you need fresh and simple ingredients. The chicken thighs are juicy and perfect for this dish. Honey adds sweetness, while soy sauce gives it a savory kick. Garlic and ginger bring in flavor that makes this meal stand out.
You can find these ingredients at any grocery store. Make sure to get fresh garlic and ginger for the best taste. If you like a bit of heat, add the red pepper flakes. They are optional but can make your meal exciting.
The green onions and sesame seeds are for garnish, adding color and crunch. They make your dish look great and taste even better.
With these ingredients ready, you are set to create a delicious meal.
Kitchen Tools Needed
– Instant Pot
– Mixing bowl
– Whisk
– Wooden spoon
– Measuring cups and spoons
You need a few basic tools to make this dish easy. The Instant Pot is key for cooking quickly and evenly. A mixing bowl helps combine the sauce ingredients. A whisk makes mixing easy and fun.
Using a wooden spoon is great for stirring the chicken and sauce. Measuring cups and spoons will help you get the right amounts. With these tools, you will have a smooth cooking experience.
Step-by-Step Instructions
Preparing the Sauce
In a bowl, combine the honey, soy sauce, garlic, ginger, sesame oil, and red pepper flakes. Stir until everything mixes well. This sauce brings a sweet and savory flavor to our chicken. You can adjust the honey for more sweetness or the soy sauce for more saltiness.
Sautéing the Chicken
Next, turn on your Instant Pot and select the Sauté function. Add a little oil if needed. Place the chicken thighs in the pot and brown them for 2-3 minutes on each side. This step adds depth to the flavor. If needed, do this in batches to avoid crowding the pot. Once browned, take the chicken out and set it aside.
Cooking Under Pressure
Now, pour the honey garlic sauce into the pot. Make sure to scrape any browned bits off the bottom. Return the chicken to the pot, ensuring it’s submerged in the sauce. Close the lid and set the pressure valve to Sealing. Select the Manual or Pressure Cook setting and set the time for 10 minutes. This step locks in all the flavors.
Finalizing the Dish
After cooking, let the Instant Pot naturally release pressure for 5 minutes. Then, do a quick release for any remaining steam. Open the lid carefully. To thicken the sauce, mix cornstarch and water in a small bowl to create a slurry. Select the Sauté function again and add the slurry to the pot. Stir continuously for about 2-3 minutes until the sauce thickens. Now, your dish is ready to serve! Enjoy it over rice or noodles, and don’t forget to drizzle with that thickened sauce.
Tips & Tricks
Perfecting the Flavor
To make your honey garlic chicken shine, taste is key. You can adjust the honey or soy sauce. If you want it sweeter, add more honey. For a saltier kick, increase the soy sauce. This lets you customize the dish to your liking. It’s all about finding that perfect balance.
Chicken Thighs vs. Breasts
I often prefer chicken thighs for this recipe. They stay juicy and tender even when cooked. Thighs also soak up flavor better than breasts. If you use chicken breasts, they can dry out more easily. So, thighs are your best bet for a tasty meal.
Sautéing Alternatives
When browning your chicken, you can use oil or the pot’s non-stick surface. A little oil can help you get a nice golden crust. If you skip the oil, make sure the pot is hot enough. This way, the chicken won’t stick. Both methods work well to achieve that delicious flavor.
Variations
Honey Garlic Chicken Bowls
You can create tasty honey garlic chicken bowls. Serve the chicken over rice, quinoa, or noodles. Each option has a unique taste and texture. Rice is soft and sticky. Quinoa adds a nutty flavor. Noodles give a delightful chewiness. Mix in the thick sauce for extra flavor. You can also add a sprinkle of sesame seeds on top.
Adding Vegetables
Want to make your meal healthier? Add vegetables! Bell peppers and broccoli work great. Cut bell peppers into strips and add them with the chicken. This adds color and crunch. Broccoli florets can be added for more nutrition. Steam or sauté them separately. Then, mix them into the honey garlic chicken before serving.
Spice Level Adjustments
Do you like it spicy? You can adjust the heat! Add more red pepper flakes for a kick. If you want it milder, reduce or skip the flakes. You can also add a dash of hot sauce after cooking. This lets each person customize their heat level. Enjoy your meal just the way you like it!
Storage Info
Refrigeration
To store your leftover honey garlic chicken, place it in an airtight container. This keeps it fresh and prevents odors from mixing. You should eat it within 3 to 4 days for the best taste. Make sure to let it cool before sealing. This helps avoid condensation, which can make the chicken soggy.
Freezing
Freezing is a great option for longer storage. First, let the chicken cool completely. Then, divide it into meal-sized portions. Use freezer-safe bags or containers to avoid freezer burn. It can last up to 3 months in the freezer. When you’re ready to eat, just thaw it in the fridge overnight.
Reheating
Reheat your honey garlic chicken gently to keep it tasty. You can use the microwave or stovetop. For the microwave, heat it in short bursts, stirring in between. If using the stovetop, add a splash of water to keep it moist. Heat it on low until warmed through. This way, it will stay juicy and delicious!
FAQs
Can I use frozen chicken for this recipe?
Yes, you can use frozen chicken. Just add a few extra minutes to the cooking time. For frozen thighs, set the Instant Pot for about 15 minutes instead of 10. This ensures your chicken cooks through and stays juicy.
What can I serve with Instant Pot Honey Garlic Chicken?
Many side dishes go well with this chicken. Here are some tasty options:
– Steamed rice
– Noodles
– Quinoa
– Roasted vegetables
– A fresh salad
These sides balance the sweet and savory flavors of the dish nicely.
How do I make this recipe in a slow cooker?
To adapt this recipe for a slow cooker, follow these steps:
1. Sauté the chicken in a pan until browned.
2. Place the chicken in the slow cooker.
3. Mix the sauce ingredients and pour over the chicken.
4. Cook on low for 6-7 hours or high for 3-4 hours.
This method gives you a tender, flavorful meal with minimal effort.
Is this dish gluten-free?
Yes, you can make this dish gluten-free. Use gluten-free soy sauce or tamari instead of regular soy sauce. This swap keeps the flavor while making the recipe safe for those with gluten intolerance. Always check labels to ensure all ingredients are gluten-free.
This recipe for Instant Pot Honey Garlic Chicken is straightforward and delicious. I shared key ingredients, tools, and step-by-step instructions to help you succeed. With tips for flavor and storage, you can make this dish your own. Enjoy it with sides or customize it with veggies for variety. This meal saves time and satisfies taste. Keep experimenting, and find what works best for you!

