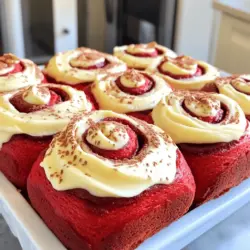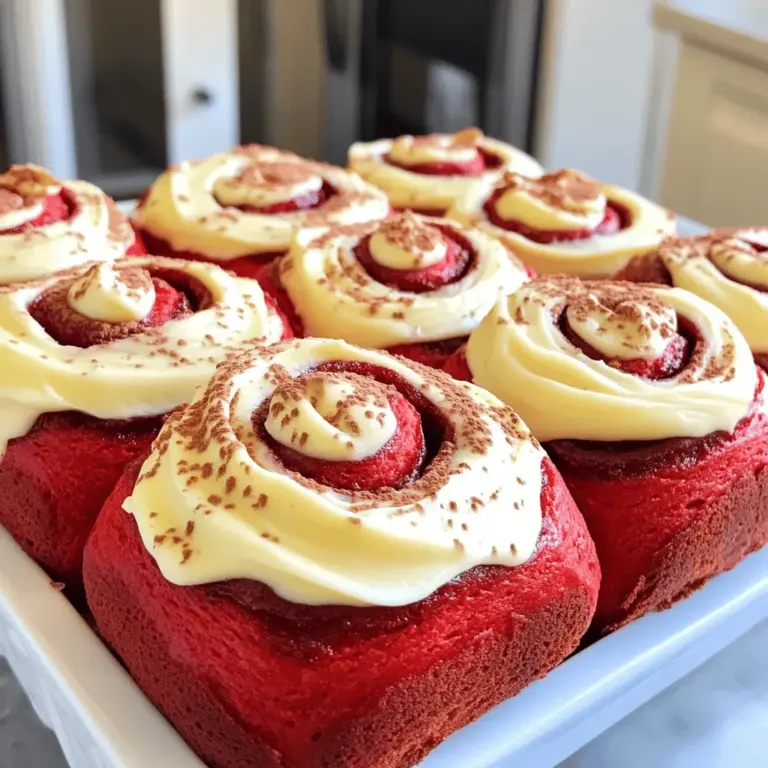
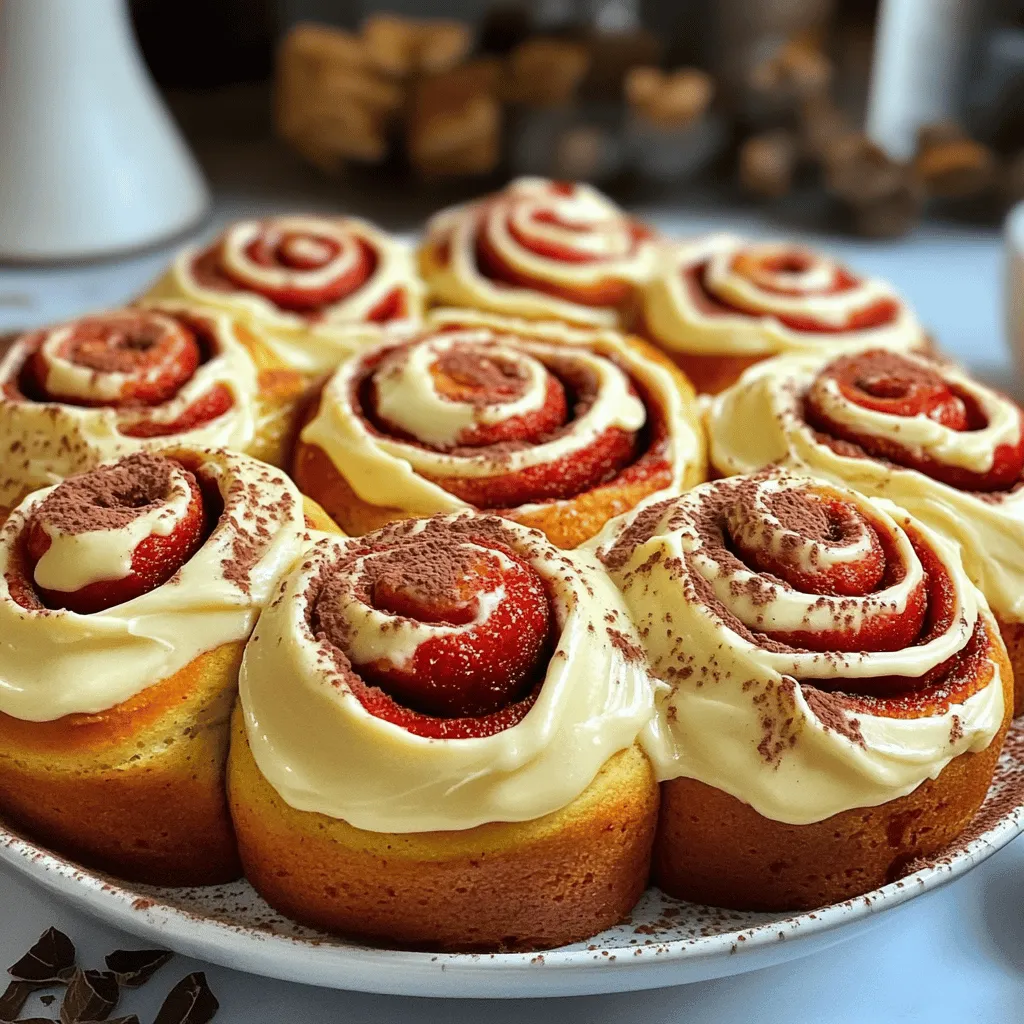
If you crave a dessert that’s both comforting and striking, look no further than Red Velvet Cinnamon Rolls! This recipe combines the rich, velvety flavor of red velvet with the warm spices of cinnamon. You’ll love how these sweet rolls offer a fun twist on a classic treat. In this article, I’ll guide you through simple steps to create these irresistible delights, topped with creamy frosting. Let’s dive in!
Ingredients
Main Ingredients
– 2 cups all-purpose flour
– 1 tablespoon unsweetened cocoa powder
– 1 teaspoon baking powder
– 1/2 teaspoon baking soda
– 1/4 teaspoon salt
– 1/2 cup granulated sugar
– 1/2 cup whole milk, warmed
– 1/4 cup unsalted butter, melted
– 1 large egg
– 2 tablespoons red food coloring
– 1 teaspoon vanilla extract
Filling Ingredients
– 1/3 cup brown sugar, packed
– 2 tablespoons cinnamon
– 1/4 cup unsalted butter, softened
Cream Cheese Frosting Ingredients
– 4 ounces cream cheese, softened
– 1/4 cup unsalted butter, softened
– 1 cup powdered sugar
– 1 teaspoon vanilla extract
– 1 tablespoon milk (if needed for consistency)
When making red velvet cinnamon rolls, the right ingredients make all the difference. Each one plays a key role. The flour gives structure. Cocoa adds a subtle chocolate flavor. Baking powder and soda help the rolls rise. Salt enhances the sweetness.
Now, let’s talk about the wet ingredients. Warm milk activates the yeast. Melted butter brings richness. The egg binds everything together. Red food coloring gives those rolls their signature hue. Vanilla extract adds a lovely aroma.
For the filling, brown sugar and cinnamon create a sweet and spicy mix. Softened butter helps the filling stick to the dough. This adds to the deliciousness of every bite.
Finally, we can’t forget the cream cheese frosting. This frosting perfectly balances the sweetness of the rolls. Cream cheese adds tanginess. Butter and powdered sugar make it smooth and creamy. A splash of milk helps achieve the right texture.Enjoy making these sweet treats!
Step-by-Step Instructions
Preparing the Dough
– Combine dry ingredients: flour, cocoa powder, baking powder, baking soda, salt, and granulated sugar.
– Mix wet ingredients: whisk warm milk, melted butter, egg, red food coloring, and vanilla extract.
To start, find a large bowl and add the dry ingredients. Mix them well to ensure even flavor. In a separate bowl, whisk your wet ingredients. The warm milk helps activate the dough. The red food coloring gives the rolls their signature look, so don’t skip this step!
Dough Preparation
– Combine wet and dry mixtures to form a dough.
– Knead the dough for about 5 minutes until smooth and elastic.
Next, pour the wet mix into the dry ingredients. Stir until it comes together to form a dough. If the dough feels too sticky, add a bit of flour. Transfer the dough to a floured surface and knead for about 5 minutes. It should feel smooth and elastic. This step helps develop the gluten, which gives the rolls their chewy texture.
Rising and Rolling
– Let the dough rise for 1 hour until it doubles in size.
– Roll out the dough into a rectangle, spread butter, and sprinkle the cinnamon-sugar mixture.
Now, place your dough in a greased bowl. Cover it with a clean cloth and let it rise in a warm spot for about 1 hour. You’ll know it’s ready when it doubles in size. Once risen, punch it down gently and roll it out into a rectangle. Spread softened butter on top, then sprinkle the cinnamon-sugar mixture evenly. This filling adds great flavor!
Forming and Baking the Rolls
– Roll the dough into a log and cut into 12 equal pieces.
– Allow the rolls to rise for another 30 minutes, then preheat the oven.
– Bake for 20-25 minutes or until golden.
Carefully roll the dough into a log, starting from one long side. Slice it into 12 equal pieces. Place the rolls in a greased baking dish and cover them again. Let them rise for another 30 minutes. Preheat your oven to 350°F (175°C) during this time. Once they are puffy and ready, bake for 20-25 minutes. Look for a golden color on top!
Making the Frosting and Finishing
– Beat together cream cheese, butter, powdered sugar, and vanilla for frosting.
– Frost the rolls after cooling for 10 minutes.
While the rolls bake, prepare the cream cheese frosting. Beat together softened cream cheese, butter, powdered sugar, and vanilla until smooth. If your frosting is too thick, add a little milk. Once the rolls cool for about 10 minutes, generously frost them. The warm rolls will make the frosting melt slightly, creating a perfect topping. Enjoy your delightful treat!
Tips & Tricks
Baking Tips
– Ensure the milk is warm but not hot to activate the yeast properly. Hot milk can kill the yeast.
– Use a kitchen scale for precise measurements to improve consistency. Accurate amounts matter for the dough’s rise.
Frosting Tips
– Make frosting ahead of time and refrigerate until ready to use. This lets the flavors blend well.
– For a thicker frosting, reduce the amount of milk added. This helps achieve that perfect spreadable texture.
Serving Suggestions
– Serve warm for the best taste. Warm rolls melt the frosting and make each bite dreamy.
– Pair with a cup of coffee or tea for a delightful treat. This combo enhances the sweet flavors.
Variations
Flavor Variations
You can easily change the flavors in your red velvet cinnamon rolls. Adding chocolate chips to the dough can make them even more decadent. The rich chocolate pairs well with the red velvet base. If you want a different taste, try using maple syrup instead of brown sugar. This swap gives a unique flavor that adds a nice twist to the rolls.
Dietary Modifications
If you need a non-dairy option, you can use almond milk in place of whole milk. This keeps the rolls moist while making them dairy-free. For those who need a gluten-free option, simply substitute gluten-free flour for regular flour. This way, everyone can enjoy these delicious treats without worry.
Seasonal Twists
You can make your red velvet cinnamon rolls even more festive with seasonal flavors. During the holidays, add a few drops of peppermint extract to the dough. This will create a refreshing minty taste that many love. In the warmer months, top your rolls with fresh seasonal fruits like strawberries or raspberries. This adds color and a bright flavor that balances the sweetness of the rolls.
Storage Info
Storage Suggestions
Store leftover rolls in an airtight container at room temperature. This keeps them fresh for a few days. If you do not eat them right away, refrigerate for up to 3 days. The cold will help keep them safe to eat.
Freezing Instructions
Allow baked rolls to cool completely before freezing. This step is key to avoid ice crystals. Wrap tightly in plastic wrap and foil. You can keep them in the freezer for up to 2 months. That way, you can enjoy them later.
Reheating Tips
Reheat rolls in the microwave for 10-15 seconds. This warms them up nicely without drying them out. You can also use a preheated oven at 350°F (175°C) for 5-10 minutes. This method makes them warm and fluffy again. Enjoy these delicious treats any time!
FAQs
How to make Red Velvet Cinnamon Rolls?
Follow the detailed step-by-step instructions in the article for perfect results. Start by mixing dry ingredients and wet ingredients separately. Then combine them to form a soft dough. Knead it for five minutes until smooth. Let it rise for an hour. Roll it out, spread the filling, and form the rolls. Allow them to rise again, then bake until golden.
What is the history of Red Velvet desserts?
Red velvet desserts have a rich history. They first appeared in the early 20th century. The unique flavor comes from cocoa powder and a hint of acidity, often from buttermilk. The vibrant color is due to red food coloring, which became popular in the 1920s. It gained fame in the South, especially in cakes. Today, it includes many treats, like our sweet rolls.
Can these rolls be made ahead of time?
Yes, you can prepare the dough ahead of time. Allow it to rise and then shape it into rolls. You can freeze them for later use. Just remember to thaw them before baking. This makes it easy to enjoy fresh rolls anytime.
Can I use a different frosting?
Absolutely! Cream cheese frosting is a classic choice, but you can switch it up. Try vanilla or chocolate frosting if you prefer. Each option offers a unique taste that pairs well with the rolls. Feel free to get creative!
In this guide, we explored how to make delicious red velvet cinnamon rolls. We detailed the key ingredients, easy steps, and tips for the best results. Baking can be fun and rewarding, especially with a treat like this. Don’t hesitate to get creative with flavors or storage options. Enjoy these rolls warm, and share them with friends or family. With a little practice, you can perfect your technique and impress anyone who tries your rolls. Happy baking!