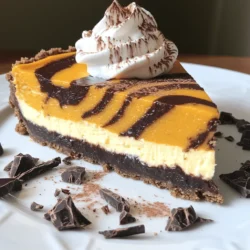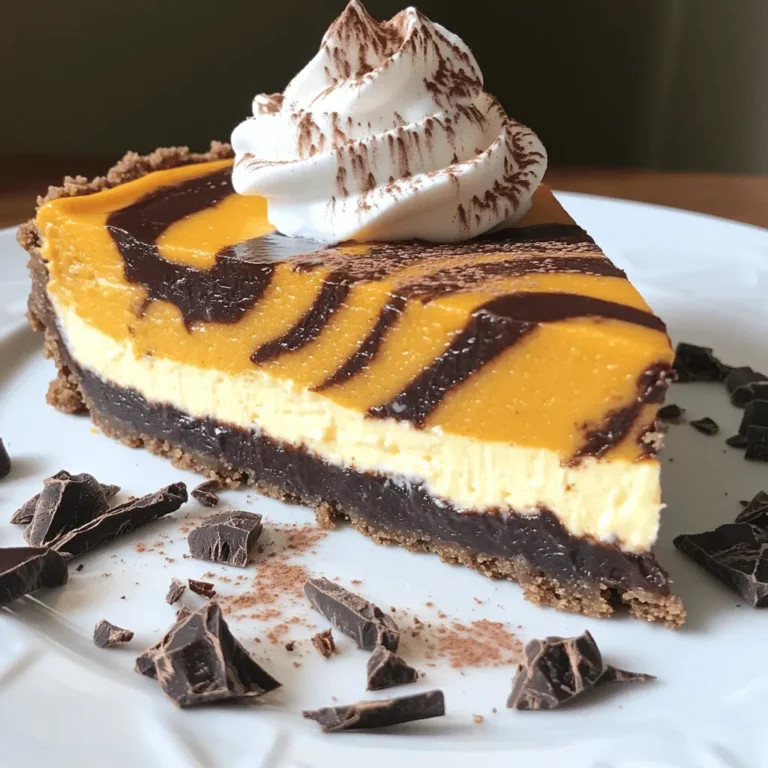
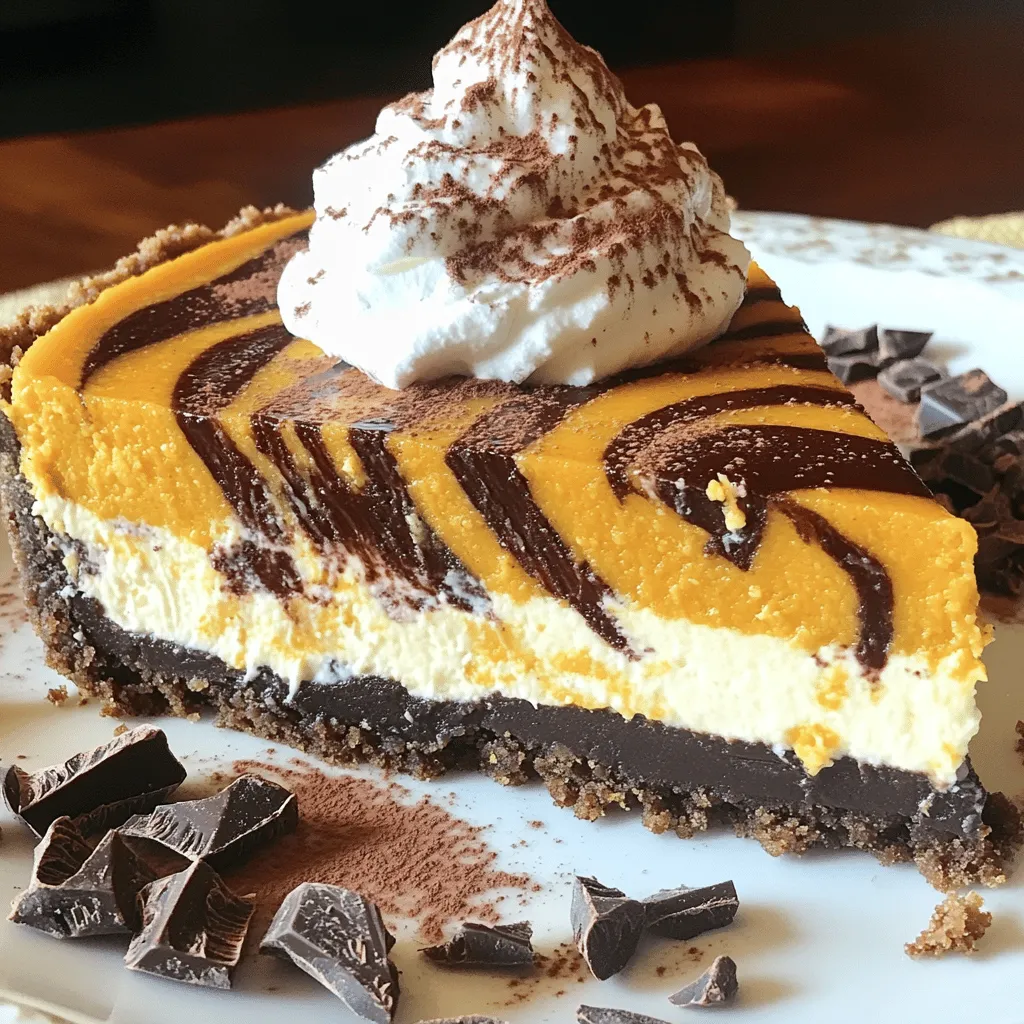
Get ready to indulge in a dessert that combines fall flavors with rich chocolate! This Pumpkin Chocolate Swirl Cheesecake is a delightful treat you won’t want to miss. With creamy pumpkin, sweet chocolate, and a buttery crust, it’s perfect for any occasion. Whether you’re hosting a gathering or just want a slice of happiness, I’ll guide you step-by-step through this simple recipe. Let’s dive into the delicious details!
Ingredients
Main Ingredients
– 1 ½ cups graham cracker crumbs
– ½ cup unsalted butter, melted
– 3 (8 oz) packages cream cheese, softened
– 1 cup granulated sugar
– 1 cup pumpkin puree
– 3 large eggs
– 1 tablespoon vanilla extract
– 1 teaspoon pumpkin pie spice
– 1 cup semi-sweet chocolate chips
– 2 tablespoons heavy cream
The main ingredients create a rich and creamy texture. Cream cheese brings that smooth base. Pumpkin puree adds warmth and a lovely fall flavor. Eggs help bind everything together. The graham cracker crust gives it a crunchy base. The melted butter makes it stick. The semi-sweet chocolate chips add a sweet twist, while the heavy cream helps create that swirl.
Optional Toppings
– Whipped cream and cinnamon
– Chocolate shavings
For extra flair, top your cheesecake with whipped cream. A sprinkle of cinnamon adds warmth. Chocolate shavings give a nice touch and enhance the dessert. These toppings make each slice even more delightful and beautiful. You can play with the toppings based on your preference!
Step-by-Step Instructions
Preparation of the Crust
– Preheat the oven to 325°F (160°C).
– In a bowl, combine 1 ½ cups of graham cracker crumbs and ½ cup of melted unsalted butter. Mix until it feels like wet sand.
– Press this mixture firmly into the bottom of a greased 9-inch springform pan. Bake for 10 minutes. Let it cool.
Preparing the Cheesecake Mixture
– In a large bowl, beat 3 packages of softened cream cheese with an electric mixer.
– Gradually add 1 cup of granulated sugar. Mix until smooth.
– Then, add 1 cup of pumpkin puree, 3 large eggs, 1 tablespoon of vanilla extract, and 1 teaspoon of pumpkin pie spice. Beat until fully mixed and creamy.
Creating the Chocolate Swirl
– In a small saucepan over low heat, melt 1 cup of semi-sweet chocolate chips with 2 tablespoons of heavy cream. Stir until smooth.
– Pour half of the pumpkin cheesecake mixture over the cooled crust.
– Drop spoonfuls of the melted chocolate onto the pumpkin layer. Use a knife to gently swirl the chocolate into the mixture.
– Pour the rest of the pumpkin mixture on top. Repeat the swirling with the remaining chocolate.
– Bake for 55-60 minutes until the edges set but the center jiggles slightly.
– Turn off the oven and crack the door. Let the cheesecake cool in the oven for one hour.
– Once cool, refrigerate for at least 4 hours or overnight.
– Before serving, run a knife around the pan’s edge and remove the sides of the springform pan.
Tips & Tricks
Perfecting the Cheesecake Texture
How to prevent cracking
To keep your cheesecake smooth, avoid overmixing the batter. Mix just until smooth. Also, avoid opening the oven door while it bakes. This helps keep the heat steady. If you see cracks forming, don’t worry! A swirl of chocolate can hide them well.
Cooling methods in the oven
After baking, turn off the oven and crack the door. This lets the cheesecake cool slowly. A sudden temperature change can cause cracks. Let it sit for one hour in the oven. Then, chill it in the fridge for at least four hours. Overnight is even better!
Serving Suggestions
Presentation ideas for special occasions
Slice the cheesecake neatly and serve on dessert plates. For a fun touch, add a dollop of whipped cream on each slice. You can sprinkle cinnamon on top for extra flavor. Try adding chocolate shavings to the plate for a fancy look!
Pairing with beverages
This cheesecake pairs well with coffee or hot cocoa. The rich flavors balance nicely with warm drinks. For a fun twist, serve it with spiced apple cider. This adds a nice fall touch to your dessert.
Equipment Recommendations
Best springform pan
Use a 9-inch springform pan for this recipe. This size makes it easy to remove the cheesecake without breaking it. Look for a pan with a sturdy base. A good seal will keep the batter from leaking.
Essential mixing tools
An electric mixer works best for smooth cheesecake. It saves time and gives you a creamy texture. You’ll also need a rubber spatula to scrape down the bowl. This ensures all ingredients mix well. A sharp knife helps with slicing the cheesecake cleanly.
Variations
Dietary Modifications
You can easily make this cheesecake for different diets. For a gluten-free crust, use gluten-free graham crackers. Just crush them and mix with melted butter. Press it into the pan like you would with regular crumbs.
If you want a vegan version, swap cream cheese for a plant-based alternative. Look for brands made from nuts or tofu. This will keep the creamy texture while fitting a vegan diet.
Flavor Enhancements
To boost the flavor, add spices like nutmeg or clove. These spices add warmth and depth to the pumpkin. You can mix them right into the pumpkin layer for a tasty twist.
You can also switch up the chocolate. Instead of semi-sweet chocolate chips, try dark or white chocolate. Each type brings a unique flavor to your cheesecake. Dark chocolate makes it rich, while white chocolate adds sweetness.
Serving Style Alternatives
For a fun twist, make mini cheesecake cups. Use small cups or muffin tins. This makes them easy to serve at parties. Layer them with pumpkin and chocolate for a lovely look.
Another idea is to create layered dessert jars. Stack spoonfuls of the pumpkin cheesecake and melted chocolate in jars. This way, guests can enjoy a stylish treat with a perfect blend of flavors.
Storage Info
Refrigeration Guidelines
To keep your cheesecake fresh, store it in the fridge. Use an airtight container or cover it tightly with plastic wrap. This way, it keeps its yummy taste and stays moist. The cheesecake can stay fresh for up to five days in the refrigerator. Just make sure to eat it before it gets too old!
Freezing Instructions
If you want to save some for later, freezing is a great option. First, let the cheesecake cool completely after baking. Then, slice it into individual pieces. Wrap each slice tightly in plastic wrap and place them in a freezer bag. This helps to keep the flavor and texture. You can freeze it for up to three months.
When you’re ready to enjoy a slice, take it out of the freezer. Place it in the fridge overnight to thaw. If you’re in a hurry, you can let it sit at room temperature for about an hour. Then, it’s ready to serve!
FAQs
How long does it take to make Pumpkin Chocolate Swirl Cheesecake?
Making Pumpkin Chocolate Swirl Cheesecake takes about 6 hours total. Here’s how the time breaks down:
– Prep Time: 20 minutes
– Bake Time: 55-60 minutes
– Cooling Time: 1 hour in the oven and at least 4 hours in the fridge
This means you need to plan ahead. Cooling is key to a perfect cheesecake.
Can I make this cheesecake ahead of time?
Yes, you can make this cheesecake a day or two ahead. This is great for events. Here’s how:
– Make the cheesecake and follow all steps.
– Let it cool as directed.
– Once cooled, cover it tightly with plastic wrap.
– Store it in the fridge.
Making it ahead gives the flavors time to blend.
What can I substitute for cream cheese if I want a lighter option?
If you want a lighter cheesecake, try these options:
– Greek Yogurt: Use plain, nonfat Greek yogurt as a cream cheese swap. It adds protein.
– Ricotta Cheese: This gives a lighter texture and taste. Blend until smooth.
– Silken Tofu: Blend silken tofu for a dairy-free choice. It works well in baked goods.
These options keep the cheesecake creamy but lighter.
You’ve learned how to make a delicious Pumpkin Chocolate Swirl Cheesecake. We covered all the main ingredients, the perfect preparation steps, and tips for a great texture. You can choose from variations, like gluten-free or vegan options, and I shared how to store your cheesecake properly. This dessert will impress at any gathering. Enjoy your baking adventure, and remember to get creative with toppings and flavors. Each bite should be a treat, full of joy and flavor. Happy baking!