Get ready to make a sweet treat with my No-Bake White Chocolate Peppermint Fudge Delight! This easy recipe combines creamy white chocolate and fresh peppermint for a festive bite that’s perfect for all occasions. You don’t need an oven to whip up this fudge, just simple ingredients and a little time. Follow my steps to create a delightful and fun dessert that everyone will love! Let’s get started!
Ingredients
Essential Ingredients
– 2 cups white chocolate chips
– 1 cup sweetened condensed milk
– 1 teaspoon peppermint extract
To make this fudge, you need three main things. First, use 2 cups of white chocolate chips. They give the fudge its sweet, creamy base. Next, grab 1 cup of sweetened condensed milk. This adds richness and helps the fudge set. Lastly, you will need 1 teaspoon of peppermint extract. It brings that festive mint flavor we all love.
Optional Ingredients
– 1/2 cup crushed candy canes
– 1/4 cup unsweetened cocoa powder (for dusting)
– Edible glitter or holiday sprinkles
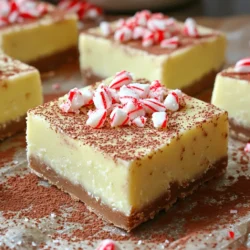
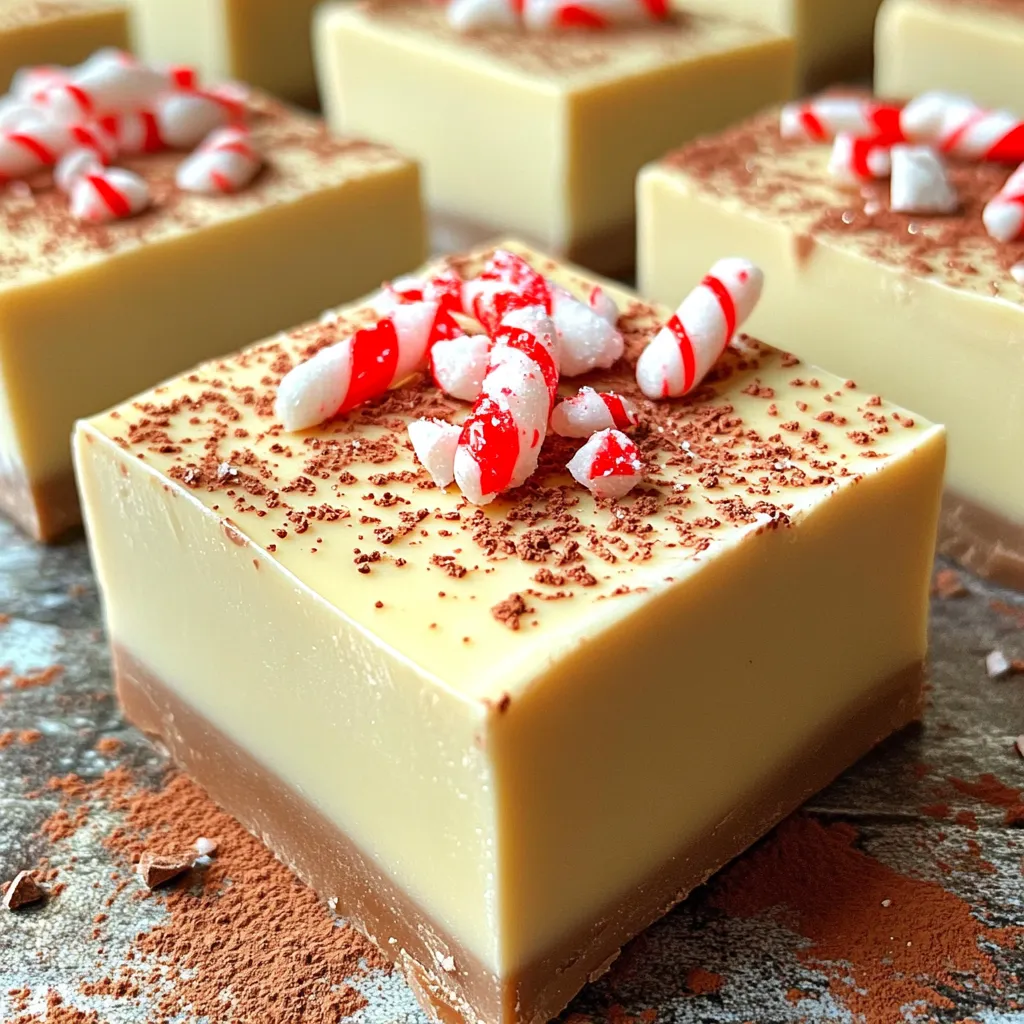
You can add some fun extras to your fudge. First, 1/2 cup of crushed candy canes gives it a nice crunch. It also makes it look pretty with red and white colors. Next, consider using 1/4 cup of cocoa powder. Dust it on top to add a chocolatey touch. Lastly, edible glitter or holiday sprinkles can make the fudge sparkle. These little details make your fudge stand out at any holiday gathering.
Step-by-Step Instructions
Preparation Steps
– Step 1: Melting the White Chocolate
First, grab a medium saucepan. Add the white chocolate chips and sweetened condensed milk. Use low heat and stir often. Keep stirring until the chocolate melts and becomes smooth. This step is key. If you rush, the chocolate might burn.
– Step 2: Adding Flavor
Next, take the pan off the heat. It’s time to add the peppermint extract. Stir it in well. This will give your fudge that nice minty taste. Make sure it blends in completely. You want every bite to burst with flavor.
– Step 3: Incorporating Candy Canes
Now, fold in the crushed candy canes. Use a spatula to mix them gently. You want to spread them throughout the fudge. The candy canes add crunch and a festive look. They also enhance the peppermint flavor.
Finalizing the Fudge
– Step 4: Preparing the Baking Dish
Grab an 8×8-inch baking dish. Line it with parchment paper. Leave some paper hanging over the edges. This makes it easy to lift out the fudge later. A well-prepped dish helps the fudge come out cleanly.
– Step 5: Pouring and Spreading Mixture
Pour your fudge mixture into the prepared dish. Use a spatula to spread it evenly. Get into the corners well. You want a smooth top. This will make it look nice when you cut it.
– Step 6: Cooling and Setting Time
Now, sprinkle a light dusting of cocoa powder on top. This adds a nice finish. If you want, add edible glitter or sprinkles for fun. Place the dish in the fridge. Let it cool for at least 2 hours. This helps the fudge set firm. When it’s ready, lift it out using the parchment. Cut it into small squares or rectangles. Enjoy your tasty treat!
Tips & Tricks
Perfecting the Recipe
To make the best no-bake white chocolate peppermint fudge, start with the right melting technique. I recommend using a medium saucepan over low heat. This helps the white chocolate chips melt slowly and evenly. Stir the mixture constantly. This prevents the chocolate from burning. If you prefer, you can also melt the chocolate in a microwave. Use a microwave-safe bowl and heat it in short bursts of 20 seconds. Stir in between until fully melted.
Achieving a smooth fudge texture is key for a great bite. After melting, mix in the sweetened condensed milk. Make sure it blends well into the chocolate. Once mixed, add the peppermint extract. Stir it in fully. Then, fold in the crushed candy canes gently. This method keeps the fudge smooth while adding a fun crunch.
Presentation Ideas
Creative ways to decorate your fudge make it even more special. After pouring the fudge into the dish, sprinkle cocoa powder on top. This adds a nice touch and a chocolatey flavor. For extra sparkle, use edible glitter or holiday sprinkles. These add color and charm to your fudge.
When serving, cut the fudge into small squares. Arrange them on a festive plate. You can also place them in small paper cups for a fun touch. Pair the fudge with peppermint sticks or holiday cookies for a complete treat. These ideas will impress your guests and make your fudge the star of the table.
Variations
Flavor Variations
You can easily change the taste of your no-bake white chocolate peppermint fudge. Swap peppermint extract for other extracts to create new flavors. For example, use vanilla extract or almond extract for a twist. These simple swaps can make the fudge feel fresh and exciting.
You can also add texture by including nuts or dried fruits. Chopped walnuts or pecans add a nice crunch. Dried cranberries or cherries can bring a sweet and fruity burst. Just mix them in with the crushed candy canes. This makes each bite even more delightful.
Dietary Modifications
Making this fudge fit special diets is simple. For a gluten-free version, you only need to ensure your ingredients are gluten-free. Most white chocolate chips are gluten-free, but always check labels.
If you want a vegan option, substitute white chocolate chips with dairy-free ones. Use coconut milk or almond milk in place of sweetened condensed milk. This keeps the creamy texture while making it vegan-friendly. You can enjoy this tasty treat no matter your dietary needs!
Storage Info
Best Storage Practices
To keep your no-bake white chocolate peppermint fudge fresh, store it in an airtight container. This prevents moisture from ruining the fudge. Line the container with parchment paper for easy removal. Place the fudge in a single layer to avoid sticking.
Refrigeration helps maintain the fudge’s texture. You can keep the fudge in the refrigerator for up to two weeks. Check for any signs of spoilage, like changes in smell or texture. If you notice any, it’s best to discard it.
Freezing the Fudge
Freezing fudge is a great option if you want to save some for later. To freeze the fudge, first cut it into squares. Wrap each piece tightly in plastic wrap. Then, place the wrapped pieces in a freezer-safe bag. Be sure to label the bag with the date.
When you’re ready to enjoy the fudge again, simply take out a piece. Let it thaw in the refrigerator for a few hours. This helps keep the texture nice. You can also leave it out at room temperature for about 30 minutes. Enjoy your fudge without losing any flavor!
FAQs
Common Questions about Fudge
Can I use different types of chocolate?
Yes, you can use other kinds of chocolate. Dark chocolate or milk chocolate works well too. Just remember that different chocolates have different sweetness levels. Adjust the sugar if needed. Mixing chocolates can add new flavors.
How long does this fudge last?
This fudge lasts up to two weeks in an airtight container. Keep it in the fridge to maintain freshness. If you want to savor it longer, consider freezing it.
Troubleshooting
What to do if fudge is too soft?
If your fudge is too soft, it may not have set properly. You can return it to the heat. Reheat gently and add a bit more white chocolate. Stir until smooth, then cool it again.
How to fix grainy fudge?
Grainy fudge often means the chocolate overheated. To fix it, try melting the fudge again. Add a splash of cream to help smooth it out. Stir well and cool before serving.
In this post, we explored how to make a delicious fudge with simple steps. You learned about key ingredients, like white chocolate and peppermint extract. We covered the best ways to prepare, cool, and store your fudge, ensuring it stays fresh. Take the time to try some fun variations or tips, too. Whether you’re a first-time baker or a pro, this recipe can bring joy. Enjoy making your fudge and share it with others for a sweet treat!