. To get the right texture in your no bake s'mores bars, start with the base. Mix the graham cracker crumbs and cocoa powder well. Add melted butter slowly so the mix binds together. It should feel like wet sand. When you press it into the pan, make sure it is firm. A firm base gives that nice crunch. The marshmallow and chocolate layer should be spread evenly. This helps each bite taste just right. One main mistake is not pressing the base firmly enough. If it’s loose, the bars will fall apart. Another issue is using too many mini marshmallows or chocolate chips. This can make the bars too sweet. Be careful when you add salt; a pinch is just right. Lastly, don’t rush the refrigeration. Letting it chill for 30 minutes helps the layers set well. Serve these bars cold or at room temperature. You can cut them into squares for easy handling. For a fun twist, top them with extra mini chocolate candies. This adds color and a nice crunch. You can also pair them with vanilla ice cream. It makes a delightful dessert combo. Enjoy these treats at parties or family gatherings. They are sure to impress! {{image_2}} You can easily mix up the flavors in your no bake s’mores bars. Try adding peanut butter for a rich, nutty twist. Just swirl in ½ cup of creamy peanut butter into the chocolate layer. It gives a nice balance of sweet and salty. Mint is another fun option. Use mint-flavored chocolate chips instead of regular ones. You can even add a few drops of mint extract to the mixture. Both flavors make the bars exciting and new! If you have dietary needs, you can swap out some ingredients. For gluten-free options, use gluten-free graham cracker crumbs. You can also use coconut oil instead of butter for a dairy-free version. If you want to cut sugar, use a sugar substitute like stevia or monk fruit. The bars will still taste great! These swaps help everyone enjoy the dessert. Get creative with how you serve your no bake s’mores bars. Cut them into fun shapes using cookie cutters. This makes them great for parties. You can also drizzle melted chocolate on top for a fancy touch. For an extra pop, sprinkle crushed graham crackers and mini marshmallows on top. These ideas will impress your guests and make the dessert even more fun. Explore the Full Recipe for more ways to enjoy these bars! To keep your No Bake S’mores Bars fresh, store them in an airtight container. Line the container with parchment paper to avoid sticking. This simple step makes it easy to lift out bars later. Keep them in the fridge to maintain their texture and taste. Avoid leaving them out at room temperature for long periods. These bars last for up to one week in the fridge. If you follow the storage tips, they stay tasty and fresh. After a week, they may lose some flavor and texture. You’ll want to eat them while they are still at their best. You don’t need to reheat No Bake S’mores Bars. They taste great chilled, right from the fridge. If you want a warm touch, try microwaving a bar for just a few seconds. This melts the chocolate slightly and makes them gooey. Enjoy the mix of flavors and textures, just as you made them. For the complete recipe, check out the Full Recipe section. Yes, you can make No Bake S’mores Bars ahead of time. In fact, they taste even better after chilling. I often prepare them a day in advance. Just store them in the fridge. Cover the pan with plastic wrap to keep them fresh. This way, they are ready for your next gathering or dessert craving. If you can’t find graham cracker crumbs, don’t worry! You can use crushed vanilla wafers or digestive biscuits. Both options work well and add a nice flavor. Some people even use chocolate cookies for a richer taste. Experiment with what you have at home and enjoy the fun! Yes, you can freeze No Bake S’mores Bars. They freeze well and stay tasty. Just cut them into bars before freezing. Wrap each bar in plastic wrap or foil. Place them in an airtight container for best results. When you’re ready to eat, let them thaw in the fridge for a few hours. Enjoy your sweet treat anytime! In this post, I covered how to make No Bake S'mores Bars. We explored each ingredient and their roles in the recipe. Step-by-step instructions helped you create a tasty treat. Tips and tricks ensured the best texture and taste. Variations let you get creative, and storage info showed how to keep them fresh. Enjoy making these bars your own. With this knowledge, you can impress friends and family with ease.](https://mycookingcast.com/wp-content/uploads/2025/06/851487fa-9882-4423-b224-3c9af6c8a5f8-768x768.webp)
Are you craving a sweet treat but don’t want to turn on the oven? I’ve got the perfect solution for you: No Bake S’mores Bars! This easy and tasty dessert combines chocolate, marshmallows, and graham crackers into a simple, no-bake recipe. Perfect for any occasion, these bars are fun to make and even better to share. Let’s dive into the ingredients and get started on your new favorite dessert!You can whip them up in no time. The kids will love to help make these bars. It’s a great way to enjoy s’mores without a campfire. You only need a few simple ingredients to create this delicious dessert.
Detailed List of Ingredients
– 1 ½ cups graham cracker crumbs
– ½ cup unsweetened cocoa powder
– ½ cup granulated sugar
– ½ cup unsalted butter, melted
– 1 cup mini marshmallows
– 1 cup semi-sweet chocolate chips
– ½ cup mini chocolate candies (optional)
– 1 teaspoon vanilla extract
– 1 pinch of salt
Importance of Each Ingredient
– Graham cracker crumbs: These form the base. They add crunch and flavor.
– Unsweetened cocoa powder: This gives the bars a rich, chocolatey taste.
– Granulated sugar: Sugar adds sweetness. It balances the other flavors.
– Unsalted butter: This helps bind the ingredients. It also adds richness.
– Mini marshmallows: Marshmallows bring the classic s’mores flavor. They give a soft texture.
– Semi-sweet chocolate chips: These add melty, chocolate goodness. They complement the marshmallows well.
– Mini chocolate candies: Optional, but they add color and fun!
– Vanilla extract: This boosts the flavor, making it more delicious.
– Pinch of salt: A small amount of salt enhances all the flavors.
This combination of ingredients makes No Bake S’mores Bars a delightful treat. Each item plays a key role in the taste and texture. So gather your ingredients and get ready for some fun!
Step-by-Step Instructions
Preparing the Base Layer
First, grab a large mixing bowl. Add 1 ½ cups of graham cracker crumbs, ½ cup of cocoa powder, and ½ cup of granulated sugar. Mix these dry ingredients well. They should blend into a fine mixture. Next, pour in ½ cup of melted unsalted butter and 1 teaspoon of vanilla extract. Stir until it looks like wet sand. Now, take a lined 9×9-inch baking pan. Press the mixture firmly into the bottom. Make sure it’s even and well packed to form a sturdy base.
Adding the Marshmallow and Chocolate Layer
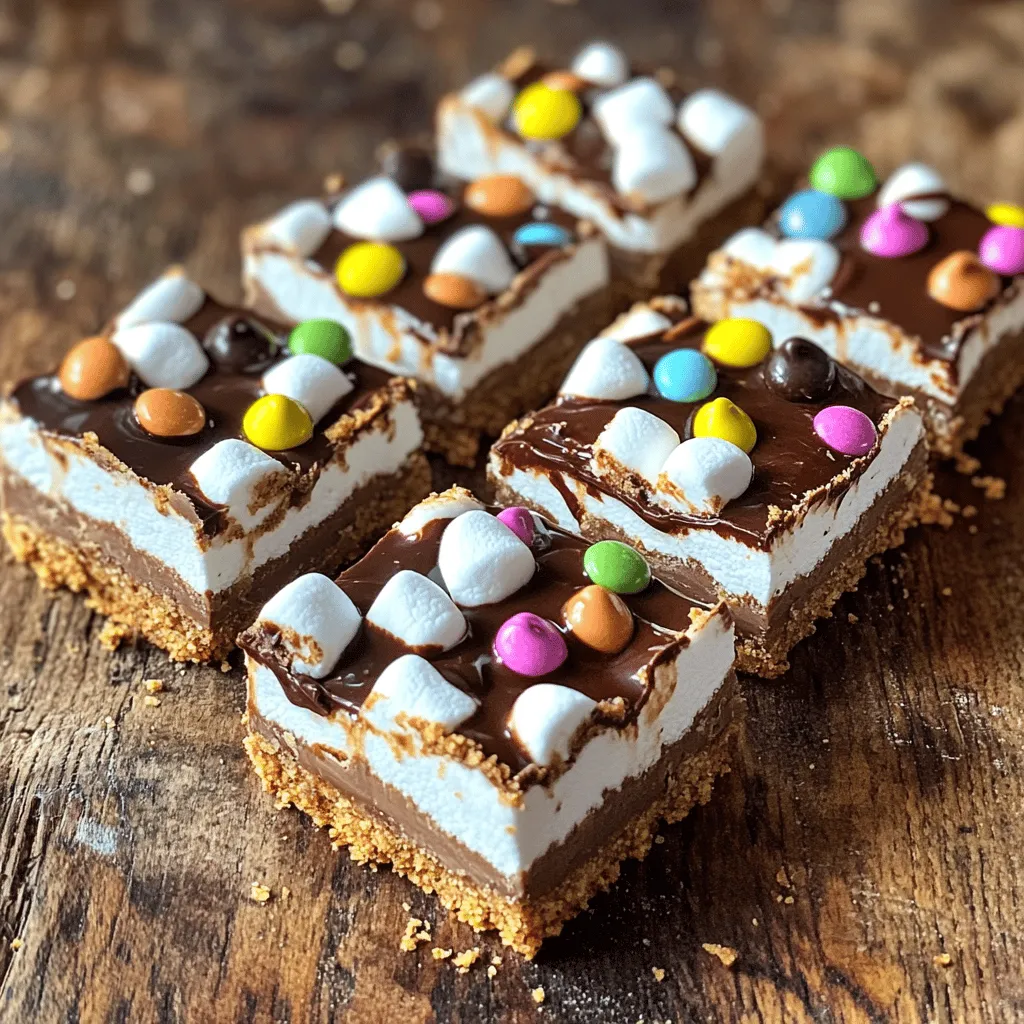
In another bowl, combine 1 cup of mini marshmallows and 1 cup of semi-sweet chocolate chips. This sweet mix will be your top layer. Spread it evenly over the pressed graham cracker base. Make sure every bite gets a taste of this delightful combo. If you want, add ½ cup of mini chocolate candies on top for extra fun and color.
Refrigerating and Serving
Now, place the pan in the refrigerator. Let it chill for about 30 minutes. This helps the bars firm up nicely. After 30 minutes, take the pan out. Cut the chilled mixture into bars. Serve them right away or store them in an airtight container in the fridge. They’ll stay fresh for up to one week. Enjoy your tasty treat!
Tips & Tricks
How to Achieve the Perfect Texture
To get the right texture in your no bake s’mores bars, start with the base. Mix the graham cracker crumbs and cocoa powder well. Add melted butter slowly so the mix binds together. It should feel like wet sand. When you press it into the pan, make sure it is firm. A firm base gives that nice crunch. The marshmallow and chocolate layer should be spread evenly. This helps each bite taste just right.
Common Mistakes to Avoid
One main mistake is not pressing the base firmly enough. If it’s loose, the bars will fall apart. Another issue is using too many mini marshmallows or chocolate chips. This can make the bars too sweet. Be careful when you add salt; a pinch is just right. Lastly, don’t rush the refrigeration. Letting it chill for 30 minutes helps the layers set well.
Serving Suggestions
Serve these bars cold or at room temperature. You can cut them into squares for easy handling. For a fun twist, top them with extra mini chocolate candies. This adds color and a nice crunch. You can also pair them with vanilla ice cream. It makes a delightful dessert combo. Enjoy these treats at parties or family gatherings. They are sure to impress!
Variations
Flavor Variations (Peanut Butter, Mint)
You can easily mix up the flavors in your no bake s’mores bars. Try adding peanut butter for a rich, nutty twist. Just swirl in ½ cup of creamy peanut butter into the chocolate layer. It gives a nice balance of sweet and salty. Mint is another fun option. Use mint-flavored chocolate chips instead of regular ones. You can even add a few drops of mint extract to the mixture. Both flavors make the bars exciting and new!
Ingredient Swaps for Dietary Restrictions
If you have dietary needs, you can swap out some ingredients. For gluten-free options, use gluten-free graham cracker crumbs. You can also use coconut oil instead of butter for a dairy-free version. If you want to cut sugar, use a sugar substitute like stevia or monk fruit. The bars will still taste great! These swaps help everyone enjoy the dessert.
Creative Presentation Ideas
Get creative with how you serve your no bake s’mores bars. Cut them into fun shapes using cookie cutters. This makes them great for parties. You can also drizzle melted chocolate on top for a fancy touch. For an extra pop, sprinkle crushed graham crackers and mini marshmallows on top. These ideas will impress your guests and make the dessert even more fun.
Storage Info
Best Practices for Storage
To keep your No Bake S’mores Bars fresh, store them in an airtight container. Line the container with parchment paper to avoid sticking. This simple step makes it easy to lift out bars later. Keep them in the fridge to maintain their texture and taste. Avoid leaving them out at room temperature for long periods.
How Long Do They Last?
These bars last for up to one week in the fridge. If you follow the storage tips, they stay tasty and fresh. After a week, they may lose some flavor and texture. You’ll want to eat them while they are still at their best.
Reheating or Refreshing Before Serving
You don’t need to reheat No Bake S’mores Bars. They taste great chilled, right from the fridge. If you want a warm touch, try microwaving a bar for just a few seconds. This melts the chocolate slightly and makes them gooey. Enjoy the mix of flavors and textures, just as you made them.
FAQs
Can I make No Bake S’mores Bars ahead of time?
Yes, you can make No Bake S’mores Bars ahead of time. In fact, they taste even better after chilling. I often prepare them a day in advance. Just store them in the fridge. Cover the pan with plastic wrap to keep them fresh. This way, they are ready for your next gathering or dessert craving.
What can I use instead of graham cracker crumbs?
If you can’t find graham cracker crumbs, don’t worry! You can use crushed vanilla wafers or digestive biscuits. Both options work well and add a nice flavor. Some people even use chocolate cookies for a richer taste. Experiment with what you have at home and enjoy the fun!
Can I freeze No Bake S’mores Bars?
Yes, you can freeze No Bake S’mores Bars. They freeze well and stay tasty. Just cut them into bars before freezing. Wrap each bar in plastic wrap or foil. Place them in an airtight container for best results. When you’re ready to eat, let them thaw in the fridge for a few hours. Enjoy your sweet treat anytime!
In this post, I covered how to make No Bake S’mores Bars. We explored each ingredient and their roles in the recipe. Step-by-step instructions helped you create a tasty treat. Tips and tricks ensured the best texture and taste. Variations let you get creative, and storage info showed how to keep them fresh.
Enjoy making these bars your own. With this knowledge, you can impress friends and family with ease.
. To get the right texture in your no bake s'mores bars, start with the base. Mix the graham cracker crumbs and cocoa powder well. Add melted butter slowly so the mix binds together. It should feel like wet sand. When you press it into the pan, make sure it is firm. A firm base gives that nice crunch. The marshmallow and chocolate layer should be spread evenly. This helps each bite taste just right. One main mistake is not pressing the base firmly enough. If it’s loose, the bars will fall apart. Another issue is using too many mini marshmallows or chocolate chips. This can make the bars too sweet. Be careful when you add salt; a pinch is just right. Lastly, don’t rush the refrigeration. Letting it chill for 30 minutes helps the layers set well. Serve these bars cold or at room temperature. You can cut them into squares for easy handling. For a fun twist, top them with extra mini chocolate candies. This adds color and a nice crunch. You can also pair them with vanilla ice cream. It makes a delightful dessert combo. Enjoy these treats at parties or family gatherings. They are sure to impress! {{image_2}} You can easily mix up the flavors in your no bake s’mores bars. Try adding peanut butter for a rich, nutty twist. Just swirl in ½ cup of creamy peanut butter into the chocolate layer. It gives a nice balance of sweet and salty. Mint is another fun option. Use mint-flavored chocolate chips instead of regular ones. You can even add a few drops of mint extract to the mixture. Both flavors make the bars exciting and new! If you have dietary needs, you can swap out some ingredients. For gluten-free options, use gluten-free graham cracker crumbs. You can also use coconut oil instead of butter for a dairy-free version. If you want to cut sugar, use a sugar substitute like stevia or monk fruit. The bars will still taste great! These swaps help everyone enjoy the dessert. Get creative with how you serve your no bake s’mores bars. Cut them into fun shapes using cookie cutters. This makes them great for parties. You can also drizzle melted chocolate on top for a fancy touch. For an extra pop, sprinkle crushed graham crackers and mini marshmallows on top. These ideas will impress your guests and make the dessert even more fun. Explore the Full Recipe for more ways to enjoy these bars! To keep your No Bake S’mores Bars fresh, store them in an airtight container. Line the container with parchment paper to avoid sticking. This simple step makes it easy to lift out bars later. Keep them in the fridge to maintain their texture and taste. Avoid leaving them out at room temperature for long periods. These bars last for up to one week in the fridge. If you follow the storage tips, they stay tasty and fresh. After a week, they may lose some flavor and texture. You’ll want to eat them while they are still at their best. You don’t need to reheat No Bake S’mores Bars. They taste great chilled, right from the fridge. If you want a warm touch, try microwaving a bar for just a few seconds. This melts the chocolate slightly and makes them gooey. Enjoy the mix of flavors and textures, just as you made them. For the complete recipe, check out the Full Recipe section. Yes, you can make No Bake S’mores Bars ahead of time. In fact, they taste even better after chilling. I often prepare them a day in advance. Just store them in the fridge. Cover the pan with plastic wrap to keep them fresh. This way, they are ready for your next gathering or dessert craving. If you can’t find graham cracker crumbs, don’t worry! You can use crushed vanilla wafers or digestive biscuits. Both options work well and add a nice flavor. Some people even use chocolate cookies for a richer taste. Experiment with what you have at home and enjoy the fun! Yes, you can freeze No Bake S’mores Bars. They freeze well and stay tasty. Just cut them into bars before freezing. Wrap each bar in plastic wrap or foil. Place them in an airtight container for best results. When you’re ready to eat, let them thaw in the fridge for a few hours. Enjoy your sweet treat anytime! In this post, I covered how to make No Bake S'mores Bars. We explored each ingredient and their roles in the recipe. Step-by-step instructions helped you create a tasty treat. Tips and tricks ensured the best texture and taste. Variations let you get creative, and storage info showed how to keep them fresh. Enjoy making these bars your own. With this knowledge, you can impress friends and family with ease.](https://mycookingcast.com/wp-content/uploads/2025/06/851487fa-9882-4423-b224-3c9af6c8a5f8-250x250.webp)
