Indulge in a treat that’s easy, delicious, and no-bake! My No-Bake Chocolate Peanut Butter Cheesecake Cups are a dream come true for dessert lovers. With creamy filling and a crunchy crust, these cups satisfy your sweet tooth without all the work. I’ll guide you through each step, from gathering your ingredients to serving it up perfectly. Ready to impress your friends and family? Let’s dive into this delightful recipe!
Ingredients
List of Ingredients
– 1 cup chocolate sandwich cookies, crushed
– 4 tablespoons unsalted butter, melted
– 8 oz cream cheese, softened
– 1/2 cup creamy peanut butter
– 1/2 cup powdered sugar
– 1 teaspoon vanilla extract
– 1 cup whipped cream (or whipped topping)
– 1/4 cup chocolate chips, melted (for drizzling)
– Chopped peanuts (for garnish)
Required Tools and Equipment
To make these cheesecake cups, you need a few simple tools:
– Mixing bowls
– Electric mixer
– Measuring cups and spoons
– Dessert cups or ramekins
– Rubber spatula
– Plastic wrap or lid for storage
Ingredient Substitutions
You can make this recipe your own with easy swaps:
– Use gluten-free cookies for a gluten-free option.
– Swap cream cheese for Greek yogurt for a lighter taste.
– Choose crunchy peanut butter for a different texture.
– Use maple syrup instead of powdered sugar for a natural sweetener.
– Replace whipped cream with coconut cream for a dairy-free option.
Step-by-Step Instructions
Preparing the Crust
To start, you need to make the crust. Take 1 cup of chocolate sandwich cookies and crush them well. You can use a food processor or a zip-top bag with a rolling pin. Once crushed, mix the cookie crumbs with 4 tablespoons of melted unsalted butter in a bowl. Stir until all the crumbs are coated in butter. Next, divide this mixture into 6 to 8 dessert cups. Press the crumbs down firmly at the bottom to form a good crust.
Making the Cheesecake Filling
Now, let’s make the cheesecake filling. In a clean bowl, beat 8 oz of softened cream cheese using an electric mixer until it is smooth and creamy. Then add 1/2 cup of creamy peanut butter, 1/2 cup of powdered sugar, and 1 teaspoon of vanilla extract. Mix these ingredients until they are well blended. This part is key to getting a rich flavor. After that, gently fold in 1 cup of whipped cream. Use a spatula to do this carefully so the mixture stays fluffy.
Assembling the Cups
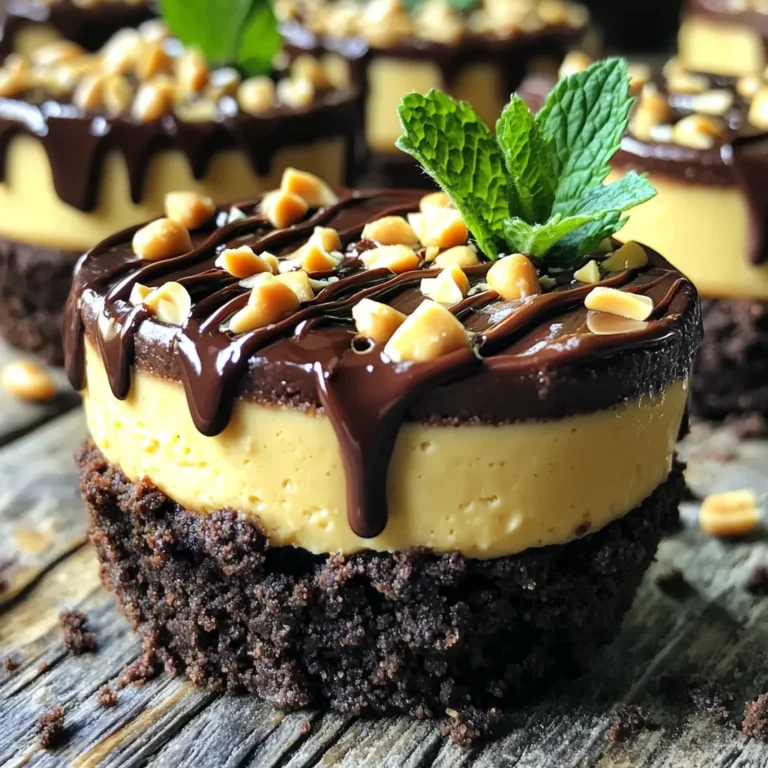
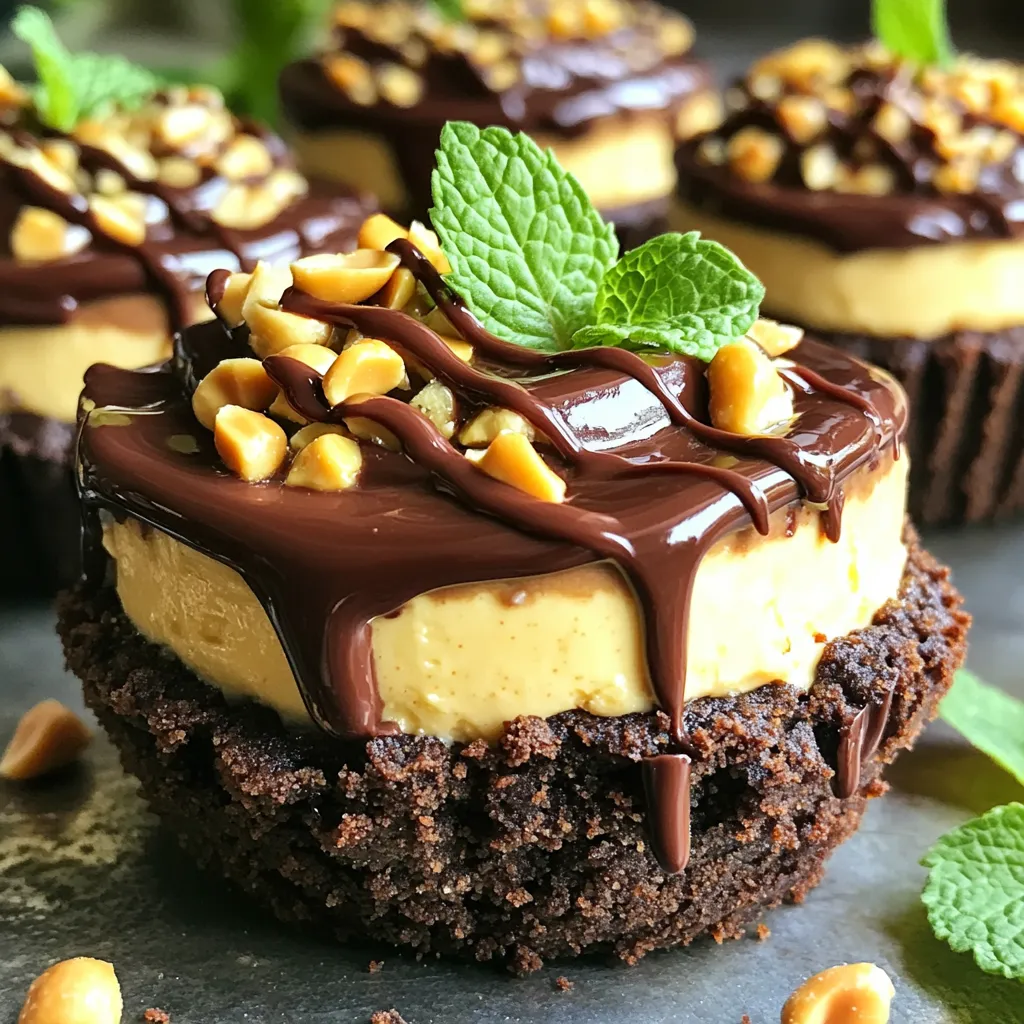
Time to put it all together! Spoon or pipe the peanut butter cheesecake filling over the crust in each cup. Fill them all the way to the top for a nice look. After that, place the cups in the fridge. Let them chill for at least 2 hours. This helps the filling set properly. Just before serving, drizzle 1/4 cup of melted chocolate on top of each cup. Finally, sprinkle some chopped peanuts for garnish. This adds a nice crunch and extra flavor!
Tips & Tricks
Achieving the Perfect Texture
To get a smooth texture in your cheesecake cups, start with softened cream cheese. This helps it mix well with peanut butter and sugar. Use an electric mixer for the best results. When you add the whipped cream, fold it in gently. This step keeps the mixture light and airy. If you mix too hard, it can become dense.
Avoiding Common Mistakes
One mistake is not pressing the crust firmly enough. If the crust is loose, it will fall apart when you serve it. Make sure you press down hard with your fingers or a spoon. Another mistake is skipping the chilling time. The cheesecake needs at least two hours to set. If you serve it too soon, it will be runny and messy.
Serving Suggestions and Presentation Tips
For a beautiful presentation, drizzle melted chocolate over each cup just before serving. Use a spoon or squeeze bottle for a nice design. Garnish with chopped peanuts for extra crunch. Adding a mint sprig on top can give a fresh look. You can also sprinkle some chocolate chips around the base. This makes your dessert look even more inviting.
Variations
Alternative Flavor Combinations
You can mix up the flavors in these cheesecake cups. Try using almond butter instead of peanut butter for a nutty twist. You can also add a bit of cocoa powder to the filling for extra chocolate flavor. If you enjoy fruit, consider adding mashed bananas or pureed strawberries. These will give your cups a fresh and fruity taste that pairs well with chocolate.
Different Crust Options
The crust can change your dessert’s whole vibe. Instead of chocolate sandwich cookies, use graham crackers for a classic taste. If you prefer a nutty flavor, try crushed almonds or pecans mixed with butter. For a gluten-free option, use gluten-free cookies or oats to create a base that everyone can enjoy. Each crust will give a unique texture and taste.
Healthier Ingredient Swaps
You can make these cups a bit healthier without losing flavor. Use Greek yogurt in place of cream cheese for a lighter option. For sweetness, swap powdered sugar with honey or maple syrup. If you want fewer calories, consider using a sugar substitute. You can also use reduced-fat whipped cream to cut back on fat. These swaps keep your dessert tasty and a little more guilt-free.
Storage Info
Best Storage Practices
To keep your No-Bake Chocolate Peanut Butter Cheesecake Cups fresh, store them in the fridge. Use airtight containers or cover them tightly with plastic wrap. This will prevent them from drying out or absorbing other smells. If you plan to serve them later, make sure to refrigerate them right after they set.
How Long They Last
These cheesecake cups can last in the fridge for about 3 to 5 days. If you notice any changes in texture or smell, it’s best to toss them. Always check before you indulge in a sweet treat.
Freezing Options
You can freeze these cheesecake cups too! To do this, place them in the freezer for up to 2 months. Just make sure they are in an airtight container. When you are ready to enjoy them, move them to the fridge to thaw overnight. Avoid refreezing after they have thawed, as this may change their texture.
FAQs
Can I use low-fat cream cheese?
Yes, you can use low-fat cream cheese. It works well in this recipe. Low-fat cream cheese can reduce calories a bit but may change the taste. If you want a lighter dessert, this is a good option. Just remember, the texture might be less rich.
How do I make this recipe gluten-free?
To make this recipe gluten-free, choose gluten-free chocolate sandwich cookies. Many brands offer gluten-free options. Check the label to be sure. The rest of the ingredients are naturally gluten-free. This way, everyone can enjoy these cheesecake cups!
What can I use instead of whipped cream?
You can use whipped topping instead of whipped cream. This is a great substitute and works well in this recipe. If you want a dairy-free option, use coconut whipped cream. It adds a fun twist to the flavor. Just make sure to fold it in gently to keep the mixture light and fluffy.
This blog post covered the key ingredients and tools for making cheesecake cups. I shared step-by-step instructions for preparing the crust and filling, and assembling the cups. You learned tips for the perfect texture and how to avoid mistakes. We also explored variations, storage tips, and common questions. Making cheesecake cups can be fun and rewarding. Use these insights to impress yourself and your friends with tasty treats. Enjoy creating your own delicious cheesecake cups!

