Craving a simple, tasty treat? You’ll love these No-Bake Chocolate Peanut Butter Bars! They combine creamy peanut butter, honey, and chocolate for a deliciously sweet bite. Plus, you don’t need an oven to whip them up. Follow my easy steps and tips to create a dessert that everyone will enjoy. Let’s dive into the sweet world of no-bake treats!
Ingredients
For my no-bake chocolate peanut butter bars, I use simple and tasty ingredients. Each one plays a big part in making these bars delicious and healthy. Here’s what you need:
– 1 cup creamy peanut butter
– 1/2 cup honey or maple syrup
– 1 cup rolled oats
– 1/2 cup shredded coconut
– 1/2 cup chocolate chips (dairy-free if desired)
– 1/2 teaspoon vanilla extract
– 1/4 teaspoon salt
These ingredients blend together to create a soft, chewy treat. The creamy peanut butter brings rich flavor, while honey or maple syrup adds sweetness. Rolled oats give the bars a hearty texture. Shredded coconut adds a hint of tropical flavor.
I love to use chocolate chips. They melt a little and add a nice touch. The vanilla extract gives a warm taste, while salt enhances all the other flavors.
Step-by-Step Instructions
Preparation Steps
1. Combining ingredients over low heat
Start by taking a medium saucepan. Add the creamy peanut butter and honey (or maple syrup). Heat it over low heat. Stir the mixture until it gets smooth. This step helps blend the flavors.
2. Adding dry ingredients to the mixture
Once the mixture is smooth, remove it from the heat. Now, add the vanilla extract and salt. Mix well. In a large bowl, combine rolled oats, shredded coconut, and half of the chocolate chips. Stir them to combine.
3. Preparing the baking dish
Line an 8×8-inch square baking dish with parchment paper. Make sure to leave some paper hanging over the sides. This will help you lift the bars out later.
4. Pressing the mixture into the dish
Pour the warm peanut butter mixture over the dry ingredients in the bowl. Stir everything until it is evenly mixed. Transfer this mixture into your prepared baking dish. Press it down firmly and evenly.
5. Refrigerating until set
Sprinkle the other half of the chocolate chips on top of the pressed mixture. Gently press them in. Now, place the dish in the fridge for at least 2 hours. This helps the bars firm up nicely.
Tips & Tricks
Perfecting the Recipe
To make the best no-bake chocolate peanut butter bars, use room temperature ingredients. This helps everything mix well and makes it easier to stir. Next, ensure even distribution of the chocolate chips. When you add them, mix thoroughly so each bite has chocolate. Lastly, press down firmly for the ideal texture. This makes your bars hold together better and feel nice when you bite into them.
Presentation Tips
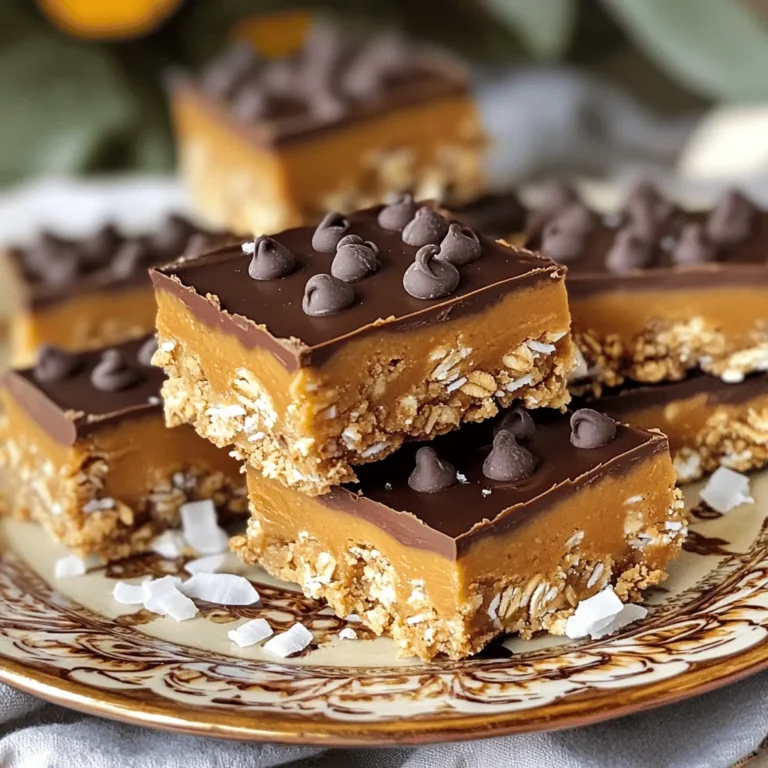
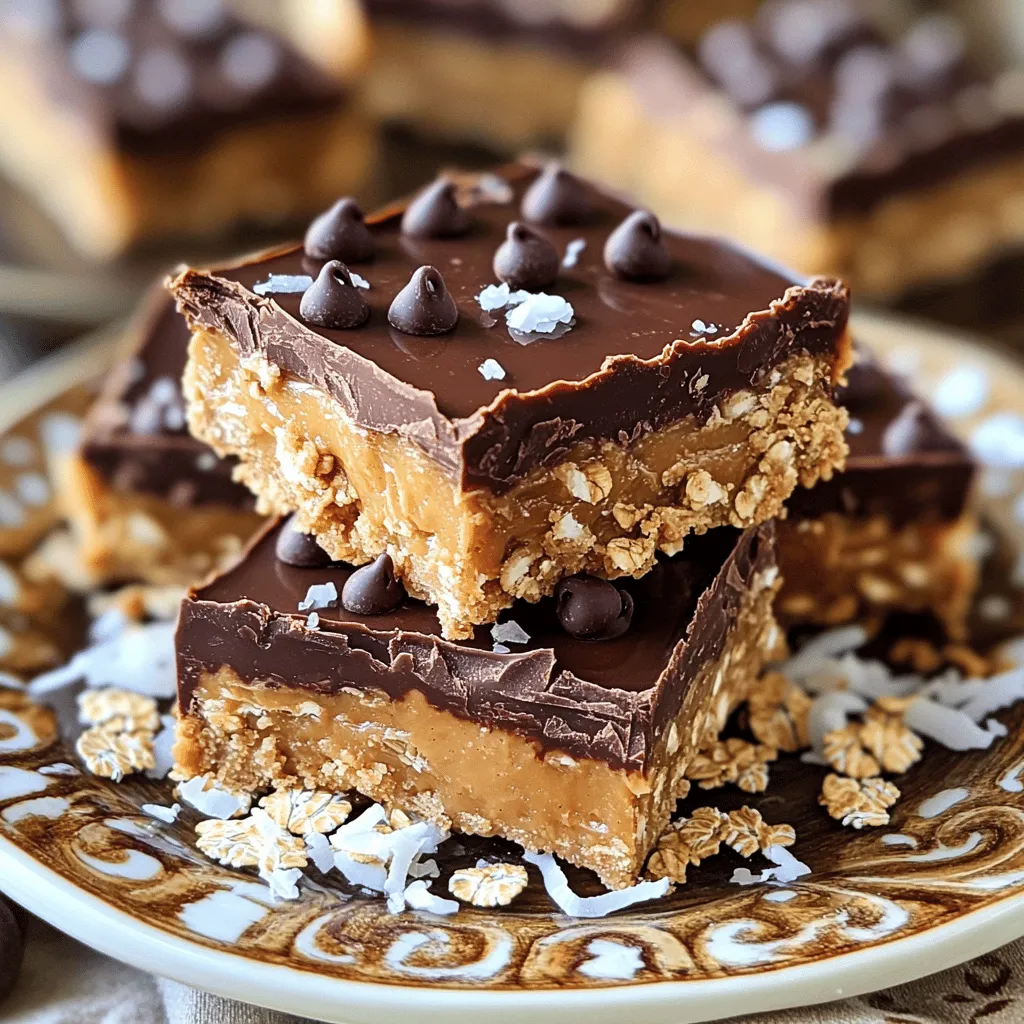
For serving, use a decorative plate. It makes your bars look fancy. You can drizzle extra melted chocolate over the top for a sweet touch. Another fun idea is to sprinkle sea salt on top. This adds a nice contrast to the sweet flavor. Try these tips to impress family and friends with your beautiful creations!
Variations
Ingredient Substitutions
You can easily swap ingredients if needed. Here are some ideas:
– Alternatives for peanut butter: Try almond butter or sunflower seed butter. Both work well and give a nice taste.
– Sweetener options: Instead of honey, use agave syrup or stevia. These will change the flavor but keep it sweet.
– Mixing in additional ingredients: Toss in some chopped nuts, dried fruit, or seeds. These add crunch and flavor.
Flavor Variations
You can change the taste with a few simple tweaks:
– Adding different extracts or spices: Consider adding almond extract or cinnamon. These will give your bars a unique twist.
– Adjusting the chocolate for different flavors: Use white chocolate or dark chocolate. Each choice will change the taste and richness.
Storage Info
How to Store
To keep your no-bake chocolate peanut butter bars fresh, use airtight containers. Glass containers work well, but plastic ones are fine too. Make sure the bars are cool before sealing them up. This helps prevent moisture and keeps them firm. Store the bars in the fridge for best results.
Shelf Life
These bars stay fresh in the fridge for about one week. If you want to keep them longer, freezing is a great option. Wrap each bar in plastic wrap and place them in a freezer bag. They can last up to three months in the freezer. Just thaw them in the fridge before eating. Enjoy your delicious treat anytime!
FAQs
Common Questions
Can I use crunchy peanut butter instead of creamy?
Yes, you can use crunchy peanut butter. This change adds texture to your bars. It gives a nice crunch and enhances the flavor. Just swap it one-to-one for creamy peanut butter.
How do I make these bars vegan?
To make these bars vegan, use maple syrup instead of honey. Choose dairy-free chocolate chips, too. With these swaps, you can enjoy a tasty vegan treat.
What is the best way to cut no-bake bars?
The best way to cut no-bake bars is to chill them first. After they set, lift the bars from the dish using the parchment paper. Use a sharp knife for clean cuts. Wipe the knife between cuts for neat squares.
Can I add protein powder to the recipe?
Yes, you can add protein powder. Start with 1/4 cup and mix it in with the dry ingredients. This boosts the nutrition without changing the taste much. Just remember, adding too much may alter the texture.
You learned how to make tasty no-bake bars. We discussed the key ingredients like peanut butter, oats, and chocolate chips. I shared easy steps for mixing and setting up your bars. From tips on texture to fun serving ideas, you have tools for success. You can also try many variations to suit your taste. Remember to store them right for the best flavor. Enjoy making your bars and sharing them with friends!

