WANT TO SAVE THIS RECIPE?
Are you ready to warm your soul with a bowl of creamy white bean chicken chili? This dish combines tender chicken, hearty white beans, and a mix of spices for a flavor explosion. Whether you’re cooking for a crowd or just a cozy night in, this chili is simple and satisfying. Let’s dive into the tasty ingredients and easy steps to create a meal that will impress everyone!
Why I Love This Recipe
- Comforting and Creamy: This chili is rich and creamy, making it the perfect comfort food for any occasion.
- Easy to Make: With simple ingredients and straightforward steps, this recipe is quick to prepare, even on busy weeknights.
- Flavorful and Satisfying: The combination of spices and creamy texture creates a hearty dish that’s packed with flavor and nutrition.
- Customizable: You can easily adjust the spice level or add your favorite toppings, making it a versatile dish for everyone to enjoy.
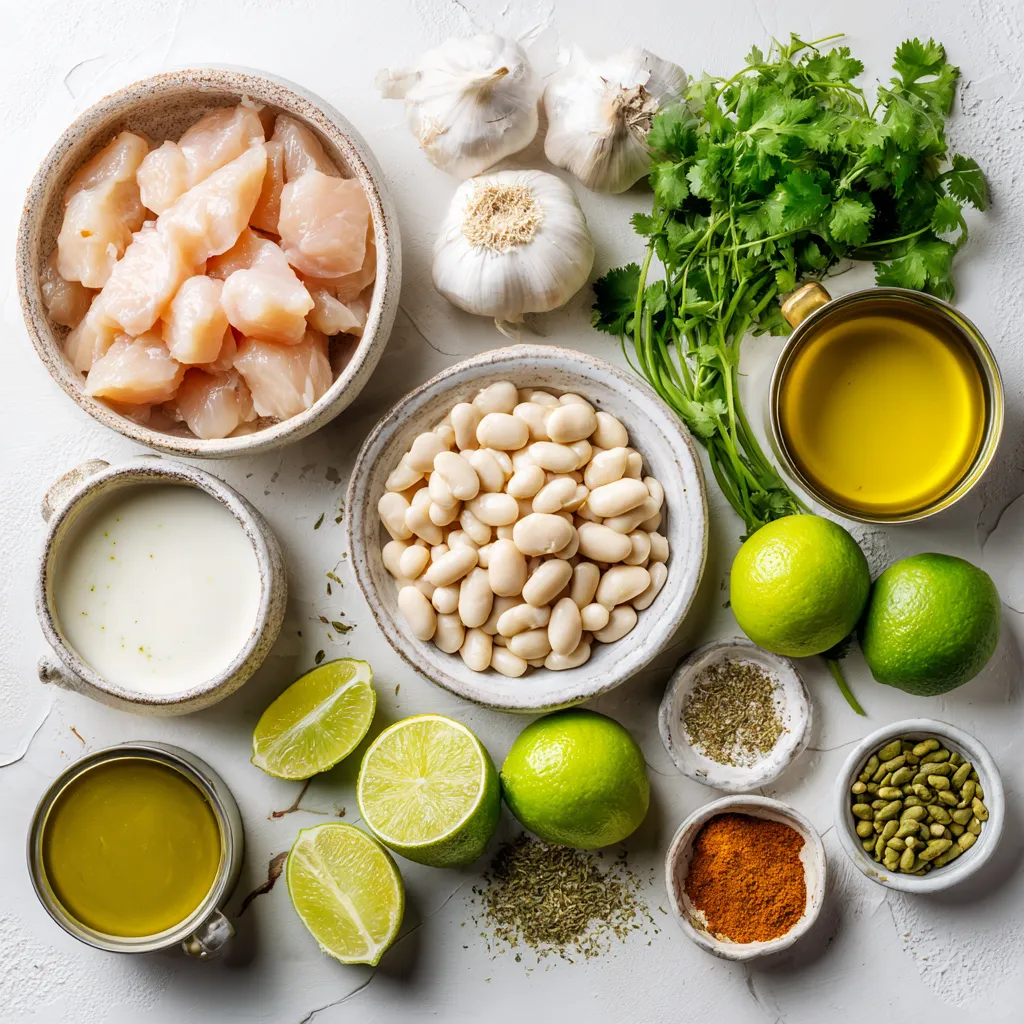
Ingredients
Main Ingredients
– 1 pound boneless, skinless chicken breasts, diced
– 2 tablespoons olive oil
– 1 medium onion, chopped
– 3 cloves garlic, minced
– 2 cans (15 oz each) white beans (such as great northern or cannellini), drained and rinsed
– 4 cups low-sodium chicken broth
– 1 can (4 oz) diced green chilies (mild or hot, depending on your preference)
The main ingredients create a solid base for your chili. The chicken adds protein and a hearty feel. White beans give a creamy texture and mild taste. Broth brings moisture and depth.
Spices and Seasoning
– 1 teaspoon ground cumin
– 1 teaspoon chili powder
– ½ teaspoon smoked paprika
– Salt and pepper to taste
Spices bring life to your dish. Cumin adds warmth, while chili powder gives a slight kick. Smoked paprika enhances the flavor with a hint of smokiness. Salt and pepper round out the taste, making it just right.
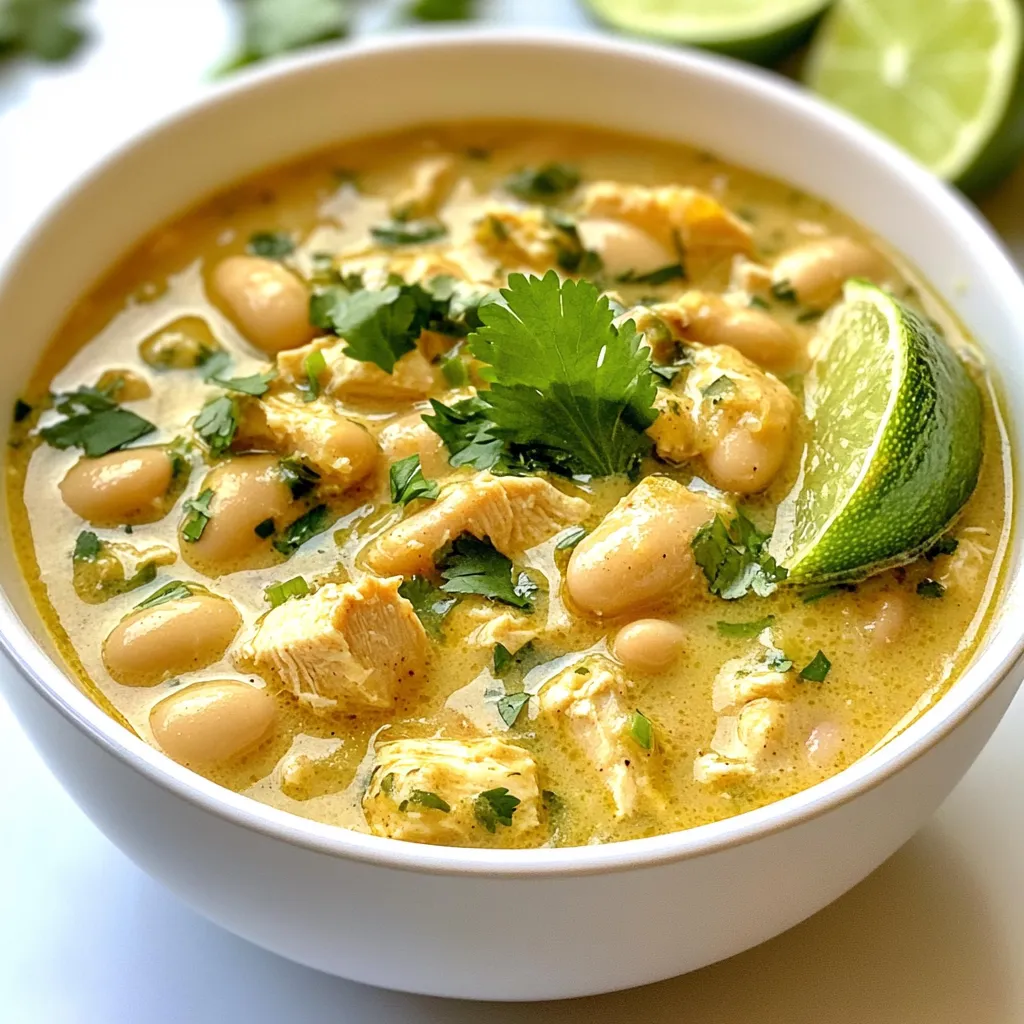
Optional Garnishes
– Fresh cilantro or parsley for garnish
– Lime wedges for serving
– Cheese or avocado for topping
Garnishes elevate your chili. Fresh herbs add brightness and flavor. Lime wedges give a zesty contrast. Cheese or avocado brings creaminess, making every bite special. Each garnish adds a fun twist to your dish.

Step-by-Step Instructions
Preparing the Base
1. Heat olive oil in a large pot over medium heat.
2. Add chopped onion and sauté for 4 to 5 minutes. It should become soft.
3. Stir in minced garlic and cook for 1 to 2 minutes. The smell will be great.
4. Add diced chicken to the pot. Cook for 6 to 7 minutes until it turns white.
Combining the Ingredients
1. Season chicken with cumin, chili powder, smoked paprika, salt, and pepper. Stir well.
2. Pour in low-sodium chicken broth. It adds richness to the chili.
3. Add drained white beans and diced green chilies. Mix everything together.
4. Bring the mix to a gentle simmer. This helps the flavors come together. Let it cook uncovered for 20 minutes.
Finishing Touches
1. Reduce heat to low. Slowly stir in heavy cream, blending it in well. Do not let it boil.
2. Cook for an additional 5 minutes to warm through.
3. Taste the chili and adjust seasonings if needed. A bit more salt or pepper can make a big difference.
Tips & Tricks
Cooking Techniques
Using a Dutch oven is great for this dish. It holds heat well and cooks evenly. You can use a regular pot if you don’t have one, but you might miss out on that rich flavor. Simmering is key. It helps the spices blend and the chicken to tenderize. Don’t rush this step. Let it bubble gently for at least 20 minutes.
Flavor Enhancements
Want to kick up the flavor? Consider adding more spices like garlic powder or onion powder. A pinch of cayenne can add a nice heat, too. For beans, you can try black beans or pinto beans. Each adds a different taste and texture. Mixing different beans makes your chili unique.
Presentation Suggestions
When serving, ladle the chili into bowls for a cozy feel. Add fresh cilantro or parsley on top for color. Lime wedges on the side add a zesty touch. For extra flavor, consider adding shredded cheese or avocado slices. They make the dish creamy and delicious.
Pro Tips
- Use Rotisserie Chicken: For a quicker version of this chili, consider using pre-cooked rotisserie chicken. Just shred it and add it to the pot in the last few minutes to warm through.
- Adjust the Spice Level: Depending on your preference, you can adjust the amount of green chilies or add a pinch of cayenne pepper for an extra kick.
- Make it Ahead: This chili tastes even better the next day! Make it ahead of time and store it in the fridge for a day or two to allow the flavors to develop.
- Garnish Creatively: Experiment with different toppings such as avocado slices, crumbled feta cheese, or a dollop of sour cream to elevate the dish.
Variations
Vegetarian Version
You can easily make this chili vegetarian. Just swap out the chicken for mushrooms. Mushrooms add a great texture and taste. Use about 1 pound of diced mushrooms. They will soak up all the flavors well. Also, use vegetable broth instead of chicken broth. This change keeps the dish hearty and rich without meat.
Spice Level Adjustments
Want to adjust the heat in your chili? You can choose mild or hot green chilies. If you like it spicy, go for the hot ones. You can also add extra spices for more heat. Consider using cayenne pepper or red pepper flakes. Just a pinch can make a big difference!
Creaminess Options
If you need a dairy-free option, I have suggestions. Use coconut cream or cashew cream for a nice texture. These options still give you that creamy feel. You can also adjust the amount of cream for thickness. If you want it thicker, add more cream. If you like it lighter, use less.
Storage Info
Refrigerating Leftovers
Store leftover chili in a proper container. Use an airtight container to keep it fresh. Glass or plastic containers work well. Make sure to cool the chili before sealing it. The best time to eat it is within three to four days. After that, the taste may fade.
Freezing Chili
To freeze chili, use a freezer-safe container. Leave some space at the top, as it expands when frozen. You can also use freezer bags. Squeeze out the air before sealing them. Chili can last up to three months in the freezer. When ready to eat, thaw it overnight in the fridge.
Reheating Techniques
Reheat chili on the stove for the best texture. Use low heat and stir often. This method helps keep it creamy. You can also use the microwave. Heat in short bursts, stirring in between. This keeps the flavor fresh. Always taste and adjust seasonings after reheating.
FAQs
Can I use frozen chicken?
Yes, you can use frozen chicken for this chili. To use frozen chicken, first, thaw it properly. You can do this overnight in the fridge or place it in a sealed bag and submerge it in cold water. If you are short on time, you can cook it from frozen but add extra cooking time. When using frozen chicken, cook it for about 10 minutes longer to ensure it is fully cooked.
What can I add to make it spicier?
To kick up the heat, consider adding spices like cayenne pepper or red pepper flakes. You can also use hotter diced green chilies if you like more spice. Another option is to add a few dashes of hot sauce. I recommend using a sauce that you enjoy for the best flavor.
How long does Creamy White Bean Chicken Chili last?
This chili can last in the fridge for about 3 to 4 days when stored in an airtight container. For best taste, eat it within this time frame. Signs of spoilage include an off smell or changes in color. If you see any mold, it’s best to discard it.
This blog post covered tasty ingredients like chicken, white beans, and spices. We explored how to prepare the dish step by step, from sautéing onions to adding cream. Tips helped enhance flavor and presentation. Variations offered vegetarian options and suggested spice adjustments. Lastly, I shared storage methods to keep your chili fresh.
By following these steps, you can make a delicious chili that impresses everyone. Cooking should be fun and rewarding, so try your own twists for the perfect bow
Creamy White Bean Chicken Chili
A delicious and creamy chili made with chicken, white beans, and spices, perfect for a cozy meal.
Prep Time 15 minutes mins
Cook Time 30 minutes mins
Total Time 45 minutes mins
Course Main Course
Cuisine American
Servings 6
Calories 400 kcal
- 1 pound boneless, skinless chicken breasts, diced
- 2 tablespoons olive oil
- 1 medium onion, chopped
- 3 cloves garlic, minced
- 2 cans (15 oz each) white beans (such as great northern or cannellini), drained and rinsed
- 4 cups low-sodium chicken broth
- 1 can (4 oz) diced green chilies (mild or hot, depending on your preference)
- 1 teaspoon ground cumin
- 1 teaspoon chili powder
- ½ teaspoon smoked paprika
- 1 cup heavy cream
- to taste Salt and pepper
- to garnish Fresh cilantro or parsley
- to serve Lime wedges
In a large pot or Dutch oven, heat the olive oil over medium heat.
Add the chopped onion and sauté until soft, about 4-5 minutes.
Stir in the minced garlic and cook for an additional 1-2 minutes, until fragrant.
Add the diced chicken breasts to the pot, cooking until no longer pink, about 6-7 minutes.
Season the chicken with cumin, chili powder, smoked paprika, salt, and pepper, mixing well to incorporate the spices.
Pour in the chicken broth and add the drained white beans and diced green chilies. Stir to combine.
Bring the mixture to a gentle simmer and cook uncovered for 20 minutes, allowing the flavors to meld.
Reduce the heat to low and slowly stir in the heavy cream, ensuring it blends well without boiling. Cook for an additional 5 minutes to warm through.
Taste and adjust seasonings as necessary.
Ladle the chili into bowls, garnish with fresh chopped cilantro or parsley, and serve with lime wedges on the side for a zesty finish. Consider topping with shredded cheese or avocado slices for extra creaminess!
Keyword chicken, chili, creamy, soup, white beans
WANT TO SAVE THIS RECIPE?