![Cooking classic chocolate brownies starts with gathering the right ingredients. Each one plays a big role in the taste and texture. Here’s what you need: - 1 cup (225g) unsalted butter, melted - 2 cups (400g) granulated sugar - 4 large eggs - 1 teaspoon vanilla extract - 1 cup (130g) all-purpose flour - 1 cup (90g) unsweetened cocoa powder - 1/2 teaspoon salt - 1/2 teaspoon baking powder - 1 cup (175g) chocolate chips (dark or semi-sweet) - 1/2 cup (75g) chopped walnuts or pecans (optional) Each ingredient serves a purpose. The unsalted butter adds richness. Granulated sugar sweetens and helps create that chewy texture. Eggs bind the mix and add moisture. Vanilla extract gives a warm flavor that enhances chocolate. All-purpose flour provides structure, while cocoa powder offers a deep chocolate taste. Salt balances the sweetness. Baking powder helps the brownies rise slightly. Chocolate chips give bursts of chocolate in every bite. If you're feeling adventurous, nuts add crunch and flavor. This list is your guide to making the perfect brownies. Follow the Full Recipe for detailed steps, and you'll enjoy a delicious treat! 1. Preheating the oven: Start by preheating your oven to 350°F (175°C). This step is vital for even baking. 2. Combining wet ingredients: In a big bowl, mix together 1 cup of melted unsalted butter and 2 cups of granulated sugar. Stir until the mixture looks smooth and shiny. Next, add 4 large eggs one by one. Make sure each egg is mixed in well before adding the next. Finally, pour in 1 teaspoon of vanilla extract for flavor. 3. Mixing dry ingredients: In another bowl, sift together 1 cup of all-purpose flour, 1 cup of unsweetened cocoa powder, 1/2 teaspoon of salt, and 1/2 teaspoon of baking powder. This makes sure there are no lumps and helps the brownies rise well. 4. Incorporating chocolate chips and nuts: Now, slowly fold the dry mix into the wet mix. Do this gently until just combined—don’t overmix! If you like, add 1 cup of chocolate chips and 1/2 cup of chopped nuts for extra crunch. 1. Pouring batter into the pan: Grab a 9x13 inch baking pan that you have greased or lined with parchment paper. Pour the brownie batter in and spread it out evenly. 2. Baking duration and temperature: Place the pan in your preheated oven. Bake the brownies for about 25 to 30 minutes. 3. Testing for doneness: To check if they are done, insert a toothpick into the center. If it comes out with a few moist crumbs, they are ready. If it has wet batter, bake a few more minutes. 1. Cooling tips: Once baked, let the brownies cool in the pan for about 15 minutes. If you used parchment paper, lift them out carefully. If not, you can cool them right in the pan. 2. Proper cutting techniques: For clean cuts, use a sharp knife. Wipe the knife between cuts to keep the edges neat. Cut into squares and enjoy your brownies. For a full recipe, check out [Full Recipe]. - Avoiding overmixing: Mix just until the ingredients blend. Overmixing makes brownies tough. You want a smooth batter, but lumps are okay. This keeps the brownies soft and chewy. - Ensuring proper oven temperature: Use an oven thermometer to check the heat. An accurate temperature helps brownies bake evenly. If the oven is too hot, they may burn. If it’s too cool, they won’t set properly. - Presentation ideas: Dust your brownies with powdered sugar right before serving. This adds a nice touch. You can also cut them into fun shapes. Think hearts or stars for special occasions. - Pairing with ice cream or whipped cream: Serve warm brownies with a scoop of vanilla ice cream. The cold cream melts slightly, creating a tasty contrast. Whipped cream also adds a light, fluffy feel. Both options make your dessert feel extra special. For the full recipe, check the earlier section! {{image_2}} You can easily change the flavor of your brownies. A great option is adding mint extract. Just a teaspoon will give a fresh taste. Another option is to add coffee. This adds depth to the chocolate flavor. Use 1-2 tablespoons of strong coffee for a unique twist. You can also swap the type of chocolate. Dark chocolate gives a rich taste, while semi-sweet chocolate is sweeter. Choose what you love! Mixing both is also a fun idea. This way, you can enjoy a blend of flavors. If you need gluten-free options, use almond flour or gluten-free flour. Make sure to check your cocoa powder too. It should also be gluten-free. This way, everyone can enjoy your brownies. For vegan brownie alternatives, swap eggs with applesauce or flaxseed meal. Use plant-based butter instead of regular butter. You can find many vegan chocolate chips too. These changes make your brownies suitable for vegan diets. For the complete details on how to make these delicious brownies, check the Full Recipe. To keep your brownies fresh, use an airtight container. Line it with parchment paper for easy cleanup. Place the brownies in a single layer if possible. This method keeps them moist and tasty. If you have cut brownies, place wax paper between layers to avoid sticking. Store them at room temperature for up to four days. They can also last in the fridge for about a week. Just remember, cold brownies may lose some of their rich flavor. Freezing brownies is simple and keeps them fresh for a longer time. Here’s how to do it: 1. Cool the Brownies: Let your brownies cool completely before freezing. This helps prevent ice crystals from forming. 2. Slice: Cut them into squares for easy serving later. 3. Wrap: Wrap each piece in plastic wrap. This helps keep them moist. 4. Bag It: Place the wrapped brownies in a freezer bag or container. Remove as much air as possible. 5. Label: Write the date on the bag. Brownies can last up to three months in the freezer. When you're ready to eat them, take out the brownies. Let them thaw at room temperature for about an hour. For a warm treat, heat them in the microwave for a few seconds. Enjoy your tasty homemade brownies! For the full recipe, refer to the instructions above. How do I know when brownies are done? You can tell when brownies are done by checking the center. Insert a toothpick into the middle. If it comes out with a few moist crumbs, they are ready. If it has wet batter, bake them a little longer. The edges should look firm, while the center may be soft. Can I substitute ingredients in the recipe? Yes, you can substitute some ingredients in the recipe. For example, you can use coconut oil instead of butter. You can also swap granulated sugar for brown sugar for a richer taste. If you need to avoid eggs, use applesauce or a flaxseed mixture as replacements. Each change may alter the flavor or texture a bit. What can I add to brownies for extra flavor? You can add many things to boost flavor! Try mixing in nuts for crunch, or swirl in peanut butter for creaminess. You can also add mint extract or coffee to enhance the chocolate taste. Don't forget to sprinkle sea salt on top for a sweet and salty mix. For a fun twist, try adding a layer of caramel or marshmallows! For the full recipe, check out the Decadent Dreamy Chocolate Brownies. You now have all you need to bake classic brownies. We covered ingredients, step-by-step instructions, and helpful tips. Remember to avoid overmixing and keep an eye on the oven temperature. Feel free to explore flavor variations or dietary swaps for your needs. You’ll impress friends and family with your skills. Enjoy every bite of your rich, chewy brownies and share them with those you love. Happy baking!](https://mycookingcast.com/wp-content/uploads/2025/06/d681dc40-b3a3-4d67-97eb-5b21c544090f-768x768.webp)
Brownies are the ultimate comfort food, and my classic chocolate brownies recipe is a must-try! With rich chocolate, a chewy texture, and the option to add nuts, these treats are simply irresistible. In this post, you’ll find easy steps, tips for perfection, flavor twists, and storage info. Get ready to impress your family and friends with this homemade delight. Let’s dive into the world of baking these heavenly brownies together!
Ingredients
Cooking classic chocolate brownies starts with gathering the right ingredients. Each one plays a big role in the taste and texture. Here’s what you need:
– 1 cup (225g) unsalted butter, melted
– 2 cups (400g) granulated sugar
– 4 large eggs
– 1 teaspoon vanilla extract
– 1 cup (130g) all-purpose flour
– 1 cup (90g) unsweetened cocoa powder
– 1/2 teaspoon salt
– 1/2 teaspoon baking powder
– 1 cup (175g) chocolate chips (dark or semi-sweet)
– 1/2 cup (75g) chopped walnuts or pecans (optional)
Each ingredient serves a purpose. The unsalted butter adds richness. Granulated sugar sweetens and helps create that chewy texture. Eggs bind the mix and add moisture. Vanilla extract gives a warm flavor that enhances chocolate.
All-purpose flour provides structure, while cocoa powder offers a deep chocolate taste. Salt balances the sweetness. Baking powder helps the brownies rise slightly. Chocolate chips give bursts of chocolate in every bite. If you’re feeling adventurous, nuts add crunch and flavor.
This list is your guide to making the perfect brownies.
Step-by-Step Instructions
Preparing the Batter
1. Preheating the oven: Start by preheating your oven to 350°F (175°C). This step is vital for even baking.
2. Combining wet ingredients: In a big bowl, mix together 1 cup of melted unsalted butter and 2 cups of granulated sugar. Stir until the mixture looks smooth and shiny. Next, add 4 large eggs one by one. Make sure each egg is mixed in well before adding the next. Finally, pour in 1 teaspoon of vanilla extract for flavor.
3. Mixing dry ingredients: In another bowl, sift together 1 cup of all-purpose flour, 1 cup of unsweetened cocoa powder, 1/2 teaspoon of salt, and 1/2 teaspoon of baking powder. This makes sure there are no lumps and helps the brownies rise well.
4. Incorporating chocolate chips and nuts: Now, slowly fold the dry mix into the wet mix. Do this gently until just combined—don’t overmix! If you like, add 1 cup of chocolate chips and 1/2 cup of chopped nuts for extra crunch.
Baking the Brownies
1. Pouring batter into the pan: Grab a 9×13 inch baking pan that you have greased or lined with parchment paper. Pour the brownie batter in and spread it out evenly.
2. Baking duration and temperature: Place the pan in your preheated oven. Bake the brownies for about 25 to 30 minutes.
3. Testing for doneness: To check if they are done, insert a toothpick into the center. If it comes out with a few moist crumbs, they are ready. If it has wet batter, bake a few more minutes.
Cooling and Cutting
1. Cooling tips: Once baked, let the brownies cool in the pan for about 15 minutes. If you used parchment paper, lift them out carefully. If not, you can cool them right in the pan.
2. Proper cutting techniques: For clean cuts, use a sharp knife. Wipe the knife between cuts to keep the edges neat. Cut into squares and enjoy your brownies.
Tips & Tricks
Baking Tips for Perfect Brownies
– Avoiding overmixing: Mix just until the ingredients blend. Overmixing makes brownies tough. You want a smooth batter, but lumps are okay. This keeps the brownies soft and chewy.
– Ensuring proper oven temperature: Use an oven thermometer to check the heat. An accurate temperature helps brownies bake evenly. If the oven is too hot, they may burn. If it’s too cool, they won’t set properly.
Serving Suggestions
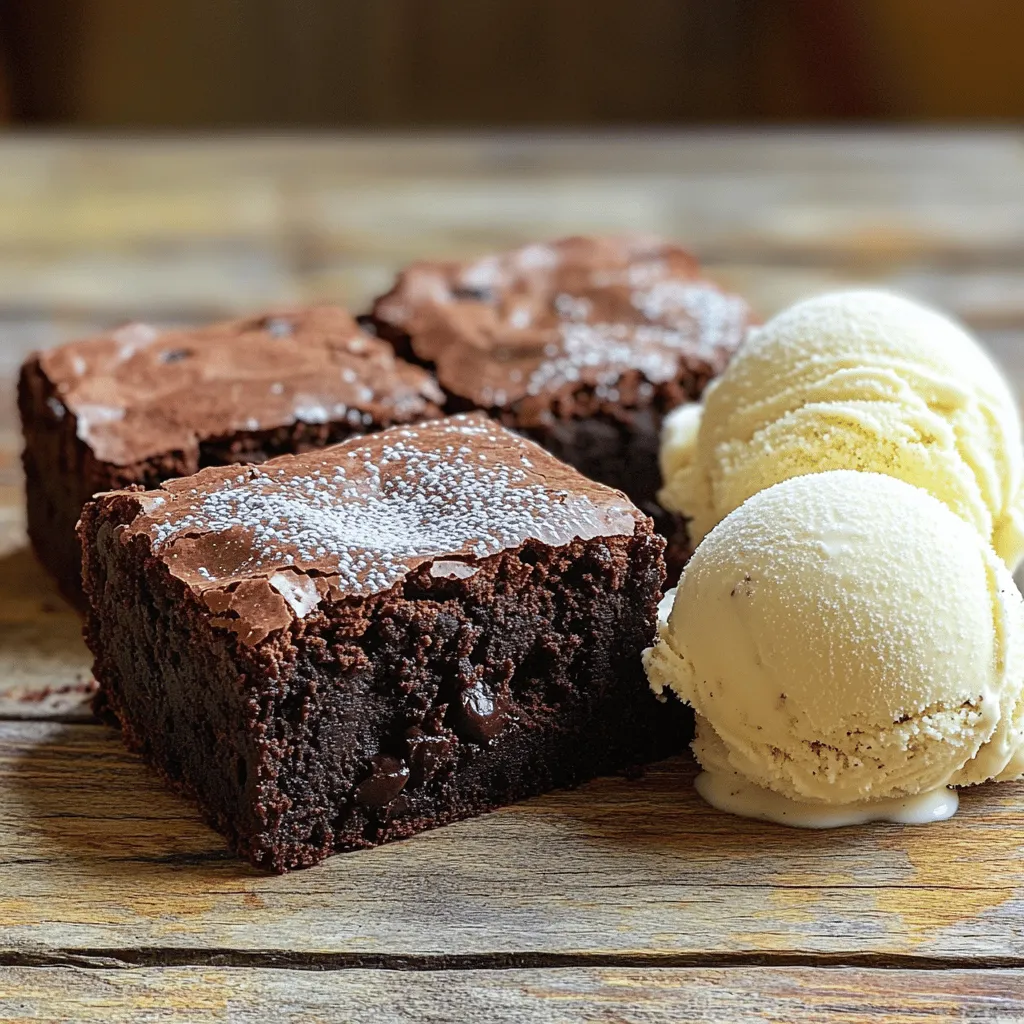
– Presentation ideas: Dust your brownies with powdered sugar right before serving. This adds a nice touch. You can also cut them into fun shapes. Think hearts or stars for special occasions.
– Pairing with ice cream or whipped cream: Serve warm brownies with a scoop of vanilla ice cream. The cold cream melts slightly, creating a tasty contrast. Whipped cream also adds a light, fluffy feel. Both options make your dessert feel extra special.
Variations
Flavor Variations
You can easily change the flavor of your brownies. A great option is adding mint extract. Just a teaspoon will give a fresh taste. Another option is to add coffee. This adds depth to the chocolate flavor. Use 1-2 tablespoons of strong coffee for a unique twist.
You can also swap the type of chocolate. Dark chocolate gives a rich taste, while semi-sweet chocolate is sweeter. Choose what you love! Mixing both is also a fun idea. This way, you can enjoy a blend of flavors.
Dietary Modifications
If you need gluten-free options, use almond flour or gluten-free flour. Make sure to check your cocoa powder too. It should also be gluten-free. This way, everyone can enjoy your brownies.
For vegan brownie alternatives, swap eggs with applesauce or flaxseed meal. Use plant-based butter instead of regular butter. You can find many vegan chocolate chips too. These changes make your brownies suitable for vegan diets.
Storage Info
How to Store Brownies
To keep your brownies fresh, use an airtight container. Line it with parchment paper for easy cleanup. Place the brownies in a single layer if possible. This method keeps them moist and tasty.
If you have cut brownies, place wax paper between layers to avoid sticking. Store them at room temperature for up to four days. They can also last in the fridge for about a week. Just remember, cold brownies may lose some of their rich flavor.
Freezing Brownies
Freezing brownies is simple and keeps them fresh for a longer time. Here’s how to do it:
1. Cool the Brownies: Let your brownies cool completely before freezing. This helps prevent ice crystals from forming.
2. Slice: Cut them into squares for easy serving later.
3. Wrap: Wrap each piece in plastic wrap. This helps keep them moist.
4. Bag It: Place the wrapped brownies in a freezer bag or container. Remove as much air as possible.
5. Label: Write the date on the bag. Brownies can last up to three months in the freezer.
When you’re ready to eat them, take out the brownies. Let them thaw at room temperature for about an hour. For a warm treat, heat them in the microwave for a few seconds. Enjoy your tasty homemade brownies!
FAQs
Common Questions about Classic Chocolate Brownies
How do I know when brownies are done?
You can tell when brownies are done by checking the center. Insert a toothpick into the middle. If it comes out with a few moist crumbs, they are ready. If it has wet batter, bake them a little longer. The edges should look firm, while the center may be soft.
Can I substitute ingredients in the recipe?
Yes, you can substitute some ingredients in the recipe. For example, you can use coconut oil instead of butter. You can also swap granulated sugar for brown sugar for a richer taste. If you need to avoid eggs, use applesauce or a flaxseed mixture as replacements. Each change may alter the flavor or texture a bit.
What can I add to brownies for extra flavor?
You can add many things to boost flavor! Try mixing in nuts for crunch, or swirl in peanut butter for creaminess. You can also add mint extract or coffee to enhance the chocolate taste. Don’t forget to sprinkle sea salt on top for a sweet and salty mix. For a fun twist, try adding a layer of caramel or marshmallows!
You now have all you need to bake classic brownies. We covered ingredients, step-by-step instructions, and helpful tips. Remember to avoid overmixing and keep an eye on the oven temperature. Feel free to explore flavor variations or dietary swaps for your needs. You’ll impress friends and family with your skills. Enjoy every bite of your rich, chewy brownies and share them with those you love. Happy baking!
![Cooking classic chocolate brownies starts with gathering the right ingredients. Each one plays a big role in the taste and texture. Here’s what you need: - 1 cup (225g) unsalted butter, melted - 2 cups (400g) granulated sugar - 4 large eggs - 1 teaspoon vanilla extract - 1 cup (130g) all-purpose flour - 1 cup (90g) unsweetened cocoa powder - 1/2 teaspoon salt - 1/2 teaspoon baking powder - 1 cup (175g) chocolate chips (dark or semi-sweet) - 1/2 cup (75g) chopped walnuts or pecans (optional) Each ingredient serves a purpose. The unsalted butter adds richness. Granulated sugar sweetens and helps create that chewy texture. Eggs bind the mix and add moisture. Vanilla extract gives a warm flavor that enhances chocolate. All-purpose flour provides structure, while cocoa powder offers a deep chocolate taste. Salt balances the sweetness. Baking powder helps the brownies rise slightly. Chocolate chips give bursts of chocolate in every bite. If you're feeling adventurous, nuts add crunch and flavor. This list is your guide to making the perfect brownies. Follow the Full Recipe for detailed steps, and you'll enjoy a delicious treat! 1. Preheating the oven: Start by preheating your oven to 350°F (175°C). This step is vital for even baking. 2. Combining wet ingredients: In a big bowl, mix together 1 cup of melted unsalted butter and 2 cups of granulated sugar. Stir until the mixture looks smooth and shiny. Next, add 4 large eggs one by one. Make sure each egg is mixed in well before adding the next. Finally, pour in 1 teaspoon of vanilla extract for flavor. 3. Mixing dry ingredients: In another bowl, sift together 1 cup of all-purpose flour, 1 cup of unsweetened cocoa powder, 1/2 teaspoon of salt, and 1/2 teaspoon of baking powder. This makes sure there are no lumps and helps the brownies rise well. 4. Incorporating chocolate chips and nuts: Now, slowly fold the dry mix into the wet mix. Do this gently until just combined—don’t overmix! If you like, add 1 cup of chocolate chips and 1/2 cup of chopped nuts for extra crunch. 1. Pouring batter into the pan: Grab a 9x13 inch baking pan that you have greased or lined with parchment paper. Pour the brownie batter in and spread it out evenly. 2. Baking duration and temperature: Place the pan in your preheated oven. Bake the brownies for about 25 to 30 minutes. 3. Testing for doneness: To check if they are done, insert a toothpick into the center. If it comes out with a few moist crumbs, they are ready. If it has wet batter, bake a few more minutes. 1. Cooling tips: Once baked, let the brownies cool in the pan for about 15 minutes. If you used parchment paper, lift them out carefully. If not, you can cool them right in the pan. 2. Proper cutting techniques: For clean cuts, use a sharp knife. Wipe the knife between cuts to keep the edges neat. Cut into squares and enjoy your brownies. For a full recipe, check out [Full Recipe]. - Avoiding overmixing: Mix just until the ingredients blend. Overmixing makes brownies tough. You want a smooth batter, but lumps are okay. This keeps the brownies soft and chewy. - Ensuring proper oven temperature: Use an oven thermometer to check the heat. An accurate temperature helps brownies bake evenly. If the oven is too hot, they may burn. If it’s too cool, they won’t set properly. - Presentation ideas: Dust your brownies with powdered sugar right before serving. This adds a nice touch. You can also cut them into fun shapes. Think hearts or stars for special occasions. - Pairing with ice cream or whipped cream: Serve warm brownies with a scoop of vanilla ice cream. The cold cream melts slightly, creating a tasty contrast. Whipped cream also adds a light, fluffy feel. Both options make your dessert feel extra special. For the full recipe, check the earlier section! {{image_2}} You can easily change the flavor of your brownies. A great option is adding mint extract. Just a teaspoon will give a fresh taste. Another option is to add coffee. This adds depth to the chocolate flavor. Use 1-2 tablespoons of strong coffee for a unique twist. You can also swap the type of chocolate. Dark chocolate gives a rich taste, while semi-sweet chocolate is sweeter. Choose what you love! Mixing both is also a fun idea. This way, you can enjoy a blend of flavors. If you need gluten-free options, use almond flour or gluten-free flour. Make sure to check your cocoa powder too. It should also be gluten-free. This way, everyone can enjoy your brownies. For vegan brownie alternatives, swap eggs with applesauce or flaxseed meal. Use plant-based butter instead of regular butter. You can find many vegan chocolate chips too. These changes make your brownies suitable for vegan diets. For the complete details on how to make these delicious brownies, check the Full Recipe. To keep your brownies fresh, use an airtight container. Line it with parchment paper for easy cleanup. Place the brownies in a single layer if possible. This method keeps them moist and tasty. If you have cut brownies, place wax paper between layers to avoid sticking. Store them at room temperature for up to four days. They can also last in the fridge for about a week. Just remember, cold brownies may lose some of their rich flavor. Freezing brownies is simple and keeps them fresh for a longer time. Here’s how to do it: 1. Cool the Brownies: Let your brownies cool completely before freezing. This helps prevent ice crystals from forming. 2. Slice: Cut them into squares for easy serving later. 3. Wrap: Wrap each piece in plastic wrap. This helps keep them moist. 4. Bag It: Place the wrapped brownies in a freezer bag or container. Remove as much air as possible. 5. Label: Write the date on the bag. Brownies can last up to three months in the freezer. When you're ready to eat them, take out the brownies. Let them thaw at room temperature for about an hour. For a warm treat, heat them in the microwave for a few seconds. Enjoy your tasty homemade brownies! For the full recipe, refer to the instructions above. How do I know when brownies are done? You can tell when brownies are done by checking the center. Insert a toothpick into the middle. If it comes out with a few moist crumbs, they are ready. If it has wet batter, bake them a little longer. The edges should look firm, while the center may be soft. Can I substitute ingredients in the recipe? Yes, you can substitute some ingredients in the recipe. For example, you can use coconut oil instead of butter. You can also swap granulated sugar for brown sugar for a richer taste. If you need to avoid eggs, use applesauce or a flaxseed mixture as replacements. Each change may alter the flavor or texture a bit. What can I add to brownies for extra flavor? You can add many things to boost flavor! Try mixing in nuts for crunch, or swirl in peanut butter for creaminess. You can also add mint extract or coffee to enhance the chocolate taste. Don't forget to sprinkle sea salt on top for a sweet and salty mix. For a fun twist, try adding a layer of caramel or marshmallows! For the full recipe, check out the Decadent Dreamy Chocolate Brownies. You now have all you need to bake classic brownies. We covered ingredients, step-by-step instructions, and helpful tips. Remember to avoid overmixing and keep an eye on the oven temperature. Feel free to explore flavor variations or dietary swaps for your needs. You’ll impress friends and family with your skills. Enjoy every bite of your rich, chewy brownies and share them with those you love. Happy baking!](https://mycookingcast.com/wp-content/uploads/2025/06/d681dc40-b3a3-4d67-97eb-5b21c544090f-250x250.webp)
