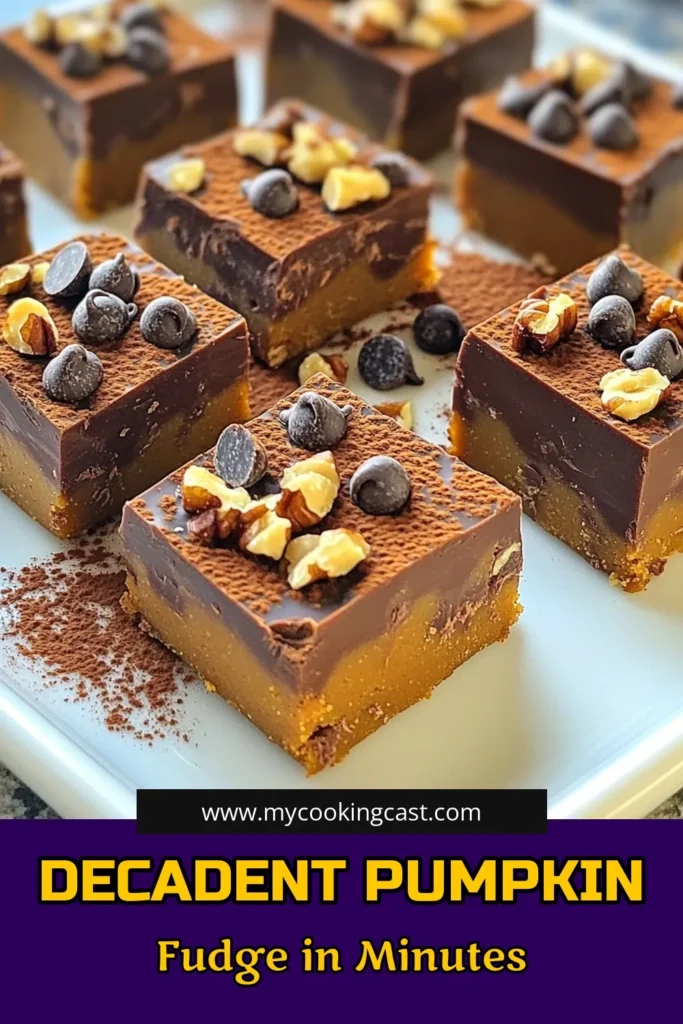
If you’re looking for a no-bake treat that combines the rich flavors of chocolate and pumpkin spice, you’re in the right place! This Chocolate Pumpkin Spice Fudge is easy to make and perfect for any occasion. With just a few simple ingredients, you can create a creamy and delightful fudge that will impress your friends and family. Let’s dive into the ingredients and get started on this delicious dessert!
Ingredients
Complete List of Ingredients
– 1 can (15 oz) pumpkin puree
– 1 cup creamy peanut butter
– 1 cup powdered sugar
– 1/2 cup cocoa powder
– 1 tsp pumpkin spice
– 1/2 tsp vanilla extract
– 1/4 tsp salt
– 1/2 cup dark chocolate chips (dairy-free if desired)
– Optional: chopped nuts for topping
Gathering your ingredients is the first step to making this delicious fudge. You’ll start with pumpkin puree, which gives the fudge its rich flavor and creamy texture. The creamy peanut butter adds a nutty touch and helps bind everything together.
Next, powdered sugar sweetens the fudge. Cocoa powder adds a deep chocolate flavor, while pumpkin spice brings warmth and a hint of fall. Vanilla extract and salt enhance the overall taste.
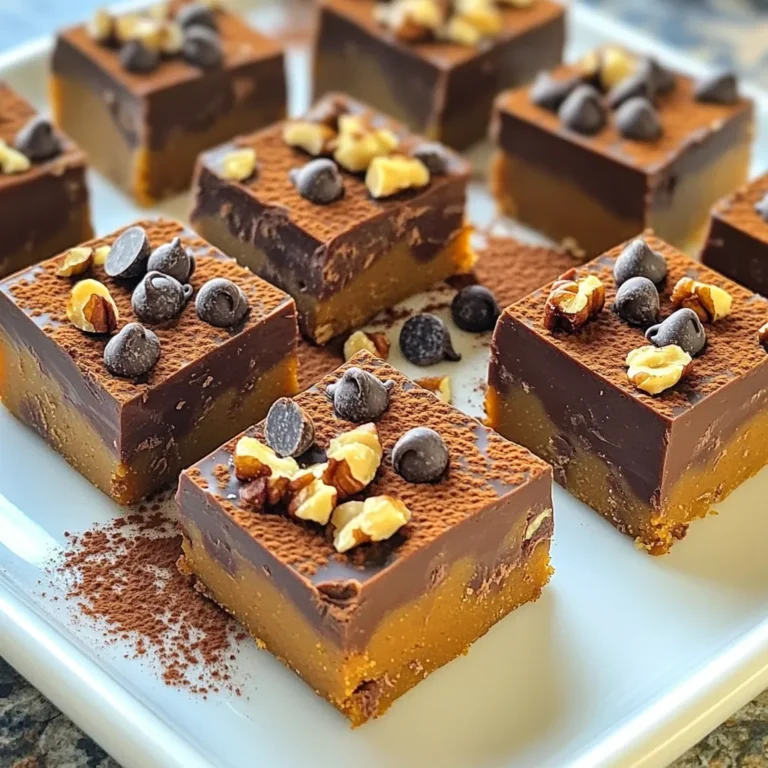
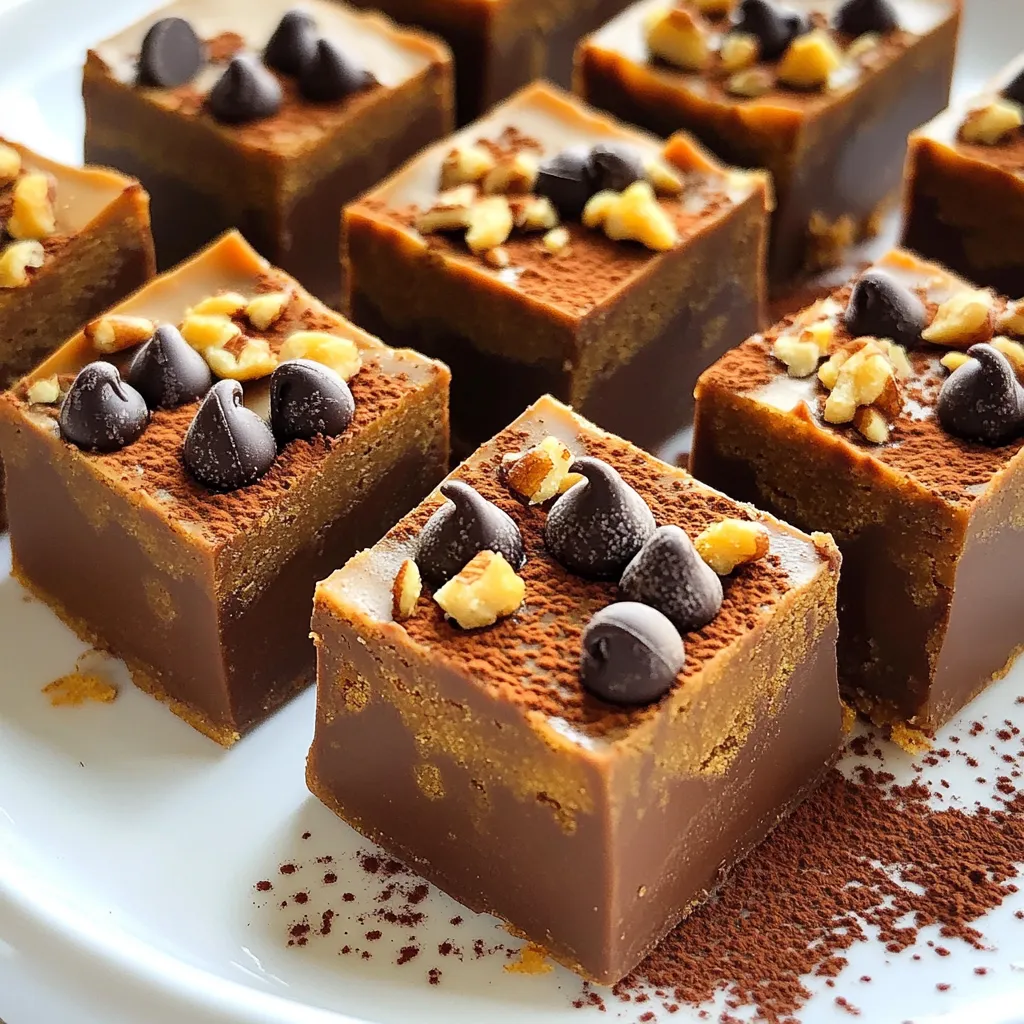
Finally, dark chocolate chips add little bursts of chocolate in every bite. If you want extra crunch, consider topping your fudge with chopped nuts. These ingredients combine beautifully to create a rich and tasty treat.
Step-by-Step Instructions
Preparation Steps
1. Mixing pumpkin puree and peanut butter
Start with a large mixing bowl. Add one can of pumpkin puree and one cup of creamy peanut butter. Stir them well until smooth. This mix should be creamy and uniform.
2. Incorporating dry ingredients
Next, sift in one cup of powdered sugar and half a cup of cocoa powder. Sifting helps avoid lumps. Then, add one teaspoon of pumpkin spice, half a teaspoon of vanilla extract, and a quarter teaspoon of salt. Mix everything until fully combined.
3. Folding in chocolate chips
Now, gently fold in half a cup of dark chocolate chips. Make sure they are evenly spread throughout the mixture. This adds rich flavor to your fudge.
4. Preparing the baking dish
Line a 9×9-inch baking dish with parchment paper. Leave some overhang on the sides. This will help you lift out the fudge later.
5. Spreading the fudge mixture
Pour the fudge mixture into the prepared dish. Use a spatula to spread it out evenly. Press it down firmly. This creates a smooth surface for your fudge.
Setting and Cutting
1. Refrigeration process
Place the dish in the refrigerator. Let it chill for at least two hours. This helps the fudge firm up and makes it easier to cut.
2. How to lift out and cut the fudge
Once the fudge is set, take it out of the fridge. Use the parchment overhang to lift it from the dish. Place it on a cutting board and cut it into squares or rectangles. Enjoy your delicious fudge!
Tips & Tricks
Best Practices for Perfect Fudge
– Ensuring proper blending: Start by mixing the pumpkin puree and peanut butter well. Use a large bowl and a sturdy spoon. Blend until the mix is smooth and creamy. This step makes sure your fudge is rich and tasty.
– Tips for preventing lumps: Sifting the powdered sugar and cocoa powder is key. This step helps break up clumps and gives you a smooth texture. Mix these dry ingredients into the wet mix carefully. Make sure everything combines well.
– Importance of refrigeration time: Don’t skip the refrigeration! Let your fudge chill for at least two hours. This time helps the fudge firm up nicely. The colder the fudge, the better it will cut into neat squares.
Presentation Ideas
– Creative serving suggestions: Arrange the fudge squares on a decorative platter. Dust them lightly with cocoa powder or shredded coconut. This adds a nice touch. You can also serve them with fresh fruit for a pop of color.
– Gift packaging options: For gifts, place your fudge in a cute box. Tie it with a ribbon for a sweet finish. You can also use clear bags to show off the fudge. Add a little tag with a personal note for that extra special touch.
Variations
Ingredient Swaps
You can customize your fudge with simple swaps. For instance, if you want a nut-free option, use almond butter instead of peanut butter. Almond butter gives a nice twist while keeping the fudge creamy. It also adds a hint of nuttiness that pairs well with pumpkin.
For a dairy-free treat, choose dairy-free chocolate chips. These work just as well in the recipe. They melt nicely and keep the fudge rich and chocolatey. Look for brands that use almond milk or coconut milk for a great flavor.
Flavor Enhancements
To make your fudge even better, try adding a splash of maple syrup. This adds a subtle sweetness and a warm flavor. Just a tablespoon will do. Mix it in with the other wet ingredients for a sweet surprise.
You can also play with spices. Adding nutmeg or extra cinnamon can elevate the taste. Each spice brings its own warmth. Start with a pinch and adjust to your liking. These simple changes can make your fudge truly unique and delicious.
Storage Info
Storing the Fudge
To keep your Chocolate Pumpkin Spice Fudge fresh, start by wrapping it well. Use plastic wrap or aluminum foil to cover the fudge. You can also store it in an airtight container. This keeps it from drying out and helps maintain its flavor.
For the best results, refrigerate your fudge. The cool temperature helps it stay firm and tasty. If you want to enjoy it later, freezing is a great option. Just cut the fudge into squares before freezing. Place parchment paper between the layers to prevent sticking.
Shelf Life
How long does fudge last in the fridge or freezer? In the fridge, your fudge can last about two weeks. Just make sure it is wrapped tightly. If you freeze it, the fudge can last up to three months. When you want to eat it, let it thaw in the fridge overnight. This keeps the texture just right. Enjoy your fudge anytime you crave a sweet treat!
FAQs
Can I make this fudge ahead of time?
Yes, you can make this fudge ahead of time. It stores well in the fridge for up to a week. Just keep it in an airtight container. If you want to enjoy it later, you can freeze it for up to three months. Just thaw it in the fridge before serving.
How do I know when the fudge is set?
The fudge is set when it feels firm to the touch. After two hours in the fridge, check the texture. It should not feel sticky or soft. If it does, give it more time in the fridge.
What can I do if my fudge is too soft?
If your fudge is too soft, it may need more time in the fridge. If it’s still soft after chilling, you can re-mix it with a little extra cocoa powder. This will help thicken it up. Then, spread it back into the dish and chill again.
Is this recipe vegan-friendly?
Yes, this recipe can be vegan-friendly. Use dairy-free dark chocolate chips to keep it vegan. The other ingredients, like pumpkin puree and peanut butter, are naturally vegan. Enjoy this treat without worry!
This blog post covered how to make tasty fudge with pumpkin. We discussed ingredients like pumpkin puree, peanut butter, and chocolate chips. I shared step-by-step instructions for mixing and setting the fudge. You learned tips for the best texture and creative ways to present it.
In conclusion, making pumpkin fudge is fun and easy. You can customize it based on your taste. Enjoy sharing this treat with friends or family. Embrace your creativity, and keep experimenting with flavors!

