Cheesy Garlic Chicken Wraps Flavorful and Simple Meal

WANT TO SAVE THIS RECIPE?

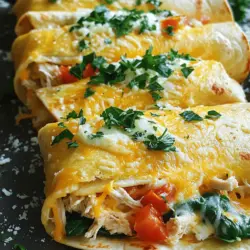
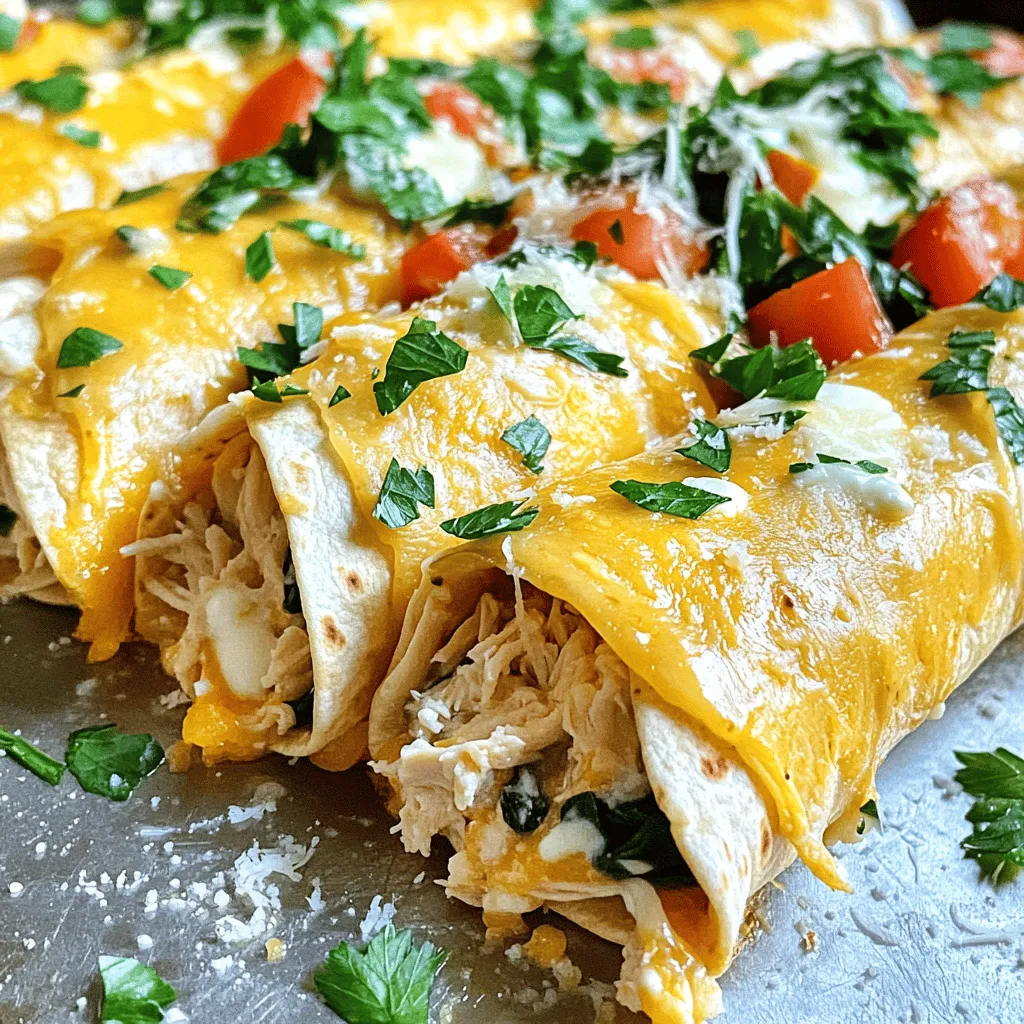
Craving a tasty meal that’s easy to whip up? Cheesy garlic chicken wraps combine rich flavors with simple steps. Picture shredded chicken, melted mozzarella, and creamy goodness all wrapped in a warm tortilla. In this post, I’ll guide you through ingredients, preparation, and variations to make this dish your own. Get ready for a meal that impresses without the fuss! Let’s dive in.

Ingredients

Detailed Ingredient List

To make cheesy garlic chicken wraps, gather these ingredients:

– 2 cups cooked chicken, shredded

– 1 cup shredded mozzarella cheese

– 1/2 cup cream cheese, softened

– 3 cloves garlic, minced

– 1 tablespoon olive oil

– 1 teaspoon Italian seasoning

– Salt and pepper to taste

– 4 large flour tortillas

– 1 cup baby spinach

– 1/2 cup diced tomatoes

– 1/4 cup grated Parmesan cheese

– Fresh parsley, chopped (for garnish)

Ingredient Substitutions

You can swap some ingredients for different flavors:

– Use cheddar or gouda instead of mozzarella for a new taste.

– Try cooked turkey or pork in place of chicken.

– Add bell peppers or mushrooms if you want more veggies.

Measuring Ingredients

Measuring ingredients correctly is key for good wraps.

– Use measuring cups for liquids and dry ingredients.

– A kitchen scale helps if you need exact amounts.

– Always pick fresh, high-quality items to boost flavor.

Step-by-Step Instructions

Preparing the Chicken and Garlic

1. Start by heating olive oil in a large skillet over medium heat.

2. Add minced garlic and sauté it for about one minute. You want it fragrant but not brown.

3. Next, mix in the shredded chicken. Sprinkle with Italian seasoning, salt, and pepper.

4. Stir well to combine everything. Heat it for about 3 to 4 minutes until warm.

Making the Cheese Mixture

1. In a mixing bowl, combine cream cheese and shredded mozzarella cheese.

2. Stir them together until the mixture is smooth and creamy. This is the key to a rich flavor.

Assembling the Wraps

1. Lay out your flour tortillas on a flat surface.

2. Spread a generous amount of the chicken and cheese mixture in the center of each tortilla.

3. Top with baby spinach and diced tomatoes for freshness.

4. Sprinkle grated Parmesan cheese for extra flavor.

5. Fold the sides of the tortilla in, then roll it up tightly from the bottom to the top.

6. To serve, cut the wraps in half diagonally and garnish with fresh parsley.

For the full recipe, refer to the earlier section.

Tips & Tricks

Cooking Techniques

When making cheesy garlic chicken wraps, you can choose between baking or frying. Frying gives a crispy edge, while baking keeps them soft. If you want a crunchy wrap, fry it in a pan for a few minutes. For a healthier option, bake them in the oven at 400°F for about 10-12 minutes.

Browning the tortillas adds extra flavor. Heat a dry skillet over medium heat. Place the tortilla in the pan and cook for 30 seconds on each side. This step makes your wraps taste even better.

Achieving Creaminess

For creamy cheese consistency, mix cream cheese and mozzarella well. Use a fork to mash them together until smooth. If you want it creamier, add a splash of milk. Be careful not to add too much, or the mix will become runny.

Adding moisture without sogginess is key. You can add sautéed spinach or diced tomatoes for flavor. Make sure to drain any excess liquid from the tomatoes before adding them to the wrap.

Serving Suggestions

Pairing sides with cheesy garlic chicken wraps is fun. You can serve them with a fresh salad or crunchy chips. A side of guacamole or salsa adds a nice touch, too.

For presentation, cut the wraps in half diagonally. This way, you can show off the cheesy filling. Garnish with fresh parsley on top for a pop of green. For more details, check out the Full Recipe.

Variations

Flavor Infusions

You can add fun flavors to your cheesy garlic chicken wraps. Spice it up with different herbs like cilantro or dill. Adding red pepper flakes gives a nice kick. You can also mix in ingredients like jalapeños for heat. They add a nice crunch and flavor burst.

Dietary Modifications

If you’re watching carbs, use low-carb tortillas. These wraps can be gluten-free too. You can use lettuce wraps instead of tortillas. For vegetarians, swap chicken for beans or tofu. Both are tasty options that still keep the meal filling.

Different Serving Styles

You can enjoy these wraps in many ways. Serve them as wraps for a fun meal. If you want something different, try a wrap bowl. Just layer the ingredients in a bowl instead. You can also transform the wraps into a baked casserole. Just place them in a baking dish and bake until bubbly.

For the full recipe, check out the details provided above!

Storage Info

Short-Term Storage

To store leftovers, let the wraps cool first. Place them in an airtight container. Keep them in the fridge for up to three days. When you want to reheat, use a microwave or stovetop. If using a microwave, heat in 30-second bursts. This helps avoid sogginess. If using the stovetop, warm them in a pan over low heat.

Long-Term Storage

For long-term storage, you can freeze the wraps. Wrap each one tightly in plastic wrap or foil. Then, place them in a freezer bag. They can last up to two months in the freezer. To thaw, move them to the fridge overnight. For reheating, use the oven or microwave until hot.

Shelf Life

The ingredients in your wraps have different shelf lives. Cooked chicken lasts about three to four days in the fridge. Cheese can last a week or more if sealed well. Tortillas usually stay fresh for about a month if kept in a cool place. Always check for signs of spoilage. If you see mold or an off smell, it’s best to toss them.

FAQs

How do I make cheesy garlic chicken wraps spicier?

To add heat to your cheesy garlic chicken wraps, consider using these spices and sauces:

Cayenne pepper: Start with a pinch and adjust to taste.

Red pepper flakes: Sprinkle a bit into the chicken mix for a kick.

Hot sauce: Drizzle your favorite brand into the cheese mixture.

Jalapeños: Add sliced fresh or pickled jalapeños for a zesty flavor.

These ingredients will enhance the flavor and give your wraps a spicy twist.

Can I prepare these wraps ahead of time?

Yes, you can prep these wraps in advance. Here are some tips:

Assemble the wraps: You can make them the night before.

Wrap tightly: Use plastic wrap or foil to keep them fresh.

Store in the fridge: They stay good for about 24 hours.

Reheat carefully: Use a skillet or microwave to warm them up.

Preparing ahead saves time and still keeps your meal delicious.

What can I serve with cheesy garlic chicken wraps?

These wraps pair well with many sides. Try these suggestions:

Fresh salad: A simple green salad with a light dressing complements the wraps.

Chips: Tortilla chips with salsa or guacamole add crunch.

Roasted veggies: Seasoned veggies bring color and flavor to your plate.

Soup: A warm bowl of tomato soup makes a comforting side.

These options enhance your meal and make it more satisfying.

Can I use leftover rotisserie chicken for this recipe?

Absolutely! Using leftover rotisserie chicken has many benefits:

Saves time: No need to cook the chicken from scratch.

Adds flavor: Rotisserie chicken is often seasoned, enhancing the wraps.

Reduces waste: It’s a great way to use leftovers and avoid waste.

Just shred the chicken and mix it into your wraps for a quick meal.

In this article, we explored the delicious world of cheesy garlic chicken wraps. We discussed the key ingredients and their substitutions, ensuring you can personalize your dish. Each step, from preparing the chicken to assembling the wraps, was laid out clearly for easy following. I also shared tips on achieving creaminess and variations for different tastes. Remember, these wraps are versatile—make them your own. Keep experimenting with serving styles and storage techniques to enjoy every bite. Your culinary journey with these wraps starts now!

To make cheesy garlic chicken wraps, gather these ingredients: - 2 cups cooked chicken, shredded - 1 cup shredded mozzarella cheese - 1/2 cup cream cheese, softened - 3 cloves garlic, minced - 1 tablespoon olive oil - 1 teaspoon Italian seasoning - Salt and pepper to taste - 4 large flour tortillas - 1 cup baby spinach - 1/2 cup diced tomatoes - 1/4 cup grated Parmesan cheese - Fresh parsley, chopped (for garnish) You can swap some ingredients for different flavors: - Use cheddar or gouda instead of mozzarella for a new taste. - Try cooked turkey or pork in place of chicken. - Add bell peppers or mushrooms if you want more veggies. Measuring ingredients correctly is key for good wraps. - Use measuring cups for liquids and dry ingredients. - A kitchen scale helps if you need exact amounts. - Always pick fresh, high-quality items to boost flavor. 1. Start by heating olive oil in a large skillet over medium heat. 2. Add minced garlic and sauté it for about one minute. You want it fragrant but not brown. 3. Next, mix in the shredded chicken. Sprinkle with Italian seasoning, salt, and pepper. 4. Stir well to combine everything. Heat it for about 3 to 4 minutes until warm. 1. In a mixing bowl, combine cream cheese and shredded mozzarella cheese. 2. Stir them together until the mixture is smooth and creamy. This is the key to a rich flavor. 1. Lay out your flour tortillas on a flat surface. 2. Spread a generous amount of the chicken and cheese mixture in the center of each tortilla. 3. Top with baby spinach and diced tomatoes for freshness. 4. Sprinkle grated Parmesan cheese for extra flavor. 5. Fold the sides of the tortilla in, then roll it up tightly from the bottom to the top. 6. To serve, cut the wraps in half diagonally and garnish with fresh parsley. For the full recipe, refer to the earlier section. When making cheesy garlic chicken wraps, you can choose between baking or frying. Frying gives a crispy edge, while baking keeps them soft. If you want a crunchy wrap, fry it in a pan for a few minutes. For a healthier option, bake them in the oven at 400°F for about 10-12 minutes. Browning the tortillas adds extra flavor. Heat a dry skillet over medium heat. Place the tortilla in the pan and cook for 30 seconds on each side. This step makes your wraps taste even better. For creamy cheese consistency, mix cream cheese and mozzarella well. Use a fork to mash them together until smooth. If you want it creamier, add a splash of milk. Be careful not to add too much, or the mix will become runny. Adding moisture without sogginess is key. You can add sautéed spinach or diced tomatoes for flavor. Make sure to drain any excess liquid from the tomatoes before adding them to the wrap. Pairing sides with cheesy garlic chicken wraps is fun. You can serve them with a fresh salad or crunchy chips. A side of guacamole or salsa adds a nice touch, too. For presentation, cut the wraps in half diagonally. This way, you can show off the cheesy filling. Garnish with fresh parsley on top for a pop of green. For more details, check out the Full Recipe. {{image_2}} You can add fun flavors to your cheesy garlic chicken wraps. Spice it up with different herbs like cilantro or dill. Adding red pepper flakes gives a nice kick. You can also mix in ingredients like jalapeños for heat. They add a nice crunch and flavor burst. If you're watching carbs, use low-carb tortillas. These wraps can be gluten-free too. You can use lettuce wraps instead of tortillas. For vegetarians, swap chicken for beans or tofu. Both are tasty options that still keep the meal filling. You can enjoy these wraps in many ways. Serve them as wraps for a fun meal. If you want something different, try a wrap bowl. Just layer the ingredients in a bowl instead. You can also transform the wraps into a baked casserole. Just place them in a baking dish and bake until bubbly. For the full recipe, check out the details provided above! To store leftovers, let the wraps cool first. Place them in an airtight container. Keep them in the fridge for up to three days. When you want to reheat, use a microwave or stovetop. If using a microwave, heat in 30-second bursts. This helps avoid sogginess. If using the stovetop, warm them in a pan over low heat. For long-term storage, you can freeze the wraps. Wrap each one tightly in plastic wrap or foil. Then, place them in a freezer bag. They can last up to two months in the freezer. To thaw, move them to the fridge overnight. For reheating, use the oven or microwave until hot. The ingredients in your wraps have different shelf lives. Cooked chicken lasts about three to four days in the fridge. Cheese can last a week or more if sealed well. Tortillas usually stay fresh for about a month if kept in a cool place. Always check for signs of spoilage. If you see mold or an off smell, it's best to toss them. To add heat to your cheesy garlic chicken wraps, consider using these spices and sauces: - Cayenne pepper: Start with a pinch and adjust to taste. - Red pepper flakes: Sprinkle a bit into the chicken mix for a kick. - Hot sauce: Drizzle your favorite brand into the cheese mixture. - Jalapeños: Add sliced fresh or pickled jalapeños for a zesty flavor. These ingredients will enhance the flavor and give your wraps a spicy twist. Yes, you can prep these wraps in advance. Here are some tips: - Assemble the wraps: You can make them the night before. - Wrap tightly: Use plastic wrap or foil to keep them fresh. - Store in the fridge: They stay good for about 24 hours. - Reheat carefully: Use a skillet or microwave to warm them up. Preparing ahead saves time and still keeps your meal delicious. These wraps pair well with many sides. Try these suggestions: - Fresh salad: A simple green salad with a light dressing complements the wraps. - Chips: Tortilla chips with salsa or guacamole add crunch. - Roasted veggies: Seasoned veggies bring color and flavor to your plate. - Soup: A warm bowl of tomato soup makes a comforting side. These options enhance your meal and make it more satisfying. Absolutely! Using leftover rotisserie chicken has many benefits: - Saves time: No need to cook the chicken from scratch. - Adds flavor: Rotisserie chicken is often seasoned, enhancing the wraps. - Reduces waste: It’s a great way to use leftovers and avoid waste. Just shred the chicken and mix it into your wraps for a quick meal. In this article, we explored the delicious world of cheesy garlic chicken wraps. We discussed the key ingredients and their substitutions, ensuring you can personalize your dish. Each step, from preparing the chicken to assembling the wraps, was laid out clearly for easy following. I also shared tips on achieving creaminess and variations for different tastes. Remember, these wraps are versatile—make them your own. Keep experimenting with serving styles and storage techniques to enjoy every bite. Your culinary journey with these wraps starts now!

Cheesy Garlic Chicken Wraps

Savor the deliciousness of cheesy garlic chicken wraps! With tender shredded chicken, creamy cheeses, and fresh spinach, this easy recipe is perfect for a quick meal. In just 20 minutes, you can whip up a satisfying dish that everyone will love. Don't wait—click through to explore the full recipe and elevate your meal prep with these irresistible wraps that are sure to impress!

Ingredients
  

2 cups cooked chicken, shredded

1 cup shredded mozzarella cheese

1/2 cup cream cheese, softened

3 cloves garlic, minced

1 tablespoon olive oil

1 teaspoon Italian seasoning

Salt and pepper to taste

4 large flour tortillas

1 cup baby spinach

1/2 cup diced tomatoes

1/4 cup grated Parmesan cheese

Fresh parsley, chopped (for garnish)

Instructions
 

In a large skillet, heat olive oil over medium heat. Add minced garlic and sauté for about 1 minute until fragrant.

    Add the shredded chicken to the skillet. Sprinkle with Italian seasoning, salt, and pepper. Stir well to combine and heat through for about 3-4 minutes.

      In a mixing bowl, combine the cream cheese and mozzarella cheese. Mix until smooth.

        Once the chicken is heated, remove from heat and stir in the cheese mixture until well combined.

          Lay out the flour tortillas on a flat surface. Spread a generous amount of the chicken and cheese mixture in the center of each tortilla.

            Top with baby spinach and diced tomatoes. Sprinkle with grated Parmesan cheese.

              Fold the sides of the tortilla in and then roll it up tightly from the bottom to the top, creating a wrap.

                To serve, cut the wraps in half diagonally, and garnish with fresh parsley on top.

                  Prep Time: 10 minutes | Total Time: 20 minutes | Servings: 4

                    WANT TO SAVE THIS RECIPE?

                    Leave a Comment

                    Recipe Rating