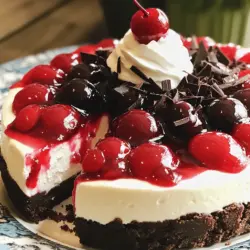
If you love sweet treats, you’ll enjoy making this Black Forest No-Bake Cheesecake! This dessert combines rich chocolate, creamy cheesecake, and cherry goodness. It’s simple to make and doesn’t require baking, which means you can focus on the fun part: eating it! Follow my easy steps and tips to impress your friends and family with this delightful dessert that’s perfect for any occasion. Let’s dive into the yummy details!
Ingredients
To create a mouth-watering Black Forest No-Bake Cheesecake, you need the right ingredients. Here’s what you will need:
List of Ingredients
– Chocolate Graham Cracker Crust
– 1 ½ cups chocolate graham cracker crumbs
– ½ cup unsalted butter, melted
– Cheesecake Filling Components
– 2 cups cream cheese, softened
– 1 cup powdered sugar
– 1 teaspoon vanilla extract
– 1 cup heavy whipping cream
– Toppings for the Finished Cheesecake
– 1 can (15 oz) cherry pie filling
– ¼ cup dark chocolate shavings for garnish
These ingredients come together to create a rich and creamy dessert. The chocolate crust gives a great base, while the cream cheese filling offers a smooth texture. The cherry topping adds a burst of flavor, and the chocolate shavings provide a lovely finish.
Step-by-Step Instructions
Preparing the Crust
Mixing the Cracker Crumbs and Butter
Start with 1 ½ cups of chocolate graham cracker crumbs in a bowl. Pour in ½ cup of melted unsalted butter. Mix well until the crumbs soak up the butter. This mixture should look like wet sand.
Pressing the Crust into the Pan
Take a 9-inch springform pan. Press the crumb mixture firmly into the bottom of the pan. Make sure it is even and compact. This step helps it hold together. Once pressed, put the pan in the fridge to chill while you make the filling.
Making the Cheesecake Filling
Whipping the Cream Cheese Mixture
In a large bowl, add 2 cups of softened cream cheese. Use an electric mixer to beat it until smooth. This should take about 2 minutes. Gradually add 1 cup of powdered sugar and 1 teaspoon of vanilla extract. Mix until everything is creamy and well combined.
Incorporating the Whipped Cream
In another bowl, whip 1 cup of heavy cream until stiff peaks form. Gently fold this whipped cream into the cream cheese mixture. Be careful here; you don’t want to lose the airiness. This step makes your cheesecake light and fluffy.
Assembling the Cheesecake
Pouring the Filling over the Crust
Now, pour the creamy mixture over the chilled crust. Spread it evenly with a spatula. Make sure it reaches all edges. This helps create a beautiful layer.
Refrigerating for the Required Time
Cover the pan with plastic wrap. Place the cheesecake in the fridge for at least 4 hours. If you can wait overnight, that’s even better! This chilling time allows the cheesecake to set properly.
Tips & Tricks
Common Mistakes to Avoid
– Overmixing the Cheese Mixture
It’s easy to get excited when mixing. Overmixing can make the filling too runny. Aim for a smooth texture but stop as soon as there are no lumps. Your cheesecake will set better this way.
– Not Chilling Long Enough
Patience is key. If you don’t chill the cheesecake long enough, it won’t hold its shape. Aim for at least four hours in the fridge. For best results, let it chill overnight. This helps all the flavors blend beautifully.
Presentation and Serving Suggestions
– Creative Garnishing Ideas
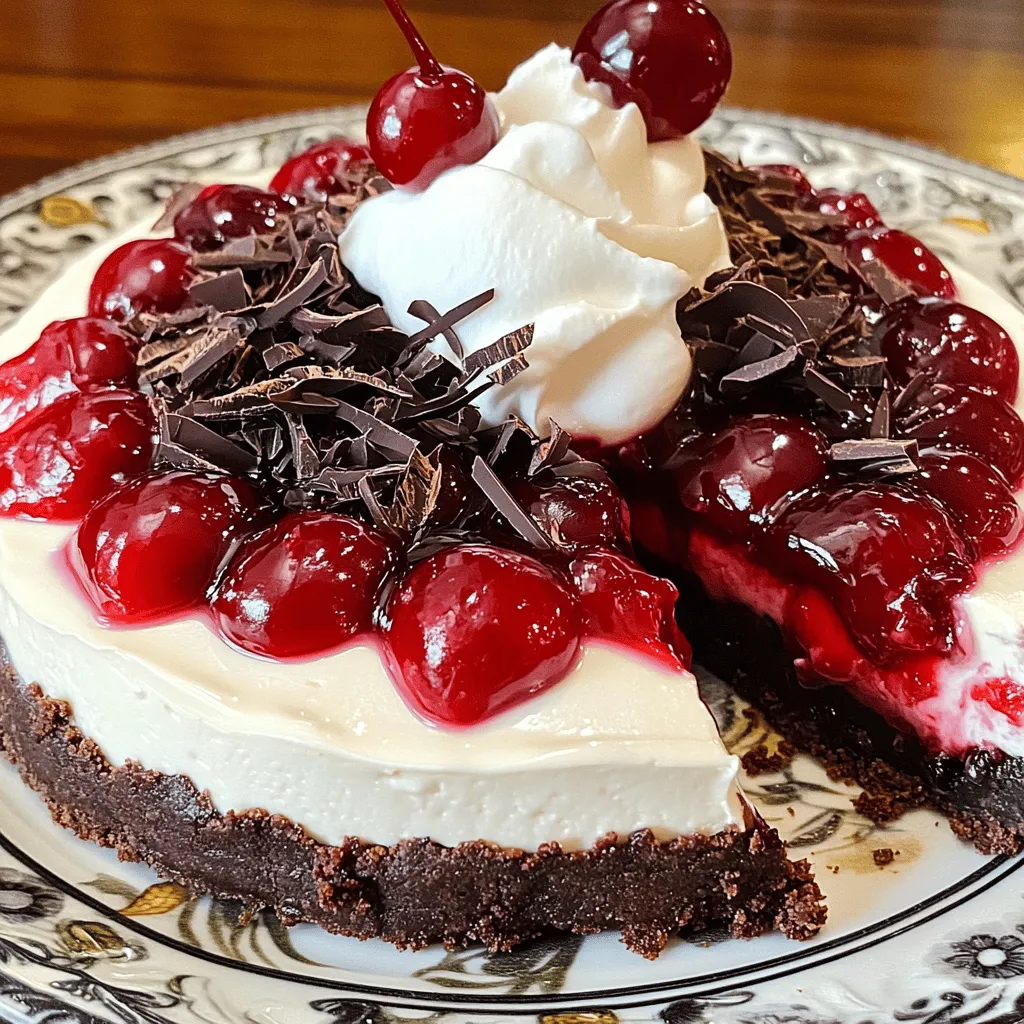
To make your cheesecake look stunning, try adding whipped cream on the sides. Place dark chocolate shavings on top, along with the cherry pie filling. You can also add fresh cherries for a pop of color.
– Ideal Slicing Techniques
Use a sharp knife for clean cuts. Dip the knife in hot water and wipe it dry before slicing. This keeps each piece neat and helps with presentation. Serve each slice with a dollop of whipped cream and a cherry on top for an extra touch.
Variations
Flavorful Twists
You can make your Black Forest No-Bake Cheesecake even more fun with tasty twists.
– Adding Different Fruit Toppings: While cherry is classic, feel free to explore. Try raspberries, strawberries, or blueberries for new flavors. Each fruit brings its unique color and taste. This adds freshness and makes your dessert pop!
– Incorporating Liqueurs for an Adult Version: If you want a grown-up treat, add some liqueur. A splash of cherry brandy or chocolate liqueur enhances the flavor. Mix it into the cream cheese filling for a delightful surprise in each bite.
Alternative Dietary Options
You can also make this cheesecake fit your dietary needs.
– Gluten-Free Crust Options: If you need a gluten-free option, use gluten-free cookies. Many brands offer chocolate cookies that work well. Just crush them and mix with melted butter for a great crust.
– Dairy-Free Cheese Alternatives: For those avoiding dairy, use dairy-free cream cheese. Look for brands made from nuts or soy. They can give you a creamy texture without the dairy. Your cheesecake will still be rich and tasty.
With these variations, you can tailor your cheesecake to fit any taste or need.
Storage Info
Best Practices for Storage
To keep your Black Forest No-Bake Cheesecake fresh, store it in the fridge. Place it in an airtight container or cover it tightly with plastic wrap. This helps prevent the cheesecake from drying out or absorbing other smells. If you want to save it for later, consider freezing it. Cut the cheesecake into slices and wrap each piece in plastic wrap. Then, place them in a freezer-safe bag or container. This makes it easy to grab one when you want a treat.
Shelf Life
How long does it last in the fridge? Your cheesecake will stay fresh for about 5 to 7 days in the fridge. After that, it may start to lose its creamy texture and flavor.
What are the signs of spoilage? Watch for any changes in color or smell. If it develops a sour smell or an off taste, it’s best to throw it away. Look for any mold or a slimy texture. If any of these signs appear, do not eat it. Always trust your senses when it comes to food safety.
FAQs
How to Make Black Forest No-Bake Cheesecake?
To make this cheesecake, follow these key steps:
1. Prepare the Crust: Mix the chocolate graham cracker crumbs with melted butter until combined. Press this mix into a springform pan to form a firm crust. Chill it while you make the filling.
2. Make the Filling: Beat softened cream cheese until smooth. Gradually add powdered sugar and vanilla extract. Mix until creamy. In a separate bowl, whip heavy cream until stiff peaks form. Fold the whipped cream into the cheese mix gently.
3. Assemble the Cheesecake: Pour the filling over the chilled crust. Spread it evenly. Refrigerate for at least four hours, or overnight for best results.
4. Top It Off: Once set, add cherry pie filling on top and sprinkle with dark chocolate shavings.
Follow these steps, and you will create a delightful treat.
Can I Use Fresh Cherries Instead of Pie Filling?
Yes, you can use fresh cherries. Here are the pros and cons:
– Pros:
– Fresh cherries taste bright and juicy.
– They add a natural sweetness.
– They look beautiful as a topping.
– Cons:
– Fresh cherries may require more prep time.
– You might need to add sugar to balance tartness.
– They may not have the same smooth texture as pie filling.
Using fresh cherries gives a unique twist, but pie filling is easier.
What is the Best Way to Cut a No-Bake Cheesecake?
To cut a no-bake cheesecake cleanly, use these tools and techniques:
– Tools:
– A sharp, long knife.
– A hot water bath for the knife.
– Techniques:
– Dip your knife in hot water before cutting.
– Wipe the knife clean after each cut.
– Use a gentle sawing motion to avoid crushing the cheesecake.
These steps help you serve perfect slices every time.
This article covered everything you need to make a delicious no-bake cheesecake. We explored the ingredients, easy steps, tips to avoid mistakes, and creative variations. Remember, patience is key to a perfect dessert. Chill it long enough, and your cheesecake will impress everyone. Get creative with toppings and flavors to make it your own. Enjoy your cheesecake journey; it’s worth every bite!