
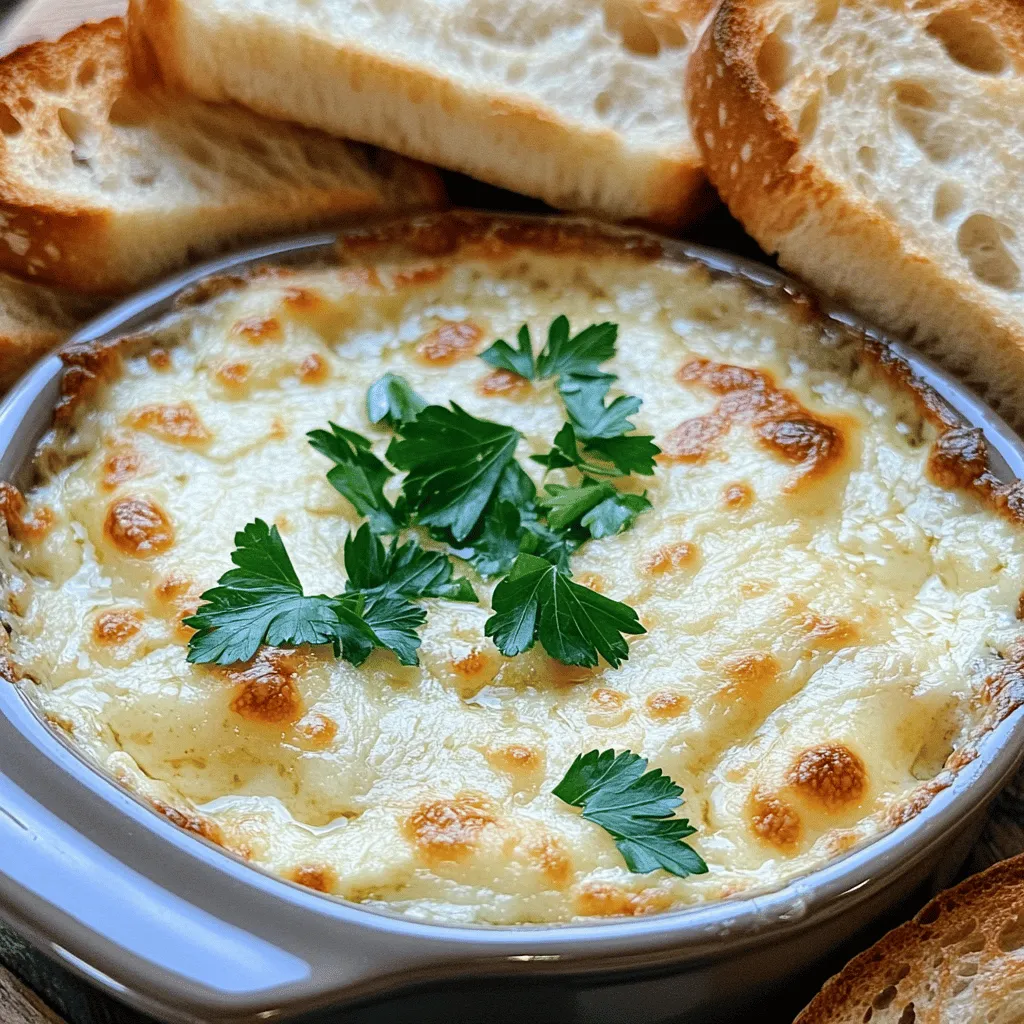
If you’re searching for the perfect appetizer, look no further! My Baked Garlic Bread Dip will be the star of your next gathering. This creamy, cheesy delight is packed with bold flavors and pairs perfectly with crusty bread. In this post, I’ll share my easy step-by-step recipe and tips for creating a dish everyone will love. Let’s dive into the details and get you baking this irresistible treat!
Ingredients
Main Ingredients for Baked Garlic Bread Dip
To create this tasty dip, you need a few key items. Here’s what you will need:
– 1 cup cream cheese, softened
– 1 cup sour cream
– 1 cup shredded mozzarella cheese
– 1 cup grated parmesan cheese
– 4 cloves garlic, minced
– 1 teaspoon Italian seasoning
– 1 teaspoon garlic powder
– Salt and pepper to taste
These ingredients combine to make a rich and creamy base. The cream cheese and sour cream add smoothness. The cheeses give flavor and thickness. The garlic, both minced and in powder form, brings a strong taste. Italian seasoning adds a lovely herbal note, while salt and pepper balance everything.
Additional Ingredients for Dipping
For dipping, I suggest using a crusty bread. Here’s my favorite choice:
– 1 loaf of crusty bread (like ciabatta or baguette)
This type of bread holds up well against the dip. The crust adds crunch, while the soft inside is perfect for scooping. You can cut the bread into thick slices for a better dipping experience. Toasting the slices makes them even better.
Recommended Pairings and Garnishes
To make your dip shine, consider these extra touches:
– 1 tablespoon fresh parsley, chopped (for garnish)
Fresh parsley adds a pop of color and a hint of freshness. You can also serve the dip with crunchy vegetable sticks for a healthy option. Carrots, celery, or bell peppers work great. If you want to impress, add a sprinkle of extra cheese on top before serving.Enjoy the process of making this delicious Baked Garlic Bread Dip!
Step-by-Step Instructions
Preparation of the Garlic Bread Dip
First, preheat your oven to 350°F (175°C). This is key for a good bake. In a medium bowl, mix together the softened cream cheese, sour cream, mozzarella, and parmesan. Blend these until smooth and creamy. Next, stir in the minced garlic, Italian seasoning, garlic powder, salt, and pepper. Make sure all the ingredients are mixed well. Transfer this cheesy mixture to a small, oven-safe dish. Spread it out evenly to ensure even baking.
Baking Tips for Optimal Flavor
Baking time is crucial for the best flavor. Bake your dip for about 25 to 30 minutes. Look for a bubbly surface and a lightly golden top. This indicates that the dip is ready. I like to check on it halfway through. If you want extra flavor, consider adding more garlic or a sprinkle of extra cheese on top before baking. This will enhance the taste and make it even more delicious.
Toasting Bread for the Perfect Dipping Experience
While the dip is baking, it’s time to prepare the bread. Slice your crusty bread into thick pieces. Lay these on a baking sheet. Toast the bread for about 8 to 10 minutes until it turns golden and crispy. This adds a nice crunch. When the dip is done, let it cool for a few minutes. Serve the warm dip with your crispy bread on the side. Enjoy this tasty treat with family and friends!
Tips & Tricks
Secrets to Making Your Dip Creamier
To make your dip super creamy, use room-temperature cream cheese. This helps it mix well with other ingredients. You can also use full-fat sour cream. It adds richness. Blend everything until smooth. If you want it even creamier, add a splash of milk. This makes the dip dreamy and easy to scoop.
Enhancing Flavor with Fresh Ingredients
Fresh ingredients make all the difference. Use fresh garlic instead of powder for a bold taste. Chopped fresh parsley adds color and flavor. You can also add fresh herbs like basil or chives. They brighten the dip. Try mixing in a bit of lemon juice for a zesty kick. This will elevate the taste and make it pop.
Serving Suggestions for Appetizer Perfection
Serve the dip hot right from the oven. Pair it with toasted bread for a crunchy bite. Crusty bread, like ciabatta or a baguette, works best. You can also serve with veggie sticks for a fresh crunch. For a fun twist, try pita chips or crackers. They add variety to your appetizer spread. Don’t forget to sprinkle extra parsley on top for a nice touch!
Variations
Spicy Garlic Bread Dip Option
If you like heat, add a kick to your dip. Mix in some diced jalapeños or a spoonful of hot sauce. You can also use pepper jack cheese instead of mozzarella for a spicy twist. This change will excite your taste buds and make your dip unforgettable.
Vegetarian-Friendly Alternatives
To make this dip vegetarian, just skip any meat-based ingredients. You can add chopped spinach or artichokes for extra flavor and nutrients. Using fresh herbs like basil or thyme can also enhance the taste. These small changes keep the dip tasty while catering to vegetarian diets.
Gluten-Free Ingredients to Use
For a gluten-free version, choose gluten-free bread for dipping. Many brands offer great options that taste just as good. You can also serve the dip with fresh veggies like carrots, celery, or bell peppers. This way, everyone can enjoy your tasty creation without worry.
Storage Info
Proper Ways to Store Leftovers
After enjoying your baked garlic bread dip, you may have some left. To store it, let the dip cool first. Then, transfer it to an airtight container. Make sure to seal it well. Store it in the fridge for up to three days. If you have leftover bread, keep it in a separate bag. This helps keep it fresh and prevents it from getting soggy.
Reheating Instructions for Best Results
When you’re ready to enjoy the dip again, reheating is easy. Preheat your oven to 350°F (175°C). Place the dip in an oven-safe dish. Cover it with foil to keep it moist. Bake for about 15 to 20 minutes until it’s warm. You can also heat it in the microwave. Use a microwave-safe bowl and heat it in short bursts of 30 seconds. Stir in between until it’s hot.
Shelf Life of Prepared Dip
The baked garlic bread dip stays fresh in the fridge for three days. If you want to keep it longer, you can freeze it. In a freezer-safe container, it can last up to two months. Just remember to thaw it in the fridge overnight before reheating. This way, you can enjoy your delicious dip whenever you want!
FAQs
Can I make Baked Garlic Bread Dip ahead of time?
Yes, you can make this dip ahead of time. Prepare the dip and place it in a baking dish. Cover it and store it in the fridge for up to two days. When you are ready to bake it, just take it out and let it sit at room temperature for about 30 minutes. This helps it cook evenly.
What can I substitute for cream cheese?
If you want to swap out cream cheese, try using Greek yogurt or ricotta cheese. Both options add a creamy texture. You can also use a vegan cream cheese for a dairy-free option. Just keep in mind that the flavor may change a bit. Adjust seasonings as needed to keep it tasty.
How do I know when the dip is done baking?
You’ll know the dip is done when it’s bubbly and golden on top. This usually takes about 25-30 minutes at 350°F (175°C). Keep an eye on it during the last few minutes. If the top isn’t golden yet, you can broil it for a minute or two. Just watch it closely to avoid burning.
Can I freeze Baked Garlic Bread Dip?
Freezing this dip is a great option for later. Prepare the dip but do not bake it. Instead, cover it tightly with plastic wrap and foil, then freeze. When you’re ready to enjoy it, defrost it in the fridge overnight.
What bread is best for dipping?
Crusty bread works best for this dip. Baguette and ciabatta are great choices. They hold up well when dipped. You can also use toasted breadsticks or crackers. Experiment to find your favorite!
This blog post shared how to make a tasty Baked Garlic Bread Dip. We explored the key ingredients and helpful tips for baking. I discussed fun variations and how to store leftovers. Each part gives you ways to make this dish your own.
In the end, you can enjoy a hot, creamy dip that delights everyone. Try it out and make your own special dips!

