Skip to content
DisclaimerTerms Of UseGDPR PolicyCookie Policy

My Cooking Cast

  • Home
  • Drinks
  • Appetizers
  • Dinner
  • Dessert
  • About
  • Contact
  • Privacy Policy
DisclaimerTerms Of UseGDPR PolicyCookie Policy

Emma

To make a Healthy Strawberry Banana Smoothie, you need fresh and simple ingredients. Here’s what you will gather: - 1 cup fresh strawberries, hulled and sliced - 1 ripe banana, peeled and sliced - 1/2 cup unsweetened almond milk - 1/2 cup Greek yogurt - 1 tablespoon honey or maple syrup - 1 tablespoon chia seeds - 1/2 teaspoon vanilla extract - Ice cubes (optional) Each ingredient plays a key role. Fresh strawberries add a sweet, juicy flavor. Bananas make the smoothie creamy and add natural sweetness. Almond milk keeps it light and dairy-free. Greek yogurt adds protein and richness. Honey or maple syrup can sweeten it further, but adjust to your taste. Chia seeds provide fiber and healthy fats. A hint of vanilla enhances the overall flavor. If you like your smoothie cold and thick, toss in some ice cubes. For the full recipe, check out Berry Bliss Banana Smoothie. To make the Healthy Strawberry Banana Smoothie, follow these easy steps. 1. Prepare the Fruit: Start by washing the strawberries. Remove the green tops and slice them. Next, peel the banana and slice it into rounds. This makes blending easier. 2. Combine Ingredients: In your blender, add the sliced strawberries and banana. Pour in the almond milk and add the Greek yogurt. If you want extra sweetness, add honey or maple syrup. Don't forget the chia seeds and vanilla extract for flavor. 3. Blend Until Smooth: Blend the mixture on high speed. Keep blending until it looks smooth and creamy. If you like it thicker, add a few ice cubes and blend again. Taste the smoothie. If it needs more sweetness, add a bit more honey or syrup and blend again. Pour the smoothie into glasses and enjoy right away for the best taste. This process is quick, taking only about five minutes. For the full recipe, check out the details above. To make your smoothie taste great, you can adjust the sweetness. If you want a sweeter drink, add honey or maple syrup. Start with one tablespoon and taste it. You can always add more if needed. If you prefer natural sweetness, use ripe bananas. They add flavor without extra sugar. For the perfect smoothie consistency, blend until smooth. If your smoothie is too thin, add more yogurt or a few ice cubes. Ice makes it thicker and colder. If it’s too thick, add a splash of almond milk. Blend again until you reach your desired texture. Before blending, prepare your fruits. Slice the strawberries and bananas into smaller pieces. This helps them blend evenly. If you have time, freeze some of the banana slices. Frozen fruit gives a nice chill and creaminess. For a healthy boost, try adding chia seeds. They blend well and add fiber. You can find the full recipe to create this delightful drink. Enjoy your smoothie! {{image_2}} This Healthy Strawberry Banana Smoothie packs a nutritious punch. Each serving has about 200 calories. This makes it a great snack or light meal. Vitamins and minerals in this smoothie are impressive. Strawberries are rich in vitamin C and potassium. Bananas provide vitamin B6 and vitamin C. Together, they offer a nice mix of nutrients. Health benefits of strawberries and bananas are many. Strawberries can help boost your immune system. They also support heart health. Bananas give energy and aid digestion. Together, they create a tasty treat that fuels your body well. For the full recipe, check out the berry bliss banana smoothie. You can easily make this smoothie your own. Dairy-free alternatives and substitutes If you want a dairy-free option, use almond milk or oat milk instead of regular milk. For yogurt, try coconut yogurt. Both options keep the creamy taste. Adding greens for nutritional boosts Want to add some greens? Spinach or kale blends well without changing the flavor. Just a small handful adds vitamins and minerals. You won’t even taste it! Flavor variations Feel free to mix in other fruits. Blueberries or mango add a fun twist. You can also throw in some peaches or a handful of pineapple. Each fruit adds its unique taste and nutrition. Experiment with these tips to find your perfect blend! For the full recipe, check out the Berry Bliss Banana Smoothie. To make this smoothie vegan, simply swap the Greek yogurt for dairy-free yogurt. You can use coconut, almond, or soy yogurt. Also, choose maple syrup instead of honey for sweetness. These small changes keep your smoothie plant-based without losing flavor. If you don’t have chia seeds, flaxseeds work well too. Ground flaxseeds give similar fiber and omega-3 benefits. You can also skip them entirely. The smoothie will still taste great and be healthy without them. You can store the smoothie in the fridge for up to 24 hours. Use an airtight container to keep it fresh. Stir or shake well before drinking, as it may separate. For longer storage, freeze it in ice cube trays. Blend the frozen cubes later for a quick treat. For the full recipe, check out the Berry Bliss Banana Smoothie! This blog post covered how to make a tasty smoothie with strawberries and bananas. You learned the ingredients, steps, and tips to make it great. We also looked at the health benefits and ways to customize your smoothie. Use the tips to mix flavors and boost its nutrition. Enjoy your delicious drink, knowing you made it just right!

Healthy Strawberry Banana Smoothie Delightful Refreshment

Looking for a simple, delicious way to kick-start your day? This Healthy Strawberry Banana Smoothie is the perfect blend of

- 4 medium zucchini - 1 cup fresh basil leaves - 1/4 cup walnuts (or pine nuts) - 1/4 cup grated Parmesan cheese (or nutritional yeast for vegan) - 2 cloves garlic, minced - 1/3 cup extra virgin olive oil - Salt and pepper to taste - Cherry tomatoes, halved - Red pepper flakes for added heat Zucchini noodles make a great base for this dish. You’ll need four medium zucchini. They spiralize well and hold their shape. Next, let’s talk about the pesto sauce. For a fresh and vibrant flavor, use one cup of basil leaves. You can choose walnuts or pine nuts, both work great. You’ll need a quarter cup. If you want a vegan option, use nutritional yeast instead of Parmesan cheese. That’s also a quarter cup. Two cloves of minced garlic add zest. Extra virgin olive oil brings it all together, about a third of a cup. Finally, season with salt and pepper to taste. For garnishes, halved cherry tomatoes look and taste great. If you like a kick, add red pepper flakes. This full recipe makes a simple and fresh meal that shines with flavor! To start, grab your zucchini. Use a spiralizer to create long, thin noodles. If you don’t have one, a vegetable peeler works too. Simply peel the zucchini into strips. Once you have your noodles, place them in a colander. Let them drain for about 10 minutes. This step helps remove excess water, so your dish stays crunchy. Next, let’s make the pesto. In a food processor, combine fresh basil leaves, walnuts, Parmesan cheese, and minced garlic. Pulse the mix until it’s finely chopped. Then, while the processor runs, slowly drizzle in the olive oil. Keep blending until you reach a smooth paste. Scrape down the sides if needed. Finally, season with salt and pepper to taste. You can adjust the texture with more olive oil or a bit of water. Now, heat a non-stick skillet over medium heat. Add your drained zucchini noodles to the pan. Sauté them for about 2-3 minutes. You want them tender but still firm, which is called al dente. Make sure not to cook them too long, or they will become mushy. Once the noodles are ready, remove the skillet from heat. Stir in the pesto sauce until the noodles are well coated. Taste your dish and adjust the seasoning if needed. For a fun touch, serve it with halved cherry tomatoes on top. If you like a bit of spice, add red pepper flakes for extra heat. Enjoy your fresh and vibrant zucchini noodles with pesto! For the full recipe, you can refer to the section above. To avoid sogginess, drain zucchini noodles well. After spiralizing, place them in a colander. Let them sit for about 10 minutes. This helps remove extra water. You want them tender, but not mushy. Sauté for 2-3 minutes over medium heat. This keeps them firm and tasty. To make your pesto richer, try adding nuts or cheese. Pine nuts and Parmesan cheese work great. You can also try adding lemon juice for zest. Adjust the texture by adding more olive oil. If it's too thick, add a splash of water. This makes the pesto smooth and easy to mix. Zucchini noodles pair well with grilled chicken or shrimp. For a vegetarian meal, add roasted veggies like bell peppers or mushrooms. Arrange the noodles in a bowl and top with cherry tomatoes. You can also sprinkle nuts on top for crunch. This gives a nice look and taste. For a fun twist, serve in a hollowed-out zucchini. You can find the full recipe [here](#). {{image_2}} If you want a vegan option, you can easily swap out the cheese. Instead of Parmesan, try using nutritional yeast. It adds a cheesy flavor without any dairy. You can also use blended cashews for a creamy texture. Both options work well in the pesto and keep it fresh and tasty. Do you need a nut-free recipe? No problem! You can use seeds instead of nuts. Sunflower seeds or pumpkin seeds make great substitutes. Just blend them in the food processor as you would with nuts. They add a nice crunch and flavor without any nuts, making it safe for those with allergies. Want to make your dish even better? Add more veggies or proteins! You can toss in sliced bell peppers, spinach, or cherry tomatoes. For protein, think of grilled chicken, shrimp, or chickpeas. These add-ins boost flavor and nutrition. Get creative and mix what you love. Remember, this dish is all about fresh and simple ingredients, so feel free to experiment! Store your zucchini noodles and pesto in separate, airtight containers. This keeps each fresh. Place the noodles in the fridge for up to two days. The pesto can last up to a week. To keep your pesto green, press plastic wrap on the surface before sealing. You can freeze zucchini noodles, but they can lose some crunch. To freeze, place them in a single layer on a baking sheet. After a few hours, transfer them to a freezer bag. For pesto, pour it into ice cube trays. Once frozen, pop them out and store in a bag. Both will last about three months in the freezer. To reheat zucchini noodles, use a non-stick skillet. Heat them on low for about two minutes. This helps keep them from getting mushy. For pesto, add it to the skillet with a bit of olive oil. Stir until warm, but don’t cook it too long. This keeps the flavors fresh and bright. For a complete recipe, check out the Full Recipe. Yes, you can make zucchini noodles ahead of time. Here are some tips for meal prep: - Spiralize or peel the zucchini a few hours before serving. - Place the noodles in a colander and sprinkle with salt. - Let them sit for 10 minutes to draw out moisture. - Store them in an airtight container in the fridge. These steps help keep your noodles fresh and ready for a quick meal. Zucchini noodles can become soggy if not prepared correctly. Here are common mistakes to avoid: - Don’t skip salting the noodles; it removes extra water. - Avoid cooking them for too long; 2-3 minutes is ideal. - Use a non-stick skillet to prevent sticking and overcooking. Following these tips keeps your noodles firm and tasty. Zucchini noodles are very versatile! Here are some alternative sauce ideas: - Marinara sauce for a classic flavor. - Alfredo sauce for a creamy twist. - A simple olive oil and garlic mix for a light option. - Spicy arrabbiata if you like heat. Feel free to experiment with different flavors! Leftovers can last in the fridge for about 3 days. Here are some storage tips: - Place them in an airtight container. - Keep the pesto and zucchini noodles separate if possible. - Reheat gently on the stove or in the microwave. This way, you maintain the best taste and texture for your meal. For the full recipe, check out the details above! This blog post covered how to make delicious zucchini noodles with pesto sauce. We started with the basic ingredients, from zucchini to fresh basil. Then, I guided you through step-by-step instructions, ensuring your noodles shine. We discussed tips to enhance flavor and ways to store your meal. In closing, experimenting with variations can make this dish even better. Enjoy healthy meals that are simple and fun to make!

Zucchini Noodles with Pesto Simple and Fresh Meal

Looking for a fresh and simple meal? Zucchini Noodles with Pesto is your answer! This dish is healthy, quick to

- Cauliflower florets - All-purpose flour or gluten-free flour - Water Cauliflower is the star of this dish. You want it cut into bite-sized florets for the best texture. Choose a large head of cauliflower for more wings. The flour creates the perfect batter, while water helps it blend smoothly. - Garlic powder - Onion powder - Smoked paprika - Cayenne pepper - Salt and black pepper Seasoning is key to flavor. Garlic powder adds depth. Onion powder gives it a sweet note. Smoked paprika brings a nice warmth. Adjust cayenne pepper to your heat level. Salt and black pepper round out the taste. - Buffalo sauce (store-bought or homemade) - Unsalted butter or vegan alternative Buffalo sauce gives the wings their signature kick. You can use store-bought or make your own. Mixing it with melted butter makes the sauce rich and smooth. For a vegan option, use a plant-based butter. These ingredients come together to create a tasty and crunchy snack. You can find the complete recipe in the Full Recipe section. - First, preheat your oven to 450°F (230°C). - Next, line a baking sheet with parchment paper. - In a large bowl, mix 1 cup of flour, 1 cup of water, garlic powder, onion powder, smoked paprika, cayenne pepper, salt, and black pepper. Whisk until smooth. - Take each cauliflower floret and dip it into the batter. - Let the excess batter drip off before placing them on the baking sheet. - Make sure to arrange them in a single layer for even baking. - Bake the cauliflower for 20 minutes. Flip them halfway through for even crispiness. - While they bake, mix buffalo sauce and melted butter in a bowl. - After 20 minutes, toss the cauliflower in the buffalo sauce until coated. - Return them to the baking sheet and bake for another 10-15 minutes. Look for a crispy, caramelized finish. - Finally, let them cool slightly before serving. Enjoy your tasty snack! For the full recipe, check out the detailed instructions above! To make your cauliflower buffalo wings super crunchy, bake them at a high temp. I recommend 450°F (230°C). This heat locks in moisture and gives you that desired crunch. Use parchment paper on your baking sheet to prevent sticking. Flipping the wings halfway through baking is key. This step ensures even cooking and browning. If you skip this, one side might end up soggy. So, set a timer for halfway, and give them a quick turn. Want to kick up the flavor? Add more spices to your batter! A sprinkle of cumin, or a dash of chili powder can add depth. You can also try smoked paprika for a deeper taste. If you like it hot, adjust the cayenne pepper. Start with a little, then add more to your taste. Remember, you can always add heat, but you can’t take it away! These wings pair great with crunchy celery sticks. They help cool down the spice and add a fresh crunch. For dipping, ranch dressing is a classic choice. You can also try blue cheese dressing for a bold twist. Serve everything on a platter for a fun, shareable snack. Check out the Full Recipe for more ideas! {{image_2}} You can change the flavor of your cauliflower buffalo wings with different sauces. Try using a blend of your favorite hot sauces. This can give your wings a new twist. Some popular options include sriracha or chipotle sauce for extra heat. You can also make your own sauce at home. Combine butter, vinegar, and spices for a personal touch. Want to make your wings even better? Add cheese! You can sprinkle some shredded cheese on top before the last baking step. This adds a tasty, gooey layer. You can also mix in vegetables like bell peppers or carrots. They add color and crunch to your dish. If you need gluten-free options, switch the all-purpose flour for gluten-free flour. This keeps the wings crispy without wheat. For a vegan version, use a plant-based butter instead of regular butter. It’s easy to adapt this recipe to fit your needs. Just follow the tips I shared, and you’ll have a delicious snack for everyone. For the full recipe, check out the [Full Recipe]. After cooking, let your cauliflower buffalo wings cool. Store leftovers in an airtight container. Place them in the fridge for up to three days. For longer storage, freeze them. Lay the wings on a baking sheet and freeze until solid. Once frozen, transfer them to a zip-top bag. This method helps to keep them from sticking together. For reheating, the oven is best. Preheat to 350°F (175°C). Spread the wings on a baking sheet. Heat for about 10-15 minutes. This keeps them crispy and tasty. If you're in a hurry, you can use the microwave. However, the wings may be softer. To keep some crunch, heat in short bursts. Check them frequently. Leftovers last about three days in the fridge. After that, they can spoil. Look for signs like an off smell or visible mold. If they look or smell strange, toss them out. When frozen, they can last for up to three months. Always check for freshness before eating. Keep these tips in mind for your delicious cauliflower buffalo wings! Yes, you can prep these wings in advance. First, make the batter and coat the cauliflower florets. Then, you can store them in the fridge for up to 24 hours. Just keep them covered in an airtight container. When ready to bake, let them sit at room temperature for about 20 minutes. This helps them cook evenly. If you want to freeze them, freeze the coated florets before baking. Place them on a baking sheet in a single layer. Once frozen, transfer them to a freezer bag. They can last for about a month. Bake them straight from the freezer when you’re ready to enjoy! There are plenty of great sides to pair with these tasty wings. Here are some popular options: - Celery sticks - Carrot sticks - Cucumber slices - Ranch dressing - Blue cheese dressing - Hummus These sides add crunch and freshness. You can also serve these wings with your favorite dipping sauces for extra flavor. To kick up the heat in your Cauliflower Buffalo Wings, you can adjust the cayenne pepper. Start by adding more cayenne to the batter. You can also mix in hot sauce directly into the batter. If you want more heat, try using a hotter buffalo sauce. Another option is to sprinkle some chili flakes on top after baking. This adds a nice touch. Just remember, start small and taste as you go! Making Cauliflower Buffalo Wings is both fun and tasty. You learned how to prepare the florets and make a great batter. I shared tips on achieving that perfect crispiness and suggested flavor tweaks. You also discovered how to store leftovers and different serving ideas. In the end, these wings adapt well to any taste. Whether you enjoy them spicy or mild, they’re a hit. Try them with your favorite dips, and don’t forget to share your creations!

Cauliflower Buffalo Wings Tasty and Crunchy Snack

If you’re looking for a tasty and crunchy snack, try my Cauliflower Buffalo Wings! These bites are perfect for game

- 4 boneless, skinless chicken thighs - 1 lemon (juiced and zested) - 3 cloves garlic, minced - 2 teaspoons dried oregano - 1 teaspoon dried thyme - 1 teaspoon smoked paprika - 1 teaspoon salt - ½ teaspoon black pepper - 2 tablespoons olive oil - 2 cups baby potatoes, halved - 1 cup cherry tomatoes - 1 bell pepper (any color), sliced - 1 red onion, cut into wedges - Fresh parsley for garnish This recipe is simple yet full of flavor. You’ll love how the chicken thighs soak up the bright lemon and herb mix. The garlic adds warmth, bringing everything together. For seasoning, the dried oregano and thyme add depth. Smoked paprika gives a nice touch of warmth. You control the salt and pepper to suit your taste. The veggies shine too! Baby potatoes become tender and creamy. Cherry tomatoes burst with sweetness. Bell peppers add crunch, while red onion caramelizes nicely in the oven. Fresh parsley makes a lovely finish. It not only adds color but also freshness to the dish. You can find the full recipe for this tasty meal and dive into the details of cooking it to perfection. Enjoy this easy, one-pan delight! 1. Preheat your oven to 425°F (220°C). This makes sure the chicken cooks well. 2. Line a large baking sheet with parchment paper. This helps with easy cleanup. 3. In a small bowl, mix the lemon juice, lemon zest, minced garlic, oregano, thyme, smoked paprika, salt, black pepper, and olive oil. Whisk until smooth. 1. Take the chicken thighs and place them on the lined baking sheet. 2. Pour half of the lemon herb mixture over the chicken. Make sure each piece is well coated. Save the other half for the veggies. 1. In a large bowl, toss the baby potatoes, cherry tomatoes, bell pepper slices, and red onion wedges with the remaining lemon herb mixture. Make sure all the veggies get coated. 2. Arrange the seasoned veggies around the chicken on the baking sheet. 1. Bake everything in the preheated oven for 25 to 30 minutes. Check that the chicken reaches 165°F (75°C) inside. The veggies should be tender and slightly caramelized. 2. When done, take the baking sheet out of the oven. Let it rest for a few minutes before serving. Enjoy your meal bursting with flavor and color. For more details, you can check the Full Recipe. To ensure a juicy result, choose chicken thighs over breasts. Thighs have more fat, which keeps them moist. Marinate the chicken for at least 30 minutes. This allows the flavors to soak in well. You can even marinate overnight for deeper flavor. Using a meat thermometer is key. Insert it into the thickest part of the thigh. It should read 165°F (75°C) to be safe to eat. This method helps avoid undercooked or overcooked chicken. For marinating, a good rule is to let it sit at least 30 minutes. If you have time, let it sit for 2 hours. This helps the chicken absorb more flavor. Want to switch things up? You can use lime juice instead of lemon. Fresh herbs like basil or cilantro add a nice twist, too. For a bit of heat, add red pepper flakes to the marinade. Using a sheet pan has many advantages. It allows for easy cleanup and quick cooking. Everything cooks together, letting the flavors blend. To achieve even cooking, cut veggies into similar sizes. Place denser vegetables, like potatoes, on one side. Less dense ones, like tomatoes, go on the other. This way, all ingredients cook perfectly without burning. For more detailed steps, check the Full Recipe. {{image_2}} You can change the protein in this dish. Instead of chicken thighs, use chicken breasts for a leaner option. They cook fast, too. If you're looking for other proteins, try turkey or tofu. Turkey gives you a similar taste with a bit less fat. Tofu is a great choice for a plant-based meal. Just make sure to press it first to remove excess water. Seasonal veggies can add a fun twist. In spring, use asparagus or peas. In fall, try butternut squash or Brussels sprouts. You can mix colors and textures. Carrots and zucchini work great, too. Toss in some green beans for a crunchy bite. Each veggie brings its own flavor, making your dish unique. Feel free to play with herbs and spices. For a bolder taste, add rosemary or basil. A pinch of red pepper flakes can give it heat. You can also swap out the lemon for lime or orange juice. This small change can refresh the dish. Each citrus fruit adds a different twist to the marinade. For the best results, use fresh herbs when possible. This will enhance the flavor and make your meal pop. For the full recipe, check out the [Full Recipe]. To store leftovers, let the chicken and veggies cool. Place them in an airtight container. They will stay fresh in the fridge for up to four days. Make sure to keep the chicken and veggies together for best flavor. If you want to freeze this meal, first cool it completely. Then, transfer the chicken and veggies to a freezer-safe bag or container. This dish can last in the freezer for about three months. To defrost, move it to the fridge overnight. For reheating, the oven works best to keep the texture. Preheat your oven to 350°F (175°C). Place the chicken and veggies on a baking sheet and cover them with foil. Heat for about 15-20 minutes until warmed through. This method keeps the flavors bright and the chicken juicy. You can also use the microwave, but it may not keep the same texture. Yes, you can prepare this sheet pan recipe ahead of time. You can marinate the chicken and veggies in the lemon herb mixture a few hours before cooking. This helps the flavors soak in. Store them in the fridge until you are ready to bake. This makes it easy to enjoy a fresh meal after a busy day. To check if the chicken is fully cooked, use a meat thermometer. Insert it into the thickest part of the thigh. The chicken should reach an internal temperature of 165°F (75°C). If you don’t have a thermometer, cut into the chicken. The juices should run clear, and the meat should look white, not pink. You can serve this dish with many things. A simple green salad pairs well. You could also add rice or quinoa for a hearty side. Garlic bread is another tasty option. For a fresh twist, try a light yogurt sauce or tzatziki on the side. Yes, you can use other spices for this recipe. Feel free to experiment with flavors. For a kick, add cayenne pepper or red pepper flakes. If you like a sweeter touch, try adding a bit of brown sugar. Fresh herbs like basil or cilantro can also add a nice twist. Just be sure to adjust the amounts to match your taste. This blog post showed you how to make Lemon Herb Chicken and Veggies. We explored the ingredients, preparation steps, and cooking tips. You can make this dish with ease and adjust it to fit your taste. Try different proteins or veggies to keep things fresh. Remember, meal prep can save time and reduce waste. Enjoy the delicious results, and feel free to experiment! The joy of cooking lies in your creativity. Now, get started and treat yourself to a tasty meal!

Sheet Pan Lemon Herb Chicken and Veggies Delight

Looking for a simple, tasty dinner? “Sheet Pan Lemon Herb Chicken and Veggies Delight” is your answer! This dish packs

- 1 cup quinoa, rinsed - 2 cups water - 1 cup parsley, finely chopped - 1/2 cup mint leaves, finely chopped - 1 medium cucumber, diced - 2 medium tomatoes, diced - 1/4 red onion, finely chopped - 1/4 cup olive oil - 3 tablespoons lemon juice - Salt and pepper to taste Quinoa offers protein and fiber. It helps keep you full. Parsley is rich in vitamins A and C. It also adds a fresh taste. Mint brings a cooling effect and aids digestion. Cucumbers provide hydration and crunch. Tomatoes are full of antioxidants and vitamins. Red onion adds flavor and has heart benefits. Olive oil is a healthy fat. It supports good heart health. Lemon juice gives a tangy flavor. It is also high in vitamin C. You can swap quinoa for bulgur if you like. For a gluten-free option, use cauliflower rice. If you don't have parsley, try fresh cilantro. You can replace mint with basil for a different taste. Any fresh veggies can work too. Try bell peppers or radishes for crunch. Use apple cider vinegar instead of lemon juice if needed. First, rinse 1 cup of quinoa under cold water. This helps remove any bitter taste. Next, bring 2 cups of water to a boil in a medium saucepan. Once boiling, add the rinsed quinoa. Lower the heat and cover the pot. Let it simmer for about 15 minutes. You will know it’s done when all the water is gone. Remove the pot from heat and let it cool for a bit. In a large bowl, combine the cooled quinoa with the fresh ingredients. Add 1 cup of finely chopped parsley, 1/2 cup of finely chopped mint leaves, 1 diced cucumber, 2 diced tomatoes, and 1/4 of a finely chopped red onion. Mix these ingredients well with a fork. This step makes sure every bite is full of flavor and freshness. In a small bowl, whisk together the dressing. Start with 1/4 cup of olive oil and 3 tablespoons of lemon juice. Add salt and pepper to taste. Once mixed, pour the dressing over the quinoa mixture. Toss everything gently to coat the ingredients well. Taste the salad and adjust the seasoning if needed. For the best flavor, refrigerate for at least 30 minutes. This allows the flavors to blend perfectly. You can find the Full Recipe for more details on this delicious dish. To make quinoa fluffy, start with rinsing it well. Rinsing removes the bitter coating called saponin. Next, use double the water for every cup of quinoa. Bring the water to a boil, then add the quinoa. Lower the heat and cover the pot. Let it simmer for about 15 minutes. After that, let it sit off the heat for 5 minutes. Finally, fluff it with a fork. This gives it a light and airy texture. Chopping herbs is easy with the right method. Start by stacking the leaves. Roll them tightly like a cigar. Then, use a sharp knife to slice across the roll. This creates thin strips. For parsley and mint, make sure to chop them finely. This helps release their flavors and makes them mix well in your tabbouleh. Always use a clean, dry cutting board to avoid any slips. You can easily adjust the flavors in your quinoa tabbouleh. Taste the dish after mixing the ingredients. If it needs more zing, add more lemon juice. For a richer taste, drizzle in extra olive oil. If you like spice, try adding a pinch of red pepper flakes. Remember, each ingredient adds its own flavor. So, start with small amounts and add more as needed. This way, you can create a tabbouleh that suits your taste perfectly. For the full recipe, check out the Healthy Quinoa Tabbouleh section. {{image_2}} You can make this quinoa tabbouleh even better by adding protein. Chickpeas are a great choice. They add a nice crunch and are full of fiber. Simply rinse and drain a can of chickpeas, then mix them in with the quinoa. If you want meat, grilled chicken works well too. Cook the chicken, chop it into small pieces, and add it to the mix. You get flavor and a hearty meal this way. Quinoa is naturally gluten-free, making it perfect for many diets. If you need a gluten-free option, ensure all your ingredients are certified gluten-free. For a twist, you can replace quinoa with cooked rice or millet. These grains also provide a light and tasty base. Using seasonal ingredients can make your quinoa tabbouleh fresh and exciting. In the summer, try adding ripe peaches or watermelon for a sweet touch. In fall, you can toss in roasted butternut squash for warmth. Think about using different herbs too! Basil or cilantro can change the taste. Experiment with what’s fresh and available to keep your dish lively and tasty. For the full recipe, check out the Healthy Quinoa Tabbouleh! 🥗 To keep your quinoa tabbouleh fresh, store it in the fridge. Use an airtight container to prevent odors from mixing. Make sure the salad is cool before sealing it. This way, it stays crisp and tasty. Glass containers are great for storing quinoa tabbouleh. They let you see the food inside. Plastic containers work well too, but choose ones without BPA. Avoid metal containers, as they can alter the taste of your dish. Quinoa tabbouleh lasts about 3 to 5 days in the fridge. If you want to freeze it, consider the ingredients. Fresh herbs and veggies may lose their crunch when thawed. I recommend freezing only the quinoa base. When you're ready to eat, mix in fresh herbs and veggies. For the best flavor, make it fresh. Check out the Full Recipe for more tips! You can serve Healthy Quinoa Tabbouleh with many dishes. It pairs well with grilled chicken or fish. You can also add it to a wrap or pita. For a vegetarian option, try it with falafel. This salad complements hummus and roasted veggies too. It’s fresh and bright, enhancing any meal. Yes, you can make Healthy Quinoa Tabbouleh ahead of time. It tastes even better after the flavors mix. Prepare it a day before your event, and keep it in the fridge. This helps the ingredients blend well. Just remember to stir it before serving. If it seems dry, add a splash of lemon juice. Quinoa is very healthy and offers many benefits. It is high in protein, which helps build muscles. Quinoa also has fiber, aiding digestion and keeping you full. It contains vitamins and minerals, like magnesium and iron. Plus, it is gluten-free, making it great for those with allergies. Eating quinoa may help support heart health too. Healthy quinoa tabbouleh offers fresh flavors and great nutrition. We covered the main ingredients that boost your health and provided easy steps to prepare it. I shared tips to make your quinoa fluffy and how to adjust flavors. We also explored tasty variations and smart storage methods. This dish is not only simple but fun to make. You can enjoy it any time with different sides or ingredients. Keep experimenting, and you’ll always have a great meal ready!

Healthy Quinoa Tabbouleh Quick and Flavorful Recipe

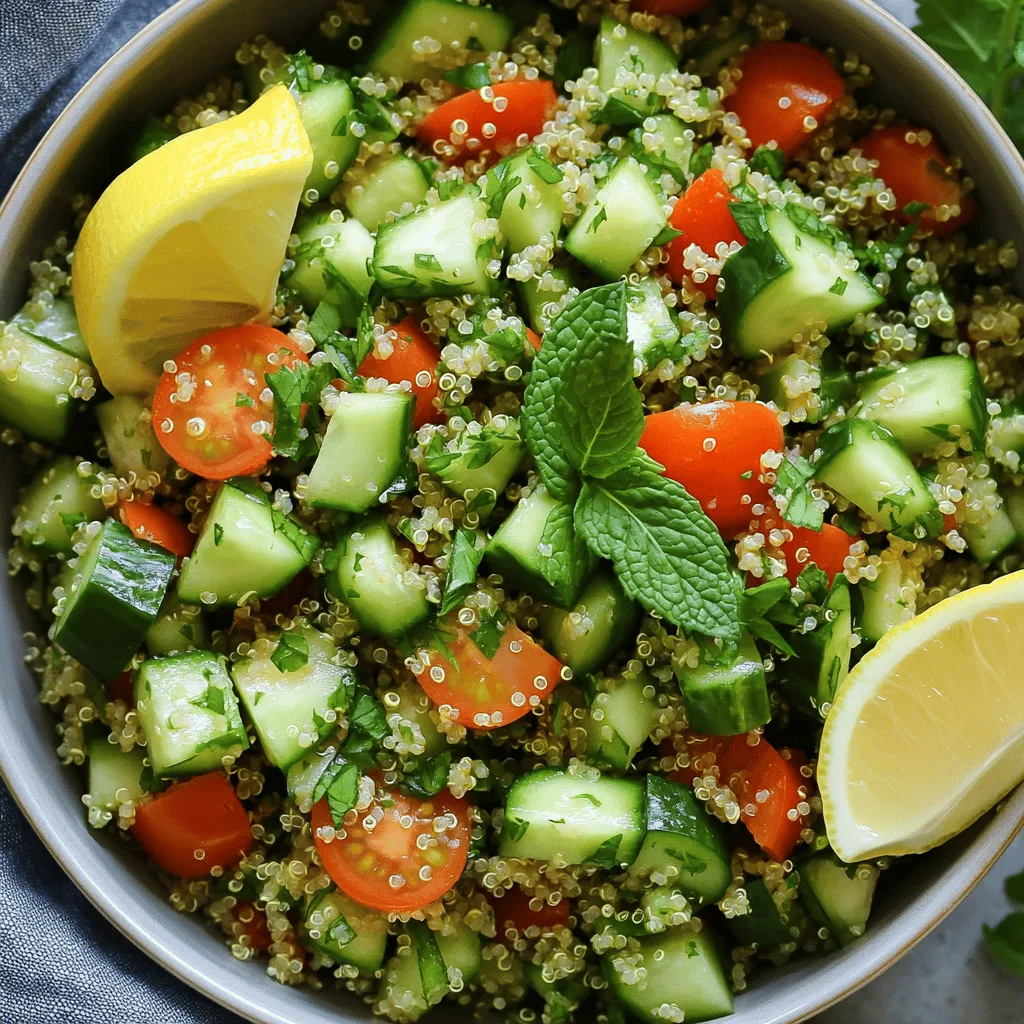
Looking for a quick and tasty dish that’s also healthy? You’ll love this Healthy Quinoa Tabbouleh recipe! Packed with fresh

- 1 lb ground chicken - 1 tablespoon vegetable oil - 3 cloves garlic, minced - 1 tablespoon fresh ginger, grated The base of this dish is ground chicken. It gives you a tasty and tender filling. I use vegetable oil to sauté the garlic and ginger. These two add a lovely aroma and flavor. Don't skip the garlic and ginger; they make a big difference. - 1 red bell pepper, diced - 1 carrot, grated - 1/4 cup green onions, chopped - Fresh cilantro leaves for garnish Adding veggies brightens the dish. Red bell pepper gives sweetness and color. Grated carrot adds crunch and fun. Green onions add a fresh bite. Finally, cilantro gives a fresh taste. You can use these garnishes to make the wraps look pretty, too. - 1 tablespoon soy sauce - 1 tablespoon fish sauce - 1 tablespoon sriracha (or to taste) - 1 tablespoon lime juice The sauces bring everything together. Soy sauce adds saltiness, while fish sauce adds umami. Sriracha gives heat, so you can adjust it for your taste. Lime juice adds a zesty finish. These flavors mix well with the chicken and veggies. For the full recipe, check out the details above. First, gather all your ingredients. For the vegetable mixture, you will need the red bell pepper, carrot, and green onions. Dice the bell pepper, grate the carrot, and chop the green onions. You want these cuts small, so they mix well with the chicken. Now, let's cook the ground chicken. Heat the vegetable oil in a large skillet over medium heat. Add minced garlic and grated ginger. Sauté for 1-2 minutes until it smells good. Then, add the ground chicken. Break it up with a wooden spoon. Cook it until it turns brown, about 5-7 minutes. Once the chicken is cooked, stir in the prepared vegetables. Cook for another 3-4 minutes until they soften. This adds color and flavor to the dish. Next, it's time to mix in the sauces and seasonings. Add soy sauce, fish sauce, sriracha, and lime juice to the skillet. Stir well to blend all the flavors together. This step is crucial for that delicious Thai taste. Let the mixture cook for an extra 2 minutes. This allows all the flavors to meld perfectly. After cooking, taste the mixture. If you like it spicier, add more sriracha. Now, it's time to assemble the lettuce wraps. Take a lettuce leaf and spoon a generous amount of the chicken mixture into it. Top with fresh cilantro leaves for a burst of flavor. Then, wrap the lettuce around the filling like a taco. For presentation, arrange the lettuce wraps on a platter. Garnish with extra chopped peanuts and cilantro for a beautiful look. Serve with lime wedges on the side for extra zest. You can find the Full Recipe for additional details! - Adjusting spice levels: Spice is key in this dish. Start with one tablespoon of sriracha. Taste the mixture. If you want more heat, add more sriracha. Remember, you can always add, but you can’t take away. - Enhancing flavor with herbs: Fresh herbs boost flavor. Try adding mint or basil along with cilantro. These herbs add a fresh taste and make your wraps even better. - Using the right skillet: A non-stick skillet works best. It keeps the chicken from sticking and helps it cook evenly. Make sure to heat it before adding the oil. - Cooking chicken evenly: Break the chicken apart as it cooks. This helps it brown well. Stir often to ensure all pieces cook at the same time. - Adding more veggies: You can boost nutrition by adding more veggies. Try adding mushrooms, zucchini, or even shredded cabbage. These add crunch and color. - Substituting proteins: If you want a different protein, try turkey or tofu. Both options work well and keep the dish tasty and healthy. You can mix and match proteins to find your favorite option. For the complete dish, check the Full Recipe. Enjoy making this fun and tasty meal! {{image_2}} You can change the ground chicken to fit your taste. Try ground turkey or tofu for a lighter option. Both work well in this dish. If you need gluten-free options, look for gluten-free soy sauce. It keeps the flavor without the gluten. To mix things up, use different sauces. Teriyaki sauce adds a sweet touch. Hoisin sauce can bring a nice depth of flavor too. For a fruity twist, consider adding pineapple or mango. These fruits pair well with spicy chicken and add a nice sweetness. You can switch up the type of lettuce for a fun look. Romaine or butter lettuce is great, but you can also try cabbage leaves. They add a nice crunch. For garnishing, sprinkle more chopped peanuts or fresh herbs on top. It makes the dish more colorful and inviting. Store your leftover spicy Thai chicken mixture in an airtight container. This keeps it fresh and safe. Place it in the fridge right after it cools. You can store it for up to three days. After that, the flavors may fade, and it won't taste as good. For reheating, use a skillet over medium heat. This method warms the filling evenly. Stir it often to avoid sticking. You can also use the microwave. If using a microwave, heat it in short bursts. This helps keep the wraps fresh and tasty. To freeze the chicken mixture, let it cool completely. Then, place it in a freezer-safe bag. Squeeze out the air before sealing. You can freeze it for up to three months. When you're ready to eat, thaw it in the fridge overnight. For reheating, use a skillet or microwave, just like before. This way, you enjoy a quick meal anytime! If you want the full recipe, check out the earlier section. To make these wraps even spicier, add more sriracha. You can also mix in some chopped fresh chili peppers. Thai bird chilies work well for a real kick. Another option is to use chili oil instead of regular oil. This adds heat and flavor. Remember to taste as you go. This way, you can control how spicy you want it. Yes, you can prepare the filling in advance. Cook the chicken mixture and let it cool. Then, store it in an airtight container. It keeps well in the fridge for up to three days. When you're ready to eat, just reheat it in a skillet. This will save you time when you want to serve these wraps. Some great sides for lettuce wraps are rice or quinoa. They add heartiness to the meal. You can also serve a simple cucumber salad. This cool crunch pairs well with the spicy chicken. Another idea is to offer a dipping sauce, like peanut sauce or sweet chili sauce. These add extra flavor and fun to your meal. For the full recipe, check out the recipe section above! This article covered making Spicy Thai Chicken Lettuce Wraps. We discussed key ingredients like ground chicken, garlic, and red bell pepper. Preparation steps included cooking techniques and mixing flavors. Tips helped you enhance taste while variations offered fun options. Storing leftovers properly keeps your meal fresh longer. You can easily adapt the recipe to your needs. Enjoy your cooking journey with these wraps, and don’t forget to share your results!

Spicy Thai Chicken Lettuce Wraps Simple and Tasty Meal

Looking for a flavorful meal that’s quick and fun to make? Spicy Thai Chicken Lettuce Wraps fit the bill! With

To make Mango Coconut Chia Pudding, you will need: - 1 cup coconut milk (canned or carton) - 2 tablespoons chia seeds - 2 ripe mangoes (1 diced, 1 pureed) - 2 tablespoons honey or maple syrup (optional) - 1 teaspoon vanilla extract - A pinch of salt - Toasted coconut flakes for garnish - Fresh mint leaves for garnish You can swap coconut milk with almond milk or soy milk. If you want a nut-free option, try oat milk. For chia seeds, you can use flax seeds, but the texture will differ. Instead of honey, you may use agave syrup for a vegan version. You can skip the sweetener if your mangoes are sweet enough. - Coconut Milk: Rich in healthy fats, it boosts energy and supports heart health. - Chia Seeds: Packed with fiber, protein, and omega-3s, they aid digestion and keep you full. - Mangoes: High in vitamins A and C, they support eye health and boost immunity. - Honey/Maple Syrup: They provide natural sweetness and antioxidants, promoting overall health. - Vanilla Extract: Adds flavor and may help reduce stress. - Salt: Enhances flavor and balances sweetness. - Toasted Coconut Flakes: Add crunch and healthy fats, making the dish more enjoyable. - Fresh Mint Leaves: They add freshness and may aid digestion. For the full recipe, check out the complete instructions provided earlier. First, gather all your ingredients. You need coconut milk, chia seeds, mangoes, honey or maple syrup, vanilla extract, and salt. If you want to add a fun touch, grab some toasted coconut flakes and mint leaves for garnish. 1. Start by mixing the coconut milk and chia seeds in a bowl. 2. If you like sweetness, add honey or maple syrup, along with vanilla and salt. 3. Stir well to mix everything. This helps prevent the chia seeds from clumping together. 4. Let this mixture sit for about 5-10 minutes. Give it another stir to spread the seeds evenly. 5. Cover the bowl and place it in the fridge. Leave it there for at least 4 hours, or overnight. This time allows the chia seeds to swell and thicken the mix. 6. While waiting, prepare your mangoes. Peel and dice one mango into small cubes. Blend the second mango into a smooth puree. 7. When the chia pudding is ready, take it out of the fridge. Stir it again to ensure it is smooth. 8. In serving bowls or glasses, layer the chia pudding with the mango puree. Top it with the diced mango. 9. For a nice finish, sprinkle some toasted coconut flakes and add mint leaves on top. To get the right pudding texture, make sure to stir the chia mix well after it sits. This step ensures the seeds don’t clump and helps create a creamy texture. If you want a little more thickness, let it sit longer in the fridge. You can adjust the amount of chia seeds if needed. If you want it creamier, use less coconut milk. Enjoy your Mango Coconut Chia Pudding! For the full recipe, check the details above. One common mistake is not letting the chia seeds soak long enough. Chia seeds need time to absorb liquid and expand. If you skip this step, your pudding may be runny. Stirring the mixture again after a few minutes helps. This keeps the seeds from clumping together. Another mistake is using unripe mangoes. Choose ripe, sweet mangoes for the best flavor. They add natural sweetness to your pudding. Layering is key for a beautiful presentation. Start with a layer of chia pudding. Then, add a layer of pureed mango. This creates a nice contrast in color. Use clear glasses to show off the layers. After the pureed mango, add some diced mango. Finish with toasted coconut flakes on top. This adds crunch and visual appeal. Make sure to use a spoon to scoop from the bottom for every bite. You can enhance the flavor of your pudding with a few extras. Try adding a pinch of cinnamon for warmth. You might also use a splash of lime juice for brightness. If you like nuts, sprinkle some on top for added texture. A dollop of yogurt can add creaminess. Feel free to get creative with flavors that you love. Remember, the goal is to make it your own! For the full recipe, check out the instructions above. {{image_2}} You can switch up the mango for other fruits. Berries, like strawberries or blueberries, add a nice touch. Bananas bring a creamy texture. Pineapple gives a tropical twist. You can mix and match fruits to find your favorite combo. To make this pudding vegan, swap honey for maple syrup or agave nectar. You can also skip the sweetener altogether. The natural fruit flavors shine without added sugar. This keeps the pudding healthy and light. Try adding spices for a flavor boost. A pinch of cinnamon or nutmeg can add warmth. For a zesty kick, mix in some lime or lemon juice. You can also blend in a bit of cocoa powder for a chocolate twist. Each variation opens a new taste adventure! You can store leftovers in a sealed container. Make sure to keep it in the fridge. This helps maintain its fresh taste and texture. If you have any toppings, store them separately. This way, your chia pudding stays creamy. Mango Coconut Chia Pudding lasts about 3 to 5 days in the fridge. Keep an eye on it for any changes in smell or texture. If it starts to look or smell off, it's best to toss it. Enjoy it while it's fresh for the best flavor! You can freeze chia pudding for longer storage. Pour it into freezer-safe containers. Leave some space at the top for expansion. To thaw, move it to the fridge overnight. Stir well before serving. The texture may change slightly, but it will still taste great! For more details, check the Full Recipe. Yes, you can use different types of milk. Almond milk, oat milk, or soy milk work well. Each type adds its own flavor. Coconut milk gives a rich taste, but feel free to explore. Just make sure the milk is unsweetened for a healthier option. You can store this pudding in the fridge for up to five days. Keep it in an airtight container. This helps maintain its freshness. If you notice any separation, just stir it before eating. The flavor will still be great! Yes, this recipe is perfect for meal prep. You can make it ahead for busy mornings. Prepare several servings at once and store them in jars. Just grab one when you need a quick breakfast or snack. It’s easy to enjoy on the go! Absolutely! You can skip the sugar altogether. The ripe mangoes add natural sweetness. If you want a little extra, try using mashed banana or dates. These options keep it healthy while still tasting yummy. This article covered the key ingredients and their benefits for Mango Coconut Chia Pudding. We detailed the steps to prepare it with perfect consistency. I shared tips to avoid common mistakes and ways to enhance its flavor. You learned about variations and how to store leftovers effectively. In summary, this recipe is easy and fun. It offers many options to fit your taste and needs. Enjoy exploring new flavors and making it your own!

Mango Coconut Chia Pudding Simple Healthy Delight

Looking for a tasty yet healthy treat? Mango Coconut Chia Pudding is your answer! This simple recipe packs a punch

To make Lemon Garlic Butter Shrimp, you need some key ingredients. Here’s what you will need: - 1 pound large shrimp, peeled and deveined - 4 tablespoons unsalted butter - 4 cloves garlic, minced - 1 lemon, zested and juiced - 1 tablespoon fresh parsley, chopped - 1 teaspoon red pepper flakes (optional) - Salt and pepper to taste - Lemon wedges, for serving These ingredients create a bright and zesty flavor that makes this dish shine. Fresh shrimp is the star of the show, so choose large, plump shrimp for the best taste and texture. Having the right tools makes cooking a breeze. For this recipe, you will need: - A large skillet - A spatula or wooden spoon - A zester or grater for the lemon - A cutting board and knife for prep These tools help you cook efficiently and keep everything organized. A good skillet ensures even cooking and helps the shrimp get that nice sear. Sometimes, you may not have all the ingredients on hand. Here are some easy swaps: - Use olive oil instead of butter for a lighter option. - If you don’t have fresh parsley, try fresh cilantro or basil. - For a different flavor, swap lemon juice with lime juice. These substitutes can give you a new twist while keeping the essence of the dish. For full guidance on the recipe, check the Full Recipe section. To start, rinse the shrimp under cold water. I like to use cold water to keep them fresh. Next, pat the shrimp dry with paper towels. This step is key! It helps the shrimp get a nice sear. Now, season the shrimp with salt and pepper. Use just enough to enhance the flavor. Now, grab a large skillet. Melt four tablespoons of unsalted butter over medium heat. Watch closely as it starts to foam. You want it melted but not browned. Add four cloves of minced garlic to the skillet. Stir it for about one to two minutes. The garlic should smell amazing, but don’t let it burn. Next, add the shrimp to the skillet. Cook one side for two to three minutes. You’ll see the shrimp turn pink and opaque. Then, flip them over to the other side. Cook for another two to three minutes. The shrimp should be fully cooked and tender. After that, pour in the lemon juice and add the lemon zest. For some heat, sprinkle in red pepper flakes. Stir well to mix all the flavors. Finally, take the skillet off the heat. Toss in the fresh parsley and mix. Your Lemon Garlic Butter Shrimp is ready to serve! For the complete guidance, check the Full Recipe. When buying shrimp, look for a few key signs. The shrimp should smell like the ocean, not fishy. Choose shrimp that feel firm to the touch. Their shells should be shiny and clear. If you see black spots, skip those shrimp. Buy shrimp from a trusted source for the best quality. Always check the sell-by date to ensure freshness. To boost the taste of your lemon garlic butter shrimp, consider these tips. Add fresh herbs like basil or dill for a unique twist. A splash of white wine can deepen the flavor. For a spicy kick, increase the red pepper flakes. You can also squeeze more lemon juice for extra zest. Experimenting with flavors helps you find your favorite mix. Many people make simple mistakes when cooking shrimp. Overcooking shrimp makes them tough and rubbery. Always cook them just until they turn pink. Another mistake is not seasoning enough. Salt and pepper enhance the shrimp's natural flavor. Lastly, don’t rush the garlic. Burnt garlic can ruin your dish. Follow these tips for the best results. For the full scoop, check the Full Recipe. {{image_2}} If you love heat, add red pepper flakes. This spice lifts the dish. It gives the shrimp a nice kick. Start with one teaspoon; you can add more if you want. Mix the flakes in when you add the lemon juice. This spicy twist makes the shrimp even more tasty. You can add veggies to the shrimp. Bell peppers, zucchini, and spinach work well. Just chop them and add them after you sauté the garlic. Cook them for a few minutes until they are tender. This adds color and nutrition to the dish. Plus, it makes a great one-pan meal. To make this dish gluten-free, check your butter. Most butter is gluten-free, but some brands may add gluten. You can use olive oil instead of butter for a dairy-free option. The taste will still be great! Just follow the same steps in the Full Recipe to cook the shrimp. After enjoying your Lemon Garlic Butter Shrimp, let the leftovers cool. Place them in an airtight container. Store in the fridge for up to two days. Make sure to keep the shrimp dry to avoid sogginess. If you have extra sauce, store it separately to maintain flavor and texture. To reheat, use a skillet over medium heat. Add a splash of water or broth to help steam the shrimp. Heat for about 3-4 minutes until warmed through. Avoid high heat; it can make the shrimp tough. Stir gently to keep the shrimp intact. You can freeze Lemon Garlic Butter Shrimp for future meals. Place cooled shrimp in a freezer-safe bag. Remove as much air as possible before sealing. They will stay fresh for about three months. When ready to eat, thaw them overnight in the fridge. Reheat in the skillet as mentioned above for the best taste. For complete guidance, refer to the Full Recipe. Yes, you can use frozen shrimp. Just thaw them first. Place them in cold water for about 15 minutes. This method works well and keeps the shrimp fresh. After thawing, dry them well with paper towels. Season as you would with fresh shrimp. To make this dish ahead, cook the shrimp and sauce. Let it cool and store in the fridge. You can keep it for up to two days. Reheat gently on low heat before serving. This way, you save time for your meal. This shrimp pairs well with many sides. You can serve it with crusty bread. It’s great for soaking up the sauce. Fluffy rice is also a good choice. You can even add a fresh salad for crunch. For complete guidance, check the Full Recipe. In this blog, we explored essential ingredients, helpful tools, and substitutes for your shrimp dish. You learned easy steps to prepare and cook shrimp perfectly. We shared tips to pick fresh shrimp, enhance flavor, and avoid common mistakes. You can try fun variations like spicy or veggie-packed options. Plus, we covered storage and reheating tips to keep leftovers tasty. For complete guidance, don't miss the full recipe. Enjoy cooking this simple and delicious dish!

Lemon Garlic Butter Shrimp Flavorsome Easy Recipe

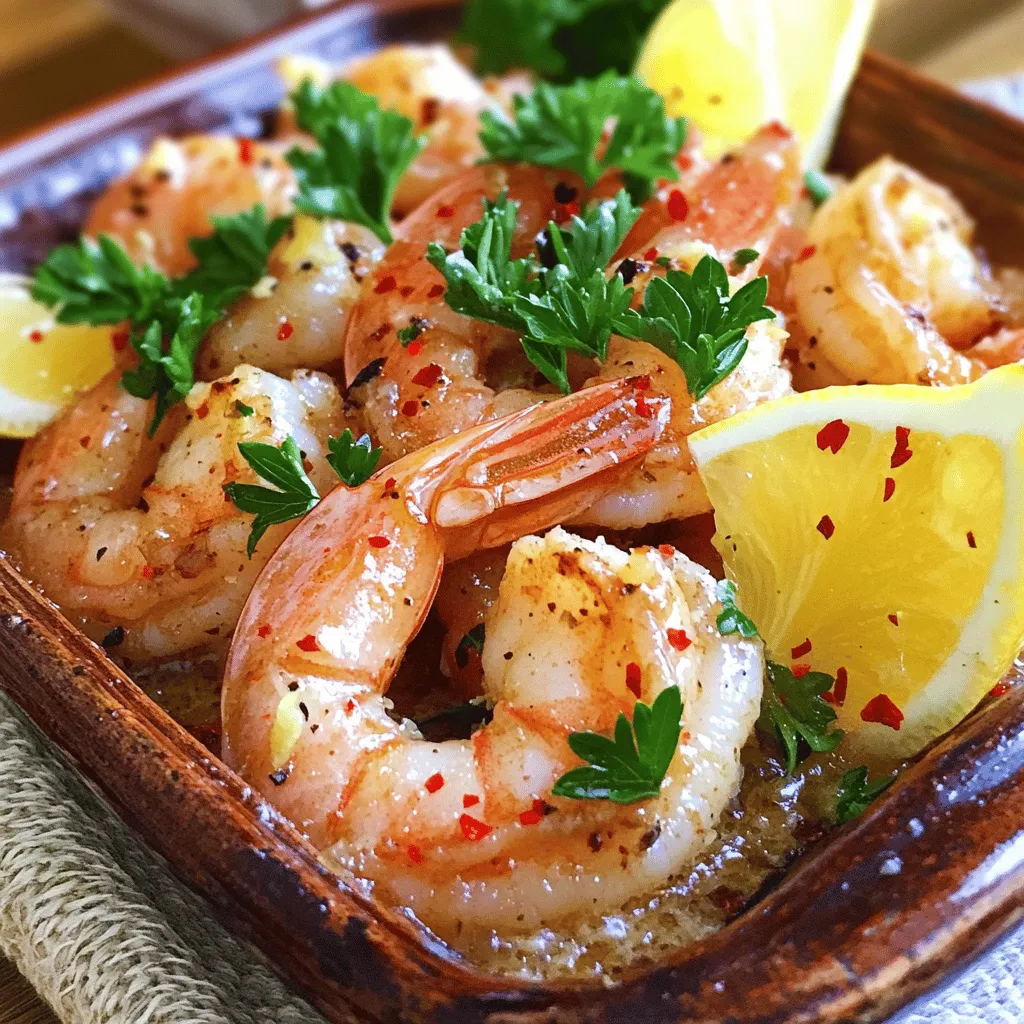
If you crave a quick and tasty meal, this Lemon Garlic Butter Shrimp recipe is for you! It’s packed with

To make this vegan sweet potato chili, gather the following ingredients: - 2 medium sweet potatoes, peeled and diced - 1 tablespoon olive oil - 1 large onion, chopped - 3 cloves garlic, minced - 1 red bell pepper, diced - 1 green bell pepper, diced - 2 cans (15 oz each) black beans, rinsed and drained - 1 can (15 oz) diced tomatoes with green chilies - 1 cup corn kernels (fresh or frozen) - 2 cups vegetable broth - 2 tablespoons chili powder - 1 teaspoon cumin - 1 teaspoon smoked paprika - Salt and pepper to taste - Fresh cilantro, chopped (for garnish) This chili packs a nutritious punch! Each serving has around: - Calories: 250 - Protein: 10g - Carbohydrates: 45g - Dietary Fiber: 12g - Sugars: 6g - Fat: 5g - Vitamin A: 180% DV - Vitamin C: 70% DV - Iron: 20% DV These numbers make it clear this meal is hearty and healthy. If you need alternatives, here are some great options: - Sweet Potatoes: Butternut squash or regular potatoes work well. - Black Beans: Kidney beans or pinto beans can replace black beans. - Olive Oil: Avocado oil or coconut oil will also do the job. - Vegetable Broth: Water or homemade broth can be used instead. - Chili Powder: Use taco seasoning for a different flavor. These swaps can help you customize the chili to your taste or pantry. You can find the full recipe in the previous section. Start by gathering all your ingredients. This makes cooking smooth and easy. Peel and dice the sweet potatoes into small cubes. Chop the onion and bell peppers. Mince the garlic. Rinse and drain the black beans. 1. In a large pot, heat the olive oil over medium heat. 2. Add the chopped onion and sauté for about 5 minutes, until it turns translucent. 3. Stir in the minced garlic and cook for one more minute. This brings out the flavor. 4. Add the diced sweet potatoes, red bell pepper, and green bell pepper to the pot. Cook for about 10 minutes. Stir often to keep the veggies from sticking. 5. Next, stir in the black beans, diced tomatoes (with juice), corn, and vegetable broth. 6. Season with chili powder, cumin, smoked paprika, salt, and pepper. Bring it to a gentle simmer. 7. Reduce the heat to low, cover the pot, and let it simmer for 30-35 minutes. Stir occasionally. The sweet potatoes should be tender when done. 8. Taste and adjust the seasoning before serving. To get the best texture, cut the sweet potatoes into uniform pieces. This helps them cook evenly. Stir often as it simmers to prevent sticking. If you want a thicker chili, let it cook longer without the lid. For a smoother texture, you can mash some of the sweet potatoes while cooking. This adds creaminess without dairy. Enjoy this hearty dish with crusty bread or cornbread for a complete meal! If you want the full recipe, you can find it in the recipe section above. To make your vegan sweet potato chili pop with flavor, try a few easy tricks. First, add a splash of lime juice before serving. This brightens the taste. You can also use smoked salt instead of regular salt. It adds a nice, rich depth. Fresh herbs like cilantro or parsley will make it even better. Consider adding a dash of hot sauce for heat. If you want a sweeter taste, a pinch of brown sugar can balance the chili's spices. Want to save time in the kitchen? Start by prepping your ingredients ahead of time. Chop the vegetables and store them in the fridge. You can also cook the sweet potatoes in the microwave for a quicker start. If you have leftover chili, it is great for lunch. Make a big batch, and you have meals ready to go! Using canned beans and tomatoes helps cut down on prep time too. When serving your vegan sweet potato chili, presentation matters. Ladle it into bowls and sprinkle fresh cilantro on top. This adds color and flavor. Pair it with crusty bread or cornbread for a filling meal. You can also serve it over rice for a heartier dish. If you like toppings, consider avocado slices, dairy-free sour cream, or vegan cheese. These add creaminess and extra flavor to your chili. For the full recipe, check out the complete guide. {{image_2}} This vegan sweet potato chili is already gluten-free! You can enjoy it without worry. Just check any canned goods, like beans and tomatoes, to ensure they are gluten-free. Most brands are safe, but it is good to read labels. You can make this chili even better by adding more veggies. Try these options: - Zucchini, diced - Carrots, chopped - Spinach or kale, stirred in at the end These add color and nutrients to your meal. You could also throw in some quinoa or lentils for extra protein and texture. For those who love heat, add more chili powder or some diced jalapeños. If you prefer it mild, just use less chili powder. You can also add a touch of maple syrup to balance the heat. This sweet touch can make the chili more complex without losing flavor. Feel free to adjust based on your taste. Remember, you can find the full recipe above to guide you through these variations! After you make this vegan sweet potato chili, you might have some left. First, let it cool down to room temperature. Then, pour it into an airtight container. Make sure to seal it well to keep it fresh. You can store it in the fridge for up to five days. If you want it to last longer, consider freezing it. When you're ready to enjoy your chili again, you can reheat it easily. For the best taste, heat it on the stove. Pour the chili into a pot and warm it over medium heat. Stir often to avoid sticking. If you need to, add a splash of vegetable broth for moisture. You can also microwave it. Just put it in a microwave-safe bowl and cover it. Heat in short bursts, stirring in between. Freezing is a great way to save your chili for later. Use freezer-safe containers or bags. Portion the chili into smaller servings for easy meals. Leave some space at the top of the container. This allows the chili to expand as it freezes. You can freeze it for up to three months. When you want to eat it, thaw it overnight in the fridge. Then, reheat it as described above. Enjoy your flavorful and hearty meal anytime! Vegan sweet potato chili is a warm and filling dish. It blends sweet potatoes, beans, and spices. You might wonder if it's hard to make. The answer is no! This recipe is easy and quick. You can whip it up in about 50 minutes. Many ask about the taste. It’s rich, hearty, and full of flavor. The chili powder and smoked paprika add depth. Plus, the sweet potatoes give it a nice sweetness. If you have allergies, you can adjust the recipe. For example, if you are allergic to beans, use lentils instead. You can swap corn with diced zucchini or carrots. If you can't have nightshades, skip the bell peppers and use celery. You can also use vegetable broth made from scratch if you want to avoid store-bought options. Always check labels to ensure safety. You don’t need much to make this chili. A large pot works best for cooking. A good wooden spoon helps to stir the ingredients well. If you have a sharp knife, it will make chopping easier. A cutting board is also essential. For serving, use bowls and a ladle. If you want to make it even easier, consider a slow cooker or an Instant Pot. These tools can help you make great chili with less fuss. You can find the full recipe linked above! In this blog post, we covered the key ingredients and steps to make vegan sweet potato chili. You learned about nutritional details, possible substitutes, and step-by-step cooking instructions. Tips on enhancing flavor and storing leftovers help ensure great taste and freshness. Remember, you can make this chili your own with variations and serving ideas. Enjoy your cooking journey, and don’t forget to share your results!

Vegan Sweet Potato Chili Flavorful and Hearty Meal

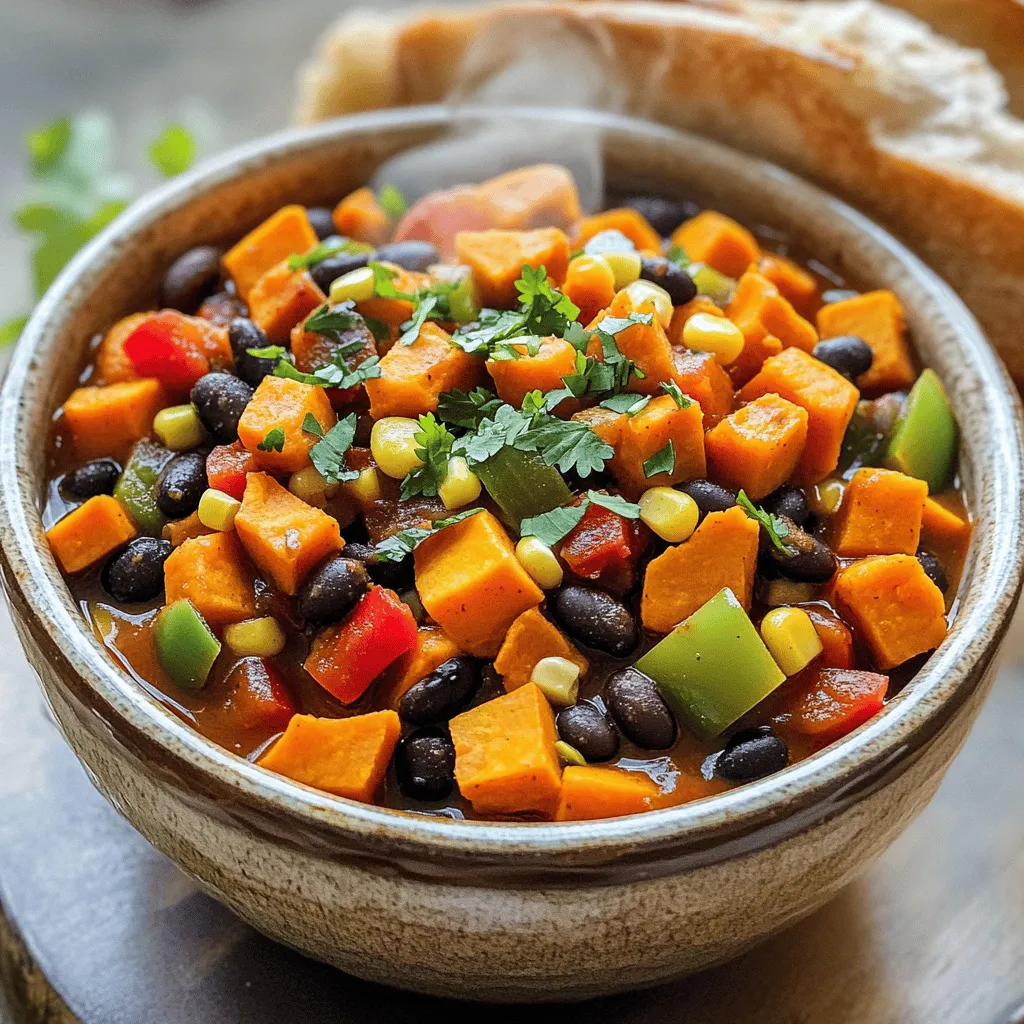
Get ready to warm your heart and satisfy your cravings with my Vegan Sweet Potato Chili! This dish is not

To make this dip, you need fresh and simple ingredients. Here’s what you will need: - 1 cup frozen spinach, thawed and drained - 1 can (14 oz) artichoke hearts, drained and chopped - 1 cup cream cheese, softened - ½ cup sour cream - ½ cup mayonnaise - 1 cup shredded mozzarella cheese - ½ cup grated Parmesan cheese - 2 cloves garlic, minced - ½ teaspoon onion powder - ½ teaspoon red pepper flakes (optional for heat) - Salt and pepper to taste These ingredients blend to create a rich and creamy flavor. The spinach gives it a nice green color, while the artichokes add a unique taste. You can add your own twist to this dip. Here are some optional ingredients: - Chopped green onions for extra flavor - A squeeze of lemon juice for brightness - Cooked and crumbled bacon for a smoky touch - Different cheese types, like cheddar or gouda, for varied flavor Feel free to mix and match based on what you love. This dip can be as unique as you want. To make this dip, you’ll need a few basic tools: - A large mixing bowl for combining ingredients - A baking dish to hold the dip while it bakes - A spatula or spoon for mixing - An oven to bake the dip These tools make the process easy and fun. With just a few items, you can create a delicious dish. For the full recipe, check out the detailed steps and cooking times. To make your creamy spinach artichoke dip, start with some simple prep. First, gather your ingredients. You will need frozen spinach, artichoke hearts, cream cheese, sour cream, mayonnaise, mozzarella cheese, Parmesan cheese, garlic, onion powder, red pepper flakes, and salt and pepper. Then, preheat your oven to 350°F (175°C). This step is key. It helps your dip cook evenly. Next, take a large mixing bowl. Add the softened cream cheese, sour cream, and mayonnaise. Mix them well until smooth. Now, add the minced garlic, onion powder, and red pepper flakes to the bowl. Stir everything together until it is fully combined. Next, it's time to add the spinach and artichokes. Make sure to drain and chop the artichokes first. Fold both the spinach and artichokes into the creamy mixture gently. Be careful not to break them apart too much. Finally, mix in the shredded mozzarella and grated Parmesan cheese. This will make your dip rich and cheesy. Season with salt and pepper to taste. Adjust this based on what you like. Now that your dip is ready, transfer it to a medium-sized baking dish. Spread the mixture evenly in the dish. Place it in the preheated oven. Bake for 25 to 30 minutes. You will know it is done when the edges are hot and bubbly, and the top is lightly golden. After baking, remove the dip from the oven. Let it cool for a few minutes before serving. This helps prevent any burns when you dig in. For the best creamy spinach artichoke dip, here are some tips. Use fresh ingredients whenever possible. Fresh spinach tastes better than frozen. If you want a thicker dip, add more cream cheese or cheese. Try different cheeses for unique flavors. A mix of cheddar and mozzarella can add a nice twist. If you like it spicy, add more red pepper flakes. Serve the dip warm with toasted baguette slices or tortilla chips. Garnish with extra Parmesan and fresh spinach leaves for a nice touch. This will impress your guests and make your dip look extra special. For the full recipe, check the earlier section. To get the smoothest dip, use softened cream cheese. Let it sit out for about 30 minutes. Mix it well with sour cream and mayonnaise. This helps create a nice base. Fold in the spinach and artichokes gently. Overmixing can make it grainy. Serve the dip warm with toasted baguette slices or tortilla chips. Fresh veggie sticks work great too. Think about cucumbers, bell peppers, or carrots. They add a crunchy touch. For a fun twist, try adding some crackers. They add a nice bite and flavor. If you want heat, include red pepper flakes. Start with half a teaspoon. Taste before adding more. You can also add hot sauce for extra kick. For a milder dip, skip the spices. Adjust salt and pepper to make it just right for you. For the complete recipe, visit the [Full Recipe]. {{image_2}} You can make a vegan version of this dip. Use cashew cream instead of cream cheese. Blend soaked cashews with lemon juice and garlic for a creamy base. Use coconut yogurt instead of sour cream. Replace the mayonnaise with silken tofu for extra creaminess. For cheese, try nutritional yeast. It adds a cheesy flavor without dairy. Mix in other ingredients for extra flavor. Try adding sun-dried tomatoes or roasted red peppers. These add a sweet, tangy taste. You can also include chopped olives for a briny touch. A squeeze of lemon juice brightens the dip. Fresh herbs like basil or parsley make it fresh and lively. You can easily adjust the serving size. If you need a dip for more people, double the recipe. Use a larger baking dish to hold it all. For smaller gatherings, half the recipe works well. Just bake it in a smaller dish. The dip is still great, no matter the size. For the full recipe, check the previous sections. Enjoy your creamy spinach artichoke dip! After you finish your dip, let it cool. Then, scoop it into an airtight container. This keeps it fresh. Store it in the fridge for up to four days. If you see any mold, toss it out. To enjoy the dip later, remember to check the smell. It should smell fresh, not sour. You can freeze the dip too! Place the cooled dip in a freezer-safe container. Leave some space at the top. The dip will expand when frozen. It can last for up to three months. Remember to label your container with the date. This helps you keep track of how long it has been frozen. To reheat, take the dip out of the fridge or freezer. If frozen, let it thaw overnight in the fridge. Preheat your oven to 350°F (175°C). Place the dip in a baking dish. Cover it with foil to keep it from drying out. Heat for about 20 minutes. If it's cold from the fridge, it may need a bit longer. Stir it once or twice to help it heat evenly. Enjoy your creamy spinach artichoke dip warm! For the full recipe, check out the main section. I love serving Creamy Spinach Artichoke Dip warm. It pairs well with toasted baguette slices, tortilla chips, or fresh veggie sticks. You can even add a sprinkle of extra Parmesan on top for a nice touch. This dip is great for parties or game days. Everyone loves dipping into this creamy goodness! Yes, you can make this dip ahead of time. Just prepare it up to the baking step. Cover it and store it in the fridge. When you're ready to serve, simply bake it as directed. This saves time and lets the flavors blend well. It’s a perfect make-ahead dish! Creamy Spinach Artichoke Dip lasts about 3 to 4 days in the fridge. Store it in an airtight container to keep it fresh. If you want it to last longer, consider freezing it. Just remember to reheat it thoroughly before serving. Enjoy this tasty treat even days later! This blog post showed how to make a tasty Creamy Spinach Artichoke Dip. We covered main ingredients, handy tools, and step-by-step cooking instructions. I shared tips for the creamiest dip and some fun variations, from vegan swaps to flavor boosts. Plus, we discussed the best ways to store leftovers. Now, you can enjoy this dip at any gathering or cozy night in. Dive into your own version and impress your friends!

Creamy Spinach Artichoke Dip Savory and Tasty Treat

If you crave a savory snack that’s simple yet delicious, you’re in for a treat! This Creamy Spinach Artichoke Dip

Older posts
Newer posts
← Previous Page1 … Page96 Page97 Page98 … Page105 Next →
© 2025 My Cooking Cast • Built with GeneratePress

Our Policies

  • Privacy Policy
  • GDPR Policy
  • Terms Of Use
  • Copyright Policy
  • Cookie Policy
  • Disclaimer

More Information​

  • Home
  • Contact
  • About
  • Dinner
  • Appetizers
  • Dessert
©2025, My Cooking Cast About Privacy Policy Back To Top