![For a hearty Cajun meatball stew, you need the following main ingredients: - 1 pound ground beef - 1/2 pound ground pork - 1/4 cup breadcrumbs - 1/4 cup grated Parmesan cheese - 1 egg - 2 cloves garlic, minced - 2 tablespoons olive oil - 1 large onion, chopped - 1 green bell pepper, chopped - 2 ribs celery, chopped - 3 cups chicken broth - 1 can (14.5 oz) diced tomatoes - 2 cups okra, sliced (fresh or frozen) - 1 teaspoon Cajun seasoning - 1/2 teaspoon smoked paprika - 1 teaspoon Worcestershire sauce - 1 tablespoon hot sauce (optional) - Fresh parsley for garnish - Salt and pepper to taste Each of these ingredients brings unique flavors and textures to the dish. The ground beef and pork create rich meatballs. The vegetables add crunch and sweetness. The broth and tomatoes create a flavorful base. Cajun cooking shines with its spices. Essential spices include: - Cajun seasoning - Smoked paprika - Hot sauce These spices make the stew warm and tasty. Cajun seasoning adds a blend of herbs and heat. Smoked paprika gives a deep, smoky flavor. Hot sauce can be adjusted for your spice level. Seasoning enhances flavor by creating balance. It brings out the natural tastes in your stew. Don’t be afraid to taste and adjust as you cook. If you want to change things up, try these substitutes: - Ground turkey or chicken instead of beef and pork - Lentils or beans for a vegetarian option - Zucchini or bell peppers in place of okra Using turkey or chicken lowers fat content. Lentils provide protein without meat. You can also swap vegetables based on what you have. This makes the stew lighter and still delicious. For the full recipe, check out [Full Recipe]. Mixing the ingredients Start by grabbing a large bowl. Combine 1 pound of ground beef and 1/2 pound of ground pork. Add 1/4 cup of breadcrumbs, 1/4 cup of grated Parmesan cheese, and 1 egg. Toss in 2 minced garlic cloves, 1 teaspoon of Cajun seasoning, 1/2 teaspoon of smoked paprika, and salt and pepper to taste. Mix everything well until it forms a uniform blend. Shaping the meatballs Now, shape your mixture into small meatballs. Aim for about 1 inch in diameter. Place them on a plate as you go. This step is key. Good meatballs give your stew a hearty bite. Sautéing the vegetables In a large pot, heat 2 tablespoons of olive oil over medium heat. Add 1 chopped large onion, 1 chopped green bell pepper, and 2 chopped ribs of celery. Sauté these for about 5-7 minutes. You want the veggies to get soft and fragrant. This is where the base flavor starts. Browning the meatballs Carefully add the meatballs to the pot. Brown them on all sides, which should take about 5 minutes. Don’t overcrowd the pot. You want each meatball to get that nice golden crust. Adding liquids and other ingredients Once your meatballs are browned, pour in 3 cups of chicken broth. Add 1 can of diced tomatoes, 2 cups of sliced okra, 1 teaspoon of Worcestershire sauce, and hot sauce if you like it spicy. Stir everything together to blend the flavors. Cooking time and tips for perfect texture Bring the stew to a gentle simmer. Reduce the heat to low, cover the pot, and let it cook for 30-40 minutes. Stir occasionally to prevent sticking. This simmering time allows all the flavors to meld together beautifully. If you want a thicker stew, let it cook a bit longer without the lid. Enjoy your savory creation! For the complete details, refer to the Full Recipe. To make juicy meatballs, use a mix of beef and pork. The pork adds fat, which keeps them moist. Don’t overwork the meat when mixing. Just combine until ingredients blend. For browning, heat olive oil in a large pot. Add meatballs in batches to avoid crowding. This helps them brown evenly. Cook for about five minutes until all sides are golden. Adjust the seasoning to fit your taste. If you like more spice, add extra Cajun seasoning or hot sauce. Experimenting with flavors makes the dish unique to you. For heat, consider adding diced jalapeños or cayenne pepper. These add warmth and depth. Just a little can go a long way in enhancing the stew. Cajun Meatball Stew pairs well with rice or crusty bread. Both soak up the rich broth nicely. You can serve it in bowls or over a plate of rice. Garnish with fresh parsley for a pop of color. It adds a nice touch to the dish. You can also sprinkle a little extra Cajun seasoning on top for flair. For the full recipe, check out the recipe section above! {{image_2}} You can switch up the meat in this stew. Try turkey or chicken meatballs. These options create a lighter dish. If you prefer a vegetarian version, use lentils or chickpeas. They add protein and texture. Just make sure to adjust the cooking time. Cook the stew longer if using raw veggies. Feel free to add extra veggies or beans. Carrots, zucchini, or black beans work great. Each choice brings its own taste and nutrition. You can also play with spice levels. Add more Cajun seasoning for a bolder kick. Or, dial it back for a milder flavor. Adjust hot sauce based on your heat preference. You can serve this stew in many fun ways. For a traditional touch, serve it over rice. It soaks up the flavors well. You can also try it as a casserole. Layer it with cheese and bake until golden. This adds a nice twist to the meal. Each serving style can change your eating experience. To store leftovers of Cajun Meatball Stew, let it cool first. This helps keep the flavor. Place the stew in airtight containers. Glass or plastic containers work well. Make sure to leave some space at the top. The stew can expand when frozen. Store in the fridge for up to four days. If you need to keep it longer, freezing is best. To reheat the stew, use a pot on the stove. Heat it over medium until warm. Stir occasionally to avoid sticking. You can also use the microwave. Place the stew in a microwave-safe bowl. Cover it with a lid or a plate. Heat in short bursts, stirring in between. This keeps the flavor and texture nice. To freeze the stew properly, pour it into freezer-safe bags. Remove as much air as you can. Lay the bags flat in the freezer. This saves space and helps with thawing. When you’re ready to eat, take it out of the freezer. Thaw it overnight in the fridge. You can also use a microwave for quick thawing. Just make sure to stir often for even heating. Enjoy your Cajun Meatball Stew later with all its great flavors! Yes, you can make Cajun Meatball Stew ahead of time. Preparing in advance allows flavors to blend. It saves time on busy days. You can store it in the fridge for up to three days. For longer storage, freeze it in airtight containers. Just reheat it when ready to eat. This dish tastes even better the next day! Cajun Meatball Stew comes from Louisiana. It reflects the rich culture of Cajun people. Cajun cooking blends French, African, and Spanish flavors. Many Cajun dishes use fresh, local ingredients. This stew shows the essence of comfort food in Cajun homes. Sharing meals brings families together, making it special in their culture. You can adjust spice levels to your taste. Start with a small amount of hot sauce. Taste as you go, and add more if needed. If you want less heat, use mild sauce or leave it out. You can also add sweet peppers for a gentle flavor. Always balance the heat with other seasonings. Yes, you can use frozen okra in this recipe. Frozen vegetables are convenient and save prep time. Make sure to add them straight from the freezer. This keeps them firm and tasty. They will cook well in the stew. Just follow the full recipe to ensure great results! This blog post covered how to create a delicious Cajun Meatball Stew. You learned about the key ingredients like ground beef, pork, and spices. I shared step-by-step cooking instructions to achieve perfect meatballs and simmer the stew. Tips for enhancing flavor and serving suggestions added extra value. Remember, you can substitute ingredients and adjust the spice levels to your taste. Don't hesitate to experiment with different variations. Enjoy your cooking adventure!](https://mycookingcast.com/wp-content/uploads/2025/05/33788693-7201-48fc-8224-cd34b1f02b2e.webp)
Cajun Meatball Stew Hearty and Flavorful Comfort Dish
If you crave a hearty and flavorful dish, Cajun Meatball Stew is for you! This comforting recipe blends ground beef
If you crave a hearty and flavorful dish, Cajun Meatball Stew is for you! This comforting recipe blends ground beef
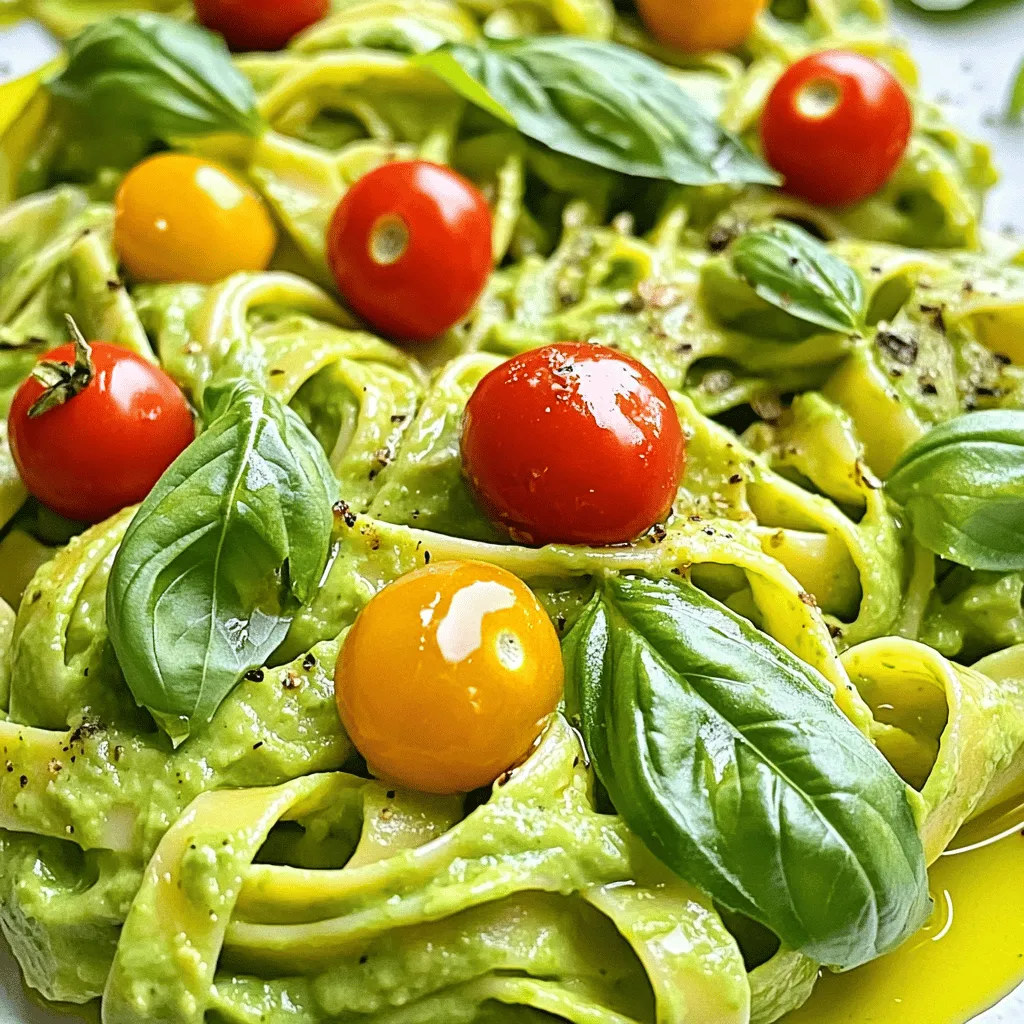
Looking for a quick, tasty meal? This creamy avocado pasta is your answer! With just a few ripe avocados, pasta,
![- 4 boneless, skinless chicken breasts - 1/4 cup olive oil - 3 tablespoons fresh lemon juice - Zest of 1 lemon The main part of this dish is the chicken. I recommend boneless, skinless chicken breasts for a lean meal. Olive oil is key in marinating. It helps keep the chicken moist and adds flavor. The fresh lemon juice brightens the dish. The lemon zest adds extra lemony notes that really pop. - 2 teaspoons dried oregano - 1 teaspoon fresh thyme, chopped - 4 cloves garlic, minced - 1 tablespoon Dijon mustard - 1 tablespoon honey - Salt and pepper to taste Dried oregano gives a warm, earthy flavor. Fresh thyme adds a hint of freshness. Garlic brings a savory depth. Dijon mustard adds a nice tang. Honey balances the flavor with a hint of sweetness. Salt and pepper are important too. They make all the flavors stand out. - Fresh parsley for garnish Fresh parsley adds color and a fresh taste. It makes the dish look pretty. You can also sprinkle more herbs for extra flavor. Try adding chili flakes for a spicy kick or lemon slices for extra zest. These small touches make your dish even better. For the full recipe, you can check out the [Full Recipe]. To make the marinade, you need to whisk together a few simple ingredients. In a bowl, combine olive oil, fresh lemon juice, lemon zest, minced garlic, Dijon mustard, honey, oregano, thyme, salt, and pepper. Whisk it well until it blends smoothly. This mix brings out all the flavors in the chicken. Marinating time is key. Letting the chicken sit in the marinade for at least 1 hour, or even overnight, allows the flavors to soak in. The longer it marinates, the better the taste. Store the chicken in a resealable plastic bag or a shallow dish. Pour the marinade over the chicken, making sure it's well coated. Seal the bag or cover the dish and place it in the fridge. This keeps the chicken fresh and prevents spills. For maximum flavor absorption, remember to turn the chicken in the marinade a few times. This ensures every piece gets that yummy flavor. When it’s time to grill, preheat your grill to medium-high heat. Lightly oil the grates to avoid sticking. This step is very important! Remove the chicken from the marinade and let the excess drip off. Discard the leftover marinade to keep things safe. Grill the chicken for about 6 to 8 minutes on each side. You want it to reach an internal temperature of 165°F (75°C). After grilling, let the chicken rest for 5 minutes. This keeps it juicy and full of flavor. Marinate your chicken for at least one hour. If you have time, longer is better. Overnight gives the best flavor. Fresh herbs always taste better than dried ones. But, dried herbs work in a pinch. If using dried herbs, use about one-third the amount. Always preheat your grill. Medium-high heat works best for even cooking. Oil the grates to stop sticking. Place the chicken on the grill and don’t move it right away. Let it cook for about 6-8 minutes on each side. This helps get nice grill marks. Watch for flare-ups, as they can burn your chicken. Serve your Lemon Herb Grilled Chicken with a side of grilled veggies. A fresh salad also pairs well. Drizzle extra lemon juice over the chicken for extra zing. It brightens the dish and adds a fresh taste. You can find the full recipe for more tips and ideas. {{image_2}} You can change up the herbs and spices in this recipe. Try using fresh basil or rosemary for a new flavor. You can also mix in some cumin or paprika for a kick. If you want to swap the chicken, consider using thighs for more juiciness. For a vegetarian option, try tofu instead of chicken. Just press the tofu to remove extra water, then marinate it like chicken. Adding global flavors can spice up your dish. For a Mediterranean twist, mix in feta cheese and olives. These add saltiness and a creamy texture. If you want an Asian twist, use soy sauce in the marinade instead of salt. Add ginger for a bright flavor. You can even make a teriyaki version by adding honey and sesame oil to the mix. You don’t have to grill if you prefer other methods. Baking the chicken works well too. Preheat your oven to 400°F (200°C) and bake the marinated chicken for about 25-30 minutes. It will be juicy and flavorful. Another option is using a slow cooker. Cook on low for 4-6 hours. This method makes the chicken very tender. You can enjoy it in many ways. Check the [Full Recipe] for more tips! To keep your lemon herb grilled chicken fresh, put it in an airtight container. This helps keep it safe from air and moisture. Store it in the fridge right after it cools down. You can eat it within 3 to 4 days. After that, the chicken may dry out or lose taste. If you want to keep the chicken longer, freeze it. First, wrap each piece in plastic wrap, then place it in a freezer bag. Make sure to squeeze out as much air as you can. It can last up to 3 months in the freezer. To thaw, move it to the fridge for a few hours or overnight. For quick thawing, use the microwave. When reheating, ensure the chicken reaches 165°F (75°C) for safety. Leftover lemon herb grilled chicken is versatile. You can add it to salads for extra protein. Toss it into a fresh green salad with mixed veggies and a light dressing. It also works well in sandwiches. Try making a wrap with lettuce, tomatoes, and a bit of mayo. For a fun twist, use the chicken in tacos with salsa and avocado. You can create so many meals with just one recipe! Check out the Full Recipe for more ideas. If you need a substitute for Dijon mustard, there are a few options. You can use yellow mustard, which is milder. Honey mustard works well if you want a sweet flavor. For those with dietary restrictions, try tahini or hummus. Both add creaminess without mustard. These substitutes keep your dish tasty and fun! Yes, you can make this recipe in advance. Marinate the chicken up to a day before grilling. This saves you time on the cooking day. Store the marinated chicken in the fridge. Use an airtight container or a resealable bag. If you have leftovers, they stay fresh for about 3 days in the fridge. Just reheat and enjoy! Lemon Herb Grilled Chicken tastes great with many sides. Try serving it with a fresh salad. A light quinoa dish adds nice texture. Roasted vegetables bring a lovely color to your plate. You can also serve it with garlic bread for a fun twist. These sides enhance the meal and make it more satisfying. This blog post covered a delicious Lemon Herb Grilled Chicken recipe. You learned about the ingredients, marinating techniques, and grilling tips. I shared how to enhance flavor and enjoy leftovers. When you choose fresh ingredients and follow the steps, you will create a tasty meal. Experimenting with flavors can make it even better. Happy cooking, and enjoy your delicious lemon herb chicken!](https://mycookingcast.com/wp-content/uploads/2025/05/47b63e57-f7e3-47f8-8127-a1798e4faa7d.webp)
Looking for a simple and tasty dish to impress your family? This Lemon Herb Grilled Chicken recipe is your answer!
![To make spicy chickpea tacos, you need a few key items. Here is the list: - 1 can (15 oz) chickpeas, rinsed and drained - 1 tablespoon olive oil - 2 teaspoons smoked paprika - 1 teaspoon ground cumin - 1 teaspoon chili powder - ½ teaspoon garlic powder - ½ teaspoon onion powder - Salt and pepper to taste - 8 small corn or flour tortillas - 1 cup red cabbage, shredded - 1 avocado, sliced - Fresh cilantro leaves for garnish - Lime wedges for serving These ingredients combine to create a tasty and satisfying meal. The chickpeas give protein and fiber, while spices add bold flavors. You can add more fun with garnishes. Here are some ideas: - Sliced jalapeños for extra heat - Diced tomatoes for freshness - Crumbled feta for a salty kick - Sour cream or yogurt for creaminess These toppings can change the flavor and make the tacos even more exciting. These tacos are great for many diets. They are: - Vegan, as they contain no animal products - Gluten-free if you use corn tortillas - High in protein and fiber, which is good for health Always check that your ingredients meet your dietary needs. Use the Full Recipe for more details on making these tasty tacos. Start by rinsing and draining a can of chickpeas. This step removes excess salt and liquid. Next, place the chickpeas in a medium bowl. Use a fork or potato masher to lightly mash them. You want to leave some whole for great texture. This gives your tacos a nice bite. Heat one tablespoon of olive oil in a skillet over medium heat. Add the chickpeas to the skillet along with the spices: two teaspoons of smoked paprika, one teaspoon of ground cumin, one teaspoon of chili powder, half a teaspoon of garlic powder, and half a teaspoon of onion powder. Season with salt and pepper to taste. Stir well to coat the chickpeas evenly with the spices. Cook for about five to seven minutes. Stir occasionally until the chickpeas heat through and get a bit crispy. This makes each bite burst with flavor. Warm your tortillas in a skillet or microwave. This makes them soft and easy to fold. Take a tortilla and add a generous spoonful of the spicy chickpea mixture. Next, top it with a handful of shredded red cabbage. Add slices of creamy avocado and sprinkle fresh cilantro on top. To finish, squeeze a lime wedge over the tacos for a zesty kick. Enjoy your delicious creation while warm. For the full recipe, check out the earlier section! To get the right texture for your spicy chickpea tacos, mash the chickpeas lightly. You want some whole chickpeas for a nice bite. This mix gives a great balance of creaminess and crunch. Cook them until they are slightly crispy but not burnt. This gives a lovely contrast to the soft tortillas. To boost the flavor, use good quality spices. Smoked paprika adds depth and a touch of sweetness. Ground cumin and chili powder bring warmth and a little heat. Taste as you go. Adjust salt and pepper to match your preference. A squeeze of fresh lime juice right before serving brightens up the whole dish. Use a medium bowl for mashing the chickpeas. A fork or potato masher works well. For cooking, grab a sturdy skillet. A spatula helps to stir and flip the chickpeas easily. Finally, a good knife makes slicing the avocado and cabbage a breeze. For the best results, check out the Full Recipe for more tips. {{image_2}} You can easily make these tacos vegetarian or vegan. The chickpeas are already plant-based. For a meat substitute, try using lentils or black beans. They add a nice protein boost and blend well with spices. Use plant-based tortillas to keep it vegan. Look for brands that do not use lard. If you love heat, add more chili powder or fresh jalapeños. For a milder taste, reduce the chili powder. You can also skip the spicy seasonings and use herbs instead. Fresh cilantro or parsley can add a nice flavor without the heat. Adjust the spices to fit your taste buds. Try adding different toppings to change up the flavor. Sautéed bell peppers or corn can add sweetness. You might like diced tomatoes or fresh salsa for extra freshness. For creaminess, use a dollop of vegan sour cream or yogurt. Each filling adds its own twist to your spicy chickpea tacos. For the complete recipe, check out the Full Recipe. You can store leftover spicy chickpea tacos in the fridge. Place them in an airtight container. They stay fresh for up to three days. Keep the chickpeas and tortillas separate. This will help the tortillas stay soft. To reheat, warm the chickpea mixture in a skillet. Heat it over medium-low heat. Stir it often until it's hot. You can also use a microwave. Just cover the mixture and heat for 1-2 minutes. Warm the tortillas in a pan or microwave before serving. You can freeze the spicy chickpea mixture for later. First, let it cool completely. Then, place it in a freezer-safe bag or container. It can last up to three months in the freezer. When you're ready to eat, thaw it overnight in the fridge. Reheat it as mentioned above. This makes meal prep easy and fun! Check the Full Recipe for more details. It takes about 20 minutes to make these tacos. Prep time is just 10 minutes. Cooking the chickpeas takes another 5 to 7 minutes. This means you can enjoy a tasty meal quickly! Yes, you can use dried chickpeas. However, you need to soak and cook them first. Soaking can take several hours or overnight. Cooking dried chickpeas takes about an hour. This adds more time but gives a great flavor. You can serve many sides with tacos. Here are some ideas: - Mexican rice - Refried beans - Corn salad - Grilled vegetables - Guacamole These sides will add color and flavor to your meal. For the full recipe, check out the [Full Recipe]. Spicy chickpea tacos are tasty and easy to make. You learned the main ingredients, optional garnishes, and dietary choices. We covered step-by-step instructions to prepare and cook the chickpeas, plus how to assemble the tacos. I shared tips for texture and flavor, along with variations for everyone. Lastly, you got key storage info to keep your tacos fresh. Enjoy exploring these tacos, making them your own, and sharing with others!](https://mycookingcast.com/wp-content/uploads/2025/05/ee0555b8-bc74-41db-bb8e-9d192576a388.webp)
Craving a tasty meal that’s both bold and satisfying? You’ll love these Spicy Chickpea Tacos! They offer a splash of
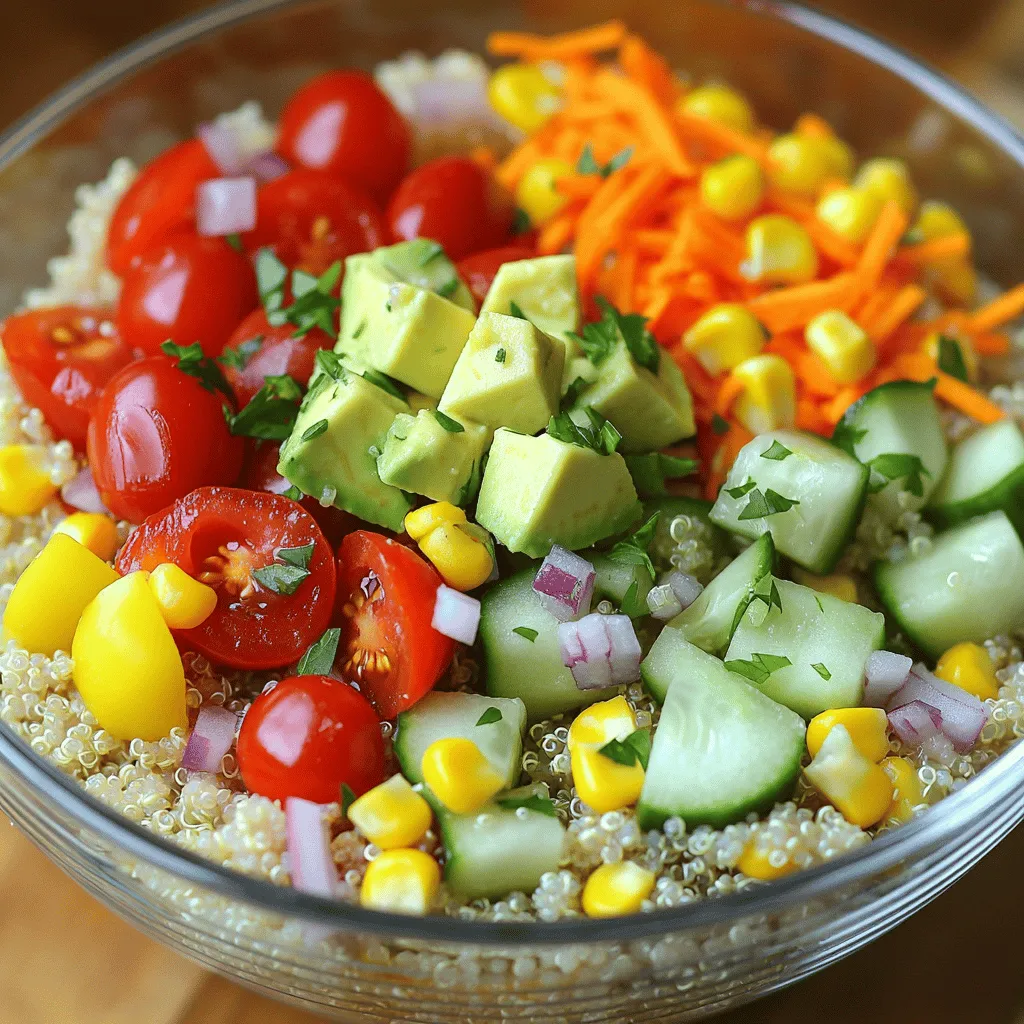
Are you ready to elevate your meal prep with a burst of color and nutrition? This vibrant vegetable quinoa salad

Craving a sweet treat? Cinnamon sugar churros are your answer! These crispy delights pack a warm cinnamon flavor and a
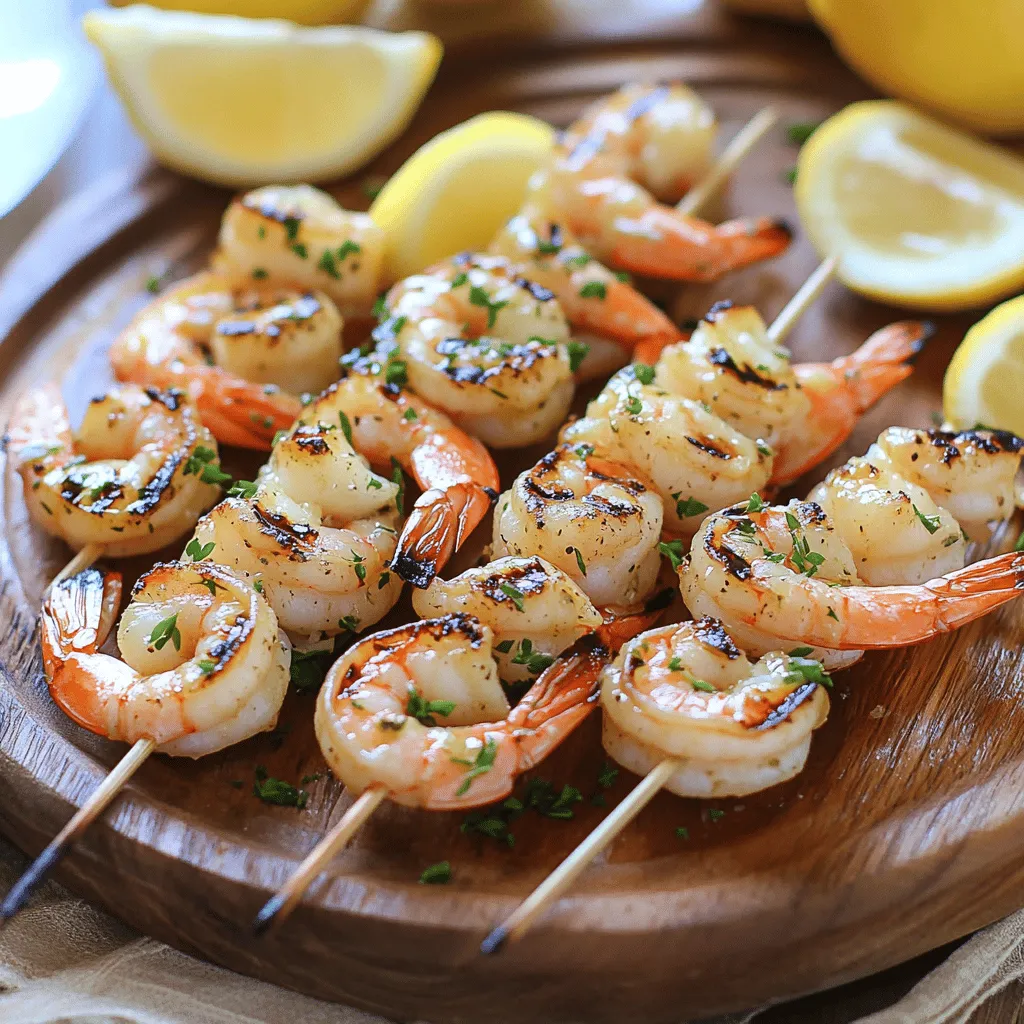
Are you ready to elevate your grilling game? Garlic Butter Shrimp Skewers are the perfect blend of juicy shrimp and
 for a complete guide to creating your avocado toast masterpiece. For a great poached egg, add vinegar to your water. This helps the egg whites hold together better. A common mistake is using water that’s boiling too hard. You want a gentle simmer, not a rolling boil. This way, the eggs cook evenly and look beautiful. To make your avocado toast eye-catching, use a colorful plate. Arrange halved cherry tomatoes around the toast for a bright touch. You can also sprinkle fresh herbs on top for a pop of green. This adds flavor and makes the dish look fancy. For brunch, serve with fresh juice or coffee to elevate the meal. To save unused avocados, put them in a bowl with a little lemon juice. This helps prevent browning. Store leftover toast in a sealed container, but it’s best fresh. Reheat toast in a toaster for crispiness. Avoid the microwave, as it can make the bread soggy. {{image_2}} You can make your avocado toast even tastier with fun add-ins. Try adding spices like garlic powder or smoked paprika for a kick. A sprinkle of feta or goat cheese can add creaminess. For protein, think about using smoked salmon or crispy bacon. Both pair well with the creamy avocado. If you want a plant-based option, try marinated tofu or chickpeas. They add great flavor and texture. If you need gluten-free options, swap whole grain bread for gluten-free bread. There are many tasty brands available now. You can also use rice cakes or lettuce wraps for a lighter choice. For those who prefer a vegan option, replace the poached egg with avocado slices or a tofu scramble. You can also use nutritional yeast to add a cheesy flavor without dairy. You can explore flavors from around the world with your avocado toast. Try a Mexican twist by adding jalapeños, cilantro, and lime juice. It brings a fresh, zesty taste. For an Italian flair, top with fresh tomatoes, basil, and a drizzle of balsamic glaze. You can also go Asian with sesame seeds, sliced radishes, and a splash of soy sauce. Each of these ideas lets you create a unique dish that excites the palate. Check out the Full Recipe for the basic version, then let your creativity shine! To keep leftover toast fresh, wrap it in foil or place it in an airtight container. Avoid stacking the slices, as this can make them soggy. For reheating, you can use a toaster or an oven. Toast for a few minutes until it's hot and crispy. This keeps the texture just right. Avocados can ripen on your counter. Once ripe, store them in the fridge to slow down the process. To prevent browning in your avocado smash, add lemon juice right after mashing. You can also cover it tightly with plastic wrap, pressing it against the surface. This reduces air contact. To store poached eggs, place them in a container with cold water. Cover and refrigerate them for up to two days. When ready to eat, reheat in warm water for a few minutes. This keeps them soft and tasty. For meal prepping eggs safely, cook them and store them in a fridge container. Use within four days for the best taste. To pick ripe avocados, look for a few key signs. First, gently squeeze the avocado in your hand. It should feel slightly soft but not mushy. Next, check the color. A ripe avocado usually has a dark green or black skin. If the skin is bright green, it is not ready. Finally, remove the small stem at the top. If it comes off easily and you see green underneath, the avocado is ripe. If it is brown, the avocado may be overripe. Yes, you can prepare avocado toast ahead of time, but with some care. Toast the bread just before serving to keep it crisp. For the avocado, mash it right before you eat. If you need to store it, add lemon juice to slow browning. Place it in an airtight container and use it within a day. If you want to make poached eggs in advance, store them in water in the fridge. Reheat them gently in hot water for a few minutes before serving. Toppings can really enhance your avocado toast. Here are some tasty ideas: - Crumbled feta or goat cheese for a creamy texture. - Sliced radishes for crunch and spice. - Smoked salmon or turkey for added protein. - Fresh herbs like basil or dill for a fresh taste. - A drizzle of balsamic glaze for sweetness. - Cherry tomatoes for a burst of flavor. - Red pepper flakes for a spicy kick. Try mixing and matching these toppings to create your perfect avocado toast. For the full recipe, check out the Avocado Bliss Toast with Poached Egg. In this article, we explored how to make the best avocado toast. We covered key ingredients, from ripe avocados to whole grain bread and eggs. Then, we discussed step-by-step instructions for preparing the toast and perfecting poached eggs. Additional tips offered insights on presentation and ingredient storage. Remember, avocado toast can be fun and flexible. Try different toppings or adaptations. Each bite can delight your taste buds while keeping it nutritious. Embrace your creativity in the kitchen!](https://mycookingcast.com/wp-content/uploads/2025/05/58684b81-d6e0-41b2-b8eb-f52bb067fbf6.webp)
Craving a tasty breakfast that’s both filling and healthy? Let’s dive into making hearty avocado toast with a perfect poached
![- 1 cup quinoa - 2 cups vegetable broth or water - 1 can (15 oz) chickpeas - 1 medium sweet potato, diced - 2 cups spinach or kale, chopped - 1 avocado, sliced - 1 cup cherry tomatoes, halved - 1 tablespoon olive oil - 1 teaspoon smoked paprika - 1 teaspoon garlic powder - Salt and pepper to taste - 2 tablespoons tahini - 2 tablespoons lemon juice - 1 tablespoon maple syrup - 1 tablespoon sesame seeds The first step is to gather these ingredients. Quinoa serves as the base, providing protein and fiber. You can mix it with vegetable broth to enhance its flavor. The chickpeas add more protein and a nice texture. Sweet potatoes give a sweet touch and are rich in vitamins. Spinach or kale adds greens, making your bowl colorful and nutritious. Avocado brings creaminess, while cherry tomatoes add freshness. For flavor, you need olive oil, smoked paprika, garlic powder, salt, and pepper. These seasonings create depth in taste. Tahini, lemon juice, and maple syrup combine to make a tasty dressing. This drizzle ties all the flavors together. When you prepare your Vegan Buddha Bowl, remember that each ingredient adds its unique taste and nutrition. You can find the full recipe to guide you through the steps. - Preheat the oven to 400°F (200°C). - Rinse the quinoa under cold water. Cook quinoa in a pot with vegetable broth or water. Bring to a boil, then reduce heat. Cover and simmer for about 15 minutes until fluffy. - Toss diced sweet potatoes with olive oil, smoked paprika, garlic powder, salt, and pepper. - Spread sweet potatoes on a baking sheet. Roast in the oven for 20-25 minutes until tender and slightly caramelized. - Heat a skillet over medium heat. Add drained and rinsed chickpeas. - Sauté chickpeas for about 5 minutes. They should be warm and slightly crispy outside. - In a small bowl, whisk together tahini, lemon juice, maple syrup, and a pinch of salt. - If the dressing is too thick, add a splash of water until it reaches your desired consistency. - Start with a base of quinoa in a large bowl. - Layer in roasted sweet potatoes, sautéed chickpeas, chopped greens, avocado slices, and halved cherry tomatoes. - Drizzle the tahini dressing over the top. Sprinkle sesame seeds for added crunch. You can find the full recipe above to guide you through these steps! - To achieve fluffy quinoa, rinse it well before cooking. This removes the bitter outer layer called saponin. Use a pot with a lid. Add quinoa and vegetable broth. Bring it to a boil, then reduce heat. Let it simmer for about 15 minutes. Fluff with a fork when done. - For perfectly roasting sweet potatoes, preheat your oven to 400°F (200°C). Cut sweet potatoes into even pieces. Toss them with olive oil, smoked paprika, garlic powder, salt, and pepper. Spread them on a baking sheet. Roast for 20-25 minutes until they are tender and golden. - Arrange ingredients for visual appeal by layering them neatly. Start with quinoa as the base. Add greens, followed by sweet potatoes, chickpeas, and avocado. Place cherry tomatoes on top for color. - Incorporate fresh herbs for garnish. Parsley or cilantro adds a pop of green and freshness. Sprinkle them on top just before serving. - You can customize the tahini dressing thickness. If it is too thick, add a splash of water or more lemon juice. Adjust until you reach your desired consistency. - Add spices for a flavor boost. Try a pinch of cayenne, cumin, or black pepper to give your dressing an extra kick. This enhances the overall taste of your Buddha bowl. For the full recipe, check out the [Full Recipe]. {{image_2}} You can swap chickpeas for lentils or tofu. Lentils cook fast and add fiber. Tofu gives a hearty texture. You can also add tempeh or edamame for extra protein. Both options boost your bowl's protein content and flavor. Instead of quinoa, try brown rice, farro, or barley. These grains bring unique tastes and textures. If you're looking for a low-carb option, cauliflower rice works great. It’s light and soaks up flavors well. Experiment with different dressings or sauces. A spicy peanut sauce or ginger dressing adds a kick. You can also add nuts or seeds for crunch. Almonds or sunflower seeds give a nice texture and extra nutrients. Feel free to get creative with these ideas to make your Vegan Buddha Bowl even more delicious. Check the Full Recipe to see how these variations fit in! To store leftovers, place your Buddha bowl in an airtight container. Keep it in the fridge. This will keep the flavors fresh. The shelf life of the components is about 3 to 5 days. Quinoa can last up to a week. Sweet potatoes and chickpeas stay good for the same time. Greens like spinach or kale should be used within 3 days for best taste. You can freeze components of your Buddha bowl. Quinoa and chickpeas freeze well. Spread them on a baking sheet first. Once frozen, transfer them to freezer bags. Sweet potatoes can also be frozen, but they may lose some texture. For meal prep, thaw overnight in the fridge. This keeps everything safe and tasty. To reheat quinoa, add a splash of water. Microwave it for 1 to 2 minutes. For vegetables, use a skillet over medium heat. This keeps the flavors intact. Stir often until warm. Avoid reheating multiple times to maintain taste and texture. Enjoy your vibrant Vegan Buddha Bowl fresh and delicious! A Vegan Buddha Bowl is a colorful meal. It includes grains, veggies, and proteins. You can make it in many ways. The base is often quinoa, rice, or farro. You add roasted veggies like sweet potatoes. Chickpeas or beans add protein. Fresh greens like spinach or kale give crunch. Avocado adds creaminess. Top it with a tasty dressing for flavor. This dish is not only healthy but also fun to make! Yes, you can easily make this recipe gluten-free. Swap quinoa with brown rice or millet. You can also use gluten-free oats if you want. Make sure to check all labels when buying ingredients. This ensures they are gluten-free. Enjoy the same great taste without gluten! You can make this bowl your own! Start by changing the base grain. Use farro, rice, or even cauliflower rice. Next, add your favorite veggies. Try roasted carrots, zucchini, or bell peppers. For protein, swap chickpeas for lentils or tofu. You can mix and match as you like. Get creative with toppings, too! Nuts and seeds add a nice crunch. A Vegan Buddha Bowl is packed with nutrients. Quinoa provides protein and fiber. Sweet potatoes offer vitamins A and C. Chickpeas add more protein and iron. Greens like spinach are full of vitamins and minerals. Healthy fats come from avocado. This dish gives you energy and supports your health. Yes, this recipe is great for meal prep! Cook all components in advance. Store them in airtight containers. Keep grains, veggies, and dressing separate to stay fresh. You can combine them when ready to eat. This makes for quick and easy meals all week long. Enjoy the flavors whenever you want! This blog post covered how to create a tasty Vegan Buddha Bowl. We explored the main ingredients, like quinoa, sweet potatoes, and chickpeas. I shared steps for cooking, assembling, and enhancing your bowl's flavor. Remember, you can customize this dish to fit your taste and nutritional needs. Use the tips for perfecting each component and store leftovers wisely. Enjoy making this healthy meal that’s both delicious and fun to create!](https://mycookingcast.com/wp-content/uploads/2025/05/246e56bb-3a36-4c7a-a885-698b7680a01a.webp)
If you’re looking for a meal that’s both tasty and good for you, try a Vegan Buddha Bowl. Packed with
![To make a chocolate chip cookie skillet, you need key ingredients. Here’s what you’ll need: - 1 cup unsalted butter, softened - 3/4 cup brown sugar, packed - 1/4 cup granulated sugar - 1 large egg + 1 egg yolk - 2 teaspoons vanilla extract Unsalted butter adds rich flavor. The sugars create a sweet, chewy texture. Mixing both sugars helps the cookie stay soft inside. The egg and yolk add structure and moisture, while vanilla brings warmth and depth. Next, you need to mix in your dry ingredients. Here's what to gather: - 2 cups all-purpose flour - 1 teaspoon baking soda - 1/2 teaspoon salt - 1 cup semisweet chocolate chips - 1/2 cup chopped walnuts (optional) All-purpose flour gives the cookie body. Baking soda helps it rise, while salt enhances all the flavors. Chocolate chips are the star of the show, melting into gooey pockets of joy. If you like, add walnuts for a nice crunch. With these ingredients ready, you can start creating your delicious skillet cookie. For the full recipe, check [Full Recipe]. First, we need to cream the butter and sugars. In a large bowl, add 1 cup of softened unsalted butter. Then, add 3/4 cup of brown sugar and 1/4 cup of granulated sugar. Use an electric mixer to beat them together. Mix until the mixture is light and fluffy. This step is key for a soft cookie. Next, we’ll add the eggs and vanilla. Crack one large egg and add one egg yolk into the bowl. Then, pour in 2 teaspoons of vanilla extract. Beat everything together until it is well combined. This will add flavor and moisture. Now, let's mix the dry and wet ingredients. In a separate bowl, whisk together 2 cups of all-purpose flour, 1 teaspoon of baking soda, and 1/2 teaspoon of salt. Slowly add this dry mixture to the butter mixture. Stir until just combined. Do not overmix; a few lumps are fine. After that, fold in the chocolate chips and walnuts. Add 1 cup of semisweet chocolate chips and 1/2 cup of chopped walnuts, if you like. Gently mix them into the dough until they are evenly spread. Time to prepare the skillet. Grease a 10-inch cast-iron skillet with butter or cooking spray. This will help the cookie come out easily. Spread the cookie dough evenly in the skillet. Use a spatula to smooth the top. Now, we’ll bake the cookie. Preheat your oven to 350°F (175°C). Place the skillet in the oven and bake for 25-30 minutes. Look for golden edges and a soft center. When it’s done, take it out and let it cool for about 10 minutes. This cooling time helps it set before slicing. For the full recipe, check out the [Full Recipe]. Enjoy your warm, gooey treat! To get the best texture in your cookie skillet, adjust the baking time. If you want a chewy cookie, take it out a bit early. Aim for golden edges and a soft center. This timing helps create that perfect balance. Using room temperature ingredients is key. When butter is soft, it blends well with sugars. This helps trap air and gives you a light, fluffy cookie. Eggs should also be at room temperature. This helps them mix better into your dough. Choosing the right skillet matters. A 10-inch cast-iron skillet works best. It heats evenly and gives great results. If you don’t have cast iron, any oven-safe skillet will do. Before adding the dough, grease your skillet well. Use butter or cooking spray to coat it. This helps the cookie slide out easily once baked. Spread the dough evenly to ensure it cooks well. This cookie skillet shines when paired with ice cream. Vanilla ice cream melts perfectly on warm cookie. You can also top it with whipped cream or chocolate sauce. For a fun presentation, serve it straight from the skillet. Add spoons for a casual feel. You can even sprinkle some extra chocolate chips on top for style. For the full recipe, check the details above and get baking! {{image_2}} You can change up your chocolate chip cookie skillet with different chocolate chips. Use milk chocolate, dark chocolate, or even white chocolate for a twist. Each type of chip brings its own taste. You can also mix in some fun extras. Try adding nuts like pecans or almonds, or even candy pieces. These mix-ins add texture and flavor. If you need gluten-free options, use almond flour or coconut flour. Both work well in this recipe and still taste great. For a vegan version, swap the butter for coconut oil. You can replace the eggs with a flaxseed mixture. Mix one tablespoon of flaxseed meal with three tablespoons of water. Let it sit for a few minutes until it thickens. Seasonal flavors can make this dish special. Add warm spices like cinnamon or nutmeg during fall or winter. You can also use fresh fruits like berries or sliced apples. They bring a fresh taste that brightens the dish. For festive occasions, try adding peppermint or orange zest for a fun twist. For more details, you can check the Full Recipe. To keep your cookie skillet fresh, let it cool first. Once it’s cool, cover it tightly with plastic wrap or aluminum foil. You can also use an airtight container. This helps keep it moist. Store it in the fridge for up to five days. If you want to enjoy it later, slice it before storing. This makes it easy to grab a piece when you want a sweet treat. To reheat your chocolate chip cookie skillet, use your oven or microwave. For the oven, preheat to 350°F (175°C). Place the skillet inside for about 10 minutes. This warms it through while keeping the edges nice. If you use a microwave, heat a slice for about 20 seconds. Be careful, as it can get hot quickly. Pairing it with a scoop of ice cream is a great idea to keep the flavor fresh. You can freeze cookie dough for later. Scoop the dough into balls and place them on a baking sheet. Freeze them for about an hour, then transfer them to a freezer bag. This method helps keep them from sticking together. You can store the dough for up to three months. When you’re ready to bake, just take out as many as you need. Let them thaw for about 30 minutes before baking. This lets you enjoy fresh cookies anytime! For the full recipe, check back to make your own delicious skillet treat. Look for a few signs. The edges should be a nice golden brown. The center will be soft but not gooey. You can also poke it with a toothpick. If it comes out mostly clean, it’s done. Remember, the cookie will continue to cook a little after you take it out of the oven. Yes, you can prepare the dough in advance. Just cover it and store it in the fridge for up to 24 hours. When ready, spread it in the skillet and bake. If you have leftovers, let them cool and store in an airtight container. They will stay fresh for about three days. If you don’t have a cast-iron skillet, use any oven-safe skillet. A regular metal skillet works well too. A glass or ceramic dish can also be a good choice. Just make sure to adjust the baking time, as different materials can cook differently. In this post, we covered how to make a delicious chocolate chip cookie skillet. We explored key ingredients, detailed step-by-step instructions, and shared essential tips for perfect results. I also highlighted fun variations and storage suggestions to keep your cookies fresh. As you dive into baking, remember to enjoy the process. Try different flavors and share with others. Your tasty creation can bring joy to any gathering!](https://mycookingcast.com/wp-content/uploads/2025/05/1db18baa-e55e-417e-b08a-96981846de95.webp)
Imagine a warm, gooey chocolate chip cookie fresh from the oven, right in your skillet. It’s the perfect treat for
