Skip to content
DisclaimerTerms Of UseGDPR PolicyCookie Policy

My Cooking Cast

  • Home
  • Drinks
  • Appetizers
  • Dinner
  • Dessert
  • About
  • Contact
  • Privacy Policy
DisclaimerTerms Of UseGDPR PolicyCookie Policy

Emma

To make these tasty bars, you need the following ingredients: - 1 cup natural creamy peanut butter - 1 cup rolled oats - 1/2 cup honey or maple syrup - 1/2 cup dark chocolate chips - 1/2 cup almond flour (or any nut flour) - 1/4 cup unsweetened cocoa powder - 1/2 teaspoon vanilla extract - Pinch of salt Getting the right measurements is key. I always use a dry measuring cup for oats and flour. For sticky ingredients like peanut butter and honey, a liquid measuring cup works best. This keeps your bars from being too dry or too wet. Feel free to make these bars your own! Here are some ideas: - Add 1/4 cup shredded coconut for extra flavor. - Mix in 1/4 cup mini chocolate chips for a sweeter touch. - Swap almond flour for oat flour if you prefer. - Include a tablespoon of chia seeds for added crunch and nutrition. These swaps let you personalize the bars while keeping them simple and fun. Check out the Full Recipe for more details on how to make these delicious treats! First, gather your ingredients. You need peanut butter, oats, honey, dark chocolate chips, almond flour, cocoa powder, vanilla extract, and a pinch of salt. Start by mixing the peanut butter and honey in a large bowl. Stir until it's smooth and creamy. Next, add in the almond flour, oats, cocoa powder, vanilla, and salt. Mix well until everything is combined. Now, line an 8x8 inch baking dish with parchment paper. Leave some paper hanging over the edges. This makes it easy to lift the bars out later. Pour the peanut butter mixture into the dish. Use a spatula to press it down. Make sure it’s packed tightly and evenly. For the chocolate layer, take your dark chocolate chips and place them in a microwave-safe bowl. Heat them in the microwave. Set it for 20 seconds, then stir. Repeat this until the chocolate is smooth. Be careful not to overheat the chocolate. Once it’s melted, pour it over the peanut butter mixture in the dish. Spread it evenly with the spatula. This chocolate layer adds a nice finish to your bars. After spreading the chocolate, place the dish in the fridge. Let it chill for at least 2 hours. This helps the chocolate set and makes the bars firm. Once the chocolate is set, lift the bars out using the parchment paper. Cut them into squares or rectangles. Now you have delicious no-bake chocolate peanut butter bars! For the full recipe, check the earlier section. Enjoy this easy treat! To make your bars smooth and chewy, use creamy peanut butter. Natural peanut butter works best. It gives a nice blend of flavor and texture. Make sure to mix the peanut butter and honey well. This step helps to create a smooth base. When adding oats and flour, stir gently. You want to avoid breaking the oats too much. Packing the mixture tightly in the dish is key. This helps your bars hold together well when cut. One common mistake is not measuring the ingredients. Accurate measurements keep the texture and taste right. Another mistake is not letting the chocolate melt fully. If it’s chunky, the topping won't spread nicely. Don’t skip the chilling time either. Refrigerating for at least two hours helps the bars set properly. Lastly, make sure to line your baking dish. This makes it easier to lift the bars out for cutting. These bars are great as a snack or dessert. You can serve them fresh from the fridge. For a fun twist, try adding a drizzle of melted chocolate on top. You could also sprinkle crushed peanuts for extra crunch. Pair them with a glass of milk or a hot drink. They also work well as a quick breakfast on the go. For more delicious recipes, check out the Full Recipe section. {{image_2}} You can easily make these bars gluten-free. Use rolled oats labeled as gluten-free. Regular oats may have gluten. Almond flour is also naturally gluten-free. This way, everyone can enjoy these tasty treats. To make these bars vegan, swap honey for maple syrup. Maple syrup adds sweetness without animal products. Use dark chocolate chips that are dairy-free. Check the label to ensure they fit your needs. Feel free to get creative with flavors! You can add a dash of cinnamon for warmth. Chopped nuts like walnuts or pecans add a nice crunch. Dried fruits like cranberries or raisins bring sweetness. For a tropical twist, consider adding shredded coconut. These choices make your no-bake chocolate peanut butter bars even more special. For the full recipe, refer to the earlier section. Enjoy exploring these variations! To keep your no-bake chocolate peanut butter bars fresh, use an airtight container. Place a layer of parchment paper between layers of bars to prevent sticking. Store the container in a cool, dry place. Avoid direct sunlight, as it can cause the chocolate to melt. These bars can last up to one week at room temperature. If you store them in the fridge, they can stay fresh for two weeks. The colder temperature helps the chocolate and peanut butter hold their shape better. If you want to save some bars for later, freezing is a great option. Wrap each bar in plastic wrap and place them in a freezer bag. They can last up to three months in the freezer. To enjoy, let them thaw in the fridge before serving. Check out the full recipe for more tips! Yes, you can use crunchy peanut butter. It adds a nice texture. I enjoy the extra crunch in every bite. It gives the bars a fun twist. Just make sure to mix it well with the other ingredients. This way, the flavors blend perfectly. To lower the sugar, use less honey or maple syrup. You can also try sugar-free sweeteners. Agave syrup is a good option too. Remember, the taste may change slightly. You want to keep the bars sweet but healthy. You can add many toppings to make these bars unique. Try crushed nuts or seeds for crunch. Shredded coconut gives a nice flavor. You can also drizzle extra chocolate for a sweet touch. Get creative and have fun with your choices. You now have all you need to make delicious no-bake chocolate peanut butter bars. We covered the essential ingredients, precise measurements, and optional add-ins for your bars. Step-by-step instructions guide you through melting chocolate and finalizing your treat. I shared tips to achieve the best texture and avoid common mistakes. You can also explore variations like gluten-free and vegan options. Finally, I provided storage tips to keep your bars fresh. Enjoy making your perfect homemade treat!

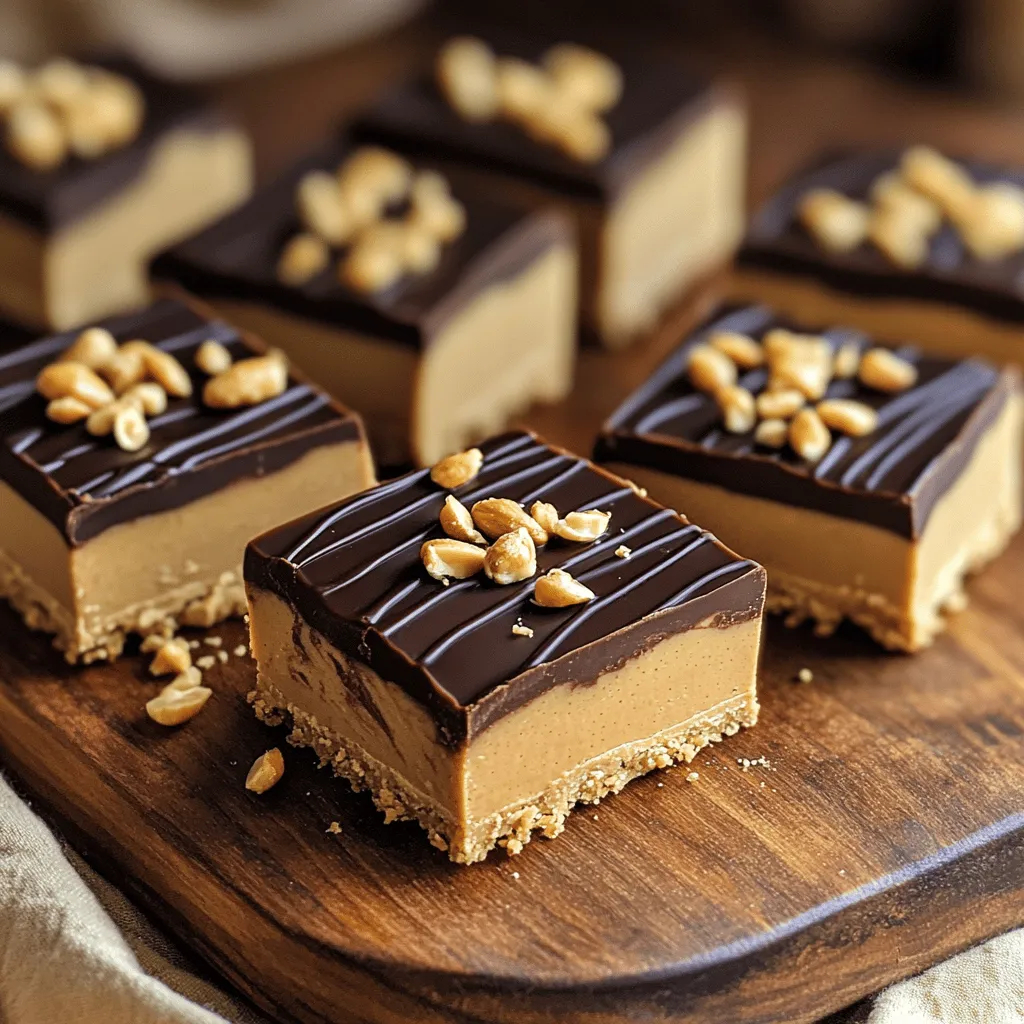
No-Bake Chocolate Peanut Butter Bars Easy Treat

Craving a sweet treat that’s simple to make? You’re in the right place! These No-Bake Chocolate Peanut Butter Bars are
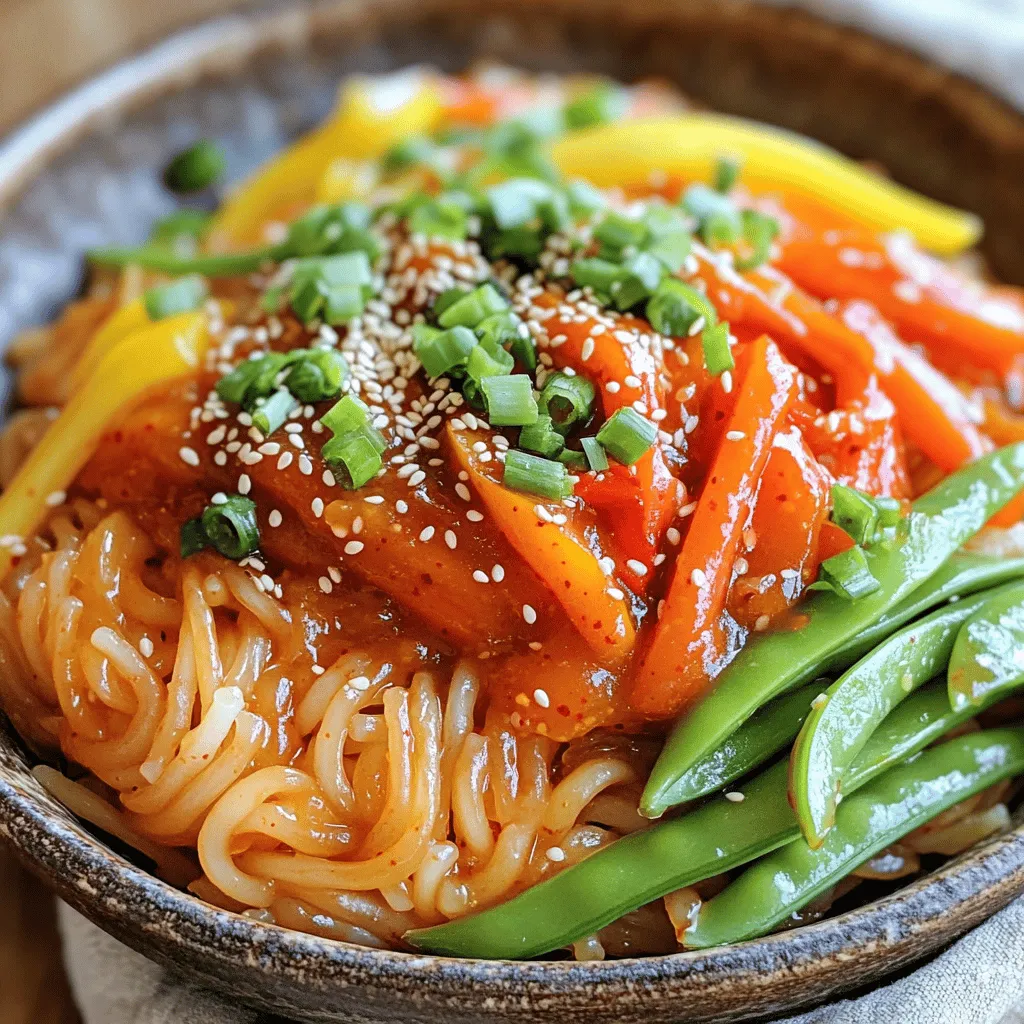
To make a tasty zucchini noodle stir-fry, you need these simple ingredients: - 3 medium zucchinis, spiralized into noodles - 1 red bell pepper, sliced into thin strips - 1 cup broccoli florets - 1 cup snap peas - 1 carrot, julienned - 2 cloves garlic, minced - 1 tablespoon ginger, minced - 3 tablespoons soy sauce (or tamari for gluten-free) - 1 tablespoon sesame oil - 1 tablespoon olive oil - 1 teaspoon sesame seeds (for garnish) - Salt and pepper to taste These fresh veggies bring color and crunch. The zucchinis serve as a great base, making this meal light and fun. To make your dish even better, consider these garnishes: - Extra sesame seeds - Fresh cilantro leaves - Chopped green onions - Lime wedges These add flavor and make the dish look pretty. Garnishes help brighten the meal and make it more appealing. If you have specific dietary needs, here are some swaps: - Use gluten-free soy sauce or tamari for a gluten-free option. - Swap the sesame oil for avocado oil if you're allergic to sesame. - Try other veggies like bell peppers, mushrooms, or zucchini. These alternatives keep the dish delicious while fitting your needs. You can still enjoy a great flavor profile with smart swaps. For the full recipe, be sure to check the complete instructions! Start by spiralizing the zucchinis into noodles. A spiralizer makes this easy and fun. Aim for three medium zucchinis for the best texture. Once you have your noodles, set them aside for later. This step keeps the noodles fresh and ready to cook. In a large skillet or wok, heat one tablespoon of olive oil over medium-high heat. Add two cloves of minced garlic and one tablespoon of minced ginger. Sauté these for about 30 seconds. You want to smell the great aroma. Next, toss in one sliced red bell pepper, one cup of broccoli florets, one cup of snap peas, and one julienned carrot. Stir-fry these veggies for 4-5 minutes until they feel tender but still crisp. This keeps the colors bright and fresh. Now it's time to bring it all together. Add the zucchini noodles to the skillet. Pour in three tablespoons of soy sauce and one tablespoon of sesame oil. Gently toss everything together for 2-3 minutes. You want the zucchini noodles to heat up but stay a bit crunchy. Season with salt and pepper to taste. Finally, remove from heat and sprinkle one teaspoon of sesame seeds on top for a nice crunch. For the full experience, check out the Full Recipe. To get the best texture in zucchini noodle stir-fry, avoid overcooking. Zucchini cooks fast and can turn mushy. I suggest cooking them for just 2-3 minutes. This leaves them slightly crunchy. You want a nice bite without losing the fresh taste. If you like, use a veggie peeler for wider noodles. Wider noodles hold sauce well and add fun to your dish. For extra flavor, try adding a touch of chili flakes or a splash of rice vinegar. They bring heat and tang to your dish. Fresh herbs like cilantro or basil can also brighten the meal. Toss them in right before serving. This keeps their flavor fresh and vibrant. You can even add a squeeze of lime for a zesty kick. When you cook, make sure your skillet or wok is hot. This helps all the veggies cook evenly. Start with garlic and ginger in hot oil to release their flavors. Stir-fry quickly and keep the vegetables moving. This avoids burning and helps them cook evenly. If your veggies start to stick, add a bit more oil. This keeps everything moving and flavors mingling. For the full recipe, check out the Zucchini Noodle Stir-Fry! {{image_2}} You can add protein to your zucchini noodle stir-fry for a more filling meal. Tofu is great for a plant-based option. Just cube it and sauté it until golden. Chicken is another tasty choice. Cook bite-sized pieces until they are no longer pink. Shrimp cooks quickly and adds a nice flavor. Just toss them in for a few minutes until they turn pink. Each protein will give your dish a unique taste. This recipe is easy to make vegan and gluten-free. Use tamari instead of soy sauce for gluten-free. For a vegan twist, simply skip the proteins or use tofu. You can also add nuts like cashews or almonds for a crunchy texture. This keeps the dish satisfying without meat. Feel free to swap in seasonal veggies. Summer means fresh bell peppers and zucchini. In fall, you might want to use butternut squash or kale. Winter brings sturdy greens like bok choy. Each season offers new flavors. You can be creative and adjust the recipe based on what’s fresh and available. This keeps the dish exciting and helps you use up what you have. Check out the Full Recipe for more ideas! To keep your Zucchini Noodle Stir-Fry fresh, store it in an airtight container. Make sure to let it cool to room temperature first. Place the container in the fridge. Use the leftovers within three days for the best taste. When you're ready to eat, reheat the stir-fry on the stove. Use medium heat in a skillet. Add a splash of water or oil to help it warm up. Stir often until it’s heated through. This method keeps the noodles from getting mushy. You can also use the microwave. Heat in short intervals, stirring in between. If you want to freeze your stir-fry, first cool it completely. Use a freezer-safe container, leaving some space at the top for expansion. It can last up to two months in the freezer. To thaw, move it to the fridge overnight. Reheat thoroughly before serving. Keep in mind that zucchini can lose some texture when frozen, so it may be softer when reheated. For the full recipe, visit the complete guide. Yes, you can use other types of noodles. Rice noodles, whole wheat, or egg noodles work well. Each option gives a different taste and texture. If you prefer gluten-free, rice noodles are a great choice. Just cook them according to package instructions. Add them to the stir-fry like you would the zucchini noodles. You can make zucchini noodles without a spiralizer. Use a peeler or a box grater instead. A peeler creates thin strips of zucchini. A box grater gives you a finer noodle. Both methods work well for stir-fry. Just be sure to cut them evenly for cooking. Zucchini noodles are low in calories and carbs. They are rich in vitamins A and C. Eating zucchini can help with digestion due to its fiber. Zucchini noodles also keep you full longer. They are a great way to add veggies to your diet. Try this recipe for a tasty and healthy dish! For the full recipe, click [Full Recipe]. You learned how to make a tasty zucchini noodle stir-fry. We covered the main ingredients, cooking steps, and useful tips. You saw how to customize it for your taste and diet. Storing leftovers is easy if you follow the right steps. Experiment with your stir-fry and have fun! With fresh flavors and simple steps, you can create a dish you love. Enjoy cooking and sharing this healthy meal!

Zucchini Noodle Stir-Fry Flavorful and Simple Meal

If you’re looking for a quick and tasty meal, zucchini noodle stir-fry is your answer. This dish is easy to

To make this delicious risotto, you will need these main ingredients: - 1 cup Arborio rice - 4 cups vegetable broth - 1 cup mushrooms (cremini or button), sliced - 1 small onion, finely chopped - 2 cloves garlic, minced - 1 cup heavy cream - 1/2 cup grated Parmesan cheese - 2 tablespoons olive oil - 1 teaspoon dried thyme - Salt and pepper to taste - Fresh parsley, chopped (for garnish) These ingredients come together to create a creamy and rich dish. Arborio rice is key, as it gives risotto its creamy texture. The mushrooms add a nice earthy flavor, while the cream and cheese make it extra indulgent. You can tweak this recipe to suit your taste. Here are some optional ingredients you might like: - Peas for a pop of color and sweetness - Spinach for a healthy boost - Bacon or pancetta for a meaty flavor - Different herbs like basil or rosemary for a fresh twist These additions can help you create your own version of this risotto. Feel free to mix and match! Having the right tools makes cooking easier and more fun. Here are some tools I recommend for this recipe: - Instant Pot or any electric pressure cooker - Wooden spoon for stirring - Measuring cups and spoons for accuracy - Chef’s knife for chopping - Cutting board for prep work Using these tools will help you prepare the risotto smoothly. They ensure your ingredients are ready to go when you need them. For the full recipe, check out the detailed steps to make this creamy mushroom risotto! First, set your Instant Pot to sauté mode. Add two tablespoons of olive oil and let it warm up. This step is key for flavor. When the oil is hot, toss in one small onion, finely chopped, and two cloves of minced garlic. Sauté these for about 2-3 minutes. You want the onion to turn translucent, which shows it’s ready. Next, add one cup of sliced mushrooms. Cremini or button mushrooms work well here. Sprinkle in one teaspoon of dried thyme for a nice herbal touch. Cook this mix for about 3-4 minutes. You’ll see the mushrooms soften and let out some moisture. This brings out their rich flavor. Now, stir in one cup of Arborio rice. Toast it for 1-2 minutes while stirring. This step helps your risotto get that nice creamy texture. After toasting, pour in four cups of vegetable broth. Make sure all the rice is covered. Close the lid tightly. Set your Instant Pot to manual high pressure for six minutes. Once the timer goes off, let it naturally release pressure for 10 minutes. After that, you can do a quick release for any leftover pressure. Once you open the lid, it’s time for the final touches. Stir in one cup of heavy cream and half a cup of grated Parmesan cheese. Mix it well until the cheese melts and the risotto becomes creamy. Season with salt and pepper to taste. If your risotto seems too thick, add a bit more broth. Serve your dish hot, garnished with fresh chopped parsley. This adds color and a fresh bite. For the full recipe, check out the details above! To make risotto creamy, you need to use Arborio rice. This rice type has starch that thickens the dish. Always toast the rice in the pot for a minute before adding broth. This step helps release more starch. Stir the mixture often to keep it smooth. After cooking, add heavy cream and cheese for extra creaminess. If your risotto is too thick, add more broth a little at a time. One common mistake is not letting the rice toast. Skipping this step can lead to a less creamy dish. Another mistake is adding all the broth at once. This can make the rice cook unevenly. Be sure to let the Instant Pot naturally release pressure. If you rush it, the risotto can become gummy. Lastly, don’t forget to taste and adjust the seasoning. You can switch out some ingredients for different flavors. If you want a lighter dish, use half-and-half instead of heavy cream. You can also use vegetable stock instead of broth. If you don’t have Parmesan cheese, try Pecorino Romano for a sharper taste. For mushrooms, you can mix in different types like shiitake or portobello. To add protein, include cooked chicken or shrimp. For a complete guide, check the Full Recipe. {{image_2}} You can easily make this risotto vegetarian or vegan. For a vegetarian dish, just use vegetable broth and keep the Parmesan cheese. To make it vegan, swap the heavy cream for coconut cream or a plant-based alternative. Nutritional yeast can replace Parmesan for a cheesy flavor. You still get all the creamy goodness without dairy. Want to add protein? Chicken or shrimp works great. For chicken, use diced breast or thighs. Sauté them first until golden, then add the onion and garlic. For shrimp, add them in during the last few minutes of cooking. They cook quickly, adding a nice touch to the risotto. Both options make this dish more filling. You can boost flavors with herbs and spices. Fresh herbs like basil or chives add brightness. You can also try adding a pinch of red pepper flakes for heat. If you love earthy tones, consider a dash of smoked paprika. Each of these choices enhances the dish's depth. Don't be shy to experiment; find what you love! For the full recipe, check out the [Full Recipe]. To keep your risotto fresh, first let it cool. Place it in an airtight container. Make sure it cools to room temperature before sealing. This helps avoid moisture buildup. Store the container in the fridge for up to three days. If you want to keep it longer, consider freezing it instead. When you reheat risotto, avoid the microwave if possible. It can make the rice dry. Instead, use a pan on low heat. Add a splash of broth or water to revive the creaminess. Stir it often to heat evenly. You want it warm and smooth, not sticky. Freezing risotto is simple. First, let it cool completely. Then, scoop portions into freezer bags. Flatten the bags to save space. Make sure to squeeze out as much air as you can. Store in the freezer for up to two months. To enjoy, thaw overnight in the fridge before reheating. This keeps the flavor and texture just right. For the full recipe, check the details above! You can use other types of rice, but Arborio rice is best. Arborio rice has a high starch content. This helps create that creamy texture you want in risotto. If you try other rice, like jasmine or basmati, the dish will not be as creamy. They cook faster and don’t absorb liquid the same way. Stick with Arborio for the best result. To make risotto without heavy cream, use milk or a plant-based option. Almond milk or coconut milk can work well too. You can also add extra vegetable broth for creaminess. Stir in some nutritional yeast for a cheesy flavor. This way, you keep the rich taste without heavy cream. Creamy mushroom risotto pairs well with many dishes. You can serve it with grilled chicken or roasted vegetables for a full meal. A fresh green salad also adds a nice contrast. For a rich touch, a glass of white wine is a perfect match. Enjoy your meal with these simple sides for a great dining experience. This article shows you how to make creamy mushroom risotto in an Instant Pot. We discussed key ingredients, step-by-step cooking instructions, and great tips for smooth texture. Variations let you add protein or make it vegan. Plus, we covered how to store and reheat leftovers. Remember, risotto is fun and customizable. Don’t be afraid to experiment with flavors. Enjoy your cooking!

Instant Pot Creamy Mushroom Risotto Satisfying Dish

If you crave a rich and creamy meal that’s easy to make, you’re in luck! Instant Pot Creamy Mushroom Risotto

- 1 cup all-purpose flour (heat-treated) - ½ cup unsalted butter, softened - ½ cup brown sugar - ¼ cup granulated sugar - 1 teaspoon vanilla extract - 1 (8 oz) package cream cheese, softened - 1 cup mini chocolate chips - ¼ cup milk (adjust for desired consistency) - Pinch of salt To make the best Chocolate Chip Cookie Dough Dip, start with high-quality ingredients. Heat-treating the flour is key. This step ensures it is safe to eat raw. Simply spread the flour on a baking sheet and bake it at 350°F for about 5 minutes. Let it cool before using. You will need softened butter for easy mixing. I find that room temperature butter blends well with the sugars. The brown sugar gives that classic cookie taste, while the granulated sugar adds sweetness. For creaminess, soften your cream cheese to room temperature. This makes mixing much easier. Vanilla extract adds depth to the flavor. Don’t skip it! Mini chocolate chips bring joy and texture to the dip. You can adjust the milk amount to get the right thickness. A pinch of salt balances the sweetness and brings out all the flavors. - Graham crackers - Pretzels - Apple slices When serving, I love using graham crackers. They pair perfectly with the dip's sweet taste. Pretzels add a nice salty crunch. If you want something fresh, apple slices are a great choice. They add a fruity touch and make the dip feel lighter. Try these options, and you will impress your guests! For the full experience, check out the Full Recipe. - Step 1: Beat butter and sugars Start by taking your softened butter and adding it to a large mixing bowl. Then, add both brown sugar and granulated sugar. Use a mixer to beat them together until the mixture is creamy and smooth. - Step 2: Combine cream cheese and vanilla Next, add the softened cream cheese and vanilla extract to your bowl. Mix well until everything is combined and creamy. This step is key for a rich texture. - Step 3: Incorporate heat-treated flour Now, it’s time to add the heat-treated flour and a pinch of salt. Mix until all the dry ingredients blend in well. This helps create that cookie dough flavor we all love. - Step 4: Stir in chocolate chips Add in the mini chocolate chips. Use a spatula to fold them in gently. This gives you those sweet bursts in each bite. - Step 5: Adjust thickness with milk If the dip feels too thick, add milk a little at a time. Stir after each addition until you reach your desired consistency. It should be creamy but not runny. - Step 6: Taste and sweeten if needed Take a moment to taste your dip. If it needs more sweetness, sprinkle in a bit more sugar and mix well. Your taste buds will thank you! - Step 7: Transfer and refrigerate Once it’s mixed to perfection, transfer your dip to a serving bowl. Cover it and refrigerate for at least 30 minutes. This helps the flavors blend beautifully. - Step 8: Serving suggestions When ready to serve, grab your favorite dippers. Graham crackers, pretzels, and apple slices work great. Enjoy your Chocolate Chip Cookie Dough Dip with friends and family! For the complete recipe, check out the Full Recipe. To adjust the thickness of your dip, start by adding milk. Add one tablespoon of milk at a time. Mix well after each addition. This method helps you find the right thickness. If it becomes too thin, you can add a bit of flour to thicken it back up. For storing leftover dip, place it in an airtight container. Keep it in the fridge for up to five days. If you want to enjoy it later, you can also freeze it. Just remember to thaw it in the fridge before serving again. You can easily add spices or extracts to elevate the flavor. A pinch of cinnamon gives warmth. A splash of almond extract adds a unique twist. Even a bit of sea salt can bring out the sweetness. Experimenting can lead to fun flavor surprises, so don’t hold back! Get creative with your serving dishes! A clear glass bowl lets the layers shine. You can also use fun, colorful plates to catch the eye. For garnishing, consider sprinkling mini chocolate chips on top. A drizzle of chocolate sauce adds flair, too. Fresh fruit slices on the side add color and flavor. These small touches make your dip even more inviting. {{image_2}} You can make your cookie dough dip more fun with mix-ins. Try adding nuts, like walnuts or pecans, for a nice crunch. Dried fruits, such as raisins or cranberries, add a chewy texture. Candy pieces, like M&Ms or crushed Oreos, bring a fun twist. If you want a vegan version, swap the cream cheese for a vegan alternative. Use coconut cream or cashew cream instead. This way, everyone can enjoy the dip, no matter their diet. Want to switch things up? Create a peanut butter chocolate chip dip. Mix in half a cup of creamy peanut butter while you beat the butter and sugars. This adds a rich, nutty flavor. For a cookie dough dip with caramel swirls, drizzle some caramel sauce on top before serving. This adds a sweet, sticky touch that everyone will love. You can craft themed versions of this dip for special occasions. For holidays, mix in festive sprinkles or chocolate shapes. A red, white, and blue theme works well for the Fourth of July. For birthdays, add colorful sprinkles or mini candles on top. You can even serve it in a fun, colorful bowl to match the party theme. The options are endless, and each variation brings a unique flavor to your table. To keep your Chocolate Chip Cookie Dough Dip fresh, store it in an airtight container. This helps prevent the dip from drying out or absorbing other flavors. Place it in the fridge for up to one week. If you plan to serve it later, remember to chill it for at least 30 minutes before serving. This allows the flavors to meld nicely. You can freeze the dip for longer storage. First, scoop it into a freezer-safe container. Make sure to leave some space at the top. The dip will expand as it freezes. When you're ready to enjoy it, thaw it in the fridge overnight. Stir it well before serving to restore its creamy texture. When stored correctly, the Chocolate Chip Cookie Dough Dip stays fresh for about one week in the fridge. If frozen, it can last up to three months. Always check for any changes in smell or texture before eating. Enjoying it while fresh will give you the best taste experience. Yes, you can eat the dip raw. This dip is made to be enjoyed straight away. It uses heat-treated flour, which makes it safe to eat raw. You get all the cookie dough flavor without any baking. Just grab a spoon and dig in! You can store this dip in the fridge for about five days. Make sure to put it in an airtight container. This keeps it fresh and tasty. If you want to save it longer, you can freeze it. Just thaw it in the fridge when you're ready to enjoy it again. If you need a substitute for cream cheese, try using Greek yogurt or mascarpone cheese. Both options add creaminess and flavor. You can also use vegan cream cheese for a dairy-free version. Just make sure it's softened for easy mixing. Yes, you can easily make this dip vegan. Use vegan butter and a plant-based cream cheese. You can also swap the milk for almond or oat milk. This way, everyone can enjoy the tasty flavors without dairy. Some great dippers include: - Graham crackers - Pretzels - Apple slices - Vanilla wafers - Fresh fruit Feel free to get creative! You can use any snack you like to scoop up this delicious dip. This article guides you through making a delicious Chocolate Chip Cookie Dough Dip. We covered essential ingredients, step-by-step instructions, and helpful tips. Remember to adjust the thickness based on your preference and get creative with mix-ins. Don't forget the best dippers like graham crackers and apple slices! This dip is easy to customize and perfect for any gathering. Enjoy experimenting and sharing it with friends or family. You’ll have a tasty treat that everyone will love!

Chocolate Chip Cookie Dough Dip Irresistible Treat

If you love the sweet taste of cookie dough, you’re in for a treat! This Chocolate Chip Cookie Dough Dip

- 2 ripe avocados - 1 cup cherry tomatoes, halved - 1 cup fresh mozzarella balls (bocconcini), halved - 1/4 cup fresh basil leaves, chopped - 2 tablespoons balsamic glaze - 1 tablespoon olive oil - Salt and pepper to taste Choosing ripe avocados: Look for avocados that yield slightly when pressed. This means they are ready to eat. A firm avocado needs more time to ripen. Selecting the best tomatoes: Choose cherry tomatoes that are bright and firm. Their sweetness adds great flavor to the dish. Freshness of mozzarella: Fresh mozzarella should be soft and moist. Look for the ones stored in water or whey for the best taste. For the detailed steps of making this dish, check out the Full Recipe. First, cut each avocado in half. Be careful with the knife. Remove the pit gently. Next, take a spoon and scoop out a little flesh from the center. This gives more room for the filling. You want to keep the shell intact. In a mixing bowl, combine the halved cherry tomatoes, mozzarella balls, and chopped basil leaves. These fresh ingredients make the dish pop. Then, drizzle the mixture with olive oil and balsamic glaze. Season with salt and pepper to taste. Gently toss everything together to blend the flavors. Now it’s time to stuff the avocado halves. Spoon the Caprese mixture generously into each half. Make sure to fill them well. For an extra kick, drizzle a little more balsamic glaze on top. This adds nice flavor and looks beautiful. For the full recipe, check the details above. Enjoy your fresh and flavorful delight! To make your Caprese stuffed avocado shine, presentation matters. Place each avocado half on a colorful plate. Sprinkle extra chopped basil on top for a pop of color. You can also serve it on a bed of mixed greens for a nice look. For drinks, pair it with a crisp white wine like Sauvignon Blanc. If you want something non-alcoholic, try sparkling water with a squeeze of lemon. Serve your Caprese stuffed avocado chilled for the best taste. The coolness helps the flavors pop. If you prepare it ahead, chill it for about 30 minutes. This lets the ingredients blend well. Serve it right after assembling for the freshest flavor. Want to spice things up? Add a pinch of red pepper flakes for heat. You can also mix in some diced olives for a briny twist. If you don't have balsamic glaze, try a splash of lemon juice or apple cider vinegar. Both add a nice zing to your dish. With these tips, your Caprese stuffed avocado will impress everyone! {{image_2}} You can get creative with your Caprese stuffed avocado by swapping ingredients. Try using different cheeses like feta or goat cheese. These cheeses add unique flavors that mix well with the fresh ingredients. You can also explore alternative herbs. Instead of basil, use fresh parsley or cilantro for a new twist. Each swap can create a new taste adventure. If you want a vegan Caprese stuffed avocado, simply omit the cheese. Instead, try using marinated tofu or avocado as a creamy base. This keeps the dish rich in flavor while staying plant-based. For low-carb options, skip the mozzarella and add more vegetables. Zucchini or bell peppers can give you the crunch you need without the carbs. Seasonal vegetables can elevate your Caprese stuffed avocado. In the summer, add diced cucumbers or bell peppers for a refreshing crunch. During fall, roasted butternut squash gives a warm, sweet flavor. For holidays, sprinkle in pomegranate seeds for a festive touch. These additions can make your dish more colorful and flavorful. Check the Full Recipe for more inspiration on how to make this dish shine! To keep your Caprese stuffed avocado fresh, store it in an airtight container. Place any leftover avocado halves in the fridge. They will stay tasty for about one day. The lemon juice helps slow browning. If you skip the lemon, cover the exposed flesh with plastic wrap. This method keeps the air out. Freezing stuffed avocados is tricky. The texture changes when frozen. I do not recommend freezing them. However, you can prepare the filling in advance. Store the Caprese mixture in the fridge for 2-3 days. For on-the-go servings, pack the filling and avocado separately. Assemble them when ready to eat. The ingredients last about one day in the fridge once prepared. The avocados brown quickly. Thus, it's best to eat them soon after making. The cherry tomatoes and mozzarella can stay fresh for a few days. Always check for spoilage before serving. Enjoy this fresh dish quickly for the best taste! Caprese stuffed avocado is a fresh dish that combines flavors from Italy. It features ripe avocados filled with a mix of cherry tomatoes, mozzarella, and basil. The creamy avocado pairs well with the juicy tomatoes and soft cheese. A drizzle of balsamic glaze adds a sweet and tangy touch. This dish looks beautiful and tastes even better. You can enjoy it as a light lunch or a fancy appetizer. Yes, you can prepare Caprese stuffed avocado in advance! Here’s how: - Prep the filling: Mix the tomatoes, mozzarella, and basil ahead of time. - Store separately: Keep the filling and avocado halves in separate containers. This keeps the avocado from browning. - Assemble before serving: Stuff the avocados just before you plan to eat. This keeps them fresh and tasty. Caprese stuffed avocado pairs well with many side dishes. Here are some great options: - A fresh green salad with a light vinaigrette. - Grilled chicken or shrimp for added protein. - Crusty bread to soak up any extra balsamic glaze. - A glass of chilled white wine or sparkling water for a refreshing drink. Yes, Caprese stuffed avocado is quite healthy! Here are some benefits: - Avocados are rich in healthy fats, good for your heart. - Tomatoes provide vitamins and antioxidants, which are great for your skin. - Mozzarella offers protein and calcium for strong bones. - Basil has anti-inflammatory properties and adds flavor without extra calories. This dish is a tasty way to get essential nutrients while enjoying delicious flavors. In this post, we explored how to make Caprese stuffed avocados. We discussed the fresh ingredients, pantry staples, and tips for picking the best produce. I provided clear instructions for preparing and mixing the filling, along with easy assembly steps. You can impress your guests with unique variations and serving suggestions. Remember, proper storage helps keep your dish fresh. Enjoy this healthy treat that's simple to make and full of flavor!

Caprese Stuffed Avocado Fresh and Flavorful Delight

Looking for a fresh and delightful twist on classic flavors? This Caprese Stuffed Avocado recipe packs a punch with ripe

- 1 pound large shrimp, peeled and deveined - 4 tablespoons unsalted butter - 4 cloves garlic, minced - 1 teaspoon red pepper flakes (optional) - Zest and juice of 1 lemon - 1 tablespoon fresh parsley, chopped - Salt and pepper, to taste These ingredients come together for a simple, tasty dish. The main star, shrimp, should be fresh or well-thawed if frozen. The butter adds richness, while garlic gives it a strong flavor. If you like a little heat, the red pepper flakes are perfect. The lemon zest and juice brighten the dish, making it refreshing. Finally, fresh parsley not only adds color but also a burst of flavor. - Large skillet - Spatula - Measuring spoons - Zester or grater You only need a few tools for this recipe. A large skillet helps cook the shrimp evenly. A spatula is great for flipping the shrimp without breaking them. Measuring spoons will help you get the right amounts of butter and spices. A zester or grater is important for adding the lemon zest. With these tools, you will make the cooking process easier and more fun. For the full recipe, check [Full Recipe]. 1. First, take a large skillet and place it on the stove. 2. Melt 2 tablespoons of unsalted butter over medium heat. 3. Watch closely. You want it melted, not browned. 4. Once the butter melts, add 4 cloves of minced garlic. 5. Sauté the garlic for about 1 minute. It should smell great but not burn. 6. If you like heat, sprinkle in 1 teaspoon of red pepper flakes. Mix well. 1. Next, grab 1 pound of large shrimp, peeled and deveined. 2. Add the shrimp to the skillet in a single layer. 3. Season with salt and pepper to taste. Do this before cooking. 4. Cook the shrimp for 2-3 minutes without stirring. Let them sear nicely. 5. After that, flip the shrimp over gently. Cook for another 2 minutes. 6. They should turn pink and opaque, which means they’re done. 1. Now, reduce the heat to low. Add the remaining 2 tablespoons of butter. 2. Zest and juice 1 lemon, then add both to the skillet. 3. Stir until the butter is melted and coats the shrimp evenly. 4. Finally, remove from heat and stir in 1 tablespoon of chopped parsley. 5. Taste your dish and adjust salt and pepper as needed. For the full recipe, check the detailed instructions above. To achieve the perfect sear on shrimp, start with a hot skillet. Heat your skillet over medium-high heat before adding butter. Once the butter melts, it will help create a nice crust on the shrimp. Next, place the shrimp in a single layer. This ensures even cooking. Do not overcrowd the pan. If you have more shrimp, cook them in batches. Do not overcook the shrimp. They cook quickly, usually in 2-3 minutes per side. Look for a bright pink color. If they turn rubbery, you have cooked them too long. You can add extra flavor to your Lemon Garlic Butter Shrimp in many ways. Fresh herbs like basil or cilantro add a unique taste. You might also try adding a pinch of smoked paprika or cayenne pepper for some heat. For sides, consider serving this dish with rice, pasta, or a fresh salad. A glass of white wine pairs well too. The lemony flavors in the shrimp go nicely with a crisp Sauvignon Blanc or a light Pinot Grigio. For the full recipe, check out the details above. Enjoy your cooking! {{image_2}} You can switch up the shrimp for other seafood. Scallops or lobster tails work great too. Each will bring its own flavor to the dish. If you prefer a lighter meal, try using olive oil instead of butter. This change keeps the dish tasty while cutting some calories. Use the same cooking steps, and you'll still enjoy a delicious meal. For those who need gluten-free options, this dish is already safe. Just make sure your shrimp and other ingredients have no gluten. If you want a dairy-free version, swap out the butter for a plant-based alternative. Coconut oil can add a nice hint of flavor. Both changes maintain the dish's essence while catering to different diets. After you enjoy your Lemon Garlic Butter Shrimp, store any leftovers in an airtight container. This keeps the shrimp fresh and prevents them from drying out. Place the container in the fridge as soon as the shrimp cools down. They will stay good for about three days. If you want to keep them longer, consider freezing them. Just make sure to use a freezer-safe container. Frozen shrimp can last for up to three months. When you want to enjoy your leftover shrimp, reheating them well is key. You can use a skillet on low heat for the best results. This method helps keep the shrimp juicy and tasty. Simply add a bit of butter or oil to the pan. Heat until warm, stirring gently. You can also use the microwave, but be careful not to overcook them. Aim for a serving temperature of around 140°F (60°C). This ensures your shrimp tastes fresh and delicious, just like when you first made them. For the full recipe, check out the earlier section! Shrimp cooks quickly. It usually takes about 4 to 6 minutes. The exact time depends on the size of the shrimp. Large shrimp cook for about 2-3 minutes on each side. Cook until they turn pink and opaque. Overcooking makes shrimp tough. So, watch carefully! Yes, you can use frozen shrimp! Just remember to thaw them first. Place the shrimp in a bowl of cold water for about 15-20 minutes. You can also leave them in the fridge overnight. After thawing, pat them dry. This helps the shrimp sear better in the pan. This dish pairs well with many sides. Here are some great options: - Steamed rice for a filling meal - Fresh salad for a light contrast - Garlic bread to soak up the sauce - Roasted vegetables for added color and taste These sides complement the shrimp perfectly and add variety to your plate. Explore these options to create a well-rounded meal! For the full recipe, check out the details above. In this post, we covered how to make Lemon Garlic Butter Shrimp. You learned about key ingredients like shrimp, butter, and garlic. I shared step-by-step cooking instructions and tips for great flavor. You also discovered ways to modify the recipe based on your diet. Remember, cooking shrimp doesn’t have to be hard. Follow these steps, and you’ll impress everyone at the table. Enjoy your delicious meal and have fun experimenting with flavors!

Lemon Garlic Butter Shrimp Quick and Easy Delight

Looking for a quick and easy meal that packs a punch? Look no further than Lemon Garlic Butter Shrimp! This

- 8 oz (225g) rice noodles - 2 tablespoons vegetable oil - 1 cup bell peppers (red and yellow), sliced - 1 cup carrots, julienned - 1 cup snap peas, trimmed - 3 green onions, chopped (reserve some for garnish) - 2 cloves garlic, minced - 3 tablespoons gochujang (Korean chili paste) - 2 tablespoons soy sauce - 1 tablespoon sesame oil - 1 teaspoon honey - 1 teaspoon rice vinegar - Sesame seeds for garnish Rice noodles provide a gluten-free option rich in carbs for energy. They cook fast and soak up flavors well. Vegetable oil is a great source of healthy fats. It helps cook the veggies without burning. Bell peppers are full of vitamins A and C. They boost your immune system and add color. Carrots are excellent for your eyes. They have beta-carotene, which your body turns into vitamin A. Snap peas add fiber and protein. They help you feel full and support digestion. Green onions have antioxidants and can improve heart health. They add a mild onion flavor. Garlic has many health benefits. It can help lower blood pressure and boost immunity. Gochujang is spicy and sweet. It contains probiotics, which help gut health. Soy sauce adds umami flavor. It contains amino acids that can aid in muscle repair. Sesame oil is rich in antioxidants. It adds a nutty flavor to the dish. Honey is a natural sweetener. It has antioxidants and can soothe coughs. Rice vinegar helps balance flavors. It may help with digestion and weight loss. Sesame seeds are tiny powerhouses. They contain healthy fats, protein, and minerals. You can find gochujang at most Asian grocery stores. Check the international aisle in big supermarkets too. Rice noodles are often found near the pasta or in the Asian section. Look for brands that make rice noodles. Fresh veggies like bell peppers, carrots, and snap peas are best at local markets or grocery stores. Green onions can be found in the produce section, usually near the herbs. Garlic is widely available. Buy fresh cloves or pre-minced for ease. For soy sauce and sesame oil, look in the Asian foods aisle or specialty shops. Honey and rice vinegar are common in most grocery stores. Check the baking or condiment sections. Lastly, sesame seeds are easy to find. Look for them in the baking aisle or near spices. For a detailed recipe, check the Full Recipe. Start by boiling water in a large pot. Once boiling, add 8 oz of rice noodles. Cook the noodles according to the package instructions. You want them to be al dente, which means they should still have a bite. After cooking, drain the noodles and rinse them under cold water. This stops the cooking process. Set the noodles aside for later. In a large skillet or wok, heat 2 tablespoons of vegetable oil over medium-high heat. Add 1 cup of sliced bell peppers, 1 cup of julienned carrots, and 1 cup of trimmed snap peas. Stir-fry the vegetables for about 4 to 5 minutes. You want them to begin softening but still be crisp. This adds great texture to your dish. Next, add 2 cloves of minced garlic and 3 chopped green onions. Stir-fry for an extra minute until you can smell the garlic. In a small bowl, mix together 3 tablespoons of gochujang, 2 tablespoons of soy sauce, 1 tablespoon of sesame oil, 1 teaspoon of honey, and 1 teaspoon of rice vinegar. Whisk until smooth. This sauce adds a sweet and spicy kick to your noodles. Now it's time to bring it all together. Add the cooked noodles to the skillet with the vegetables. Pour the gochujang sauce over the noodles. Toss everything together until the noodles are well coated. Heat everything for about 2 to 3 minutes. This step makes sure that the flavors blend well. Transfer the gochujang noodles to serving bowls. Garnish with reserved green onions and a sprinkle of sesame seeds. Enjoy your delicious dish! For the full recipe, check the previous sections! To get the best noodle texture, follow these steps: - Choose rice noodles: They have a great chew and soak up flavors well. - Cook to al dente: Boil them just until they are firm but not hard. - Rinse with cold water: This stops the cooking and prevents stickiness. This technique keeps the noodles from clumping together later. For richer flavor in your gochujang noodles, try these tips: - Use high heat: Stir-frying over high heat helps lock in flavors. - Add aromatics early: Sauté garlic and green onions first to release their oils. - Toss quickly: Stir-fry quickly to keep the veggies crisp and vibrant. These methods will give your dish depth and a tasty kick. Garnishing makes your dish look great and adds flavor: - Chopped green onions: Sprinkle these on top for a fresh, oniony taste. - Sesame seeds: Add these for a nutty crunch. - Chili flakes: If you want more heat, sprinkle some chili flakes on top. Serve your gochujang noodles in a bowl and enjoy with chopsticks for an authentic experience. For the full recipe, refer to the recipe section above. {{image_2}} You can easily make this dish vegetarian or vegan. Simply skip the honey or use a plant-based sweetener. For extra flavor, add tofu or tempeh. You can sauté them until golden and crispy, then toss them in. If you want more protein, chicken, beef, or shrimp work great. Just cook the protein first. Remove it from the skillet and set it aside. Then stir-fry the veggies as usual. Add the protein back in when you mix everything together. If you need gluten-free noodles, use rice noodles, which are perfect here. You can also find gluten-free soy sauce. Just check the label to be sure. Enjoy the Full Recipe for all the tasty details! After you enjoy your Korean gochujang noodles, store any leftovers in an airtight container. This keeps out air and moisture. Place the container in the fridge. The noodles will stay good for up to three days. When you are ready to eat your leftovers, you can reheat them easily. Use a microwave-safe bowl. Add a splash of water to keep them moist. Heat in the microwave for about two minutes. Stir halfway through to warm evenly. You can also reheat them in a skillet. Just add a little oil over medium heat. Stir for about five minutes until hot. You can freeze gochujang noodles for later. First, let the noodles cool completely. Then, place them in a freezer-safe bag. Squeeze out as much air as you can before sealing. Label the bag with the date. They will stay fresh for up to three months. To enjoy, thaw them in the fridge overnight. Reheat as mentioned before. For the full recipe, check out the instructions above! Gochujang is a Korean chili paste. It has a thick texture and a deep red color. This paste combines heat and sweetness. It often contains fermented soybeans, salt, and sugar. You can use gochujang in many dishes. It adds flavor to soups, stews, and marinades. I also love it in Korean Gochujang Noodles. The heat from gochujang makes the dish exciting and tasty. Yes, you can use other sauces if needed. Sriracha can work for some heat. However, it lacks the unique sweetness. You might mix sriracha with miso paste for a better match. Another option is chili garlic sauce, but it will change the flavor. If you want a sweet taste, add sugar or honey. Remember, these substitutes change the dish's final taste. Some brands stand out in the market. I recommend Chung Jung One and Sunchang. These brands have good flavor and quality. You can find them in Asian grocery stores or online. They offer different heat levels too, so choose what you like. Always check the label for the best choice. To lower the spice, use less gochujang. Start with one tablespoon. Taste the dish, then add more if you want it spicier. You can also mix in a bit of sugar or honey. This addition balances the heat. For extra spice, add more gochujang or a dash of chili flakes. Adjust to your taste for a perfect meal. Korean Gochujang noodles are simple, tasty, and good for you. We explored the key ingredients, their health benefits, and where to find them. You learned how to cook the noodles, stir-fry the veggies, and make the flavorful sauce. Don't forget the tips for perfect texture and great garnishes. You can also try veggie options, add protein, or go gluten-free. Store leftovers well and follow the reheating tips. Enjoy making this dish your own!

Korean Gochujang Noodles Simple and Tasty Recipe

Are you ready to spice up your dinner routine? In this post, I’ll share a simple and tasty recipe for

To make this creamy dish, you need: - 8 oz fettuccine pasta - 1 lb Italian sausage (mild or spicy, your choice) - 2 tablespoons olive oil - 3 cloves garlic, minced - 1 cup heavy cream - 1 cup freshly grated Parmesan cheese - 1 teaspoon Italian seasoning - Salt and pepper to taste - Fresh parsley, chopped (for garnish) - Crushed red pepper flakes (optional, for a spicy kick) If you're missing an ingredient, here are some swaps: - Use penne or rotini pasta instead of fettuccine. - Ground turkey or chicken can replace the Italian sausage. - For a lighter sauce, try half-and-half instead of heavy cream. - Nutritional yeast can stand in for Parmesan cheese for a vegan option. - Use vegetable broth instead of olive oil for a lighter flavor. This dish can fit various diets with some changes: - To make it gluten-free, use gluten-free pasta. - For a vegan option, use plant-based sausage, coconut cream, and nutritional yeast. - Check labels to ensure your ingredients are dairy-free if needed. - This recipe can easily adjust to be lower in fat by using low-fat cream or less cheese. For those interested in the Full Recipe, check the section above. Start by filling a large pot with water. Add a good amount of salt, about one tablespoon. Bring the water to a rolling boil. Add the fettuccine pasta. Cook it according to the package directions until it is al dente. This means it should be firm but not hard. Stir the pasta occasionally to keep it from sticking. Once done, drain the pasta in a colander. Remember to save one cup of the pasta water for later. This water can help loosen your sauce. Use a large skillet for this step. Heat two tablespoons of olive oil over medium heat. Take the Italian sausage out of its casing. Crumble it into the hot skillet. Spread it evenly in the pan so it cooks well. Let it brown for about 5 to 7 minutes. You want it to be cooked through and have a nice golden color. Stir it occasionally to ensure it cooks evenly. This adds great flavor to your dish. After the sausage is cooked, add minced garlic to the skillet. Sauté it for about one minute. Then, lower the heat to medium-low. Pour in one cup of heavy cream slowly while stirring. Add half of the freshly grated Parmesan cheese and one teaspoon of Italian seasoning. Mix until the cheese melts and the sauce is creamy. If the sauce gets too thick, add a little of the reserved pasta water. This will help make it smooth and perfect for coating the pasta. Combine the cooked fettuccine with the sauce. Toss it well so every piece of pasta gets coated. Add salt and pepper to taste. If you love spice, sprinkle in some crushed red pepper flakes for a kick. For the complete recipe, check out the Full Recipe. When making sausage Alfredo pasta, avoid overcooking the fettuccine. This pasta should be al dente, firm but not hard. If you overcook it, the pasta can become mushy. Also, watch the sausage closely. It cooks fast. If it gets too brown, it may taste bitter. Finally, don’t rush the sauce. Stir slowly to blend everything well. To boost the flavor of your dish, try adding a touch of nutmeg to the sauce. This spice adds warmth and depth. You can also mix in sautéed spinach or sun-dried tomatoes for extra taste and color. For a kick, sprinkle in some crushed red pepper flakes. Fresh herbs like basil or thyme can also brighten the dish. Serve your sausage Alfredo pasta in shallow bowls. This way, everyone can enjoy the creamy sauce. Top each bowl with fresh parsley and a generous sprinkle of Parmesan cheese. It looks great and adds flavor. Pair the dish with garlic bread or a crisp salad for a full meal. Enjoy it right away for the best taste! {{image_2}} You can swap Italian sausage for vegetarian or vegan options. Look for plant-based sausage made from soy or lentils. They taste great and add similar flavors to the dish. If you want more texture, try using mushrooms. They can give a meaty feel without the meat. While fettuccine is classic, other pasta shapes work well too. You can use penne, rigatoni, or even spaghetti. Each shape holds the sauce differently, giving you new experiences with each bite. Choose whichever pasta you like best or have on hand. Add vegetables to boost nutrition and flavor. Spinach, broccoli, or bell peppers cook well in the sauce. Simply sauté them with the sausage for a tasty mix. You can also add frozen peas for a pop of color. These extras make your meal healthier and more colorful. To keep your leftover Sausage Alfredo Pasta fresh, place it in an airtight container. Make sure to let the pasta cool to room temperature before sealing it. This helps prevent moisture buildup, which can make it soggy. Store the container in the fridge for up to three days. When you are ready to enjoy your leftovers, use a skillet for reheating. Add a splash of milk or cream to help restore the creamy texture. Heat it on low, stirring often. This way, the sauce stays smooth and creamy. You can also microwave it, but be careful not to overheat. If you want to save your Sausage Alfredo Pasta for later, you can freeze it. Place the cooled pasta in a freezer-safe bag or container. Try to remove as much air as possible before sealing. It will stay good for up to three months. To thaw, place it in the fridge overnight or use the microwave on a low setting. After thawing, reheat as mentioned above for the best results. For the full recipe, check out the detailed instructions provided earlier! Yes, you can use different types of sausage! I love using Italian sausage, but you could try chicken, turkey, or even plant-based sausage. Each type brings its own taste. Just remember to adjust the cooking time if needed. For a milder flavor, choose sweet Italian. For a kick, go with spicy sausage. The choice is yours! To keep your Alfredo sauce smooth, don't let it boil. Cook it on low heat. Adding the cream slowly helps too. Stir constantly as you add cheese. If it gets too thick, mix in a bit of pasta water. This keeps the sauce creamy and delicious. To make your Sausage Alfredo Pasta gluten-free, swap regular pasta for gluten-free pasta. Many brands offer great options that taste amazing. Just follow the cooking times on the package. Enjoy the same creamy delight without the gluten! For the full recipe, click [here](#)
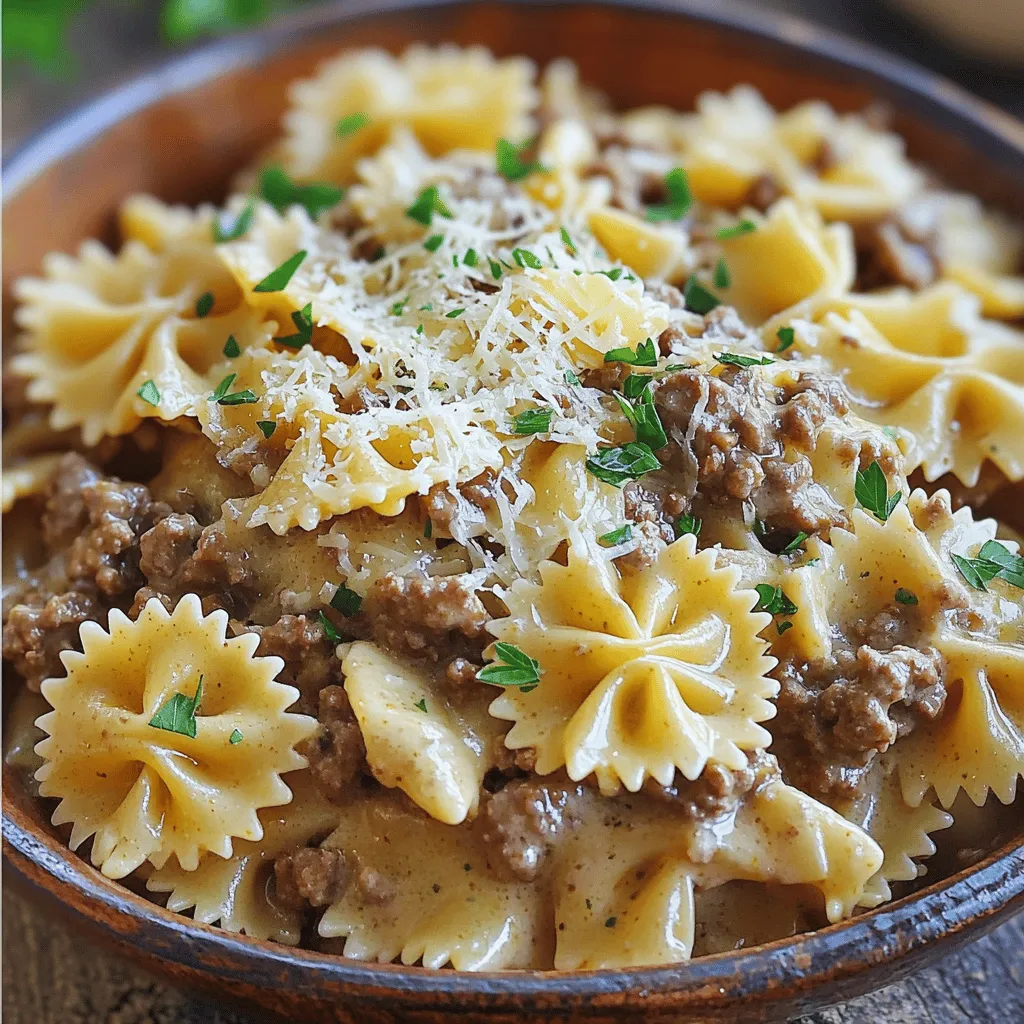
. You’ll find all the details you need to create this tasty dish! In this blog post, we covered all you need to make Sausage Alfredo Pasta. We explored ingredients, cooking steps, and the best tips to avoid mistakes. I shared ways to adjust the recipe for different diets and preferences. Remember, you can mix in your favorite veggies or try different pasta shapes. Storage tips help keep leftovers tasty. Enjoy your cooking and create a meal that suits your taste!

Sausage Alfredo Pasta Creamy Delight in Minutes

Craving a quick and creamy meal that hits the spot? This Sausage Alfredo Pasta is your solution! In just minutes,

To make a delicious Creamy Beef Bowtie Pasta, gather these ingredients: - 12 oz bowtie pasta - 1 lb ground beef - 1 onion, finely chopped - 2 cloves garlic, minced - 1 cup heavy cream - 1 cup beef broth - 1 cup grated Parmesan cheese - 1 teaspoon Italian seasoning - 1 teaspoon salt - 1/2 teaspoon black pepper - 1 tablespoon olive oil - Fresh parsley, chopped (for garnish) Each ingredient plays a key role in taste and texture. Use precise measurements for best results. Here are some tips: - For the pasta, 12 ounces makes enough for four servings. - Ground beef adds richness; use 1 pound for a hearty dish. - One onion and two cloves of garlic create a strong flavor base. - Heavy cream and beef broth blend well for a creamy sauce. - Use 1 cup of grated Parmesan cheese to finish with a cheesy touch. - Seasonings like Italian seasoning, salt, and black pepper enhance the dish. You can customize this recipe with simple swaps if needed: - Swap bowtie pasta for any pasta shape you like, such as penne or fusilli. - Ground turkey or chicken works well instead of beef for a lighter option. - If you’re dairy-free, try coconut cream or cashew cream instead of heavy cream. - Use vegetable broth instead of beef broth for a vegetarian approach. - Fresh herbs like basil or oregano can replace Italian seasoning for a fresh taste. Feel free to explore variations while keeping the core flavors intact. For the full recipe, check out the recipe section. To start, bring a large pot of salted water to a boil. Add the bowtie pasta and cook it according to the package instructions. You want it to be al dente, which means it should be firm but cooked. This usually takes about 10-12 minutes. Once done, drain the pasta and set it aside. Make sure to not rinse it so it keeps some starch. Next, heat a large skillet over medium heat and add one tablespoon of olive oil. Once the oil is hot, toss in the finely chopped onion and minced garlic. Sauté them for 2-3 minutes until the onion turns soft and clear. This step adds a lot of flavor. Now, raise the heat to medium-high and add the ground beef. Cook it for about 5-7 minutes. Use a spatula to break it up until it’s nicely browned. If there’s extra fat, you can drain it off. Now it’s time to make the sauce. Lower the heat to medium. Pour in one cup of beef broth and one cup of heavy cream. Add one teaspoon of Italian seasoning, one teaspoon of salt, and half a teaspoon of black pepper. Stir this well and let it simmer for about 5 minutes. This will help it thicken and combine all the flavors. Once the sauce is ready, gently add the cooked bowtie pasta into the skillet. Toss everything together to coat the pasta in that creamy goodness. Then, sprinkle in one cup of grated Parmesan cheese and stir until it melts and becomes part of the sauce. This makes the dish rich and tasty. Finally, remove the skillet from heat. Sprinkle some freshly chopped parsley on top for a pop of color and flavor. Serve the creamy beef bowtie pasta warm in shallow bowls. If you want, add more Parmesan and a sprig of parsley for a nice touch. Enjoy your meal! To make perfect bowtie pasta, always use a large pot. Fill it with plenty of salted water. The salt helps give flavor. Bring the water to a rapid boil before adding the pasta. Stir it well to avoid sticking. Cook until it's al dente, which means firm but tender. This usually takes about 10-12 minutes for bowtie pasta. Drain it well, but save a bit of pasta water. You can use this to adjust your sauce later. To boost the taste of your creamy beef bowtie pasta, consider using fresh herbs. Fresh basil or thyme can add brightness. A splash of lemon juice at the end can also lift the dish. If you want some heat, add red pepper flakes while cooking the beef. A sprinkle of extra Parmesan cheese will bring richness too. Don't forget to let your sauce simmer to develop its flavors. Many cooks forget to season the pasta water. This can lead to bland pasta. Also, don’t overcook the pasta, as it will become mushy. Another mistake is adding cheese too early. Wait until the sauce is off the heat to stir in the cheese for a smooth finish. Lastly, be careful with the heat. Cooking too fast can burn the garlic and beef. Follow these tips to avoid common pitfalls and enjoy a tasty meal. For more details on making this dish, check out the Full Recipe. {{image_2}} You can switch out ground beef for other meats. Try ground turkey or chicken for a lighter meal. If you love pork, use ground pork instead. Each option brings a new taste to the dish. For a richer flavor, consider using Italian sausage. Just remember to adjust the seasoning for each meat type. To make this dish vegetarian, skip the meat and try mushrooms instead. You can use 1 pound of chopped mushrooms for great texture. Add extra veggies, like spinach or bell peppers, for a colorful touch. Use vegetable broth in place of beef broth. This will keep the creamy sauce rich but plant-based. Want to kick up the flavor? Add a pinch of red pepper flakes for some heat. A splash of white wine can add depth to the sauce. Fresh herbs, like basil or thyme, can brighten the dish. For a cheesy twist, mix in some ricotta cheese before serving. Try adding sun-dried tomatoes for a burst of flavor. For full details on how to prepare this dish, check the Full Recipe. After you make your creamy beef bowtie pasta, let it cool down. Store any leftovers in an airtight container. Place the container in the fridge. The pasta should last for 3 to 4 days. When you're ready to eat, just check for any off smells or changes in texture. If you want to keep it longer, freezing is a great option. First, let the pasta cool completely. Then, transfer the pasta to a freezer-safe container. You can also use freezer bags. Press out as much air as you can before sealing. It will last for about 2 to 3 months in the freezer. Make sure to label the containers with the date! To reheat, you can use either the microwave or the stovetop. If using the microwave, place the pasta in a bowl. Add a splash of water or broth to keep it moist. Heat in short intervals, stirring in between. If using the stovetop, warm in a skillet over low heat. Stir often to prevent sticking. If the sauce looks too thick, add a bit of cream or broth. Enjoy your meal just like fresh! For the complete recipe, check out the Full Recipe. To add some heat to your creamy beef bowtie pasta, try these ideas: - Add red pepper flakes when cooking the beef. - Stir in diced jalapeños for a fresh kick. - Use spicy Italian sausage instead of ground beef. - Add hot sauce to the creamy sauce for more warmth. These changes will make the dish more exciting without losing its creamy goodness. Yes, you can use gluten-free pasta! Many brands offer gluten-free bowtie pasta. Just cook it according to the package directions. Keep an eye on the cooking time, as it may differ from regular pasta. This way, everyone can enjoy creamy beef bowtie pasta without gluten. You can serve this dish with many tasty sides. Here are some great options: - A fresh green salad with a light vinaigrette. - Garlic bread for a crunchy contrast. - Steamed veggies like broccoli or green beans. - A simple fruit salad for a sweet touch. These sides pair well and complete your meal. For the full recipe, check out the earlier section! This post covered all you need for Creamy Beef Bowtie Pasta. We shared the complete list of ingredients, measurement details, and substitutions. You learned step-by-step how to cook pasta, brown beef, and create the creamy sauce. We also provided tips for best practices and avoiding common mistakes. You can explore variations, including meat options and vegetarian adaptations. Finally, we discussed storage tips for refrigerating and freezing. Use these insights to create a delicious dish every time. Enjoy cooking!

Creamy Beef Bowtie Pasta Quick and Tasty Meal

Looking for a meal that’s both quick and tasty? You’ve come to the right place! My Creamy Beef Bowtie Pasta

For this Peach Cobbler Cheesecake Salad, you need: - 2 ripe peaches, diced - 1 cup cream cheese, softened - 1/2 cup powdered sugar - 1 teaspoon vanilla extract - 1 cup whipped topping (or whipped cream) - 1 cup granola - 1 teaspoon cinnamon - 1/2 teaspoon nutmeg - Fresh mint leaves for garnish (optional) These ingredients come together to create a delightful mix of flavors and textures. The ripe peaches bring sweetness, while the cream cheese adds creaminess. The whipped topping gives it a fluffy feel, and granola adds a nice crunch. When measuring, it's important to be precise: - Use 2 cups for the diced peaches. - Measure 1 cup for cream cheese and whipped topping. - Use 1/2 cup for powdered sugar. - One teaspoon is great for vanilla and cinnamon. - Use 1/2 teaspoon for nutmeg. These measurements help ensure that every bite is balanced and delicious. You can add some fun extras to your salad: - Fresh mint leaves for a cool touch. - Extra toppings like honey, chocolate shavings, or even nuts. These add-ins can enhance your salad, making it more colorful and flavorful. You can find the full recipe to guide you through the process of mixing these ingredients into a beautiful dish. - Mixing Cream Cheese and Sugar Start by taking a medium bowl. Add 1 cup of softened cream cheese. Then, mix in 1/2 cup of powdered sugar. Use a hand mixer or a whisk. Blend until it becomes smooth and creamy. - Folding in the Whipped Topping Now, take 1 cup of whipped topping and gently fold it into the cream cheese mix. Use a spatula for this. Be careful not to deflate the mixture. You want it light and fluffy. This makes your cheesecake base rich and delightful. - Dicing Peaches and Adding Spices Grab 2 ripe peaches and dice them into small pieces. In another bowl, mix the peaches with 1 teaspoon of cinnamon and 1/2 teaspoon of nutmeg. This will add a warm, sweet flavor that pairs perfectly with the peaches. - Mixing for Flavor Enhancement Stir the diced peaches to coat them well with spices. This step brings out the best flavor in the peaches. It is important for the overall taste of the salad. - Constructing Layers in a Salad Bowl Take a large salad bowl to start layering. Begin with a layer of the peach mixture. Follow this with a layer of the cheesecake mixture. Repeat these layers until you use all the ingredients. Make sure to end with the cheesecake layer on top. - Finishing Touches To finish, sprinkle 1 cup of granola on top. This adds a nice crunch. If you like, add fresh mint leaves for garnish. They bring color and a fresh taste. For more flavor, drizzle a little honey on top before serving. For the full recipe, refer to the main section. Enjoy every bite of this Peach Cobbler Cheesecake Salad! To get the best texture in your Peach Cobbler Cheesecake Salad, softening the cream cheese is key. - How do I soften cream cheese properly? Place the cream cheese on the counter for about 30 minutes. You can also microwave it for 10-15 seconds. Check it often to avoid melting. A smooth cream cheese helps mix better, giving you a creamy base. - What are tips for folding whipped topping? Always use a large bowl and a spatula. Gently add the whipped topping to the cream cheese mix. Use a folding motion, not stirring. This keeps air in the mix and makes it light. The right spices can bring your salad to life. - What are the best spices to use? Cinnamon and nutmeg work wonders with peaches. They add warmth and depth. Just a teaspoon of cinnamon and half a teaspoon of nutmeg will elevate the flavor. - How do I adjust sweetness levels? If you want a sweeter salad, add more powdered sugar. Start with a tablespoon at a time. Taste as you go. You can also drizzle honey on top for extra sweetness. The way you serve this salad can make it shine. - How do I serve in individual bowls? Use clear glass bowls to show off the layers. This makes it pretty and fun to eat. Fill each bowl with layers of peaches and cheesecake mix. - What garnishing ideas make it look beautiful? Fresh mint leaves add a pop of green. You can also add extra peach slices on top. A drizzle of honey gives a nice shine and extra sweetness. For the best look, keep it colorful and fresh. These tips will help you create a Peach Cobbler Cheesecake Salad that's not only tasty but also beautiful. For the full recipe, check the details above. {{image_2}} You can switch up the peaches with other seasonal fruits. Try using ripe berries, apples, or even mangoes. Each fruit brings its unique taste and texture. Mixing different fruits can create exciting flavor combinations. For example, pair peaches with blueberries for a sweet-tart balance. You can also layer in strawberries for a vibrant color. If you need to make the salad gluten-free, swap out granola for gluten-free oats or nuts. This keeps the crunch without the gluten. For vegan substitutes, use dairy-free cream cheese and whipped topping. Sweeteners like agave or maple syrup can replace powdered sugar. These swaps ensure everyone can enjoy this treat. Pair this peach cobbler cheesecake salad with other desserts. It goes well with vanilla ice cream or a slice of pound cake. You can also create a dessert table with this salad as the star. Add brownies, cookies, and fresh fruit to round out the display. This way, guests can enjoy a variety of flavors and textures. To keep your peach cobbler cheesecake salad fresh, store it in the fridge. Make sure to cover it tightly with plastic wrap or use an airtight container. This will help keep the flavors intact and prevent drying out. - Refrigeration Guidelines: Store leftovers within two hours of serving. - Best Containers for Storage: Use glass containers with lids or plastic food storage containers. How long does it last in the fridge? The peach cobbler cheesecake salad can stay fresh for about three days. After that, the peaches may become mushy, affecting the texture. - How Long it Lasts in the Fridge: Aim to eat it within three days for the best taste. - Signs of Spoilage: Look for a sour smell, discoloration, or a watery texture. If you see any of these, it's best to discard it. When you want to serve leftovers again, you can refresh them easily. Just give it a gentle stir to mix the layers again. This can help bring back some of the original texture and flavor. - Rejuvenating Leftovers for Serving: If it seems dry, add a splash of cream or milk to help. - Best Practices for Serving: Serve it chilled. You might also add more granola on top for an extra crunch. For the full recipe, check out the Peach Cobbler Cheesecake Salad recipe. Can I use frozen peaches? Yes, you can use frozen peaches! Just make sure to thaw them first. Drain any extra juice before mixing. This helps keep your salad from getting too watery. Fresh peaches bring a nice crunch, but frozen ones work well too. How long does it take to make? This Peach Cobbler Cheesecake Salad is quick! You’ll need only about 15 minutes. It’s perfect for a last-minute dessert. Just mix, layer, and serve. What if my cream cheese is lumpy? If your cream cheese is lumpy, it may be too cold. Make sure to soften it well first. Use a hand mixer for a smooth blend. If lumps remain, keep mixing until creamy. How can I make it sweeter? To make your salad sweeter, add more powdered sugar. Start with a tablespoon and taste. You can also drizzle honey on top for extra sweetness without changing the texture. Caloric Breakdown This salad has a good balance of flavors and calories. Each serving has about 250 calories. The cream cheese and whipped topping give it a rich taste. Health Benefits of Ingredients Peaches are full of vitamins and fiber. They help boost your immune system. Cream cheese adds protein, while granola provides healthy carbs. This dessert can be both tasty and nourishing. Enjoy it guilt-free! For the full recipe, check the details above. In this post, I shared how to make a delicious Peach Cobbler Cheesecake Salad. We covered the key ingredients, including ripe peaches and cream cheese. You learned the steps for preparing the mixture and layering the salad. I also provided tips for consistency, flavor suggestions, and presentation ideas. As you create your own version, remember to have fun with variations and toppings. Enjoy this tasty treat, and share it with friends and family!

Peach Cobbler Cheesecake Salad Delight in Every Bite

If you love peachy desserts, you’re in for a treat! In this blog, I’ll show you how to make a

Older posts
Newer posts
← Previous Page1 … Page91 Page92 Page93 … Page105 Next →
© 2025 My Cooking Cast • Built with GeneratePress

Our Policies

  • Privacy Policy
  • GDPR Policy
  • Terms Of Use
  • Copyright Policy
  • Cookie Policy
  • Disclaimer

More Information​

  • Home
  • Contact
  • About
  • Dinner
  • Appetizers
  • Dessert
©2025, My Cooking Cast About Privacy Policy Back To Top