No-Bake Maple Pecan Fudge Bars Easy and Delicious Treat
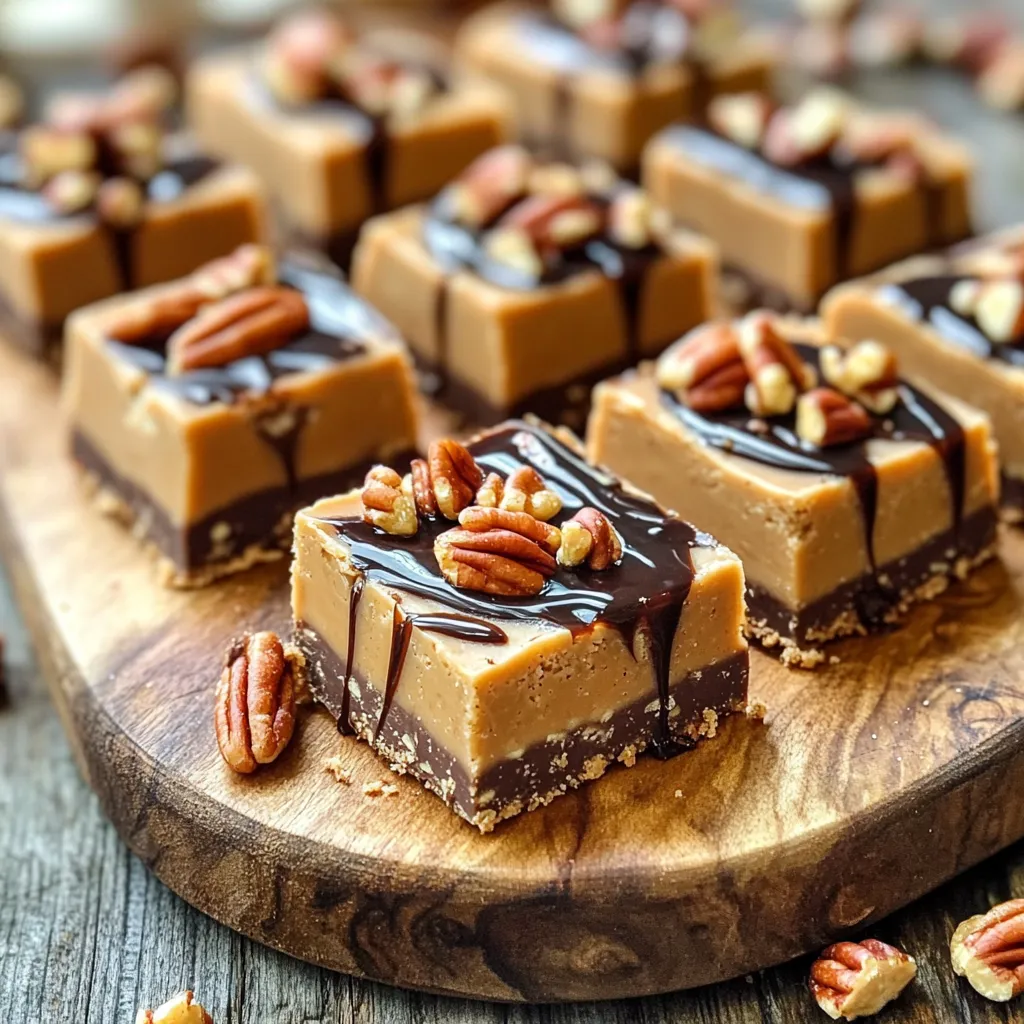
Craving a sweet treat that’s both easy and delicious? My No-Bake Maple Pecan Fudge Bars are the answer! Packed with
Craving a sweet treat that’s both easy and delicious? My No-Bake Maple Pecan Fudge Bars are the answer! Packed with
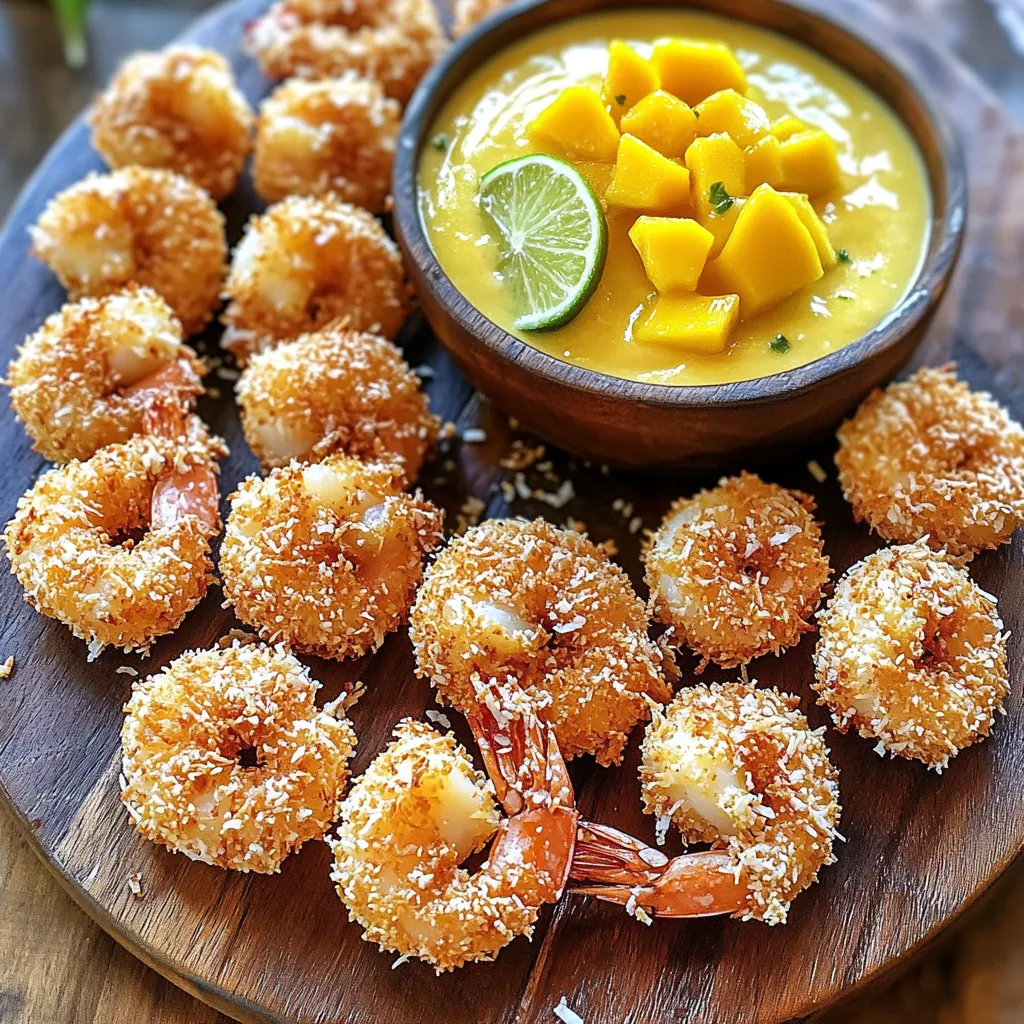
Craving a tasty snack? You’ll love my Air Fryer Crispy Coconut Shrimp with Mango Dip! This dish is not just

Craving something sweet and savory? My Slow Cooker Honey Teriyaki Meatballs are here to save your dinner. With juicy meatballs
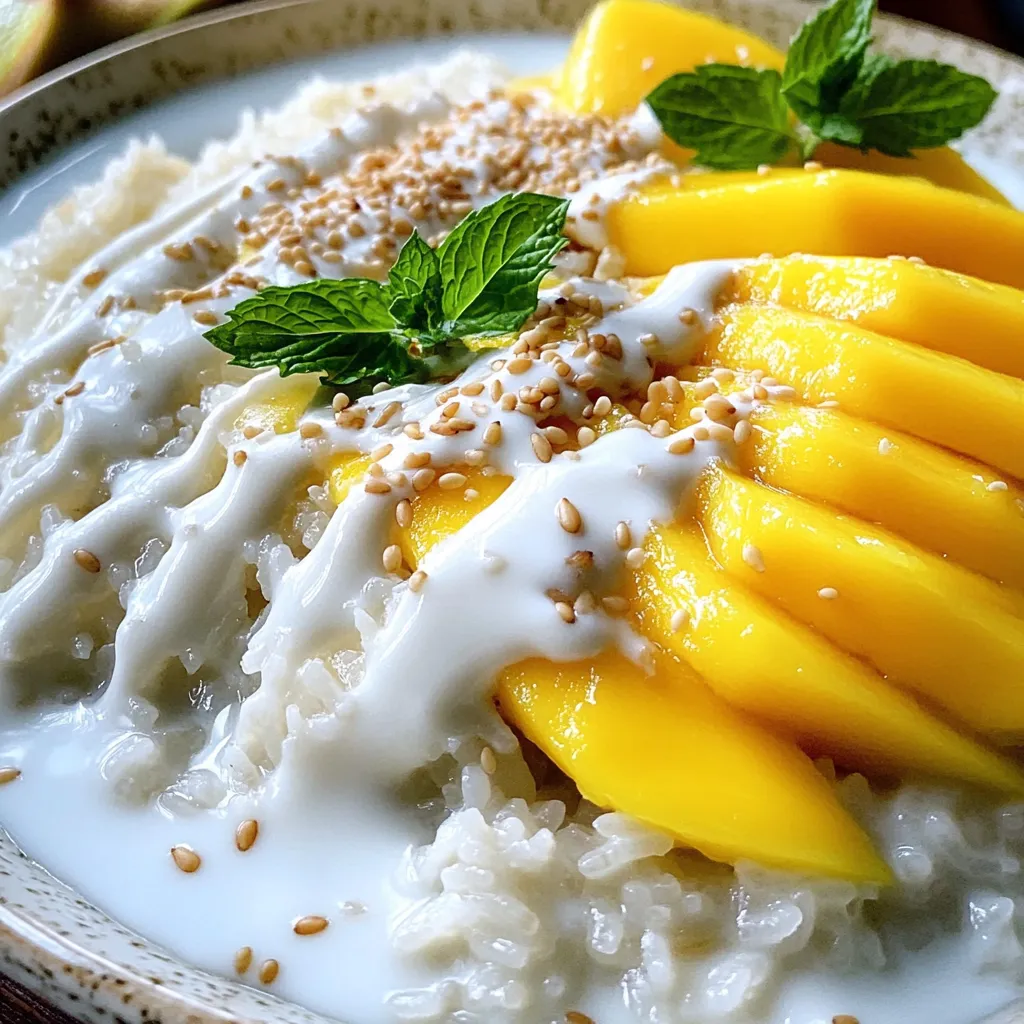
If you crave a sweet, creamy treat, Thai Mango Sticky Rice is for you! This delightful dessert combines glutinous rice,

Craving something sweet and delightful? Chocolate dipped coconut macaroons are here to satisfy! These treats combine the rich flavor of
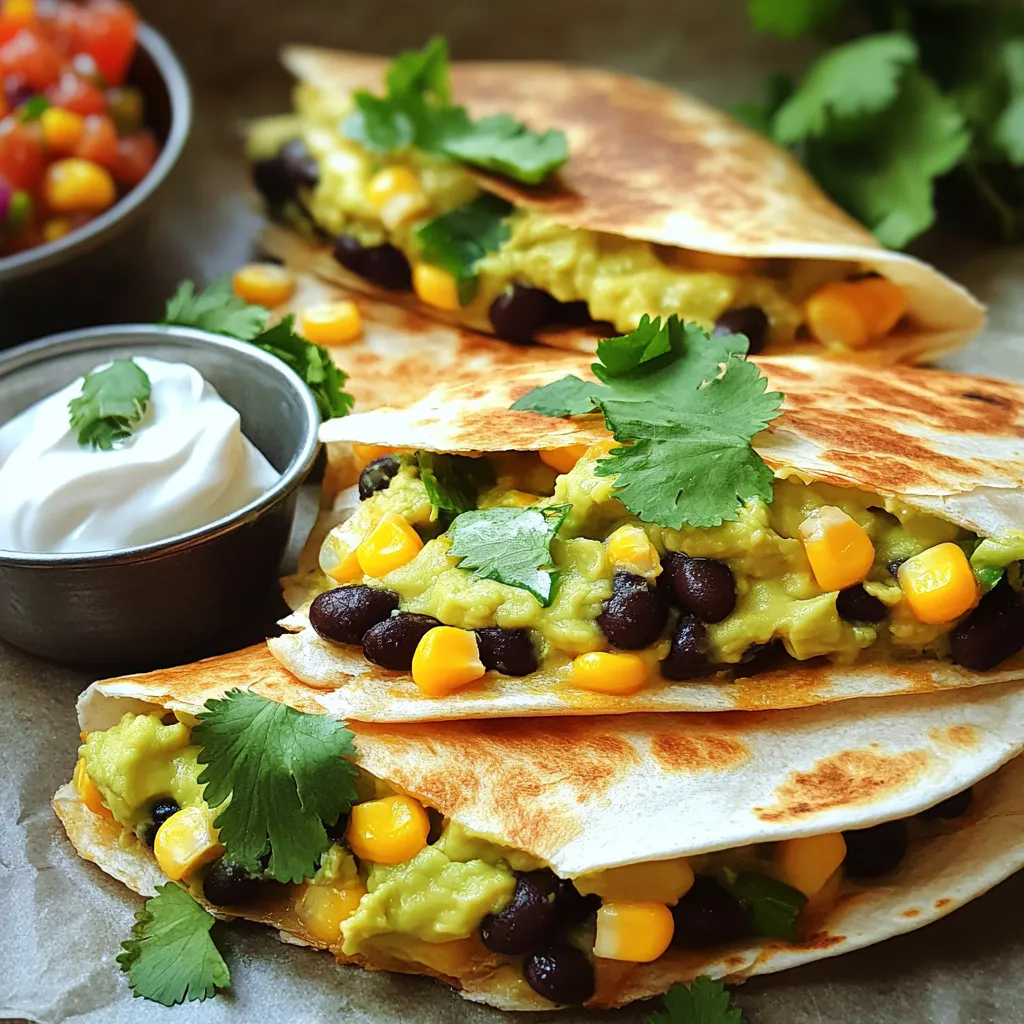
If you’re looking for a quick and tasty meal, you’re in for a treat! Avocado black bean quesadillas are simple

Are you ready to whip up a tasty treat that fuels your day? These Blueberry Lemon Energy Bites offer a

Looking for a quick and tasty dinner? You’ll love my Sheet Pan Garlic Parmesan Chicken Veggies Delight! This dish combines
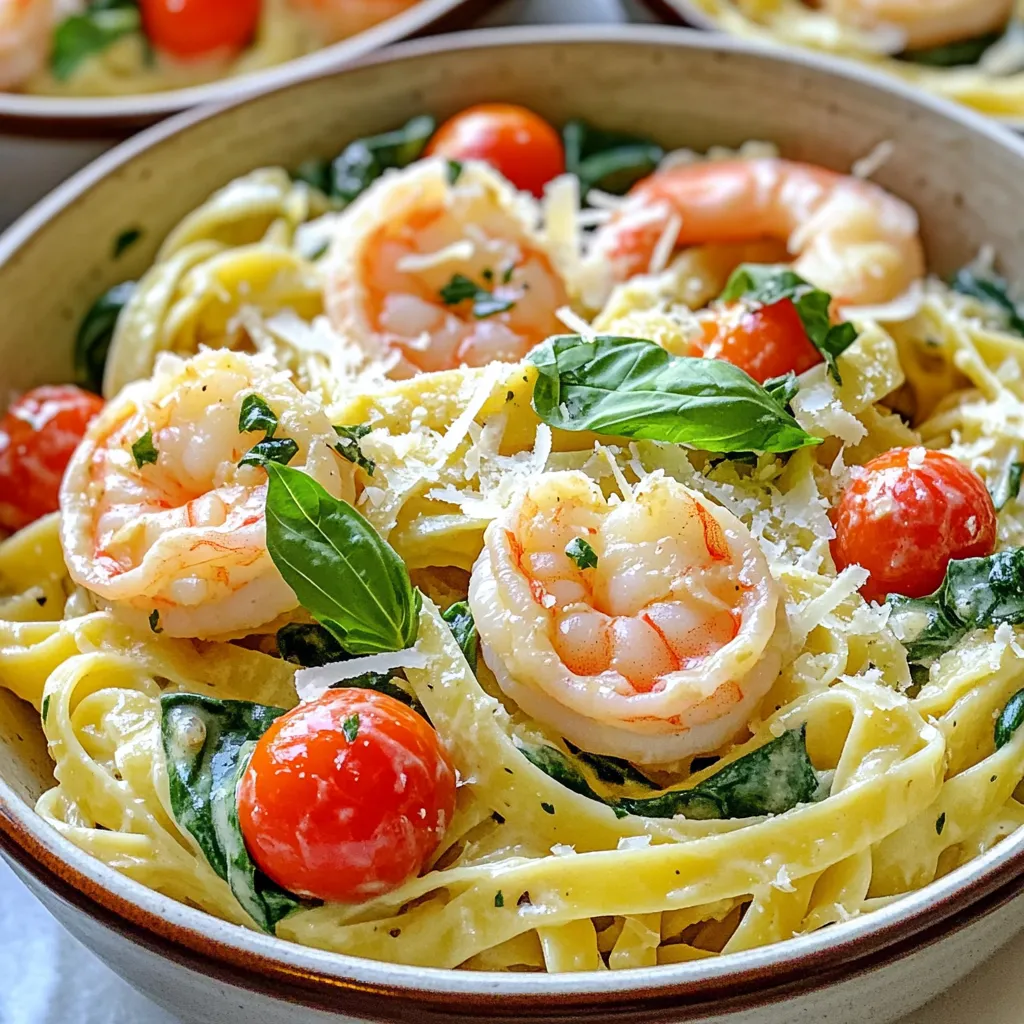
Craving a rich, creamy pasta dish? This Creamy Tuscan Shrimp Pasta is the answer! It’s easy to make and packed
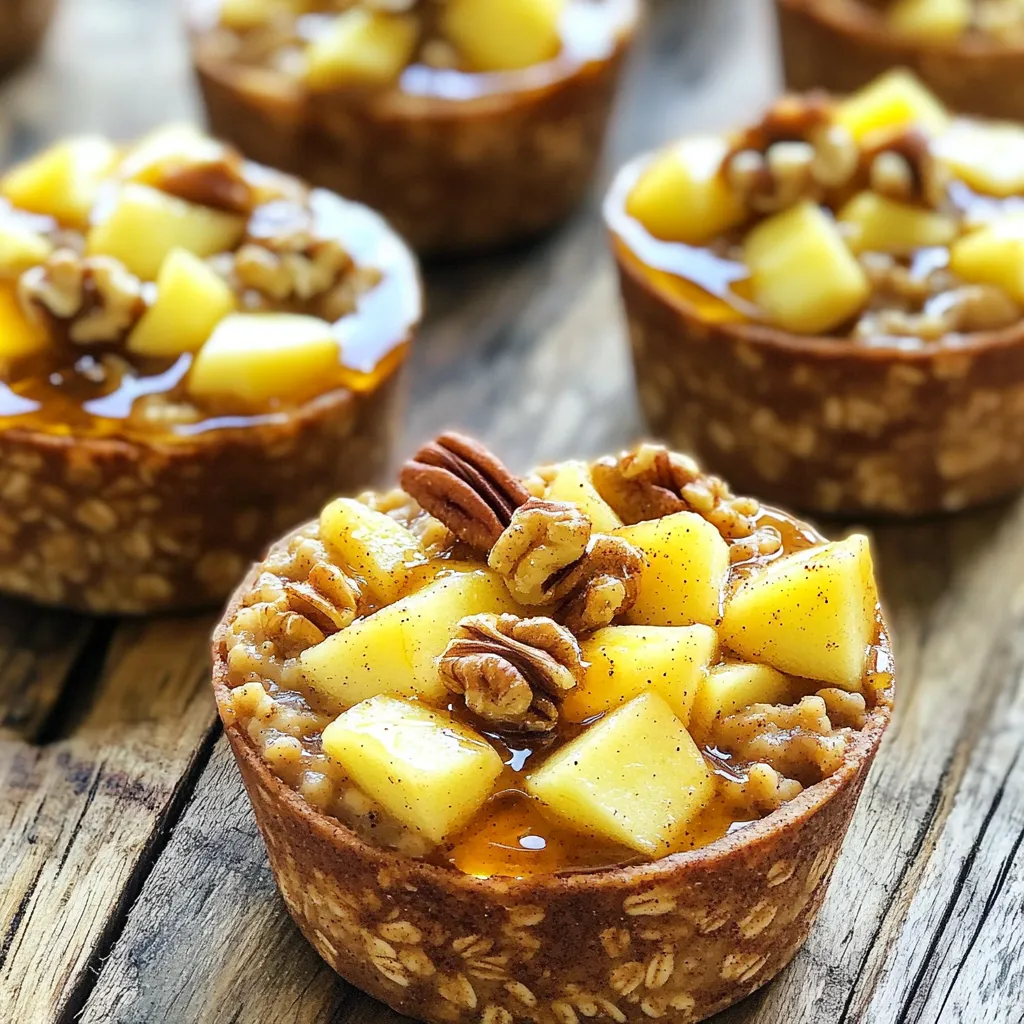
Looking for a healthy and tasty snack? Try my Baked Apple Cinnamon Oatmeal Cups! These delicious cups are easy to
