Skip to content
DisclaimerTerms Of UseGDPR PolicyCookie Policy

My Cooking Cast

  • Home
  • Drinks
  • Appetizers
  • Dinner
  • Dessert
  • About
  • Contact
  • Privacy Policy
DisclaimerTerms Of UseGDPR PolicyCookie Policy

Emma

To make Cowboy Butter Chicken Linguine, you need these key ingredients: - 500g linguine pasta - 400g boneless, skinless chicken thighs, cubed - 4 tablespoons cowboy butter (see below for recipe) - 3 cloves garlic, minced - 1 teaspoon smoked paprika - 1 teaspoon dried oregano - 1/2 teaspoon cayenne pepper (adjust to taste) - 1/2 cup cherry tomatoes, halved - 1 cup spinach leaves - 1/4 cup grated Parmesan cheese (optional) - Salt and pepper to taste - Fresh parsley, chopped for garnish The combination of these ingredients creates a dish bursting with flavor. The chicken adds protein, while the linguine provides a hearty base. The spices and garlic infuse the dish with warmth and depth. Cowboy Butter enhances your dish with rich, bold flavor. You will need: - 1 stick (113g) unsalted butter, softened - 1 tablespoon lemon juice - 1 tablespoon chopped fresh parsley - 1 tablespoon chopped fresh chives - 1 teaspoon garlic powder - 1/2 teaspoon onion powder - 1/2 teaspoon salt - 1/4 teaspoon black pepper Mixing these ingredients creates a buttery spread that complements the pasta and chicken perfectly. To finish your Cowboy Butter Chicken Linguine, consider these garnishes: - Grated Parmesan cheese - Fresh parsley, chopped These garnishes add color and extra flavor. They make your dish look beautiful and appetizing. For the full recipe, check out the detailed instructions on how to prepare this fantastic meal. To start, grab a mixing bowl. Add softened butter, lemon juice, chopped parsley, and chives. Then, sprinkle in garlic powder, onion powder, salt, and black pepper. Mix it until everything is well blended. This cowboy butter adds a burst of flavor. Once mixed, put it in a small container and refrigerate. This helps the flavors come together nicely. Next, take a large pot and fill it with salted water. Bring the water to a boil. Once boiling, add the linguine. Cook it according to the package instructions until it is al dente. When done, reserve 1/2 cup of pasta water. Then, drain the pasta and set it aside for later. Now, we’ll cook the chicken. In a large skillet, melt 2 tablespoons of cowboy butter over medium heat. Add the cubed chicken to the skillet. Season it with smoked paprika, oregano, cayenne pepper, salt, and pepper. Cook for about 6 to 8 minutes. You want the chicken to be golden brown and cooked through. Next, stir in the minced garlic and cherry tomatoes. Cook for another 2 to 3 minutes until the tomatoes become soft. It’s time to bring it all together. Add the drained linguine and spinach to the skillet. Toss everything together. If the dish seems dry, add some of the reserved pasta water to create a light sauce. Stir in the remaining cowboy butter. This will coat the pasta with rich flavor. Finally, serve the dish in deep bowls. You can add grated Parmesan cheese and fresh parsley on top for a pretty finish. Enjoy your cowboy butter chicken linguine! For the complete recipe, check out the Full Recipe. To cook linguine just right, start with a big pot of water. Add a good amount of salt. This helps the pasta taste great. Bring the water to a boil. Add the linguine, stirring it well. Cook it according to the package instructions, usually about 8-10 minutes. Test it a minute before the time is up. You want it al dente, which means firm to bite. Once done, save a half cup of pasta water. Then drain the linguine and set it aside. If you have leftovers, let them cool down first. Place them in an airtight container. This keeps the flavors fresh. You can store it in the fridge for up to three days. To reheat, use a skillet on low heat. Add a splash of water or broth to keep it moist. Stir well until heated through. You can also use a microwave, but add a bit of water to avoid dryness. You can swap out some ingredients if needed. For a lighter dish, use chicken breast instead of thighs. If you don’t have cowboy butter, try regular butter with garlic and herbs. For a veggie boost, add bell peppers or zucchini. If you want a creamier sauce, stir in some heavy cream. This makes the dish rich and smooth. Remember, feel free to mix and match based on what you have at home! For the full recipe, check out the earlier section. {{image_2}} You can easily make a vegetarian version of Cowboy Butter Chicken Linguine. Replace the chicken with hearty vegetables. Good choices include mushrooms, zucchini, or bell peppers. These veggies add flavor and texture. Cook them just like the chicken in the recipe. Use the same spices and cowboy butter for a rich taste. You can also add chickpeas for extra protein. This version remains filling and satisfying. If you enjoy heat, you can spice up your Cowboy Butter Chicken Linguine. Start by increasing the cayenne pepper in the recipe. You can also add red pepper flakes for an extra kick. If you want more flavor, try adding hot sauce. Just remember to start slow; you can always add more. Taste as you go to find the perfect heat level for you. Not a fan of chicken? You have many options for alternative proteins. Shrimp works well and cooks quickly. Just sauté shrimp until pink and tender instead of chicken. Tofu is another great choice for a plant-based meal. Firm tofu can soak up flavors well. You can also use diced turkey or even beef for a twist. Each protein adds a unique taste to this dish. To keep your Cowboy Butter Chicken Linguine fresh, store it in an airtight container. Make sure it cools down before sealing it up. This prevents moisture buildup, which can make the pasta soggy. Keep it in the fridge. It stays good for about 3 to 4 days. When you reheat, add a splash of water or broth to revive the pasta. This helps keep it moist and tasty. You can also freeze this dish if you have extra. Use a freezer-safe container or bag. Make sure to remove as much air as possible. It’s best to freeze it without any cheese. This keeps the flavor and texture. You can freeze it for up to 3 months. When you’re ready to enjoy it again, thaw it in the fridge overnight. Then, reheat it on the stove or in the microwave. Most ingredients in this recipe have a good shelf life. Here’s a quick guide: - Linguine Pasta: Lasts for about 2 years if kept dry. - Boneless Chicken Thighs: Good in the fridge for 1-2 days. Freeze for up to 9 months. - Cowboy Butter: Can last up to 2 weeks in the fridge. It can also be frozen for 3 months. - Spinach: Fresh spinach lasts about 5-7 days in the fridge. Use frozen spinach within 6 months. - Cherry Tomatoes: Best used within 1 week. They spoil quickly. - Parmesan Cheese: Lasts about a week in the fridge once opened. You can freeze it for up to 6 months. By following these storage tips, you keep your Cowboy Butter Chicken Linguine flavorful and ready to enjoy later. For the full recipe, check the earlier sections! You can serve a simple salad or garlic bread. A fresh green salad pairs well. Try a Caesar or garden salad for crunch. Garlic bread adds a nice touch and soaks up sauce. You could also add a glass of white wine for a special meal. Yes, you can make Cowboy Butter Chicken Linguine ahead of time. Cook and cool the pasta and chicken, then store them in the fridge. When ready to eat, reheat everything together in a pan. Add a splash of water to loosen the sauce. This dish tastes great even the next day! To make it gluten-free, use gluten-free linguine. Many brands offer good options that taste great. The rest of the ingredients are naturally gluten-free. Just check the labels for any hidden gluten. One serving contains about 500 calories. You get protein from chicken and carbs from pasta. It has healthy fats from cowboy butter. The dish also offers vitamins from spinach and tomatoes. For exact numbers, check the full recipe for more detailed info. Cowboy Butter Chicken Linguine is a fun, easy dish. We covered key ingredients, step-by-step cooking, and helpful tips. You can tweak the recipe with fun variations, like a vegetarian version or spicy adjustments. Remember, storing leftovers is simple, and freezing is a great option. Enjoy this dish with your favorite sides, and don’t hesitate to make it your own. Cooking should be enjoyable, so have fun in the kitchen!

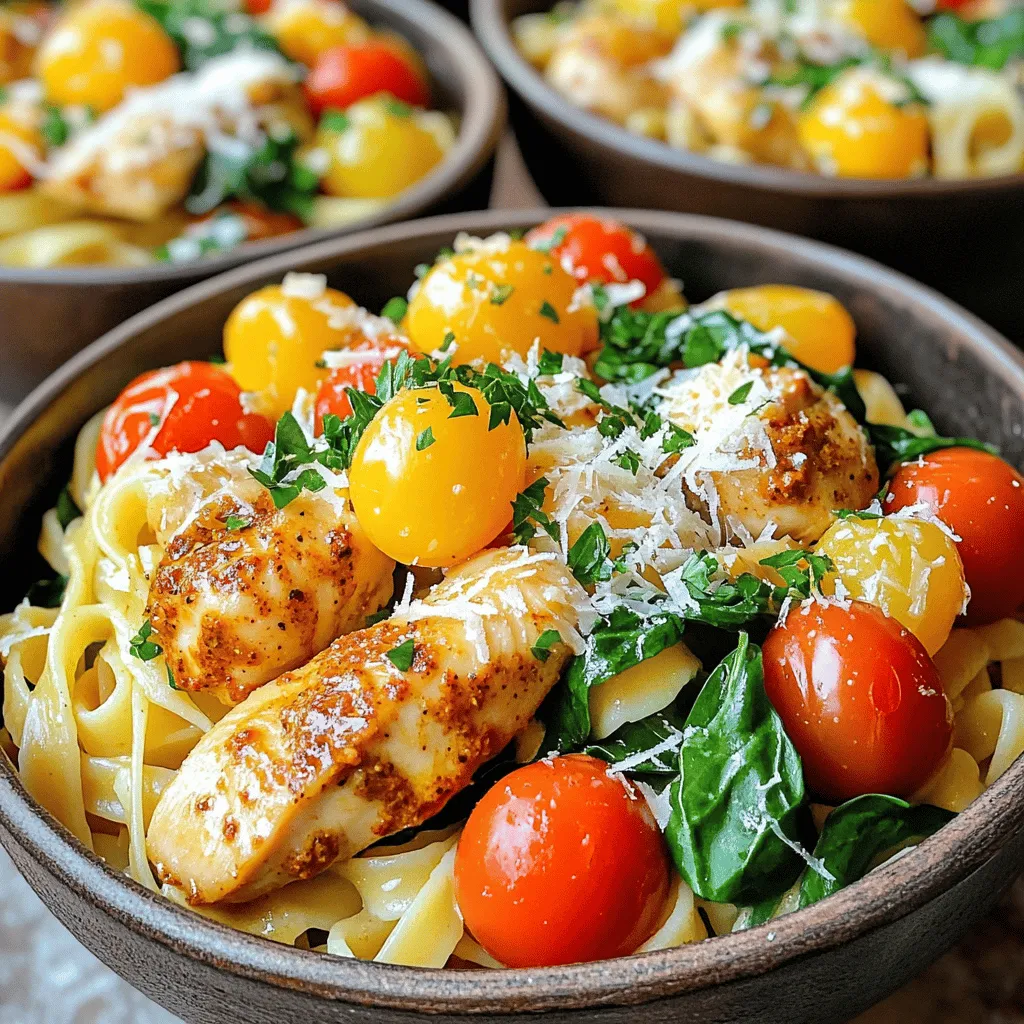
Cowboy Butter Chicken Linguine Flavorful Pasta Dish

Are you ready to spice up your dinner routine? Cowboy Butter Chicken Linguine is here to deliver bold flavors and

- 1 cup red lentils - 2 cups pumpkin, peeled and diced - 1 medium onion, finely chopped - 3 cloves garlic, minced - 1 tablespoon fresh ginger, grated - 2 tablespoons curry powder - 1 teaspoon turmeric - 1 teaspoon cumin - Salt and pepper to taste - 1 can (14 oz) coconut milk - 2 cups vegetable broth - 1 tablespoon olive oil - Fresh cilantro for garnish When I create my pumpkin lentil curry, I love using fresh and simple ingredients. Red lentils are my go-to because they cook fast and are packed with protein. Pumpkin adds a sweet, creamy texture. I always chop my onion finely for a smoother base. Garlic and ginger bring an aromatic punch that brightens the dish. For spices, I use curry powder, turmeric, and cumin. Each one adds warmth and depth. I adjust salt and pepper to taste, which gives the curry its unique flavor. In terms of liquids, coconut milk gives the dish a rich creaminess. I add vegetable broth to balance it out. Finally, a drizzle of olive oil adds a silky touch, and fresh cilantro on top makes it pop. This simple yet flavorful mix turns into a perfect meal. For the full recipe, check out the details above. - Heat olive oil in a pot over medium heat. - Sauté the chopped onion until it softens, about 5 minutes. - Add minced garlic and grated ginger, cooking until fragrant, about 1 minute. - Stir in curry powder, turmeric, and cumin into the pot. - Toast the spices for about 30 seconds to enhance their flavor. - Add the diced pumpkin and rinsed red lentils to the pot. - Pour in the coconut milk and vegetable broth. - Bring everything to a boil. Then, reduce the heat to a simmer. - Cover the pot and let it simmer for 20-25 minutes. - Stir occasionally until the lentils are tender and the pumpkin is soft. - Taste the curry and season with salt and pepper as needed. - If you want a thinner curry, add more vegetable broth for your desired consistency. - Let the curry sit for a few minutes before serving. - Serve hot, garnished with fresh cilantro on top. For the complete cooking process, check out the full recipe. - Use fresh spices for better taste. Fresh spices hold more oil and flavor. - Adjust seasoning to personal preference. Taste as you go to make it perfect for you. - Consider using a slow cooker for convenience. A slow cooker makes it easy to let flavors meld. - Blend for a creamier texture if desired. Blending adds smoothness and richness to the dish. - Pair with rice or naan. These sides soak up the curry well and add heartiness. - Serve with a side salad for freshness. A crisp salad balances the warm, rich flavors of the curry. {{image_2}} You can boost the protein in your pumpkin lentil curry. Adding chickpeas gives it a hearty twist. They bring a nutty flavor and extra texture. Simply stir in one can of drained chickpeas towards the end of cooking. Tofu is another great option. It absorbs flavors well. Use firm tofu, cut into cubes. Add it to the pot after the spices. This makes the dish even more filling. Feel free to get creative with your vegetables. You can swap pumpkin for other seasonal squash. Butternut squash works nicely and adds sweetness. You can also try acorn squash for a unique taste. Different leafy greens can add color and nutrition. Kale or spinach are excellent choices. Add them in the last few minutes of cooking. They wilt quickly and keep their vibrant color. Spice is a personal choice. If you love heat, add chili powder. Start with a teaspoon and adjust to taste. This can turn up the flavor without overwhelming the dish. For a milder option, use less curry powder. Mix in sweet spices like cinnamon or coriander for warmth. This keeps the dish family-friendly while still being tasty. Try these variations to make your pumpkin lentil curry your own. Enjoy experimenting with flavors and textures! For the full recipe, check out the complete list of ingredients and steps. To keep your pumpkin lentil curry fresh, store it in an airtight container. This method prevents air and moisture from spoiling the flavors. The curry lasts up to 5 days in the fridge, making it great for meal prep. If you want to save some for later, freeze it in portions. This way, you can enjoy a warm meal anytime. It stays good for up to 3 months in the freezer. When you're ready to eat, thaw it in the refrigerator overnight. This gentle method keeps it tasty. Reheat your curry gently on the stove for the best results. Stir it often to ensure even heating. Adding a splash of broth can help maintain its creamy consistency. This way, you’ll enjoy the same great flavor as when you first cooked it. Yes, but cooking times may vary. Red lentils cook faster than green or brown. If you use green or brown lentils, you may need to simmer longer. Check for doneness before serving. Yes, all ingredients are plant-based. This dish is perfect for anyone looking for vegan meals. You can enjoy it without any animal products. Add fresh chilies or more curry powder to taste. You can also try cayenne pepper for an extra kick. Adjust the spice level to fit your preference. Yes, almond milk or vegetable stock can be used for a lighter alternative. Coconut milk gives a rich flavor, but you can switch it for a different taste. Just make sure to adjust spices accordingly. Rice, naan, or a fresh salad are great accompaniments. Rice absorbs the curry's flavors well. Naan is perfect for scooping up the curry. A salad adds freshness to the meal. Follow the full recipe for optimal flavors and texture. Each step builds the dish’s taste. Use fresh ingredients for the best results. This pumpkin lentil curry recipe is simple and delicious. It offers rich flavors and is perfect for any meal. You learned how to cook it step-by-step, from aromatics to garnishing. You can make it your own by adding proteins or spices. It stores well too, lasting up to five days in the fridge or three months in the freezer. Enjoy this dish with rice, naan, or a salad, and savor the healthy goodness it brings to your table. Happy cooking!

Pumpkin Lentil Curry Flavorful and Hearty Meal

If you’re looking for a cozy, hearty meal that warms you up from the inside out, this Pumpkin Lentil Curry

- 1 cup creamy peanut butter - 1 cup cream cheese, softened - 1/2 cup powdered sugar - 2 teaspoons vanilla extract - 1/4 cup chocolate syrup - 1/4 cup caramel sauce - 1 cup crushed Twix bars (about 4-5 bars) - Assorted dippers (apple slices, pretzels, graham crackers) The magic of Twix Dip starts with its main ingredients. First, you need creamy peanut butter. This gives the dip a rich and nutty flavor. Then, cream cheese adds a smooth texture. The powdered sugar makes it sweet and perfect for dipping. Next, we add some extra flavor. Vanilla extract brings warmth to the dip. Chocolate syrup adds a rich, sweet touch. Caramel sauce gives it that gooey, dreamy quality we love. Finally, we top it all off with crushed Twix bars. These pieces add crunch and caramel flavor. You can enjoy this dip with various dippers. Try apple slices for a fresh bite, pretzels for saltiness, or graham crackers for a sweet crunch. For the full recipe, check out the complete guide to make this delightful treat. - Step 1: Combine peanut butter and cream cheese. Start by taking a mixing bowl. Add 1 cup of creamy peanut butter and 1 cup of softened cream cheese. Use an electric mixer to blend them until the mix is smooth and fluffy. This step is key for a creamy base. - Step 2: Mix in powdered sugar and vanilla extract. Gradually add 1/2 cup of powdered sugar and 2 teaspoons of vanilla extract. Keep mixing on low speed. This helps sweeten the dip and adds a lovely flavor. - Step 3: Add chocolate syrup and caramel sauce. Now, drizzle in 1/4 cup of chocolate syrup and 1/4 cup of caramel sauce. Continue mixing until everything is fully combined and smooth. The blend of chocolate and caramel makes this dip truly special. - Step 4: Fold in crushed Twix bars. Gently fold in 1 cup of crushed Twix bars, which is about 4-5 bars. Make sure they are evenly spread throughout the dip. This adds crunch and that classic Twix flavor. - Step 5: Transfer to serving bowl and garnish. Move the dip to a nice serving bowl. For an extra touch, drizzle a bit more chocolate syrup and caramel sauce on top. This makes it look great! - Step 6: Serve with dippers. Enjoy your dip right away with assorted dippers. Apple slices, pretzels, and graham crackers work best. You can also check the Full Recipe for more tips on serving. To make the perfect creamy Twix dip, start with softened cream cheese. It blends well with peanut butter and gives a smooth texture. Mix them until fluffy. If your dip feels too thick, add a splash of milk. This will help reach the creamy level you want. Adjusting sweetness is easy. If the dip is not sweet enough, add more powdered sugar a little at a time. Taste as you go. This way, you find the right balance for your taste buds. For the best dippers, think outside the box. Apple slices add freshness, while pretzels give a nice crunch. Graham crackers are also great for scooping. You can even try cookies for a sweet twist. For presentation, serve the dip in a shallow dish. Arrange your dippers around the dip. This makes it look fun and inviting. A sprinkle of extra crushed Twix on top adds an appealing touch. Want to jazz up your Twix dip? Try adding toppings like mini chocolate chips or a drizzle of extra caramel. Chopped nuts can add a nice crunch too. If you want to switch things up, you can substitute peanut butter with almond butter. Cream cheese could be swapped for Greek yogurt for a lighter option. Both choices keep the flavor but change the taste just enough for a new experience. {{image_2}} You can make Twix dip extra fun by adding ingredients. Try mixing in nuts like almonds or pecans for crunch. You can also toss in other candies, like Snickers or Reese’s Pieces, for a sweet twist. For a healthier version, consider using alternative sweeteners. Honey or agave syrup can give you a nice, natural sweetness. You can adjust the amount to fit your taste. If you're serving guests with dietary needs, there are easy swaps. Use gluten-free dippers like rice cakes or veggie sticks. This way, everyone can enjoy the dip. To make a vegan version, switch out cream cheese for a plant-based alternative. You can also use almond butter in place of peanut butter. These changes keep the dip creamy and delicious. Twix dip is not just for dipping! You can use it in desserts too. Spread it between cake layers for a fun treat. You can also layer it in parfaits with yogurt and fruit. For a chocolatey surprise, mix it into brownie batter or cookie dough. It adds a rich flavor that everyone will love. To keep your Twix dip fresh, store it in an airtight container. This helps keep moisture out and prevents it from absorbing other fridge smells. If stored this way, Twix dip lasts about 5 to 7 days in the fridge. Always check for any signs of spoilage before serving. Yes, you can freeze Twix dip! To do this, place it in a freezer-safe container. Make sure to leave some space at the top, as the dip can expand. It will stay good in the freezer for about 2 to 3 months. When you're ready to enjoy it again, thaw it in the fridge overnight. Avoid using a microwave, as it can change the texture. Once thawed, stir it well before serving. Got some leftover dip? You can use it in fun ways! Try spreading it on toast or pancakes for a sweet breakfast. You can also mix it into smoothies for a creamy twist. Another idea is to use it as a filling for cupcakes or cookies. The options are endless when you get creative with Twix dip! What is Twix dip made of? Twix dip is a sweet and creamy treat. It combines creamy peanut butter, softened cream cheese, powdered sugar, vanilla extract, chocolate syrup, caramel sauce, and crushed Twix bars. This mix creates a delicious dip that everyone loves. You can find the full recipe above. How can I make Twix dip more chocolatey? To make your Twix dip more chocolatey, add more chocolate syrup. You can also mix in mini chocolate chips or melted chocolate. This extra chocolate boosts the flavor and makes the dip even more indulgent. Why is my dip too runny? If your dip is too runny, it may have too much liquid. This can happen if you add too much chocolate syrup or caramel sauce. To fix this, try adding more cream cheese or powdered sugar. Both will help thicken the dip. How do I thicken Twix dip if it's too loose? To thicken your dip, mix in more crushed Twix bars. You can also add a bit more powdered sugar. Both options will improve the texture without changing the flavor much. What are the best dippers for Twix dip? Great dippers include apple slices, pretzels, and graham crackers. These options provide a nice crunch and balance the sweet dip. You can also use cookies or marshmallows for a fun twist. Can I use other candy bars in place of Twix? Yes, you can swap Twix with other candy bars. Snickers, Milky Way, or even Reese's work well. Just crush them and mix them into the dip for a new flavor. Twix dip is simple and fun to make. We started with creamy peanut butter and cream cheese, blending in powdered sugar and vanilla. Then, we added chocolate and caramel flavors, folding in crushed Twix bars. The right dippers, like apple slices or pretzels, make it even better. Remember, you can mix in extra flavors or swap ingredients for a twist. Enjoy your dip at parties or as a sweet treat. Store it well for later use, and it’s easy to refresh leftovers. This dip is sure to become a favorite, so dive in and enjoy!

Twix Dip Irresistible Treat for Any Occasion

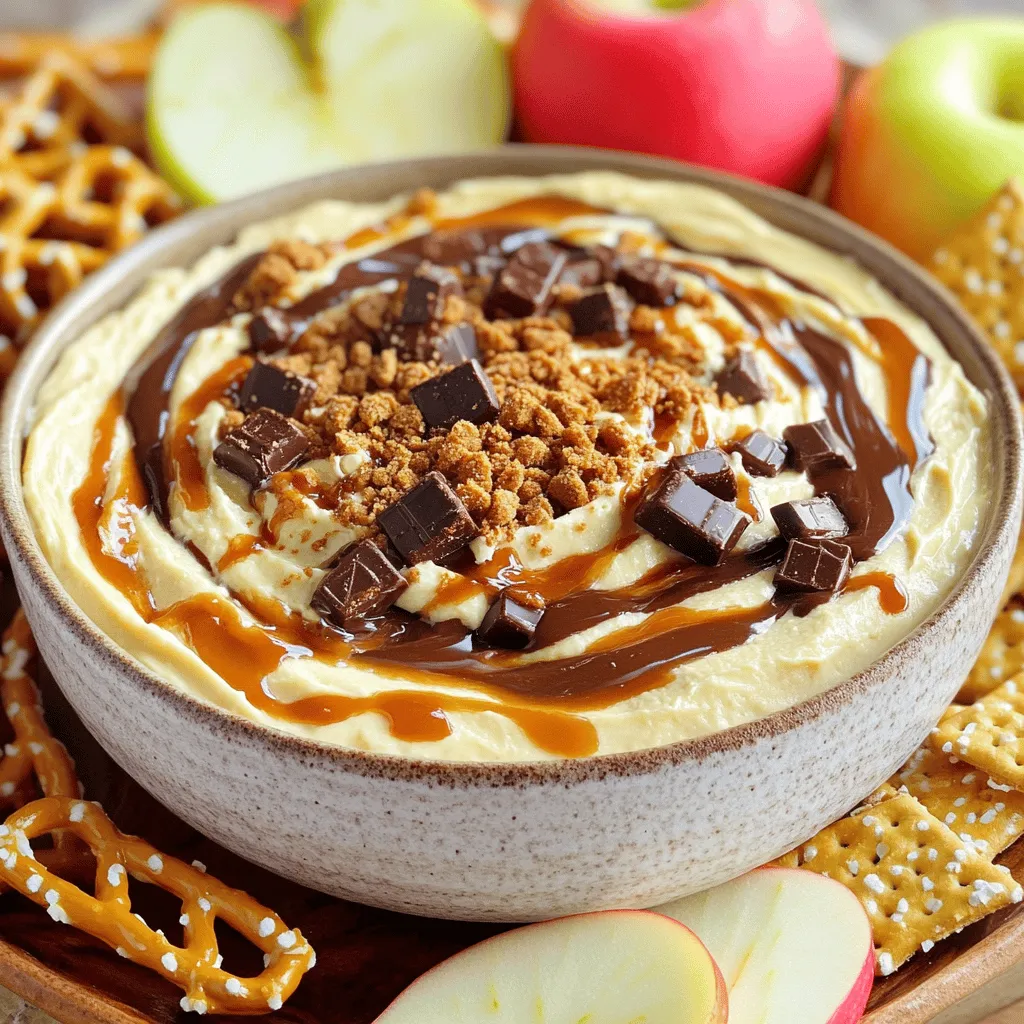
Looking for a sweet snack that wows everyone? Twix Dip is your answer! This simple, creamy treat combines peanut butter,

To make a tasty crab salad, you need a few key items. Here’s what you’ll want: - 1 pound fresh crab meat (lump or claw meat) - 1 cup cucumber, finely diced - 1 cup cherry tomatoes, halved - 1/2 cup red bell pepper, finely chopped - 1/4 cup shallots, finely minced - 1/4 cup fresh cilantro, chopped - 2 tablespoons lime juice - 1 tablespoon olive oil - 1 avocado, diced - Salt and pepper to taste - Mixed greens for serving These ingredients blend well together and create a fresh taste. The crab meat is the star. It adds sweet and rich flavors to the dish. You can boost your crab salad with some fun extras. Here are a few ideas: - Diced jalapeños for a spicy kick - Chopped celery for a nice crunch - Fresh herbs like dill or parsley for more flavor - A touch of garlic for depth Feel free to mix and match based on your taste. These add-ins can make your salad unique and exciting. When buying crab meat, freshness matters most. Here’s how to choose the best: - Look for meat that is white and has a sweet scent. - Avoid any meat that smells fishy or has strong odors. - Check for lumps of meat without shells or bits. Quality crab meat has big, clean pieces. Buying fresh crab meat helps ensure your salad tastes amazing. You can find it in seafood markets or grocery stores. Remember, quality crab meat makes all the difference in your dish. For the full recipe, check out the Crab Delight Salad. To make this crab salad, start by gathering all your ingredients. You will need fresh crab meat, cucumber, cherry tomatoes, red bell pepper, shallots, cilantro, lime juice, olive oil, avocado, salt, and pepper. First, take a large mixing bowl. Gently mix the crab meat, cucumber, tomatoes, bell pepper, shallots, and cilantro. This step is crucial. You want to keep the crab meat in big chunks. When you mix the ingredients, do it softly. Use a big spoon to lift the mixture. Avoid smashing the crab meat. You want it to stay fluffy and tender. After you mix everything, prepare the dressing. In a small bowl, whisk lime juice, olive oil, salt, and pepper. The dressing adds a bright flavor. Once mixed, drizzle it over the crab mixture. Toss gently again to coat everything evenly. For a lovely plate, start with mixed greens. Place a handful on each plate. Then, carefully spoon the crab salad on top. To make it extra special, add some cilantro leaves and lime wedges as a garnish. This adds color and freshness. You can serve it with crispy tortilla chips for a nice crunch. This whole process makes your crab salad look and taste amazing. For the complete recipe, check the [Full Recipe]. To make your crab salad shine, focus on fresh ingredients. Use crab meat that is sweet and tender. Lump or claw meat works best for flavor. Chop your veggies finely for a nice crunch. This adds texture and balance to the dish. A touch of lime juice brightens the salad. Don't skip on salt and pepper; they enhance the taste. Mix gently to keep the crab meat intact. Too much stirring can break it apart. If you have leftovers, store them properly. Place the salad in an airtight container. Keep it in the fridge. It’s best to eat it within two days. The avocado will brown quickly. To avoid this, add it just before serving. If you don't finish it, remove the avocado first. This keeps the salad fresh longer. Make your crab salad just before you plan to eat. This keeps all the flavors bright and fresh. If you have to prepare it ahead of time, do so no more than four hours in advance. The longer it sits, the more flavors blend, which can be nice but may lose some freshness. Remember, a fresh crab salad is a delightful treat that everyone will love! For more details, check the Full Recipe. {{image_2}} You can switch up the dressing for crab salad. A classic mayo and lemon juice blend works well. Try using Greek yogurt for a creamy twist. You can also mix olive oil, vinegar, and Dijon mustard for a light option. Each dressing offers a unique taste. Experiment to find your favorite! Adding fruits and vegetables can make your crab salad more fun. Diced mango or pineapple gives a sweet touch. Fresh herbs like dill or basil add flavor depth. You can also toss in diced celery for crunch. Consider using radishes for a peppery bite. These extras make your salad vibrant and exciting! Want some heat? Add jalapeños or Sriracha to kick up the spice. A sprinkle of cayenne pepper can also spice things up. You might enjoy adding a bit of wasabi for a unique twist. Pairing crab with spicy elements offers a great balance. Make sure to taste as you go! For the full recipe, see the Crab Delight Salad section above. To store leftover crab salad, place it in an airtight container. Make sure the lid seals tightly. This keeps out air and moisture. You can store it in the fridge for up to two days. If you plan to keep it longer, consider freezing it. However, note that freezing may alter the texture. When you prepare your crab salad, use fresh ingredients. Fresh crab meat adds great flavor. Keep the crab meat in the coldest part of your fridge until you are ready to use it. Store vegetables like cucumbers and tomatoes in the crisper drawer. This helps them stay crisp and tasty. If you slice vegetables ahead of time, store them in water to keep them fresh longer. Crab salad is best served cold. It tastes fresh and bright this way. If you want to warm it, do so gently. Use low heat on the stove. Avoid using a microwave, as it can make the crab tough. Remember, the flavors shine when served chilled. So, enjoy your crab salad fresh from the fridge! For the full recipe, check out the Crab Delight Salad. I recommend using lump crab meat or claw meat. Both types have great flavor and texture. Lump meat comes from the crab’s body, while claw meat is from the claws. Lump meat is more delicate and sweet. Claw meat is a bit firmer and has a stronger taste. You can mix both types for a unique flavor in your salad. Yes, you can make crab salad ahead of time. However, I suggest you add the avocado just before serving. This keeps it fresh and prevents browning. You can mix all other ingredients and store them in the fridge. This way, the flavors will blend nicely. Just remember to stir gently when you're ready to serve. Crab salad is a healthy choice! It is low in calories but high in protein. One serving can provide about 20 grams of protein, which helps build muscle. The fresh veggies add vitamins and minerals, making it nutritious. The healthy fats from avocado and olive oil are good for your heart. Enjoying crab salad can be a smart part of a balanced diet. For a deeper look at the health benefits, refer to the Full Recipe for detailed nutrition facts. In this post, we covered how to make a tasty crab salad. We looked at key ingredients, step-by-step instructions, and tips for a perfect mix. You can enhance your dish with different dressings and fun add-ins like fruits or spices. Remember to store any leftover salad correctly for the best taste. Crab salad is healthy and can be prepared ahead of time. Enjoy experimenting with this simple yet delicious recipe in your kitchen!

Crab Salad Delight Simple and Fresh Recipe

Crab salad is a tasty treat that’s both simple and fresh. In this article, I’ll share a delightful crab salad

To make a delicious Hungarian Lentil Vegetable Stew, gather these key ingredients: - 1 cup green lentils, rinsed and drained - 2 tablespoons olive oil - 1 large onion, diced - 2 cloves garlic, minced - 2 carrots, diced - 1 bell pepper, diced (red or yellow) - 1 medium potato, peeled and cubed - 1 can (14 oz) diced tomatoes - 4 cups vegetable broth - 1 teaspoon smoked paprika - 1 teaspoon caraway seeds - 1 teaspoon dried thyme - Salt and pepper to taste - Fresh parsley, chopped (for garnish) These ingredients create a hearty base for the stew. The lentils add protein and fiber, making this dish filling and nourishing. You can elevate the stew's flavor with a few optional ingredients: - 1 bay leaf - 1 teaspoon chili powder for a bit of heat - 1 tablespoon soy sauce for umami - 1 cup chopped kale or spinach for added nutrition Adding these ingredients can enhance the taste and bring in new textures. They allow you to customize the stew to match your preferences. For a complete and satisfying meal, consider these serving options: - Crusty bread for dipping - Cooked quinoa or rice for a hearty base - A side salad for freshness These accompaniments balance the stew's flavors and provide a delightful eating experience. They make your meal more enjoyable and nutritious. For the full recipe, check out the details above! Start by heating olive oil in a large pot over medium heat. Add diced onion and sauté until it becomes soft and clear, about five minutes. The onion gives the stew a sweet base. Next, add minced garlic and cook for one more minute. This step brings out the garlic's rich aroma. Now it’s time for the colorful veggies! Add diced carrots and bell peppers to the pot. Cook them for five to seven minutes until they soften. This mix adds crunch and flavor. After that, add the cubed potatoes. Stir well and let them cook for about three minutes. Potatoes make the stew hearty and filling. Now, it's time to bring it all together. Add the rinsed lentils, diced tomatoes, vegetable broth, smoked paprika, caraway seeds, and dried thyme. Stir everything together for a good mix. Bring the stew to a boil, then lower the heat. Let it simmer for thirty to thirty-five minutes. Stir occasionally to keep it from sticking. When the lentils and vegetables are soft, season with salt and pepper to taste. Finally, let the stew sit for a few minutes to let the flavors blend. Check out the Full Recipe for more details on serving and garnishing. To make lentils just right, start with green lentils. They keep their shape well. Rinse and drain them before cooking. This helps remove any dust or debris. When cooking, keep an eye on the time. Cook them for about 30-35 minutes. Check for doneness by tasting a few. They should be tender but not mushy. If they are too soft, try reducing the cooking time next time. Storing leftovers is easy. Let the stew cool down first. Use airtight containers to keep it fresh. Store in the fridge for up to five days. If you want to keep it longer, freeze it. Just make sure to leave some space in the container. This allows the stew to expand as it freezes. When you’re ready to eat, thaw it overnight in the fridge. Making this stew ahead is a smart idea. The flavors deepen and improve overnight. To do this, follow the full recipe, but don’t add salt until you reheat it. Salt can change the texture when stored. After cooking, let it cool, then store it in the fridge. You can also freeze it. Just remember to label your containers. That way, you won’t forget what’s inside. {{image_2}} You can easily make this stew vegetarian or vegan. The recipe is already plant-based. Just ensure your vegetable broth is vegan. You can add more veggies like zucchini or spinach for extra nutrition. This stew stays hearty and filling without meat. If you want to add protein, consider using sausage or chicken. Brown the meat first, then add it to the pot with the other ingredients. For a plant-based option, try adding tofu or tempeh. They soak up flavors well and add texture. You can also use chickpeas for a different taste. This stew is very flexible with vegetables. In spring, use fresh peas and asparagus. In summer, zucchini and bell peppers shine. In fall, add root vegetables like parsnips or sweet potatoes. Each season brings new flavors. Feel free to mix and match based on what you have. The full recipe helps guide you through these variations. After you make your Hungarian lentil vegetable stew, let it cool. Place it in an airtight container. You can keep it in the fridge for about 3 to 5 days. Make sure to label the container with the date. This way, you know when to eat it. If you want to save some for later, freezing is a great option. Use freezer-safe containers or bags. Divide the stew into smaller portions. This makes it easy to thaw just what you need. Hungarian lentil vegetable stew can last up to 3 months in the freezer. Just remember to label and date your containers. When you're ready to eat the stew, pull it from the fridge or freezer. If frozen, let it thaw in the fridge overnight. For reheating, you can use a pot on the stove. Heat it on medium until it's hot throughout. Stir it often to avoid hot spots. You can also use a microwave. Place the stew in a microwave-safe bowl, cover it, and heat for 2-3 minutes. Stir, then heat again if needed. Enjoy your delicious stew! For the full recipe, check out the earlier section. Yes, you can use dried lentils. Just remember to rinse and soak them first. Soaking helps soften the lentils and reduces cooking time. When using dried lentils, add them before the broth and tomatoes. Cook them for about 30-35 minutes, or until they are tender. You can add many vegetables to this stew. Here are some great options: - Zucchini, diced - Spinach or kale, chopped - Celery, diced - Mushrooms, sliced - Peas, fresh or frozen These add color, flavor, and nutrition to your stew. Feel free to get creative with your choices! Hungarian Lentil Vegetable Stew lasts about 4-5 days in the fridge. Store it in an airtight container to keep it fresh. If you want to keep it longer, consider freezing it. This stew freezes well and stays tasty for up to 3 months. Just thaw it in the fridge before reheating. For the full recipe, check the details above. This blog provides a clear guide on making Hungarian Lentil Vegetable Stew. We covered main and optional ingredients, plus tips for texture and storage. You can easily adjust the recipe for vegetarian or seasonal tastes. In the end, this stew is healthy, tasty, and very versatile. Don't hesitate to explore different flavors and ingredients for your perfect bowl. Enjoy your cooking journey!

Hungarian Lentil Vegetable Stew Hearty and Nutritious

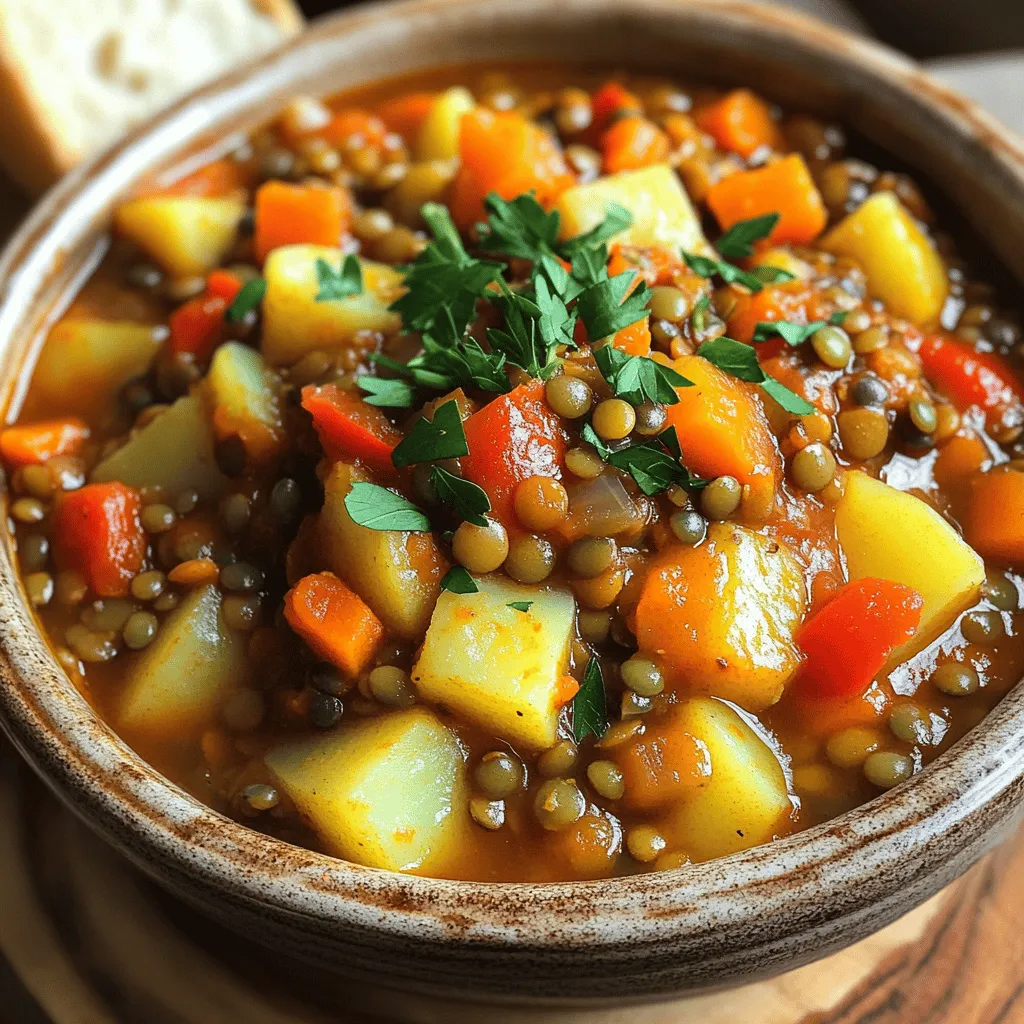
Looking for a warm, hearty meal? Try my Hungarian Lentil Vegetable Stew! Packed with protein and vitamins, this dish is

- 4 cod fillets (about 6 oz each) - 1/2 cup mayonnaise - 2 tablespoons Dijon mustard - 1 tablespoon lemon juice - 1 teaspoon garlic powder - 1 teaspoon smoked paprika - 1 teaspoon fresh parsley, chopped (plus extra for garnish) - Salt and pepper to taste - Zest of 1 lemon - 1/2 cup breadcrumbs (preferably panko for crunch) The main ingredients play a big role in this dish. Cod fillets offer a light, flaky texture. Mayonnaise adds creaminess, while Dijon mustard gives a tangy kick. The spices enhance the flavor and make the dish pop. - Extra herbs for flavor - Accompaniments and sides You can add extra herbs like dill or thyme for more flavor. For sides, consider serving with rice or a fresh salad. These options can balance the meal and make it even better. Each ingredient brings its own charm, making your dinner a hit. For the full experience, check the Full Recipe. 1. Preheat the oven: Set your oven to 400°F (200°C). This heat helps cook the cod evenly. 2. Prepare the baking dish: Lightly grease a baking dish with non-stick spray or olive oil. This step keeps your cod from sticking. 3. Mix the sauce: In a mixing bowl, combine the following: - 1/2 cup mayonnaise - 2 tablespoons Dijon mustard - 1 tablespoon lemon juice - 1 teaspoon garlic powder - 1 teaspoon smoked paprika - Zest of 1 lemon - 1 teaspoon chopped fresh parsley Stir until smooth. This sauce is key for flavor. 1. Season the fillets: First, pat the cod fillets dry with paper towels. Season both sides with salt and pepper. This boosts the flavor of the fish. 2. Apply the mayo mixture: Place the cod fillets in the greased baking dish. Spread a thick layer of the mayo mix on each fillet. This will add moisture and flavor. 3. Add breadcrumbs: Sprinkle 1/2 cup of breadcrumbs evenly over the mayo-coated cod. Use panko for extra crunch. This step ensures a crispy topping. 1. Bake the cod: Place the baking dish in the oven. Bake for 15-20 minutes. The cod should flake easily with a fork. The breadcrumbs should turn golden brown. 2. Garnish and serve: Once done, remove the dish from the oven. Let it cool slightly. Garnish with extra chopped parsley and lemon wedges to add freshness. Serve warm for a delightful meal. For full instructions, check the Full Recipe. To cook cod perfectly, aim for an internal temp of 145°F. Use a meat thermometer to check. The fish should flake easily with a fork when done. This means it is moist and cooked just right. For a crispy topping, use panko breadcrumbs. They give a light and crunchy texture. After spreading the mayo mix, cover the fish with breadcrumbs. Ensure they are evenly spread. This helps prevent sogginess and adds crunch. When serving baked cod, pair it with fresh sides. Roasted vegetables, like asparagus or Brussels sprouts, complement the dish well. A light salad with lemon vinaigrette works nicely too. For drinks, white wine is a great choice. A crisp Sauvignon Blanc or Chardonnay pairs well with the fish. If you prefer non-alcoholic options, sparkling water with lemon is refreshing. For the full recipe, check out the details above. {{image_2}} You can change the flavor of this dish easily. One way is to add spices to the mayo mix. Try adding cayenne pepper for heat or dill for a fresh taste. You can also swap out the garlic powder for onion powder if you like. These small changes can make a big difference. Alternative toppings can also change the texture. Instead of breadcrumbs, use crushed nuts or seeds for a crunchy bite. You can even add some shredded cheese on top for a richer taste. Mix and match these ideas to find your favorite flavor! I find that both grilling and baking cod work well, but they give you different results. Baking keeps the fish moist and tender. Grilling adds a smoky flavor and nice char marks. If you grill, try using a grill basket to keep the fish from falling apart. You don’t have to stick with cod, either. Other firm fish like halibut or tilapia work great in this recipe too. Each fish has its own unique flavor, so experiment and see what you like best. This recipe is flexible and can adapt to your tastes! To keep your baked cod fresh, store it in the fridge. Place it in an airtight container. This helps avoid drying out and keeps flavors intact. Make sure the cod cools down before sealing the container. You can store it for up to 3 days. If you want to save it for longer, freeze the cod. Wrap each piece tightly in plastic wrap first, then place it in a freezer bag. You can enjoy it for up to 2 months this way. To reheat your cod and keep it tasty, use the oven. Preheat it to 350°F (175°C). Place the cod in a baking dish and cover it with foil. This keeps the moisture in. Heat for about 10-15 minutes, or until warm. If you prefer using a microwave, place the cod on a microwave-safe plate. Cover it with a damp paper towel. Heat it in short bursts, about 30 seconds at a time, checking often. This way, you avoid overcooking and keep it juicy. Enjoy your flavorful baked cod with mayo! For the full recipe, check out the Full Recipe link. Can I use frozen cod for this recipe? Yes, you can use frozen cod. Just make sure to thaw it first. You can leave it in the fridge overnight or place it in cold water for quicker thawing. Once thawed, pat it dry before seasoning and coating. What can I substitute for mayonnaise? If you prefer not to use mayonnaise, there are great alternatives. Greek yogurt is a popular choice. It adds creaminess and a bit of tang. You can also use sour cream or a mixture of olive oil and mustard for a lighter option. How long should cod be baked? Bake the cod for 15 to 20 minutes at 400°F (200°C). The cooking time varies based on the thickness of the fillets. Always check for doneness after 15 minutes. What are the signs that the cod is done cooking? The cod is done when it flakes easily with a fork and is opaque throughout. You can also use a food thermometer to check. The internal temperature should reach 145°F (63°C). This ensures it's safely cooked and still moist. This blog post covered key ingredients and steps to bake cod. We explored flavor options, cooking tips, and how to store leftovers. You learned about variations in spices and cooking methods. The right sides and drinks elevate your meal. With these insights, you can make a tasty baked cod that impresses. Enjoy cooking and sharing your delicious dish!

Flavorful Baked Cod with Mayo Easy Dinner Recipe

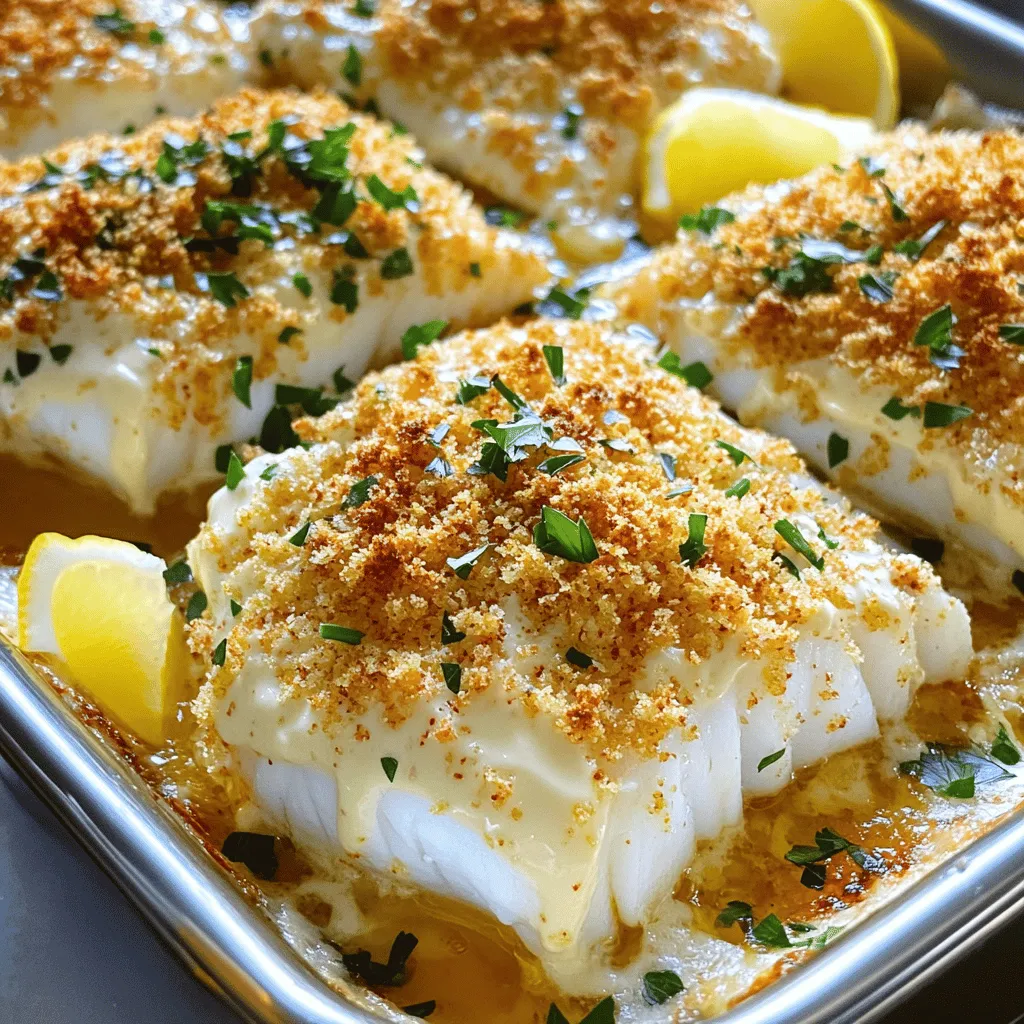
Looking for an easy dinner that packs a punch? This Flavorful Baked Cod with Mayo recipe is just what you

To make these tasty chocolate muffins, gather these main ingredients: - 1 cup all-purpose flour - 1/2 cup unsweetened cocoa powder - 1 tsp baking powder - 1/2 tsp baking soda - 1/4 tsp salt - 1/2 cup granulated sugar - 1/2 cup brown sugar, packed - 1/2 cup unsalted butter, melted - 2 large eggs - 1 tsp vanilla extract - 1/2 cup milk - 1/2 cup semi-sweet chocolate chips - 1/4 cup dark chocolate, chopped (for molten center) These ingredients work together to create a rich and moist muffin with a chocolatey center. The combination of sugars adds depth and sweetness. You can customize your muffins with these fun add-ins or substitutions: - Swap half of the all-purpose flour for whole wheat flour for added fiber. - Use almond milk or oat milk instead of regular milk for a dairy-free option. - Add nuts like walnuts or pecans for a crunchy texture. - Stir in a teaspoon of instant coffee for a deeper chocolate flavor. - Toss in some chopped fruits like bananas or raspberries for a fruity twist. These changes can make your muffins unique and tailored to your taste. Make your baking process smooth with these tools: - Muffin tin (12-cup) - Mixing bowls (one large, one medium) - Whisk - Rubber spatula - Measuring cups and spoons - Oven mitts - Cooling rack Having the right equipment helps you bake without fuss. These tools ensure your muffins turn out great every time. For the full recipe, check out the previous section. Start by preheating your oven to 350°F (175°C). Grease your muffin tin or use paper liners. In a medium bowl, mix together the flour, cocoa powder, baking powder, baking soda, and salt. This helps to combine dry ingredients well. Set this bowl aside for now. In a larger bowl, add the melted butter, granulated sugar, brown sugar, eggs, vanilla extract, and milk. Beat these together until smooth. Then, slowly add the dry mix to this wet mix. Stir gently until just mixed. Be cautious not to overmix. Finally, fold in the semi-sweet chocolate chips. This gives your muffins extra delight. Now, it's time to fill your muffin cups. Pour a small amount of batter into each cup, filling them about one-third full. This step is key to making room for the molten chocolate. Next, take a piece of dark chocolate and place it in the center of each cup. Cover it with more batter until the cups are two-thirds full. This will ensure a gooey center when baked. Place your muffin tin in the oven and bake for 12-15 minutes. Keep an eye on them! The edges should feel firm, while the tops should look slightly set. It's okay if the center remains soft; that's what gives that lava effect. Once done, let the muffins cool in the tin for about five minutes. Then, transfer them to a wire rack to cool completely. Enjoy the rich aroma as you wait! To get soft, fluffy chocolate muffins, follow these tips: - Use room temperature eggs and milk. This helps mix well. - Do not overmix the batter. Gently stir until just combined. - Use a scale for precise measurements. This gives you the best results. - Let the batter sit for a few minutes before baking. This helps the flavors blend. Here are common errors that can hurt your muffins: - Overbaking. Keep an eye on your muffins. They should be soft in the center. - Using cold ingredients. This can lead to a dense texture. - Not measuring your flour correctly. Too much flour can make muffins dry. - Skipping the resting time. This can lead to less flavor and texture. Serving your muffins right can make them even better: - Dust with powdered sugar for a nice finish. - Add a dollop of whipped cream for extra creaminess. - Pair with vanilla ice cream for a rich dessert. - Serve warm for that gooey chocolate center. Enjoy every bite! For the full recipe, check out the detailed instructions provided earlier. {{image_2}} You can make small changes to make these muffins a bit healthier. Try using whole wheat flour instead of all-purpose flour. This adds fiber and nutrients. You can also swap granulated sugar for coconut sugar. It has a lower glycemic index. For a richer taste, use Greek yogurt instead of butter. It will keep your muffins moist, too. Get creative with flavors! Add a few drops of peppermint extract for a minty twist. You can also mix in some orange zest for a fresh kick. For a richer chocolate flavor, add espresso powder. This will deepen the taste without making it taste like coffee. Experiment with your favorite flavors to make these muffins your own! You can make these muffins gluten-free by using almond flour or a gluten-free blend. Just ensure it has a good binding agent for the best texture. For a vegan option, replace the eggs with flaxseed meal or applesauce. Use plant-based butter and almond milk instead of dairy. These swaps keep the muffins just as tasty while meeting dietary needs. For the full recipe, check out the section above! To keep your chocolate muffins fresh, let them cool completely first. Place them in an airtight container. Store at room temperature for up to three days. If you want to keep them longer, the fridge is an option. Just note that this may change their texture. Always wrap the muffins in plastic wrap to prevent them from drying out. Freezing is a great way to save muffins for later. Wrap each muffin in plastic wrap or foil. Then, place them in a freezer bag or container. Make sure to remove as much air as possible. Label the bag with the date. You can freeze them for up to three months. When you’re ready to enjoy, thaw them overnight in the fridge or at room temperature. When you want to enjoy a muffin, reheating is easy. If they are frozen, let them thaw first. Then, place a muffin on a microwave-safe plate. Heat it in the microwave for about 15-20 seconds. For a crispier texture, use an oven. Preheat it to 350°F (175°C) and bake for about 5-7 minutes. Enjoy the warm, gooey center! For the full recipe, check out the heavenly chocolate lava muffins. Yes, you can make these muffins ahead of time. Bake them and let them cool completely. Then, store them in an airtight container at room temperature for up to three days. If you want to keep them longer, freeze them. Wrap each muffin tightly in plastic wrap and place them in a freezer bag. They can last up to three months in the freezer. If you need an egg substitute, try using applesauce. Use 1/4 cup of unsweetened applesauce for each egg. You can also use mashed bananas, yogurt, or flaxseed meal. To use flaxseed, mix 1 tablespoon of flaxseed meal with 2.5 tablespoons of water. Let it sit for about five minutes to thicken before adding it to the mix. Check the muffins around the 12-minute mark. Insert a toothpick into the center of a muffin. If it comes out clean or with just a few crumbs, they are done. The tops should be firm and slightly set. Remember, the center should remain soft for that lovely lava effect. For perfect muffins, keep an eye on them as they bake. Now you have all you need to make perfect chocolate muffins. We covered key ingredients, step-by-step instructions, and useful tips to avoid errors. You learned smart ways to vary the recipe and store leftovers, plus answers to common questions. My final tip? Enjoy sharing these treats with friends and family. Muffin magic is in your hands now, so get baking!

Chocolate Muffins Delightful and Easy Recipe Guide

Ready to dive into the world of chocolate muffins? This delightful and easy recipe guide will show you how to

To make this dish, you need the following key ingredients: - 8 oz fettuccine or spaghetti - 2 salmon fillets (about 6 oz each) - 2 tablespoons olive oil - 4 cloves garlic, minced - 1 cup heavy cream - 1 cup grated Parmesan cheese - 1 cup baby spinach - 1 lemon (zested and juiced) - Salt and pepper to taste - Fresh parsley, chopped (for garnish) These ingredients create the rich flavors in the creamy garlic sauce. The salmon provides a lovely, flaky texture. The pasta absorbs the sauce well, making each bite delicious. To take your dish to the next level, consider adding: - Red pepper flakes for heat - Capers for a briny kick - Sun-dried tomatoes for sweetness - Fresh basil or dill for herbaceous notes These optional ingredients can add depth and excitement. You can mix and match based on what you enjoy most. You will need a few simple tools to prepare this meal: - Large pot for cooking pasta - Large skillet for the sauce and salmon - Colander for draining pasta - Zester or grater for lemon zest - Wooden spoon or spatula for mixing Having the right tools makes cooking easier. These utensils help you work efficiently and keep your kitchen organized. For the full recipe, refer to the instructions above. Start by boiling a large pot of salted water. Add 8 oz of fettuccine or spaghetti. Cook it according to the package until it is al dente. This usually takes about 8-10 minutes. Once done, reserve 1 cup of pasta water. Drain the pasta and set it aside for later. While the pasta cooks, take 2 salmon fillets and season them with salt and pepper. In a large skillet, heat 1 tablespoon of olive oil over medium heat. Place the salmon in the skillet skin-side down. Cook for 5-6 minutes until the skin is crispy. Flip the fillets and cook for another 2-3 minutes until they are fully cooked. Remove them from the skillet and flake them into bite-sized pieces. In the same skillet, add another tablespoon of olive oil. Sauté 4 minced garlic cloves over medium heat for about 1 minute until fragrant. Pour in 1 cup of heavy cream and stir it gently. Bring the mixture to a gentle simmer. Now, stir in 1 cup of grated Parmesan cheese until it melts and combines with the cream. Then, add 1 cup of baby spinach and cook for 2 minutes until the spinach wilts. Add the drained pasta to the skillet, tossing it well in the creamy garlic sauce. If the sauce seems too thick, add some reserved pasta water until you like the consistency. Gently fold in the flaked salmon, along with the juice and zest of 1 lemon. Mix everything well, then taste. Adjust the seasoning with more salt and pepper if needed. Plate the pasta and sprinkle fresh chopped parsley on top for a nice touch. Enjoy your delicious Creamy Garlic Salmon Pasta! For the detailed recipe, make sure to check the Full Recipe section. To get perfectly cooked salmon, start with fresh fillets. Look for bright color and no strong smell. Season each side with salt and pepper. Heat olive oil in a skillet over medium heat. Lay the salmon skin-side down. Cook for about 5 to 6 minutes. You want crispy skin! Flip the salmon over and cook for another 2 to 3 minutes. Check that it flakes easily with a fork. This method gives you juicy salmon that pairs well with pasta. The creamy sauce is key to this dish. If it is too thick, add reserved pasta water slowly. Start with a few tablespoons and stir. Keep adding until it reaches your desired creaminess. If it is too thin, let it simmer a little longer. This will help thicken it naturally. You can also add more cheese for extra richness. Cooking pasta may seem easy, but there are tricks. Always use a large pot with plenty of water. Add a good amount of salt to the water for flavor. Stir the pasta to prevent sticking. Cook until al dente, which means firm to the bite. Save some pasta water before draining. This water helps to bind the sauce and pasta together. Follow these steps for perfect pasta every time. For the full recipe, check out the detailed instructions above. {{image_2}} You can switch up the pasta in this dish. Fettuccine and spaghetti are great, but other types work too. Consider using penne, farfalle, or even whole wheat pasta for a healthy twist. Each type brings its own texture and taste, adding fun to the meal. Just remember to cook according to package instructions for the best results. Boost the nutrition by adding vegetables. Baby spinach is a classic choice, but you can add others too. Try cherry tomatoes for a burst of flavor or zucchini for a nice crunch. Broccoli or asparagus can also add great color and health benefits. Adding veggies makes the dish more colorful and satisfying. If you want a lighter sauce, there are great alternatives. You can use Greek yogurt or a dairy-free cream. These options cut some fat but keep that creamy feel. Adding a splash of vegetable broth can also bring flavor without heavy cream. Play around to find what you like best. For the full recipe, check out the detailed instructions above. After you enjoy your creamy garlic salmon pasta, store any leftovers in an airtight container. This keeps the pasta fresh. Let it cool to room temperature before sealing. Always place it in the fridge within two hours. The leftovers will stay good for up to three days. You can freeze creamy garlic salmon pasta for later enjoyment. First, let it cool completely. Then, place it in a freezer-safe container. Be sure to leave some space at the top for expansion. This dish can last up to three months in the freezer. When you want to eat it again, just thaw it overnight in the fridge. To reheat your creamy garlic salmon pasta, use a skillet for best results. Add a splash of water or cream to keep it moist. Heat it over low to medium heat. Stir often until it warms through. You can also use the microwave, but cover it to avoid drying out. Enjoy your meal just like the first time! For the full recipe, check out the earlier section. Yes, you can use frozen salmon. Just thaw it first. Thaw it overnight in the fridge or for a few hours in cold water. Once thawed, it cooks just like fresh salmon. The flavor stays great, and the dish will still taste amazing. You can use half-and-half or whole milk with butter. For a lighter option, try Greek yogurt or cashew cream. Each swap changes the texture and taste a bit, but they all work well in this dish. Just keep in mind that heavy cream gives the richest flavor. This dish lasts for about 3 days in the fridge. Store it in an airtight container to keep it fresh. When you’re ready to eat, just reheat it gently on the stove. Add a splash of water or broth to help it stay creamy. Yes, you can! Try serving the creamy salmon over rice or quinoa. You could also use zucchini noodles for a low-carb option. The creamy garlic sauce works well with many bases, so feel free to get creative with your choice. Check out the Full Recipe for more details. This blog post covered all you need to make creamy garlic salmon pasta. I detailed the main and optional ingredients, plus tools you’ll need. You learned step-by-step instructions and helpful tips for perfect salmon and sauce. We also explored pasta variations and smart storage methods. In summary, you can create a delicious meal that everyone will enjoy. Simple changes can make a big difference. Now, grab your ingredients and start cooking!

Creamy Garlic Salmon Pasta Easy Weeknight Meal

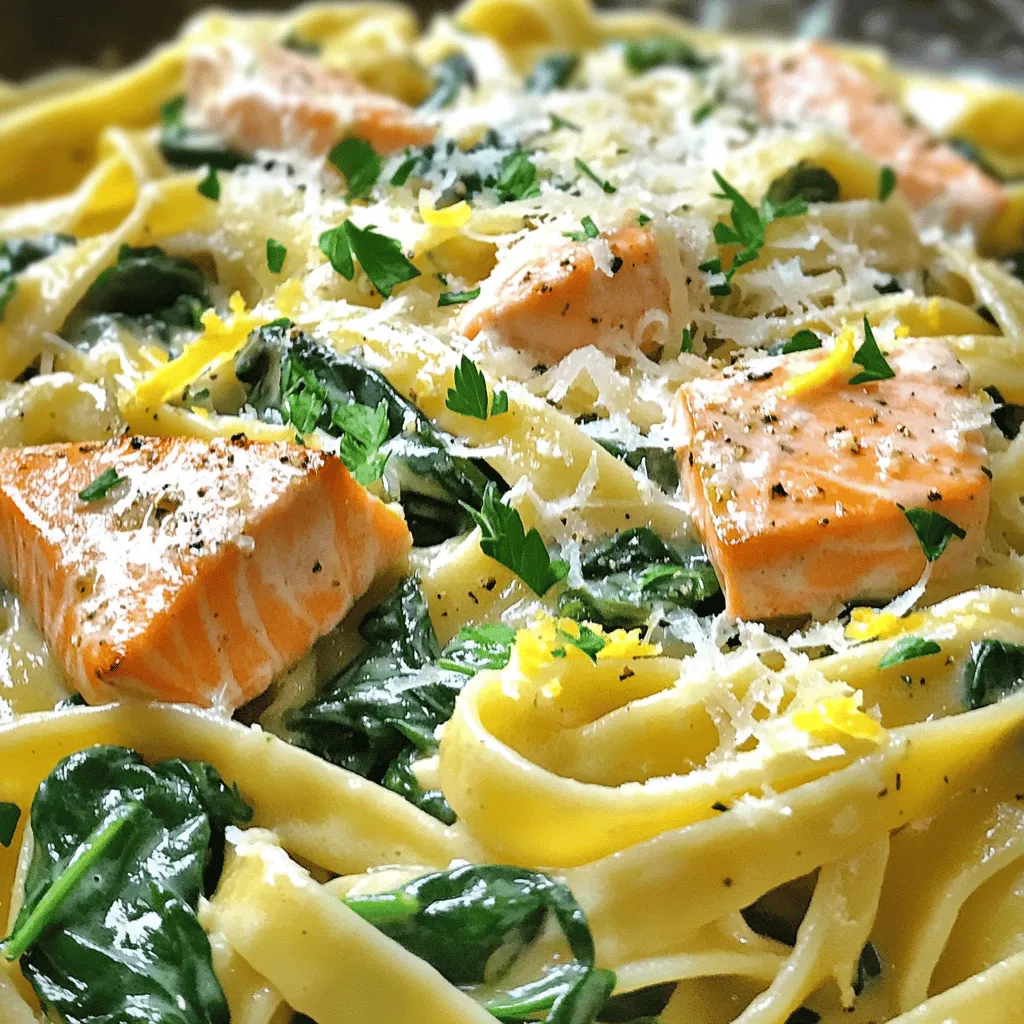
Looking for a speedy yet delicious dinner option? This Creamy Garlic Salmon Pasta hits the mark! With just a few

To make these easy blueberry cheesecake cookies, you will need: - 1 cup cream cheese, softened - 1/2 cup unsalted butter, softened - 1 cup granulated sugar - 1 large egg - 1 teaspoon vanilla extract - 2 cups all-purpose flour - 1 teaspoon baking powder - 1/2 teaspoon salt - 1 cup fresh or frozen blueberries For a tasty twist, consider adding: - 1/2 teaspoon lemon zest This gives a nice burst of citrus flavor. You can also mix in some nuts for added crunch, but that’s up to you! To get the best results, measure your ingredients carefully. Here are some tips: - For flour, spoon it into your measuring cup and level it off with a knife. - When measuring brown sugar, pack it tightly into the cup so it holds its shape. - Use a liquid measuring cup for cream cheese and butter to ensure you get the right amount. Following these tips helps you create the perfect dough for the cookies. For the full recipe, check out the complete instructions to make these delightful treats! To start, gather your ingredients. You will need: - 1 cup cream cheese, softened - 1/2 cup unsalted butter, softened - 1 cup granulated sugar - 1 large egg - 1 teaspoon vanilla extract - 2 cups all-purpose flour - 1 teaspoon baking powder - 1/2 teaspoon salt - 1 cup fresh or frozen blueberries - 1/2 teaspoon lemon zest (optional) First, preheat your oven to 350°F (175°C). Line a baking sheet with parchment paper. In a large bowl, cream the softened cream cheese and butter together until they are smooth. You want a fluffy texture here. Next, add in the granulated sugar. Mix it well until everything combines nicely. Then, beat in the egg and vanilla extract. This makes the mixture creamy and rich. In another bowl, whisk together the flour, baking powder, and salt. Gradually add these dry ingredients to the wet mixture. Stir gently until just combined. Be careful not to overmix. Finally, fold in the blueberries and optional lemon zest. Use a light hand to avoid crushing the berries. Now, use a cookie scoop or a spoon to drop rounded tablespoons of dough onto your baking sheet. Make sure to leave some space between each cookie. This allows them to spread without sticking together. Bake the cookies in your preheated oven for 12 to 15 minutes. Look for lightly golden edges and a set center. When your cookies are done baking, remove them from the oven. Let them cool on the baking sheet for about 5 minutes. This helps them firm up a bit. After that, transfer the cookies to a wire rack. Allow them to cool completely before serving. Enjoy these easy blueberry cheesecake cookies with joy! You can find the full recipe to guide you through this tasty journey. To get soft and chewy cookies, use room temperature cream cheese and butter. This helps them mix well. Mix until the dough is smooth but don’t overbeat. Overmixing can make the cookies tough. When you fold in the blueberries, do it gently. This keeps the cookies tender and the berries whole. Use fresh or frozen blueberries. If you use frozen ones, do not thaw them first. This helps keep the berries from smashing. Also, toss the blueberries in a bit of flour before adding them to the dough. This prevents them from sinking to the bottom during baking. If you need a dairy-free option, try using vegan cream cheese and butter. You can also swap sugar for a sugar substitute if you want to cut calories. For gluten-free cookies, use a gluten-free flour blend. Each swap may change the taste slightly, but it can still be yummy! For the full recipe, check out the link. {{image_2}} You can easily change the flavor of these cookies. Try adding lemon zest for a fresh twist. If you love chocolate, mix in some cocoa powder. Replace a little flour with cocoa powder, about 1/4 cup, to keep the right texture. You can also add chocolate chips to the dough for extra sweetness. Making gluten-free cookies is simple! Use a gluten-free flour blend instead of all-purpose flour. Look for a blend that has a good mix of starches and flours. This swap allows everyone to enjoy these cookies without gluten. Feel free to swap blueberries with other fruits! Raspberries give a tart flavor, while strawberries add sweetness. Chop larger fruits into smaller pieces to keep the cookies from getting soggy. You can mix different fruits for a fun variety, too. Each fruit brings its own unique taste and color to your cookies. Enjoy these fun twists while baking your Easy Blueberry Cheesecake Cookies. Check out the Full Recipe to get started! To keep your blueberry cheesecake cookies fresh, store them in an airtight container. Place parchment paper between layers to avoid sticking. These cookies taste best when enjoyed within three days. If you need to keep them longer, freezing is the way to go. You can freeze these cookies to save some for later. First, let the cookies cool completely. Then, place them in a single layer on a baking sheet. Freeze for about two hours until solid. After that, transfer them to a freezer bag or container. They can last up to three months in the freezer. When you're ready to enjoy your frozen cookies, take out what you need. Let them thaw at room temperature for about 30 minutes. To warm them up, preheat your oven to 350°F (175°C). Place the cookies on a baking sheet and heat for about 5-7 minutes. This will make them soft and tasty again. For the full recipe, check out the details above. These cookies stay fresh for about five days. Store them in an airtight container. You can keep them at room temperature. If you want them to last longer, place them in the fridge. They will still taste great! Yes, you can use frozen blueberries. They work well in this recipe. Just make sure to add them straight from the freezer. This way, they won’t get mushy in the dough. Frozen blueberries may change the color of your cookies a bit. Don’t worry; they will still taste delicious! If your cookies spread too much, check your butter. Make sure it is softened, not melted. You can also chill the dough for about 30 minutes before baking. This helps the cookies hold their shape. Lastly, ensure you measure the flour correctly. Too little flour can cause extra spreading. For the full recipe, click [here](#). You’ve learned how to make delicious blueberry cheesecake cookies. We covered essential and optional ingredients, plus tips for measuring. I shared clear steps for preparation, baking, and cooling. You now have helpful tips for texture, best practices for blueberries, and substitutions for diets. You can explore tasty variations, storage tips, and answers to common questions. Enjoy making these cookies, and don't hesitate to personalize them! With these simple steps, impressing family and friends is easy. Happy baking!

Easy Blueberry Cheesecake Cookies Simple and Tasty Treat

Craving a sweet treat that’s easy to make? Discover my recipe for Easy Blueberry Cheesecake Cookies! These cookies blend rich

For a hearty sausage and egg casserole, you need specific key ingredients: - 8 large eggs - 1 pound ground sausage (choose mild or spicy) - 2 cups shredded cheddar cheese - 2 cups whole milk - 4 slices of bread, cubed - 1 bell pepper, diced (red or green) - 1 small onion, diced - 1 teaspoon garlic powder - 1 teaspoon dried oregano - Salt and pepper to taste These items create a rich, filling dish. The eggs provide protein, while the sausage gives flavor. Cheese adds creaminess, and the bread makes it hearty. The veggies bring in freshness and color. You can add some optional ingredients to boost flavor: - Fresh herbs like parsley or chives - Spicy peppers for a kick - Different types of cheese like mozzarella or feta These choices let you customize your dish. Fresh herbs brighten the meal, while spicy peppers can make it exciting. Using quality ingredients makes a big difference in taste. Fresh eggs and high-quality sausage enhance the dish. When you pick good cheese, you get a creamier texture. Try to source local or organic items when possible. It not only tastes better but also supports your community. For the full recipe, check out the details above. Gather all your ingredients first. This makes cooking smoother. You will need: - 8 large eggs - 1 pound ground sausage (mild or spicy, as preferred) - 2 cups shredded cheddar cheese - 2 cups whole milk - 4 slices of bread, cubed - 1 bell pepper, diced (red or green) - 1 small onion, diced - 1 teaspoon garlic powder - 1 teaspoon dried oregano - Salt and pepper to taste - Fresh parsley for garnish (optional) Make sure to chop the onion and bell pepper. Cubing the bread helps it soak up the egg mixture well. In a skillet, cook the sausage over medium heat. Stir it often. Cook until it turns brown, which takes about 7-10 minutes. Drain any grease from the pan. Move the sausage to a large mixing bowl. Next, use the same skillet for the onions and bell peppers. Add them to the pan. Sauté until the onion is soft and clear, around 5 minutes. Once done, mix these cooked veggies into the bowl with the sausage. In another bowl, whisk the eggs and milk. Add garlic powder, oregano, salt, and pepper. Mix well until smooth. Now, fold the cubed bread into the sausage and veggie mix. Pour the egg mixture over everything. Gently stir it all together. This creates a rich and tasty filling. Transfer the mixture into a greased 9x13 inch baking dish. Spread it evenly. Sprinkle the shredded cheese on top. Set your oven to 350°F (175°C). Bake for 35-40 minutes. The casserole should be firm in the center and the cheese golden. Let it cool for a few minutes before slicing. Enjoy your Easy Sausage and Egg Casserole! To get that soft and fluffy texture, the balance of eggs and milk is key. I suggest using a mix of eight eggs and two cups of milk. This ratio keeps the casserole light. Whisk them well to incorporate air, which helps fluff it up as it bakes. Also, let the casserole sit for a few minutes after baking. This helps it set and makes slicing easier. One common mistake is overcooking the casserole. Bake it just until the center is set. If you bake it too long, it can become dry. Another mistake is not draining excess grease from the sausage. This can lead to a soggy bottom. Lastly, avoid using stale bread. Fresh bread cubes give better texture and flavor. Serve your sausage and egg casserole warm. It pairs well with fresh fruit like berries or sliced oranges. For a tasty touch, sprinkle chopped parsley on top. You can also serve it with a side of toast or a light salad for extra color. For a special treat, add a dollop of salsa or hot sauce on top for some heat. For the complete recipe, check out the Full Recipe section. {{image_2}} If you want a meatless version, swap the sausage for vegetables. You can use mushrooms, zucchini, or spinach. These veggies add great taste and texture. They also keep the dish light and fresh. You still get a hearty meal, but without the meat. Just sauté your chosen vegetables until soft, then mix them in with the eggs and cheese. This way, you create a delicious vegetarian casserole that everyone will enjoy. Spices can turn your casserole from good to great. Try adding a pinch of red pepper flakes for heat. You can also use smoked paprika for a rich flavor. Other options include cumin or chili powder. These spices bring depth to the dish. Mix them into the egg mixture before pouring it over the bread and sausage. This small step makes a big difference in taste. Cheese plays a big role in your casserole's flavor. While cheddar is classic, feel free to mix it up. Try using pepper jack cheese for a spicy kick. For a milder taste, mozzarella works well too. You can even combine different cheeses for a unique flavor blend. Just remember to adjust the amount based on how cheesy you want it. Using a variety of cheeses can create a more complex taste that delights your palate. For the full recipe, check out the provided instructions, and enjoy your cooking! To store leftovers, let the casserole cool first. Once cool, cut it into squares. Place the squares in an airtight container. This helps keep the casserole fresh for later meals. You can store it in the fridge for up to three days. If you plan to eat it beyond that time, freezing is a better option. When reheating, I recommend using the oven. Preheat your oven to 350°F (175°C). Place the casserole pieces on a baking sheet. Cover them with foil to keep them moist. Bake for about 15 to 20 minutes. You can also use the microwave. Just heat each piece for 1 to 2 minutes. Make sure to check that it is hot all the way through. Freezing is simple and a great way to save time. First, let the casserole cool completely. Then, wrap the pieces tightly in plastic wrap. Place the wrapped pieces in a freezer-safe bag or container. You can keep it frozen for up to three months. When you're ready to eat, just thaw it overnight in the fridge. Then, reheat as needed for a quick meal. Enjoy the flavors of this hearty dish anytime! For more details, check the Full Recipe. Yes, you can prepare the casserole the night before. Just follow the full recipe to mix the ingredients. Cover it well and store it in the fridge. In the morning, bake it straight from the fridge. This saves you time and makes breakfast easy. You can serve this casserole with fresh fruit, yogurt, or toast. A simple green salad can add a nice crunch. Pairing it with coffee or juice makes a great breakfast spread. Feel free to get creative with your sides! Leftovers will stay fresh in the fridge for about 3 to 4 days. Store them in an airtight container to keep them tasty. You can reheat slices in the oven or microwave. This makes for a quick meal during busy mornings. This blog post shows you how to make a sausage and egg casserole. We discussed key ingredients and optional flavors to boost taste. I shared simple steps for cooking and baking this dish. With useful tips, you’ll avoid common mistakes and find great serving ideas. You can also explore variations for different diets. Remember to store leftovers properly for the best flavor later. Enjoy your casserole adventure and make it your own!

Easy Sausage and Egg Casserole Quick Breakfast Dish

Looking for a quick and tasty breakfast? This Easy Sausage and Egg Casserole is perfect for busy mornings! With simple

Older posts
Newer posts
← Previous Page1 … Page87 Page88 Page89 … Page106 Next →
© 2025 My Cooking Cast • Built with GeneratePress

Our Policies

  • Privacy Policy
  • GDPR Policy
  • Terms Of Use
  • Copyright Policy
  • Cookie Policy
  • Disclaimer

More Information​

  • Home
  • Contact
  • About
  • Dinner
  • Appetizers
  • Dessert
©2025, My Cooking Cast About Privacy Policy Back To Top