Skip to content
DisclaimerTerms Of UseGDPR PolicyCookie Policy

My Cooking Cast

  • Home
  • Drinks
  • Appetizers
  • Dinner
  • Dessert
  • About
  • Contact
  • Privacy Policy
DisclaimerTerms Of UseGDPR PolicyCookie Policy

Emma

To make a tasty creamy spinach and artichoke dip, you need fresh and simple ingredients. Here’s the detailed list: - 2 cups fresh spinach, chopped - 1 (14 oz) can artichoke hearts, drained and roughly chopped - 1 cup cream cheese, softened - 1/2 cup sour cream - 1/2 cup mayonnaise - 1 cup grated Parmesan cheese - 1 cup shredded mozzarella cheese - 2 cloves garlic, minced - 1/2 teaspoon onion powder - Salt and pepper to taste - 1/4 teaspoon crushed red pepper flakes (optional for heat) You can add your favorite extras to change the flavor: - Cooked and crumbled bacon for a smoky taste - Fresh herbs like parsley or basil for freshness - A squeeze of lemon juice for brightness Using the right mix of ingredients makes the dip rich and creamy. The combination of cheeses adds depth, while spinach and artichokes provide a lovely texture. This dip is not just easy to make, but also fun to customize! For the complete recipe, check the Full Recipe section. To make this creamy spinach and artichoke dip, start by gathering your ingredients. You will need fresh spinach, canned artichoke hearts, cream cheese, sour cream, mayonnaise, Parmesan cheese, mozzarella cheese, garlic, onion powder, and some spices. 1. Mix the Creamy Base: In a large bowl, combine the softened cream cheese, sour cream, and mayonnaise. Use a mixer or a sturdy spoon to blend until smooth. This step is key for a creamy dip. 2. Add the Good Stuff: Fold in the chopped spinach and artichoke hearts. Add the minced garlic and half of the mozzarella cheese. Mix gently to keep the spinach and artichokes intact. 3. Season It Up: Sprinkle in the onion powder, salt, pepper, and crushed red pepper flakes if you like some heat. Mix everything until well combined. This adds flavor and richness. 4. Transfer to Dish: Scoop the mixture into a baking dish. Spread it evenly to ensure even cooking. Top it with the remaining mozzarella cheese for that gooey, melty finish. 1. Preheat the Oven: Set your oven to 350°F (175°C). This allows for even baking and helps the cheese melt perfectly. 2. Bake the Dip: Place the dish in the oven. Bake it for 25 to 30 minutes. You know the dip is ready when it bubbles and the top turns golden brown. 3. Cool and Serve: Once baked, take the dip out. Let it cool for a few minutes before diving in. This dip pairs well with tortilla chips, toasted bread, or fresh veggies. For the full recipe, check out the Creamy Spinach & Artichoke Delight section. Enjoy creating this creamy treat! To make a smooth and creamy dip, start with softened cream cheese. If it’s too cold, it might clump. Mix it well with sour cream and mayonnaise until it’s smooth. Add your spinach and artichokes gently. Be careful not to over-mix. This keeps the chunks of artichoke intact for a nice bite. Avoid common mistakes. Do not skip the garlic; it adds a nice flavor. Too much salt can ruin your dip, so add it slowly. If you want heat, try crushed red pepper flakes, but not too much. You can serve this dip with many sides. Tortilla chips are a classic choice. They add a nice crunch. Toasted bread or baguette slices also work well. For a healthy option, try fresh vegetable sticks like carrots or celery. When it comes to drinks, think about pairing. A crisp white wine goes great with this dip. If you prefer non-alcoholic drinks, try sparkling water with lemon. Both options balance the rich flavor of the dip well. For the complete recipe, check the Full Recipe section. {{image_2}} You can easily change this recipe. Try adding different cheeses for a unique taste. Cheddar cheese adds a sharp flavor. Creamy goat cheese can make it rich. Mix in a bit of feta for a tangy twist. You can also play with spices. A pinch of smoked paprika gives it a warm kick. For a zesty option, add some lemon zest. Feel free to include other vegetables, too. Chopped bell peppers add color and crunch. Mushrooms can give a nice earthy flavor. You can even throw in some sun-dried tomatoes for a burst of sweetness. The more you mix it up, the more fun it becomes! If you want a lighter dip, there are great swaps. Use low-fat cream cheese or Greek yogurt. These keep the creaminess while cutting calories. For a vegan version, replace cream cheese and sour cream with cashew cream or tofu. Nutritional yeast can add a cheesy taste without dairy. When it comes to serving, you can keep it gluten-free. Use corn tortilla chips or veggie sticks. Fresh cucumbers or carrot sticks work well. This way, everyone can enjoy the dip, regardless of diet. To keep your creamy spinach and artichoke dip fresh, store it in an airtight container. This helps keep out moisture and air. You can refrigerate it for up to four days. If you want to save some for later, freezing is a great option. Use a freezer-safe container and leave some space at the top, as the dip may expand when frozen. When you want to eat it again, just thaw it in the fridge overnight. To reheat the dip, place it in an oven-safe dish. Cover it with foil to keep the moisture in. Heat it at 350°F (175°C) for about 15-20 minutes. This will help it warm up without drying out. You can also use the microwave, but be careful to stir it often. This helps it heat evenly. In the fridge, your creamy spinach and artichoke dip will last about four days. If you freeze it, expect it to stay fresh for up to three months. Just remember, the taste and texture may change a bit after freezing. For the best flavor, try to eat it within a month. What can I use instead of cream cheese? You can use Greek yogurt or ricotta cheese. Both will give a creamy texture. They also add a nice flavor to the dip. Can this dip be made ahead of time? Yes! You can prepare the dip a day before. Just cover it and store it in the fridge. When ready, bake it as the recipe shows. How do I make the dip spicier? Add crushed red pepper flakes or diced jalapeños. You can also use pepper jack cheese for a spicy kick. What are the best substitutes for sour cream? Plain yogurt works well. You can also use cashew cream for a dairy-free option. Both keep the dip rich and creamy. Can I bake this dip in a slow cooker? Absolutely! Just mix all the ingredients and place them in the slow cooker. Cook on low for about 2-3 hours. Stir occasionally and enjoy the warm dip. For the full recipe, check out the detailed instructions above. This blog post covered everything you need to make a great creamy spinach and artichoke dip. You learned about the ingredients, preparation steps, and baking tips to ensure tasty results. We discussed essential tips for the best flavor and texture. Plus, we explored fun variations and health-conscious options. Don’t forget how to store leftovers for later enjoyment. With these ideas, you'll impress everyone at your next gathering. Now, get in the kitchen and create your perfect dip!

Creamy Spinach and Artichoke Dip Tasty and Easy Recipe

Are you ready to whip up a dish that will impress everyone at your next gathering? This Creamy Spinach and

To make a great Spaghetti Aglio e Olio, you need a few simple ingredients. Here’s what you’ll need: - Spaghetti - Garlic - Olive Oil - Red Pepper Flakes - Fresh Parsley - Lemon Zest - Salt - Parmesan Cheese (optional) Using fresh garlic and high-quality olive oil makes a big difference. The red pepper flakes give it a nice kick, while parsley adds color and freshness. Lemon zest brightens the dish and brings all the flavors together. If you like, sprinkle some Parmesan cheese on top for extra richness. This recipe is quick, easy, and full of flavor, perfect for any night of the week. For the full recipe, check out Spaghetti Aglio e Olio with a Kick! . First, you need to boil water. Fill a large pot with water and add salt. The salt helps flavor the pasta. Turn on the heat and bring the water to a boil. Once the water is boiling, carefully add the spaghetti. Stir it gently to prevent sticking. Cook the spaghetti for about 8 to 10 minutes. You want it to be al dente. This means it should be soft but still firm when you bite it. When the spaghetti is done, save 1 cup of the water. Then, drain the spaghetti in a colander. Now, let’s make the garlic oil. Take a large skillet and heat the olive oil over medium heat. Add the thinly sliced garlic to the oil. Sauté the garlic for 2 to 3 minutes. You want it to turn golden and fragrant. Be careful not to burn the garlic. Burnt garlic tastes bitter and ruins the dish. Once the garlic is golden, add the red pepper flakes. Stir for another 30 seconds to blend the flavors. Next, add the drained spaghetti to the skillet. Toss the pasta to coat it with the garlic oil. If the pasta looks dry, add some reserved pasta water. This helps create a nice, silky sauce. Mix in the chopped parsley and lemon zest. Taste the pasta and add salt if needed. Now, plate the spaghetti. You can garnish it with more parsley and grated Parmesan if you like. A drizzle of olive oil on top adds extra flavor. Enjoy your delicious Spaghetti Aglio e Olio! For the full recipe, check the link above. - Best practices for garlic preparation: Use fresh garlic for the best taste. Thinly slice the cloves. This helps release their flavor better. Avoid crushing the garlic. Slicing gives you a milder taste. Keep an eye on it while cooking. Burnt garlic can ruin your dish. - Customizing spice levels with red pepper flakes: Start with one teaspoon of red pepper flakes. This gives a nice kick without overwhelming the dish. If you like it spicier, add more flakes. Just remember, it's easier to add than to take away. Taste as you go. Adjust to find your perfect heat level. - Garnishing ideas: Fresh parsley adds color and freshness. Sprinkle it on top before serving. You can also add lemon zest for a bright touch. If you like cheese, freshly grated Parmesan will impress your guests. - Plate arrangement for visual appeal: Twirl the spaghetti on a fork before placing it on the plate. This creates a neat, inviting look. Drizzle a bit of olive oil on top for shine. A simple dish can look fancy with a little effort. {{image_2}} You can make Spaghetti Aglio e Olio even better by adding protein. Shrimp or chicken work great. Just cook them in the garlic oil before adding the pasta. This adds tasty flavor and makes the meal more filling. If you want a vegetarian twist, try adding roasted vegetables. Bell peppers or zucchini blend well. You can also toss in some chickpeas for a hearty touch. Pairing can elevate your meal. A simple green salad is a perfect side. A tangy lemon vinaigrette complements the dish. If you want more, garlic bread adds a nice crunch. For drinks, a crisp white wine works well. Try a Pinot Grigio or Sauvignon Blanc. They balance the garlic and spice nicely. Enjoy your meals with these ideas for a great dining experience. After enjoying your Spaghetti Aglio e Olio, store any leftovers properly. First, let the pasta cool down to room temperature. This helps prevent moisture build-up in the container. Use an airtight container to keep the pasta fresh. Store it in the fridge for up to three days. To reheat your spaghetti, avoid the microwave if you can. Instead, use a skillet on low heat. Add a splash of water or olive oil to keep it moist. Stir gently until warmed through. This method helps to maintain the pasta's texture and flavor. If you must use the microwave, cover the dish with a damp paper towel. This adds steam and helps prevent drying out. Enjoy your meal just like the first time! To boost flavor in Spaghetti Aglio e Olio, use good quality olive oil. You can add more garlic or use roasted garlic for depth. Fresh herbs like basil or oregano also enhance the taste. Adding lemon juice or zest gives a bright twist. For a spicy kick, increase red pepper flakes to your liking. Yes, you can make Spaghetti Aglio e Olio ahead. Cook the spaghetti and garlic oil, then mix just before serving. Keep the pasta and oil separate in the fridge. This way, they stay fresh. When ready to eat, reheat the oil and toss with the pasta. Spaghetti Aglio e Olio comes from Naples, Italy. It dates back to the early 20th century. The dish is simple, made with garlic, oil, and spaghetti. It represents Italian kitchen wisdom, using few ingredients for great taste. Its popularity spread due to its quick prep and delicious flavor. To store leftovers, let the spaghetti cool first. Place it in an airtight container. It lasts up to three days in the fridge. For longer storage, freeze it in portions. When reheating, add a splash of water or oil to keep it moist. Enjoy your meal again with ease! This blog shared how to make a tasty dish: Spaghetti Aglio e Olio. You learned about key ingredients like garlic, olive oil, and red pepper flakes. I also showed you how to cook the pasta and create the garlic oil properly. We discussed tips for enhancing flavor, serving, and even variations you might enjoy. Now that you have these skills, you can impress anyone with your cooking. Enjoy making this dish and share it with friends and family!

Spaghetti Aglio e Olio Quick and Simple Recipe

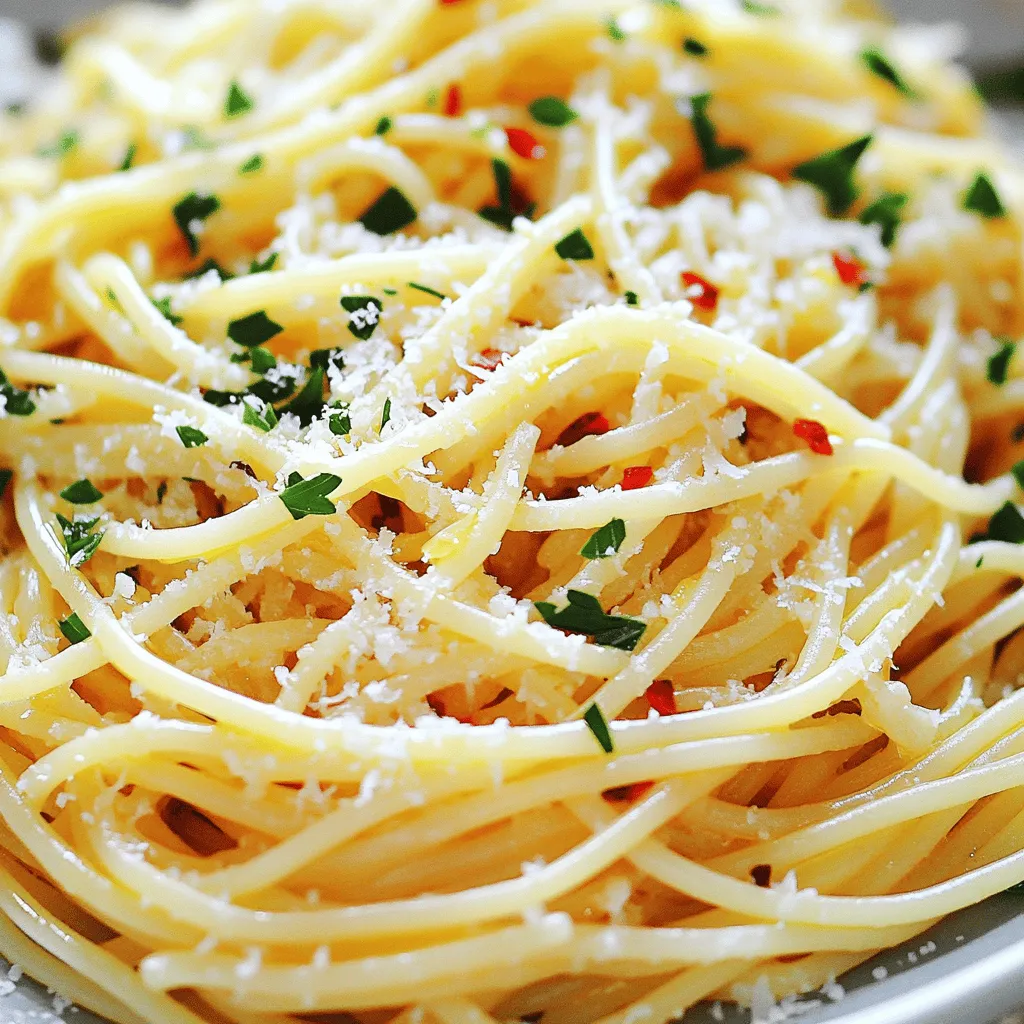
Looking for a quick and tasty meal? Spaghetti Aglio e Olio is your answer! This classic Italian dish requires just

- 1 whole chicken (about 4-5 pounds) - Fresh herbs: rosemary, thyme, parsley - Garlic and lemon For this dish, I start with a whole chicken. A bird around 4-5 pounds works best. Fresh herbs like rosemary, thyme, and parsley bring bright flavors. I also use garlic and lemon to add zest. - Olive oil - Salt and pepper - Chicken broth - Onion Next, I gather some pantry staples. Olive oil helps with cooking and flavor. Salt and pepper are key for seasoning. Chicken broth adds moisture to the pan. Finally, I quarter an onion to stuff inside the chicken. This mix of ingredients makes every bite tasty and juicy. For the full recipe, check the details above! 1. First, preheat your oven to 425°F (220°C). This high heat helps the chicken cook evenly. 2. Next, prepare your roasting pan by placing it on the counter. This makes it easy to transfer the chicken. 3. In a mixing bowl, combine 6 minced garlic cloves, 1/4 cup of olive oil, and the chopped herbs (2 tablespoons each of rosemary, thyme, and 1 tablespoon of parsley). Add salt and pepper to taste. Mix well to create a herb paste. 1. To season the chicken, pat it dry with paper towels. This helps the skin crisp up while cooking. 2. Gently separate the skin of the chicken over the breast and thighs. Be careful not to tear it. 3. Spread half of the herb paste under the skin. This adds flavor directly to the meat. 4. Rub the remaining herb paste all over the chicken’s exterior. Ensure it is well-coated for maximum flavor. 1. Stuff the cavity of the chicken with lemon slices and onion quarters. This adds moisture and flavor. 2. Pour 1 cup of chicken broth into the bottom of the roasting pan. This helps keep the chicken juicy. 3. Place the chicken in the oven and roast it for about 1 hour and 15 minutes. You want the internal temperature to reach 165°F (75°C). 4. Baste the chicken with the pan juices halfway through cooking. This keeps the skin moist and flavorful. 5. Once cooked, remove the chicken from the oven. Let it rest for 10-15 minutes before carving. This helps the juices settle, making each bite delicious. For the full recipe, check out the details above. Enjoy your savory family dinner! To make sure your chicken is juicy and tasty, use a meat thermometer. Insert it into the thickest part of the thigh. The chicken is done when it reaches 165°F (75°C). This tool takes the guesswork out of cooking. You will avoid dry meat and enjoy a perfect roast. For crispy skin, dry the chicken well before cooking. Pat it with paper towels inside and out. The drier the skin, the crunchier it gets. Rub olive oil over the skin before roasting. This helps the skin brown nicely. Also, roasting at high heat, like 425°F (220°C), gives a great texture. Garlic herb roasted chicken goes well with many side dishes. Some great choices include roasted vegetables, mashed potatoes, or a fresh salad. These sides balance the rich flavors of the chicken. For dinner parties, presentation matters. Place the chicken on a large platter. Slice it and add fresh herbs around it. You can also surround it with the roasted lemon and onions. This looks nice and adds flavor. A beautiful display makes the meal feel special. Enjoy your delicious creation! {{image_2}} You can change the flavor of Garlic Herb Roasted Chicken easily. Try different herbs like basil, oregano, or dill. Each herb brings a unique taste. For a spicy kick, add crushed red pepper flakes or paprika. You can even mix in some lemon zest for a bright flavor. Adding vegetables to the roasting pan makes the dish even better. Carrots, potatoes, and bell peppers roast nicely alongside the chicken. They soak up the chicken juices and herbs, making them tasty. To do this, just chop the veggies and place them around the chicken in the pan. They will cook at the same time as the chicken. You can make Garlic Herb Roasted Chicken in a slow cooker too. This method keeps the chicken moist and tender. Just follow the same steps for seasoning the chicken. Place it in the slow cooker with the broth and cook on low for 6 to 8 hours. For a smoky taste, try grilling the chicken. Marinate it with the herb paste and let it sit for an hour. Preheat your grill to medium heat. Cook the chicken for about 45 minutes, turning it often. This gives you crispy skin and a great smoky flavor. For the full recipe, check the details above. Enjoy! After you enjoy your garlic herb roasted chicken, you will likely have some leftovers. Proper storage keeps the chicken tasty and safe to eat. - Let the chicken cool down first. - Wrap it tightly in plastic wrap or aluminum foil. - You can also place it in an airtight container. In the fridge, your chicken will stay fresh for about 3 to 4 days. If you want to keep it longer, freezing is a great option. Freezing cooked chicken is simple and safe. Here are the steps: - Cut the chicken into pieces for easier storage. - Place it in a freezer-safe bag or container. - Remove as much air as possible before sealing. When you're ready to eat, defrost the chicken in the fridge overnight. This method helps keep the chicken juicy. To reheat, place it in the oven at 350°F (175°C) until it warms through. Enjoy your delicious garlic herb roasted chicken again! For the full recipe, check out the provided link. How do I know when the chicken is cooked? Check the chicken's thickest part with a meat thermometer. The safe internal temperature is 165°F (75°C). The juices should run clear, not pink. If you don't have a thermometer, cut into the thigh. Look for clear juices and no pink meat. Can I use frozen chicken for this recipe? Yes, you can use frozen chicken, but it’s best to thaw it first. Thaw the chicken in the fridge overnight. This helps it cook evenly. If you must cook it from frozen, add extra time and check the temperature often. What to do if the chicken is undercooked? If the chicken is undercooked, return it to the oven. Cook it for an extra 10 to 15 minutes. Check the temperature again to ensure it reaches 165°F (75°C). Always trust your thermometer for safety. How to avoid dry chicken meat? To avoid dry chicken, do not overcook it. Use a meat thermometer for best results. Basting with pan juices keeps the meat moist. Let the chicken rest after cooking. This helps the juices stay in the meat. Can I prepare the chicken a day ahead of cooking? Absolutely! You can prep the chicken the day before. Rub the herb paste on and store it in the fridge. This saves time on cooking day. It also allows the flavors to soak in. How to marinate it overnight for enhanced flavors? To marinate the chicken, mix the herb paste and coat the chicken. Cover it and place it in the fridge. This overnight marination makes the chicken very tasty. Just be sure to remove it from the fridge about 30 minutes before cooking. This helps it cook evenly. For the full recipe, check the details above. In this post, I covered how to make Garlic Herb Roasted Chicken. You learned about the key ingredients, kitchen staples, and steps to prep and cook your chicken perfectly. I shared tips to ensure juicy meat and crispy skin, along with serving ideas and storage instructions. Now, you can confidently make this dish for your family or friends. Enjoy experimenting with flavors and cooking methods to make it your own. Happy cooking!

Garlic Herb Roasted Chicken Savory Family Dinner Dish

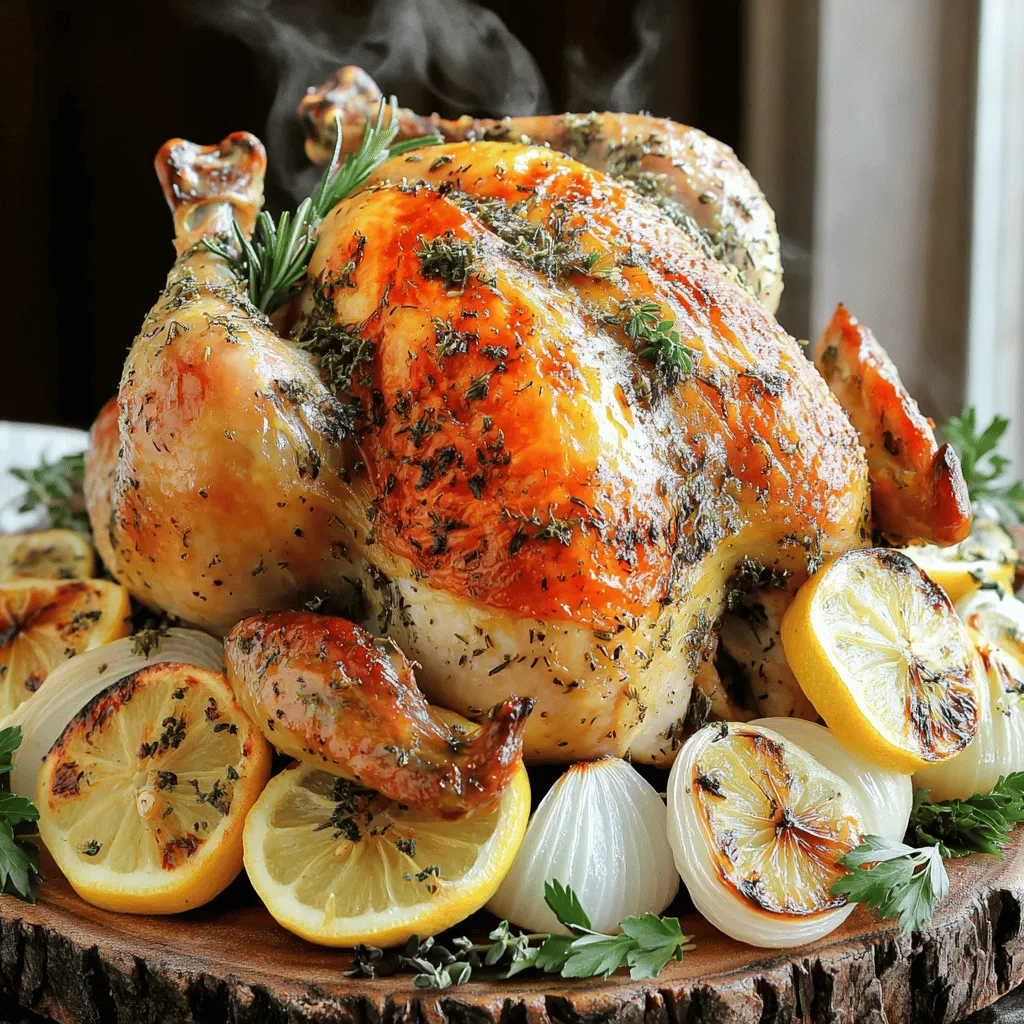
If you’re looking for a tasty and easy family dinner, Garlic Herb Roasted Chicken is a winner! This savory dish

To make a sweet potato casserole, gather these key ingredients: - 3 large sweet potatoes (about 2 pounds), peeled and cubed - 1/2 cup brown sugar - 1/4 cup granulated sugar - 1/2 cup unsalted butter, melted - 1/4 cup milk - 1 teaspoon vanilla extract - 1/2 teaspoon ground cinnamon - 1/4 teaspoon ground nutmeg - 1/4 teaspoon salt - 2 cups mini marshmallows These ingredients create a creamy and sweet base, perfect for your casserole. You can add some fun extras to make your casserole unique. Here are some ideas: - Chopped pecans for crunch - Coconut flakes for a tropical twist - A touch of maple syrup for extra sweetness - A splash of orange juice for brightness Feel free to mix and match these options to suit your taste! If you have dietary needs, here are some substitutions: - Use coconut milk instead of regular milk for a dairy-free option. - Swap the butter with coconut oil for a vegan alternative. - For a lower-sugar version, try using a sugar substitute. These swaps help keep the dish delicious while meeting your dietary needs. For the full recipe, you can check here: [Full Recipe]. Start by peeling the sweet potatoes. I use about three large ones, weighing around two pounds. Next, cut them into cubes. This helps them cook evenly. In a large pot, bring salted water to a boil. Add the sweet potato cubes and cook for about 15 minutes. They should be fork-tender. Once done, drain the water and let them cool for a few minutes. In a mixing bowl, mash the cooled sweet potatoes until they are smooth. This step is key for a creamy texture. Then, add in the brown sugar, granulated sugar, melted butter, milk, vanilla extract, ground cinnamon, ground nutmeg, and salt. Mix everything well until it’s combined and creamy. This mix is the heart of your casserole. Transfer it into a greased 9x13 inch baking dish. Smooth the top with a spatula for even baking. Now, it’s time to bake! Preheat your oven to 350°F (175°C). Sprinkle two cups of mini marshmallows evenly over the sweet potato mixture. Bake in your preheated oven for 25 to 30 minutes. Keep an eye on it; you want the marshmallows to be golden brown and slightly toasted. Once done, remove it from the oven and let it cool for a few minutes before serving. Enjoy this sweet potato casserole as a delightful side dish! For the full recipe, check out [Full Recipe]. To make your sweet potato casserole smooth, start by cooking the sweet potatoes right. Boil them in salted water until they are fork-tender, about 15 minutes. Drain and let them cool a bit. When you mash the sweet potatoes, ensure there are no lumps. A smooth texture is key to a great casserole. You can boost the flavor in your casserole easily. Try adding a pinch of cayenne pepper for a bit of heat. A splash of orange juice can add a nice citrus twist. You might also want to mix in some chopped pecans for a crunchy texture. Don’t forget to taste as you mix! Serve your sweet potato casserole warm from the oven. For a lovely touch, sprinkle some chopped pecans on top. A dusting of cinnamon adds a nice pop of color and flavor. You can also pair it with savory dishes like roast turkey or ham. This makes it a fantastic side for any holiday feast. For the full recipe, check out the details above. {{image_2}} While marshmallows add a sweet touch, you can try other toppings. Consider using crushed graham crackers for a crunchy layer. You can sprinkle brown sugar and butter on top for a caramelized finish. Or, how about a nutty topping made from chopped pecans? These options can give your sweet potato casserole a twist. You can switch the flavor profile by adjusting sweet and savory elements. If you prefer a savory dish, cut back on sugars. Add ingredients like cheese or herbs for a unique taste. For a sweeter version, increase brown sugar and add maple syrup. Both versions can delight your guests! Nuts bring a lovely crunch to the dish. Chopped pecans or walnuts can enhance the texture. You can also mix in fruits like cranberries or apples for a fruity surprise. These additions not only improve flavor but also add nutrition. Experiment with these ideas to create your perfect casserole. For the full recipe, check out the Sweet Potato Marshmallow Delight. To keep your sweet potato casserole fresh, let it cool first. Cover the dish with plastic wrap or a lid. Store it in the fridge. It should stay good for about 3 to 5 days. If you want to save space, transfer it to an airtight container. To reheat, preheat your oven to 350°F (175°C). Place the casserole in an oven-safe dish. Cover it with foil to prevent drying out. Heat for 15 to 20 minutes. If you want to toast the marshmallows, remove the foil for the last 5 minutes. If you want to freeze your casserole, let it cool completely. Wrap it tightly in plastic wrap, then in aluminum foil. Label it with the date. It can freeze well for up to 3 months. To thaw, put it in the fridge overnight before reheating. Enjoy your Sweet Potato Marshmallow Delight later! For the full recipe, check the section above. Yes, you can make Sweet Potato Casserole ahead. Prepare the dish and store it in the fridge. Cover it with plastic wrap or foil. You can keep it for about two days. When ready to bake, remove it from the fridge. Let it sit at room temperature for 30 minutes before baking. This helps it cook evenly. To make this Sweet Potato Casserole vegan, swap butter for plant-based butter. Use almond milk instead of regular milk. For sweeteners, maple syrup is a great choice. You could also use coconut sugar. The mini marshmallows can be replaced with vegan marshmallows. Many brands offer this option today. Sweet Potato Casserole pairs well with many sides. Here are some ideas: - Green beans: Their crispness balances the softness of the casserole. - Stuffing: A savory stuffing complements the sweet flavors. - Roasted vegetables: Carrots or Brussels sprouts add color and nutrition. - Cranberry sauce: Its tartness cuts through the sweetness nicely. Try these sides to create a balanced meal. For the full recipe, check out the Sweet Potato Marshmallow Delight. This blog detailed how to make a delicious sweet potato casserole. We covered the key and optional ingredients, along with swaps for dietary needs. I shared step-by-step instructions and tips for the best texture and flavor. You can also explore different topping choices and ways to store leftovers. In the end, this dish is versatile and quick to prepare. Enjoy making this tasty casserole that fits your style and needs. The joy is in the cooking and sharing!

Sweet Potato Casserole with Marshmallows Delight

Sweet Potato Casserole with Marshmallows is a classic dish that brightens any table. I’ll share my easy guide to making

Creating a no-bake chocolate cheesecake is easy with the right ingredients. Here’s what you need: - Chocolate Graham Cracker Crust Components - 1 ½ cups chocolate graham cracker crumbs - ½ cup unsalted butter, melted - Cream Cheese Filling Ingredients - 2 cups cream cheese, softened - 1 cup powdered sugar - 1 teaspoon vanilla extract - 1 cup heavy whipping cream - 6 ounces semi-sweet chocolate, melted and cooled - Topping Options - Chocolate shavings - Cocoa powder for garnish Using quality ingredients is key. The chocolate graham cracker crumbs give the crust its rich flavor. Softened cream cheese makes the filling creamy. The whipped cream adds lightness. Melted chocolate brings a deep chocolate taste, making every bite a delight. You can find the full recipe linked above for more details. Enjoy your cooking adventure! To make the crust, I start by mixing the chocolate graham cracker crumbs with melted butter. I use a medium bowl for this. Stir until the crumbs feel wet, like sand. This helps form a strong base for the cheesecake. Next, I press this mixture firmly into the bottom of a 9-inch springform pan. I make sure to create an even layer. Using the back of a measuring cup works great for compacting it well. Once it’s ready, I pop the pan in the fridge while I prepare the filling. Now, I move on to the filling. I take a large mixing bowl and beat the softened cream cheese with an electric mixer. I mix until it's smooth and creamy. Then, I gradually add powdered sugar. I keep mixing until it is well combined. After that, I mix in the vanilla extract and the melted chocolate. This will give the filling a rich flavor. I want it to be creamy and smooth, so I keep at it until everything blends perfectly. With the filling ready, I whip up some heavy cream in a separate bowl. I whip it until stiff peaks form. This step is key to making the filling light. I then gently fold the whipped cream into the cream cheese mixture. I use a spatula and take care not to deflate the whipped cream. This keeps the filling airy. Once fully combined, I pour the filling into the chilled crust. I smooth the top with a spatula to make it look nice. Now comes the waiting part. I cover the cheesecake with plastic wrap and put it in the fridge. It needs to chill for at least 4 hours, but overnight is best. This helps it set properly. When it's ready to serve, I carefully remove the sides of the springform pan. For a finishing touch, I garnish with chocolate shavings or a dusting of cocoa powder. This makes the cheesecake look fancy and inviting. To make a great crust, press it evenly into the pan. Start by mixing the chocolate graham cracker crumbs with melted butter. Use a firm hand to press the mixture down. This helps create a solid base. A measuring cup works well for pressing down the crumbs evenly. Make sure to cover the bottom and the edges. After you form the crust, refrigerate it while you prepare the filling. This sets it nicely. To avoid lumps in the cream cheese, make sure it is very soft. Let it sit at room temperature before mixing. Use an electric mixer to beat the cream cheese until it's smooth. When you add whipped cream, fold it in gently. Use a spatula to lift and turn the mixture. This keeps the whipped cream airy. A light filling makes each bite melt in your mouth. Pair the cheesecake with fruits like raspberries or strawberries. They add a nice burst of flavor. You can also drizzle chocolate or caramel sauce on top for extra sweetness. For special occasions, consider using decorative plates. Add chocolate shavings or a dusting of cocoa powder on top. This makes the dessert look fancy and inviting. If you want to explore more about this delightful dessert, check out the Full Recipe for all the details! {{image_2}} You can change the flavor of your no-bake chocolate cheesecake. Try using different types of chocolate. Dark chocolate adds a rich taste. White chocolate gives a sweet, creamy touch. You can also mix in flavors like raspberry or mint. These will brighten the cheesecake and add a fun twist. Just fold in the new flavors before adding the whipped cream. If you need gluten-free options, use gluten-free chocolate graham crackers. They work just as well as regular ones. For a dairy-free cheesecake, replace cream cheese with a dairy-free cream cheese. You can also use coconut cream instead of heavy cream. These swaps keep the taste rich while meeting your dietary needs. Mini cheesecake cups are a great way to serve this treat. You can use small cups or jars for fun presentations. This makes it easy for guests to grab their own dessert. For individual servings, pour the filling into muffin tins lined with paper cups. This way, everyone gets their own slice. These ideas make your cheesecake even more enjoyable! To keep your no-bake chocolate cheesecake fresh, store leftovers in the fridge. Use an airtight container to prevent it from absorbing other smells. Wrap the cheesecake tightly in plastic wrap if you don't have a container. This method keeps the flavors intact. - Store in the fridge for up to 5 days. - Use a springform pan for easy removal. You can freeze this cheesecake if you have leftovers. First, remove the cheesecake from the springform pan. Wrap it tightly in plastic wrap, then cover with aluminum foil. This double layer protects it from freezer burn. - Freeze for up to 3 months. - To thaw, place it in the fridge overnight. This helps maintain the texture. Enjoy your delicious no-bake chocolate cheesecake at its best! For a complete guide, check the Full Recipe. A no-bake cheesecake lasts about 4 to 5 days in the fridge. Make sure to store it in an airtight container. This helps keep it fresh and tasty. For best results, avoid leaving it out for long periods. You can use low-fat cream cheese, but the texture may change. Low-fat cream cheese can make the cheesecake less creamy. It might also taste a bit different compared to full-fat cream cheese. If you want a rich flavor, stick with the full-fat option. To prevent cracks, chill the cheesecake slowly. Rapid temperature changes can cause it to crack. Ensure your cheesecake cools at room temperature before you put it in the fridge. Also, avoid over-mixing the filling. This keeps the air bubbles small and helps it set evenly. Yes, you can make this cheesecake a day or two ahead. Making it ahead gives it time to chill and set well. Just cover it tightly in the fridge until you're ready to serve. This makes it a great choice for parties or gatherings. For the full recipe, check out the complete details. This guide showed how to create a tasty no-bake cheesecake. We covered essential ingredients, step-by-step instructions, and helpful tips. You now know about variations and storage practices for your cheesecake. Remember, the key is in using quality ingredients and taking your time. With these skills, you can impress anyone with your cheesecake creation. Enjoy every bite and share your sweet success with friends!

No-Bake Chocolate Cheesecake Rich and Simple Delight

Craving a dessert that’s rich, creamy, and easy? Look no further! This No-Bake Chocolate Cheesecake is your go-to sweet treat.

To make creamy tomato basil pasta, you need a few simple ingredients. Here’s the list: - 12 oz fettuccine pasta - 2 tablespoons olive oil - 4 cloves garlic, minced - 1 can (14 oz) crushed tomatoes - 1 cup heavy cream - 1 cup fresh basil leaves, chopped (plus extra for garnish) - 1 teaspoon dried oregano - Salt and pepper to taste - ½ cup grated Parmesan cheese (plus more for serving) - Zest of 1 lemon These ingredients bring together a lovely blend of flavors. The fettuccine serves as a hearty base. The olive oil adds richness, while garlic gives a punch of flavor. Crushed tomatoes form the heart of the sauce, making it juicy and vibrant. Heavy cream gives the dish its creamy texture. Fresh basil adds a bright, aromatic note. Dried oregano complements the tomatoes nicely. Salt and pepper enhance all the flavors, while Parmesan cheese adds a nutty finish. Lastly, lemon zest brightens the entire dish. Make sure to gather all these items before you start cooking. This way, you can focus on the fun part—creating a delicious meal! If you want to see the full recipe, check it out [here](#). To boil fettuccine, fill a large pot with water. Add a good amount of salt. Bring the water to a boil over high heat. Once boiling, gently add the fettuccine. Cook according to the package instructions. I usually check for al dente texture after about 8-10 minutes. This means the pasta should be firm but not hard. To achieve this perfect bite, stir the pasta occasionally. It helps to keep it from sticking. Don't forget to reserve ½ cup of pasta water before draining. This water is key for the sauce later. To start the sauce, heat 2 tablespoons of olive oil in a large skillet over medium heat. Add 4 cloves of minced garlic. Sauté for about 1 minute. You want the garlic fragrant but not browned. Next, pour in a can of crushed tomatoes. Stir in 1 teaspoon of dried oregano. Let the mixture simmer for 5-7 minutes. This helps the flavors blend well. Now, lower the heat and stir in 1 cup of heavy cream. Mix until everything is smooth and creamy. Then add 1 cup of chopped fresh basil leaves. Season with salt, pepper, and the zest of one lemon for brightness. This gives the sauce a fresh lift. Adding the pasta to the sauce is where the magic happens. Carefully add the drained fettuccine to the skillet. Toss everything together, ensuring the pasta gets a good coat of sauce. Here’s where the reserved pasta water comes in handy. Add it a little at a time until you reach your desired consistency. Finally, stir in ½ cup of grated Parmesan cheese. Mix until the cheese melts into the sauce. This adds richness and depth to your creamy tomato basil pasta. Now you're ready to serve this delightful dish. For the full recipe, check the link! To make your creamy tomato basil pasta shine, focus on seasoning. Start with salt in the boiling water. It helps flavor the pasta. Taste the sauce before serving. Adjust salt and pepper as needed. You can also add a pinch of sugar if the tomatoes taste too acidic. For creaminess, you can adjust the amount of heavy cream. If you want a lighter sauce, use less cream. Add a touch of pasta water to thin it out. This can help you achieve the desired consistency. Not all pasta types are equal, and that’s okay! You can use penne, spaghetti, or whole wheat pasta. Choose what you love or what you have. Each type will bring a different bite to the dish. If you want to switch up the flavors, try different herbs. Fresh parsley or thyme can work well. You can also use different cheeses. Try mozzarella for a gooey texture or goat cheese for tanginess. A common mistake is overcooking the pasta. Keep an eye on the timer! Cook until al dente for the best texture. Overcooked pasta turns mushy and soggy. Another mistake is skipping the pasta water. This starchy water helps the sauce cling to the pasta. Always reserve some before draining. Add it a little at a time when mixing your pasta with the sauce. It makes a big difference! {{image_2}} You can easily boost your creamy tomato basil pasta with protein. Here are a few tasty options: - Chicken: Grilled or sautéed chicken breast adds great flavor. - Shrimp: Cook shrimp in the same pan for a quick seafood twist. - Sausage: Use Italian sausage for a hearty kick. For those who prefer plant-based meals, try these vegetarian proteins: - Chickpeas: Add canned chickpeas for extra fiber and protein. - Tofu: Sauté firm tofu until golden for a nice texture. - Lentils: Cooked lentils mix well and add depth to the dish. Want to switch up the creamy sauce? Here are some ideas: - Dairy-Free Alternatives: Use coconut milk or cashew cream if you're avoiding dairy. - Other Creamy Ingredients: You can blend silken tofu or use cream cheese for a rich taste. Seasonal veggies can make your dish pop. Consider these options: - Spinach: Add fresh spinach for color and nutrition. - Zucchini: Sauté sliced zucchini for a light crunch. - Bell Peppers: Sweet bell peppers bring a lovely flavor. Feel free to play with spices, too. A pinch of red pepper flakes can add heat. Fresh herbs like thyme or parsley can bring new flavors to your pasta. The possibilities are endless! To keep your creamy tomato basil pasta fresh, store it in an airtight container. Place it in the fridge within two hours of cooking. This helps avoid bacteria growth. The pasta stays fresh for about 3 to 5 days. When reheating, avoid the microwave if you can. Instead, use a skillet over low heat. Add a splash of milk or cream to keep it moist. Stir often to maintain that creamy texture you love. Yes, you can freeze creamy tomato basil pasta! To do this, let it cool completely. Then, place it in a freezer-safe container. When you're ready to eat, thaw it in the fridge overnight. Reheat it slowly in a skillet, adding a little cream to keep it creamy. Enjoy your delicious meal later! You can pair creamy tomato basil pasta with many tasty side dishes. Here are some great options: - Garlic bread: It’s warm and buttery, perfect for dipping. - Mixed green salad: A fresh salad adds a nice crunch. - Roasted vegetables: Try zucchini, bell peppers, or asparagus for extra flavor. - Grilled chicken: It adds protein and makes the meal more filling. These sides keep the meal balanced and tasty. Yes, you can make creamy tomato basil pasta ahead of time. Here are some tips: - Cook the pasta until al dente. It will not get mushy when reheated. - Store the sauce separately in a sealed container. This keeps it fresh. - When ready to eat, reheat the sauce and mix it with the pasta. This method saves time for busy days. Absolutely! Creamy tomato basil pasta is great for meal prep. Here’s how to store it: - Divide the pasta into meal-sized portions. Use airtight containers. - Keep the pasta and sauce separate to avoid sogginess. - Store in the fridge for up to three days. This way, you can enjoy it all week long! Adjusting the spice levels is easy. Here are some ideas: - For a milder dish, use less garlic or skip the pepper. - To spice it up, add red pepper flakes or a dash of hot sauce. - Fresh herbs like basil can also add flavor without heat. You can customize the heat to your liking! For the full recipe of creamy tomato basil pasta, click here: [Full Recipe](#). This blog covered creamy tomato basil pasta from start to finish. We discussed ingredients, how to cook pasta, and make the sauce. I shared tips for perfecting flavors while avoiding common mistakes. You also learned about fun variations and storage tips. Remember, experimenting can lead to new, exciting dishes. Enjoy the process and savor every bite!

Creamy Tomato Basil Pasta Quick and Flavorful Meal

Are you ready to whip up a delicious and quick meal? My Creamy Tomato Basil Pasta hits the spot every

- 1 cup broccoli florets - 1 cup bell peppers (red, yellow, and green), sliced - 1 cup snap peas - 1 medium carrot, julienned - 1 small zucchini, sliced Using fresh vegetables makes a big difference in taste. Broccoli adds crunch, while bell peppers give sweetness. Snap peas offer a nice snap, and carrots add color. Zucchini brings a soft texture that complements the other veggies. - 3 cloves garlic, minced - 1 tablespoon fresh ginger, grated - 3 tablespoons soy sauce (or tamari for gluten-free) - 1 tablespoon sesame oil - 1 tablespoon olive oil - Salt and pepper to taste Garlic and ginger give a warm flavor base. Soy sauce adds saltiness and depth. Sesame oil brings a nutty taste. Salt and pepper finish the dish, elevating all the flavors. - 1 teaspoon sesame seeds (for garnish) Sesame seeds not only add crunch but also make the dish look pretty. You can also add other veggies you have on hand. This makes the stir-fry unique and fun to create. For the full recipe, check out the complete steps to make this tasty meal. First, wash all your vegetables. Clean veggies are key for taste and health. Next, cut your broccoli into small florets. Slice the bell peppers into thin strips. Julienne the carrot and slice the zucchini. Lastly, mince the garlic and grate the ginger. Having everything ready helps the stir-fry cook evenly and quickly. Grab a large skillet or wok. Heat olive oil over medium-high heat. When the oil is hot, add the minced garlic and grated ginger. Sauté them for about 30 seconds until they smell great. Now, toss in the broccoli and carrots. Stir-fry these for 2 to 3 minutes. They should start to soften but still stay crisp. Next, add the bell peppers and snap peas. Keep stir-frying for another 2 to 3 minutes. All the veggies should be bright and slightly tender. It’s important not to overcook them, as we want a nice crunch. Drizzle soy sauce and sesame oil over your veggies. Stir well to coat every piece. Cook for one more minute to let the flavors mix. Finally, season with salt and pepper to taste. Once done, remove the skillet from heat. Transfer your colorful stir-fry to a bowl or platter. For a final touch, sprinkle sesame seeds on top. Enjoy your tasty and healthy meal! For full instructions, check the Full Recipe. To get that perfect crisp, keep your heat high. Use a large skillet or wok. This gives the vegetables space to cook quickly. Don’t overcrowd the pan. If you add too many veggies at once, they will steam instead of stir-fry. Stir constantly to keep them moving. This helps all sides cook evenly. Each vegetable has its own cooking time. Start with the harder ones first. Broccoli and carrots need more time. Add bell peppers and snap peas later, as they cook faster. Here’s a quick guide: - Broccoli: 2-3 minutes - Carrots: 2-3 minutes - Bell Peppers: 1-2 minutes - Snap Peas: 1-2 minutes Pay attention to their colors. Bright green and vivid shades mean they’re done! For a great meal, serve your stir-fry over rice or quinoa. This adds a nice touch and makes it filling. You can also add fresh herbs, like cilantro, on top. A sprinkle of sesame seeds adds crunch. For a spicy kick, try drizzling sriracha or chili oil. Want something different? Pair this stir-fry with a light soup. It complements the meal well. For more ideas, check the Full Recipe for inspiration! {{image_2}} You can easily add protein to your vegetable stir-fry. Try tofu, chicken, or shrimp. Each option adds flavor and makes the meal more filling. For tofu, use firm or extra firm. Cut it into cubes and sauté until golden. For chicken, slice it thinly and cook until no longer pink. Shrimp cooks fast, so add it near the end. This addition boosts nutrition and makes your dish more satisfying. Soy sauce is great, but you can switch it up! Try teriyaki sauce for sweetness or hoisin sauce for a rich flavor. If you want a kick, add sriracha or chili paste. For a tangy taste, use lemon juice or rice vinegar. Marinating your protein before cooking adds depth. Just mix your sauce and let the protein sit for 30 minutes. Using seasonal veggies can enhance your stir-fry. In spring, add asparagus and snap peas. Summer is perfect for zucchini and corn. In fall, try carrots and bell peppers. Winter often brings hearty greens like kale. You can mix and match based on what's fresh. This keeps your meal exciting and supports local farmers. For the full recipe, check the detailed steps above. To keep your vegetable stir-fry fresh, store it in an airtight container. Make sure it is completely cool before sealing. Place it in the fridge within two hours of cooking. This helps prevent bacteria growth. You can store it for up to three days. When you’re ready to eat, check for any off smells or changes in texture. If it seems fine, you can enjoy it again. If you want to save your stir-fry for later, freezing is a great option. Allow it to cool completely before packing it. Use a freezer-safe container or a heavy-duty freezer bag. Make sure to remove as much air as possible to avoid freezer burn. You can freeze it for up to three months. Label the bag with the date to keep track. Thaw it overnight in the fridge before reheating. When reheating your stir-fry, you want to keep it tasty. The best way is to use a skillet. Add a splash of water or broth to help steam the veggies. Heat it over medium heat, stirring gently. This helps keep the vegetables crisp. You can also use a microwave if you're short on time. Cover the dish and heat in short bursts, stirring in between. This ensures even heating without overcooking. For the full recipe, check out the recipe link above. Yes, you can make this stir-fry ahead of time. Cook the vegetables and store them in the fridge. They will stay fresh for up to three days. When you're ready to eat, heat the stir-fry in a pan. You can add a splash of soy sauce to refresh the flavor. This saves time on busy days and still gives you a tasty meal. Great sides for vegetable stir-fry include: - Steamed rice - Quinoa - Noodles - Crispy spring rolls - A fresh salad These sides add variety and help round out the meal. You can also serve a light soy sauce or sweet chili sauce for dipping. Each option complements the stir-fry well and boosts your meal's flavor. To make this stir-fry vegan-friendly, use plant-based sauces. Replace regular soy sauce with a gluten-free version if needed. Make sure your oils are vegan, which they usually are. You can also add tofu or tempeh for extra protein. This keeps your meal healthy and satisfying without any animal products. Enjoy this delicious dish knowing it fits your diet! Stir-frying is simple and fun. We covered fresh veggies, seasonings, and cooking tips. You learned how to achieve a crispy texture and paired your dish with proteins and sauces. We also explored storage methods to keep leftovers tasty. Remember, you can make this dish suit your taste and diet. Experiment with different veggies and flavors. Enjoy your cooking!

Quick and Easy Vegetable Stir-Fry Tasty and Healthy Meal

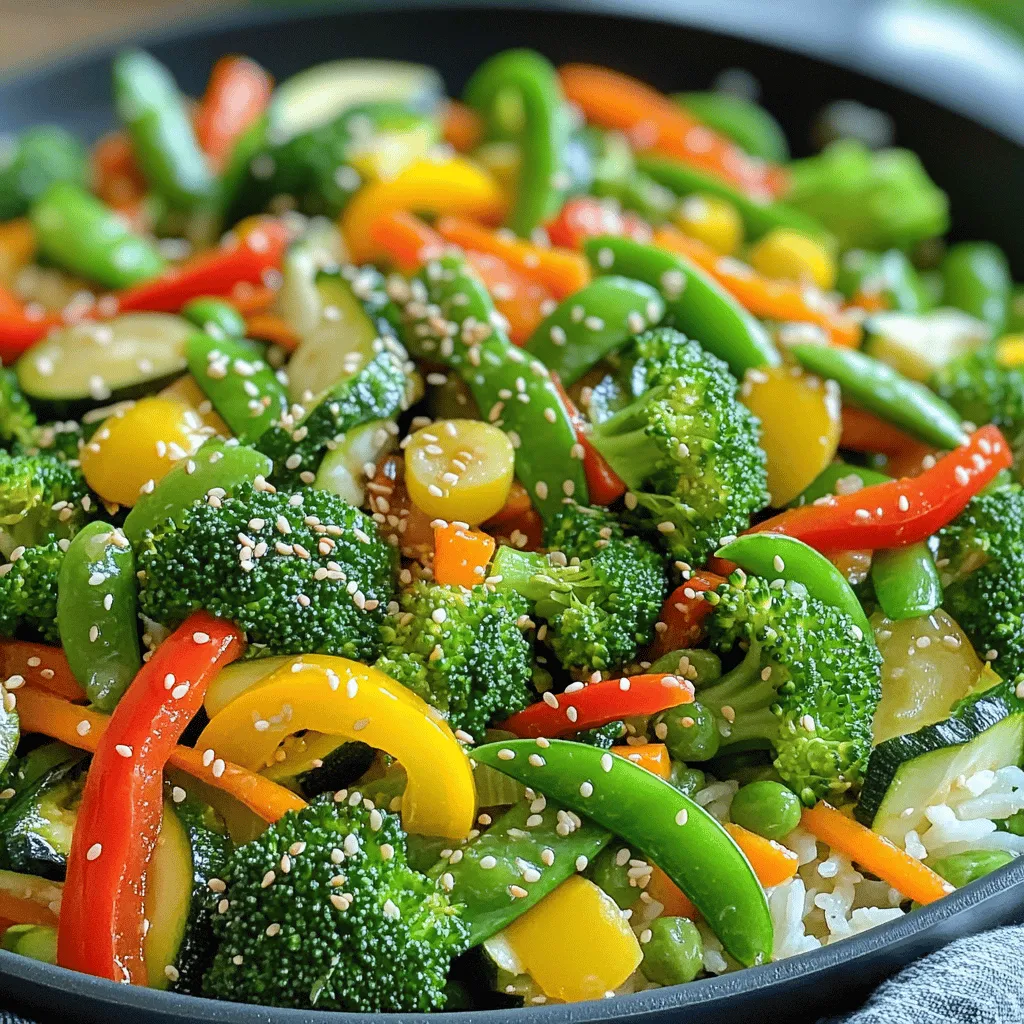
Do you want a meal that’s quick, easy, and packed with flavor? Then a vegetable stir-fry is for you! This

- 2 slices of whole grain bread - 1 ripe avocado - 2 large eggs - 1 teaspoon white vinegar - 1 tablespoon olive oil - Juice of 1/2 lemon - Salt and pepper to taste - Red pepper flakes (optional) - Fresh herbs for garnish (such as cilantro or chives) When making avocado toast with a poached egg, it's key to use fresh, quality ingredients. The bread gives the toast structure. Whole grain bread adds fiber and flavor. Pick a ripe avocado that feels soft but not mushy. This will make your spread creamy and rich. Use large eggs for a perfect poach. The white vinegar helps the egg whites hold their shape. The olive oil adds a nice touch of richness. Lemon juice brightens the flavor of the avocado. Salt and pepper enhance all the tastes. For an extra kick, red pepper flakes are great. Fresh herbs like cilantro or chives add color and taste. They make your dish pop! Ready to cook? Check out the Full Recipe for the full details! Toasting the bread is key for a great texture. You want it nice and crisp. Set your toaster to medium-high. Watch closely to avoid burning. The toast should be golden brown and sturdy enough to hold the toppings. Choosing a ripe avocado is simple. Look for one that yields slightly to gentle pressure. Cut it in half and remove the pit. Scoop the flesh into a bowl. Mash it with a fork to your liking. For extra flavor, mix in lemon juice, olive oil, salt, and pepper. This step adds creaminess and taste. Poaching eggs can seem tricky, but it’s easy with practice. Fill a pot with water and bring it to a gentle simmer. Add one teaspoon of white vinegar. Crack an egg into a small bowl. Make a gentle swirl in the water and slowly lower the egg in. Cook for 3-4 minutes for a runny yolk. Adjust time for firmer yolks. Use a slotted spoon to lift the egg out and drain it on a paper towel. Now it's time to put it all together. Spread a thick layer of mashed avocado on each slice of toast. Place one poached egg on top of each slice. Make sure to center the egg for a nice look. For the finishing touches, sprinkle red pepper flakes for heat. Add fresh herbs like cilantro or chives for flavor. Taste and add extra salt and pepper if needed. Enjoy your beautiful avocado toast with poached egg. For more details, check the Full Recipe. To make a great poached egg, the water temperature matters. Aim for a gentle simmer. If the water boils, your egg will break apart. Add one teaspoon of white vinegar to the simmering water. This helps the egg whites stay together. Common mistakes include using cold eggs and adding them directly to the water. Always crack your egg into a bowl first. This way, you avoid breaking the yolk. Swirl the water gently before adding the egg for a neat shape. For mashing avocado, you can use a fork or a masher. A fork gives a chunkier texture, while a masher creates a smooth spread. Add flavor to your avocado by mixing in spices. Try salt, pepper, or even garlic powder. You can also add lime juice for a zesty kick. For an extra twist, mix in diced tomatoes or red onion. Choosing the right bread is key for avocado toast. Whole grain bread adds fiber and flavor. Look for bread that is thick and sturdy. This will hold the toppings well. If you need a gluten-free option, try gluten-free bread or a rice cake. Both create a great base for your toppings. You want something that complements the creamy avocado and rich egg. For the full recipe, check out the complete guide. {{image_2}} You can change your avocado toast by adding toppings. Proteins like bacon or smoked salmon can enhance your dish. They add a savory taste that pairs well with the creamy avocado. You can also try vegetable toppings. Slices of tomato or thin radishes add freshness and crunch. These toppings not only look good but also boost the nutrition of your meal. Mixing flavors makes your avocado toast exciting. You can add spices like chili flakes for heat or garlic powder for a savory touch. Consider using herbs like basil or dill for a unique twist. A drizzle of balsamic reduction can add a sweet tang. These combinations offer a whole new taste experience. Think about what to serve with your toast. A side salad can add color and nutrients. A fruit plate can bring in sweetness and balance the meal. You can even serve it with a smoothie for a full breakfast. These sides make your meal more fun and filling. Enjoy exploring these options to find your favorite pairings. To store leftover mashed avocado, place it in a bowl. Cover it tightly with plastic wrap. Press the wrap directly onto the surface of the avocado. This reduces air contact and keeps it fresh. If you want, add a little lemon juice on top to help prevent browning. You can also store it in an airtight container. Use it within one day for the best taste. For reheating, use a toaster or an oven. Avoid the microwave, as it can make the bread soggy. If you have unassembled ingredients, keep the toast and avocado separate. Store the toast in a paper towel bag to keep it crispy. The avocado should stay in a sealed container. This way, you can enjoy your meal again without losing texture or flavor. To poach an egg, start with fresh eggs. Fresh eggs hold their shape better. Use a medium pot and fill it with water. Heat the water until it simmers gently. Add one teaspoon of white vinegar; this helps the egg whites stay together. Crack the egg into a small bowl. Create a gentle swirl in the water with a spoon. Slowly drop the egg into the center. Cook it for 3 to 4 minutes for a runny yolk. Use a slotted spoon to lift the egg out. Drain it on a paper towel. You can prepare some parts ahead of time. Toast the bread just before serving. You can mash the avocado earlier, but it may brown. To keep the avocado fresh, mix in lemon juice. Store it in an airtight container. When ready to serve, spread it on the toast and add the poached egg. Look for avocados that feel slightly soft when you gently squeeze them. A ripe avocado will have a dark green skin. Avoid ones with large dark spots or blemishes. If it feels hard, it is not ripe yet. You can let it sit on the counter for a few days to ripen. You can use tofu or chickpea flour for a vegan option. Silken tofu works well when blended. You can also try making a chickpea scramble. This gives a similar texture and protein. Use whole grain or sprouted bread for added fiber. You can add veggies like spinach or tomatoes for more nutrients. Instead of butter or oil, try using a light spread of hummus. You can also sprinkle nuts or seeds on top for extra crunch and healthy fats. In this post, we covered the best ingredients for avocado toast and how to prepare it. We discussed toasting bread, choosing the right avocado, and poaching eggs perfectly. We also shared tips for perfecting your dish and creative variations to try. Finally, we talked about storing leftovers and answering common questions. Avocado toast is simple, healthy, and fun to customize. Enjoy making it your way!

Avocado Toast with Poached Egg Savory Pleaser Recipe

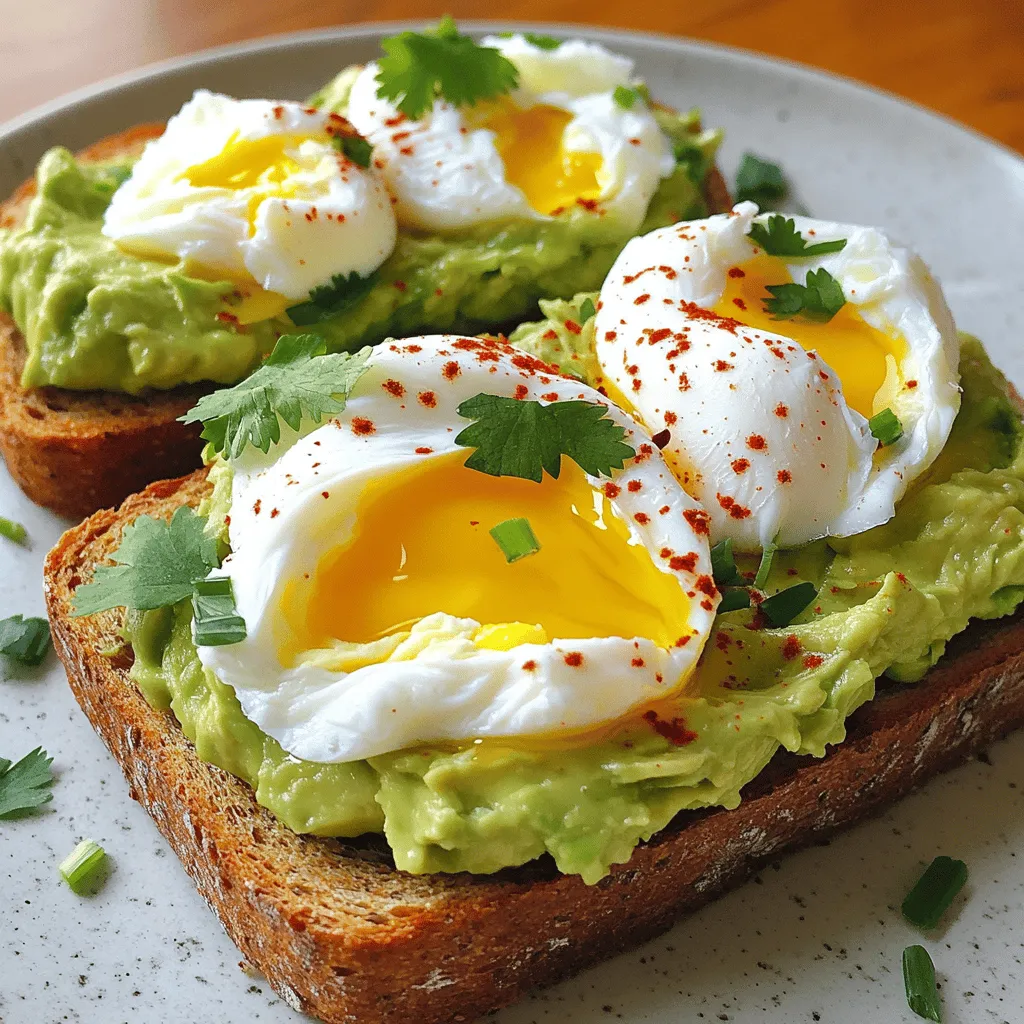
Looking for a tasty and healthy meal that’s easy to make? Avocado Toast with Poached Egg is the perfect dish!

- 2 medium zucchinis, cut into fries - 1 cup breadcrumbs (panko for extra crunch is preferred) - 1/2 cup grated Parmesan cheese - 1 teaspoon garlic powder - 1 teaspoon onion powder - 1 teaspoon Italian seasoning - Salt and pepper, to taste - 2 large eggs, beaten - Olive oil spray The ingredients for crispy baked zucchini fries are simple yet flavorful. Zucchinis are low in calories and high in nutrients. They make a great snack or side dish. The breadcrumbs give the fries a nice crunch. I like using panko because it adds extra crispiness. Parmesan cheese adds a salty, rich flavor. Garlic and onion powders bring depth to the dish. Italian seasoning adds a nice herb blend. Eggs help the coating stick to the zucchini. A spray of olive oil helps achieve that golden, crispy texture. - Calories per serving: About 150 - Macronutrient breakdown: - Fat: 7g - Protein: 6g - Carbs: 17g These zucchini fries are not just tasty; they are also a healthier choice. They fit well into many diets. You can enjoy them guilt-free while satisfying your cravings. For the full recipe, check out the instructions above. - Preheat your oven to 425°F (220°C) and line a baking sheet with parchment paper. This helps with easy cleanup. - In a shallow bowl, mix together 1 cup of breadcrumbs, 1/2 cup of grated Parmesan cheese, 1 teaspoon of garlic powder, 1 teaspoon of onion powder, 1 teaspoon of Italian seasoning, salt, and pepper. This mixture gives great flavor and crunch. - Take two large eggs and beat them in another shallow bowl. This will help the coating stick. - Grab each zucchini fry. First, dip it in the beaten eggs, making sure it is well coated. Next, roll it in the breadcrumb mixture until fully covered. This step is key for a crispy finish. - Lay the coated zucchini fries in a single layer on the prepared baking sheet. Make sure they don’t touch each other. - Spray the fries lightly with olive oil. This helps them get nice and crispy. - Bake for about 20-25 minutes. Flip the fries halfway through to ensure even crispiness. You want them golden brown and crunchy. These crispy baked zucchini fries are perfect for snacking. Serve them warm with your favorite dip. For the complete cooking guide, refer to the Full Recipe. To get your zucchini fries extra crispy, use panko breadcrumbs. They create a light and crunchy coating. Regular breadcrumbs won't give the same texture. Panko is airy, so it fries up beautifully. You can find it in most grocery stores, often in the Asian food aisle. Also, use olive oil spray. This helps the fries crisp up in the oven. Lightly spray before baking. Too much oil can make them soggy, so be careful! When it comes to dips, marinara sauce is a classic. It’s tangy and pairs well with zucchini. Ranch dressing is another great choice. Both add flavor and fun to your snack. For presentation, serve the fries in a cone-shaped holder. This makes them look fancy. You can also use a nice platter with your dips on the side. It’s all about making it fun and inviting! To boost the flavor, add spices or herbs. A pinch of cayenne gives a nice kick. You can also use paprika for a smoky taste. Fresh herbs like parsley or basil can brighten things up too. For cheese lovers, try different types of cheese. Cheddar adds a sharp flavor, while mozzarella gives a gooey texture. Mix and match to find your favorite flavor combo! For the full recipe, check out the complete guide. {{image_2}} To make gluten-free zucchini fries, swap out regular breadcrumbs for gluten-free ones. You can use crushed cornflakes or almond flour. Both options give a nice crunch. Just ensure your seasonings are also gluten-free. This way, everyone can enjoy this tasty snack. For a kick, add cayenne pepper or chili powder to your breadcrumb mix. Start with a small amount, about half a teaspoon, and adjust to your taste. This adds flavor and heat to each bite. You can also sprinkle some on top after baking for extra spice. Mix things up by using different cheeses. Cheddar melts beautifully for a rich taste. Mozzarella gives a gooey texture. You can even blend them for a unique flavor. Just sprinkle the cheese into the breadcrumb mix or on top before baking for a cheesy crust. For the full recipe, check out the detailed instructions earlier in the article! To store your leftover crispy baked zucchini fries, use airtight containers. Glass or plastic containers work well. Make sure the fries are cool before you seal them up. This keeps moisture out and helps them stay crispy longer. When you're ready to enjoy your leftovers, the best method is to use an oven. Preheat it to 375°F (190°C). Place the zucchini fries on a baking sheet and heat for about 10 minutes. This method helps keep them crunchy. You can also use an air fryer if you have one. Set it to 375°F (190°C) for about 5 minutes. If you want to freeze the zucchini fries, lay them on a baking sheet in a single layer. Freeze them for about an hour. Once frozen, place them in a freezer bag. This prevents them from sticking together. To reheat, bake them straight from the freezer at 425°F (220°C) for about 20-25 minutes. This will help them get crispy again. Enjoy your snack anytime! For the full recipe, check the earlier section. Yes, you can prep them in advance. Cut the zucchinis and coat them as directed. Place the coated fries on a baking sheet. Cover them with plastic wrap and store them in the fridge. This can save time on busy days. Just bake them when you're ready. Crispy baked zucchini fries pair well with many dips and sides. Here are some ideas: - Marinara sauce - Ranch dressing - Garlic aioli - Ketchup - Hummus You can also serve them with a fresh salad or as a side with burgers. To keep your zucchini fries crispy, avoid excess moisture. Here are some tips: - Pat the zucchini dry before coating. - Use panko breadcrumbs for extra crunch. - Bake at a high temperature. - Flip the fries halfway through baking. - Store leftovers in an open container in the fridge. This helps reduce softness. For the full recipe, check the detailed instructions above. To wrap up, making crispy baked zucchini fries is simple and fun. You just need a few ingredients, like zucchini, breadcrumbs, and Parmesan. The steps are easy: coat, bake, and enjoy. For added flavor, try different cheeses or spices. Storing leftovers? Just follow the tips for best results. With these fries, you can have a tasty snack that’s healthy too. Dive into this recipe and enjoy your delicious, crispy creation!

Crispy Baked Zucchini Fries Delicious Snack Option

Looking for a tasty snack that’s both crispy and healthy? You’ll love these crispy baked zucchini fries! With their golden

For this tasty dish, gather these items: - 4 large russet potatoes - 1 cup chickpeas, drained and rinsed - 1/2 cup tahini - 2 cloves garlic, minced - 2 tablespoons lemon juice - 1 tablespoon maple syrup - 1 teaspoon smoked paprika - 1/4 teaspoon cayenne pepper (optional) - Salt and black pepper to taste - Vegan cheese shreds (to taste) - Chopped green onions for garnish - Fresh parsley for garnish In this recipe, you will use both fresh and pantry items. The russet potatoes provide a hearty base. Fresh garlic and green onions add great flavor. The chickpeas and tahini create a creamy sauce. These pantry staples give you the right texture and taste. Using fresh lemon juice brightens the dish. This mix keeps the meal both tasty and satisfying. You might not have all these ingredients on hand. If you don’t have russet potatoes, try sweet potatoes instead. They will add a different flavor and sweetness. For a nut-free option, use sunflower seed butter in place of tahini. You can also swap chickpeas for white beans. If you want a spicier kick, add more cayenne or some jalapeños. Feel free to get creative with your toppings too! Use any herbs or veggies you have. Each change can lead to a new twist on this dish. Check out the Full Recipe for more details! Start by preheating your oven to 425°F (220°C). This helps the fries get crispy. Next, wash and peel the large russet potatoes. Cut them into thick fries or wedges. Place them in a large bowl. Drizzle some olive oil over the potatoes. Add salt and black pepper to taste. Toss everything well to coat the fries evenly. Spread the fries in a single layer on a baking sheet lined with parchment paper. Bake for 30-35 minutes. Toss them halfway through for even cooking. The fries should turn golden and crispy. While the fries bake, it is time to make the chickpea sauce. In a blender or food processor, combine one cup of drained and rinsed chickpeas, half a cup of tahini, and two minced garlic cloves. Add two tablespoons of lemon juice, one tablespoon of maple syrup, one teaspoon of smoked paprika, and a pinch of cayenne pepper if you like some heat. Season with salt and black pepper. Blend until smooth and creamy. If the sauce is too thick, add a splash of water to reach your preferred consistency. Once the fries are done, take them out of the oven. Place a generous serving of fries on a plate or a serving dish. Drizzle the creamy chickpea sauce over the fries. Then sprinkle vegan cheese shreds on top. For a pop of color, add chopped green onions and fresh parsley as a garnish. Serve right away for the best texture. You want those fries to be hot and crispy! For the full recipe, check the details above. To make your fries crispy, start with high-starch russet potatoes. Cut them thick for a satisfying bite. Rinse the cut potatoes in cold water to remove extra starch. This helps them crisp up nicely. Toss them lightly in olive oil, salt, and pepper. Spread them out on a baking sheet, making sure they don’t touch. Bake at 425°F (220°C) for 30-35 minutes, flipping halfway through. Keep an eye on them, and pull them out when they turn golden brown. Add-ins can make your dish pop. Try mixing smoked paprika into your chickpea sauce for a smoky taste. If you like heat, cayenne pepper is a great choice. You can also add nutritional yeast for a cheesy flavor. For more texture, consider adding sliced jalapeños or diced tomatoes. Even a sprinkle of fresh herbs can brighten the dish. Experiment with these add-ins to find your favorite combination. For a stunning presentation, stack your fries high on a plate. Drizzle the creamy chickpea sauce over the top. Use a light hand with the vegan cheese shreds; less is often more. Garnish with chopped green onions and parsley. These colors add visual appeal and freshness. To take a great photo, use natural light. A simple background will help your dish shine. Don’t forget to snap a picture before digging in! You can find the full recipe for Vegan Animal Fries in the article. {{image_2}} If you love heat, try adding spices. Use more cayenne pepper in the chickpea sauce. You can also sprinkle some chili flakes on top. For an extra kick, add sliced jalapeños as a garnish. This spice boost makes the dish exciting and perfect for spicy food fans. Make your Vegan Animal Fries even better by piling on toppings. Consider adding black olives, diced tomatoes, or avocado slices. You can also use pickled jalapeños for a tangy flavor. Vegan sour cream is a great addition too. These toppings add color and a burst of flavor to every bite. Get creative with sauces! Instead of chickpea sauce, try vegan ranch or barbecue sauce. A drizzle of sriracha adds heat and flavor. You can even use a tahini dressing for a nutty twist. These sauces can change the whole vibe of your dish and keep it fresh. Explore more ideas and combinations from the Full Recipe to make your own perfect Vegan Animal Fries! To keep your leftover fries fresh, let them cool first. Place them in an airtight container. You can store them in the fridge for up to three days. Make sure not to stack them too high, as this can make them soggy. To reheat your fries, use an oven or air fryer. Preheat the oven to 400°F (200°C). Spread the fries out on a baking tray. Bake for about 10-15 minutes until they get hot and crispy again. Avoid using a microwave, as it will make them soft. If you want to freeze your fries, ensure they are fully cooled. Place them in a single layer on a baking sheet. Freeze them for about an hour until solid. Then, transfer them to a freezer bag. They can stay frozen for up to two months. When you’re ready to eat, bake them straight from the freezer for a quick meal. Yes, you can use sweet potatoes. They add a nice sweet flavor. Slice them like fries. Bake them the same way. Sweet potatoes can change the taste a bit, but they are still tasty. Yes, this recipe is gluten-free. The main ingredients are potatoes and chickpeas. Just check your tahini and vegan cheese for gluten. Most brands are safe, but it is good to double-check. You can store the chickpea sauce for up to five days. Keep it in an airtight container in the fridge. If it gets thick, just stir in a little water. This will bring back its creamy texture. Yes, an air fryer works great for these fries. Cook them at 400°F (200°C) for about 20 minutes. Shake the basket halfway through for even cooking. This method makes them super crispy and tasty. If you don’t have tahini, you can use sunflower seed butter or almond butter. These will change the flavor a bit but will still be good. You can also blend in some soaked nuts for a different taste. Absolutely! You can add more spices to the sauce. Try adding cumin, chili powder, or even a dash of hot sauce. This will make the sauce more flavorful and exciting. To make oil-free fries, skip the oil when seasoning. Use a splash of vegetable broth instead. This will help the seasonings stick to the fries. Bake or air fry them as usual for a healthier option. Yes, canned chickpeas work well for this recipe. Just rinse and drain them before using. They save time and are very convenient. Make sure to blend them until smooth for the best sauce. To make it more filling, add a protein source. You can top the fries with black beans or lentils. This will add more texture and nutrients to the dish. Enjoy it as a hearty meal! In this blog post, we explored how to make tasty vegan animal fries. We covered key ingredients, like fresh staples and easy substitutions. I shared steps for preparing your fries and making the chickpea sauce. Then, we discussed useful tips for crispy fries and eye-catching presentation. You can also try fun variations with spicy toppings or alternative dips. Finally, I explained how to store leftovers and answered common questions. Enjoy making this dish and impress your friends with your cooking skills!

Vegan Animal Fries Flavorful and Satisfying Dish

If you’re hunting for a dish that’s both tasty and satisfying, look no further. Vegan Animal Fries are here to

Older posts
Newer posts
← Previous Page1 … Page81 Page82 Page83 … Page106 Next →
© 2025 My Cooking Cast • Built with GeneratePress

Our Policies

  • Privacy Policy
  • GDPR Policy
  • Terms Of Use
  • Copyright Policy
  • Cookie Policy
  • Disclaimer

More Information​

  • Home
  • Contact
  • About
  • Dinner
  • Appetizers
  • Dessert
©2025, My Cooking Cast About Privacy Policy Back To Top