Skip to content
DisclaimerTerms Of UseGDPR PolicyCookie Policy

My Cooking Cast

  • Home
  • Drinks
  • Appetizers
  • Dinner
  • Dessert
  • About
  • Contact
  • Privacy Policy
DisclaimerTerms Of UseGDPR PolicyCookie Policy

Emma

To make these Oven-Baked S'mores Bars, you need the following items: - 1 cup graham cracker crumbs - 1/2 cup all-purpose flour - 1/3 cup brown sugar, packed - 1/2 cup unsalted butter, melted - 1/4 teaspoon salt - 1/2 teaspoon baking powder - 1 cup mini marshmallows - 1 cup chocolate chips (milk or dark) - 1/2 cup chopped nuts (optional) Each ingredient plays a key role. The graham cracker crumbs give a nice base. The flour helps bind everything. Brown sugar adds sweetness and a hint of caramel. Butter brings richness. Salt enhances all the flavors, while baking powder makes them rise slightly. Marshmallows and chocolate chips make it a true s'mores delight. You can add nuts for crunch, or skip them if you prefer. This recipe is simple and fun. You can find the full recipe for more details on how to combine these ingredients. Enjoy making these tasty treats! - Preheat your oven to 350°F (175°C). - Line an 8x8 inch baking dish with parchment paper. This helps with easy removal later. - In a bowl, combine graham cracker crumbs, flour, brown sugar, melted butter, salt, and baking powder. Mix until you have a crumbly dough. - Reserve a half cup of this mixture for later. This will be the topping for the bars. - Bake the crust in the oven for 10 minutes. It should be lightly set and just starting to brown. - Once baked, take the crust out and sprinkle chocolate chips evenly over the top. - Next, add mini marshmallows over the chocolate chips. - Finally, crumble the reserved graham cracker mixture over the marshmallows. For a crunch, you can add chopped nuts if you like. - Return the dish to the oven and bake for another 15-20 minutes. You want the marshmallows to be golden brown and slightly puffed. - Let the bars cool for at least 10 minutes in the pan. Use the parchment overhang to lift them out. - Slice into squares and serve warm for a gooey s'mores treat! For the full recipe, check [Full Recipe]. To get golden marshmallows, watch your oven closely. Bake them until they puff up and turn brown. This usually takes about 15 to 20 minutes. Using parchment paper is key for easy removal. It helps prevent the bars from sticking to the pan. You can lift the bars out easily, thanks to the overhang. This makes cutting and serving much simpler. You can add fun toppings or mix-ins to your bars. Try adding peanut butter chips or crushed candy bars. You can also sprinkle some sea salt on top for a sweet and salty twist. If you need gluten-free options, use gluten-free graham cracker crumbs. For vegan substitutes, swap the butter with coconut oil and use dairy-free chocolate. These tweaks keep the joy of s'mores while catering to different diets. {{image_2}} You can change up the flavor of your Oven-Baked S'mores Bars. Try making peanut butter s'mores bars. Just mix creamy peanut butter into the dough. This adds a rich, nutty taste. It pairs well with chocolate and marshmallows. Mint chocolate s'mores bars are another fun twist. Use mint chocolate chips instead of regular ones. The mint adds a fresh kick that feels special. You can also add crushed mint candies on top for extra flavor. Don't be afraid to swap ingredients for your s'mores bars. You can use dark chocolate instead of milk chocolate. This gives a deeper flavor. You can also mix in different nuts. Try almonds or hazelnuts for a tasty crunch. For the crust, you could use cookie dough instead of graham cracker crumbs. This makes the bars sweeter and softer. It’s a fun way to change the texture while still keeping that s'mores feel. Explore these variations to find your favorite flavor. These twists keep your s'mores bars exciting and fresh! Check out the Full Recipe for more details on making these delicious treats. To keep your s'mores bars fresh, use an airtight container. Glass or plastic containers work well. Place a layer of parchment paper between the bars and the lid. This helps keep them from sticking. You can store the bars at room temperature for about three days. If you want them to last longer, keep them in the fridge for up to a week. When you're ready to enjoy your leftovers, reheating is key. Place a bar on a microwave-safe plate. Heat it for about 10-15 seconds. This warms the bars without making them hard. If you want that gooey texture back, you can also put them in the oven. Preheat to 350°F (175°C) and warm for 5-10 minutes. For a fun twist, serve your reheated bars with a scoop of ice cream. The warm s'mores with cold ice cream create a yummy contrast. You can also drizzle some caramel or chocolate sauce on top for extra flavor. For more ideas, check the Full Recipe. Can I make S'mores bars ahead of time? Yes, you can make S'mores bars ahead of time. Just bake them as directed. Once cooled, store them in an airtight container. They stay fresh for about three days. For the best taste, warm them slightly before serving. What if I don't have graham cracker crumbs? If you lack graham cracker crumbs, you can use digestive biscuits or vanilla wafers. Crush them into fine crumbs. This will give you a similar sweet and crunchy base for your bars. How can I make these bars more decadent? To make these bars more decadent, add toppings like caramel sauce or peanut butter. You can also mix in flavored chocolate chips, like caramel or butterscotch. These small changes create a richer flavor. Why are my bars falling apart? If your bars fall apart, they might lack enough binding. Ensure you pressed the crust well and used the right amount of butter. Let them cool completely before slicing for better stability. What should I do if my marshmallows are not browning? If your marshmallows are not browning, the oven may not be hot enough. Broil them for a minute at the end if needed. Keep a close eye to prevent burning. This will give you that perfect golden top. You learned to make delicious S'mores Bars with simple steps. From gathering ingredients to baking, it’s easy and fun. Remember to use parchment paper and watch your marshmallows turn golden. Try adding fun twists like peanut butter or mint for new flavors. Store leftovers well, and enjoy them later. These bars are great for sharing or a sweet treat just for you. Don't be afraid to experiment and make them your own. Happy baking!

Oven-Baked S’mores Bars Simple and Delicious Treats

Do you crave a sweet treat that’s easy to make and super delicious? Look no further! Oven-Baked S’mores Bars blend

- 6 oz dark chocolate (70% cocoa), chopped - 4 oz milk chocolate, chopped - 4 oz white chocolate, chopped - 3 tablespoons unsalted butter - 4 large eggs, separated - 1/4 cup granulated sugar - 1 1/2 cups heavy cream, divided - 1 teaspoon vanilla extract - A pinch of salt - Cocoa powder for dusting Using the right measurements is key for this mousse. If you need a bit of change, here are some tips: - Dark chocolate: You can swap it with semi-sweet chocolate if you prefer a milder taste. - Milk chocolate: Try using a milk chocolate with a higher cocoa percentage for a richer flavor. - White chocolate: If you want dairy-free, look for dairy-free white chocolate options. - Heavy cream: Coconut cream can be a great substitute for a non-dairy option. These swaps will still give you a great mousse cake! High-quality chocolate can take your mousse to the next level. Here’s why: - Flavor: Good chocolate has a richer taste. It enhances the overall flavor of the cake. - Texture: Quality chocolate melts smoother. This gives your mousse a creamy feel. - Ingredients: High-quality chocolate has fewer additives. You get pure cocoa flavor without unwanted fillers. When you use better chocolate, your mousse cake will impress everyone who tries it. For the best results, check out the [Full Recipe] for detailed steps and tips. Step 1: Melting the Chocolates Start by chopping the dark and milk chocolates. Place them in a heatproof bowl with the unsalted butter. Set this bowl over a pot of simmering water, known as a double boiler. Stir until the mix melts smoothly. This step is key for rich flavors. Let the melted chocolate cool slightly. Step 2: Creating Dark Chocolate Mousse In a different bowl, whisk the egg yolks with granulated sugar. Keep whisking until the mix gets thick and light in color. Next, stir in the cooled dark chocolate mixture. Add half a cup of heavy cream and mix well. Now, gently fold in whipped cream until you see no streaks. Set this aside. Step 3: Milk Chocolate Mousse Process Repeat the same process for the milk chocolate. Melt it in the double boiler. Combine it with egg yolks and sugar, just like before. After mixing, add another half cup of heavy cream. Fold this milk chocolate mix into the dark chocolate mousse gently. Step 4: Making White Chocolate Mousse For the last mousse, melt the white chocolate in the same way. Once melted, whisk it with egg yolks and sugar. Add heavy cream again, mixing well. Fold this final mousse into the dark and milk chocolate blend. You’ll have a rich, three-layered mousse now. Step 5: Whipping the Cream In a chilled bowl, take the last half cup of heavy cream. Whip until you form soft peaks. This will give your mousse a light texture. Carefully fold this whipped cream into the chocolate mixture. Make sure it’s fully mixed but still fluffy. Step 6: Assembling the Cake Now you can assemble your cake. Use a prepared cake pan or jars. Start with a layer of dark chocolate mousse at the bottom. Then add a layer of milk chocolate mousse. Finally, top it with white chocolate mousse. Smooth the tops with a spatula for an even look. Step 7: Chilling the Mousse Place your assembled cake in the fridge. Chill it for at least 4 hours, or overnight if you can wait. This step helps the mousse set properly, making it easy to slice. Step 8: Serving Suggestions When ready to serve, take it out of the fridge. Carefully remove the cake from the pan. Dust the top with cocoa powder for a beautiful finish. Each slice can be garnished with fresh berries or a dollop of whipped cream for an elegant touch. For the Full Recipe, check out the complete ingredients and steps. When making a triple chocolate mousse cake, avoid these common mistakes: - Overheating the chocolate: Melt chocolate on low heat. High heat can burn it. - Not whipping the cream enough: Soft peaks are key. If you whip too little, the mousse will be thin. - Folding too hard: Use a gentle folding motion. This keeps air in and helps the mousse stay light. To get the perfect mousse texture, follow these tips: - Use cold bowls: Chill your mixing bowls and beaters. Cold helps the cream whip faster. - Separate eggs carefully: Make sure no yolk gets in the whites. Even a pinch can stop them from whipping. - Add flavors: A splash of vanilla extract can boost the chocolate taste. For even layers in your mousse cake, do this: - Use a piping bag: Fill a piping bag with mousse. This helps you control the amount in each layer. - Level the layers: After adding each layer, gently shake the pan. This helps settle the mousse evenly. - Chill between layers: If you want distinct layers, chill each layer for about 30 minutes before adding the next. Remember to check out the Full Recipe for all the details on making your cake. Enjoy your baking adventure! {{image_2}} You can easily customize the flavor of your triple chocolate mousse cake. Here are some ideas: - Coffee: Add a splash of brewed espresso to the dark chocolate layer for a rich depth. - Mint: Mix in a few drops of peppermint extract for a refreshing twist. - Orange: Add some orange zest to the white chocolate mousse for a citrus kick. - Spices: A pinch of cinnamon or cayenne can elevate the flavor profile. These additions can create new dimensions in the cake, making it truly yours. You can adapt this recipe for different dietary needs. Here’s how: - Gluten-Free: The cake is naturally gluten-free as it does not use flour. Just double-check all chocolate labels. - Dairy-Free: Use dairy-free chocolate and coconut cream instead of heavy cream. This keeps the mousse light and fluffy. These swaps ensure that everyone can enjoy this dessert without worry. The way you present your cake adds to its charm. Here are some fun ideas: - Fresh Berries: Top each slice with raspberries or strawberries for a pop of color. - Whipped Cream: A dollop of whipped cream enhances the rich chocolate. - Chocolate Shavings: Use a vegetable peeler to create shavings from extra chocolate. - Nuts: Toasted hazelnuts or almonds can add a nice crunch. These garnishes not only look great but also enhance the flavors of your mousse cake. For the full recipe, visit the link provided. To keep your Triple Chocolate Mousse Cake fresh, store it in the fridge. Use an airtight container to prevent it from absorbing other smells. If you made the cake in jars, simply cover them with lids. This cake tastes best chilled, so keep it cool until you’re ready to serve. You can freeze leftovers if needed. Cut the cake into slices for easy servings. Wrap each slice tightly in plastic wrap. Then place them in a freezer bag. This helps to keep the flavors intact. When you’re ready to eat, let the slices thaw in the fridge overnight. The mousse can last for about 3 to 4 days in the fridge. After that, the texture may change. If you freeze it, the mousse can last up to 2 months. However, it’s best to enjoy this sweet treat fresh for the best taste and texture. Yes, you can use different chocolates. You can mix dark, milk, and white chocolates. Each type brings a unique taste and texture. If you want a sweeter mousse, use more milk chocolate. For a richer flavor, add more dark chocolate. You can also try flavored chocolates, like hazelnut or orange, for a twist. Just remember, the balance of flavors is key. The mousse is set when it is firm to the touch. After chilling, gently press the top with your finger. If it holds its shape, it’s ready. You can also check by tilting the pan. If the mousse does not move, it is set. Chill for at least four hours, or overnight for best results. This time allows the layers to meld and create a smooth texture. You can serve many things with this cake. Fresh berries, like strawberries or raspberries, add a nice tartness. A dollop of whipped cream enhances the creaminess. Mint leaves can add a pop of color and flavor. You could also pair it with a scoop of vanilla ice cream for extra richness. Each option adds a fun twist to your dessert experience. For the full recipe, check out the details above. In this article, we explored the process of making a triple chocolate mousse cake. We discussed the ingredients, measurements, and the benefits of using high-quality chocolate. The step-by-step guide included melting chocolates and creating three types of mousse. We also shared tips to avoid common mistakes and ways to enhance your cake's presentation. Remember, the right storage keeps your mousse fresh. With this knowledge, you can create a delicious treat that impresses all. Enjoy your mousse cake journey!

Triple Chocolate Mousse Cake Rich and Indulgent Dessert

If you love chocolate, this Triple Chocolate Mousse Cake will make your heart sing. Imagine smooth layers of dark, milk,

To make Creamy Cajun Shrimp Pasta, gather these fresh ingredients: - 12 oz fettuccine pasta - 1 lb large shrimp, peeled and deveined - 1 tablespoon Cajun seasoning - 2 tablespoons olive oil - 1 medium onion, diced - 4 cloves garlic, minced - 1 red bell pepper, diced - 1 cup heavy cream - 1 cup chicken broth - 1 cup cherry tomatoes, halved - 1 cup fresh spinach, roughly chopped - Salt and pepper to taste - 1/2 cup grated Parmesan cheese - Fresh parsley, chopped (for garnish) When choosing ingredients, aim for high quality. Fresh shrimp make a big difference in flavor. Use large shrimp for the best bite. Fresh vegetables should be vibrant and firm. They add color and texture to your dish. You can swap some ingredients if needed. If you can't find fettuccine, try penne or linguine. For a lighter touch, use half-and-half instead of heavy cream. If you're avoiding dairy, you can use coconut milk. Just remember, these changes can alter the final flavor. Each ingredient plays a role in creating that creamy, spicy goodness. For more details, check the Full Recipe for step-by-step guidance on this delicious dish! To make the best fettuccine, start with a large pot of salted water. Bring the water to a rolling boil. Add the fettuccine and stir it gently. Cook it according to the package directions until it is al dente. This means it should be firm when you bite it. Drain the pasta in a colander and set it aside. First, take the peeled and deveined shrimp and place them in a bowl. Sprinkle Cajun seasoning over the shrimp. Toss them well to coat each shrimp evenly. Heat a large skillet over medium heat and add olive oil. When the oil is hot, add the shrimp. Cook for about 2 to 3 minutes on each side. The shrimp should turn pink and opaque. Once done, remove them from the skillet and set aside. In the same skillet, add diced onion and red bell pepper. Sauté them for about 3 to 4 minutes until they soften. Then, add minced garlic and cook for another minute until it smells good. Pour in chicken broth and heavy cream, stirring to mix. Let the mixture simmer gently. Add cherry tomatoes and fresh spinach, letting the spinach wilt for about 2 minutes. Now it's time to combine everything! Return the cooked shrimp to the skillet. Gently mix the shrimp, pasta, and sauce together. Make sure the pasta is well coated. For a nice presentation, you can sprinkle grated Parmesan on top. Use fresh parsley to garnish. This step adds a pop of color and flavor to your dish. To enhance flavor balance in your creamy Cajun shrimp pasta, consider these tips: - Use fresh herbs like parsley or basil for bright flavor. They add a fresh kick. - Dried spices, while convenient, lack the zest of fresh herbs. Use them sparingly. - Add a splash of lemon juice before serving. This brightens the dish and adds depth. If you want alternatives for sautéing, here are some ideas: - Grilling the shrimp can add a smoky flavor. Just brush them with olive oil and grill for 2-3 minutes per side. - Baking shrimp in the oven is another option. Coat them in Cajun seasoning and bake at 400°F for about 6-8 minutes. To adjust spiciness levels, try these methods: - Add more Cajun seasoning if you prefer a spicy kick. Start with a small amount and taste as you go. - Include diced jalapeños for extra heat. Remove the seeds for less spice. To garnish your dish, consider these ideas: - Top with freshly chopped parsley for color and freshness. It makes the dish pop. - Add a sprinkle of grated Parmesan cheese just before serving. It gives a nice finish. For serving suggestions, think about these options: - Use a large bowl for a family-style presentation. It looks inviting and casual. - Serve with crusty bread on the side. This helps soak up the creamy sauce. By following these tips, you can make your creamy Cajun shrimp pasta shine. If you want the full recipe, check out the details above. Enjoy your cooking! {{image_2}} You can change the protein in this dish to fit your taste. Try chicken instead of shrimp. Simply cut it into bite-sized pieces and cook it until golden. Tofu is also a great option for a meatless meal. Press the tofu to remove water, then sauté it until crispy. For veggies, get creative! You can add: - Broccoli florets - Zucchini slices - Mushrooms These add flavor and color while boosting nutrition. If you want a lighter sauce, swap heavy cream for half-and-half or Greek yogurt. This keeps the creaminess but reduces fat. For a vegan option, use coconut milk or cashew cream instead. Both options provide a rich taste without dairy. Change up the flavors by adding ingredients like: - Lemon juice for brightness - Smoked paprika for a deeper taste - Fresh herbs like basil or cilantro for freshness While fettuccine is the star of this dish, feel free to try other pasta types. Penne or linguine work well, too. Just keep in mind that different pasta shapes may change cooking times. For example: - Penne usually cooks in about 11-13 minutes - Linguine takes around 8-10 minutes Each pasta shape offers a unique texture and bite, so pick one that you love! To store leftover Creamy Cajun Shrimp Pasta, place it in an airtight container. This keeps it fresh and safe. Let the dish cool to room temperature first. When stored properly, it lasts about 3 to 4 days in the fridge. Make sure to label the container with the date. This helps you track how long it has been stored. You can also freeze Creamy Cajun Shrimp Pasta for longer storage. First, let it cool completely. Then, transfer it to a freezer-safe container. You can use freezer bags as well. When you freeze it this way, it can last up to 3 months. To thaw, place the container in the fridge overnight. For reheating, you can use the microwave or stovetop. If using the stovetop, add a splash of chicken broth or cream. This helps restore the creamy texture. Heat gently over low heat, stirring often, until warmed through. Enjoy your flavorful dish again! You can find the complete recipe for Creamy Cajun Shrimp Pasta [here](#). To add more heat, increase the Cajun seasoning. You can also add red pepper flakes. Start with a pinch, then taste. If you want it hotter, add more slowly. Always balance heat with creaminess for a great flavor. This way, you maintain that creamy goodness while enjoying the spice. Yes, you can use frozen shrimp. First, thaw the shrimp before cooking. Place them in cold water for about 15-20 minutes. Pat them dry before seasoning. This step ensures they cook evenly. Frozen shrimp can be just as tasty as fresh when prepared right. Pair your pasta with a simple green salad. A side of garlic bread goes well too. You can also serve it with roasted vegetables for a healthy touch. These sides complement the creamy pasta nicely and create a complete meal. To make this dish gluten-free, swap the fettuccine for gluten-free pasta. Many brands offer great gluten-free options. Cook them according to the package instructions. This way, you can enjoy the same delicious flavors without gluten. For detailed cooking instructions, check out the Full Recipe. This link will guide you through every step to create this delightful dish. This blog post covered the key steps for making Creamy Cajun Shrimp Pasta. You learned about the best ingredients and how to cook them right. I shared tips on getting the perfect flavor and texture. Remember, you can swap ingredients to fit your taste. Don't forget to store leftovers properly for later enjoyment. This dish is both easy and fun to make. Now, it's time to create your own delicious version of this recipe. Enjoy the cooking journey!

Creamy Cajun Shrimp Pasta Flavorful Dinner Delight

Are you ready to spice up your dinner routine? My Creamy Cajun Shrimp Pasta is a flavorful delight that’s sure

- 12 ounces linguine pasta - 4 tablespoons unsalted butter - 6 garlic cloves, minced - 1 cup heavy cream - 1 cup grated Parmesan cheese - 1 cup shredded mozzarella cheese - 1 teaspoon red pepper flakes - Fresh parsley for garnish - Zest of 1 lemon - You can use gluten-free pasta options if needed. - Dairy-free cheese substitutes work well for a vegan dish. - Olive oil can replace butter for a lighter taste. The main ingredients create a rich and creamy dish. The linguine is the base, holding the sauce well. Butter and garlic bring a savory flavor that everyone loves. Heavy cream adds richness, making the dish feel special. Parmesan and mozzarella create a cheesy goodness that melts in your mouth. If you want a little heat, add red pepper flakes. Fresh parsley brightens the dish and adds color. Lemon zest gives a nice, fresh flavor. You can adjust these flavors to your liking. For those with dietary needs, gluten-free pasta is a great choice. Dairy-free cheese options are available in stores. Using olive oil instead of butter keeps it light and healthy. For the full recipe, check the main article. Enjoy making this tasty dish! First, fill a large pot with water. Add a good amount of salt to the water. Bring the water to a boil. Once it boils, add the linguine. You want to cook it until it is al dente. This means it should be firm but not hard. Follow the package instructions for timing. After cooking, save one cup of the pasta water. Then, drain the linguine and set it aside. In a large skillet, melt the butter over medium heat. Add the minced garlic to the hot butter. If you like a little heat, add the red pepper flakes now. Sauté the garlic for one or two minutes. You want it fragrant but not brown. Next, pour in the heavy cream. Bring the mix to a gentle simmer. Let it cook for about three to five minutes. Stir it occasionally until it thickens a bit. Now, it’s time to stir in the cheeses. Add the grated Parmesan and shredded mozzarella. Mix well until the cheese melts and forms a creamy sauce. Add the cooked linguine to the skillet. Toss it well to coat the pasta in the cheese sauce. If the sauce seems thick, add some of that reserved pasta water. Keep adding until you reach your desired consistency. Season with salt, black pepper, and lemon zest. Finally, mix in the chopped parsley for a fresh touch. You can find the full recipe to guide you along the way! To make your Cheesy Garlic Butter Linguine taste great, you need to balance the salt and seasoning. I recommend starting with a small pinch of salt and adding more if needed. Taste as you go to find the perfect mix. Adding a hint of lemon is another way to boost flavor. The zest adds brightness, which makes the dish pop. Just one lemon’s zest can change the whole dish. It brings freshness to the rich cheese and butter. When sautéing garlic, keep an eye on it. Garlic can burn quickly, which makes it taste bitter. I suggest using medium heat and stirring often. This will help it cook evenly and stay fragrant. To get the right creamy texture, make sure your cream simmers gently. If it boils too hard, it can separate and lose its smooth feel. Stirring in the cheese slowly helps it melt. This way, you create a velvety sauce that clings to the pasta. For the best presentation, serve the pasta in a large bowl. Top it with extra parsley and a sprinkle of Parmesan. A lemon wedge on the side adds a nice touch and looks pretty. Great side dishes include a simple green salad or garlic bread. These complement the rich flavors of the pasta well. They add a fresh crunch and a bit of texture to your meal. For the full recipe, check out the [Full Recipe]. {{image_2}} You can make Cheesy Garlic Butter Linguine even better! Add vegetables like spinach or sun-dried tomatoes. They bring color and nutrition. If you want some protein, try chicken or shrimp. Cook them first, then mix them in. This gives you a filling meal. Cheese is key in this dish. You can switch it up by using different cheese types. Try gouda, cheddar, or feta for a twist. If you prefer vegan options, use vegan cheese. It melts well and keeps the creamy texture. Want some heat? Adjust the red pepper flakes to your taste. Start with a little and add more if you like it spicy. You can also try other spices. Paprika or black pepper adds great flavor without too much heat. Experiment and find your perfect blend! To store leftovers, let the Cheesy Garlic Butter Linguine cool down first. Once cool, place it in an airtight container. This keeps the pasta fresh for up to three days. Use glass or BPA-free plastic containers for the best results. These types help avoid any unwanted flavors or odors from the fridge. When you reheat, keep moisture in mind. The best way to do this is to add a splash of water or cream. Heat it gently on the stove over low heat. Stir often to prevent sticking. You can also use the microwave, but cover it with a damp paper towel. This traps steam and keeps the pasta from drying out. To freeze Cheesy Garlic Butter Linguine, let it cool completely. Then, portion it into freezer-safe bags or containers. Squeeze out excess air before sealing. Label the bags with the date. When you want to enjoy it again, thaw it overnight in the fridge. Reheat it on the stove or in the microwave, adding a little cream or water to restore the creamy texture. This method helps keep the flavor and texture intact. Making Cheesy Garlic Butter Linguine is quick and easy. It takes about 10 minutes to prep and 15 minutes to cook. In total, you can enjoy this dish in just 25 minutes. It’s perfect for busy nights when you want something delicious fast. Yes, you can! Whole wheat linguine is a great option. It has more fiber and nutrients than regular pasta. This small change makes your meal a bit healthier. The taste will still be great, and you won’t lose the cheesy goodness. Absolutely! Cheesy Garlic Butter Linguine works well for meal prep. You can make it ahead of time and store it in the fridge. Just keep it in an airtight container. When you're ready to eat, simply reheat it on the stove or in the microwave. It’s a great way to have a tasty meal ready to go. This dish pairs well with many sides. A simple green salad adds freshness. Garlic bread or crusty rolls make a great addition, too. You can also serve it with grilled vegetables for a balanced meal. Each of these choices enhances the flavors and makes your meal complete. Cheesy garlic butter linguine is a simple, tasty dish. We covered the main ingredients like pasta, butter, and cheeses. I shared step-by-step cooking tips and helpful tricks for great flavor. You can mix in veggies or proteins, too. Remember to store any leftovers well for later. This dish is quick to make and perfect for any meal. Enjoy creating a comforting plate of creamy goodness!

Cheesy Garlic Butter Linguine Flavorful Pasta Dish

If you’re craving a comforting pasta dish, look no further than Cheesy Garlic Butter Linguine. This recipe combines simple ingredients

To create this tasty dip, you need a few key items. Here’s what you will need: - 1 cup cream cheese, softened - 1 cup sour cream - 1 cup shredded mozzarella cheese - 1 cup grated parmesan cheese - 4 cloves garlic, minced - 1 teaspoon Italian seasoning - 1 teaspoon garlic powder - Salt and pepper to taste These ingredients combine to make a rich and creamy base. The cream cheese and sour cream add smoothness. The cheeses give flavor and thickness. The garlic, both minced and in powder form, brings a strong taste. Italian seasoning adds a lovely herbal note, while salt and pepper balance everything. For dipping, I suggest using a crusty bread. Here’s my favorite choice: - 1 loaf of crusty bread (like ciabatta or baguette) This type of bread holds up well against the dip. The crust adds crunch, while the soft inside is perfect for scooping. You can cut the bread into thick slices for a better dipping experience. Toasting the slices makes them even better. To make your dip shine, consider these extra touches: - 1 tablespoon fresh parsley, chopped (for garnish) Fresh parsley adds a pop of color and a hint of freshness. You can also serve the dip with crunchy vegetable sticks for a healthy option. Carrots, celery, or bell peppers work great. If you want to impress, add a sprinkle of extra cheese on top before serving. For the full recipe, refer to the details above. Enjoy the process of making this delicious Baked Garlic Bread Dip! First, preheat your oven to 350°F (175°C). This is key for a good bake. In a medium bowl, mix together the softened cream cheese, sour cream, mozzarella, and parmesan. Blend these until smooth and creamy. Next, stir in the minced garlic, Italian seasoning, garlic powder, salt, and pepper. Make sure all the ingredients are mixed well. Transfer this cheesy mixture to a small, oven-safe dish. Spread it out evenly to ensure even baking. Baking time is crucial for the best flavor. Bake your dip for about 25 to 30 minutes. Look for a bubbly surface and a lightly golden top. This indicates that the dip is ready. I like to check on it halfway through. If you want extra flavor, consider adding more garlic or a sprinkle of extra cheese on top before baking. This will enhance the taste and make it even more delicious. While the dip is baking, it’s time to prepare the bread. Slice your crusty bread into thick pieces. Lay these on a baking sheet. Toast the bread for about 8 to 10 minutes until it turns golden and crispy. This adds a nice crunch. When the dip is done, let it cool for a few minutes. Serve the warm dip with your crispy bread on the side. Enjoy this tasty treat with family and friends! For the full recipe, check out the details above. To make your dip super creamy, use room-temperature cream cheese. This helps it mix well with other ingredients. You can also use full-fat sour cream. It adds richness. Blend everything until smooth. If you want it even creamier, add a splash of milk. This makes the dip dreamy and easy to scoop. Fresh ingredients make all the difference. Use fresh garlic instead of powder for a bold taste. Chopped fresh parsley adds color and flavor. You can also add fresh herbs like basil or chives. They brighten the dip. Try mixing in a bit of lemon juice for a zesty kick. This will elevate the taste and make it pop. Serve the dip hot right from the oven. Pair it with toasted bread for a crunchy bite. Crusty bread, like ciabatta or a baguette, works best. You can also serve with veggie sticks for a fresh crunch. For a fun twist, try pita chips or crackers. They add variety to your appetizer spread. Don't forget to sprinkle extra parsley on top for a nice touch! {{image_2}} If you like heat, add a kick to your dip. Mix in some diced jalapeños or a spoonful of hot sauce. You can also use pepper jack cheese instead of mozzarella for a spicy twist. This change will excite your taste buds and make your dip unforgettable. To make this dip vegetarian, just skip any meat-based ingredients. You can add chopped spinach or artichokes for extra flavor and nutrients. Using fresh herbs like basil or thyme can also enhance the taste. These small changes keep the dip tasty while catering to vegetarian diets. For a gluten-free version, choose gluten-free bread for dipping. Many brands offer great options that taste just as good. You can also serve the dip with fresh veggies like carrots, celery, or bell peppers. This way, everyone can enjoy your tasty creation without worry. For the full recipe, visit the main section. After enjoying your baked garlic bread dip, you may have some left. To store it, let the dip cool first. Then, transfer it to an airtight container. Make sure to seal it well. Store it in the fridge for up to three days. If you have leftover bread, keep it in a separate bag. This helps keep it fresh and prevents it from getting soggy. When you're ready to enjoy the dip again, reheating is easy. Preheat your oven to 350°F (175°C). Place the dip in an oven-safe dish. Cover it with foil to keep it moist. Bake for about 15 to 20 minutes until it's warm. You can also heat it in the microwave. Use a microwave-safe bowl and heat it in short bursts of 30 seconds. Stir in between until it’s hot. The baked garlic bread dip stays fresh in the fridge for three days. If you want to keep it longer, you can freeze it. In a freezer-safe container, it can last up to two months. Just remember to thaw it in the fridge overnight before reheating. This way, you can enjoy your delicious dip whenever you want! For the full recipe, check the previous sections. Yes, you can make this dip ahead of time. Prepare the dip and place it in a baking dish. Cover it and store it in the fridge for up to two days. When you are ready to bake it, just take it out and let it sit at room temperature for about 30 minutes. This helps it cook evenly. Then, follow the baking steps in the Full Recipe. If you want to swap out cream cheese, try using Greek yogurt or ricotta cheese. Both options add a creamy texture. You can also use a vegan cream cheese for a dairy-free option. Just keep in mind that the flavor may change a bit. Adjust seasonings as needed to keep it tasty. You’ll know the dip is done when it’s bubbly and golden on top. This usually takes about 25-30 minutes at 350°F (175°C). Keep an eye on it during the last few minutes. If the top isn’t golden yet, you can broil it for a minute or two. Just watch it closely to avoid burning. Freezing this dip is a great option for later. Prepare the dip but do not bake it. Instead, cover it tightly with plastic wrap and foil, then freeze. When you're ready to enjoy it, defrost it in the fridge overnight. Bake as directed in the Full Recipe. Crusty bread works best for this dip. Baguette and ciabatta are great choices. They hold up well when dipped. You can also use toasted breadsticks or crackers. Experiment to find your favorite! This blog post shared how to make a tasty Baked Garlic Bread Dip. We explored the key ingredients and helpful tips for baking. I discussed fun variations and how to store leftovers. Each part gives you ways to make this dish your own. In the end, you can enjoy a hot, creamy dip that delights everyone. Try it out and make your own special dips!

Baked Garlic Bread Dip Irresistible Appetizer Recipe

If you’re searching for the perfect appetizer, look no further! My Baked Garlic Bread Dip will be the star of

To make sweet chili sauce, you need a few key items. Here’s a quick list: - 1 cup water - 1/2 cup sugar - 1/4 cup rice vinegar - 1/4 cup ketchup - 2 tablespoons cornstarch - 1/4 cup fresh red chili, finely chopped - 1 teaspoon garlic powder - 1/2 teaspoon salt - 1/4 teaspoon soy sauce - 1 tablespoon sesame oil These ingredients come together to create a sauce that is both sweet and spicy. The sugar balances the heat from the chili. Rice vinegar gives it a nice tang. Ketchup adds depth and texture, making this sauce smooth. You can add more flavor if you want. Consider these options: - 1 tablespoon crushed red pepper flakes (for extra heat) - Fresh herbs like cilantro or mint - A dash of lime juice These add-ins can change the taste of your sauce. If you love heat, crushed red pepper flakes are great. Fresh herbs can add a bright flavor. Now, let’s look at the nutrition facts for this sauce. Each serving of about 2 tablespoons contains: - Calories: 40 - Total Fat: 1 g - Sodium: 150 mg - Carbohydrates: 10 g - Sugars: 8 g This sauce is low in fat and can add flavor to many dishes. Just keep in mind that it has added sugars, so use it in moderation. You can enjoy this sauce with spring rolls, grilled chicken, or even as a dip. For the full recipe, check out the Sweet & Spicy Chili Delight . To make sweet chili sauce, start with a medium saucepan. Combine 1 cup of water, 1/2 cup of sugar, and 1/4 cup of rice vinegar. Stir this mixture over medium heat until the sugar dissolves. Next, add 1/4 cup of ketchup and 1/4 cup of finely chopped fresh red chili. Mix in 1 teaspoon of garlic powder and 1/2 teaspoon of salt. Stir well to blend all the flavors. In a small bowl, mix 2 tablespoons of cornstarch with 2 tablespoons of water. This forms a slurry. Gradually add the slurry to the saucepan, stirring constantly to keep it smooth. Bring the sauce to a simmer, and cook for 3 to 5 minutes. Stir often until it thickens. Remove the pan from heat and stir in 1/4 teaspoon of soy sauce and 1 tablespoon of sesame oil. If you want it spicier, add 1 tablespoon of crushed red pepper flakes. Allow the sauce to cool before pouring it into a jar. To get the right thickness, pay close attention to the cooking time. If the sauce is too thin, cook it longer while stirring. If it’s too thick, add a little water and heat it gently. Using fresh red chili gives the sauce a vibrant flavor. Adjust the amount based on your spice level preference. Always keep stirring while adding the cornstarch slurry to prevent lumps. Sweet chili sauce is perfect as a dip. Serve it with fresh spring rolls or grilled chicken skewers. You can also drizzle it over stir-fried vegetables or use it as a glaze on grilled meats. It pairs well with many dishes. For a fun twist, mix it into a salad dressing or use it on tacos. This sauce can enhance many meals, adding a sweet and spicy kick. Check out the Full Recipe for more details! When making sweet chili sauce, avoid adding too much salt. It can overpower the sweet flavor. Another mistake is cooking it too fast. If you rush, the sauce may not thicken well. Make sure to stir often while it simmers. This helps prevent lumps that can ruin your sauce. Lastly, don’t skip cooling it before storing. This keeps it fresh and tasty. To change the spice level, start with less chili. You can always add more later if needed. If you want more heat, try adding crushed red pepper flakes. Add them in small amounts and taste as you go. This way, you can control the heat. For a milder sauce, use less fresh chili or remove the seeds. This helps keep the flavor without too much spice. Always use fresh ingredients for the best flavor. When cooking, keep the heat at medium. This helps the sugar dissolve without burning. Store your sauce in a clean jar. Make sure it’s airtight to keep it fresh. The sauce lasts in the fridge for about two weeks. For longer storage, consider freezing it. Just pour it into ice cube trays for easy use later. {{image_2}} You can switch up the ingredients in sweet chili sauce. If you want a fruity twist, try using mango or pineapple juice instead of water. This adds a nice sweetness and tang. For a richer flavor, replace ketchup with tomato paste. It gives a deeper taste. You can also swap rice vinegar for apple cider vinegar for a different kick. If you want a healthier version, use honey instead of sugar. This keeps the sweetness but adds good nutrients. You can also use low-sodium soy sauce to cut down on salt. For a low-carb option, replace sugar with a sugar substitute like stevia. This way, you can enjoy the sauce without worrying about extra sugar. Sweet chili sauce fits well with many dishes. It’s perfect for dipping fresh spring rolls or grilled chicken skewers. You can drizzle it over roasted vegetables or use it in stir-fries for added flavor. It also works great on seafood, especially shrimp or fish tacos. For a fun twist, try it with sweet potato fries for a tasty snack. If you want to make your own sauce, check out the Full Recipe for a quick guide! To keep your homemade sweet chili sauce fresh, let it cool first. Then, pour it into a clean jar or an airtight container. Make sure to seal it tightly. Store it in the fridge. This helps preserve its flavor and texture. You can enjoy it for many meals to come. Homemade sweet chili sauce lasts about two weeks in the fridge. Store-bought sauce can last longer. Check the label for the best-before date. Once opened, it usually stays good for about a month. Always look for signs of spoilage before using. You can freeze sweet chili sauce for later use. Pour it into ice cube trays for easy portions. Once frozen, transfer the cubes to a freezer bag. This way, you can take out just what you need. The sauce can last up to six months in the freezer. When ready, thaw it overnight in the fridge. Reheat gently before serving. Sweet chili sauce is a mix of simple ingredients. The main ones include: - 1 cup water - 1/2 cup sugar - 1/4 cup rice vinegar - 1/4 cup ketchup - 2 tablespoons cornstarch - 1/4 cup fresh red chili, finely chopped (or to taste) - 1 teaspoon garlic powder - 1/2 teaspoon salt - 1/4 teaspoon soy sauce - 1 tablespoon sesame oil - Optional: 1 tablespoon crushed red pepper flakes for extra heat These ingredients blend to create a sweet and spicy taste. You can adjust the chili amount for more or less heat. Yes, you can use sweet chili sauce as a marinade. It adds a tasty flavor to meats and veggies. Just coat your choice of protein or vegetables in the sauce. Let them sit for at least 30 minutes. This gives the flavors time to soak in. You can find sweet chili sauce at most grocery stores. Look in the Asian foods aisle. Many brands sell it, but I recommend checking the label for quality. You can also buy it online for convenience. - Additional FAQs Related to Sweet Chili Sauce - Can I make it spicy? Yes! Add more chili or red pepper flakes. - How long does it last? Homemade sauce lasts about two weeks in the fridge. - User-Submitted Questions and Answers - Q: Can I use other vinegars? A: Yes, you can use apple cider vinegar or white vinegar. - Q: Is there a vegan version? A: Yes! Just skip the oyster sauce and use soy sauce instead. For those looking for a great homemade recipe, check out the Full Recipe section. Making sweet chili sauce is easy and fun. We explored key ingredients, optional add-ins, and nutrition values. I shared step-by-step instructions for the perfect sauce, along with tips for texture and serving ideas. I highlighted common mistakes and how to adjust spice levels. You learned about variations and cooking practices. We also covered smart storage tips and a FAQs section for common questions. Enjoy creating your own sweet chili sauce. It's a tasty way to spice up your meals!

Sweet Chili Sauce Flavorful and Easy Homemade Recipe

Are you ready to spice up your meals? This homemade Sweet Chili Sauce is both flavorful and easy to make.

- 1 cup all-purpose flour - 2 tablespoons sugar - 1 tablespoon baking powder - 1/2 teaspoon salt - 1 cup milk (dairy or non-dairy) - 1 large egg - 2 tablespoons unsalted butter, melted (plus extra for cooking) - 1 teaspoon vanilla extract - Maple syrup for serving - Fresh berries (optional, for garnish) These ingredients are simple and easy to find. Each one plays a role in making fluffy pancakes. The flour gives the base. Sugar adds a touch of sweetness. Baking powder makes the pancakes rise. Salt enhances all the flavors. Milk brings moisture. The egg binds everything. Butter adds richness. Vanilla gives a nice aroma. Maple syrup is the classic topping. Fresh berries can make it special. - Mixing bowls - Whisk - Non-stick skillet or griddle - Measuring cups and spoons Having the right tools makes cooking easier. Mixing bowls help you combine ingredients. A whisk mixes everything well. A non-stick skillet or griddle ensures pancakes cook evenly. Measuring cups and spoons help you get the right amounts. With these items ready, you can start cooking fluffy pancakes with maple syrup. For the full recipe, check the earlier section. - Whisk together the flour, sugar, baking powder, and salt in a large bowl. - In a separate bowl, mix the milk, egg, melted butter, and vanilla extract. - Carefully combine the wet and dry ingredients. Stir gently until just mixed. - Let the batter rest for about 5 to 10 minutes. This helps make the pancakes fluffy. - Preheat your skillet over medium heat and grease it with butter. - Pour 1/4 cup of batter for each pancake. Cook until bubbles form on top. - Flip the pancakes and cook for another 1 to 2 minutes until golden brown. Use this Full Recipe to make sure you get every step right. Enjoy your fluffy pancakes topped with maple syrup! To make fluffy pancakes, avoid overmixing. When you combine wet and dry ingredients, mix gently. You want some lumps in the batter. This keeps the pancakes light. After mixing, let the batter rest for about 5-10 minutes. Resting allows the flour to hydrate and the baking powder to work. This step is key for a fluffy texture. Getting the right skillet temperature is crucial. Preheat your non-stick skillet over medium heat before adding batter. If the skillet is too hot, your pancakes will burn. If it's too cool, they won't rise. Use a small amount of butter each time you cook pancakes. This adds flavor and helps prevent sticking. Ensure you coat the skillet evenly with butter for best results. For a beautiful presentation, stack your pancakes high on a plate. Drizzle them with plenty of maple syrup. Add fresh berries on top for color and extra flavor. You can also mix and match different fruits, like bananas or peaches. This adds a fun twist to your meal. Enjoy your fluffy pancakes with a side of crispy bacon or sausage for a hearty breakfast. For the full recipe, check out the detailed steps above. {{image_2}} You can easily change up your fluffy pancakes. Try adding chocolate chips or fresh fruits like blueberries or bananas to the batter. This makes each bite exciting and tasty. You can also add spices like cinnamon or nutmeg. A sprinkle of these spices boosts the flavor and adds warmth. If you need gluten-free options, use almond or coconut flour instead of all-purpose flour. These flours can create a great texture. For vegan pancakes, swap the egg for a mashed banana or ground flaxseed mixed with water. Use almond or soy milk in place of dairy milk. Both options work well and keep the pancakes fluffy. Toppings can make your pancakes even better. You can use different syrup options like agave or fruit syrup for added sweetness. Try topping your pancakes with whipped cream or a handful of nuts for crunch. Each choice adds a unique flavor and texture, making breakfast fun and delicious. For the full recipe, check out the Fluffy Pancakes with Maple Syrup section above. You can store leftover pancakes in the refrigerator for up to 3 days. Place them in an airtight container to keep them fresh. If you want to save them longer, freezing is best. To freeze pancakes, stack them with parchment paper in between. This prevents them from sticking together. Then, place the stack in a freezer bag and remove as much air as possible. To reheat pancakes, a few methods work well. The microwave is quick but can make them a bit soggy. Instead, use your skillet. Heat it on low and add a little butter. Place the pancakes in the skillet and warm them for about 1-2 minutes on each side. This keeps them fluffy and delicious. You can also use a toaster for a crispier texture. Leftover pancakes can be fun to use in different meals. Try making a pancake sandwich with your favorite filling. You can also cut them into strips and add them to a fruit salad. For desserts, stack them with ice cream and drizzle with chocolate sauce. You can even create a pancake trifle by layering pancakes, whipped cream, and fresh berries. Enjoy your creativity with these tasty options! To make pancakes fluffier, you should use fresh baking powder. This helps create bubbles. Mix the wet and dry ingredients gently. Overmixing can make pancakes tough. Also, allow the batter to rest for 5-10 minutes. This gives the flour time to hydrate. You can also separate the egg. Whip the egg white until stiff and fold it in at the end. This adds extra air for fluffiness. Yes, you can make the batter ahead of time! Mix the dry and wet ingredients, but do not overmix. Store the batter in the fridge for up to 24 hours. When you are ready to cook, give it a gentle stir. If it looks thick, add a splash of milk to loosen it. This helps keep your pancakes fresh and tasty. The best maple syrup for pancakes is pure maple syrup. Look for brands that say "100% pure" on the label. Grade A syrup is lighter and sweeter. It works well with pancakes. Grade B is darker and richer, perfect for a strong maple flavor. Choose a syrup based on your taste. Local farms often sell delicious options, too. You can tell pancakes are done when they are golden brown. Look for bubbles forming on the surface. When the bubbles begin to pop, it’s time to flip. After flipping, cook for another 1-2 minutes. The edges should look set, and the pancake should spring back when touched. This shows they are fluffy and ready to serve. In this blog post, I detailed how to make perfect pancakes. You learned about the key ingredients and the essential tools needed. I shared step-by-step instructions and helpful tips for fluffiness. Variations and storage tips helped you see new possibilities with pancakes. Remember, perfect pancakes don’t just fill your belly; they create moments. Enjoy experimenting in the kitchen!

Fluffy Pancakes with Maple Syrup Easy Breakfast Delight

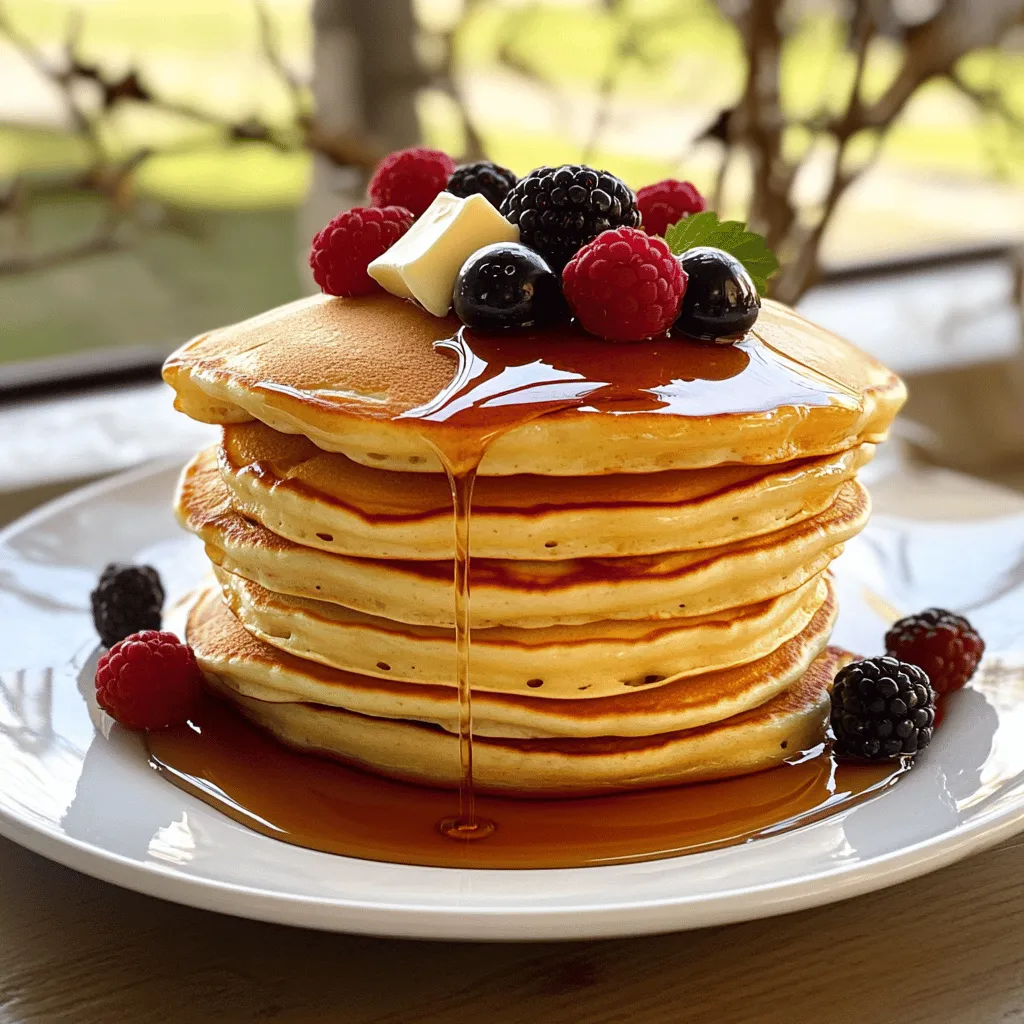
Looking for a quick and tasty breakfast? You’ve come to the right place! With my easy recipe for fluffy pancakes

To make a great Coconut Curry Lentil Soup, you need these simple ingredients: - 1 cup red lentils, rinsed - 1 can (14 oz) coconut milk - 4 cups vegetable broth - 1 tablespoon olive oil - 1 onion, finely chopped - 3 cloves garlic, minced - 1 tablespoon fresh ginger, grated - 1 tablespoon curry powder - 1 teaspoon turmeric powder - 1 teaspoon cumin - 1 red bell pepper, diced - 1 cup spinach, chopped - Salt and pepper to taste - Fresh cilantro, for garnish - Lime wedges, for serving When selecting your ingredients, freshness counts. Pick bright, firm vegetables. Look for lentils that are not broken or damaged. Choose coconut milk that is creamy and free from additives. Always opt for low-sodium vegetable broth for better taste control. Fresh herbs like cilantro should be vibrant and fragrant. This adds more flavor to your soup. If you have allergies or special diets, there are many swaps you can make: - Red lentils can be replaced with green lentils or split peas. - Use light coconut milk for a lower-fat option. - If you are allergic to nuts, ensure your broth is nut-free. - Swap olive oil for avocado oil if preferred. - For a vegan option, you can use vegetable broth instead of chicken broth. - If you can't have garlic, you can omit it or use garlic powder instead. These substitutes can help you enjoy this delicious soup while staying within your dietary needs. With the full recipe, you can create a bowl of warmth and nutrition that fits your lifestyle. Start by gathering all your ingredients. It helps to have everything ready. Chop the onion, garlic, and ginger. Dice the red bell pepper. Rinse one cup of red lentils under cold water until the water runs clear. Measure out your spices and coconut milk. This prep makes cooking smooth and fast. Heat one tablespoon of olive oil in a large pot over medium heat. Add the chopped onion first. Sauté it for about five minutes until it looks soft. Then, stir in the minced garlic and grated ginger. Cook for another minute. You want that lovely aroma to fill your kitchen. Next, add the curry powder, turmeric, and cumin to the pot. Stir everything well. Toast the spices for about two minutes. This step brings out their full flavors. Now, toss in the diced red bell pepper and the rinsed lentils. Mix them in well. Pour in four cups of vegetable broth and one can of coconut milk. Bring this mix to a gentle boil. Once it bubbles, lower the heat to let it simmer. Cook for about 20 to 25 minutes. The lentils should be nice and tender. After the lentils are soft, add one cup of chopped spinach. Cook for another five minutes. This adds color and nutrition to the soup. Now it’s time to taste your soup. Add salt and pepper to your liking. You can adjust the seasoning based on your preference. Serve your Coconut Curry Lentil Soup hot. Garnish it with fresh cilantro and lime wedges. This adds a bright touch to every bowl. Enjoy this flavorful and nourishing soup with family and friends! For the full recipe, check out the detailed instructions above. To make your coconut curry lentil soup extra tasty, focus on the spices. Toasting spices like curry powder, turmeric, and cumin brings out their full flavor. Add them to the pot after you sauté the onions, garlic, and ginger. This step makes a big difference. The key to creamy soup is the coconut milk. Use full-fat coconut milk for a rich taste. It pairs well with the lentils, giving a smooth texture. If you want a lighter option, you can use light coconut milk. Don’t forget to season as you go. Taste the soup after adding each ingredient. This helps you find the right flavor balance. Adjust the salt and pepper to suit your taste. To store your coconut curry lentil soup, let it cool first. Then, transfer the soup to an airtight container. It can stay fresh in the fridge for up to five days. For longer storage, freeze it in portions. Use freezer-safe bags or containers. When reheating, do it slowly. Heat the soup on the stove over medium-low heat. Stir often to prevent sticking. You can also use a microwave, but be sure to cover it to avoid mess. Add a splash of vegetable broth or water if the soup thickens too much. Serve your coconut curry lentil soup in warm bowls. Top each bowl with fresh cilantro for color and flavor. Lime wedges are a great side, too. Squeeze some lime juice over the soup for a zesty kick. This soup pairs well with crusty bread or rice. For a full meal, add a simple salad on the side. You can also enjoy it with naan for a fun twist. If you want to spice it up, add a pinch of red pepper flakes or hot sauce. Try the full recipe for coconut curry lentil soup, and enjoy every comforting bite! {{image_2}} You can use different lentils in this soup. Red lentils cook fast and break down well. Yellow lentils are a great choice too. They have a slightly nutty taste. Green lentils stay firm and add texture. You can mix them for fun flavors. Each type gives a unique twist to your dish. If you like heat, add chili powder or fresh chilies. Start with a small amount. You can always add more later. For a milder soup, skip the hot spices. Instead, focus on the warm flavors of curry and turmeric. Adjusting spices helps you create the perfect bowl for your taste. You can boost nutrition by adding veggies or beans. Carrots, zucchini, or sweet potatoes work well. They add color and taste. For protein, chickpeas or tofu are great options. You can toss in leafy greens like kale for extra vitamins. These add-ins make your soup even more filling and healthy. For the complete recipe, check out the Full Recipe. After you enjoy your bowl of Coconut Curry Lentil Soup, store any leftovers in an airtight container. Let the soup cool to room temperature before sealing it. This step helps keep the soup fresh. Place the container in the fridge, where it will last for about 3 to 5 days. You can freeze Coconut Curry Lentil Soup for longer storage. Start by letting the soup cool completely. Then, pour it into freezer-safe containers or heavy-duty freezer bags. Leave some space at the top for expansion as the soup freezes. Label the bags with the date. The soup can stay in the freezer for up to 3 months. Reheating your soup is easy. For the best flavor, use the stovetop. Pour the soup into a saucepan and heat over medium heat. Stir often until it warms through. This method keeps the soup creamy. You can also use the microwave if you’re short on time. Place the soup in a microwave-safe bowl, cover it, and heat in short bursts. Stir between heats for even warming. Enjoy your delicious Coconut Curry Lentil Soup again! For the full recipe, check out the detailed list above. Coconut Curry Lentil Soup is a warm, flavorful dish made with lentils, coconut milk, and spices. The soup combines red lentils with coconut milk to create a creamy texture. I add spices like curry powder, turmeric, and cumin for depth. Fresh veggies like onion, garlic, and bell pepper enhance the taste. Spinach adds a healthy twist to this comforting bowl. Coconut Curry Lentil Soup lasts about five days in the fridge. Store it in an airtight container to keep it fresh. If you want the best taste, eat it within three days. The flavors will develop, but the soup may thicken as it sits. You can always add a bit of broth when reheating to loosen it up. Yes, you can make Coconut Curry Lentil Soup in advance. It tastes even better after sitting for a day. Prepare the soup and let it cool before storing it. When you're ready to eat, just reheat the soup on the stove. This makes it a great meal prep option. You can enjoy a warm, delicious soup anytime! - Full Recipe: Coconut Curry Lentil Soup 🥥 Coconut curry lentil soup offers a rich blend of flavors and nutrition. We discussed key ingredients, cooking steps, and helpful tips to make it perfect every time. Remember, you can customize it with different lentils and spices to fit your taste. Store the leftovers for later or freeze for a quick meal. Enjoy this soup warm and comforting, and don't hesitate to experiment with variations. Cooking should be fun and creative, so dive in and make it your own!

Coconut Curry Lentil Soup Flavorful and Nourishing Bowl

If you’re craving a warm, hearty meal, then you’ll love my Coconut Curry Lentil Soup. This dish is packed with

To create your honey garlic shrimp tacos, gather these key ingredients: - 1 lb large shrimp, peeled and deveined - 3 tablespoons honey - 2 tablespoons soy sauce - 1 tablespoon fresh lime juice - 3 cloves garlic, minced - 1 teaspoon grated ginger - 1 tablespoon olive oil - 1 teaspoon chili powder - 8 small corn tortillas - 1 cup shredded red cabbage - 1 avocado, sliced - Fresh cilantro leaves for garnish - Lime wedges for serving Using these fresh ingredients makes a big difference in flavor. The shrimp needs to be large and fresh for the best texture. Honey adds a sweet touch that balances the soy sauce. Garlic and ginger give a nice kick, making every bite tasty. Corn tortillas provide a soft base and hold everything together well. You can find the Full Recipe above for a step-by-step guide to bring these delicious tacos to life. Enjoy cooking! Start by mixing the marinade. In a medium bowl, whisk together: - 3 tablespoons honey - 2 tablespoons soy sauce - 1 tablespoon fresh lime juice - 3 cloves garlic, minced - 1 teaspoon grated ginger - 1 teaspoon chili powder This mix brings sweet and savory flavors to the shrimp. Once combined, add 1 pound of large shrimp, peeled and deveined. Toss to coat the shrimp well. Let them marinate for 15 to 20 minutes. This step is key for flavor. Heat 1 tablespoon of olive oil in a large skillet over medium-high heat. When the oil is hot, add the marinated shrimp in a single layer. Cook the shrimp for 2 to 3 minutes on each side. They should turn opaque and curl up. Remove them from the heat when done. This quick cooking keeps the shrimp tender and juicy. Warm 8 small corn tortillas in another skillet for about 30 seconds on each side. This makes them soft and easy to fold. Now, lay a few pieces of shrimp on each tortilla. Top with 1 cup of shredded red cabbage and a few slices of avocado. Finish with fresh cilantro leaves for a pop of color and flavor. Serve with lime wedges for squeezing over the tacos. Enjoy your fresh and flavorful meal! For the Full Recipe, see the detailed instructions above. To make great honey garlic shrimp, start with fresh shrimp. Look for shrimp that are firm and smell clean. The key to juicy shrimp is not overcooking them. Cook the shrimp for just 2-3 minutes on each side. When they turn opaque, they are done. Marinating the shrimp adds flavor and keeps them tender. Use the marinade for about 15-20 minutes for best results. Corn tortillas work best for these tacos. They are soft and hold the shrimp well. Warm the tortillas in a skillet before serving. This makes them pliable and enhances their flavor. If you want a twist, try flour tortillas. They are thicker and add a different taste. Toppings can take your tacos to the next level. Try adding shredded cabbage for crunch. Sliced avocado gives a creamy texture and flavor. Fresh cilantro adds a bright taste. You can also add lime wedges for a zesty kick. If you want heat, sprinkle some jalapeños on top. The variety of toppings lets you customize each taco to your taste. You can find the Full Recipe above for more details on how to make this delicious dish. {{image_2}} You can easily swap shrimp for other proteins. Chicken works well in this recipe. Use boneless, skinless chicken thighs for juicy bites. Cut the chicken into small pieces and follow the same marinade steps. Tofu is a great option for a plant-based meal. Firm tofu absorbs flavors well. Press the tofu to remove extra moisture. Then, cube it and marinate just like shrimp. Adding spices or sauces can take your tacos to the next level. Try a pinch of smoked paprika for a deeper flavor. If you want heat, add cayenne pepper or red pepper flakes. You can also drizzle sriracha or hot sauce on top for extra spice. For a creamy touch, blend avocado with lime juice and spread it on the tortillas. This will add a delicious twist. Pair your honey garlic shrimp tacos with simple side dishes. A fresh salad with lime vinaigrette complements the tacos nicely. You can also serve cilantro-lime rice for a filling side. If you want something crunchy, try tortilla chips with salsa. These sides balance the flavors and textures of the tacos. Enjoying your meal with fresh fruit like mango or pineapple adds sweetness. After enjoying your honey garlic shrimp tacos, store leftovers in an airtight container. Place the shrimp and toppings separately to keep them fresh. You can keep the shrimp in the fridge for up to three days. Store the tortillas at room temperature for the best texture. To reheat the shrimp, place them in a skillet over medium heat. Cook for about 2-3 minutes until they are warm. Avoid using the microwave if you want to keep the shrimp tender. Warm the tortillas in a dry skillet for about 30 seconds on each side. This will help restore their softness. If you have more leftovers than you can eat, freezing is a good option. Put the shrimp in a freezer-safe bag. Remove as much air as possible before sealing. You can freeze them for up to two months. When you are ready to eat, thaw them in the fridge overnight. Then, reheat as mentioned above. Just remember, freezing may change the texture a bit, but they will still taste great. - Full Recipe can be found in the detailed instructions above. To marinate shrimp well, use a mix of flavors. I like to combine honey, soy sauce, lime juice, minced garlic, grated ginger, and chili powder. This mix gives the shrimp a sweet and savory taste. Make sure to coat the shrimp fully in this marinade. Let them sit for about 15 to 20 minutes. This short time allows the shrimp to soak up all those yummy flavors. You can prepare parts of the tacos in advance. You can marinate the shrimp ahead of time. Store the shrimp in the fridge for up to 30 minutes. You can also slice the avocado and shred the cabbage early. Just remember to store them separately to keep them fresh. However, I recommend cooking the shrimp right before serving. This keeps them juicy and tasty. These tacos go great with many sides. Here are some ideas: - Mexican rice - Black beans - Grilled corn on the cob - A fresh green salad - Chips with salsa These sides add flavor and balance to your meal. You can mix and match based on what you like. - Full Recipe can be found in the detailed instructions above. In this blog post, we explored a delicious honey garlic shrimp taco recipe. You learned about key ingredients like shrimp, honey, and tortillas. We provided step-by-step instructions to create flavorful tacos. You also discovered tips for perfecting your dish and variations to try. Finally, we discussed storage and answered common questions. These tacos are tasty, easy, and customizable. Give them a try, and enjoy all the flavors!

Honey Garlic Shrimp Tacos Fresh and Flavorful Meal

If you’re craving a meal that’s both fresh and flavorful, you’re in the right place! Honey Garlic Shrimp Tacos are

- 1 cup long-grain white rice - 2 cups vegetable broth - 1 tablespoon olive oil - 1/2 teaspoon salt - Zest of 1 lime - Juice of 2 limes - 1/4 cup fresh cilantro, finely chopped - 1/4 teaspoon ground cumin - 1/4 teaspoon black pepper - Optional: thinly sliced jalapeño for garnish To make Zesty Cilantro Lime Rice, start with simple and fresh ingredients. First, you need long-grain white rice, which gives a nice texture. The vegetable broth adds a rich flavor, while olive oil keeps the rice moist. Salt is key to bringing all the flavors together. Next, you enhance the dish with lime zest and juice. This adds a bright, zesty kick. Fresh cilantro gives the rice a vibrant color and fresh taste. Ground cumin and black pepper round out the flavor profile. If you like heat, consider adding thinly sliced jalapeño on top. For the full recipe, follow the steps to create this flavorful dish. Each ingredient plays a role in making the rice bright and fun. Enjoy the simple joy of cooking with fresh ingredients! - Rinse the rice. - Combine ingredients in a saucepan. Start by rinsing the rice under cold water. Use a fine-mesh strainer for this. Rinsing helps remove excess starch, which keeps the rice fluffy. Once the water runs clear, add the rinsed rice to a medium saucepan. Then, pour in the vegetable broth, olive oil, and salt. This mix creates a tasty base for the rice. - Boil and simmer the rice. - Let it sit after cooking. Next, bring the mixture to a boil over medium-high heat. Once boiling, reduce the heat to low. Cover the pan and let it simmer for 16-18 minutes. This step is key for cooking the rice evenly. You will know it's ready when all the liquid is absorbed. After cooking, remove the saucepan from heat and let it sit, still covered, for 5 minutes. This allows the rice to absorb any remaining steam. - Fluffing the rice. - Incorporating lime and cilantro. - Adjusting seasoning. After the rice has rested, it’s time to fluff it with a fork. This step makes it light and airy. Now, stir in the lime zest, lime juice, chopped cilantro, cumin, and black pepper. Mix everything well until combined. Taste the rice and adjust the seasoning if needed. You can add more lime juice or a pinch of salt to enhance the flavor. For the full recipe, check the earlier section. Enjoy your fresh and zesty rice! To get the best texture, I recommend using long-grain white rice. This type cooks up fluffy and separate. Rinsing the rice is also very important. It removes excess starch, which helps prevent clumping. Just rinse it under cold water until the water runs clear. This step makes a big difference! You can boost the flavor by using fresh lime juice and zest. Fresh lime adds brightness and zest makes it even more vibrant. Try to use fresh cilantro instead of dried. Fresh herbs have a stronger flavor and aroma. They bring life to the rice dish. You can also add a pinch of ground cumin for depth. Garnishing your rice can make it stand out! Consider adding thinly sliced jalapeño for heat. You can also sprinkle more fresh cilantro on top. This adds color and freshness. Zesty cilantro lime rice pairs well with grilled chicken, fish, or tacos. It acts as a perfect side dish or a base for your favorite bowls. For more ideas, check the Full Recipe for inspiration! {{image_2}} You can change the broth for more flavor. Try using chicken broth instead of vegetable broth. This adds a rich taste to the rice. You can also add vegetables like peas or corn. They bring color and extra nutrients. Beans like black beans or pinto beans work well too. They add protein and make the dish heartier. Want to make your rice even more exciting? Add a little cayenne pepper for heat. It gives a nice kick without being too spicy. Paprika can also add a sweet, smoky flavor. Don't stop there! Try mixing in fresh herbs like parsley or mint. They give a fresh taste and brighten the dish. Zesty cilantro lime rice is a great side dish. It pairs well with grilled chicken or fish. You can also use it as a base for rice bowls. Top with fresh veggies, proteins, and a drizzle of sauce. This makes a quick and tasty meal. For the full recipe, check out the details above! To keep your zesty cilantro lime rice fresh, follow these tips: - Refrigeration tips: Let the rice cool down to room temperature. Transfer it to an airtight container. Store it in the fridge. It will stay fresh for about 4 to 5 days. - Freezing instructions: For long-term storage, freeze the rice. Place cooled rice in freezer-safe bags. Squeeze out the air before sealing. It can last up to 2 months in the freezer. When it's time to enjoy your rice again, use these methods: - Best methods to reheat rice: You can reheat rice in the microwave or on the stove. For the microwave, place rice in a bowl. Add a splash of water, cover with a damp paper towel, and heat for 1-2 minutes. - Maintaining texture after reheating: If using the stove, add a little water to the pan. Heat on low while stirring gently. This keeps the rice fluffy and moist. Understanding how long your rice lasts helps you avoid waste: - Understanding freshness duration: When stored properly, cooked rice lasts about 4 to 5 days in the fridge. In the freezer, it can last up to 2 months. - Signs of spoilage: Check for an off smell, discoloration, or a slimy texture. If you notice these signs, it's best to toss the rice. To make Zesty Cilantro Lime Rice vegan, swap the broth. Use vegetable broth instead of chicken broth. This keeps the dish flavorful and plant-based. You can also skip the olive oil if you want a lighter option. Yes, you can prepare this rice ahead. Cook it and let it cool completely. Store it in an airtight container in the fridge for up to three days. When you're ready to eat, reheat it in the microwave or on the stove. You may need to add a splash of water to keep it moist. To adjust the lime flavor, taste as you go. If it’s too tart, add a bit of sugar. This will help balance the acidity. On the other hand, if you want more zing, squeeze in extra lime juice. Don’t be afraid to experiment; find your perfect balance! Zesty Cilantro Lime Rice pairs well with many dishes. It complements grilled chicken or fish wonderfully. You can also serve it alongside tacos or burritos for a fun meal. For a vegetarian option, consider black bean tacos or a veggie burrito with this rice as a base. Zesty Cilantro Lime Rice is a simple dish that shines with flavor. We covered the required ingredients and how to cook them perfectly. You learned tips for enhancing texture and flavor, along with fun variations. This rice pairs well with many dishes, adding fresh zest to your meals. I encourage you to try this recipe and make it your own. Experiment with spices and herbs to find your favorite blend. Enjoy the burst of flavors and the joy it brings to your table.

Zesty Cilantro Lime Rice Refreshing and Flavorful Dish

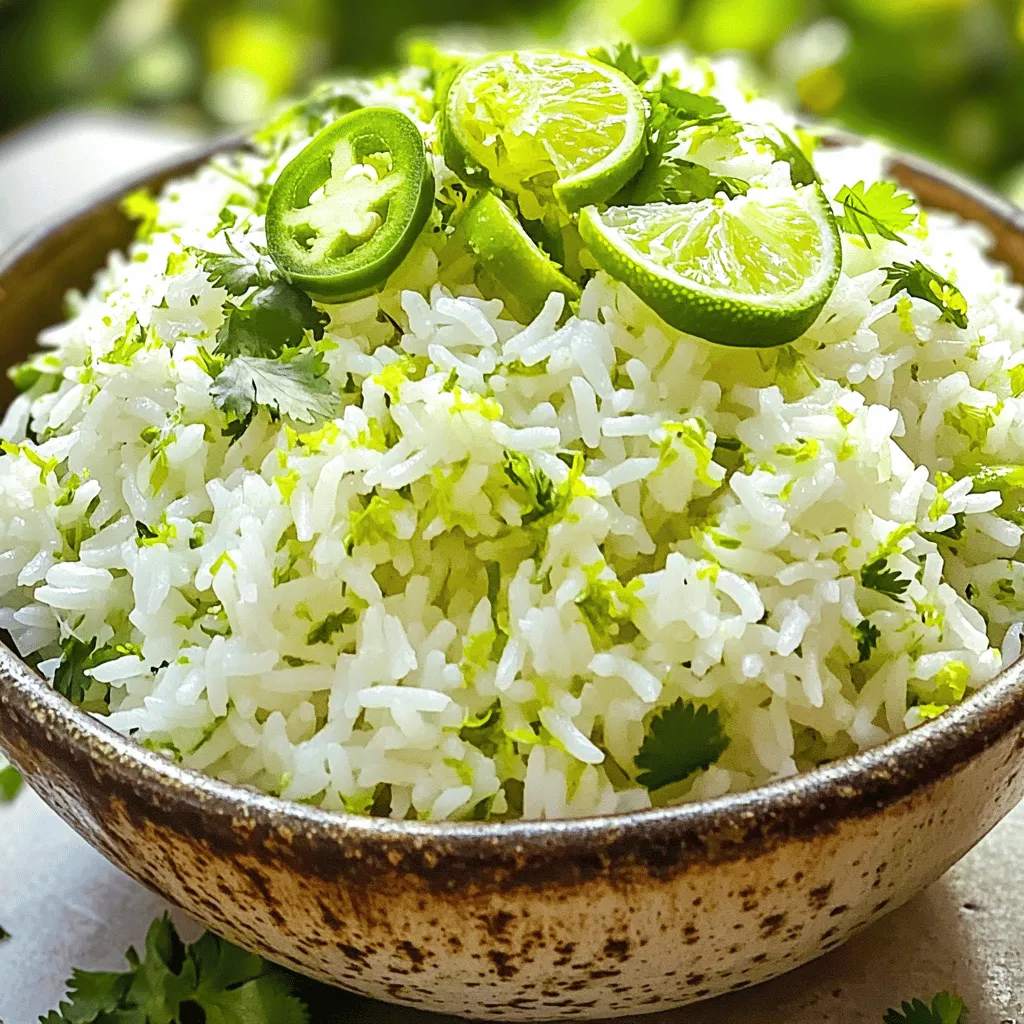
Welcome to a world of vibrant flavors with Zesty Cilantro Lime Rice! This scrumptious dish adds a refreshing kick to

Older posts
Newer posts
← Previous Page1 … Page80 Page81 Page82 … Page106 Next →
© 2025 My Cooking Cast • Built with GeneratePress

Our Policies

  • Privacy Policy
  • GDPR Policy
  • Terms Of Use
  • Copyright Policy
  • Cookie Policy
  • Disclaimer

More Information​

  • Home
  • Contact
  • About
  • Dinner
  • Appetizers
  • Dessert
©2025, My Cooking Cast About Privacy Policy Back To Top