Skip to content
DisclaimerTerms Of UseGDPR PolicyCookie Policy

My Cooking Cast

  • Home
  • Drinks
  • Appetizers
  • Dinner
  • Dessert
  • About
  • Contact
  • Privacy Policy
DisclaimerTerms Of UseGDPR PolicyCookie Policy

Emma

To make cheesy garlic chicken wraps, gather these ingredients: - 2 cups cooked chicken, shredded - 1 cup shredded mozzarella cheese - 1/2 cup cream cheese, softened - 3 cloves garlic, minced - 1 tablespoon olive oil - 1 teaspoon Italian seasoning - Salt and pepper to taste - 4 large flour tortillas - 1 cup baby spinach - 1/2 cup diced tomatoes - 1/4 cup grated Parmesan cheese - Fresh parsley, chopped (for garnish) You can swap some ingredients for different flavors: - Use cheddar or gouda instead of mozzarella for a new taste. - Try cooked turkey or pork in place of chicken. - Add bell peppers or mushrooms if you want more veggies. Measuring ingredients correctly is key for good wraps. - Use measuring cups for liquids and dry ingredients. - A kitchen scale helps if you need exact amounts. - Always pick fresh, high-quality items to boost flavor. 1. Start by heating olive oil in a large skillet over medium heat. 2. Add minced garlic and sauté it for about one minute. You want it fragrant but not brown. 3. Next, mix in the shredded chicken. Sprinkle with Italian seasoning, salt, and pepper. 4. Stir well to combine everything. Heat it for about 3 to 4 minutes until warm. 1. In a mixing bowl, combine cream cheese and shredded mozzarella cheese. 2. Stir them together until the mixture is smooth and creamy. This is the key to a rich flavor. 1. Lay out your flour tortillas on a flat surface. 2. Spread a generous amount of the chicken and cheese mixture in the center of each tortilla. 3. Top with baby spinach and diced tomatoes for freshness. 4. Sprinkle grated Parmesan cheese for extra flavor. 5. Fold the sides of the tortilla in, then roll it up tightly from the bottom to the top. 6. To serve, cut the wraps in half diagonally and garnish with fresh parsley. For the full recipe, refer to the earlier section. When making cheesy garlic chicken wraps, you can choose between baking or frying. Frying gives a crispy edge, while baking keeps them soft. If you want a crunchy wrap, fry it in a pan for a few minutes. For a healthier option, bake them in the oven at 400°F for about 10-12 minutes. Browning the tortillas adds extra flavor. Heat a dry skillet over medium heat. Place the tortilla in the pan and cook for 30 seconds on each side. This step makes your wraps taste even better. For creamy cheese consistency, mix cream cheese and mozzarella well. Use a fork to mash them together until smooth. If you want it creamier, add a splash of milk. Be careful not to add too much, or the mix will become runny. Adding moisture without sogginess is key. You can add sautéed spinach or diced tomatoes for flavor. Make sure to drain any excess liquid from the tomatoes before adding them to the wrap. Pairing sides with cheesy garlic chicken wraps is fun. You can serve them with a fresh salad or crunchy chips. A side of guacamole or salsa adds a nice touch, too. For presentation, cut the wraps in half diagonally. This way, you can show off the cheesy filling. Garnish with fresh parsley on top for a pop of green. For more details, check out the Full Recipe. {{image_2}} You can add fun flavors to your cheesy garlic chicken wraps. Spice it up with different herbs like cilantro or dill. Adding red pepper flakes gives a nice kick. You can also mix in ingredients like jalapeños for heat. They add a nice crunch and flavor burst. If you're watching carbs, use low-carb tortillas. These wraps can be gluten-free too. You can use lettuce wraps instead of tortillas. For vegetarians, swap chicken for beans or tofu. Both are tasty options that still keep the meal filling. You can enjoy these wraps in many ways. Serve them as wraps for a fun meal. If you want something different, try a wrap bowl. Just layer the ingredients in a bowl instead. You can also transform the wraps into a baked casserole. Just place them in a baking dish and bake until bubbly. For the full recipe, check out the details provided above! To store leftovers, let the wraps cool first. Place them in an airtight container. Keep them in the fridge for up to three days. When you want to reheat, use a microwave or stovetop. If using a microwave, heat in 30-second bursts. This helps avoid sogginess. If using the stovetop, warm them in a pan over low heat. For long-term storage, you can freeze the wraps. Wrap each one tightly in plastic wrap or foil. Then, place them in a freezer bag. They can last up to two months in the freezer. To thaw, move them to the fridge overnight. For reheating, use the oven or microwave until hot. The ingredients in your wraps have different shelf lives. Cooked chicken lasts about three to four days in the fridge. Cheese can last a week or more if sealed well. Tortillas usually stay fresh for about a month if kept in a cool place. Always check for signs of spoilage. If you see mold or an off smell, it's best to toss them. To add heat to your cheesy garlic chicken wraps, consider using these spices and sauces: - Cayenne pepper: Start with a pinch and adjust to taste. - Red pepper flakes: Sprinkle a bit into the chicken mix for a kick. - Hot sauce: Drizzle your favorite brand into the cheese mixture. - Jalapeños: Add sliced fresh or pickled jalapeños for a zesty flavor. These ingredients will enhance the flavor and give your wraps a spicy twist. Yes, you can prep these wraps in advance. Here are some tips: - Assemble the wraps: You can make them the night before. - Wrap tightly: Use plastic wrap or foil to keep them fresh. - Store in the fridge: They stay good for about 24 hours. - Reheat carefully: Use a skillet or microwave to warm them up. Preparing ahead saves time and still keeps your meal delicious. These wraps pair well with many sides. Try these suggestions: - Fresh salad: A simple green salad with a light dressing complements the wraps. - Chips: Tortilla chips with salsa or guacamole add crunch. - Roasted veggies: Seasoned veggies bring color and flavor to your plate. - Soup: A warm bowl of tomato soup makes a comforting side. These options enhance your meal and make it more satisfying. Absolutely! Using leftover rotisserie chicken has many benefits: - Saves time: No need to cook the chicken from scratch. - Adds flavor: Rotisserie chicken is often seasoned, enhancing the wraps. - Reduces waste: It’s a great way to use leftovers and avoid waste. Just shred the chicken and mix it into your wraps for a quick meal. In this article, we explored the delicious world of cheesy garlic chicken wraps. We discussed the key ingredients and their substitutions, ensuring you can personalize your dish. Each step, from preparing the chicken to assembling the wraps, was laid out clearly for easy following. I also shared tips on achieving creaminess and variations for different tastes. Remember, these wraps are versatile—make them your own. Keep experimenting with serving styles and storage techniques to enjoy every bite. Your culinary journey with these wraps starts now!

Cheesy Garlic Chicken Wraps Flavorful and Simple Meal

Craving a tasty meal that’s easy to whip up? Cheesy garlic chicken wraps combine rich flavors with simple steps. Picture

- Shrimp, mussels, and scallops - Freshness and selection tips For this seafood pasta, I love using shrimp, mussels, and scallops. Each adds a unique taste and texture. When choosing shrimp, look for ones that are firm and slightly sweet. Mussels should be closed and smell like the ocean. Scallops should feel dry and have a sweet scent. Freshness is key for the best flavor. - Linguine vs other pasta types - Cooking tips for al dente pasta I prefer linguine for seafood pasta. Its flat shape holds sauce well. You can use spaghetti or fettuccine too. Cook your pasta in salted water until it’s al dente. This means it should be firm when you bite it. Save some pasta water before draining. This water helps the sauce stick. - Garlic and onion - Diced tomatoes and spices Garlic and onion are my go-to for flavor. They create a lovely base for the dish. Use fresh garlic, as it adds a strong taste. Diced tomatoes add sweetness and acidity. You can spice things up with red pepper flakes. This adds a little heat, but it’s optional. To start, boil salted water in a large pot. Add 250g of linguine and cook it until al dente. This means it should be firm but not hard. It usually takes about 8 to 10 minutes. After cooking, remember to reserve 1 cup of that pasta water, then drain the linguine. This water holds starch, which helps bind the sauce later. In a large skillet, heat 2 tablespoons of olive oil over medium heat. Add 1 small finely chopped onion. Sauté it until it turns translucent, which takes about 3-4 minutes. Then, add 3 minced garlic cloves and sprinkle in red pepper flakes if you like a little heat. Cook this for another 1-2 minutes until it smells great. Now, pour in a can of diced tomatoes, including their juice. Let this mixture simmer for about 5 minutes. Next, add 200g shrimp, 200g cleaned mussels, and 100g scallops. Stir gently to mix everything. Cover the skillet and let the seafood steam for about 5-7 minutes. You’ll know it’s ready when the mussels open and the shrimp turn pink. Discard any mussels that do not open. Once the seafood is cooked, toss the drained linguine into the skillet. Add the reserved pasta water to help combine everything. Stir well to mix all the ingredients. To brighten the dish, add the zest and juice of 1 lemon. Season with salt and pepper to taste. Let it sit for a minute to let the flavors blend. You can find the full recipe for this delicious meal in the previous section. To make your seafood shine, start with shrimp. First, remove the shell and tail. Then, use a knife to slice along the back. This reveals the dark vein. Rinse under cold water to clean. For mussels, scrub the shells with a brush to remove dirt. Pull off the beards gently. Discard any mussels that are open and do not close when tapped. Scallops should be dry and firm. Pat them with a paper towel to prepare. Using reserved pasta water is a game changer. It has starch that helps sauce stick to pasta. After draining your linguine, save a cup of that water. Add it slowly to your dish for a creamy texture. Balancing seasoning is key. Start with salt and pepper. Taste as you go. A splash of lemon juice adds brightness. It cuts through richness and lifts flavors. Aim for a well-rounded taste. For a beautiful presentation, serve your seafood pasta in deep bowls. Top with fresh parsley for color. Add a lemon wedge on the side for a pop of brightness. A drizzle of olive oil enhances the look and taste. Pair your dish with a light salad or crusty bread. A glass of white wine works well too. It complements the seafood and enriches the meal. Enjoy your flavorful seafood pasta! {{image_2}} You can easily switch out seafood in this dish. If you want to try different seafood, consider using squid or crab. These options add new flavors and textures. For a vegetarian twist, use mushrooms or artichokes. They give a rich taste and a nice bite. To enhance the taste, add fresh herbs like basil or oregano. These herbs bring a fresh aroma and flavor. You can also sprinkle in some lemon zest for extra brightness. If you like heat, add more red pepper flakes. Adjust the amount based on your spice level preference. If you prefer a healthier option, try whole wheat pasta. It has more fiber and a nuttier taste. Gluten-free pasta is also a great choice for those with allergies. You can use penne or fusilli instead of linguine. These shapes hold the sauce well and make each bite delicious. To keep your leftover seafood pasta fresh, store it right. First, let it cool down. Then, place it in an airtight container. This helps prevent odors from other foods. Use glass or plastic containers that seal tightly. Label the container with the date. This way, you know when you made it. When it's time to enjoy your leftovers, use the best methods for reheating. The microwave is quick but can dry out seafood. Instead, try reheating on the stove. Put the pasta in a pan with a splash of water or broth. Heat it over low heat. Stir gently until warm. This keeps the seafood tender and juicy. You can freeze seafood pasta, but it’s best to eat it fresh. If you want to freeze it, cool the pasta first. Then, place it in a freezer-safe container. Make sure to remove as much air as you can. To thaw frozen pasta, move it to the fridge overnight. For reheating, follow the same stovetop method. This keeps the flavors bright and delicious. If you want to skip seafood, try using chicken or tofu. Both options work well in this dish. Chicken adds a savory flavor. Tofu soaks up the sauce nicely. You can also use vegetables like zucchini or bell peppers for a tasty vegetarian option. Seafood pasta stays good in the fridge for about 2-3 days. Store it in an airtight container. This keeps the flavors fresh and safe to eat. Just make sure to check for any signs of spoilage before eating. You can prep the seafood pasta ahead. Cook the pasta and store it separately from the seafood. This way, the pasta won't get mushy. When ready to eat, heat the seafood mixture and combine it with the pasta. This helps keep everything fresh. A crisp white wine complements seafood pasta best. Try a Pinot Grigio or Sauvignon Blanc. These wines enhance the flavors without overpowering the dish. If you prefer red, a light Pinot Noir works too. Enjoy your meal with a glass of your choice! This article covered key points on preparing a seafood pasta dish. We explored seafood choices like shrimp and scallops, cooking pasta al dente, and adding flavors with garlic and tomatoes. Remember to reserve pasta water for the best taste. I shared tips for perfecting seafood prep and highlighted variations for different diets. Now, whether you enjoy this dish fresh or as leftovers, follow the storage tips for optimal flavor. Dive into your culinary adventures, and enjoy tasty meals made with care!

The Best Seafood Pasta Recipe Flavorful and Easy Meal

Looking for a meal that’s both flavorful and easy? You’ve come to the right place! In this guide, I’ll share

To create a mouth-watering Black Forest No-Bake Cheesecake, you need the right ingredients. Here’s what you will need: - Chocolate Graham Cracker Crust - 1 ½ cups chocolate graham cracker crumbs - ½ cup unsalted butter, melted - Cheesecake Filling Components - 2 cups cream cheese, softened - 1 cup powdered sugar - 1 teaspoon vanilla extract - 1 cup heavy whipping cream - Toppings for the Finished Cheesecake - 1 can (15 oz) cherry pie filling - ¼ cup dark chocolate shavings for garnish These ingredients come together to create a rich and creamy dessert. The chocolate crust gives a great base, while the cream cheese filling offers a smooth texture. The cherry topping adds a burst of flavor, and the chocolate shavings provide a lovely finish. For the full recipe, check out the detailed steps to put this delightful treat together! Mixing the Cracker Crumbs and Butter Start with 1 ½ cups of chocolate graham cracker crumbs in a bowl. Pour in ½ cup of melted unsalted butter. Mix well until the crumbs soak up the butter. This mixture should look like wet sand. Pressing the Crust into the Pan Take a 9-inch springform pan. Press the crumb mixture firmly into the bottom of the pan. Make sure it is even and compact. This step helps it hold together. Once pressed, put the pan in the fridge to chill while you make the filling. Whipping the Cream Cheese Mixture In a large bowl, add 2 cups of softened cream cheese. Use an electric mixer to beat it until smooth. This should take about 2 minutes. Gradually add 1 cup of powdered sugar and 1 teaspoon of vanilla extract. Mix until everything is creamy and well combined. Incorporating the Whipped Cream In another bowl, whip 1 cup of heavy cream until stiff peaks form. Gently fold this whipped cream into the cream cheese mixture. Be careful here; you don’t want to lose the airiness. This step makes your cheesecake light and fluffy. Pouring the Filling over the Crust Now, pour the creamy mixture over the chilled crust. Spread it evenly with a spatula. Make sure it reaches all edges. This helps create a beautiful layer. Refrigerating for the Required Time Cover the pan with plastic wrap. Place the cheesecake in the fridge for at least 4 hours. If you can wait overnight, that’s even better! This chilling time allows the cheesecake to set properly. For the full recipe, check out the Full Recipe section. - Overmixing the Cheese Mixture It’s easy to get excited when mixing. Overmixing can make the filling too runny. Aim for a smooth texture but stop as soon as there are no lumps. Your cheesecake will set better this way. - Not Chilling Long Enough Patience is key. If you don’t chill the cheesecake long enough, it won’t hold its shape. Aim for at least four hours in the fridge. For best results, let it chill overnight. This helps all the flavors blend beautifully. - Creative Garnishing Ideas To make your cheesecake look stunning, try adding whipped cream on the sides. Place dark chocolate shavings on top, along with the cherry pie filling. You can also add fresh cherries for a pop of color. - Ideal Slicing Techniques Use a sharp knife for clean cuts. Dip the knife in hot water and wipe it dry before slicing. This keeps each piece neat and helps with presentation. Serve each slice with a dollop of whipped cream and a cherry on top for an extra touch. For the full recipe, check out the Black Forest No-Bake Cheesecake recipe. {{image_2}} You can make your Black Forest No-Bake Cheesecake even more fun with tasty twists. - Adding Different Fruit Toppings: While cherry is classic, feel free to explore. Try raspberries, strawberries, or blueberries for new flavors. Each fruit brings its unique color and taste. This adds freshness and makes your dessert pop! - Incorporating Liqueurs for an Adult Version: If you want a grown-up treat, add some liqueur. A splash of cherry brandy or chocolate liqueur enhances the flavor. Mix it into the cream cheese filling for a delightful surprise in each bite. You can also make this cheesecake fit your dietary needs. - Gluten-Free Crust Options: If you need a gluten-free option, use gluten-free cookies. Many brands offer chocolate cookies that work well. Just crush them and mix with melted butter for a great crust. - Dairy-Free Cheese Alternatives: For those avoiding dairy, use dairy-free cream cheese. Look for brands made from nuts or soy. They can give you a creamy texture without the dairy. Your cheesecake will still be rich and tasty. With these variations, you can tailor your cheesecake to fit any taste or need. For the full recipe, check the full recipe section above. To keep your Black Forest No-Bake Cheesecake fresh, store it in the fridge. Place it in an airtight container or cover it tightly with plastic wrap. This helps prevent the cheesecake from drying out or absorbing other smells. If you want to save it for later, consider freezing it. Cut the cheesecake into slices and wrap each piece in plastic wrap. Then, place them in a freezer-safe bag or container. This makes it easy to grab one when you want a treat. How long does it last in the fridge? Your cheesecake will stay fresh for about 5 to 7 days in the fridge. After that, it may start to lose its creamy texture and flavor. What are the signs of spoilage? Watch for any changes in color or smell. If it develops a sour smell or an off taste, it's best to throw it away. Look for any mold or a slimy texture. If any of these signs appear, do not eat it. Always trust your senses when it comes to food safety. For the full recipe, check out the Black Forest No-Bake Cheesecake details. To make this cheesecake, follow these key steps: 1. Prepare the Crust: Mix the chocolate graham cracker crumbs with melted butter until combined. Press this mix into a springform pan to form a firm crust. Chill it while you make the filling. 2. Make the Filling: Beat softened cream cheese until smooth. Gradually add powdered sugar and vanilla extract. Mix until creamy. In a separate bowl, whip heavy cream until stiff peaks form. Fold the whipped cream into the cheese mix gently. 3. Assemble the Cheesecake: Pour the filling over the chilled crust. Spread it evenly. Refrigerate for at least four hours, or overnight for best results. 4. Top It Off: Once set, add cherry pie filling on top and sprinkle with dark chocolate shavings. Follow these steps, and you will create a delightful treat. For the full recipe, refer to the earlier section. Yes, you can use fresh cherries. Here are the pros and cons: - Pros: - Fresh cherries taste bright and juicy. - They add a natural sweetness. - They look beautiful as a topping. - Cons: - Fresh cherries may require more prep time. - You might need to add sugar to balance tartness. - They may not have the same smooth texture as pie filling. Using fresh cherries gives a unique twist, but pie filling is easier. To cut a no-bake cheesecake cleanly, use these tools and techniques: - Tools: - A sharp, long knife. - A hot water bath for the knife. - Techniques: - Dip your knife in hot water before cutting. - Wipe the knife clean after each cut. - Use a gentle sawing motion to avoid crushing the cheesecake. These steps help you serve perfect slices every time. This article covered everything you need to make a delicious no-bake cheesecake. We explored the ingredients, easy steps, tips to avoid mistakes, and creative variations. Remember, patience is key to a perfect dessert. Chill it long enough, and your cheesecake will impress everyone. Get creative with toppings and flavors to make it your own. Enjoy your cheesecake journey; it’s worth every bite!

Black Forest No-Bake Cheesecake Delightful Treat

If you love sweet treats, you’ll enjoy making this Black Forest No-Bake Cheesecake! This dessert combines rich chocolate, creamy cheesecake,

- Chicken thighs (500g, boneless and skinless) - Honey (1/3 cup) - Soy sauce (1/4 cup) To make sticky honey chicken, start with chicken thighs. I prefer thighs for their juicy flavor. Next, use honey to add that sweet touch. The soy sauce gives the dish a nice umami kick. Together, these main ingredients create a rich base for the chicken. - Minced garlic (2 cloves) - Grated ginger (1 teaspoon) - Red pepper flakes (1/4 teaspoon, optional for heat) Aromatics bring the dish to life. I always use fresh garlic and ginger. They add warmth and depth to the sauce. If you like heat, add red pepper flakes. This small touch brings a bit of spice without overpowering the sweetness. - Apple cider vinegar (2 tablespoons) - Sesame oil (1 tablespoon) - Sesame seeds and chopped green onions for garnish Apple cider vinegar balances the sweetness. It adds a slight tang that brightens the dish. Sesame oil brings a nutty flavor that rounds out the taste. For garnish, sesame seeds and green onions add crunch and color. These little details make your dish look and taste amazing. For the full recipe, check out the detailed steps to create this delightful meal. Start by mixing the marinade. In a large bowl, combine honey, soy sauce, apple cider vinegar, minced garlic, grated ginger, sesame oil, and red pepper flakes. Stir well to blend the flavors. Next, add the chicken thighs to the bowl. Make sure each piece is fully coated with the marinade. Cover the bowl and put it in the fridge. I recommend marinating for at least 30 minutes. For even more flavor, you can marinate for up to 2 hours. While your chicken marinates, it's time to prep the oven. Preheat it to 200°C (400°F). This ensures even cooking. Then, line a baking sheet with parchment paper or lightly grease it. This step helps with easy cleanup later. Once ready, remove the chicken from the fridge and place the thighs on the lined baking sheet. Don’t forget to save the leftover marinade in a small saucepan for later. Now it's time to bake! Place the baking sheet in the oven. Bake the chicken for 20 to 25 minutes. You want the chicken to reach an internal temperature of 75°C (165°F). This ensures it is safe to eat and fully cooked. While the chicken bakes, prepare the glaze. Pour the reserved marinade into the saucepan and bring it to a boil over medium heat. Once it boils, reduce the heat and let it simmer for about 5 to 7 minutes. You want it to thicken slightly. After the chicken is done baking, take it out of the oven. Brush the thickened glaze over each piece, coating them well. Return the chicken to the oven for another 5 minutes. This lets the glaze set and caramelize, adding that delicious sticky finish. For the full recipe, check below. For the best flavor, marinate your chicken thighs well. Use a bowl big enough to hold the chicken and marinade. Mix your marinade ingredients in the bowl first. Then, add the chicken. Make sure each piece is covered. Cover the bowl and place it in the fridge. Marinate for at least 30 minutes, but 2 hours gives a stronger taste. To check doneness, use a meat thermometer. The chicken should reach 75°C (165°F). If you don’t have a thermometer, cut into a thigh. The meat should be white, and juices should run clear. To thicken your marinade, boil it in a saucepan. This brings out flavors and reduces the liquid. Simmer it for 5-7 minutes until it thickens slightly. If you want alternatives for glazing, try using a brush to apply the glaze. You can also dip the chicken in the glaze before serving. This makes each bite extra tasty. Sticky honey chicken pairs well with rice or steamed veggies. You can also serve it with a fresh salad for a bright touch. For creative serving ideas, try plating the chicken on a bed of rice. Drizzle extra glaze over the top. Add a sprinkle of sesame seeds and chopped green onions for a pop of color. This makes for a beautiful and tasty dish that impresses everyone! {{image_2}} You can change the proteins in this dish. Try tofu or shrimp instead of chicken. Both options add unique flavors. Tofu absorbs the sauce well, making it tasty. Shrimp cooks fast and adds a nice texture. For sweeteners, honey is great, but you can swap it out. Maple syrup or agave syrup works well too. They give a slightly different taste but still sweeten the dish nicely. Want to jazz it up? Add fruits like pineapple or orange. Pineapple brings a tropical twist, while orange adds a nice zing. Both fruits balance the sweetness of the honey. If you like spice, change up the peppers. Use jalapeños for a kick or bell peppers for a milder taste. Adjusting spice levels can make this dish your own. You can grill or bake the chicken. Grilling gives a smoky flavor and nice char. However, baking is easier for busy cooks. It keeps the chicken juicy and tender while being hands-off. For slow cooks, this recipe adapts well. Just place the marinated chicken in a slow cooker. Cook on low for 4-6 hours. This method makes the chicken super tender and full of flavor. Check the [Full Recipe] for exact cooking times and techniques. To store your sticky honey chicken leftovers safely, place them in an airtight container. Make sure to cool the chicken to room temperature before sealing. This helps keep it fresh. You can store it in the fridge for up to three days. When reheating, I recommend using the oven for the best results. Preheat it to 180°C (350°F). Place the chicken on a baking sheet and cover it with foil. This keeps the chicken moist. Heat for about 10-15 minutes until warm. If you use a microwave, cover the chicken with a damp paper towel. Heat in short bursts, checking often to avoid drying it out. You can freeze sticky honey chicken for future meals. Cut it into portions and place them in freezer bags. Squeeze out the air to prevent freezer burn. It can last for up to three months in the freezer. To thaw, move it to the fridge for a few hours or overnight. This keeps the taste and texture intact. You can pair sticky honey chicken with many tasty sides. Here are some ideas: - Steamed broccoli or green beans - Fluffy white rice or jasmine rice - Roasted or stir-fried vegetables - A fresh garden salad with light dressing - Crispy coleslaw for a crunchy contrast These sides balance the sweet and savory flavors of the chicken. They also add color and nutrition to your plate. Yes, you can make sticky honey chicken ahead of time. It’s great for meal prep! Here are some tips: - Marinate the chicken the night before. This boosts flavor. - Cook the chicken and store it in the fridge for up to three days. - Reheat it gently in the oven for best results. Planning this meal ahead saves time on busy days. You can enjoy it fresh and hot whenever you like. If you want to feed more people, scaling the recipe is easy. Just follow these steps: - Double or triple the amount of chicken. Keep the same ratio of marinade. - Use more honey, soy sauce, and other ingredients in equal parts. - Adjust baking time if you use larger pieces of chicken. This way, you won't lose any flavor. Everyone will enjoy a delicious meal! For the full recipe, check out the Sticky Honey Chicken recipe above. You now understand how to make sticky honey chicken with great flavor and texture. Start with the right ingredients and follow the steps for marinating, baking, and glazing. Use the tips provided to perfect your dish. Remember, you can easily adapt this recipe with different proteins or flavors. Finally, safely store leftovers for later enjoyment. Enjoy your cooking, and share this recipe with friends. Happy eating!

Sticky Honey Chicken Recipe Flavorful and Simple Meal

Welcome to a delicious adventure with my Sticky Honey Chicken Recipe! If you seek a meal that is both easy

To make the Cheesy Garlic Bread Shrimp Grilled Cheese, gather these ingredients: - 8 slices of thick-cut sourdough bread - 2 cups cooked shrimp, peeled and deveined - 1 cup shredded mozzarella cheese - 1 cup shredded cheddar cheese - 4 tablespoons butter, softened - 4 cloves garlic, minced - 1 tablespoon fresh parsley, chopped - 1 teaspoon paprika - Salt and black pepper to taste These ingredients are key for a rich and tasty experience. The sourdough gives a nice crunch. The shrimp adds a delightful seafood flavor. Both mozzarella and cheddar melt beautifully, creating a gooey center. Garlic enhances the aroma, while parsley adds freshness. Paprika gives a subtle warmth to the dish. Salt and pepper balance all the flavors. When you combine these ingredients, you're in for a treat. This grilled cheese is not your ordinary sandwich. It’s a cheesy delight with a seafood twist! For the full recipe, check the detailed steps provided. 1. Start by mixing the shrimp and cheese filling. In a bowl, combine 2 cups of cooked shrimp, 1 cup of shredded mozzarella cheese, 1 cup of shredded cheddar cheese, 4 cloves of minced garlic, 1 tablespoon of chopped parsley, 1 teaspoon of paprika, and salt and black pepper to taste. Stir until the shrimp are coated evenly. 2. Next, prepare the sourdough bread with butter. Take 8 slices of thick-cut sourdough bread. Spread 1 tablespoon of softened butter on one side of each slice. This butter will give you a nice crispness. 3. Now, assemble the grilled cheese sandwich. Place one slice of bread butter-side down in a skillet. Add half of the shrimp and cheese mixture on top. Cover it with another slice of bread, butter-side up. Press down gently to keep it together. 1. Cook the first side until golden brown. Heat your skillet over medium heat. Cook the sandwich for about 3-4 minutes. Look for a nice golden color and melting cheese. 2. Flip the sandwich carefully. Cook the second side until crispy and the cheese melts completely, about another 3-4 minutes. You can use a spatula to help flip it over. 3. Once cooked, slice the sandwich in half. Let it cool for a minute before serving. Enjoy this tasty Cheesy Garlic Bread Shrimp Grilled Cheese with a side of your favorite dipping sauce. For the full recipe, refer to the earlier section. To get the perfect golden crust, use medium heat. This keeps the bread crisp and the cheese melty. Keep an eye on it while it cooks. Flip it when the bottom is golden brown. A cast-iron skillet works best for even heat. For melting cheese effectively, use a lid. Cover the sandwich while it cooks. This helps the heat circulate and melts the cheese fast. You can also lower the heat slightly after flipping. This way, the cheese melts without burning the bread. If you want to try alternative cheeses, consider gouda or fontina. These cheeses provide a rich flavor and melt nicely. Mixing different cheeses can create unique tastes in your grilled cheese. To make it spicy, add sliced jalapeños or crushed red pepper flakes. You can mix these into the shrimp and cheese filling. This will give your sandwich a nice kick. Adding a splash of hot sauce also works well for heat. For the full recipe, check out the details above. {{image_2}} You can easily change up your Cheesy Garlic Bread Shrimp Grilled Cheese. Adding vegetables can boost flavor and nutrition. Try spinach or diced tomatoes. Both add freshness and color. If you want a different protein, shrimp is not your only choice. You can use crab or lobster for a luxe twist. Chicken or even tofu works well too. Each option brings a unique taste to your meal. Pair your grilled cheese with tasty sides. A simple salad can add crunch and brightness. Try a light coleslaw or a bowl of soup. Tomato soup is a classic choice, but any broth-based soup works great. For dips, consider garlic aioli or a zesty marinara. These sauces can enhance the flavor and add moisture. You can also serve it with a squeeze of lemon for a fresh pop. For the full recipe, check out the link provided. To store leftovers, place your sandwich in an airtight container. This keeps it fresh for up to three days. Before sealing, let it cool to room temperature. Avoid stacking sandwiches on top of one another to prevent sogginess. When you’re ready to eat, the best way to reheat is in a skillet. Heat it over medium-low heat. This method helps keep the bread crispy and the cheese gooey. You can cover the skillet to melt the cheese faster. For long-term storage, you can freeze the sandwiches. Wrap each sandwich tightly in plastic wrap, then place it in a freezer bag. This can last up to three months. To keep the texture, avoid freezing them for too long. When you're ready to eat, thaw in the fridge overnight. Reheat in a skillet for the best results. This way, you'll enjoy a tasty grilled cheese just like fresh! For the full recipe, check the earlier section. How to make Cheesy Garlic Bread Shrimp Grilled Cheese without shrimp? You can use cooked chicken or mushrooms instead of shrimp. These options keep the dish tasty. Just follow the same mixing steps. Mix your chosen protein with the cheese and garlic. Then, assemble and cook as you would with shrimp. This way, you still enjoy a cheesy and flavorful sandwich. Can I use gluten-free bread for this recipe? Yes, gluten-free bread works great for this recipe. It keeps the same taste and texture. Just choose a sturdy gluten-free bread to hold the filling. Follow the same steps for buttering and cooking. You’ll still get that crispy, cheesy goodness. What are some good pairings with Cheesy Garlic Bread Shrimp Grilled Cheese? Tomato soup is a classic pairing here. It adds a nice, warm touch. You can also serve it with a fresh salad. A simple green salad or coleslaw complements the sandwich well. For drinks, try a light soda or iced tea. These choices balance the rich flavors of the grilled cheese. This blog post shared how to make a delicious Cheesy Garlic Bread Shrimp Grilled Cheese. We covered the key ingredients, step-by-step instructions, and tips to perfect your sandwich. You learned about fun variations and how to store leftovers too. As you try this recipe, remember to get creative with ingredients. Enjoy the tasty flavors and make it your own. Happy cooking!

Cheesy Garlic Bread Shrimp Grilled Cheese Delight

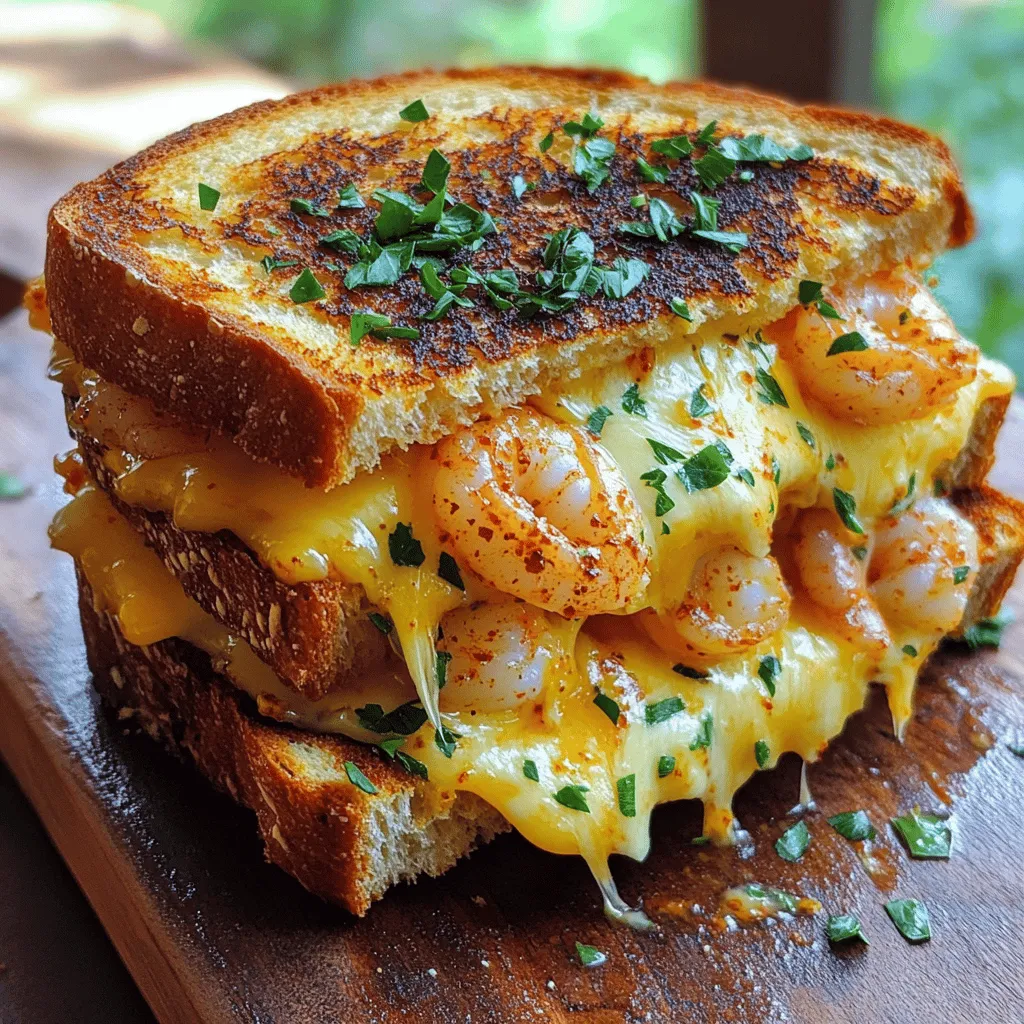
If you love grilled cheese, you’re in for a treat! My Cheesy Garlic Bread Shrimp Grilled Cheese Delight combines crispy

- 4 cups vegetable broth - 1 cup mushrooms, sliced - 1 cup firm tofu, cubed - 1/2 cup bamboo shoots, sliced - 1/2 cup carrots, julienned Hot and sour soup starts with a good base. Vegetable broth gives it a warm, rich flavor. I love using mushrooms and tofu for their textures. Bamboo shoots add a nice crunch, while the carrots bring a touch of sweetness. - 1/4 cup soy sauce - 2 tablespoons rice vinegar - 1 tablespoon chili paste (adjust to taste) - 1 teaspoon sesame oil To really amp up the flavor, add soy sauce and rice vinegar. They balance the heat and tang. Chili paste adds spice, so adjust it to your liking. A drizzle of sesame oil at the end gives it a nutty finish. - Fresh cilantro - Salt and pepper to taste For the final touch, sprinkle fresh cilantro on top. It adds color and freshness. You can also season with salt and pepper to make it just right for your taste. For the full recipe, visit the link provided. Enjoy your cooking! To start, bring 4 cups of vegetable broth to a boil in a large pot. This forms the base of your soup. Once it reaches a rolling boil, add 1 cup of sliced mushrooms and 1/2 cup of julienned carrots. The mushrooms add umami, while the carrots give sweetness. Let them simmer for about 5-7 minutes. This softens the veggies and allows their flavors to blend into the broth. Next, stir in 1 cup of cubed firm tofu and 1/2 cup of sliced bamboo shoots. These ingredients boost protein and texture. Then, add 1/4 cup of soy sauce, 2 tablespoons of rice vinegar, and 1 tablespoon of chili paste. Adjust the chili paste to match your spice level. Allow the soup to simmer for another 2-3 minutes. This step infuses all the flavors together, creating that perfect hot and sour taste. Now it’s time to thicken your soup. Mix 1 tablespoon of cornstarch with 2 tablespoons of water in a small bowl. Gradually stir this mixture into the bubbling soup. Keep stirring until it thickens slightly. This gives the soup a nice, hearty texture. Finally, drizzle in 1 teaspoon of sesame oil and season with salt and pepper. Turn off the heat and fold in 1/4 cup of chopped green onions. Your bowl of comfort is almost ready! For the full recipe, check out the provided link. To make your soup just right, play with the seasoning. Start with soy sauce and rice vinegar. Taste your soup as you go. If it needs more heat, add chili paste. Remember, a little goes a long way. For a balanced broth, keep the salt low. You can always add more later. Fresh herbs can also brighten flavors. Simmer your soup gently. This helps the flavors blend well. Keep the heat low to avoid boiling. When adding tofu, be gentle. You want it to hold its shape. Stir softly to prevent crumbling. This way, every bite has tofu goodness. You can make this soup ahead of time. It tastes even better the next day! Store it in the fridge in an airtight container. When you’re ready to eat, reheat on low heat. This keeps the tofu from getting mushy. If it thickens too much, add a splash of broth. For the Full Recipe, check the earlier section. Enjoy your cooking! {{image_2}} Hot and sour soup has many fun twists. Let's dive into some tasty variations that suit different diets and preferences. You can make this soup vegan with simple swaps. Instead of tofu, try using tempeh or seitan for protein. These options give a nice texture and flavor. You can also replace the soy sauce with tamari for a gluten-free choice. This keeps the taste while making it safe for everyone. Just ensure all your other ingredients, like broth and vinegar, are plant-based too. If you need gluten-free options, use tamari instead of soy sauce. This swap keeps the flavor while removing gluten. For those watching sodium intake, look for low-sodium vegetable broth. You can also reduce soy sauce or add less salt. These changes help you enjoy the soup without worrying about your diet. Many cultures have their own styles of hot and sour soup. In China, you might find wood ear mushrooms and white pepper. Thai versions often use lime juice and galangal for a different zing. Vietnamese styles may add fresh herbs like basil or mint. Each region adds its unique twist, making this soup a worldwide favorite. To store leftovers, let the soup cool to room temperature. Pour it into an airtight container. This keeps it fresh and safe. Place the container in the fridge. Enjoy the soup within three to four days for the best taste. After that, it may lose flavor and texture. You can freeze Hot and Sour Soup for later use. Use freezer-safe containers or bags to store it. Leave some space at the top, as the soup expands when frozen. It keeps well for about one month. For thawing, move it to the fridge overnight. You can also thaw it in cold water for quicker results. To reheat soup, use a pot on the stove over medium heat. Stir often to warm it evenly. You can also use a microwave. Heat in short bursts, stirring in between. This helps maintain flavor and texture. If the soup seems thick, add a bit of broth or water while heating. Enjoy it just like the first bowl! Hot and Sour Soup comes from China. It has deep roots in Chinese cooking. Each region adds its own twist. The soup is popular for its bold mix of flavors. It represents balance in Chinese cuisine. The heat and sourness can symbolize life’s ups and downs. This soup is often served in Chinese restaurants worldwide. It is a comfort food for many. Yes, you can make it spicier! Here are some tips: - Add more chili paste for extra heat. - Use fresh chilies or chili flakes. - Mix in hot sauce to boost spice. - Try adding a dash of white pepper. Feel free to adjust the spice to your taste. Start slow, and add more as needed. This way, you can find your perfect heat level. Hot and Sour Soup is nutritious. Here’s a quick overview of its health benefits: - Low in calories: Great for a light meal. - High in fiber: Ingredients like mushrooms and bamboo shoots help digestion. - Protein source: Tofu adds plant-based protein. - Rich in vitamins: Carrots and green onions provide essential vitamins. The ingredients may help boost your immune system. Plus, the warm broth can soothe a sore throat. You can find the full recipe here: [Fiery Zesty Hot and Sour Soup ](#) In this blog post, we covered the essential ingredients for Hot and Sour Soup, including vegetable broth, mushrooms, and tofu. We discussed how to prepare the broth, add flavor, and achieve the perfect thickness. I shared tips for perfecting your soup's flavor and ways to adapt the recipe for different diets or regional styles. Cooking this soup is an enjoyable process. It allows you to experiment with flavors and create your unique twist. Enjoy your cooking and savor every bowl!

Hot and Sour Soup Flavorful Comforting Bowl

Craving a bowl of warmth and spice? Hot and Sour Soup delivers the perfect comfort. Bursting with flavors, this soup

For this dish, you need some fresh and simple items. Here’s what you should gather: - 2 cups water - 1 cup stone-ground grits - 1/2 teaspoon salt - 1 tablespoon butter - 1 pound shrimp, peeled and deveined - 1 medium red bell pepper, diced - 1 medium yellow onion, diced - 2 cloves garlic, minced - 1 teaspoon smoked paprika - 1/2 teaspoon cayenne pepper (adjust for spice level) - 1 tablespoon lemon juice - 2 tablespoons fresh parsley, chopped - Salt and pepper to taste These key ingredients bring out the flavors in your dish. Stone-ground grits give a rich texture, while the shrimp adds a sweet taste. The spices and veggies create a beautiful blend. You can make this dish even better with a few extra items. Consider adding: - 1/4 cup heavy cream for creamy grits - 1 tablespoon Worcestershire sauce for depth - Fresh thyme or basil for herbs These optional ingredients can elevate your dish. Heavy cream makes the grits richer. Worcestershire sauce adds a savory kick. Fresh herbs brighten the flavors. This dish is not just tasty; it's also nutritious. Here’s a quick look at what’s inside: - Calories: About 450 per serving - Protein: Approximately 30 grams - Carbohydrates: Roughly 45 grams - Fat: About 15 grams The shrimp provides a good source of protein. The grits offer carbs for energy. Overall, this dish balances taste and nutrition. For the full recipe, check out the mentioned sections. Start by boiling 2 cups of water in a medium saucepan. Add 1/2 teaspoon of salt to the water. Gradually stir in 1 cup of stone-ground grits. This process helps avoid lumps. Reduce the heat to low and cover the pot. Cook the grits for 20 to 25 minutes, stirring occasionally. You want them creamy and smooth. Once finished, stir in 1 tablespoon of butter. Keep the grits warm while you work on the shrimp. In a large skillet, heat a tablespoon of oil over medium heat. Add 1 medium diced onion and 1 medium diced red bell pepper. Cook these veggies for about 5 minutes until they are soft. This will add a nice flavor base. Next, add 2 minced garlic cloves, 1 teaspoon of smoked paprika, and 1/2 teaspoon of cayenne pepper. Sauté everything for an extra minute until fragrant. This step brings out the spices' aroma, making your dish more inviting. Add 1 pound of peeled and deveined shrimp to the skillet. Cook them for about 3 to 4 minutes. The shrimp should turn pink and opaque when done. At this point, drizzle in 1 tablespoon of lemon juice. Season with salt and pepper to taste. This adds brightness to your dish. Now, you are ready to serve! Spoon the shrimp and vegetable mixture over the warm grits. Finish with fresh parsley for a pop of color. For the full recipe, refer to the previous section. To make smooth and creamy grits, always use stone-ground grits. They have a great texture and taste. Start by boiling water and add salt to it. Slowly stir in the grits. This helps avoid lumps. Cook on low heat for 20-25 minutes. Stir often for the best results. When the grits are creamy, mix in butter. This adds richness and flavor. For tasty shrimp, fresh is best. Peel and devein your shrimp just before cooking. This keeps them tender and juicy. In your skillet, use oil at medium heat. Add diced onion and red bell pepper first. Cook until soft, then add garlic. The garlic gives a lovely aroma. Don’t forget the spices! Smoked paprika adds depth and cayenne gives heat. Cook shrimp until they turn pink, about 3-4 minutes. Finish with lemon juice for brightness. Garnishing adds a nice touch to your dish. Fresh parsley gives color and freshness. Sprinkle it on top just before serving. You can also add lemon wedges on the side. This enhances the dish with a tangy flavor. Serve in shallow bowls for a beautiful presentation. With these tips, your Red Snapper Shrimp Grits will shine. Check the Full Recipe for more details! {{image_2}} If you want to switch things up, feel free to try other proteins. You can use fish like tilapia or cod. Chicken also works well if you want something different. Tofu is a great option for a plant-based twist. Each protein adds its own flavor to the dish. You can play with the spices to change the taste. Try adding Old Bay seasoning for a seafood twist. Cajun seasoning can give it a kick. If you like it mild, just use salt and pepper. Fresh herbs like thyme or dill also work nicely. Mix and match to find your favorite! For a vegan version, you can skip the shrimp and fish. Use sautéed mushrooms or chickpeas instead. They add texture and flavor. Instead of butter, use olive oil or vegan butter. You can also replace the grits with quinoa or polenta for a new take. This way, everyone can enjoy a delicious meal! For the complete recipe, check out the [Full Recipe]. After enjoying your Red Snapper Shrimp Grits, let the dish cool. Place leftovers in an airtight container. Store them in the fridge for up to three days. Make sure to separate the grits from the shrimp if possible. This keeps each part fresh longer. To reheat, add a splash of water or broth to the grits. Heat them gently on the stove over low heat. Stir often to prevent sticking. For the shrimp, warm them in a skillet over medium heat. Cook until they are heated through, about five minutes. Avoid overheating to keep the shrimp tender. You can freeze the grits and shrimp for later use. Let both cool completely before freezing. Place the grits in a freezer-safe bag. Store the shrimp in a separate bag. They can last for up to three months in the freezer. To cook, thaw them overnight in the fridge. Reheat as described above for a quick meal. Follow the [Full Recipe] to make this delightful dish. Yes, you can use frozen shrimp. Just thaw them first. Run them under cold water for a few minutes. This helps them cook evenly. Frozen shrimp are often just as tasty as fresh. Keep an eye on cooking time, as they may need a minute more. You can serve this dish with a fresh salad. A simple green salad pairs well. You might also add some crusty bread on the side. A light white wine can enhance the meal too. Feel free to enjoy some lemon wedges for added zest. To add heat, increase the cayenne pepper. You can also add a dash of hot sauce. If you like it really spicy, try adding diced jalapeños. Just be careful not to overpower the other flavors. Taste as you go so it stays balanced. Stone-ground grits work best for this dish. They have a rich, deep flavor. Instant grits are quicker but lack texture. Choose a brand that is fresh for the best results. Remember, the cooking time will vary with different types of grits. For a full recipe, check the details above. Red Snapper Shrimp Grits is a tasty dish full of flavor. I discussed key ingredients, cooking steps, and handy tips. You learned how to make perfect grits and tasty shrimp. Plus, I shared variations to suit your taste and storage info for leftovers. Enjoy cooking this meal. It’s easy to make, and you can impress your friends. Try different proteins or spices to make it your own. Happy cooking!

Red Snapper Shrimp Grits Flavorful Southern Delight

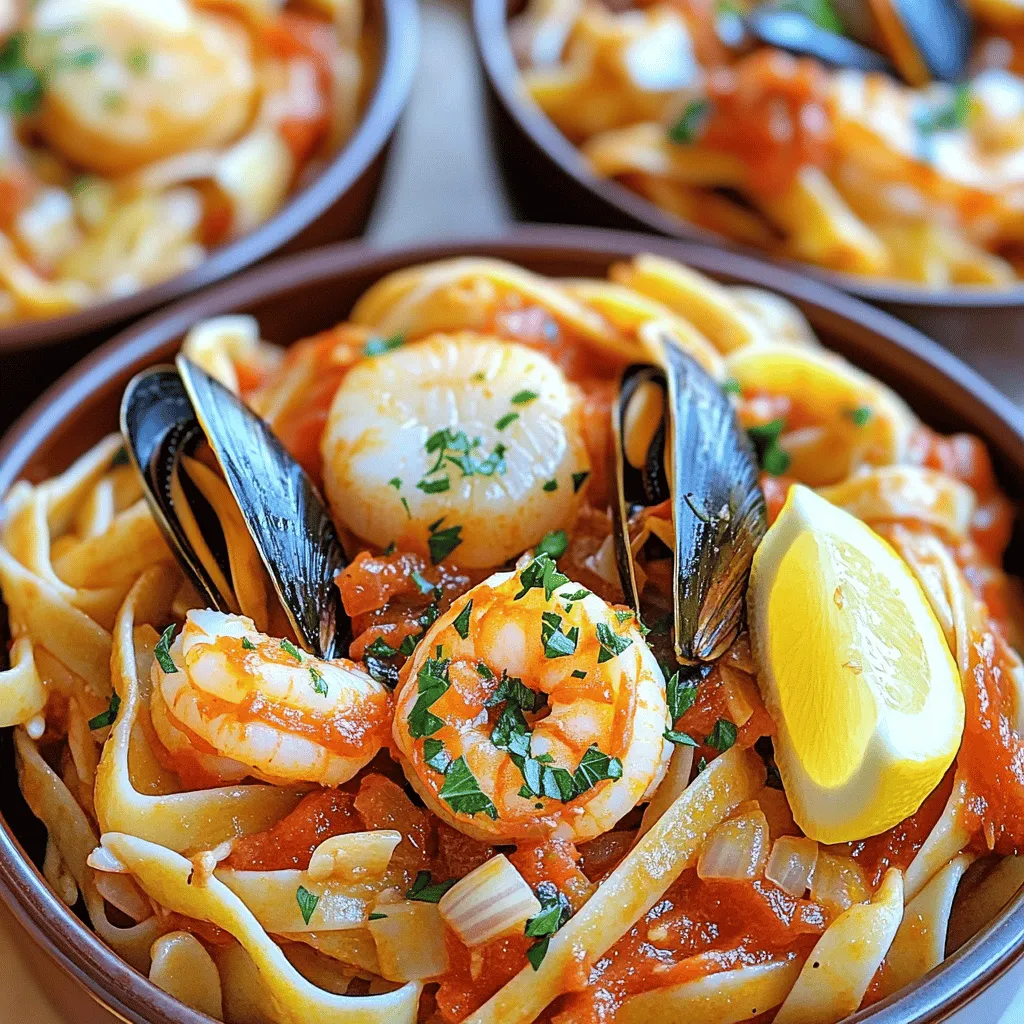
If you crave a taste of the South, you’re in for a treat! Red Snapper Shrimp Grits is the kind

- 1 cup quinoa, rinsed - 2 cups vegetable broth - 1 cup cherry tomatoes, halved - 1 cup corn kernels (fresh or frozen) - 1 red bell pepper, diced - 1 cup black beans, rinsed and drained - 1 avocado, diced - 1 cup spinach, chopped - 1/4 cup olive oil - 2 tablespoons lime juice - 1 teaspoon cumin - 1 teaspoon smoked paprika - Salt and pepper to taste - Fresh cilantro for garnish (optional) For my Meal Prep Magic: Colorful Quinoa Bowls, these ingredients work together perfectly. You can swap quinoa with brown rice or farro for a different base. If you don’t like black beans, chickpeas make a great substitute. Each ingredient has its own benefits. - Quinoa: This grain is high in protein and fiber. It helps keep you full. - Vegetable broth: Using broth instead of water adds flavor. It also keeps the dish light. - Cherry tomatoes: They add a burst of sweetness and are rich in vitamins. - Corn: Fresh or frozen corn brings a nice crunch and adds fiber. - Red bell pepper: This pepper is sweet and full of vitamin C. - Black beans: They are a great source of protein. They also add texture. - Avocado: Creamy and rich, it gives healthy fats for energy. - Spinach: This leafy green is packed with iron and vitamins. - Olive oil: A healthy fat that adds richness and flavor. - Lime juice: It brightens the dish with acidity. - Cumin and smoked paprika: These spices give the dish depth and warmth. - Salt and pepper: These are key to making all flavors pop. - Fresh cilantro: It adds a fresh touch if you enjoy its taste. When you mix these ingredients, you create a meal that is not only colorful but also full of flavor and nutrition. Each bite supports your health while being easy to prepare. How do I cook quinoa? To cook quinoa, start by rinsing 1 cup of quinoa under cold water. This removes any bitter taste. Then, in a medium saucepan, mix the rinsed quinoa with 2 cups of vegetable broth. Bring it to a boil over medium-high heat. Once boiling, lower the heat, cover, and let it simmer. In about 15 minutes, the quinoa will be fluffy and all the liquid will be gone. How do I sauté vegetables perfectly? While the quinoa cooks, heat 1 tablespoon of olive oil in a skillet over medium heat. Add 1 diced red bell pepper and 1 cup of corn kernels. Sauté them for 5-7 minutes. The peppers should soften, and the corn should heat through. Season with salt, pepper, 1 teaspoon cumin, and 1 teaspoon smoked paprika. This will add great flavor. How do I combine the ingredients? In a large mixing bowl, combine the cooked quinoa, sautéed vegetables, 1 cup of halved cherry tomatoes, 1 cup of rinsed black beans, and 1 cup of chopped spinach. Drizzle with 2 tablespoons of lime juice and the remaining olive oil. Gently mix everything together until well combined. Taste the mixture and adjust the seasoning with more salt or pepper if needed. What are the best practices for portion control? When portioning your meal prep, use meal prep containers. Make sure to divide the mixture evenly among them. Each container should have a good mix of quinoa, veggies, and beans. This helps you manage your servings and ensures balanced meals throughout the week. What are tips for sealing and storing meal prep containers? After filling the containers, top each bowl with diced avocado for freshness. If you want, add fresh cilantro too. Seal the containers tightly to keep the meals fresh. Store them in the fridge for up to 5 days. If you want to keep them longer, you can freeze them. Just make sure to thaw them in the fridge before eating. To make meal prep easy, start with a plan. Choose recipes that share ingredients. This cuts down on shopping time and waste. For example, use the same veggies in multiple meals. Next, cook in bulk. Make a big batch of quinoa or roast several veggies at once. This speeds up your prep time for the week. I always suggest setting aside a few hours on the weekend. This time helps you prepare for busy days ahead. Recommended kitchen tools help you work faster. Here are a few must-haves: - Sharp chef’s knife - Cutting board - Large mixing bowls - Meal prep containers - A good set of measuring cups Using these tools can save you time and make cooking more fun. Adding flavor to your meals is key. Use spices to make your dishes pop. Here are my favorites: - Cumin - Smoked paprika - Garlic powder Dressings also boost taste. You can mix olive oil and lime juice for a fresh touch. Or try balsamic vinegar for a tangy twist. To make the quinoa bowls your own, customize them. Swap out black beans for chickpeas if you prefer. Add different veggies or proteins based on what you love. This way, your meals never feel boring. For the full recipe, check out Meal Prep Magic: Colorful Quinoa Bowls. {{image_2}} You can adapt this recipe to meet various dietary needs easily. For a vegan protein boost, add tofu, tempeh, or chickpeas. These options add flavor and keep the meal filling. If you're gluten-free, quinoa is already a great choice. You can also use rice or gluten-free pasta as alternatives. Getting creative with flavors can keep meal prep exciting. For a Mediterranean twist, add olives, feta cheese, or roasted red peppers. You can also drizzle balsamic glaze for added depth. If you prefer Asian flavors, incorporate diced ginger, soy sauce, or sesame oil. Top the bowls with sliced green onions and sesame seeds for an extra kick. For a Mexican flair, toss in diced jalapeños, corn salsa, or lime zest. Fresh cilantro can enhance the overall taste too. Don't forget to switch up your ingredients based on the seasons. Use fresh veggies like asparagus in spring or pumpkin in fall. This keeps your meals fresh and exciting. For the Full Recipe, check out the full details on making Meal Prep Magic: Colorful Quinoa Bowls. To keep your meals fresh, use airtight containers. Glass or BPA-free plastic works best. These containers help prevent spills and keep food tasty. When storing, make sure each bowl has a good seal. This helps keep the flavors locked in. When you refrigerate meals, keep them between 32°F and 40°F. Meals can last up to 5 days in the fridge. If you want to store meals longer, freezing is a great option. Use containers that are safe for the freezer. This way, your meals stay fresh for up to 3 months. Different ingredients have different shelf lives. Cooked quinoa can last about 5 days in the fridge. Vegetables like bell peppers and tomatoes stay fresh for 3 to 5 days. Black beans, once cooked, last for about 5 days as well. Avocado, however, can brown quickly. Use it within 1 to 2 days after cutting. Watch for signs of spoilage. If you see mold or a strange smell, it’s best to throw it away. If the texture feels slimy or mushy, that’s also a sign. Always trust your senses when checking for freshness. For the best taste, use ingredients right when they are at their peak. How do I ensure my meal prep stays fresh all week? To keep your meal prep fresh, use good containers. Glass or BPA-free plastic works best. Seal them tightly to avoid air exposure. Always store cooked food in the fridge right after cooling. Label your containers with dates. This way, you know when to eat them. Can I freeze these quinoa bowls? Yes, you can freeze the quinoa bowls! Just pack them in airtight containers. Leave some space for expansion. When you want to eat, thaw them in the fridge overnight. Then, heat them up on the stove or in the microwave. What pantry staples should I have for quick meal prep? Stock your pantry with these items for easy meals: - Quinoa - Brown rice - Canned beans - Olive oil - Dried herbs and spices - Frozen veggies - Canned tomatoes These staples let you whip up meals fast. How often should I meal prep for a busy week? I suggest meal prepping once a week. Pick a day when you have some free time, like Sunday. This way, you can plan for the days ahead. It helps save time and keeps your meals healthy. What are some quick recipes for beginners? If you are just starting, try these simple recipes: - Overnight oats: Mix oats with milk and your favorite toppings. - Stir-fried veggies and rice: Quickly sauté mixed veggies with rice. - Omelets: Whisk eggs and add your choice of fillings. These meals are easy, fast, and tasty. For a fun recipe to get you started, check out the Full Recipe for Meal Prep Magic: Colorful Quinoa Bowls! Meal prep offers an easy way to eat healthy and save time. We discussed key ingredients for quinoa bowls, their benefits, and substitutes. I shared steps for cooking and tips for portioning and storing. The right tools and flavor boosts can make cooking smoother. Whether you need vegan, gluten-free, or different tastes, there are options for everyone. Always check for freshness and know how to store meals. Meal prep can help you enjoy great food all week long!

Meal Prep for Busy Weeks Simplified and Efficient

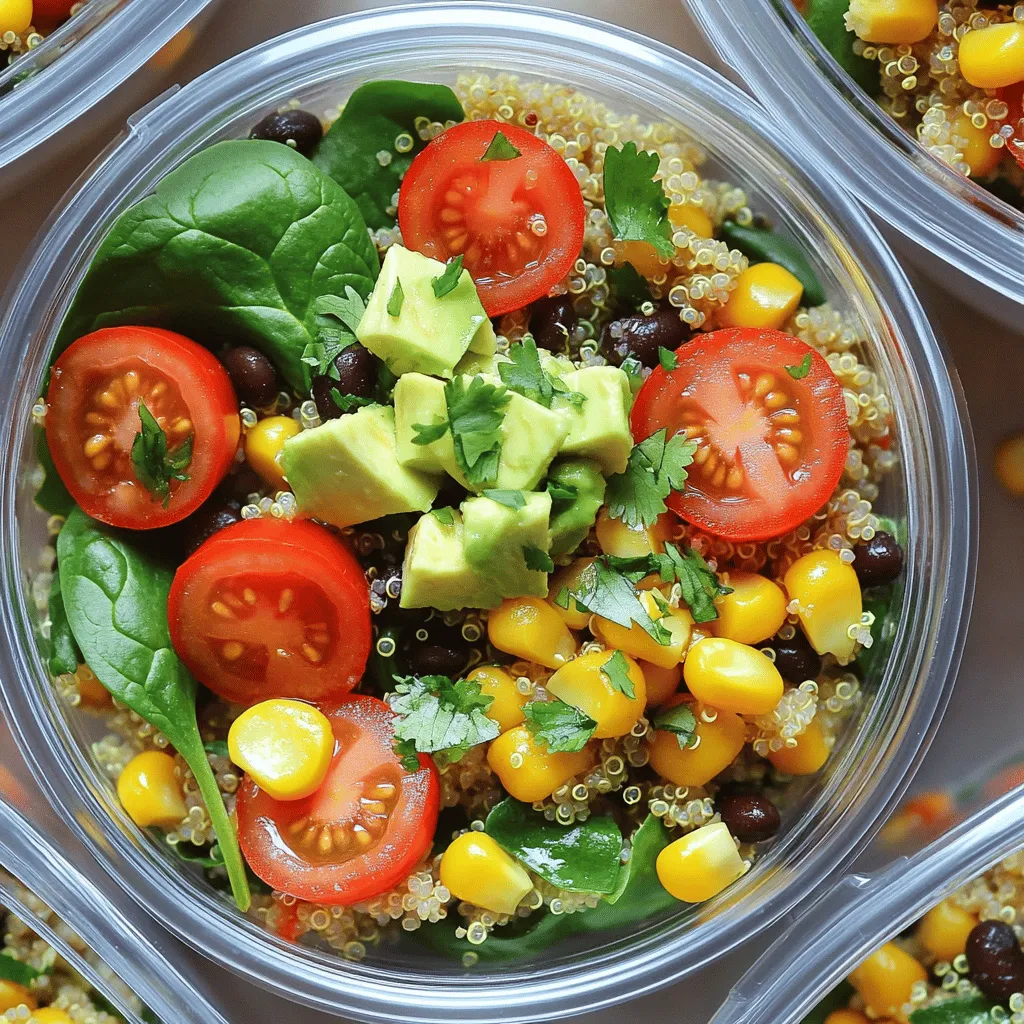
Are you tired of scrambling for meals during your busy weeks? Meal prep can change that! In this article, I

- 1 cup all-purpose flour - 1/2 cup unsweetened cocoa powder - 1 teaspoon baking powder - 1/2 teaspoon baking soda - 1/4 teaspoon salt - 1/2 cup unsalted butter, softened - 1 cup granulated sugar - 2 large eggs - 1 teaspoon vanilla extract - 1/2 cup buttermilk - 3/4 cup roasted unsalted pistachios, finely chopped - 1/2 cup dark chocolate chips - Optional: Powdered sugar for dusting Using high-quality ingredients makes a big difference in your cake. Fresh flour gives better texture. Good cocoa helps with rich chocolate flavor. Quality chocolate chips melt perfectly and add a creamy taste. Fresh eggs ensure your cake rises well. Pistachios add a unique crunch. They also bring a nice green color to the cake. Always choose unsalted pistachios for balance. This will prevent the cake from being too salty. Each ingredient plays a role in making this cake special. If you have dietary needs, there are options. You can use gluten-free flour instead of all-purpose flour. This keeps the flavor while making it gluten-free. For a dairy-free version, use almond milk instead of buttermilk. You can also swap butter for coconut oil. If you cannot find pistachios, walnuts or almonds work well. Just chop them finely to match the texture. Dark chocolate chips can be replaced with semi-sweet or milk chocolate for a sweeter taste. For those who want less sugar, try using a sugar substitute. This recipe is flexible and can fit many tastes. Use the [Full Recipe] for precise measurements and steps. Start by preheating your oven to 350°F (175°C). You want to get that heat just right. Next, take an 8-inch round cake pan and grease it with butter. Then, dust it lightly with flour. This step helps the cake slide out easily after baking. Grab a medium bowl and sift together the dry ingredients. Combine 1 cup of all-purpose flour, 1/2 cup of cocoa powder, 1 teaspoon of baking powder, 1/2 teaspoon of baking soda, and 1/4 teaspoon of salt. Sifting helps remove lumps and mixes everything well. Set this bowl aside for later. In a large bowl, take 1/2 cup of softened unsalted butter and 1 cup of granulated sugar. Use a hand mixer to beat them together until they look light and fluffy. This usually takes about 3 to 4 minutes. Make sure you scrape the sides of the bowl so everything mixes evenly. Now, it's time to mix the wet and dry ingredients. Add 2 large eggs to the butter-sugar mix, one at a time. Mix well after each egg. Then, stir in 1 teaspoon of vanilla extract. Gradually add the dry mix to this bowl, alternating with 1/2 cup of buttermilk. Start and end with the dry mix. Mix just until combined; don’t overdo it. Gently fold in 3/4 cup of finely chopped roasted pistachios and 1/2 cup of dark chocolate chips. Use a spatula to ensure they are evenly spread throughout the batter. This adds great flavor and texture to your cake. Pour the cake batter into the prepared pan. Smooth the top with your spatula. Place it in the oven and bake for 30 to 35 minutes. To check if it’s done, insert a toothpick into the center. If it comes out clean, your cake is ready. Once baked, remove the cake from the oven. Let it cool in the pan for 10 minutes before transferring it to a wire rack. Let it cool completely. If you want, dust the top with powdered sugar for a nice finish. You can also add whole pistachios for decoration. Enjoy your delicious creation! For the full recipe, check out the main article. To get a cake that is light and fluffy, you must cream the butter and sugar well. This process adds air to the mix. Use a hand mixer for about 3 to 4 minutes. Also, be careful not to over-mix when adding the dry ingredients. Mixing just until combined will help keep the cake tender. Adding buttermilk keeps the cake moist. The balance of dry and wet ingredients is key to your cake's texture. One mistake is not measuring ingredients correctly. Use proper measuring cups for dry and wet items. Another error is not sifting the dry ingredients. Sifting helps mix the cocoa and flour, ensuring no lumps. Also, avoid opening the oven door too soon. This can cause the cake to sink. Wait until the last 10 minutes of baking to check for doneness. To boost flavor, choose high-quality cocoa powder and dark chocolate chips. You can also add a pinch of espresso powder. This will enhance the chocolate taste without being too strong. Mixing in a bit of almond extract can add a lovely nutty note. Lastly, consider using fresh pistachios. Their crunch and flavor will shine through in every bite. For the full recipe, follow along with the detailed steps above! {{image_2}} You can make a gluten-free version of this cake easily. Substitute all-purpose flour with a gluten-free blend. Many blends work well in cakes. Just ensure it has a good mix of starches. You might need to add a bit of xanthan gum for better structure. This will help the cake rise and stay moist. The fun part about this cake is the toppings! You can keep it simple with a dusting of powdered sugar. If you want more flavor, try a cream cheese frosting. It pairs well with chocolate and adds a tangy touch. You can also use a ganache made from dark chocolate. Pour it over the cooled cake for a rich finish. For a crunchy texture, sprinkle more chopped pistachios on top. To boost the flavor of your cake, think about adding espresso powder. Just a teaspoon can enhance the chocolate without making it taste like coffee. Another idea is to add a splash of almond extract. This pairs nicely with pistachios and adds a unique twist. You can also mix in some orange zest for a fresh and bright note. Each of these options adds a new layer of taste to your Chocolate Pistachio Cake. For the full recipe, refer back to the earlier section. After you enjoy your Chocolate Pistachio Cake, store any leftovers in an airtight container. This keeps it fresh and moist. If you don’t have a container, you can cover it tightly with plastic wrap. Make sure to put it in a cool, dry place. This way, you can enjoy your cake for days. Want to save your cake for later? You can freeze it! First, let the cake cool completely. Then, slice it into individual pieces. Wrap each slice in plastic wrap, then place them in a freezer-safe bag. Label the bag with the date. When you’re ready to eat, simply thaw it in the fridge overnight. This cake stays fresh at room temperature for about 3 to 4 days. For the best taste, eat it within this time. If you freeze it, it can last up to 3 months. Just remember to check for quality. If it looks or smells off, it’s best to toss it. Enjoy your cake, whether fresh or frozen! Serve this cake warm or at room temperature. Slice it into wedges and place on plates. You can add a dollop of whipped cream or a scoop of vanilla ice cream. A sprinkle of extra chopped pistachios or a dusting of powdered sugar looks great too. This makes each slice fun and inviting. Yes, you can make this cake a day in advance. Just store it in an airtight container. Keep it at room temperature if you plan to serve it soon. If you want to keep it longer, wrap it well and place it in the fridge. Bring it to room temperature before serving for the best taste. To check if your cake is done, insert a toothpick in the center. If it comes out clean, the cake is ready. If it has wet batter on it, bake for a few more minutes. Remember, every oven is different, so keep an eye on it! Absolutely! You can use walnuts, almonds, or hazelnuts instead. Just chop them finely, just like the pistachios. Each nut will add its own flavor to the cake, making it a fun twist. Feel free to experiment with your favorite nuts. The ideal temperature for baking chocolate cakes is 350°F (175°C). This heat helps the cake rise nicely while keeping it moist. Make sure to preheat your oven before baking. This ensures even cooking and great results for your Chocolate Pistachio Cake. For the full recipe, check above! This blog post shared a simple recipe for Chocolate Pistachio Cake. We covered the key ingredients, tips for success, and variations. Quality ingredients play a big role in flavor, while proper techniques ensure a great texture. Remember to avoid common mistakes and try different toppings to make it your own. With careful storage, this cake stays fresh longer. I hope you feel ready to create a delicious cake that impresses everyone! Enjoy baking and share your results.

Chocolate Pistachio Cake Delicious and Easy Recipe

If you love dessert that combines rich chocolate and crunchy pistachios, you’ll adore this recipe. I’ll walk you through making

- 12 oz fresh or frozen ravioli (cheese or spinach-filled) - 1 cup cherry tomatoes, halved - 1 bunch asparagus, trimmed and cut into 2-inch pieces - 3 cloves garlic, minced - 2 tablespoons olive oil - Salt and pepper to taste - 1 teaspoon Italian seasoning - 1/4 cup grated Parmesan cheese (optional) - Fresh basil, for garnish This dish shines with simple, fresh ingredients. You can use either fresh or frozen ravioli, but I prefer fresh for its taste and texture. Cherry tomatoes bring sweetness and color, while asparagus adds a nice crunch. Garlic is a must; it gives that lovely aroma and flavor. Olive oil adds richness, and salt and pepper help balance everything. Italian seasoning ties it all together, making the dish sing. Parmesan cheese is optional, but it adds a creamy finish. Fresh basil on top brightens the dish and gives a pop of color. You can find the full recipe in the earlier section. Enjoy preparing this delightful meal! Start by boiling water in a large pot. Add a generous pinch of salt to the water. This helps to flavor the ravioli. If you use fresh ravioli, cook it for 3 to 5 minutes. For frozen ravioli, it takes about 7 to 9 minutes. Keep an eye on it to avoid overcooking. When they float, they are ready! Drain the ravioli but save 1/2 cup of the water. You may need it later. While the ravioli cooks, heat 2 tablespoons of olive oil in a large skillet over medium heat. Once the oil is hot, add 3 minced garlic cloves. Sauté the garlic for about 30 seconds. You want it fragrant but not burnt. Next, add the chopped asparagus pieces. Cook the asparagus for about 3 minutes, stirring often. Then, toss in 1 cup of halved cherry tomatoes and 1 teaspoon of Italian seasoning. Cook this mixture for another 4 to 5 minutes. The tomatoes should soften, and the asparagus should be tender. Now it’s time to bring everything together. Add the drained ravioli to the skillet with the veggies. Gently toss everything together. If the dish seems dry, add some of the reserved pasta water. This creates a light sauce that coats the ravioli. Season with salt and pepper to taste. If you want a richer flavor, sprinkle 1/4 cup of grated Parmesan cheese over the top and toss gently. For a fresh touch, garnish with basil before serving. Enjoy your Ravioli with Tomatoes and Asparagus! For the complete recipe, check out the Full Recipe section. To avoid overcooking ravioli, watch the timer closely. Fresh ravioli cooks fast, usually in 3 to 5 minutes. Frozen ravioli takes about 7 to 9 minutes. Check the package for exact times. The ravioli should float to the top when done. This means they are ready! For the best texture in your vegetables, add them at the right time. Start with the asparagus, as it takes longer to cook. Sauté it for about 3 minutes before adding the tomatoes. This way, the asparagus stays crisp, and the tomatoes soften just enough. Adding herbs and spices can really boost the flavor. I recommend using Italian seasoning for a classic touch. Fresh basil adds a nice aroma and flavor too. You might also try crushed red pepper for some heat. If you want to make a homemade sauce, consider adding a splash of lemon juice. It brightens the dish and adds a fresh taste. You could mix in some cream for a richer sauce. Both options make the dish even tastier. Plating is key to making your dish look fancy. Serve the ravioli in shallow bowls for a nice effect. Drizzle a bit of olive oil on top for shine. For garnishing, add fresh basil leaves for color. A sprinkle of grated Parmesan cheese adds a nice touch too. These small details make your dish look as good as it tastes! {{image_2}} You can change the filling in your ravioli for a unique twist. Consider using mushroom or lobster for exciting flavors. Each option brings its own charm to the dish. If you want to keep it fresh, use seasonal vegetables. Peas and zucchini are great choices in spring, while butternut squash shines in fall. This keeps your meal lively and fun. If you need gluten-free options, many stores sell gluten-free ravioli. These taste great and feel just like traditional options. For vegan diets, swap the cheese with cashew cream or nutritional yeast. Both add a rich flavor without dairy. These adjustments make the dish enjoyable for everyone at your table. Pair your ravioli with a light salad for a refreshing contrast. A simple arugula salad with lemon vinaigrette works well. Bread, like a crusty baguette, can soak up delicious sauce. For drinks, a crisp white wine, like Pinot Grigio, enhances the meal's flavors. This combination makes an enjoyable dining experience. If you want to explore more, check out the Full Recipe for additional ideas! To keep your ravioli with tomatoes and asparagus fresh, follow these tips: - Refrigerate Quickly: Place leftovers in a shallow container. This helps them cool fast. - Seal Tight: Use an airtight lid to prevent moisture loss and odors. - Use Within 3 Days: Enjoy your leftovers within three days for best taste. For uncooked ravioli, keep it in a sealed bag or container. Store it in the freezer for up to three months. Make sure to label the date. When reheating, you want to keep the flavors and texture. Here’s how: - Stovetop Method: Heat a skillet over medium heat. Add a splash of water and the ravioli. Cover it to steam for a few minutes. - Microwave Method: Place the ravioli in a bowl. Add a little water and cover it. Heat for one minute, then check and stir if needed. If you have leftover ravioli, consider making a pasta salad. Toss it with some fresh veggies and a light dressing. You can also blend it into a creamy soup for a warm dish. I recommend using fresh ravioli for the best flavor and texture. Fresh ravioli cooks quickly and has a light, delicate taste. Frozen ravioli, while convenient, may have a denser texture. If you use frozen ravioli, make sure to adjust the cooking time to 7-9 minutes. Both types work well, but fresh ravioli truly shines in this dish. Yes, you can easily add protein to your ravioli. Grilled chicken pairs nicely with the flavors of tomatoes and asparagus. Shrimp adds a nice seafood touch, and it cooks quickly. If you prefer a plant-based option, tofu works well too. Simply sauté your protein of choice before adding it to the dish. Ravioli with tomatoes and asparagus lasts about 3 days in the fridge. To keep it fresh, store it in an airtight container. Make sure to cool it down before putting it away. Always check for any signs of spoilage before enjoying leftovers. This dish pairs great with a simple green salad. A side of garlic bread complements the flavors nicely too. You can also serve it with roasted vegetables for added nutrition. These sides balance the meal and make it even more delightful. For the full recipe, check out the [Full Recipe]. This blog post covered the tasty ravioli dish with tomatoes and asparagus. You learned about the best ingredients and step-by-step cooking instructions. I shared tips for perfecting the dish and ideas for variations. Remember to store leftovers properly and reheat them with care. Lastly, consider pairing it with fresh salads or a nice wine. Enjoy making this meal, and feel free to get creative with your own twists!

Ravioli with Tomatoes & Asparagus Flavorful Delight

Are you ready to enjoy a delicious meal that’s quick and easy? In this guide, I’ll show you how to

Older posts
Newer posts
← Previous Page1 … Page78 Page79 Page80 … Page106 Next →
© 2025 My Cooking Cast • Built with GeneratePress

Our Policies

  • Privacy Policy
  • GDPR Policy
  • Terms Of Use
  • Copyright Policy
  • Cookie Policy
  • Disclaimer

More Information​

  • Home
  • Contact
  • About
  • Dinner
  • Appetizers
  • Dessert
©2025, My Cooking Cast About Privacy Policy Back To Top