Skip to content
DisclaimerTerms Of UseGDPR PolicyCookie Policy

My Cooking Cast

  • Home
  • Drinks
  • Appetizers
  • Dinner
  • Dessert
  • About
  • Contact
  • Privacy Policy
DisclaimerTerms Of UseGDPR PolicyCookie Policy

Emma

- Fresh vegetables: - 1 cup broccoli florets - 1 red bell pepper, sliced - 1 carrot, julienned - 1 zucchini, sliced - 1 cup snap peas - Aromatics: - 2 cloves garlic, minced - 1 tablespoon fresh ginger, minced - Seasoning: - 2 tablespoons soy sauce (or low-sodium soy sauce) - 1 tablespoon sesame oil - 1 tablespoon olive oil - Salt and pepper to taste - Optional garnish: - Sesame seeds - 3 green onions, chopped Gather these fresh ingredients to create a quick and healthy meal. I love using vibrant vegetables like broccoli and bell pepper for color and crunch. Garlic and ginger add a nice kick. The soy sauce and sesame oil bring everything together with savory flavor. You can even make it your own by adding extra toppings like sesame seeds or green onions. For the full recipe, follow the detailed instructions for a truly delightful stir-fry experience! Start by washing all your veggies. This removes dirt and germs. I like to use cold water. Once washed, chop them as needed. Cut the broccoli into small florets. Slice the bell pepper into thin strips. Julien the carrot into matchstick shapes. Slice the zucchini into half-moons. Arrange the vegetables on your cutting board. Keep them separate for easy access. This helps speed up cooking. It also keeps the colors vibrant. Heat a large skillet or wok on medium-high heat. Pour in the olive oil and let it warm up. You want the oil to shimmer but not smoke. This means it is ready for cooking. Add the minced garlic and ginger. Stir them for about 30 seconds. You want to smell their rich aroma. Next, toss in the harder vegetables first. Start with the broccoli, carrots, and red bell pepper. Stir-fry these for 3-4 minutes. They should soften but still have a nice crunch. Now it’s time to add the softer veggies. Toss in the zucchini and snap peas. Stir-fry for another 2-3 minutes. This will keep all the colors bright and inviting. Pour in the soy sauce and sesame oil. Stir everything well to coat the veggies. Season with salt and pepper to your taste. Finally, cook for an extra 1-2 minutes. This ensures the veggies are tender but still crisp. Serve the stir-fry hot on a platter or in bowls. You can sprinkle sesame seeds and chopped green onions on top for extra flair. This recipe makes a quick and healthy meal that is sure to please everyone! For the full recipe, check the earlier section. To boost the taste of your veggie stir-fry, I suggest adding a few spices. A pinch of red pepper flakes adds heat. For a sweet touch, try a drizzle of honey or maple syrup. Fresh herbs like cilantro or basil can also brighten the dish. Using fresh veggies is key. Fresh produce holds more flavor and nutrients. Buy seasonal vegetables for the best taste. To get the right crunch, use high heat. Heat your oil until it shimmers before adding veggies. Start with harder vegetables, like broccoli and carrots. They take longer to cook. Stir-fry them for about three to four minutes. Then, add softer veggies like zucchini and snap peas. Cook for an extra two to three minutes. This way, all your veggies stay bright and crisp. Pair your stir-fry with rice or quinoa for a full meal. Both add fiber and protein. You can also serve it over noodles for a different texture. For a beautiful presentation, use a large platter. Arrange the stir-fry neatly and sprinkle sesame seeds on top. Add chopped green onions for a pop of color. These tips make your meal look as good as it tastes! {{image_2}} You can switch out vegetables based on what you have. Try using seasonal veggies like asparagus, cauliflower, or bell peppers. They add great taste and color. Other greens, like kale or spinach, can also work well. Just remember to chop them before adding to the stir-fry. This helps them cook evenly. Adding protein makes your stir-fry more filling. Tofu is a great choice. It absorbs flavors well and adds a nice texture. Tempeh is another option; it has a firmer bite. You can also add chickpeas for a good protein boost. Pair these proteins with soy sauce or sesame oil for a tasty blend. Sauces can change the whole dish. For a sweet twist, use teriyaki sauce. If you like heat, try a spicy chili sauce. Fresh herbs like basil or cilantro can add a burst of flavor. Just toss them in at the end for the best taste. For more ideas, check out the Full Recipe for tips on sauces and herbs! After you finish your delicious veggie stir-fry, cool it down first. This step helps keep the taste fresh. Use airtight containers for storing your leftovers. Glass or plastic containers work well. Make sure they are clean and dry before use. Label your containers with the date. This way, you’ll know when you made it. In the fridge, your veggie stir-fry lasts about three to four days. Keep it in the back of the fridge for the best temperature. For long-term storage, you can freeze it. Use freezer-safe bags or containers. Be sure to remove as much air as possible to prevent freezer burn. Reheat your stir-fry on the stove for the best texture. Use medium heat and stir often. If you want to add fresh ingredients, toss in some new veggies or a splash of soy sauce. This boosts flavor and keeps your meal exciting. You can also use a microwave if you’re short on time, but stir occasionally to heat evenly. Enjoy your tasty stir-fry again! Yes, you can easily make this dish vegan. Just swap the soy sauce for a vegan version, if needed. Instead of using sesame oil, you can use another plant-based oil. If you want more protein, add tofu or tempeh. You have lots of options! Serve the stir-fry over steamed rice or quinoa. You can also pair it with noodles or a fresh salad. For a crunchy touch, add some roasted nuts or seeds. Making stir-fry sauce is simple! Combine soy sauce, sesame oil, garlic, and a bit of sugar. You can add some chili paste for heat or vinegar for a tangy kick. Mix these ingredients well, and pour over the stir-fry. Yes, stir-frying is a great method! It cooks food quickly, keeping nutrients intact. You use less oil than frying. Plus, it helps keep veggies crunchy and fresh. This method also allows for a colorful, tasty meal. In this blog post, we explored how to make an Easy Veggie Stir-Fry. We covered the required ingredients and provided step-by-step instructions to make cooking simple and fun. Tips addressed enhancing flavor and perfecting techniques for a great meal. I shared variations like adding proteins and alternative vegetables to suit your taste. Finally, we discussed storage and reheating to make the most of your leftovers. Now, you can create a tasty veggie dish that fits any meal!

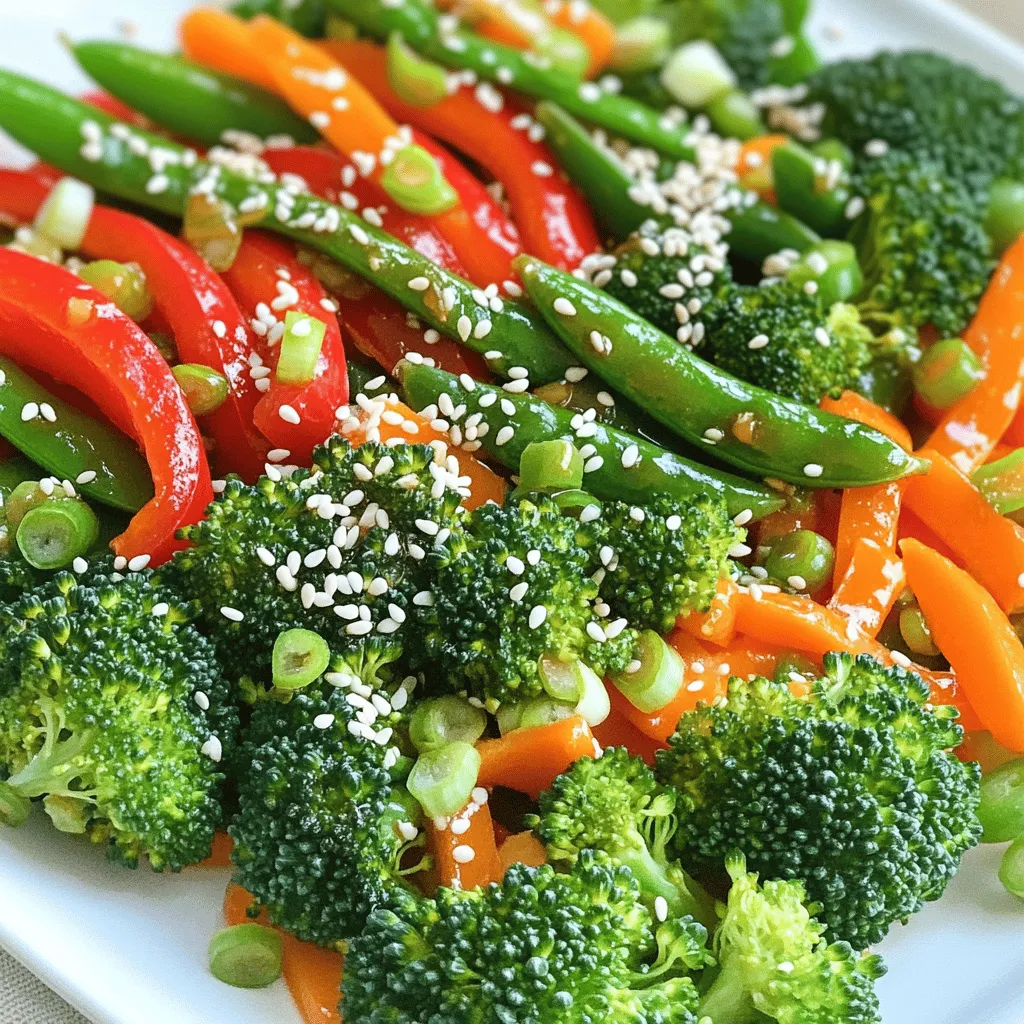
Easy Veggie Stir-Fry Quick and Healthy Meal Recipe

Looking for a quick and healthy meal? This Easy Veggie Stir-Fry recipe is just what you need! Packed with fresh

To make Zesty Lemon Herb Chicken, you need a few key items. Here is what you'll need: - 4 boneless, skinless chicken breasts - 2 lemons (zest and juice) - 4 cloves garlic, minced - 1/4 cup fresh parsley, finely chopped - 1/4 cup fresh basil, finely chopped - 2 tablespoons olive oil - 1 teaspoon dried oregano - 1 teaspoon salt - 1/2 teaspoon black pepper - 1/4 teaspoon red pepper flakes (optional for spice) These ingredients work together to create a bright and fresh flavor. The chicken absorbs the lemon and herb notes, making it delicious. You can add some extra ingredients to boost the taste. These are not required but can make your dish special: - Fresh thyme - A splash of white wine - Sun-dried tomatoes - Capers These flavors can add depth to the dish. Feel free to mix and match based on what you like. When picking herbs, freshness is key. Here are some tips to choose the best ones: - Look for vibrant green leaves. Avoid yellow or wilted ones. - Smell the herbs. They should have a strong, fragrant scent. - Check for moisture. Fresh herbs should feel damp, not dry. Using fresh herbs can make a big difference in taste. They bring brightness to your Zesty Lemon Herb Chicken. For the full recipe, refer to the detailed instructions provided earlier. To make the marinade, grab a mixing bowl. Combine the lemon zest and juice, minced garlic, chopped parsley, and chopped basil. Add olive oil, oregano, salt, black pepper, and red pepper flakes if you want some heat. Mix it all well. This mix packs a punch of flavor that makes the chicken shine. Next, place the chicken breasts in a large resealable plastic bag or a shallow dish. Pour that tasty marinade over the chicken, making sure each piece gets coated. Seal the bag or cover the dish. Now, let it soak in the fridge for at least 30 minutes, or up to 2 hours for a deeper flavor. After the chicken has marinated, it's time to grill! Preheat your grill to medium-high heat, about 375°F to 400°F. Remove the chicken from the marinade, letting any extra drip off. You can toss the leftover marinade; it has done its job. Place the chicken on the grill. Cook for about 6-7 minutes on each side. You want the internal temperature to reach 165°F and for the chicken to be white inside. Once the chicken is grilled, take it off the heat. Let it rest for about 5 minutes. This helps the juices stay inside the chicken, making it tasty and tender. When you’re ready to serve, slice the chicken and place it on a bed of mixed greens. Drizzle some extra lemon juice on top for a fresh kick. Garnish it with lemon wedges and a sprinkle of fresh herbs. For the full recipe, check out the [Full Recipe]. Enjoy your meal! To get great grill marks, preheat your grill well. Aim for medium-high heat. Place the chicken on the grill at a 45-degree angle. This angle helps create those nice crisscross marks. Don’t move the chicken for the first few minutes. Let it sit so it can sear nicely. After about 3-4 minutes, flip the chicken to the other side. This gives you those perfect grill marks that look great and taste even better. Making the marinade ahead is easy and smart. You can mix it the night before. Just combine all the marinade ingredients and store them in the fridge. This way, the flavors deepen and make your chicken taste awesome. When you’re ready to cook, simply add the chicken to the marinade. Let it sit for at least 30 minutes or up to 2 hours for the best taste. This simple step saves you time on busy days. Zesty Lemon Herb Chicken pairs well with many sides. Try serving it on a bed of mixed greens. You can add fresh veggies like cherry tomatoes or cucumbers. Drizzle extra lemon juice on top for a zesty kick. You can also serve it with rice or quinoa for a heartier meal. For a yummy touch, add a sprinkle of fresh herbs. This adds color and flavor to your dish. Check out the full recipe for more ideas! {{image_2}} You can cook Zesty Lemon Herb Chicken in different ways. Grilling gives it a smoky flavor and nice grill marks. The high heat seals in juices, making it tender. Baking is also great if you want a hands-off approach. It cooks evenly in the oven. To bake, preheat to 400°F. Place the marinated chicken on a baking sheet. Bake for about 25-30 minutes or until it reaches 165°F. Both methods work well, but choose based on your time and tools. You can mix up the flavors by using different herbs. Instead of parsley and basil, try thyme or rosemary. These herbs add depth and aroma. For a Mediterranean twist, use oregano and dill. You can also explore using cilantro for a fresh taste. Mix and match herbs based on what you have. This keeps the dish exciting and new every time. Your taste buds will love the variety! If you have dietary needs, you can still enjoy this dish. For a low-carb option, skip the chicken and use cauliflower. It absorbs the lemon and herbs well. If you want a vegan option, use chickpeas marinated in the same mix. You can also swap chicken for turkey or fish. Just adjust cooking times as needed. These swaps keep the meal tasty while meeting your needs. Enjoy the flavor and make it your own! After enjoying your Zesty Lemon Herb Chicken, store leftovers quickly. Place the chicken in a shallow, airtight container. This helps keep the chicken fresh and tasty. You can also wrap the chicken tightly in plastic wrap. Make sure to let it cool first. Proper storage keeps the chicken good for up to three days in the fridge. Reheating your chicken can be simple. Preheat your oven to 350°F. Place the chicken on a baking sheet. Cover it with foil to keep moisture in. Heat for about 15 to 20 minutes. You can also use a microwave if you're in a hurry. Place the chicken on a microwave-safe plate. Heat for one to two minutes until warm. Just be careful not to overcook it, or it may dry out. Freezing is a great way to save time. You can freeze the chicken before or after cooking. If freezing raw, marinate the chicken first. Place it in a freezer bag. Remove as much air as you can before sealing. This helps prevent freezer burn. If freezing cooked chicken, let it cool completely. Then, place it in a freezer-safe container. It can last up to three months in the freezer. When you're ready to enjoy it, just thaw in the fridge overnight. Then, reheat as needed. For more details, check the Full Recipe. You should marinate the chicken for at least 30 minutes. This time helps the chicken soak in all the bright lemon and herb flavors. For more flavor, you can marinate it for up to 2 hours. Just remember not to exceed this time, as the acid from the lemon can make the chicken too soft. Yes, you can use chicken thighs instead of breasts. Thighs have more fat, which makes them juicy and full of flavor. Just keep in mind that they may need a few more minutes to cook through. Ensure the internal temperature reaches 165°F for safety. Zesty Lemon Herb Chicken pairs well with many sides. Here are some great options: - Grilled vegetables: Bell peppers and zucchini are excellent choices. - Rice: Lemon or herb-infused rice adds a nice touch. - Salad: A fresh green salad with a light vinaigrette complements the flavors well. - Potatoes: Roasted or mashed potatoes provide a hearty balance. Try out these sides to create a full meal that shines! For the full recipe, check the earlier sections. This post covered how to make Zesty Lemon Herb Chicken. We discussed essential and optional ingredients for flavor. You learned tips for using fresh herbs and step-by-step cooking instructions. Perfect grill marks add to its appeal. We also explored cooking methods, flavor variations, and storage tips for leftovers. Lastly, I answered common questions to make cooking easier. Enjoy your tasty meal and impress your friends!

Zesty Lemon Herb Chicken Flavorful and Easy Recipe

Are you ready to elevate your dinner game? Zesty Lemon Herb Chicken is the perfect dish to impress family and

To make oven-fried green tomatoes, you need a few simple ingredients. Here’s what you’ll need: - 4 medium green tomatoes, sliced into 1/4-inch thick rounds - 1 cup buttermilk - 1 cup cornmeal - 1/2 cup all-purpose flour - 1 teaspoon paprika - 1 teaspoon garlic powder - 1/2 teaspoon cayenne pepper - Salt and pepper to taste - Olive oil spray for baking These items create a crispy coating that makes the tomatoes shine. You will need some basic tools to make this dish. Here’s a list to help you: - Baking sheet - Parchment paper - Two shallow bowls - A knife for slicing - A cutting board These tools make your cooking process smooth and easy. While the base recipe is tasty, you can add more flavor. Consider these seasoning options: - Add some Italian herbs like oregano or thyme - Use a pinch of cumin for a smoky flavor - Try adding grated Parmesan cheese for a savory twist Feel free to mix and match according to your taste. For a complete guide, check the Full Recipe. Start with fresh green tomatoes. Choose firm ones for the best texture. Rinse them under cold water. Then, slice the tomatoes into 1/4-inch thick rounds. This thickness helps them cook evenly. Lay the slices on a paper towel to absorb excess moisture. This step will help them crisp up in the oven. Next, set up your dredging station. You will need two shallow bowls. In the first bowl, pour in the buttermilk. It adds moisture and flavor. In the second bowl, mix together cornmeal, flour, paprika, garlic powder, cayenne, salt, and pepper. This mixture gives the tomatoes a tasty crust. Dip each tomato slice into the buttermilk. Make sure it is fully coated. Then transfer it to the cornmeal mix. Press down gently so the coating sticks well. Now it’s time to bake! Preheat your oven to 425°F (220°C). Line a baking sheet with parchment paper for easy cleanup. Place all the coated tomato slices on the sheet in a single layer. Once they are all arranged, lightly spray the tops with olive oil. This helps them become golden and crispy. Bake them for 20 to 25 minutes. Flip them halfway through for even cooking. When they turn golden brown, they are ready. Enjoy these tasty oven-fried green tomatoes as a snack or appetizer. For the full recipe, check the earlier section. To get that perfect crunch, start by slicing your tomatoes evenly. Each slice should be about 1/4 inch thick. This thickness helps them cook evenly. Use buttermilk for soaking; it adds moisture and flavor. Dredging is key! After soaking, coat each slice in the cornmeal mix. Press firmly to ensure the coating sticks well. A light spray of olive oil on top before baking helps create a golden finish. One mistake is using ripe tomatoes. They can turn mushy. Stick to firm green tomatoes for the best texture. Another error is overcrowding the baking sheet. Give each slice space to breathe. This helps hot air circulate and keeps them crispy. Also, do not skip flipping them halfway through baking. This ensures both sides brown nicely. If you own an air fryer, you can use it! Set it to 375°F and cook for about 15 minutes. This method gives a similar crisp without much oil. For a skillet, heat oil over medium heat. Fry each slice for 3-4 minutes on each side until golden. Both methods are tasty and can be quicker than baking. For more details, refer to the Full Recipe. {{image_2}} You can change the flavor of your oven-fried green tomatoes by trying different coatings. Instead of just cornmeal, mix in crushed crackers or panko breadcrumbs for extra crunch. You might also use seasoned breadcrumbs for an added kick. For a spicy twist, add more cayenne pepper or chili powder to the mix. You can even try adding grated Parmesan cheese to the coating. This will give a rich, savory flavor to each bite. If you want a vegan option, it's easy to swap out a few ingredients. Use plant-based milk, like almond or soy, instead of buttermilk. You can also mix in a teaspoon of vinegar to mimic the tangy taste of buttermilk. For the flour, use chickpea flour or any gluten-free flour to make it suitable for everyone. These small changes keep the dish tasty and satisfying while making it plant-based. You can add seasonal flavors to your oven-fried green tomatoes. In spring, try serving them with fresh herbs like dill or chives. In summer, pair them with a zesty corn salsa. For fall, mix in spices like cinnamon or nutmeg for warmth. Winter calls for hearty sides, such as a warm bean salad. These additions can enhance the taste and make your meal more exciting. For the full recipe, check out the detailed steps above! To keep your leftover oven-fried green tomatoes fresh, store them in an airtight container. Place a paper towel inside to absorb any moisture. This helps keep them crispy. You can store them in the fridge for up to three days. To reheat your green tomatoes, use the oven for the best texture. Preheat your oven to 375°F (190°C). Place the tomatoes on a baking sheet and heat for about 10 minutes. This method helps restore the crispiness. Avoid the microwave, as it can make them soggy. You can freeze oven-fried green tomatoes for later use. First, let them cool completely. Then, place them in a single layer on a baking sheet and freeze until firm. After that, transfer them to a freezer bag. To thaw, place them in the fridge overnight. Reheat them in the oven for the best results. This method keeps their flavor and texture intact. For the full recipe, check the details above. To make oven-fried green tomatoes crispy, you need the right coating. Use cornmeal and flour for a crunchy texture. Ensure each tomato slice is well-coated in buttermilk first. This helps the dry mix stick better. When you place them on the baking sheet, give them space. This allows heat to circulate and crisp them up. Lastly, spray some olive oil on top before baking. Bake at 425°F (220°C) for 20-25 minutes. Flip them halfway for even crispiness. Using ripe tomatoes can change the taste and texture. Ripe tomatoes are softer and may not hold up as well in the oven. They can turn mushy when baked. However, if you prefer a sweeter flavor, ripe tomatoes are a fun option. Just remember they will not be as crispy. If you choose ripe ones, cut them thicker to help them stay firm during baking. The best dipping sauce for oven-fried green tomatoes is ranch dressing. Its creamy texture pairs well with the crunchiness. You can also try aioli for a more gourmet touch. A zesty remoulade adds a nice kick, too. Feel free to get creative! Mixing herbs or spices into your sauce can add more flavor. Whatever you choose, it should enhance the taste of your crispy tomatoes. This post covered how to make oven-fried green tomatoes. We looked at the main ingredients and the tools you need. I shared steps to prepare, dredge, and bake for crunchiness. You learned tips to avoid mistakes and try different methods. We also discussed flavors and how to store leftovers. Embrace this tasty dish as a fun way to enjoy tomatoes. Experiment with ideas and make it your own!

Oven-Fried Green Tomatoes Perfectly Crispy Recipe

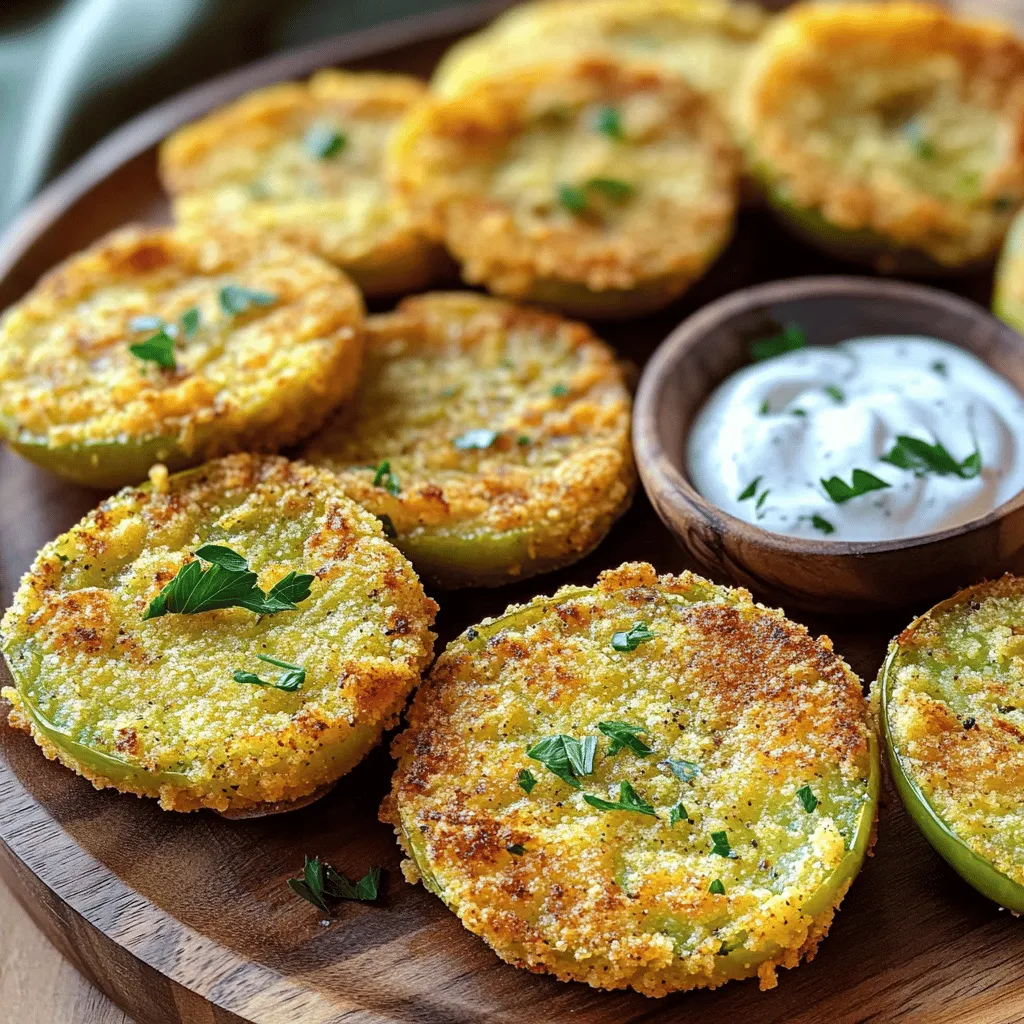
Want to enjoy a crispy, tasty Southern classic without the deep fryer? You’re in the right place! In this guide,

For my favorite fried rice, I use these simple ingredients: - 2 cups cooked jasmine rice (preferably day-old) - 1 cup pineapple chunks (fresh or canned) - 1/2 cup green peas - 1/2 cup carrots, diced - 1/2 cup bell pepper, diced (any color) - 2 green onions, chopped - 2 cloves garlic, minced - 2 tablespoons soy sauce - 1 tablespoon teriyaki sauce - 2 tablespoons sesame oil (divided) - Salt and pepper to taste - Optional: sesame seeds for garnish I recommend using day-old rice for the best texture. Fresh rice can be too sticky. Each cup of rice should be cooked and cooled before use. For measuring, I use standard measuring cups and spoons. Keep your veggies chopped small for quick cooking. When I cook, I trust these brands: - Jasmine rice: Nishiki or Royal - Soy sauce: Kikkoman or La Choy - Teriyaki sauce: Kikkoman or Soy Vay - Sesame oil: Kadoya or Spectrum Using these brands helps me get great flavor and quality. These ingredients make my fried rice tasty and easy to prepare. You can find the full recipe above to guide you through the cooking process! Start by gathering all your ingredients. You need: - 2 cups cooked jasmine rice (preferably day-old) - 1 cup pineapple chunks (fresh or canned) - 1/2 cup green peas - 1/2 cup carrots, diced - 1/2 cup bell pepper, diced (any color) - 2 green onions, chopped - 2 cloves garlic, minced - 2 tablespoons soy sauce - 1 tablespoon teriyaki sauce - 2 tablespoons sesame oil (divided) - Salt and pepper to taste - Optional: sesame seeds for garnish Make sure your rice is cold. This helps it fry better without getting mushy. Chop your vegetables and set them aside. Heat 1 tablespoon of sesame oil in a large skillet or wok over medium-high heat. Add the minced garlic and sauté for 30 seconds. You want it to smell nice but not burn. Toss in the diced carrots and bell peppers, cooking them for 2-3 minutes. They should start to soften but still have some crunch. Next, add the cooked rice to the skillet. Use a spatula to break up any clumps. Stir well to mix the rice with the veggies. Drizzle the soy sauce and teriyaki sauce over the rice. Mix it all together until the rice is well coated. Now, add in the green peas and pineapple chunks. Stir gently and cook for an additional 3-4 minutes. You want everything heated through but still fresh. Finally, drizzle the last tablespoon of sesame oil and season with salt and pepper. Stir in the chopped green onions for a fresh finish. Remove the skillet from heat and let the fried rice cool for a minute. Serve it in bowls, topped with sesame seeds and extra chopped green onions for color. For a fun twist, you can serve it in a pineapple half. This makes the dish look gorgeous and adds a tropical flair. Enjoy your meal! For fried rice, day-old cooked jasmine rice is best. It has the right texture. Fresh rice tends to be too sticky. If you must use fresh rice, spread it out to cool. This helps it dry a bit. You can also use basmati rice for a nice flavor twist. When cooking fried rice, remember these dos and don'ts: - Do use a hot pan. This helps the rice fry well. - Do break up clumps of rice. This keeps it from sticking together. - Do add ingredients in stages. Start with veggies, then add rice. - Don’t overcrowd the pan. This can steam the rice instead of frying it. - Don’t skip the oil. It helps with cooking and adds flavor. To boost flavor, try these tips: - Use soy sauce and teriyaki sauce for depth. They add saltiness and sweetness. - Add a splash of sesame oil at the end for richness. - Fresh herbs like cilantro or basil can brighten the dish. - A squeeze of lime juice can add a nice zing. - You can also toss in some chili flakes for heat. For more details, check the Full Recipe. Enjoy customizing your fried rice! {{image_2}} You can make fried rice without meat. Start with the base recipe. Use your favorite veggies. Good choices include bell peppers, carrots, and peas. Add in some corn for sweetness. For protein, toss in edamame or chickpeas. You can even use tofu for a hearty option. It absorbs flavors well and adds a nice texture. Adding protein makes fried rice more filling. For chicken, use cooked, shredded meat. It blends nicely with the rice. Shrimp is another great choice. Cook it until pink and tender before mixing it into the rice. If you prefer plant-based, use tofu. Press it to remove water, then cube and fry it. This gives a nice, crispy bite. Want to kick up the heat? Add chili flakes or sriracha. Start with a little, then taste. You can always add more if needed. For a milder option, toss in sweet chili sauce. It adds flavor without too much heat. Adjusting spice levels makes the dish fun and personal. You can create your own favorite blend! Explore these ideas and let your fried rice shine! Check out the Full Recipe for more details. After making your fried rice, let it cool to room temperature. Once cooled, place it in an airtight container. Store the container in the fridge. Fried rice stays fresh for up to three days. Make sure to label the container with the date. This helps you keep track of how long it has been stored. When you're ready to eat your leftover fried rice, take it out of the fridge. You can reheat it in a few ways. Use a microwave for quick heating. Place the rice in a bowl and cover it with a damp paper towel. Heat it for one minute, then stir. If it's not hot enough, heat it for another 30 seconds. You can also use a skillet. Heat a little oil in the skillet over medium heat. Add the rice and stir it often until it’s hot. If you want to save fried rice for longer, freezing is a great option. First, let the rice cool completely. Then, divide it into serving sizes. Use freezer-safe bags or containers. Remove as much air as you can before sealing. Label each bag with the date. Fried rice can last up to three months in the freezer. When you’re ready to eat it, thaw it overnight in the fridge. Then, reheat it using the methods mentioned above. This keeps the flavor and texture nice! Yes, you can use many kinds of vegetables in fried rice. Broccoli, corn, and zucchini work well. You can even add spinach or mushrooms for extra flavor. Just remember to chop them small so they cook evenly. Use what you like or what you have at home. The key is to keep the colors bright and the flavors fresh. To store leftover fried rice, let it cool first. Then, place it in an airtight container. You can keep it in the fridge for about three to four days. If you want to keep it longer, freeze it. To freeze, use a freezer-safe bag. Remember to remove as much air as possible before sealing. When ready to eat, just reheat it on the stove or in the microwave. You can make fried rice without soy sauce by using other tasty options. Try coconut aminos for a sweet and salty flavor. You can also use lemon juice for a fresh taste or a splash of vinegar. Adding herbs like basil or cilantro can boost flavor too. Experiment with different flavors to find what you like best! For a full recipe, check out the Ultimate Pineapple Teriyaki Fried Rice. To make tasty fried rice, remember the key steps. I covered the best ingredients, measurements, and brands. Next, I detailed the cooking process and how to add final touches. Tips on rice choices and seasoning help boost flavor. I shared fun variations for everyone, plus storage tips for leftovers. Fried rice can be simple and delicious, no matter how you make it. Enjoy crafting your perfect dish with these ideas.

Favorite Fried Rice Recipe Simple and Tasty Meal

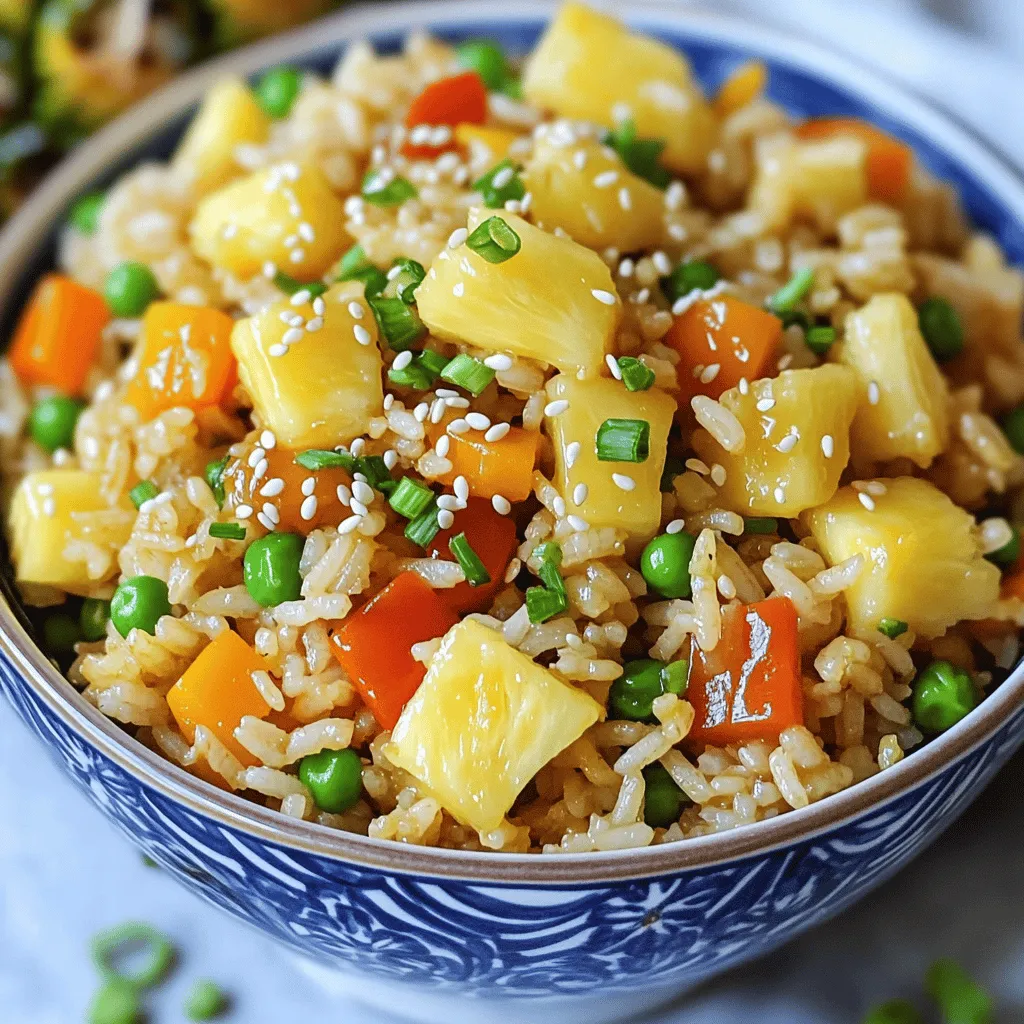
If you’re looking for a quick and tasty meal, my favorite fried rice recipe is just what you need. With

To make this tasty chocolate chip pumpkin bread, you will need: - 1 ½ cups all-purpose flour - 1 teaspoon baking soda - ½ teaspoon baking powder - ½ teaspoon salt - 1 teaspoon ground cinnamon - ½ teaspoon ground nutmeg - 1 cup canned pumpkin puree - ½ cup granulated sugar - ½ cup brown sugar, packed - 2 large eggs - ⅓ cup vegetable oil - 1 teaspoon vanilla extract - 1 cup semi-sweet chocolate chips - Optional: ½ cup chopped walnuts or pecans You can swap some ingredients if needed. For flour, try whole wheat flour for a nutty taste. Use coconut oil instead of vegetable oil for a hint of sweetness. If you prefer less sugar, reduce it by a quarter cup. For eggs, use unsweetened applesauce or mashed banana. This change keeps the bread moist. For nut allergies, skip the nuts or try seeds like sunflower seeds. Always use fresh ingredients for the best flavor. Check your baking powder and baking soda for freshness. Old spices can dull the taste. I recommend using pure vanilla extract, as it adds rich flavor. Choose canned pumpkin that is 100% pumpkin, not pumpkin pie filling. This ensures you get true pumpkin flavor without added sugars or spices. First, gather all your ingredients. You need flour, baking soda, baking powder, salt, spices, pumpkin, sugars, eggs, oil, vanilla, and chocolate chips. For a nutty twist, grab walnuts or pecans too. Preheat your oven to 350°F (175°C). Prepare your loaf pan by greasing it or placing parchment paper inside. This helps with easy removal. Start by whisking the dry ingredients. Combine flour, baking soda, baking powder, salt, cinnamon, and nutmeg in a bowl. Mix until everything is even. In a separate large bowl, mix the pumpkin puree, both sugars, eggs, oil, and vanilla. Stir until smooth. Next, add the dry mix to the pumpkin mix. Stir gently until just combined. Be careful not to overmix. Now, fold in the chocolate chips and nuts if you want. Pour this thick batter into your prepared loaf pan. Smooth the top with a spatula. Bake your bread for 60 to 70 minutes. Check by inserting a toothpick in the center. If it comes out clean, your bread is ready. The bread should be golden brown on top. It should also spring back when lightly pressed. If you see cracks, that's normal. This shows it's baking well. Let the bread cool in the pan for 10 minutes before moving it to a wire rack. This helps it finish cooling and keeps it from getting soggy. Enjoy your delicious creation! For a full recipe, check out the details above. To get the best texture in your chocolate chip pumpkin bread, use canned pumpkin puree. It gives a smooth and moist base. Make sure your eggs are at room temperature. This helps blend everything well. Do not overmix the batter. Stir just enough to combine the wet and dry ingredients. This keeps the bread light and fluffy. Start by mixing the dry ingredients in one bowl. In another bowl, mix the wet ingredients. This keeps your flavors balanced. When you combine them, do it gently. Use a spatula to fold in the dry mix. Adding the chocolate chips last ensures they spread evenly. If you want nuts, fold them in at the same time as the chips. You can add fun spices for more flavor. Try a pinch of ginger or allspice. These spices pair well with pumpkin. You can also swap the chocolate chips for butterscotch or white chocolate chips. If you want a nutty taste, add chopped walnuts or pecans. For a touch of sweetness, drizzle honey on top before serving. Check out the Full Recipe for more ways to enjoy this treat! {{image_2}} You can easily change the flavor of your chocolate chip pumpkin bread. Try adding different spices, like ginger or allspice, for a warm twist. You can also mix in dried fruits, such as cranberries or raisins, for a sweet surprise in every bite. If you want a nutty taste, add in walnuts or pecans. These add-ins make every loaf unique and fun. If you need a gluten-free version, you can still enjoy this tasty bread. Use gluten-free flour blends instead of all-purpose flour. Look for blends that include xanthan gum; this helps with the texture. Make sure to check the labels on your baking powder and chocolate chips. Most are gluten-free, but it’s good to confirm. This way, everyone can join in the fall fun! To make this recipe vegan, you can replace the eggs with flaxseed meal. Mix 1 tablespoon of flaxseed meal with 2.5 tablespoons of water for each egg. Let it sit for a few minutes until it thickens. Swap out the vegetable oil for a plant-based oil, such as coconut or olive oil. For extra sweetness, use maple syrup instead of granulated sugar. These small changes keep the bread moist and delicious, while making it vegan-friendly! For the full recipe, check out the link above to create your own delicious loaf. To keep your chocolate chip pumpkin bread fresh, wrap it tightly. Use plastic wrap or aluminum foil. You can also store it in an airtight container. Place it at room temperature for up to three days. For longer storage, refrigerate it. This will keep the bread good for about a week. If you want to keep it even longer, consider freezing it. Freezing your chocolate chip pumpkin bread is easy. First, let it cool completely. Then, slice the bread if you want individual pieces. Wrap each slice in plastic wrap. After that, place the slices in a freezer bag. This helps save space and keeps the bread fresh. It can stay in the freezer for up to three months. When you’re ready to eat it, just take out what you need. To reheat your chocolate chip pumpkin bread, you have a few options. You can use a microwave or an oven. For the microwave, place a slice on a plate. Heat it for about 15-20 seconds. If you want it warm and a bit crispy, use the oven. Preheat the oven to 350°F (175°C). Wrap the slice in foil and heat for about 10 minutes. Enjoy a warm slice with butter on top. It makes for a cozy treat! For the full recipe, check the section above. You can use applesauce or mashed bananas. Use ¼ cup of either for each egg. This makes the bread moist and adds flavor. You can also use flaxseed meal. Mix 1 tablespoon of flaxseed with 2.5 tablespoons of water. Let it sit for a few minutes until it thickens. Yes, you can use fresh pumpkin! To do this, roast a small pumpkin until soft. Scoop out the flesh and blend it until smooth. This adds a fresh taste. Just make sure to measure 1 cup of your fresh puree for the recipe. The best way to check is with a toothpick. Insert it into the center of the bread. If it comes out clean or with a few crumbs, the bread is done. If it’s wet, bake for a few more minutes. The top should also be golden brown. Absolutely! For mini loaves, fill mini loaf pans about halfway. Bake for 30-40 minutes. For muffins, fill muffin cups about two-thirds full. Bake for 20-25 minutes. Both options give you a fun twist on this recipe. If stored properly, it lasts about 3-5 days at room temperature. Keep it in an airtight container to keep it fresh. You can also freeze it for up to 3 months. Just wrap it tightly in plastic wrap, then foil. Thaw it at room temperature when ready to enjoy! We covered all you need for making chocolate chip pumpkin bread. I shared the key ingredients, tips for mixing, and how to bake to perfection. I included fun variations and how to store your bread. Remember, fresh ingredients make a big difference in flavor. Try different add-ins for a unique twist. With these steps and tips, you can enjoy a tasty treat. Don’t forget to experiment and have fun with your baking process!

Chocolate Chip Pumpkin Bread Delightful Fall Treat

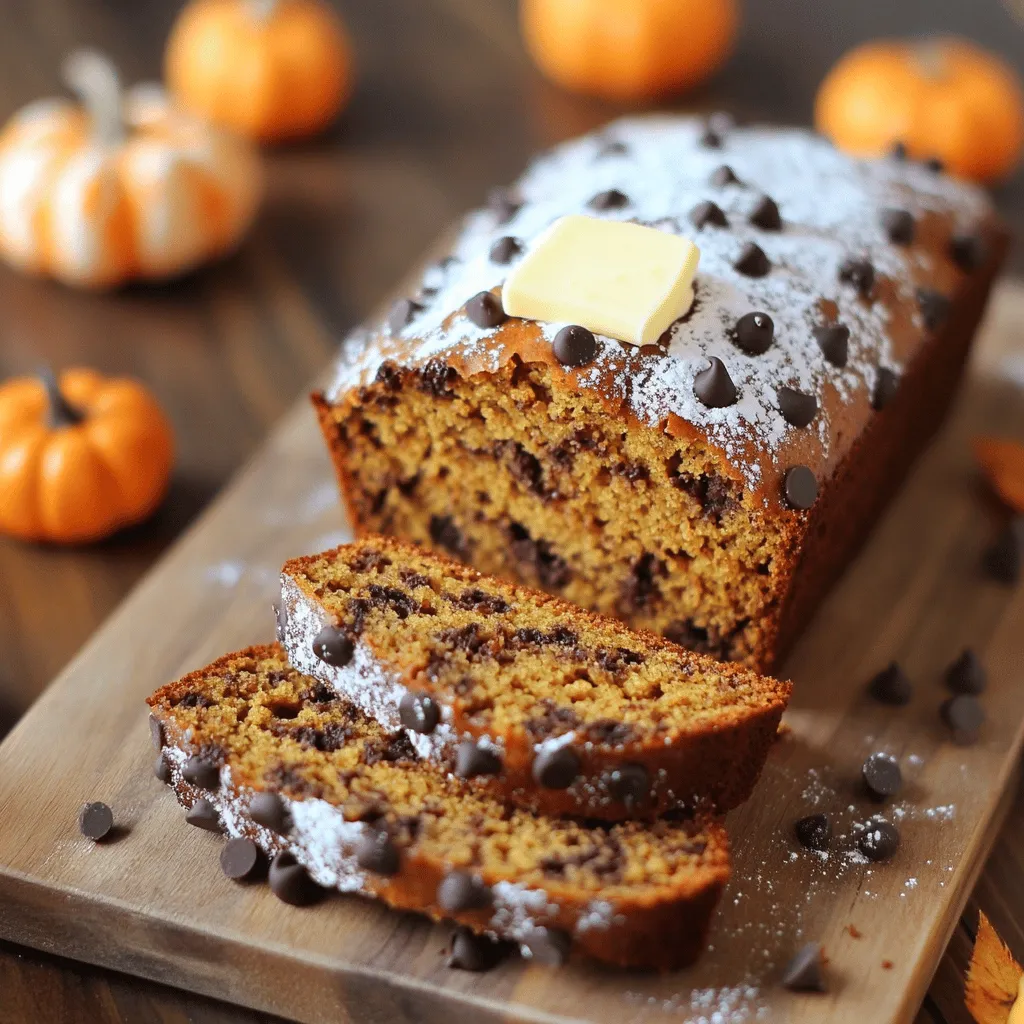
Fall is here, and so is the craving for warm, cozy treats! Chocolate Chip Pumpkin Bread is the perfect blend

- 6 ripe peaches, pitted and sliced - 1 tablespoon lemon juice - 1/2 cup granulated sugar - 1 teaspoon vanilla extract - 1 teaspoon ground cinnamon - 1 cup rolled oats - 3/4 cup all-purpose flour - 1/2 cup brown sugar, packed - 1/3 cup unsalted butter, melted - 1/4 teaspoon salt - Optional: Vanilla ice cream for serving Gathering fresh ingredients makes a big difference in flavor. I love using ripe peaches for their sweetness. When you slice them, the juice flows, making them perfect for this crisp. The lemon juice adds a bit of tang. It helps balance the sweetness. I always add granulated sugar for a nice, sweet flavor. Vanilla extract and ground cinnamon are key to making the filling aromatic. They bring warmth to the dish. The oat topping is where the magic happens. Rolled oats provide a chewy texture. Adding all-purpose flour, brown sugar, and melted butter makes the topping crispy and rich. A pinch of salt enhances all the flavors. For an extra treat, serve this peach crisp warm with a scoop of vanilla ice cream on top. It melts slightly and creates a creamy contrast to the crisp. This simple recipe is all about using fresh, quality ingredients to create something delightful. You can find the full recipe with all details to help you on your cooking journey. - Preheat your oven to 350°F (175°C). - In a large bowl, combine the sliced peaches with: - 1 tablespoon lemon juice - 1/2 cup granulated sugar - 1 teaspoon vanilla extract - 1 teaspoon ground cinnamon - Toss the peaches gently to coat them well. Let them sit for about 10 minutes. This softens the peaches and brings out their juices. - In another bowl, mix together: - 1 cup rolled oats - 3/4 cup all-purpose flour - 1/2 cup brown sugar, packed - 1/3 cup unsalted butter, melted - 1/4 teaspoon salt - Stir until the mixture looks like crumbly sand. This texture is key for a great topping. - Take your baking dish, about 9x9 inches, and arrange the peach mixture evenly on the bottom. - Sprinkle the oat topping generously over the peaches. Make sure every peach is covered for even baking. - Bake in the preheated oven for 30-35 minutes. - Check for a golden brown topping and bubbly peaches. The smell will be amazing! For the complete recipe, check out the Full Recipe section. Choosing ripe peaches is key. Look for peaches that feel slightly soft. Their color should be vibrant and even. Sweetness is important too. If your peaches are tart, add more sugar. You can taste the peach mix before baking. Adjust the sweetness to your liking. A warm peach crisp pairs great with vanilla ice cream. The cold ice cream melts into the warm crisp, making it a treat. You can also serve it with whipped cream or yogurt. This adds creaminess and balances the sweetness. To add more texture, try adding nuts like walnuts or pecans. They add a nice crunch. You can also mix in spices like nutmeg or ginger for warmth. If you want to mix flavors, try adding blueberries or raspberries. These fruits add a pop of color and extra sweetness to your peach crisp. For the full recipe, check the earlier section. {{image_2}} One of the best things about peach crisp is how easy it is to adapt. You can change it to fit your needs or the season. Here are some fun variations to try. You can make this dish gluten-free with a few swaps. - Substitute all-purpose flour with almond or coconut flour. - Use gluten-free oats to ensure your crisp stays delicious and safe. These changes keep the flavor while being kind to those with gluten sensitivities. Want to make this peach crisp vegan? It’s simple! - Replace unsalted butter with coconut oil or vegan butter. - Use maple syrup instead of granulated sugar to sweeten your dish. These swaps still give you the same yummy flavor without any animal products. You can also change your peach crisp to match the season. - In summer, add fresh berries like blueberries or raspberries for a burst of color. - In fall, sprinkle in spices like nutmeg or allspice to warm up the flavors. These seasonal tweaks bring new life to this classic recipe. For the full recipe, check out the details above. To keep your peach crisp fresh, you should store it properly. First, let the crisp cool down completely. Once cooled, cover it with plastic wrap or aluminum foil. You can also place it in an airtight container. Store it in the refrigerator for up to five days. If you want to save it for longer, you can freeze it. For freezing, cut the peach crisp into portions. Wrap each piece tightly in plastic wrap, then place them in a freezer-safe bag. This way, you can enjoy a slice whenever you want. It will last in the freezer for up to three months. When it’s time to enjoy your leftovers, reheating them properly is key. The best way to reheat peach crisp is in the oven. Preheat your oven to 350°F (175°C). Place the crisp in an oven-safe dish and cover it with foil. Heat it for about 15-20 minutes, or until it’s warmed through. You can also use a microwave if you’re in a hurry. Place a portion on a microwave-safe plate. Heat it for 30 seconds to one minute. Make sure to check if it's hot enough before eating. Enjoy your delicious peach crisp again! Yes, you can use frozen peaches. Just let them thaw before using. Frozen peaches may have extra water. So, drain them well to avoid a soggy crisp. Using fresh peaches gives a better texture. They have a firmer bite and great flavor. In summer, ripe peaches shine in this dish. If you use frozen ones, the crisp still tastes great. Your peach crisp lasts about 3 to 5 days in the fridge. Store it in an airtight container. This keeps it fresh and tasty. To keep the topping crunchy, reheat it in the oven. Heat at 350°F (175°C) for about 10 minutes. This will give you a warm and crispy treat again. If you want to skip oats, try these options: - Almond flour: Adds a nutty flavor and keeps it gluten-free. - Coconut flakes: Gives a tropical twist and a chewy texture. - Crushed nuts: Use almonds, pecans, or walnuts for crunch. - Granola: Adds sweetness and texture if you want a quick fix. These alternatives offer different flavors and textures. Feel free to experiment with what you have at home. This blog post guides you to make a delicious peach crisp. We covered ingredients, equipment, and step-by-step instructions. You learned tips for perfecting flavors and serving ideas. We also shared variations for dietary needs and storage tips. Making peach crisp can be fun and easy. Enjoy every bite of this sweet treat, whether warm or cold. Your kitchen can be the go-to spot for great desserts that everyone will love!

Peach Crisp with Oat Topping Simple and Sweet Recipe

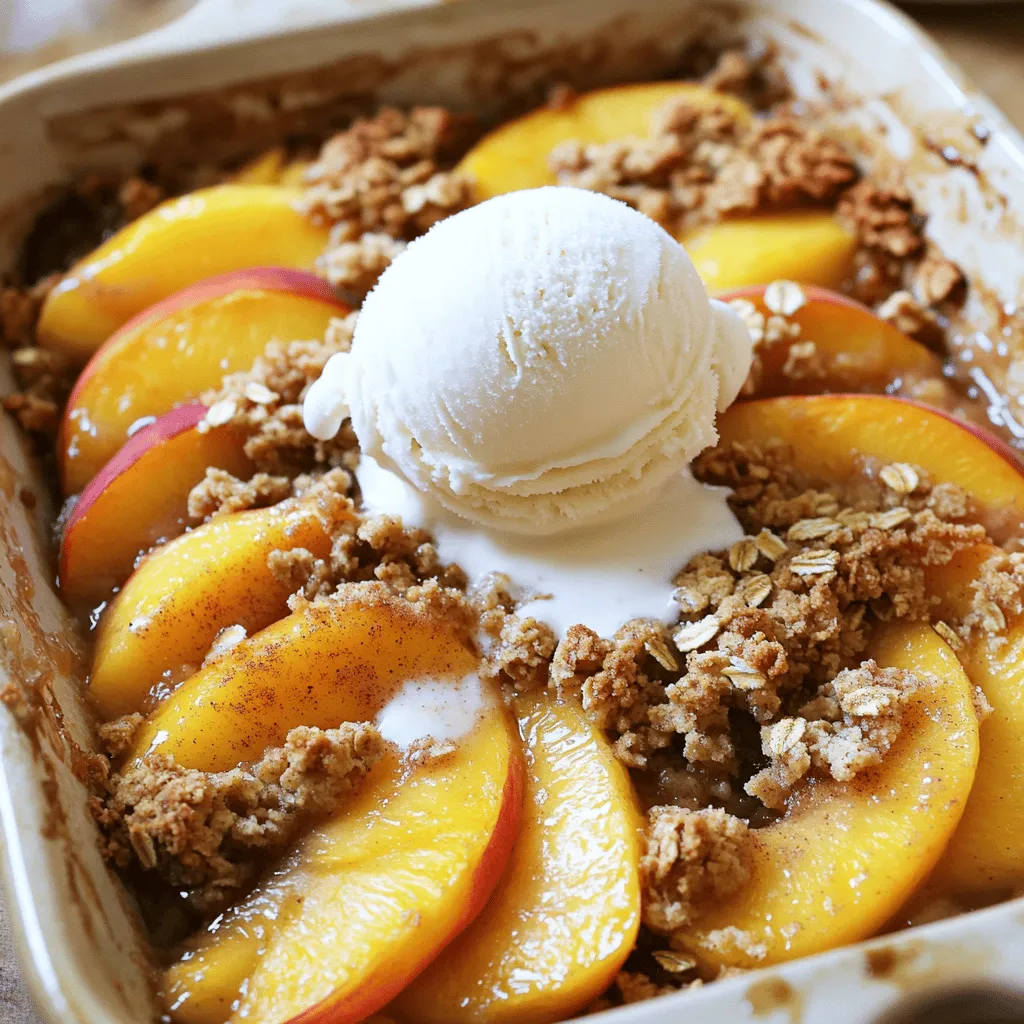
If you’re craving a dessert that’s simple yet packed with flavor, this Peach Crisp with Oat Topping is perfect for

- 2 medium sweet potatoes, peeled and diced - 1 can (15 oz) black beans, rinsed and drained - 1 can (15 oz) kidney beans, rinsed and drained - 1 can (28 oz) crushed tomatoes - 1 cup corn kernels (fresh, frozen, or canned) - 1 medium onion, diced - 3 cloves garlic, minced - 1 red bell pepper, diced - 2 tablespoons chili powder - 1 teaspoon cumin - 1 teaspoon smoked paprika - 1/2 teaspoon cayenne pepper (optional) - 4 cups vegetable broth - 2 tablespoons olive oil - Salt and black pepper to taste - Fresh cilantro and avocado for garnish You need these ingredients for a tasty vegan sweet potato chili. Sweet potatoes are the star here. They add a sweet flavor and creamy texture. Black and kidney beans pack in protein and fiber. The crushed tomatoes provide a rich base for the chili. Use fresh or frozen corn for added sweetness and crunch. The onion, garlic, and red bell pepper will create a nice aroma as they cook. Chili powder, cumin, and smoked paprika give the dish depth. Cayenne pepper adds optional heat, so adjust to your taste. You can also pick vegetable broth that suits your preference. Olive oil helps sauté the veggies. Don't forget salt and black pepper to enhance all the flavors. Top it off with fresh cilantro and avocado for a delicious finish. For the full recipe, check the section above. This chili is not just tasty; it’s healthy too. Each serving has about 250 calories. You get around 45 grams of carbs, 12 grams of protein, and 6 grams of fat. It’s a filling dish that supports a balanced diet. Sweet potatoes are full of vitamins and minerals. They are great for your eyes and skin. Beans provide plant-based protein and fiber, which help with digestion. This chili is a comforting meal that keeps you full. Enjoying it regularly can support your health goals. 1. Heating the oil in a pot: Begin by heating the olive oil in a large pot over medium heat. This step is crucial because it adds flavor to the base of your chili. 2. Sautéing aromatics: Next, add the diced onion and red bell pepper. Sauté them for about 5 minutes until they soften. Add minced garlic in the last minute to avoid burning. 3. Adding sweet potatoes and spices: Stir in the diced sweet potatoes. Cook for an additional 5 minutes. This gives them a head start before you add spices. Now, sprinkle the chili powder, cumin, smoked paprika, and optional cayenne pepper. Mix well to coat the sweet potatoes and veggies with the spices. 1. Combining tomatoes and broth: Pour in the crushed tomatoes and vegetable broth. Stir everything together to mix all the ingredients. 2. Folding in beans and corn: Gently fold in the black beans, kidney beans, and corn kernels. This adds protein and texture to your chili. 3. Simmering the chili: Bring the mixture to a boil, then reduce the heat to low. Cover the pot and let it simmer for 25-30 minutes. Stir occasionally until the sweet potatoes are soft and the chili thickens. 1. Adjusting seasoning: Taste your chili and adjust the seasoning with salt and black pepper as needed. This step enhances all the flavors. 2. Presentation tips: Ladle the chili into bowls. Garnish with fresh cilantro and diced avocado for a vibrant touch. Serve with a lime wedge and some crunchy bread or tortilla chips for a complete meal. Enjoy every flavorful bite! For the complete recipe, check out the full recipe section. To avoid mushy sweet potatoes, cut them into even pieces. This helps them cook evenly. You can also pre-cook them lightly before adding to the chili. For enhancing chili flavors, try toasting the spices first in olive oil. This brings out their natural oils and boosts taste. Adding fresh herbs like cilantro at the end brightens the dish. A squeeze of lime juice also adds a zesty kick. You can swap out beans for chickpeas or lentils if desired. If you prefer other vegetables, add bell peppers, zucchini, or spinach. For spices, try adding oregano or thyme for a new twist. If you need gluten-free options, all beans and vegetables used here are naturally gluten-free. Just ensure your broth is also gluten-free. Using canned ingredients can save you lots of time. Canned beans and tomatoes are quick and easy. If you have fresh produce, prep it ahead of time. Chop sweet potatoes and veggies the night before. Store them in the fridge to make cooking faster. This way, you can enjoy your chili in no time! For the full recipe, check back for details on cooking times and prep steps. {{image_2}} You can change the heat of your vegan sweet potato chili. To make it spicier, add cayenne pepper or chopped jalapeños. Start with a little and taste as you go. If you want more flavor, try adding more spices like paprika or cumin. Fresh herbs like cilantro can also add a nice kick. Feel free to swap out the beans or lentils. You can use chickpeas or black-eyed peas instead. For veggies, add zucchini, carrots, or bell peppers. These swaps make the chili fun and unique. You can also mix and match your favorites to create a personal touch. Serve your chili in a bowl with rice for a hearty meal. You can also enjoy it cold as a salad. Top it with avocado or fresh herbs for extra flavor. If you want a twist, use it as a topping for baked potatoes or nachos. This recipe adapts well to any meal style. For the full recipe, check out the details above. To keep leftover vegan sweet potato chili fresh, store it in an airtight container. This helps prevent spoilage and keeps it tasty. You can safely eat the chili for up to 5 days in the fridge. Make sure to let it cool before sealing the container. This way, it won’t trap heat, which can cause bacteria to grow. You can freeze vegan sweet potato chili for longer storage. Pour the cooled chili into freezer-safe bags or containers. Remove as much air as you can to avoid freezer burn. It can last up to 3 months in the freezer. To reheat, thaw it overnight in the fridge. Heat it on the stove or in the microwave until hot. Stir occasionally to ensure even heating. Meal prep makes life easier. You can divide the chili into single servings for quick meals. Just scoop the desired amount into containers. This is great for lunch or a light dinner. You can also use the chili as a topping for baked potatoes or tacos. It’s versatile and saves time in the kitchen. Can I make this chili in a slow cooker? Yes, you can! Just add all the ingredients to your slow cooker. Cook on low for 6-8 hours or high for 3-4 hours. This makes it easy to enjoy a warm meal after a long day. Is this chili suitable for meal prep? Definitely! This chili stores well in the fridge. You can make a big batch and divide it into containers. It’s perfect for quick lunches or dinners throughout the week. How can I thicken the chili if it's too watery? If your chili is too thin, you can add a few tablespoons of cornmeal or mashed beans. Stir well and let it cook a bit longer. This will help give it a nice, thick texture. Is this recipe gluten-free? Yes, this recipe is gluten-free. All the ingredients, like beans and sweet potatoes, are safe for a gluten-free diet. Just make sure to check any canned goods for gluten-free labels. Can I make it oil-free? Absolutely! You can skip the olive oil. Just sauté the veggies in a little vegetable broth or water instead. It will still taste great without the oil. Recommended pots and pans for the recipe I suggest using a large pot for this chili. A heavy-bottomed pot works best. It helps the chili cook evenly and prevents burning. Tools for chopping and preparation A sharp knife and a cutting board are must-haves. You’ll also need measuring cups and spoons. A can opener is helpful too for the beans and tomatoes. This chili recipe combines diverse ingredients, flavors, and healthy benefits. Sweet potatoes, beans, and spices create a satisfying meal. You can enjoy it with rice or as a chilled salad. Remember to adjust the spice level and try different ingredients for variety. It’s easy to store, freeze, and prepare ahead for quick meals. With these steps and tips, you can make a tasty, versatile dish everyone will love. Keep exploring, and let your creativity shine in your cooking!

Vegan Sweet Potato Chili Easy and Flavorful Recipe

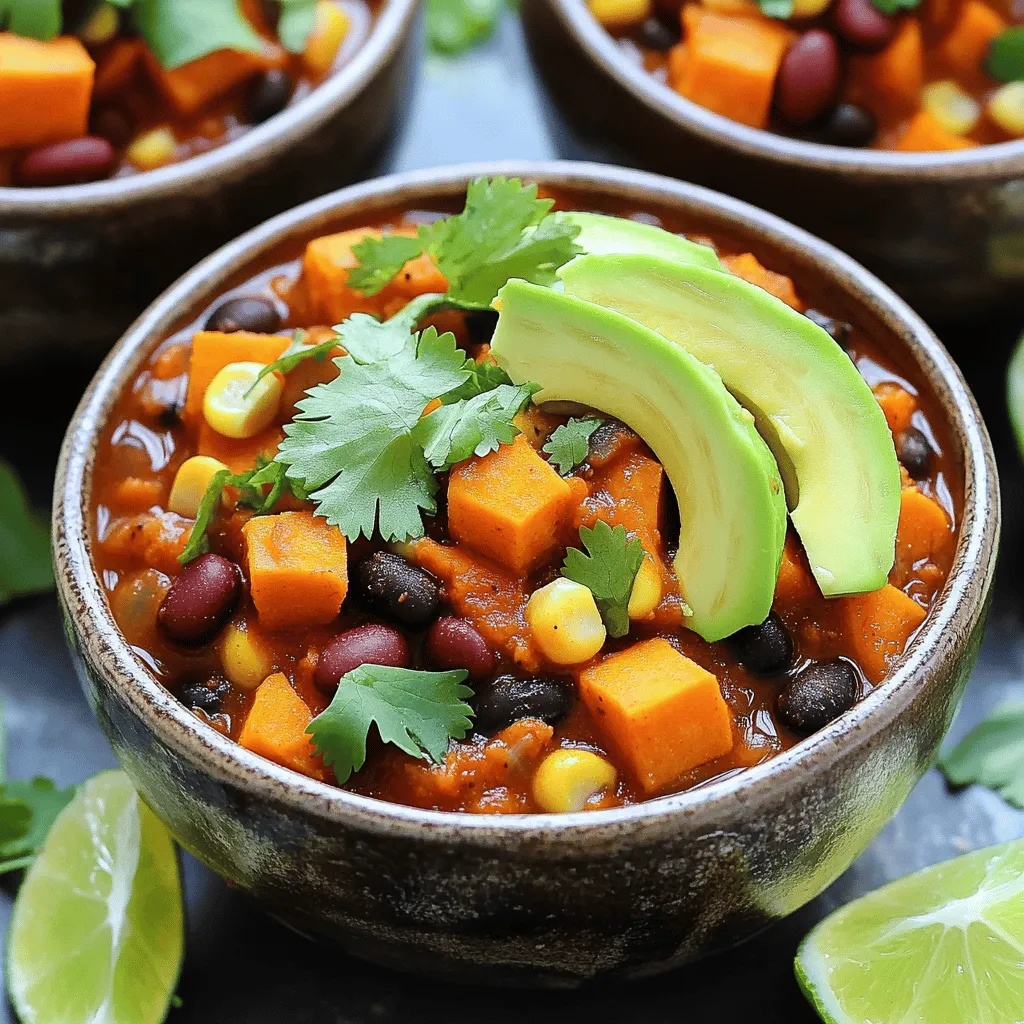
Looking for a warm, hearty meal that’s packed with flavor? This Vegan Sweet Potato Chili is your answer! With simple

- 1 cup full-fat coconut milk - 1/2 cup dairy-free dark chocolate chips (at least 70% cacao) - 2 tablespoons maple syrup (adjust to taste) - 1 teaspoon vanilla extract - A pinch of sea salt - 1 tablespoon unsweetened cocoa powder (optional for extra chocolate flavor) - Fresh berries (for garnish) To make this dairy-free chocolate mousse, you need just a few simple ingredients. The base is full-fat coconut milk, which gives the mousse a rich and creamy texture. You will also use dairy-free dark chocolate chips. I recommend choosing chocolate with at least 70% cacao. This will add depth to your mousse. Next, you’ll want a sweetener. I like to use maple syrup because it adds a nice flavor. You can adjust the amount to fit your taste. Vanilla extract provides extra flavor, while a pinch of sea salt enhances the sweetness. If you want an even richer chocolate taste, you can add unsweetened cocoa powder. It's optional, but I think it makes a big difference. Finally, for a lovely garnish, fresh berries work great. They add color and a burst of freshness to this indulgent treat. For the full recipe, check out the complete instructions to whip up this easy and delicious dessert. To start, refrigerate a can of full-fat coconut milk overnight. This helps the cream rise to the top. When you open the can, scoop out the thick coconut cream into a mixing bowl. Leave the watery part behind. This creamy base gives our mousse its rich texture. For best results, use coconut milk without additives. Next, we need to melt the dairy-free dark chocolate chips. Place them in a microwave-safe bowl. Heat the chocolate in the microwave in 20-second bursts. Stir the chocolate each time. This method prevents burning and helps achieve a smooth melt. It’s okay if some pieces are still solid. The heat will finish melting them as you stir. Once your chocolate is smooth, mix in the coconut cream. Stir until blended well. Then, add in the maple syrup, vanilla extract, and a pinch of sea salt. You can also add cocoa powder for a richer flavor. Mix everything until it’s smooth and creamy. Taste the mixture and adjust sweetness if needed. Now it’s time to whip the mousse. Use a hand mixer or whisk to beat the mixture. Start at a low speed, then increase. Whip until the mousse becomes fluffy and light, which should take about 2 to 3 minutes. The goal is to get air into the mixture, making it airy and light. Once whipped, spoon the mousse into serving cups. Refrigerate them for at least 2 hours. This chilling time helps it set and firm up. When ready to serve, you can garnish with fresh berries or a sprinkle of cocoa powder. A sprig of mint on top adds a nice touch for color. Enjoy this indulgent treat as a delightful dessert! For the full recipe, refer to the earlier sections. - Alternatives for coconut milk: If you cannot find coconut milk, try using almond milk, cashew cream, or oat milk. These can give a nice flavor but may change the texture. Choose full-fat versions for a creamier finish. - Sweetener options: You can swap maple syrup with agave nectar, honey, or date syrup. Adjust according to your taste. Each sweetener adds a unique flavor, so feel free to experiment! - Tips for fluffiness: To make your mousse light and airy, whip the mixture well. Use a hand mixer or whisk until it turns fluffy. This step is key for a perfect texture. - Common mistakes to avoid: Avoid overmixing. If you whip too long, the mousse may become grainy. Also, make sure to chill the mousse for at least two hours. This helps it set properly. - Creative serving suggestions: Serve your mousse in clear cups or jars. This shows off the beautiful layers and texture. You can even layer it with fruit or nut butter for extra flavor. - Garnishing tips: Top your mousse with fresh berries, a sprig of mint, or a dusting of cocoa powder. These add color and enhance the taste. A drizzle of melted dairy-free chocolate can also make it look fancy! For the full recipe, check the [Full Recipe]. {{image_2}} You can enhance your mousse by adding different spices or extracts. A pinch of cinnamon brings warmth. A dash of peppermint extract gives a fresh twist. You can even try espresso powder for a rich coffee flavor. Each option makes the mousse unique and exciting. Switching up the chocolate type also changes the taste. Dark chocolate offers a bold flavor. Milk chocolate gives a sweeter touch. You can also use white chocolate for a creamy, light experience. Each type adds its own character to this treat. Pairing your mousse with fresh fruits makes it even better. Berries like strawberries or raspberries add brightness. Slices of banana or kiwi also create a fun contrast. You can top with nuts or coconut flakes for crunch. For presentation, consider serving the mousse in small jars or cups. Layer it with fruit for a beautiful look. Drizzling melted chocolate on top adds extra flair. A sprig of mint can brighten up the dish, too. Get creative and make it visually appealing! If you need nut-free options, you can still enjoy this mousse. Just ensure your chocolate chips are nut-free. Many brands offer safe choices. You can also replace coconut milk with soy or oat milk for a different flavor. For gluten-free needs, this mousse is already safe! All the ingredients are gluten-free as is. Just check your chocolate chips to avoid hidden gluten. This way, everyone can enjoy a delicious dessert. To keep your mousse fresh, refrigerate it right away. Place it in an airtight container. This way, it stays creamy and delicious for longer. Make sure the lid is tight to avoid any weird smells or tastes from the fridge. If you want to store it for a longer time, you can freeze it. Just scoop the mousse into freezer-safe containers, leaving some space at the top. This allows for expansion as it freezes. When you’re ready to eat it, move it to the fridge for a slow thaw. Your mousse will stay fresh in the fridge for about 3 to 5 days. However, for the best taste and texture, aim to eat it within 2 days. After that, it might lose its fluffy texture. Look for signs that your mousse has gone bad. If you notice any off smells, a change in color, or if it feels slimy, it’s best to throw it away. Fresh mousse should look smooth and feel light. If you want to soften the mousse after it’s been in the fridge, use a gentle method. Take it out and let it sit at room temperature for about 15 minutes. This helps restore some of its creamy texture. You can also give it a quick whip with a hand mixer. This can help bring back its fluffiness. Avoid using the microwave, as it may change the texture and make it gritty. Always aim for a gentle touch to keep that light, airy feel. Yes, you can make this mousse a day in advance. Just follow the full recipe and chill it overnight. This allows the flavors to blend well. When you’re ready to serve, simply garnish it with fresh berries. This dessert stays tasty for up to three days in the fridge. If you want to use something else, you have options. Agave nectar or coconut sugar works well as sweeteners. You can also try brown rice syrup for a different taste. Just adjust the amount to your liking. This mousse is already vegan-friendly! All the ingredients are plant-based. Just ensure your chocolate chips are dairy-free. Look for brands that specify they are vegan. Absolutely! Kids love the rich chocolate flavor. It’s sweet and creamy, making it a hit with little ones. You can even let them help with mixing. They will enjoy garnishing it with berries too! You now have a clear guide to making dairy-free chocolate mousse. We covered the key ingredients, step-by-step instructions, and useful tips. Remember to check for ingredient substitutions and variations, so you can make it your own. Store your mousse properly to keep it fresh, and feel free to prep it ahead for convenience. With a few creative touches, your dessert can impress anyone. Go ahead and make this yummy treat! Enjoy your cooking adventure!

Dairy-Free Chocolate Mousse Easy and Indulgent Treat

Looking for a sweet treat that’s both simple and dairy-free? I’ve got just the recipe for you! This Dairy-Free Chocolate

To create the perfect cheesy spinach stuffed shells, gather these simple ingredients: - 20 jumbo pasta shells - 2 cups fresh spinach, chopped - 1 cup ricotta cheese - 1 cup mozzarella cheese, shredded - 1/2 cup grated Parmesan cheese - 1 large egg - 1 teaspoon garlic powder - 1 teaspoon Italian seasoning - Salt and pepper to taste - 2 cups marinara sauce - Fresh basil leaves for garnish Each ingredient plays a key role in making this dish rich and flavorful. The jumbo shells are perfect for holding the creamy filling. Fresh spinach adds a pop of color and nutrition. Ricotta and mozzarella cheeses create that luscious, gooey texture we crave. Parmesan gives it a savory kick that ties everything together. The egg helps bind the filling, ensuring it stays put in the shells. Garlic powder and Italian seasoning bring warmth and depth. Salt and pepper enhance all the flavors, while marinara sauce adds a tangy base. Finally, fresh basil leaves not only add flavor but also a beautiful garnish. To find the full recipe for this delightful dish, check out the [Full Recipe]. - Set your oven to 375°F (190°C). - Grab a 9x13-inch baking dish and lightly coat it with cooking spray. - Fill a large pot with water and add salt. - Bring the water to a rolling boil and add the jumbo pasta shells. - Cook for 8 to 10 minutes until they are al dente. - Drain the shells and place them on a baking sheet to cool. - In a medium bowl, mix the chopped spinach, ricotta cheese, half of the mozzarella cheese, Parmesan cheese, egg, garlic powder, Italian seasoning, and salt and pepper. - Stir the mixture well until it’s smooth and creamy. - Take each shell and spoon the cheese and spinach mix inside. - Fill each shell generously but do not overstuff. This helps avoid spills while baking. - Spread a thin layer of marinara sauce on the bottom of your baking dish. - Place the stuffed shells in a single layer on top of the sauce. - Pour the remaining marinara sauce over the shells and sprinkle the rest of the mozzarella cheese on top. - Cover the dish with aluminum foil. - Bake for 20 minutes, then remove the foil and bake for another 10 to 15 minutes. - Check if the cheese is bubbly and slightly golden before taking it out. This recipe gives you a filling and tasty meal. You can find the full recipe to make these cheesy spinach stuffed shells in the earlier sections. Enjoy your cooking! To make sure your cheesy spinach stuffed shells turn out great, follow these tips. - Avoiding sogginess: Use a good amount of marinara sauce, but don’t drown the shells. A layer on the bottom keeps them moist and helps with cooking. If shells sit too long in the sauce, they can become mushy. - Ensuring even cooking: Spread the stuffed shells in a single layer in the baking dish. This allows the heat to reach every shell. Cover the dish with foil for the first part of baking. This helps steam the shells and keeps them tender. Having the right tools makes cooking easier and more fun. - Top tools for successful preparation: A large pot for boiling pasta is key. A mixing bowl helps combine your filling. A good spoon will help you stuff the shells without breaking them. - Importance of a good baking dish: A sturdy baking dish, like a 9x13-inch pan, helps with even heat. Glass or ceramic dishes are perfect for this recipe. They hold heat well and look great when serving. Pair your cheesy spinach stuffed shells with tasty sides and drinks for a complete meal. - Side dish options: A simple green salad brightens the plate. Garlic bread adds a nice crunch. Roasted veggies also work well and bring extra flavor. - Wine pairings: A light white wine, like Pinot Grigio, pairs nicely with the rich flavors. If you prefer red, try a light Chianti. Both will complement the meal well. Enjoy making these cheesy spinach stuffed shells! For the full recipe, check out the details above. {{image_2}} You can switch up the cheese in your Cheesy Spinach Stuffed Shells. Try using cottage cheese or feta for a new taste. Both options add a nice twist without losing creaminess. Want to add protein? Cooked chicken or ground turkey works well. Just chop or crumble it into the filling. This makes the dish heartier and more filling. To add extra flavor, consider mixing in herbs like parsley or dill. A bit of red pepper flakes can also provide a nice kick. Just a pinch can transform the dish into something special. You can also add vegetables. Chopped mushrooms or bell peppers blend well. These options boost nutrition and add color to your dish. If you need a gluten-free version, use gluten-free jumbo shells. They cook and taste great, just like regular pasta. You can find them in many grocery stores. To keep the flavors, use a gluten-free marinara sauce. Many brands offer tasty options without gluten. This way, you can enjoy your Cheesy Spinach Stuffed Shells without worry. For the full recipe to guide you through these variations, check the [Full Recipe]. To keep your cheesy spinach stuffed shells fresh, store them correctly. If you plan to eat them within a few days, refrigeration is best. Here’s how: - Refrigeration Tips: Allow the shells to cool completely. Place them in an airtight container. They will stay fresh for about 3 to 5 days in the fridge. Always check for any off smells or changes in color before eating. - Freezing Instructions: For longer storage, freeze the shells. Wrap them tightly in plastic wrap or foil before placing them in a freezer-safe bag. They can last up to 3 months. Just make sure to label the bag with the date so you know when to use them. Reheating your cheesy spinach stuffed shells can be easy and delicious. You want to bring back that great flavor without drying them out. - Best Methods: The best way to reheat is in the oven. Preheat it to 350°F (175°C). Place the shells in a baking dish and cover them with foil. This keeps moisture in and prevents burning. You can also use a microwave, but the oven gives better results. - Recommended Time & Temperature: If using the oven, heat for about 20 to 25 minutes. For the microwave, start with 2 to 3 minutes on high. Check to see if they are heated through. If not, add a little more time. Knowing how long your cheesy spinach stuffed shells last helps avoid waste. - Fridge: In the fridge, they last about 3 to 5 days. - Freezer: In the freezer, they can last up to 3 months. After that, the taste and texture may change. You can enjoy a delicious meal at any time with these simple storage tips! For the complete recipe, check out the Full Recipe. Yes, you can prepare Cheesy Spinach Stuffed Shells in advance. To do this, cook the shells and make the filling. You can stuff the shells and place them in a baking dish. Cover the dish with plastic wrap and store it in the fridge for up to 24 hours. When you are ready to bake, remove the wrap and add extra sauce if needed. Bake as directed for a warm meal. Cheesy Spinach Stuffed Shells pair well with crisp salad or garlic bread. A light Caesar salad adds a nice crunch and flavor. Roasted vegetables can also be a great side. For a drink, choose a glass of white wine, like Sauvignon Blanc. Its acidity complements the cheesy flavors well. To keep the shells standing, spread a little marinara sauce on the bottom of the dish. This will help them stick. Place the shells close together so they support each other. You can also use crumpled parchment paper to fill gaps. This keeps them upright during baking. Yes, frozen spinach works great in this recipe. Just make sure to thaw it first. Squeeze out any extra water to avoid a soggy filling. Use about 1 cup of thawed spinach in place of fresh. It saves time and still gives you that delicious flavor. Cheesy Spinach Stuffed Shells are a delicious dish with simple steps. We covered all the key ingredients needed, cooking tips, and storage methods. You learned how to create a tasty filling and bake it perfectly. Remember, you can adapt the recipe to your taste. Add different cheeses or proteins as you like. This dish is easy and fun to make, perfect for family dinners. Enjoy your cooking adventure with these tasty shells!

Cheesy Spinach Stuffed Shells Irresistible Comfort Food

Are you craving cozy comfort food? Look no further! Cheesy spinach stuffed shells are a delightful dish that combines rich

- 1 pound boneless, skinless chicken breasts, cut into 1-inch cubes - 1/4 cup honey - 1/4 cup Dijon mustard - 2 tablespoons olive oil - 1 tablespoon apple cider vinegar - 1 teaspoon garlic powder - 1 teaspoon onion powder - Salt and pepper to taste - 1 bell pepper, cut into 1-inch pieces (any color) - 1 medium red onion, cut into wedges The heart of this dish is the chicken. I prefer using boneless, skinless chicken breasts for their tenderness. The marinade shines with honey and Dijon mustard, giving a sweet and tangy flavor. Olive oil helps keep the chicken moist, while apple cider vinegar adds a bit of brightness. Garlic and onion powder enhance the taste without overpowering the dish. For veggies, I love using bell peppers and red onions. They add color and crunch. You can choose any color of bell pepper. This way, your skewers look vibrant and inviting. - Grill Types: Gas or charcoal grills work well. I find charcoal adds a nice smoky flavor. - Types of Skewers: Wooden skewers need to soak in water first. This stops them from burning. Metal skewers are great for reusing, but they can get hot! With these ingredients and tools, you will create a dish that is both simple and packed with flavor. For the full recipe, check out the detailed instructions provided. Mixing Ingredients To make the marinade, grab a medium bowl. Add 1/4 cup honey and 1/4 cup Dijon mustard. Next, pour in 2 tablespoons of olive oil and 1 tablespoon of apple cider vinegar. Sprinkle in 1 teaspoon of garlic powder and 1 teaspoon of onion powder. Don’t forget some salt and pepper! Whisk everything together until it’s smooth and well mixed. Marinating Time Now, take your chicken. Use 1 pound of boneless, skinless chicken breasts, cut into 1-inch cubes. Add the chicken to the marinade. Make sure each piece is well coated. Cover the bowl and place it in the fridge. Let it marinate for at least 30 minutes. For the best flavor, try to marinate for up to 2 hours. How to Thread Chicken and Vegetables Once the chicken is marinated, it’s time to assemble your skewers. Grab your wooden or metal skewers. If you use wooden ones, soak them in water for 15-20 minutes to prevent burning. Start by threading the marinated chicken onto the skewer. Alternate between the chicken and pieces of bell pepper and red onion. Cut the bell pepper and onion into 1-inch pieces. This adds color and flavor! Tips for Even Cooking Make sure to leave a little space between each piece. This helps the heat circulate around the food, ensuring even cooking. Aim for a good mix of chicken and veggies on each skewer to get all those flavors together. Preheating the Grill Before you grill, preheat your grill to medium-high heat. This step is key for getting nice grill marks and juicy chicken. If you’re using a charcoal grill, let the coals turn white before cooking. Cooking Time and Techniques Place the skewers on the grill. Cook them for about 10-12 minutes. Make sure to turn them occasionally. Check the chicken’s internal temperature; it should reach 165°F (75°C). In the last few minutes, brush the skewers with any leftover marinade for extra flavor. Once done, let them rest for a couple of minutes before serving. For the full recipe, you can refer to the main article. Enjoy your delicious honey mustard chicken skewers! How Long to Marinate for Best Flavor Marinating chicken is key for great flavor. I recommend marinating for at least 30 minutes. If you have time, go for 2 hours. This longer time allows the flavors to soak into the chicken. It makes a big difference in taste. Adjusting Ingredients for Heat or Sweetness You can change the taste by adding more honey for sweetness or more mustard for heat. If you want spice, try adding a pinch of cayenne pepper. Taste the marinade before you add the chicken. Adjust it to fit your preferences. Indirect vs Direct Heat When grilling, use direct heat for quick cooking. Place the skewers over hot coals or flames. If you need to cook slowly, use indirect heat. This method cooks the chicken evenly without burning. Avoiding Common Grilling Mistakes Don't crowd the skewers on the grill. Leave space so heat can circulate. Always preheat your grill. This helps get nice grill marks. Avoid flipping too often; let them cook for a few minutes on each side. Garnishing Suggestions For a beautiful plate, sprinkle fresh parsley or cilantro on top. It adds color and freshness. You can also drizzle a bit of extra honey mustard on the skewers for a nice touch. Side Dishes That Pair Well Serve these skewers with a side salad or grilled veggies. They go well with rice or couscous, too. A light yogurt dip can add a cool contrast to the dish. These sides make your meal more complete and fun! {{image_2}} You can switch up the main protein in this recipe. Shrimp is an excellent choice. It cooks quickly and adds a nice texture. Just be sure to marinate it for only 15-20 minutes. This way, you keep it tender and juicy. Tofu is another great option for a vegetarian twist. Use firm tofu for better skewering. Press it to remove extra moisture, then cut it into cubes. Marinate the tofu just like the chicken. This helps the flavors soak in well. If you like a kick in your dish, add some heat. You can mix in sriracha or cayenne pepper with the marinade. Start with just a teaspoon. Taste the marinade before adding more heat. You can also add chopped jalapeños or red pepper flakes. This gives the chicken a nice spicy touch without overpowering the honey and mustard. You can make a great vegetarian version too. Use an array of colorful veggies like zucchini, mushrooms, or cherry tomatoes. Cut them into bite-sized pieces. Toss them in the same honey mustard marinade to enhance their flavor. Thread the veggies onto skewers and grill them just like the chicken. This way, everyone can enjoy a tasty meal, regardless of their diet. You can find the full recipe above to guide you through these variations. Store any leftover honey mustard chicken skewers in an airtight container. This keeps them fresh and tasty. Make sure to let them cool down first. Place them in the fridge within two hours of cooking. They will stay good for up to three days. To reheat the skewers, use the oven or a skillet. Preheat the oven to 350°F (175°C). Place the skewers on a baking sheet. Cover them with foil to keep moisture in. Heat for about 10-15 minutes. If you use a skillet, heat it on medium. Add a splash of water and cover the pan. This method helps keep them juicy. To freeze honey mustard chicken skewers, wrap them tightly in plastic wrap. Then, place them in a freezer bag. Remove as much air as you can. They will stay good for up to three months. When ready to eat, thaw them in the fridge overnight before reheating. You can serve many tasty sides with Honey Mustard Chicken Skewers. Here are some ideas: - Mixed greens salad: A light salad adds freshness. - Rice or quinoa: These grains soak up flavors well. - Grilled vegetables: Add color and nutrients to your plate. - Garlic bread: This pairs nicely with the skewers. - Potato wedges: Crispy potatoes are always a hit. These sides make your meal more enjoyable and balanced. Yes, you can use different mustards for flavor. Dijon gives a tangy taste. Yellow mustard is milder and sweeter. Honey mustard adds extra sweetness. Spicy brown mustard adds a kick. Experiment with your favorite types. Each will change the taste of your skewers in a unique way. Don’t be afraid to try new flavors! Grilling chicken skewers at medium-high heat works best. This temperature allows the chicken to cook evenly. Aim for about 375°F to 400°F (190°C to 200°C). This heat helps achieve a nice char while keeping the chicken juicy. Always check the internal temperature. It should reach 165°F (75°C) for safety. Using a grill thermometer can help you get it right. Honey mustard chicken skewers are easy and fun to make. Start with good chicken, a flavorful marinade, and fresh veggies. Use the right tools and follow the steps for grilling. Remember to marinate for great flavor and avoid common grilling mistakes. Try variations like shrimp or veggie options for new tastes. Store leftovers properly and enjoy them later. This dish is a crowd-pleaser, perfect for any meal. Enjoy experimenting with flavors to find your favorite combo!

Honey Mustard Chicken Skewers Flavorful and Simple Meal

If you’re looking for a tasty, easy meal, you’ll love these Honey Mustard Chicken Skewers! This dish combines juicy chicken,

Older posts
Newer posts
← Previous Page1 … Page69 Page70 Page71 … Page76 Next →
© 2025 My Cooking Cast • Built with GeneratePress

Our Policies

  • Privacy Policy
  • GDPR Policy
  • Terms Of Use
  • Copyright Policy
  • Cookie Policy
  • Disclaimer

More Information​

  • Home
  • Contact
  • About
  • Dinner
  • Appetizers
  • Dessert
©2025, My Cooking Cast About Privacy Policy Back To Top