Skip to content
DisclaimerTerms Of UseGDPR PolicyCookie Policy

My Cooking Cast

  • Home
  • Drinks
  • Appetizers
  • Dinner
  • Dessert
  • About
  • Contact
  • Privacy Policy
DisclaimerTerms Of UseGDPR PolicyCookie Policy

Emma

For this delightful strawberry cheesecake, gather these ingredients: - 1 ½ cups graham cracker crumbs - ½ cup unsalted butter, melted - 2 tablespoons sugar - 16 oz cream cheese, softened - 1 cup powdered sugar - 1 teaspoon vanilla extract - 1 cup sour cream - 2 cups fresh strawberries, hulled and sliced - 2 tablespoons lemon juice - 3 tablespoons cornstarch - 1 tablespoon sugar (for strawberry topping) When choosing ingredients, opt for fresh strawberries. They give a burst of flavor. Use high-quality cream cheese for a rich taste. If you are out of graham crackers, crushed cookies work well. To make this cheesecake, you will need: - Mixing bowls - Electric mixer - 9-inch springform pan - Spatula - Measuring cups and spoons For the best results, use a springform pan. It helps in easy removal. A hand mixer is great for a smooth filling. If you don’t have one, a whisk can work, but it takes longer. To start, grab a mixing bowl. Add 1 ½ cups of graham cracker crumbs, ½ cup of melted unsalted butter, and 2 tablespoons of sugar. Mix these ingredients until they look like wet sand. This step is key for a great crust. Next, take a 9-inch springform pan and press the mixture evenly into the bottom. It should be packed tightly. Now, refrigerate this crust while you make the filling. This helps it set well. In a large bowl, beat 16 oz of softened cream cheese with an electric mixer. You want it smooth and creamy. Slowly add 1 cup of powdered sugar, mixing until fluffy. Then, add 1 cup of sour cream, 1 teaspoon of vanilla extract, and 2 tablespoons of lemon juice. Keep mixing until everything is blended well. Next, stir in 3 tablespoons of cornstarch. Make sure there are no lumps. Pour this filling over your chilled crust. Smooth the top with a spatula. Bake the cheesecake in a preheated oven at 325°F for 50-60 minutes. The edges should set, but the center can jiggle a bit. Turn off the oven and let it cool inside for one hour. This helps prevent cracks. While the cheesecake cools, take 2 cups of hulled and sliced strawberries. In a bowl, mix them with 1 tablespoon of sugar. Set them aside for about 15-20 minutes. This process is called macerating. It helps the strawberries release their juices and makes a tasty sauce. Timing is important here; don’t skip this step! To serve strawberry cheesecake, let it chill well. This makes it firm and tasty. You can slice it into nice pieces. Add a dollop of whipped cream on each slice. Fresh mint leaves add a pop of color. You can also sprinkle some crushed graham crackers on top. This will give it a nice crunch. Common mistakes can ruin your cheesecake. Do not overmix the cream cheese. This can add too much air and cause cracks. Make sure to bake it at the right temperature. Check for doneness by gently shaking the pan. The edges should be set, but the center can jiggle a bit. This means it's still creamy. Use a good electric mixer for the best results. A springform pan is great for easy removal. If you have a food processor, it helps with crust prep. When baking, use a water bath to keep the cheesecake moist. If cracks appear, don't worry! You can cover them with a strawberry topping. This makes it look beautiful again. For more detailed instructions, refer to the [Full Recipe]. {{image_2}} For a quick and easy treat, try a no-bake strawberry cheesecake. This version skips baking, making it perfect for hot days. Ingredients: - 1 ½ cups graham cracker crumbs - ½ cup unsalted butter, melted - 1 cup cream cheese, softened - 1 cup powdered sugar - 1 teaspoon vanilla extract - 1 cup whipped cream - 2 cups fresh strawberries, hulled and sliced - 2 tablespoons lemon juice - 1 tablespoon sugar (for strawberries) To make it, mix the graham cracker crumbs and melted butter. Press this mixture into a springform pan. In a bowl, beat the cream cheese until smooth. Add the powdered sugar and vanilla, mixing well. Fold in the whipped cream gently. Pour this filling over the crust and spread evenly. Chill for at least four hours. For serving, top with sliced strawberries mixed with sugar and lemon juice. This adds a fresh, fruity flavor that everyone loves. You can also create a vegan strawberry cheesecake. It's simple to swap regular ingredients for plant-based ones. Alternative Ingredients: - 1 ½ cups almond flour (instead of graham cracker crumbs) - ½ cup coconut oil (instead of butter) - 1 cup soaked cashews (instead of cream cheese) - 1 cup maple syrup (instead of powdered sugar) - 1 cup coconut whipped cream (for fluffiness) Blend soaked cashews until smooth. Mix with maple syrup and vanilla. Fold in the whipped cream for a light texture. Follow the same steps as the no-bake recipe. The flavor is rich and creamy, just like the classic version. You get a delicious taste without any dairy. Feel free to get creative with flavors! Try adding chocolate or lemon zest to your cheesecake. Suggestions: - Mix in cocoa powder for a chocolate twist. - Add lemon zest for a bright flavor. - Combine crushed cookies or nuts for crunch. For toppings, consider crushed cookies, nuts, or a drizzle of chocolate sauce. Fresh mint can add a nice touch too. The options are endless, and it makes your cheesecake unique! To store leftover cheesecake, keep it in the fridge. Use an airtight container to avoid drying. You can also cover the cheesecake with plastic wrap. This helps keep the flavors fresh. Store it in the fridge for up to five days. If you do not have a container, you can wrap it tightly in plastic wrap. To freeze the cheesecake, first, let it cool completely. Wrap it in plastic wrap, then place it in a freezer-safe bag. This keeps it fresh for up to three months. When ready to eat, thaw it in the fridge for a few hours. Do not thaw at room temperature, as this may change the texture. In the fridge, cheesecake lasts about five days. In the freezer, it can stay good for three months. Watch for signs of spoilage like a sour smell or discoloration. If it looks off or smells strange, it’s best to throw it away. Enjoy your strawberry cheesecake while it’s fresh! Yes, you can make strawberry cheesecake ahead of time. This dessert tastes even better after sitting in the fridge. Prepare it a day before serving for the best flavor. Store it tightly wrapped in the refrigerator. This keeps it fresh and tasty. Baking at high altitudes can change how your cheesecake cooks. You often need to reduce the sugar and increase the liquid. Bake the cheesecake a bit longer, as the air is thinner. Check for doneness by gently shaking the pan. If it jiggles slightly in the center, it is ready. You can use frozen strawberries. They work well, but fresh strawberries have better flavor. Frozen berries may not slice as nicely. If using frozen, thaw and drain them first. This helps avoid excess water on your cheesecake. Cracks often happen due to rapid temperature changes. To avoid this, cool the cheesecake slowly in the oven after baking. Another tip is to avoid overmixing the batter. This can add too much air and lead to cracks. Lastly, use a water bath while baking to keep moisture in. To cut your cheesecake well, use a sharp knife. Dip the knife in hot water and wipe it dry before cutting. This helps create clean slices. Cut slowly and gently to keep the crust intact. If you want perfect pieces, use a ruler to measure. Yes, cooling in the oven is necessary. This step helps set the cheesecake and reduces the chance of cracks. After baking, turn off the oven and leave the door slightly open. Let it sit for about an hour. This gradual cooling is key for a smooth finish. This blog post covered all you need for making strawberry cheesecake. We discussed ingredients, essential equipment, and step-by-step instructions. You learned tips for serving, achieving the right texture, and some fun variations. I shared storage methods and answered common questions. Now, dive into creating your perfect cheesecake. Enjoy the process and share it with others. Happy baking!

Strawberry Cheesecake Delightful and Easy Recipe

If you love strawberries and cheesecake, this recipe is for you! I’ll guide you through making a delightful strawberry cheesecake

To make Peanut Butter Chocolate Chip Energy Bites, you need these key items: - 1 cup rolled oats - 1/2 cup creamy peanut butter - 1/4 cup honey or maple syrup - 1/2 cup chocolate chips (dark or semi-sweet) - 1/4 cup ground flaxseed - 1/2 teaspoon vanilla extract - A pinch of salt These ingredients work together to create a tasty and healthy snack. The oats give a nice chewy texture. Peanut butter adds creaminess and protein. Honey or maple syrup provides natural sweetness. Chocolate chips bring a fun flavor that kids love. Flaxseed boosts nutrition and adds fiber. You can customize your energy bites with these fun add-ins: - Chopped nuts (like almonds or walnuts) - Dried fruit (like raisins or cranberries) - Coconut flakes - Cinnamon or cocoa powder - Chia seeds These options allow you to mix and match flavors. Try adding chopped nuts for crunch. Dried fruit adds a chewy texture. Coconut flakes give a tropical twist. Each energy bite offers a good balance of nutrients. Here’s a quick look: - Calories: About 100 per bite - Protein: 3 grams - Fiber: 2 grams - Sugars: 5 grams These bites provide energy without too much sugar. They are great for a quick snack or a post-workout boost. You can feel good about enjoying these bites, knowing they are both tasty and nutritious. For the complete recipe, check out the Full Recipe section! To make Peanut Butter Chocolate Chip Energy Bites, start by gathering all your ingredients. In a mixing bowl, combine the rolled oats, ground flaxseed, and a pinch of salt. Stir well to mix these dry ingredients. In another bowl, combine the creamy peanut butter, honey or maple syrup, and vanilla extract. Mix until it is smooth. Next, pour the peanut butter mixture into the bowl with the dry ingredients. Stir until everything is fully combined. Finally, gently fold in the chocolate chips. This ensures they spread evenly in the mixture. Mixing well is key to great energy bites. Use a sturdy spatula or spoon to combine the ingredients. If the mixture seems too dry, add a bit more honey or peanut butter. If it's too wet, add some more oats or flaxseed. Make sure to scrape the sides of the bowl. This helps ensure all the ingredients mix together evenly. Take your time and enjoy the process. To form the bites, wash your hands first. Then, take small portions of the mixture, about 1 inch in size. Roll them into balls between your palms. This helps them hold their shape. If the mixture sticks to your hands, wet them slightly with water. Place the rolled bites on a parchment-lined baking sheet or plate. After rolling all the mixture, refrigerate the bites for at least 30 minutes. This will make them firm and easy to enjoy. For extra flair, arrange them on a decorative plate or in a small jar. Store your energy bites in a cool place. A sealed container keeps them fresh. You can use a mason jar or a plastic container. If you keep them in the fridge, they last longer. They can stay good for up to a week in the fridge. For longer storage, consider the freezer. Frozen bites can last for about three months. To boost flavor, try adding a pinch of cinnamon or a dash of sea salt. These simple additions make a big difference. You can also swap honey for maple syrup for a different taste. For texture, add chopped nuts or seeds. These add a nice crunch and extra nutrients. Making these energy bites ahead saves time. I recommend doubling the recipe for meal prep. Once made, store them in your fridge or freezer. Grab them for a quick snack or a post-workout boost. You can also roll them into different shapes for fun. Try making bars or squares instead of balls for variety. {{image_2}} You can swap honey with maple syrup. Both add sweetness. If you want something lower in sugar, try agave syrup. Coconut sugar also works well. Each sweetener gives a unique taste to your bites. Experiment and find your favorite! Peanut butter is great, but other nut butters shine too. Almond butter adds a nutty twist. Cashew butter brings a creamy texture. Sunflower seed butter is perfect for nut-free diets. Each nut butter changes the flavor and texture of your bites. Boost your bites with superfoods! Chia seeds add omega-3s and fiber. Hemp seeds give protein and healthy fats. You can also add dried fruits like cranberries or raisins. These extras make your energy bites even healthier. Check out the full recipe for more ideas! To keep your energy bites fresh, store them in an airtight container. Place the container in the fridge. This helps them stay firm and tasty. You can also use wax paper between layers if you stack them. This prevents sticking. Always check for any signs of spoilage before enjoying them. You can freeze your energy bites to enjoy later. To freeze, place them in a single layer on a baking sheet. Leave them in the freezer for about an hour. Once firm, transfer them to a freezer bag. Be sure to remove as much air as possible. When you're ready to eat, simply take out the desired amount and let them thaw in the fridge overnight. Homemade energy bites last about one week in the fridge. If you freeze them, they can last up to three months. Keep track of the dates you make them. This way, you always know how fresh they are. For the best taste, enjoy them within the first month of freezing. Yes, you can use natural peanut butter. It adds a richer flavor. However, it may be a bit runnier than creamy peanut butter. This can change the texture of your energy bites. If you choose natural peanut butter, consider adding a little more oats to help bind the mixture. To make these bites vegan, replace honey with maple syrup. This simple swap keeps the sweetness while ensuring your bites are plant-based. Use dairy-free chocolate chips too. These small changes make the energy bites suitable for everyone. Serve these bites chilled for the best taste. You can arrange them on a nice plate or in a jar. This makes them great for sharing or gifting. For a fun touch, sprinkle some extra chocolate chips on top before serving. You can also pair them with fresh fruit for a balanced snack. You learned how to make delicious Peanut Butter Chocolate Chip Energy Bites. We covered the right ingredients, step-by-step instructions, and helpful tips. I shared variations that keep things fun and exciting. Storing and freezing these bites helps keep them fresh and tasty. Overall, these bites are simple, healthy, and full of flavor. Enjoy making them and sharing them with others. You now have the tools to create perfect snacks anytime!

Peanut Butter Chocolate Chip Energy Bites Essential Guide

Are you ready to energize your day with a tasty treat? In this essential guide, I’ll show you how to

To make delicious homemade strawberry ice cream, gather these items: - 2 cups fresh strawberries, hulled and sliced - 1 cup granulated sugar - 1 teaspoon lemon juice - 1 cup whole milk - 2 cups heavy cream - 1 teaspoon vanilla extract - A pinch of salt These basic ingredients create a rich, smooth ice cream. Each one plays a key role. The strawberries provide sweetness and flavor, while the cream adds a velvety texture. You can make your strawberry ice cream even better with these add-ins: - Chopped nuts for crunch - Chocolate chips for a sweet twist - Mint leaves for a fresh taste - A splash of balsamic vinegar for depth These options let you personalize your ice cream. Mix them in before churning for the best results. Using fresh strawberries gives the best flavor and texture. They are bright, juicy, and sweet. However, frozen strawberries can work too. They are convenient and available year-round. When using frozen strawberries, let them thaw and drain excess water. This helps keep your ice cream from getting icy. Always choose the best strawberries for the best ice cream! To make homemade strawberry ice cream, follow these steps closely. First, gather all your ingredients. You need fresh strawberries, sugar, lemon juice, whole milk, heavy cream, vanilla extract, and a pinch of salt. 1. In a medium bowl, mix the sliced strawberries with 1/2 cup of sugar. Toss them well. Let them sit for about 15 minutes. This process is called maceration. The sugar helps the strawberries release their juices. 2. After 15 minutes, use a fork or potato masher. Gently mash the strawberries into a chunky puree. Leave some pieces for a nice texture. 3. In a large mixing bowl, whisk together the whole milk and the remaining 1/2 cup of sugar. Keep whisking until the sugar dissolves completely. 4. Now, add the heavy cream, vanilla extract, lemon juice, and a pinch of salt to the milk mixture. Stir until everything blends well. 5. Fold the strawberry puree into the cream mixture. Make sure the strawberries are evenly mixed throughout. 6. Cover the bowl with plastic wrap. Refrigerate the mixture for at least 2 hours. This step cools it down and enhances the flavors. 7. Once chilled, pour the mixture into your ice cream maker. Churn it according to the manufacturer's instructions until you achieve a soft-serve consistency. 8. Transfer the soft ice cream to an airtight container. Freeze for about 4 hours or until it hardens to your liking. 9. Serve your homemade strawberry ice cream in bowls or cones. Enjoy the fresh, sweet taste. Maceration is key for great flavor. Here are some tips: - Always use ripe strawberries. They have more juice and better taste. - Adjust sugar to your taste. More sugar helps with sweetness. - Let the strawberries sit longer if you want more juice. This step is crucial for flavor. Churning is important for texture. Here’s how to do it right: - Make sure your ice cream maker is cold. Freeze the bowl overnight if needed. - Don’t overfill the ice cream maker. Leave space for expansion. - Start churning slowly to avoid splashing. Gradually increase speed. - Stop churning when it reaches a soft-serve texture. It will harden more in the freezer. By following these steps, you’ll create a fresh and creamy delight that everyone will love! For the complete process, see the Full Recipe. To make your ice cream creamy, use high-fat dairy. The heavy cream adds richness. Whole milk also helps, but don’t skip the cream. Churn the mixture just until it thickens. Over-churning can create ice crystals. Chill your mixture well before churning. A cold base helps create a smooth texture. One common mistake is not letting the strawberries macerate long enough. This step brings out their juicy flavor. Another mistake is skipping the salt. A pinch of salt enhances sweetness. Don’t forget to fold the strawberry puree gently. This keeps some chunks for texture. Lastly, avoid leaving the ice cream out too long before serving. To boost the strawberry taste, add a bit of lemon juice. This brightens the flavor. You can also mix in a splash of strawberry extract. Fresh herbs like basil or mint can add a unique twist. Try using ripe, in-season strawberries for the best taste. If you want a richer flavor, try roasting the strawberries before mashing them. For the full recipe, check out the Sweet Summer Strawberry Bliss section. {{image_2}} You can make dairy-free strawberry ice cream easily. Use coconut milk instead of whole milk and cream. This gives you a rich, creamy texture. Choose full-fat coconut milk for the best results. This option is perfect for those who avoid dairy. Mix-ins can add fun flavors and textures to your ice cream. You can fold in chocolate chips or chopped nuts for a crunch. Swirls of chocolate sauce or caramel can create a delicious surprise in every bite. Add mix-ins during the last few minutes of churning for the best results. Want to try new flavors? You can infuse other fruits into your ice cream. Peaches, raspberries, or mango can add a fresh twist. Just follow the same steps as the strawberries. You’ll create a delightful blend of flavors with each scoop. For the full recipe, check out the steps to create your homemade strawberry ice cream. Enjoy experimenting with these variations! To keep your homemade strawberry ice cream fresh, follow these simple steps. First, use an airtight container. This helps prevent ice crystals from forming. Make sure to press a piece of plastic wrap directly on the surface of the ice cream before sealing the lid. This keeps it extra smooth and creamy. When you freeze the ice cream, set your freezer to zero degrees Fahrenheit or colder. This helps maintain the best texture. Avoid opening the freezer door too often. Temperature changes can make your ice cream icy. For a fun twist, label your container with the date. You’ll know how long it’s been in the freezer. Homemade strawberry ice cream can last about two weeks in the freezer. After that, it may lose its flavor and texture. If you notice ice crystals, it's a sign that it's past its prime. For the best taste, enjoy it within a week. Always check for any off smells or flavors before serving. If it smells strange, it’s best to toss it out. Remember, fresh is always best! Leftover ice cream can become hard in the freezer. To soften it, simply take it out and let it sit at room temperature for about 10 to 15 minutes. This helps bring it back to a scoopable texture. If it’s still too hard, you can re-churn it. Place the ice cream back in your ice cream maker for a few minutes. This adds air and makes it creamy again. Enjoy your homemade strawberry ice cream just like it was freshly made! For the full recipe, check out the details above. Yes, you can! If you don’t have an ice cream maker, you can still enjoy this treat. First, make the mixture as usual. Then, pour it into a shallow dish. Place the dish in the freezer. Every 30 minutes, stir the mixture with a fork. Keep doing this until it becomes creamy. This method takes more time, but it works well! To change the sweetness, you can add or reduce sugar. Start with less sugar if you prefer a less sweet flavor. You can taste the mixture before freezing. If it’s not sweet enough, stir in more sugar gradually. Just remember, the cold can dull flavors, so keep that in mind! Serving homemade strawberry ice cream is fun! You can scoop it into bowls or cones. Top it with fresh strawberry slices for a nice touch. A sprig of mint adds color and flavor. Want something extra? Drizzle chocolate sauce or sprinkle crushed nuts on top. This ice cream pairs well with warm desserts, too! For a full recipe, see the details above. Enjoy making your homemade strawberry ice cream! You learned about making strawberry ice cream, from ingredients to techniques. We covered required and optional ingredients, comparing fresh and frozen strawberries. You discovered detailed steps and tips for perfect maceration and churning. We discussed ways to avoid mistakes and enhance flavor. Variations included dairy-free options and mix-ins. Lastly, we reviewed storage tips for your ice cream. Homemade strawberry ice cream is fun and rewarding. With practice, you can create a creamy treat that impresses everyone. Enjoy your ice cream journey!

Homemade Strawberry Ice Cream Fresh and Creamy Delight

Craving a cool treat? You’ll love making homemade strawberry ice cream! This recipe is not only fresh but also creamy

To make these tasty tacos, you need simple ingredients that pack a punch. Here’s what you'll need: - 2 cans (15 oz each) chickpeas, drained and rinsed - 1 tablespoon olive oil - 1 teaspoon cumin - 1 teaspoon smoked paprika - 1/2 teaspoon cayenne pepper - 1 teaspoon garlic powder - Salt and pepper to taste - 8 small corn tortillas These ingredients form the base of your spicy chickpea filling. The chickpeas give a nice texture, while the spices add warmth and flavor. You can customize your tacos with some fun toppings. Here are my favorites: - 1 avocado, sliced - 1 cup red cabbage, shredded - 1/2 cup fresh cilantro, chopped - 1 lime, cut into wedges - Salsa for serving (optional) These toppings add fresh flavors and textures. The creamy avocado balances the spice, and the lime adds brightness. Feel free to mix and match based on what you love! Each serving of these spicy chickpea tacos packs a healthy punch. Here’s what you get per serving, based on four servings: - Calories: Approximately 350 - Protein: 12g - Carbohydrates: 45g - Fiber: 12g - Fat: 14g These tacos are not just tasty; they are also filling and nutritious. You get good protein and fiber from the chickpeas, making them a great meal choice. For the full recipe, check out the earlier section. Start by heating one tablespoon of olive oil in a large skillet over medium heat. Next, drain and rinse the chickpeas well. Once the oil is hot, add the chickpeas to the skillet. Sprinkle in one teaspoon of cumin, one teaspoon of smoked paprika, half a teaspoon of cayenne pepper, and one teaspoon of garlic powder. Be sure to add salt and pepper to taste. Cook the chickpea mixture for about 5 to 7 minutes. Stir it occasionally. You want the chickpeas to be heated through and slightly crispy. This step makes the flavors meld together well, giving depth to each bite. While the chickpeas cook, grab another pan. Warm the corn tortillas in this pan over low heat. Flip them once to ensure even warming. You want them to be soft and pliable. This step makes it easier to fold the tacos later. Now it’s time to build your tacos. Take a warm tortilla and place a generous spoonful of the spicy chickpea mixture onto it. Top it with slices of avocado, shredded red cabbage, and fresh cilantro. For a zing, squeeze fresh lime juice over the top. If you like, add salsa for extra flavor. Serve your tacos right away with lime wedges on the side. This dish bursts with flavor and is sure to please. For the complete guide, check the Full Recipe. Cooking chickpeas is simple. Start with canned chickpeas for ease. Drain and rinse them well. This removes excess sodium and ensures better flavor. If using dried chickpeas, soak them overnight. Cook them until soft for a perfect texture. Spices make your tacos pop. Cumin and smoked paprika are must-haves. They add warmth and depth. Cayenne pepper gives a nice kick. Adjust the amount based on your heat preference. Don’t forget garlic powder for an extra layer of flavor. Fresh herbs like cilantro brighten the dish. Always taste and adjust as needed. Serve your spicy chickpea tacos with fresh toppings. Sliced avocado adds creaminess. Shredded red cabbage gives a nice crunch. Lime juice enhances all the flavors. You can also add salsa for a zesty kick. These tacos pair well with a side of rice or a light salad. For a fun twist, serve with a cold drink like lemonade. Enjoy the blend of flavors in every bite! {{image_2}} You can easily make these tacos vegan and gluten-free. Chickpeas are already vegan, so you’re off to a great start. For gluten-free options, just swap corn tortillas for other gluten-free wraps. You can also try lettuce wraps for a light and fresh twist. Want more heat? Add more cayenne pepper to the chickpeas. You can also use fresh jalapeños for a spicy kick. If you like it milder, reduce the cayenne or skip it. A touch of smoked paprika gives a nice flavor without too much heat. Feel free to get creative with your tacos! Here are some fun add-ins to consider: - Black beans for extra protein - Diced bell peppers for crunch - Corn for sweetness - Shredded carrots for color - A sprinkle of feta cheese for creaminess Mix and match these ingredients to make your tacos unique! For the full recipe, check out the recipe section above. To store leftover chickpea tacos, first, separate the filling from the tortillas. This keeps everything fresh. Place the chickpea mix in an airtight container. You can store it in the fridge for up to three days. Wrap the tortillas in foil or place them in a zip-top bag. Keep them in the fridge too. This way, they won't get soggy. When you are ready to enjoy your leftovers, reheat the chickpea filling in a skillet. Heat it over medium heat for about five minutes. Stir it to warm evenly. For the tortillas, warm them in a pan or microwave. You can use a damp paper towel to wrap them in the microwave. Heat them for about 30 seconds. This keeps them soft and tasty. You can also freeze the chickpea filling if you want to meal prep. Place it in a freezer-safe container. It will last for up to three months in the freezer. When ready to eat, thaw it in the fridge overnight. Reheat it in a pan as mentioned before. You can freeze tortillas too. Just stack them with parchment paper in between. This way, they won't stick together. Enjoy your spicy chickpea tacos later! For the full recipe, check out the earlier sections. Yes, you can use fresh chickpeas. Start by soaking them overnight. Then, cook them for about 1 to 2 hours until they are soft. Canned chickpeas save time and are ready to use. They also have a nice creamy texture, which works well in tacos. Fresh chickpeas can give a different bite and flavor. If you like a firmer texture, fresh is great. If you can't find corn tortillas, use flour tortillas. They are soft and flexible, making them easy to fold. You can also try lettuce wraps for a low-carb option. They add a fresh crunch and work well with the spicy chickpeas. Pita bread is another fun choice. It adds a unique flavor and holds the filling well. To kick up the heat, add more cayenne pepper to the chickpeas. You can also mix in diced jalapeños or serrano peppers while cooking. If you want a spicy salsa, use a hot variety or add chopped fresh chili peppers. Another option is to drizzle some hot sauce on top of the tacos. Adjust the spice level to match your taste. Enjoy the heat! You now know how to make tasty spicy chickpea tacos. We covered main and optional ingredients, plus a quick nutritional breakdown. I shared step-by-step instructions for preparing, warming, and assembling your tacos. I also gave tips for cooking, flavor boosting, and serving ideas. Feel free to get creative with variations and storage options. Enjoy your meal prep with these easy tacos! You can impress friends and family with a delicious, healthy dish.

Spicy Chickpea Tacos Flavorful and Filling Recipe

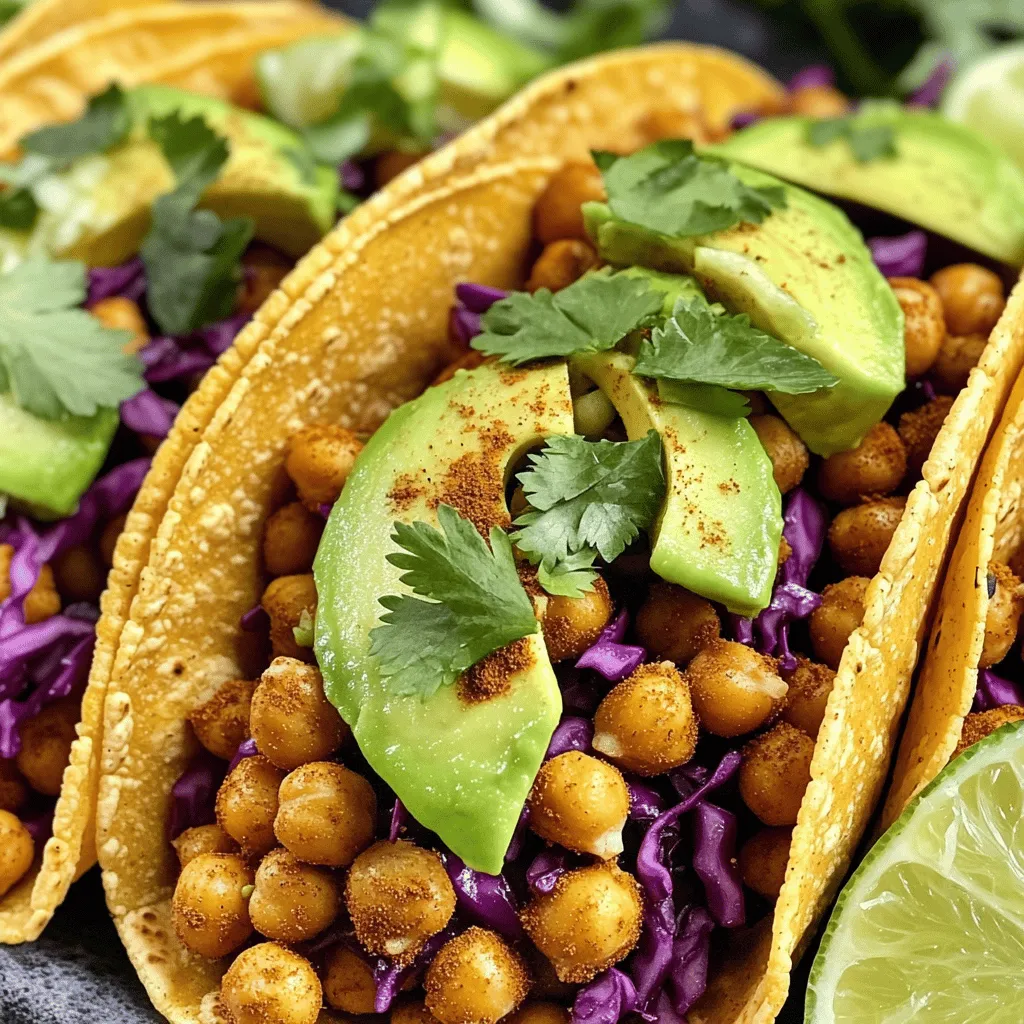
If you’re craving a tasty and healthy meal, then you need to try these Spicy Chickpea Tacos! This recipe packs

To make this chocolate chip cookie dough dip, you will need some simple ingredients. Here’s what you need to gather: - 1 cup all-purpose flour - ½ cup unsalted butter, softened - 1 cup brown sugar, packed - 2 tablespoons granulated sugar - 2 teaspoons vanilla extract - ½ teaspoon salt - 1 cup cream cheese, softened - 1 cup mini chocolate chips - Optional dippers: pretzel sticks, graham crackers, or apple slices Each ingredient plays a special role. The flour gives the dip its doughy texture. The softened butter and cream cheese create a creamy base. Brown sugar adds richness, while granulated sugar brings sweetness. Vanilla extract gives a warm flavor, and salt enhances all the tastes. Mini chocolate chips add that classic cookie touch. You can choose fun dippers like pretzel sticks for a salty crunch, graham crackers for a sweet bite, or apple slices for a fresh twist. With these ingredients, you’re set to create a dip that everyone will love. For the full recipe, check out the details above! Baking the Flour Start by baking the flour. This step will remove any raw taste. Place one cup of all-purpose flour in a heatproof bowl. Microwave it for one minute. After, let it cool down for a few minutes. Softening the Butter and Cream Cheese Next, soften the butter and cream cheese. Use a half cup of unsalted butter and one cup of cream cheese. Leave them out at room temperature for about 30 minutes. This will help them mix better later. Creaming Butter and Sugars In a mixing bowl, add the softened butter. Then, add one cup of packed brown sugar and two tablespoons of granulated sugar. Beat them together until the mixture is creamy and smooth. Incorporating Cream Cheese Now, add the softened cream cheese to the bowl. Mix it in until everything combines well. The texture should be light and fluffy. Combining Dry and Wet Ingredients Slowly mix in the cooled flour and a half teaspoon of salt. Stir until just combined. Then, add in two teaspoons of vanilla extract and one cup of mini chocolate chips. Make sure the chips are evenly distributed throughout the dip. Chilling the Dip Transfer the dip into a serving bowl. Cover it and chill in the fridge for about 30 minutes. Chilling enhances the flavors and makes it even more delicious. Serving Suggestions When ready to serve, pair the dip with your favorite dippers. You can use pretzel sticks, graham crackers, or even apple slices. Enjoy this sweet treat with friends or family. For the full recipe, check out the earlier section. Importance of Softened Ingredients Softened ingredients are key for a smooth dip. Use room-temperature butter and cream cheese. This makes mixing easier and helps blend the flavors well. If they are too cold, lumps may form. Mixing Techniques Start by beating the butter and sugars together. Mix until creamy and light. Then, add the cream cheese. Mix slowly at first, then increase speed. This helps to avoid splatters while making it fluffy and smooth. Add-ins and Mix-ins Want to make your dip even better? Try adding different treats! Chopped nuts, toffee bits, or a splash of almond extract can add a fun twist. Mini marshmallows also give a nice texture. Adjusting Sweetness Level You can control the sweetness. If you prefer a less sweet dip, cut back on the brown sugar. Remember, you can always add more sugar later if needed. Taste as you go! Best Dippers to Use Choosing the right dippers can make a big difference. I love using pretzel sticks for that salty-sweet combo. Graham crackers add a crunchy contrast. Apple slices bring freshness, which balances the rich dip. Presentation Suggestions Make your dip look great! Serve it in a fun bowl with a colorful plate. Arrange the dippers around the dip. This makes it easy for guests to grab and enjoy. For more ideas, check the Full Recipe. {{image_2}} You can make chocolate chip cookie dough dip healthier with a few easy swaps. Start by using whole wheat flour instead of all-purpose flour. Whole wheat flour adds fiber and nutrients. You can also swap the butter for coconut oil or Greek yogurt. These options cut down on saturated fat. For lower sugar options, use less sugar in the recipe. You can reduce the brown and granulated sugar by half. If you want to cut sugar even more, consider using a sugar substitute like stevia or monk fruit. These alternatives still give you sweetness without the calories. Want to change the flavor? Try different extracts! Almond or hazelnut extracts can add a fun twist. Just replace the vanilla extract with your choice. Adding spices like cinnamon or nutmeg can also enhance the taste. A dash of cinnamon gives a warm flavor, while nutmeg adds a unique touch. Seasonal twists can make your dip special. For the holidays, mix in festive items like crushed peppermint or mini candy canes in December. In the fall, try adding pumpkin spice for a cozy flavor. Incorporating seasonal fruits is another great idea. Fresh strawberries or raspberries can brighten the dip in spring. You can fold in diced apples or pears in the fall for a fresh crunch. These additions keep the dip exciting all year round. For the full recipe, check out the recipe section above! To keep your chocolate chip cookie dough dip fresh, use an airtight container. Glass or plastic containers work well. Make sure to seal the lid tightly. Store the dip in a cool, dry place. Avoid areas with high humidity. In the fridge, this dip lasts about 5 to 7 days. You can freeze it too. If you freeze it, it stays good for up to 3 months. Just make sure it is in an airtight container. To revive your dip after storage, take it out of the fridge. Let it sit at room temperature for about 15 minutes. If it feels too thick, mix in a little cream cheese or milk. Before serving, taste it and adjust the sweetness if needed. This will ensure it tastes fresh and delicious. Enjoy with your favorite dippers! No, you should not eat raw flour. Raw flour can carry harmful bacteria, like E. coli. It is important to bake the flour first. This step makes it safe to eat. I recommend microwaving the flour for one minute. This simple process kills any germs. After baking, let it cool before mixing it into your dip. You can store chocolate chip cookie dough dip in the fridge for up to five days. Keep it in an airtight container. If you want to store it longer, you can freeze it. It stays good in the freezer for about three months. Just make sure to let it thaw in the fridge before serving. You have many options for dippers! Try using graham crackers or apple slices. Other good choices include vanilla wafers, chocolate cookies, or even strawberries. These dippers add fun flavors and textures. Get creative and use what you love! To make this dip gluten-free, swap the all-purpose flour for a gluten-free blend. Many brands offer good alternatives. Just ensure that all other ingredients are gluten-free as well. This way, everyone can enjoy the treat! You can make this dip vegan by using vegan butter and a dairy-free cream cheese. Also, make sure the chocolate chips are dairy-free. These simple swaps let you enjoy the dip without any animal products. It tastes just as delicious! For the full recipe, check out the earlier section. This recipe for chocolate chip cookie dough dip is both fun and tasty. We reviewed the key ingredients, preparation steps, storage tips, and variations. This dip suits any occasion with the right dippers. Keep in mind the suggestions for smooth texture and flavor enhancements. You can also explore healthier or seasonal options. Whether you serve it at a party or snack at home, this dip brings joy and sweetness. Enjoy creating and sharing this delicious treat!

Chocolate Chip Cookie Dough Dip Irresistible Treat

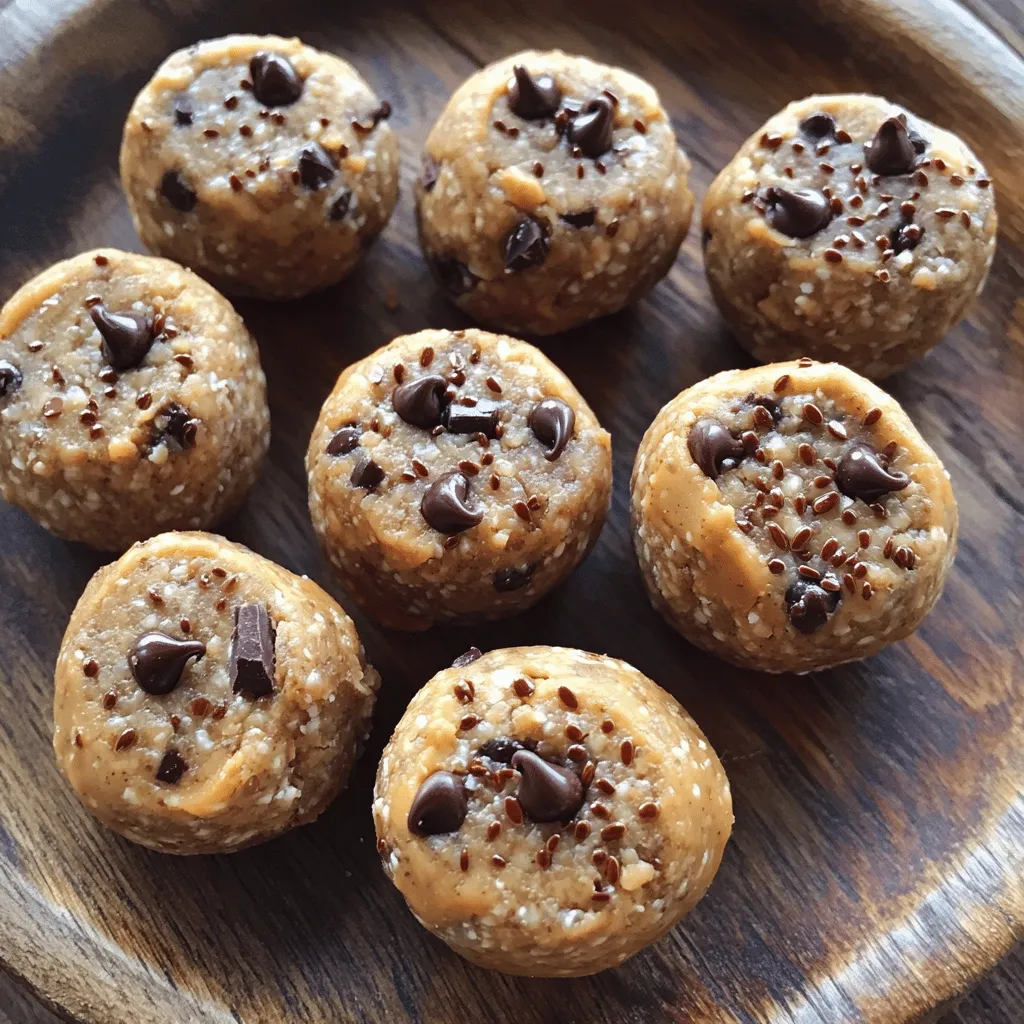
Craving a sweet treat that’s easy to whip up? My Chocolate Chip Cookie Dough Dip is the answer! With its

- 4 bell peppers (any color) - 1 cup quinoa, rinsed - 1 can (15 oz) black beans, drained and rinsed - 1 cup corn kernels (fresh, frozen, or canned) - 1 cup diced tomatoes (canned or fresh) Vegan quinoa stuffed peppers are a feast for the eyes and the taste buds. The bell peppers create a bright and colorful base. They hold the filling like little edible bowls. Quinoa is the star of this dish. It adds texture and protein, making it a hearty meal. Black beans give extra protein and a creamy texture. Corn kernels add sweetness and crunch. Diced tomatoes bring a juicy burst of flavor. - 1 teaspoon cumin - 1 teaspoon smoked paprika - 1 teaspoon garlic powder - 2 tablespoons olive oil - 1/4 cup fresh cilantro, chopped (for garnish) Seasonings are key to making this dish shine. Cumin gives a warm, earthy flavor. Smoked paprika adds a hint of smokiness. Garlic powder brings depth to the filling. A drizzle of olive oil helps everything blend nicely. Fresh cilantro at the end adds a pop of brightness. - Garnishes like avocado - Accompaniments like lime - Ideas for sides Serving your stuffed peppers can be fun and creative. Diced avocado adds creaminess and healthy fats. A squeeze of lime brightens the flavors. Pair this dish with a fresh salad or rice for a full meal. You can also serve it with tortilla chips for extra crunch. For the Full Recipe, just follow along with the easy steps provided. Start by preheating your oven to 375°F (190°C). Next, take each bell pepper and slice off the tops. This gives you a lid and lets you fill the peppers easily. Remove the seeds and membranes from inside the peppers. You can save the tops to chop and add to your filling if you want. In a medium pot, bring 2 cups of vegetable broth to a boil. Once it's boiling, add 1 cup of rinsed quinoa to the pot. Lower the heat to a simmer, cover the pot, and cook for about 15 minutes. The quinoa is ready when it is fluffy and the broth is all absorbed. While the quinoa cooks, heat 2 tablespoons of olive oil in a large skillet over medium heat. If you saved the bell pepper tops, chop them and add them to the skillet. Sauté for about 2-3 minutes until they soften. Then, stir in 1 can of black beans, 1 cup of corn, and 1 cup of diced tomatoes. Add 1 teaspoon of cumin, 1 teaspoon of smoked paprika, 1 teaspoon of garlic powder, and salt and pepper to taste. Cook this mixture for about 5 more minutes until it’s heated through. Once the quinoa is done, fluff it with a fork and combine it with the vegetable mixture in the skillet. Mix everything well. Now, it's time to stuff the bell peppers. Take the quinoa and vegetable mixture and pack it into each pepper. Make sure to fill them well. Place the stuffed peppers upright in a baking dish. You can drizzle a little more olive oil over the tops if you'd like. Cover the dish with aluminum foil and bake in the oven for 25 minutes. After that, take off the foil and bake for another 10-15 minutes to roast the tops. Once done, let them cool for a bit before serving. You can garnish with fresh cilantro and diced avocado to make them extra special. For the full recipe, refer back to the original section. To ensure your quinoa cooks perfectly, rinse it well before cooking. This removes any bitter coating. Use two cups of vegetable broth for one cup of quinoa. Bring the broth to a boil before adding the quinoa. Cover the pot and let it simmer until the quinoa is fluffy. This takes about 15 minutes. Check it after ten minutes to avoid overcooking. Adjusting seasoning to taste is key. Start with the basic spices like cumin, smoked paprika, and garlic powder. After mixing the quinoa and veggies, taste the filling. Add more salt, pepper, or spices if needed. Remember, you can always add more, but you can't take it out! Make your dish visually appealing by using colorful plates. A bright plate makes the stuffed peppers pop. Arrange the stuffed peppers upright for a stunning look. You can add extra avocado slices and fresh cilantro around the dish. This adds color and freshness. For a fun twist, consider using lime wedges as a garnish. The vibrant green looks great on the plate. It also adds a nice touch of flavor when squeezed over the peppers. Quinoa is a super grain. It is high in protein and contains all nine essential amino acids. This makes it a complete protein source. It is also rich in fiber, which is great for digestion. Using colorful vegetables boosts the health benefits. They provide essential vitamins and minerals. Red, yellow, and green peppers bring antioxidants. These help fight inflammation. Plus, the variety adds different flavors and textures to your meal. Eating a rainbow of vegetables is always a smart choice! For the full recipe, check the previous sections. {{image_2}} You can change the fillings in your stuffed peppers. Try using other grains, like rice or farro. Both options can give you a nice texture. You might also want to add nuts or seeds for extra crunch. Chopped walnuts or sunflower seeds work well here. Spices can elevate the taste of your dish. Try adding chili powder or oregano for a warm kick. You can also mix in different vegetables. Zucchini or mushrooms can add depth and flavor. Simply chop them and cook them with the other veggies. If you need it gluten-free, use certified gluten-free grains. Quinoa is naturally gluten-free, making it a great choice. For a nut-free version, skip the nuts or seeds. You can still enjoy a tasty meal without them. These changes keep the dish safe and delicious for everyone. For the full recipe, check out the vibrant vegan quinoa stuffed peppers. To keep your stuffed peppers fresh, let them cool first. Place them in an airtight container. They will stay good in the fridge for about 3 to 5 days. Make sure to store them without toppings like avocado. This helps prevent sogginess. When you reheat, add fresh garnishes for a tasty touch. You can freeze stuffed peppers for later. Start by letting them cool completely. Wrap each pepper in plastic wrap, then place them in a freezer-safe bag. They can last up to 3 months in the freezer. To reheat frozen peppers, remove the wrap and place them in a baking dish. Cover with foil and bake at 375°F (190°C) for about 30-40 minutes. This helps them heat through evenly. For a crispy top, remove the foil in the last 10 minutes. Enjoy your vibrant Vegan Quinoa Stuffed Peppers anytime with this easy storage method! You can tell the stuffed peppers are done when they are tender. The peppers should be soft enough to pierce with a fork. The filling should be hot and bubbly. If the tops start to brown, that’s a good sign too. Yes, you can prepare these stuffed peppers in advance. Cook the filling and stuff the peppers. Then, cover them and keep them in the fridge for up to two days. When you're ready, bake them as per the instructions in the Full Recipe. If you don't have quinoa, you can use rice, farro, or couscous. For a protein boost, lentils or chickpeas work well too. Just adjust the cooking times based on your choice. These stuffed peppers are not spicy on their own. If you want some heat, add chili powder or diced jalapeños. You can also use hot sauce for extra spice. Adjust it to your taste. Vegan quinoa stuffed peppers are easy to make and tasty. We covered key ingredients, like bell peppers, quinoa, and beans. You learned step-by-step instructions to prepare and bake them. I shared tips for cooking and presenting this dish. You saw ways to adapt the recipe for various diets and preferences. These stuffed peppers are a healthy, versatile meal. Enjoy experimenting with different flavors and ingredients. Whether for a quick dinner or meal prep, you can create a dish that delights.

Vegan Quinoa Stuffed Peppers Flavor-Packed Delight

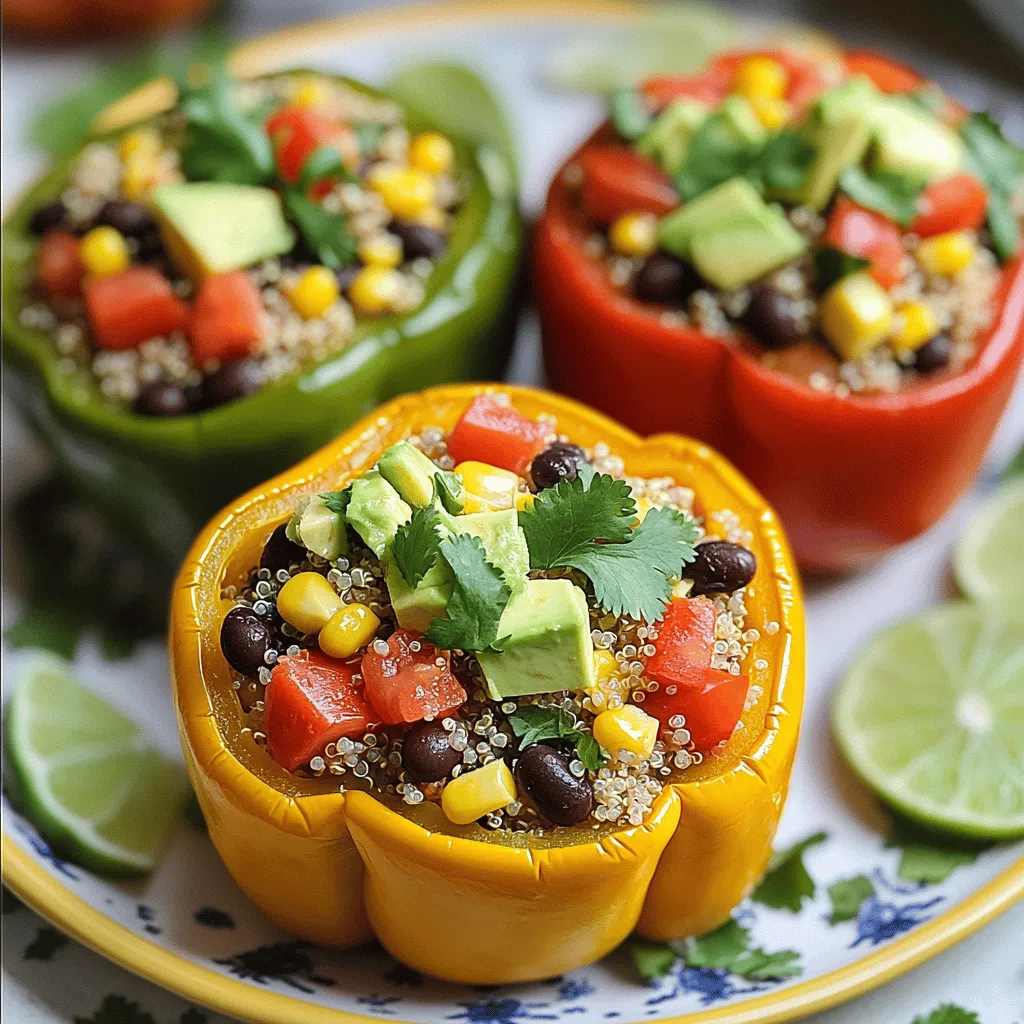
Are you ready to enjoy a meal that’s as tasty as it is good for you? In this blog, I’ll

The main flavors in One-Pan Creamy Tuscan Chicken come from a few key ingredients. Here’s what you need: - 4 boneless, skinless chicken breasts - 2 tablespoons olive oil - 4 cloves garlic, minced - 1 cup cherry tomatoes, halved - 2 cups fresh spinach - 1 cup heavy cream - 1 cup grated Parmesan cheese - 1 teaspoon Italian seasoning These ingredients create the perfect balance of taste and texture. The chicken stays juicy, while the sauce is creamy and rich. To enhance the dish, you’ll also need some seasonings: - Salt and pepper - Fresh basil for garnish These simple seasonings uplift the flavors. The basil adds a fresh note that really ties everything together. For the full recipe, check out the [Full Recipe]. First, grab a large skillet and heat the olive oil over medium-high heat. While the oil warms, season the chicken breasts with salt and pepper. This simple step enhances the flavor. Once the oil is hot, add the chicken breasts to the skillet. Brown the chicken on each side for about 5 to 7 minutes. You want them golden brown and fully cooked. After browning, carefully remove the chicken from the skillet and set it aside. This keeps it juicy while you make the sauce. Next, in the same skillet, add the minced garlic. Sauté it for about 30 seconds. You want it to smell great but not burn. After that, toss in the halved cherry tomatoes. Cook them for about 3 to 4 minutes until they soften. Now, pour in the heavy cream. This adds richness. Stir in the grated Parmesan cheese and Italian seasoning. Keep stirring until the cheese melts and the sauce becomes smooth. This creamy sauce is what makes the dish shine. Now it's time to finish your dish. Add the fresh spinach to the skillet. Cook it until it wilts, which should take about 2 minutes. Then, return the chicken to the skillet, spooning the creamy sauce over the top. Let it simmer for another 3 to 5 minutes. This heats everything through and blends the flavors. Before serving, taste the sauce. Adjust the seasoning with more salt and pepper if needed. For a lovely touch, garnish with fresh basil. This One-Pan Creamy Tuscan Chicken is now ready to serve. For the full recipe, check out the earlier section! To make sure your chicken cooks well, start with a hot skillet. Heat your olive oil until it shimmers. Season the chicken breasts with salt and pepper. Cook them for 5-7 minutes on each side. This browning adds flavor and keeps the chicken juicy. Use a meat thermometer. Aim for an internal temperature of 165°F. For a creamy sauce, add the heavy cream slowly. Stir it well with the melted Parmesan cheese. This helps create a smooth texture. If the sauce seems too thick, add a splash of chicken broth or water to loosen it up. Keep stirring until everything blends well. To make your dish look fancy, serve the chicken on a plate with the creamy sauce drizzled around it. Sprinkle fresh basil on top for color. You can also add a few halved cherry tomatoes for contrast. Pair your One-Pan Creamy Tuscan Chicken with crusty bread. This adds a nice touch and helps soak up the sauce. You can also serve it with a side salad for a fresh crunch. Roasted vegetables go well too. They add flavor and complement the dish nicely. {{image_2}} You can change the proteins in this dish. Shrimp or tofu make great swaps. Shrimp cooks fast and adds a nice texture. Tofu is perfect for a plant-based option. Just ensure you season them well to match the dish's flavor. If you want a dairy-free version, you can use coconut cream or cashew cream. Both provide a rich texture without the dairy. They blend well and keep the sauce creamy. Just adjust the seasoning to balance the flavors. To add more flavor, consider mushrooms or artichokes. Mushrooms bring an earthy taste. Sauté them with garlic before adding cream for depth. Artichokes add a unique twist. They pair well with the creamy sauce and offer a pleasant bite. For spice variations, try red pepper flakes for heat or smoked paprika for a smoky touch. A pinch of nutmeg can add warmth. Just sprinkle in a little at a time, so it does not overpower the dish. These variations keep the dish exciting and tailor it to your taste. For the full details, check out the Full Recipe. To store leftovers from One-Pan Creamy Tuscan Chicken, let the meal cool first. Place it in an airtight container. This helps keep the chicken moist and the sauce fresh. Use glass or BPA-free plastic containers. They are the best options for storing food. Label the container with the date. This way, you can track how long it has been in the fridge. When it’s time to enjoy your leftovers, reheat the chicken safely. You can use the microwave or the stovetop. If using the microwave, place the chicken on a plate. Cover it with a damp paper towel. This keeps the chicken from drying out. Heat in short bursts, stirring in between. If you prefer the stovetop, place the chicken in a skillet over low heat. Add a splash of water or extra cream to maintain moisture. Stir gently to warm it up. To keep the cream sauce from separating, avoid high heat. A gentle heat keeps the sauce smooth and creamy. Enjoy your tasty dinner delight! Making this dish is quick and easy. It takes about 30 minutes from start to finish. You’ll spend around 10 minutes prepping the ingredients. The cooking time is about 20 minutes. This makes it a great choice for busy weeknights when you want a tasty meal fast. Yes, you can use frozen chicken breasts for this recipe. Just be sure to thaw them first. You can defrost them overnight in the fridge or use the quick method of placing them in cold water. Once thawed, you can follow the recipe as usual. Cooking times may vary slightly, so ensure the chicken is cooked through. This creamy chicken pairs well with many sides. Here are a few great options: - Steamed rice or quinoa - Garlic bread for dipping in the sauce - A fresh green salad to balance the meal - Roasted vegetables for a colorful plate You might also enjoy a light white wine, like Pinot Grigio, with it. Yes, this dish works well for meal prep. You can make it in advance and store it in the fridge. Just divide it into meal containers. It keeps well for about 3 days. When you’re ready to eat, simply reheat it in the microwave. Make sure the chicken is hot throughout. This way, you can enjoy a tasty meal any day of the week. For the full recipe, check above! In this blog post, we explored how to make One-Pan Creamy Tuscan Chicken. We covered the key ingredients like juicy chicken, fresh spinach, and creamy sauce. I included step-by-step instructions to guide you through prepping, cooking, and finishing the dish perfectly. For those looking to add variety, we discussed ingredient swaps and flavor boosts. Remember to follow my tips for the best texture and taste. With these simple steps, you'll create a delicious meal that everyone will love. Enjoy your cooking!

One-Pan Creamy Tuscan Chicken Tasty Dinner Delight

Looking for a quick and tasty dinner? Try my One-Pan Creamy Tuscan Chicken! With juicy chicken, vibrant spinach, and sun-kissed

- 1 pound large shrimp, peeled and deveined - 4 cloves garlic, minced - 1/4 cup fresh lemon juice - Zest of 1 lemon - 1/4 cup olive oil - 1 teaspoon red pepper flakes (adjust to taste) - 1 tablespoon fresh parsley, chopped - Salt and pepper, to taste - Lemon wedges, for serving For this dish, I always choose fresh shrimp. They bring bright flavors and a juicy bite. You can find them at your local market. Look for shrimp that feels firm and has a clean smell. If you use frozen shrimp, make sure to thaw them well before cooking. The marinade is key to great taste. Fresh garlic gives a strong flavor. Lemon juice and zest add a nice zing. Olive oil makes everything rich and smooth. Red pepper flakes give a little heat, but you can use less if you want it milder. Garnish with parsley for color and freshness. Serve with lemon wedges for a zesty kick. You can find the full recipe for Zesty Lemon Garlic Shrimp in the earlier sections. To start, grab a medium bowl. In this bowl, mix together the olive oil, minced garlic, and fresh lemon juice. Add the lemon zest and red pepper flakes. Season with salt and pepper. Whisk it all together until it looks smooth and mixed well. This marinade gives the shrimp a bright and zesty flavor. Now, take your peeled and deveined shrimp and place them in the bowl with the marinade. Toss the shrimp gently to coat them evenly. This step is key to ensuring every bite is full of flavor. Let the shrimp marinate for at least 15 minutes. If you have time, let them sit for up to 30 minutes. This longer time allows the flavors to soak in even more. Once your shrimp have marinated, heat a large skillet over medium-high heat. When the skillet is hot, add the shrimp in a single layer. Cook them for about 2-3 minutes on one side. You want them to turn pink and opaque. After that, flip the shrimp over and cook for another 2 minutes. Once done, remove the skillet from heat. Garnish your shrimp with chopped parsley for a fresh touch. Serve them right away with lemon wedges for an extra zesty kick. For the full recipe, check the earlier section. When picking shrimp, look for large, fresh shrimp. They should smell like the sea, not fishy. You can choose either wild-caught or farmed shrimp. Wild shrimp often have better flavor. If using frozen shrimp, thaw them in the fridge overnight for best results. To make your dish even tastier, try adding some extras. Fresh basil or cilantro adds a nice twist. For a smoky flavor, add smoked paprika. A splash of white wine can also elevate the dish. Experiment with different spices to find your favorite mix. Cooking shrimp takes just a few minutes. They are done when they turn pink and curl into a C shape. Avoid overcooking, as it makes them tough. Pay close attention to the cooking time. Remove them from heat as soon as they're done. Follow the Full Recipe for precise cooking times. {{image_2}} You can boost the taste of your Zesty Lemon Garlic Shrimp with fun add-ins. Consider adding diced tomatoes for a fresh burst. Fresh spinach adds color and nutrients. For a kick, toss in sliced jalapeños or crushed red pepper. You can also mix in capers or olives for a salty touch. Each add-in brings a new twist, so feel free to get creative! You don’t have to stick to a skillet for cooking shrimp. You can grill them for a smoky flavor. Just thread the marinated shrimp on skewers and cook on medium heat. Broiling is another great option. Place the shrimp on a baking sheet and broil for about 2-3 minutes on each side. This method gives them a nice char and depth of flavor. Pair your shrimp with various sides for a complete meal. Serve over fluffy rice or creamy risotto for a hearty dish. You can also go with a fresh salad for a lighter option. Roasted vegetables add a nice crunch and color. If you want a crunchy touch, serve with garlic bread. Each side complements the shrimp and makes your meal special. For the full recipe, check below. After you enjoy your zesty lemon garlic shrimp, store any leftovers in an airtight container. This keeps the shrimp fresh. Place the container in the fridge. Your shrimp will stay good for up to two days. If you notice any strange smells or colors, it’s best to toss it out. If you want to keep your shrimp longer, freezing is a great option. First, make sure the shrimp is completely cooled. Place the shrimp in a freezer-safe bag or container. Remove as much air as you can to prevent freezer burn. Your shrimp can last up to three months in the freezer. When you're ready to use them, transfer them to the fridge to thaw overnight. To reheat your shrimp, avoid using the microwave. This can make them rubbery. Instead, use a skillet on low heat. Add a little olive oil and heat the shrimp slowly. This keeps them juicy and flavorful. You can also add a splash of lemon juice for extra zest while reheating. Enjoy your shrimp again just like the first time! For the full recipe, check out the previous section. You can tell shrimp is cooked when it turns pink and opaque. It should curl into a "C" shape. If it curls into an "O," it is overcooked. Cooking shrimp takes about 2 to 3 minutes per side. Keep an eye on it to avoid overcooking. Yes, you can use frozen shrimp for this recipe. Just make sure to thaw them first. Place them in the fridge overnight or run them under cold water for quick thawing. Pat the shrimp dry before marinating. This helps the marinade stick better. Zesty Lemon Garlic Shrimp goes well with many sides. Here are some great options: - Steamed rice or quinoa - Garlic bread or crusty baguette - Roasted vegetables like asparagus or broccoli - A fresh green salad with lemon vinaigrette - Pasta tossed in olive oil and herbs These sides will complement the bright flavors of the shrimp. For the full recipe, check out the main section on Zesty Lemon Garlic Shrimp. This post covered how to prepare zesty lemon garlic shrimp. You learned about the key ingredients, step-by-step cooking, and helpful tips. Remember to choose the right shrimp for the best taste. You can also explore fun variations to fit your meal. Storing leftovers properly keeps your dish tasty for later. Now you can cook shrimp with confidence. Enjoy your time in the kitchen and delight in every bite!

Zesty Lemon Garlic Shrimp Flavorful and Easy Recipe

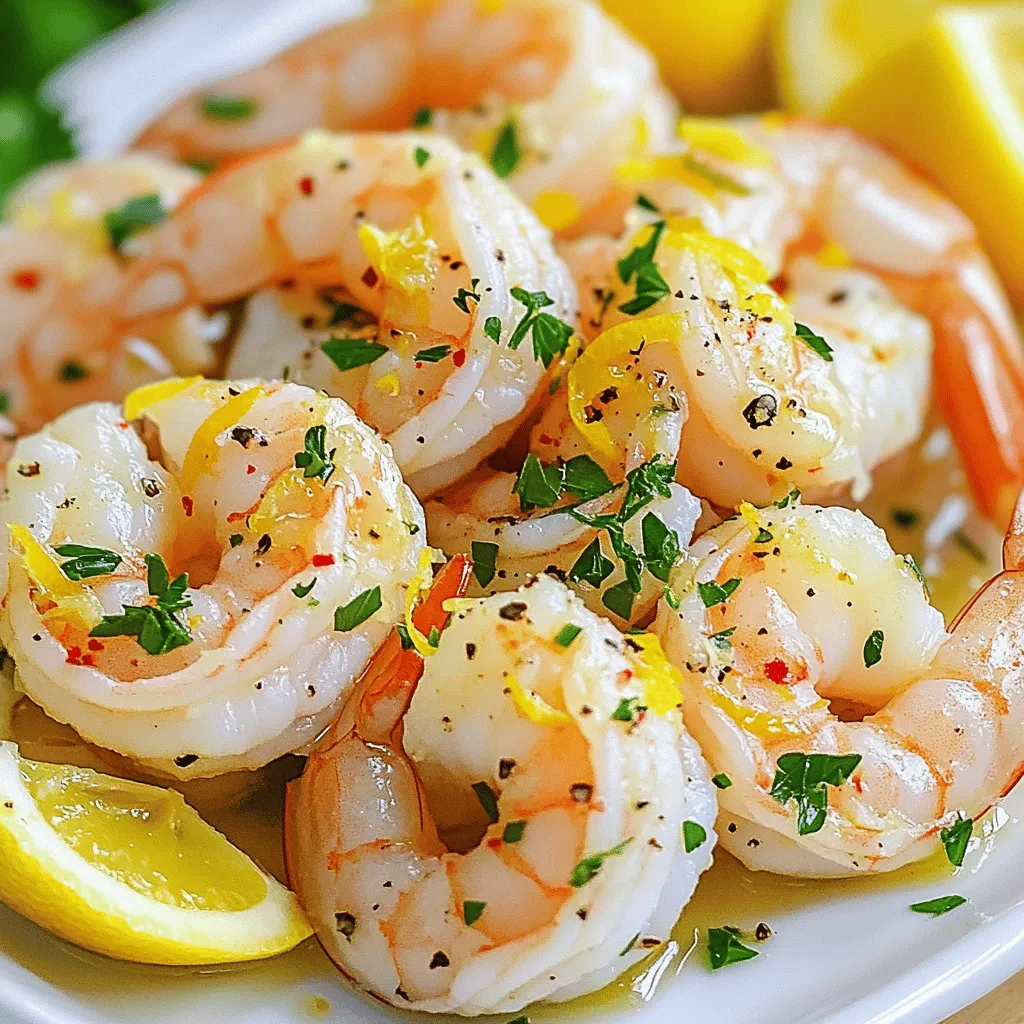
Craving a burst of flavor in your meal? You’ll love this Zesty Lemon Garlic Shrimp recipe. It’s quick, easy, and

To make this Heavenly Banana Walnut Cream Cake, gather these items: - 2 ripe bananas, mashed - 1 cup granulated sugar - 1/2 cup unsalted butter, softened - 2 large eggs - 1 teaspoon vanilla extract - 1 1/2 cups all-purpose flour - 1 teaspoon baking powder - 1/2 teaspoon baking soda - 1/4 teaspoon salt - 1/2 cup buttermilk - 1 cup walnuts, chopped - 1 cup heavy cream - 2 tablespoons powdered sugar - Optional: additional walnuts or banana slices for decoration Each ingredient plays a key role in the cake’s flavor and texture: - Ripe bananas add natural sweetness and moisture. - Granulated sugar gives sweetness and helps with browning. - Unsalted butter provides richness and a soft texture. - Eggs act as a binder and help the cake rise. - Vanilla extract enhances flavor. - Flour is the backbone of the cake, giving it structure. - Baking powder and baking soda create lift for a light cake. - Salt balances sweetness and brings out flavors. - Buttermilk adds moisture and a slight tang. - Walnuts contribute a crunchy texture and nutty flavor. - Heavy cream is whipped for a rich topping. - Powdered sugar sweetens the cream, making it fluffy. Choosing the right bananas and walnuts makes a big difference: - Bananas: Look for bananas that are ripe with brown spots. They should feel soft but not mushy. The more spots, the sweeter they will be. - Walnuts: Choose fresh, unsalted walnuts. Check for any signs of rancidity or an off smell. Toasting them lightly before adding can enhance their flavor. Follow these tips to ensure your cake is both tasty and delightful! For the full recipe, check out the detailed cooking instructions. 1. First, preheat your oven to 350°F (175°C). This is key for baking. 2. Grease and flour a 9-inch round cake pan. This helps the cake to come out easily. 3. In a mixing bowl, cream together the softened butter and granulated sugar until light and fluffy. This should take about 3 minutes. 4. Next, beat in the eggs one at a time. Stir in the mashed bananas and vanilla extract until well mixed. 5. In another bowl, whisk together the flour, baking powder, baking soda, and salt. This helps the cake rise well. 6. Gradually add the dry mix to the banana mixture, alternating with the buttermilk. Mix until just combined. Don’t overmix! 7. Fold in the chopped walnuts gently. This keeps the walnuts whole for a nice crunch. 8. Pour the batter into the prepared pan and spread it evenly. 9. Bake for about 25-30 minutes. Check with a toothpick in the center. It should come out clean. 10. Once done, let the cake cool in the pan for 10 minutes. Then, transfer it to a wire rack to cool completely. 11. While the cake cools, prepare the whipped cream. In a bowl, whip the heavy cream with the powdered sugar. Whip until soft peaks form. 12. Once the cake has cooled, spread the whipped cream evenly over the top. 13. For fun, garnish with additional walnuts or banana slices. This adds a nice touch and makes it look pretty. For the complete recipe, check out the Full Recipe section. Enjoy your baking! Baking can be tricky, and I’ve seen some common mistakes. First, do not skip the buttermilk. It makes the cake moist. Second, avoid overmixing the batter. This can make your cake tough. Lastly, check your oven temperature. An oven that is too hot can burn the cake. To get that perfect texture, use ripe bananas. They add natural sweetness and moisture. Make sure to mash them well. Next, cream the butter and sugar until fluffy. This adds air and lightens the cake. When mixing, add the dry and wet ingredients alternately. This keeps the batter light. For a lovely presentation, top the cake with whipped cream. You can add banana slices on top for color. Chopped walnuts also add a nice crunch. If you like, drizzle some honey or caramel sauce. This makes the cake even more tempting. For the full recipe, check out the detailed instructions above. {{image_2}} You can switch up some ingredients in the Heavenly Banana Walnut Cream Cake to suit your taste. For example, if you prefer a sweeter cake, use brown sugar instead of granulated sugar. This swap adds a nice caramel flavor. You can also use coconut oil in place of unsalted butter for a different twist. If you want a nut-free cake, simply leave out the walnuts or replace them with sunflower seeds. To make this cake even more exciting, you can add extra flavors. Try mixing in a teaspoon of cinnamon for warmth. You could also add a splash of rum or bourbon for a richer taste. Another option is to fold in chocolate chips for a sweet surprise. You can even mix in some shredded coconut for a tropical vibe. These additions will enhance the cake’s flavor and make it your own. If you have gluten or dairy restrictions, you can still enjoy this cake. Use a gluten-free flour blend instead of all-purpose flour. Many blends work well and keep the cake moist. For a dairy-free version, replace buttermilk with almond milk mixed with a teaspoon of vinegar. This will mimic the tanginess of buttermilk. Additionally, choose coconut cream or a dairy-free whipped topping for the cake's creamy layer. These changes will help you enjoy this delightful treat without worry. For the complete recipe, check out the Full Recipe. To keep your Heavenly Banana Walnut Cream Cake fresh, store it properly. First, allow the cake to cool fully. Then, cover it with plastic wrap or foil. You can also use an airtight container. This keeps the cake moist and stops it from drying out. If you want to save it for later, refrigerate it. When stored correctly, your cake can last about 3 to 5 days in the fridge. If you freeze it, it can last up to 3 months. Just make sure to wrap it well before freezing. When you are ready to eat it, thaw it in the fridge overnight. If you want to enjoy a warm slice, you can reheat the cake. Place a slice in the microwave for about 10 to 15 seconds. This warms it up nicely without making it dry. Serve it with a dollop of whipped cream or some fresh banana slices for extra flavor. For a fun twist, try adding a sprinkle of cinnamon on top! For the full recipe, visit the Full Recipe section. Yes, you can use frozen bananas. Just thaw them first. Drain any excess liquid. Mash them well before mixing. Frozen bananas work great in baked goods. They are often sweeter and softer. This can enhance the flavor and texture of your cake. You can bake the cake a day before serving. Let it cool completely. Wrap it tightly in plastic wrap. You can also store it in an airtight container. This keeps it fresh and moist. You can whip the cream topping on the day you serve. This way, it stays fluffy and light. If you don't have buttermilk, don't worry. You can make your own. Mix one cup of milk with one tablespoon of vinegar or lemon juice. Let it sit for about five minutes. This will mimic buttermilk's tangy taste. You can also use yogurt or sour cream mixed with water. This blog post covered everything you need for a delicious cake. We explored the key ingredients and their importance. I provided step-by-step baking instructions and tips to avoid common mistakes. You learned about fun variations and how to store your cake properly. Remember, using fresh bananas and walnuts makes a big difference. Bake smart, and enjoy your creation with a tasty whipped cream topping. Now, you have all the tools to make a perfect cake!

Heavenly Banana Walnut Cream Cake Easy and Delicious Recipe

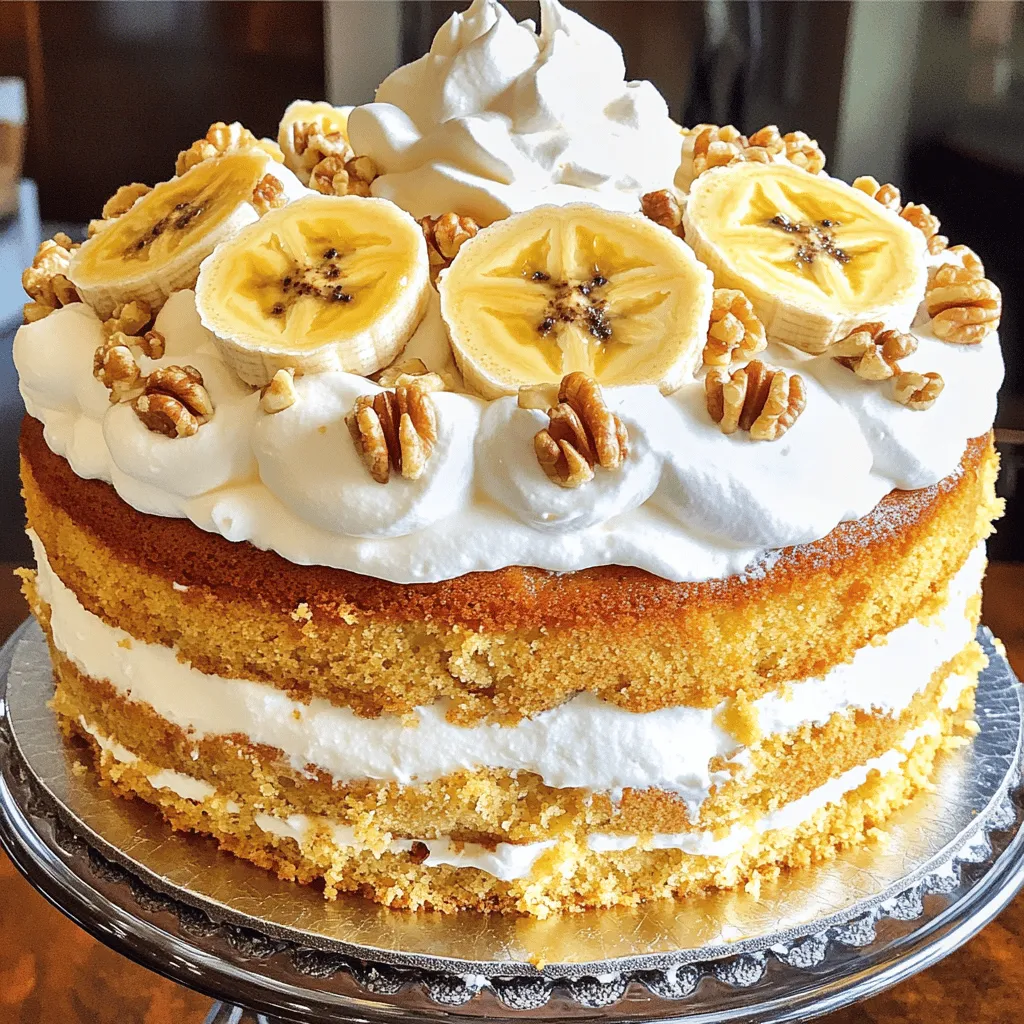
Are you ready for a dessert that tastes as good as it looks? My Heavenly Banana Walnut Cream Cake is

- 8 oz penne pasta - 1 lb chicken breast, diced - 2 cups broccoli florets - 1 cup heavy cream - 1 teaspoon Italian seasoning - 3 cloves garlic, minced - 1 cup grated Parmesan cheese - 2 tablespoons olive oil - Additional vegetables like bell peppers or carrots - Spices for flavor, such as red pepper flakes or paprika When I whip up Creamy Broccoli and Chicken Penne, I love to keep it simple yet flavorful. The main ingredients form the base of this dish. You need penne pasta, chicken breast, broccoli florets, and heavy cream. This combo creates a creamy, rich texture that wraps around the penne beautifully. Next, let's talk about seasoning. I always use Italian seasoning and minced garlic to add depth to the dish. A sprinkle of grated Parmesan cheese brings a nice salty flavor, while olive oil helps cook the chicken just right. Feel free to get creative with optional ingredients. You can toss in extra vegetables like bell peppers or carrots for color and nutrition. If you like heat, add spices like red pepper flakes or paprika. This dish is all about your taste and what you enjoy! For the full recipe, check the instructions to create this delightful meal. To start, fill a large pot with water. Add a pinch of salt and bring it to a boil. Once boiling, add 8 oz of penne pasta. Cook it according to the package instructions until it reaches an al dente texture. In the last 2 minutes of cooking, add the 2 cups of broccoli florets. This step keeps the broccoli bright and crisp. After everything is cooked, drain the pasta and broccoli together. Set them aside for later. Next, heat a large skillet over medium heat. Pour in 2 tablespoons of olive oil. When the oil is hot, add 1 lb of diced chicken breast. Season it with salt, pepper, and 1 teaspoon of Italian seasoning. Cook the chicken for about 6-8 minutes. Look for a golden brown color and ensure it is fully cooked. After that, stir in 3 cloves of minced garlic. Cook for one more minute until you smell that wonderful garlic aroma. Now it’s time to make the sauce. Pour in 1 cup of chicken broth and bring it to a simmer. Let it reduce slightly for about 3-4 minutes. Then, gradually whisk in 1 cup of heavy cream. This will make the mixture smooth and creamy. Next, stir in 1 cup of grated Parmesan cheese until it melts. If your sauce feels too thick, add a splash of chicken broth to loosen it. Finally, add the drained penne and broccoli back into the skillet. Toss everything well to coat it in the creamy sauce. Heat it through for about 2-3 minutes. Make sure to taste and adjust the seasoning if needed. Serve your creamy broccoli and chicken penne hot, garnished with fresh parsley and an extra sprinkle of Parmesan. For the full recipe, check out the previous section. Enjoy your meal! To keep your sauce smooth, avoid boiling it after adding cream. High heat can cause it to separate. Stir gently over low heat for best results. If your sauce gets too thick, add a splash of chicken broth. This will help bring it back to a nice creamy consistency. To keep chicken juicy, start with even-sized pieces. This ensures they cook evenly. Brown the chicken on medium heat. Don’t crowd the pan; this helps achieve a nice golden color. Use a meat thermometer to check for doneness. The chicken should reach 165°F for safe eating. For a pretty presentation, serve in deep bowls. Garnish with fresh parsley and an extra sprinkle of Parmesan. This adds color and taste. Pair your dish with a light salad or garlic bread. A crisp side will balance the creamy pasta nicely. For a complete cooking experience, check out the Full Recipe! {{image_2}} You can switch up the pasta type in this dish. Try whole wheat penne for a healthier option. Gluten-free pasta works well too. It gives the same great texture without gluten. If you want to swap chicken, you have options. You can use shrimp, turkey, or tofu. Each option adds a unique flavor twist. Just adjust cooking times based on your choice. To change the creaminess, consider Greek yogurt or light cream. Both options cut calories while keeping that rich taste. You can mix them in slowly to see how creamy you want it. If you're dairy-free, there are substitutes too. Coconut milk or almond milk can work well. Just make sure to choose unsweetened versions for the best flavor. Boost the flavor with spices or herbs. A pinch of red pepper flakes adds heat. Fresh basil or thyme can bring a lovely aroma. Experiment to find the mix you enjoy. You can also add different vegetables to the mix. Bell peppers, spinach, or peas all work well. They not only add color but also extra nutrition. For the full recipe, check out the detailed instructions above. To store leftover creamy broccoli and chicken penne, let it cool first. Use an airtight container. Keep it in the fridge. This meal stays fresh for about 3-4 days. If you want to keep it longer, consider freezing. When reheating, use a skillet or microwave. If using a skillet, add a splash of broth or cream. This helps keep it moist. Stir often to avoid burning. For the microwave, cover it to trap steam. This keeps the dish from getting soggy. To freeze creamy broccoli and chicken penne, use a freezer-safe container. Leave some space at the top for expansion. Label the container with the date. For best taste, eat it within 3 months. When ready to eat, thaw it in the fridge overnight before reheating. Yes, you can prepare creamy broccoli and chicken penne ahead of time. Cook the pasta and chicken as directed, then combine them with the sauce. Store everything in an airtight container. Keep it in the fridge for up to three days. When ready to eat, reheat gently on the stove. Add a splash of chicken broth to keep it creamy. To spice up your dish, add red pepper flakes while cooking the chicken. You can also mix in some hot sauce or diced jalapeños. If you like a smoky flavor, try adding smoked paprika. Start with a small amount, then taste and adjust to your heat preference. This dish pairs well with a simple green salad. A side of garlic bread also complements it nicely. You could serve it with roasted vegetables or a light soup for a complete meal. If you want to add more greens, consider sautéed spinach or kale. Yes, creamy broccoli and chicken penne is great for meal prep. It holds up well in the fridge and reheats nicely. Divide it into individual containers for easy grab-and-go meals. This makes it a perfect choice for busy weekdays. Absolutely! Frozen broccoli works well in this recipe. Just add it to the boiling pasta for the last two minutes. It cooks quickly and retains its nutrients. Plus, it saves you time and effort, making this dish even easier to prepare. This blog post covered a creamy chicken and broccoli penne recipe. You learned about key ingredients like penne pasta, chicken, and heavy cream. I shared step-by-step instructions, tips for perfect sauce, and variations to suit your taste. Remember, you can store leftovers and reheat them with care. Try this dish in your kitchen for a comforting meal. Cooking is fun, and experimenting can lead to tasty surprises! Enjoy the process as you create delicious meals for yourself or loved ones.

Creamy Broccoli and Chicken Penne Comfort Meal

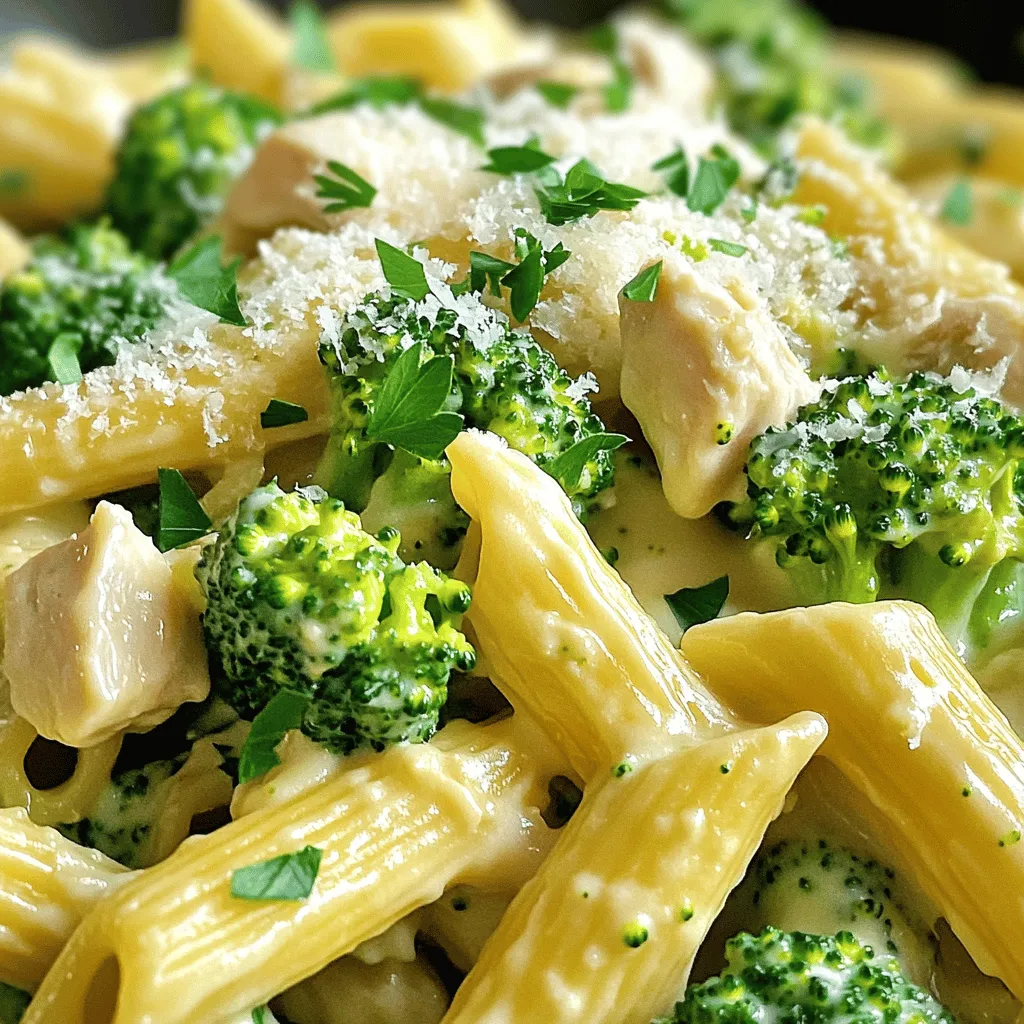
Looking for a warm, comforting meal that’s easy to make? This Creamy Broccoli and Chicken Penne dish is perfect for

Older posts
Newer posts
← Previous Page1 … Page60 Page61 Page62 … Page76 Next →
© 2025 My Cooking Cast • Built with GeneratePress

Our Policies

  • Privacy Policy
  • GDPR Policy
  • Terms Of Use
  • Copyright Policy
  • Cookie Policy
  • Disclaimer

More Information​

  • Home
  • Contact
  • About
  • Dinner
  • Appetizers
  • Dessert
©2025, My Cooking Cast About Privacy Policy Back To Top