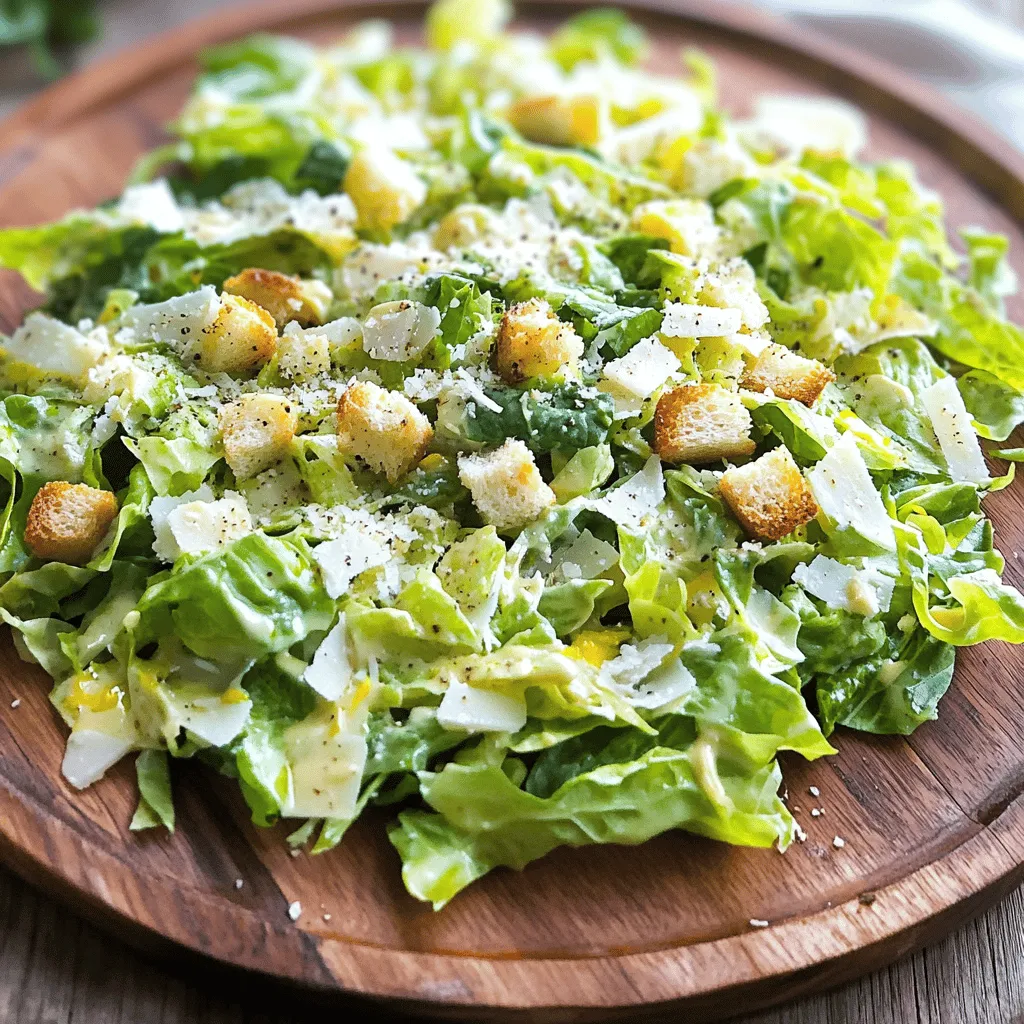
Classic Caesar Salad Fresh and Flavorful Delight
Welcome to the world of Caesar Salad, where crisp greens meet rich flavors! In this guide, I’ll show you how
Welcome to the world of Caesar Salad, where crisp greens meet rich flavors! In this guide, I’ll show you how
![To make a Vegan Lentil Shepherd’s Pie, you will need: - 1 cup green or brown lentils, rinsed - 2 cups vegetable broth - 1 medium onion, diced - 2 carrots, diced - 2 celery stalks, diced - 3 cloves garlic, minced - 1 cup frozen peas - 1 tablespoon tomato paste - 1 teaspoon dried thyme - 1 teaspoon dried rosemary - 2 tablespoons soy sauce - 2 tablespoons olive oil - Salt and pepper to taste - 4 large potatoes, peeled and cubed - 1/4 cup coconut milk (or other non-dairy milk) - 2 tablespoons nutritional yeast (optional) - Fresh parsley for garnish You can easily swap some ingredients for others. If you don’t have lentils, try canned beans. Use any vegetable broth you like. For the veggies, feel free to add mushrooms or bell peppers. If you prefer, you can use sweet potatoes instead of regular potatoes. If you want a creamier mash, add more coconut milk or use cashew cream. Nutritional yeast can be skipped if you don’t have it. This Vegan Lentil Shepherd’s Pie is not just tasty; it’s also healthy. Each serving is packed with protein and fiber from lentils. You get vitamins from the mix of vegetables. The potatoes provide carbs to give you energy. With coconut milk, you add healthy fats too. On average, one serving has around 300 calories, making it a filling meal without being heavy. For the full recipe, check the link. Start by rinsing 1 cup of lentils. Place them in a medium pot. Add 2 cups of vegetable broth. Bring the pot to a boil. Once boiling, lower the heat and let it simmer. Cook for about 25 to 30 minutes. The lentils should be tender but not mushy. After they are done, drain any extra liquid. Set the lentils aside for now. In a large skillet, pour in 2 tablespoons of olive oil. Heat it over medium heat. Add 1 diced onion, 2 diced carrots, and 2 diced celery stalks. Sauté the mix for about 5 to 7 minutes. You want the veggies soft but not brown. Next, add 3 minced garlic cloves to the skillet. Cook for 1 more minute, stirring often. This step makes the flavors pop! Now it’s time to combine everything. Take the cooked lentils and add them to the skillet. Stir in 1 tablespoon of tomato paste, 1 teaspoon of dried thyme, and 1 teaspoon of dried rosemary. Pour in 2 tablespoons of soy sauce and add 1 cup of frozen peas. Season with salt and pepper to taste. Cook for another 5 minutes. This mix becomes the filling for your pie. For the mashed potatoes, boil 4 large cubed potatoes in salted water. Cook for about 15 to 20 minutes. Drain and return them to the pot. Add 1/4 cup of coconut milk and 2 tablespoons of nutritional yeast if you want a cheesy taste. Mash until smooth and creamy. Now, preheat your oven to 400°F (200°C). In a baking dish, spread the lentil and vegetable mix evenly. Top it with the creamy mashed potatoes. Make sure to cover the filling completely. This step-by-step guide will help you create a hearty and comforting dish. For the complete recipe, check out the Full Recipe section! To make great mashed potatoes, start with the right potatoes. Use starchy types like russet or Yukon gold. Peel and chop them into even pieces. This helps them cook evenly. Boil them in salted water until fork-tender. Drain them well to remove excess water. For creaminess, add coconut milk and mash until smooth. If you like, you can add nutritional yeast for a cheesy flavor. Seasoning is key to a tasty dish. Start with a little salt and pepper. Taste the filling before baking. You can always add more seasoning later. If you want a kick, try adding red pepper flakes or smoked paprika. Herbs like thyme and rosemary can boost the flavor too. Adjust to what you enjoy most. Gather these tools for easy cooking: - A medium pot for lentils - A large skillet for vegetables - A baking dish for the pie - A potato masher for the potatoes - A chopping board and knife for prep - Measuring cups and spoons for accuracy These tools will help you create a perfect Vegan Lentil Shepherd’s Pie. For the full recipe, check [Full Recipe]. {{image_2}} You can change up the veggies in this dish. Try adding mushrooms for a meaty flavor. Sweet potatoes add a nice sweetness and color. Bell peppers bring a crunch and bright taste. You can also use zucchini or green beans for added nutrition. Mix and match to suit your taste. Just chop them small for even cooking. Want to make your Vegan Lentil Shepherd’s Pie even heartier? Add tempeh or tofu. Tempeh gives a nutty flavor and extra protein. Crumble it into the lentil mix. Tofu can add creaminess. Use firm tofu and mash it before mixing. Both options make the dish more filling and nutritious. Herbs and spices take this pie to the next level. Add fresh parsley or cilantro for brightness. A pinch of smoked paprika gives a warm, smoky flavor. You can also try adding a dash of cumin for a savory kick. Don’t forget about nutritional yeast; it adds a cheesy taste. Experiment with these to find your perfect flavor mix. For the complete recipe, check out the Full Recipe link. After making Vegan Lentil Shepherd’s Pie, let it cool down. Place leftovers in an airtight container. Store in the fridge for up to five days. When ready to eat, check for any signs of spoilage. You can freeze Vegan Lentil Shepherd’s Pie for longer storage. First, let it cool completely. Cut it into portions for easy use later. Wrap each portion tightly in plastic wrap, then place in a freezer-safe bag. It can last for about three months in the freezer. Remember to label the bags with the date. To reheat, you can use the oven or the microwave. For the oven, preheat it to 350°F (175°C). Place the pie in an oven-safe dish and cover it with foil. Heat for about 20-25 minutes or until hot. For the microwave, place a portion on a microwave-safe plate. Heat for 2-3 minutes, checking every minute. Enjoy your warm, hearty meal again! For the full recipe, check out the original instructions above. Yes, you can make this recipe gluten-free. Just use gluten-free soy sauce or tamari. Both work well in place of regular soy sauce. This small change keeps the taste great while making it safe for gluten-free diets. To add heat to your Vegan Lentil Shepherd’s Pie, try adding red pepper flakes. Start with a pinch and taste it. You can also mix in diced jalapeños or a splash of hot sauce. These options let you control the spice level to suit your taste. Many sides complement this dish wonderfully. A simple green salad with a light dressing works well. Roasted vegetables also pair nicely, adding color and flavor. For a heartier meal, serve it with crusty bread or garlic bread. These sides enhance the comfort food vibe of the shepherd's pie. For the complete recipe and more details, check out the Full Recipe. In this blog post, we explored a delicious Vegan Lentil Shepherd’s Pie. We covered ingredients, cooking steps, and useful tips. You can adjust flavors and add veggies or proteins to fit your taste. Proper storage keeps leftovers fresh for later meals. Now you can whip up this dish and impress everyone. With simple changes, this recipe can suit any preference. Enjoy your cooking and share your results!](https://mycookingcast.com/wp-content/uploads/2025/06/f9c4da1f-028c-46e2-91a2-deda6ba54625.webp)
Looking for a dish that warms the heart and satisfies your taste buds? This Vegan Lentil Shepherd’s Pie is your

Are you ready to warm up with a bowl of delicious roasted butternut squash soup? This easy recipe combines sweet
![To make crispy baked avocado fries, you need the following ingredients. Each one plays a key role in achieving that delicious crunch and flavor. - 2 ripe avocados, halved and pitted - 1 cup all-purpose flour - 2 large eggs, beaten - 1 cup breadcrumbs (preferably panko for extra crunch) - 1 teaspoon garlic powder - 1 teaspoon paprika - 1 teaspoon salt - 1/2 teaspoon black pepper - Optional: 1 teaspoon cayenne pepper (for added kick) - Cooking spray Using ripe avocados is essential. They should be firm yet slightly soft to the touch. If you want to add some spice, cayenne pepper gives a nice kick, but it's not necessary. If you don't have panko, regular breadcrumbs work, but panko gives a crunchier texture. For a healthier option, you can use whole wheat flour instead of all-purpose flour. If you need to avoid eggs, consider using flaxseed meal mixed with water as a substitute. With these ingredients, you will create a tasty treat that everyone will love. Don't forget to check out the Full Recipe for more details! 1. Preheat your oven to 425°F (220°C). This step is key for crispiness. Then, line a baking sheet with parchment paper. It makes cleanup easy. 2. Cut the avocados correctly. Slice each avocado in half and remove the pit. Then, cut each half into wedges. Aim for about 4 to 6 wedges per avocado. This gives you the perfect size for frying. 3. Set up your breading station. Use three separate bowls: - In the first bowl, mix the flour, garlic powder, paprika, salt, black pepper, and cayenne pepper if you like some heat. - In the second bowl, add the beaten eggs. - In the third bowl, pour in the breadcrumbs. I recommend using panko for added crunch. 1. Dredge each avocado wedge in the flour mixture first. Make sure it gets coated well. Shake off any extra flour. 2. Dip the floured wedge into the beaten eggs. Cover it fully with egg so the breadcrumbs stick well. 3. Roll the wedge in the breadcrumbs. Press gently to make sure they adhere well. This step is what gives the fries their crunch. 1. Place the coated avocado fries on the lined baking sheet. Make sure they sit in a single layer so they cook evenly. 2. Tips for achieving crispiness: Lightly spray the fries with cooking spray. This helps them brown nicely. Flip them halfway through baking for even cooking. 3. Bake in the preheated oven for about 20 to 25 minutes. Look for a golden brown color and crispy texture. Enjoy your crispy baked avocado fries! For the full recipe, check out the details above. To make sure your avocado fries come out perfectly, coat them well. Start by dredging the avocado wedges in the flour mixture. Make sure every side gets a good coat. Shake off extra flour to avoid clumps. After that, dip the wedges in the beaten eggs. This helps the breadcrumbs stick better. Finally, roll them in breadcrumbs. Press gently so they stick well. Flipping the fries halfway through baking is key. This ensures they cook evenly and get crispy all around. Adding spices can take your avocado fries to the next level. Try garlic powder, paprika, and salt for a tasty base. If you want a kick, add cayenne pepper. Fresh herbs like cilantro or parsley can also boost flavor. For dipping sauces, I recommend spicy mayo or a cool cilantro-lime sauce. These will complement the fries nicely and add extra taste. One common mistake is overcooking the fries. Keep an eye on them, especially towards the end of baking. They should be golden brown and crispy, not burnt. Another tip is to prevent the avocados from browning. Once cut, sprinkle lemon juice on the wedges before breading. This keeps them looking fresh and tasty. For the full recipe, check out [Full Recipe]. {{image_2}} You can switch up the breadcrumbs for more crunch. Try using whole wheat or cornflake crumbs. These options add a new taste and texture. You can also sprinkle grated cheese on top before baking. Parmesan or cheddar works great for an extra cheesy bite. If you like heat, add more cayenne pepper to the flour mix. You can also drizzle some hot sauce on the avocado wedges. For a fun twist, try spice blends like taco seasoning or Cajun mix. Both will give your fries a zesty flavor. To make this dish vegan, replace eggs with flaxseed meal. Mix one tablespoon of flaxseed meal with three tablespoons of water. Let it sit for a few minutes to thicken. For the coating, you can use chickpea flour or ground oats instead of regular flour. These options keep the fries tasty and plant-based. For the full recipe, check out the Crispy Baked Avocado Fries section. Enjoy your cooking! To keep your crispy baked avocado fries fresh, place them in an airtight container. Refrigerate them right after they cool down. They stay fresh for about 2-3 days. After that, they may lose their crispness and flavor. For the best reheating method, use an oven or an air fryer. Preheat your oven to 350°F (175°C). Place the fries on a baking sheet and heat for about 10-15 minutes. This method helps them regain their crispness. Avoid using a microwave, as it makes them soggy. Yes, you can freeze baked avocado fries! To do this, let them cool completely. Then, place them in a single layer on a baking sheet and freeze for about 1-2 hours. Once frozen, transfer them to a freezer bag or container. They can stay fresh in the freezer for up to 3 months. To defrost, leave them in the fridge overnight, then reheat in the oven as described above. Enjoy your crispy treat anytime! For the complete recipe, check out the Full Recipe. You can easily skip eggs in this recipe. Try using one of these substitutes: - Flaxseed meal: Mix 1 tablespoon of flaxseed meal with 2.5 tablespoons of water. Let it sit for a few minutes to thicken. - Chia seeds: Use 1 tablespoon of chia seeds mixed with 2.5 tablespoons of water, just like flaxseed. - Applesauce: Use 1/4 cup of unsweetened applesauce as a binder. - Silken tofu: Blend 1/4 cup of silken tofu until smooth for a creamy coating. These options work well to keep your avocado fries crispy and tasty. Yes, you can! The best types of avocados for baking include: - Hass avocados: They are creamy and rich, perfect for baking. - Fuerte avocados: They have a smooth texture and mild flavor. - Bacon avocados: These are less oily and have a firm texture. Choose ripe avocados for the best results. These fries are great with various dips and sides. Here are some suggestions: - Spicy mayo: Mix mayonnaise with sriracha for a creamy, spicy dip. - Cilantro-lime dip: Blend cilantro, lime juice, and yogurt for a fresh flavor. - Guacamole: This classic dip pairs well with the fries. - Salsa: Fresh tomato salsa adds a zesty kick. You can also serve them with a side salad for a complete meal. Baked avocado fries can last in the fridge for 3-4 days. Store them in an airtight container. If you want to freeze them, they can last up to 3 months. Make sure to freeze them in a single layer, then transfer to a container. Yes, baked avocado fries are a healthy snack! They are rich in healthy fats, fiber, and vitamins. Avocados contain potassium, which helps with heart health. Baking instead of frying cuts down on extra oil and calories. Enjoy these fries as a tasty treat without guilt. For the full recipe, check out the Crispy Baked Avocado Fries 🥑 section. In this post, I covered how to make delicious baked avocado fries from start to finish. We explored the right ingredients, preparation steps, and baking techniques needed for success. I also shared tips to enhance flavor and common mistakes to avoid. You can enjoy different variations, including vegan options. Remember, storing and reheating properly helps maintain their crispiness. Follow these steps, and you'll make tasty avocado fries that everyone loves. Happy cooking!](https://mycookingcast.com/wp-content/uploads/2025/06/9645e249-f48d-41fd-b0f9-e1d1da628789.webp)
Looking for a tasty snack that’s also healthy? Try my Crispy Baked Avocado Fries! With just a few simple ingredients,

Looking for a cozy meal that is quick and healthy? You’ve found it! This Savory Chicken Zoodle Soup combines tender
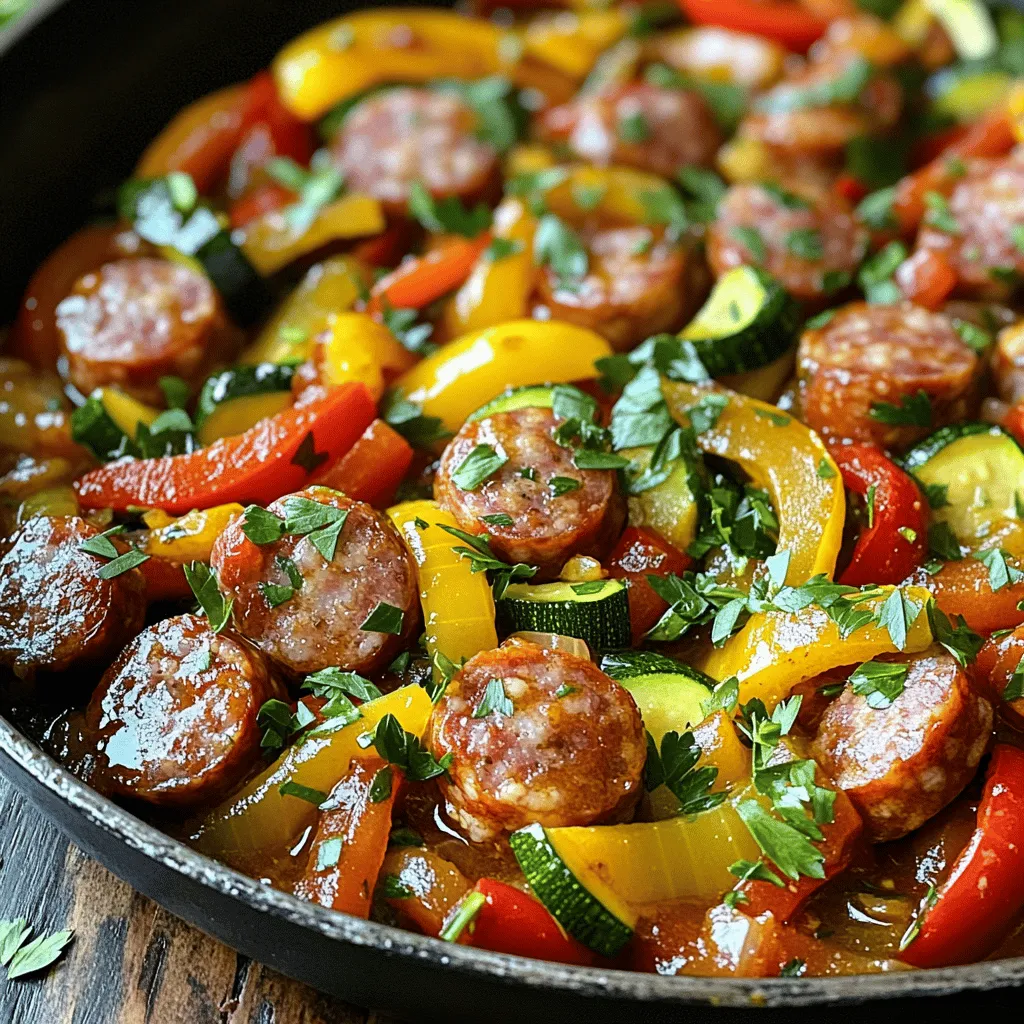
Looking for a fast, tasty dinner? Try this Sausage and Veggie Skillet! It’s not just quick to cook; it’s full
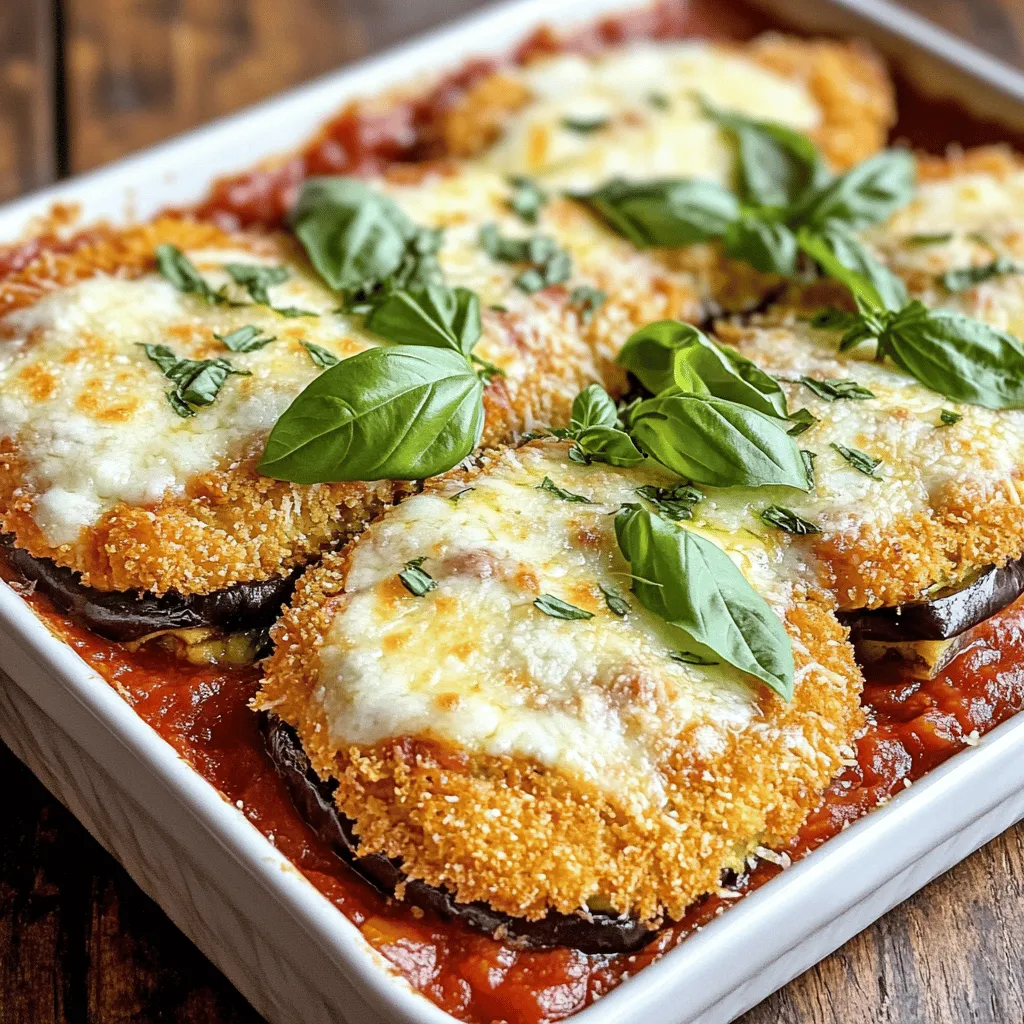
Looking for a delicious, cheesy dish that will impress everyone? Try my Baked Eggplant Parmesan! This recipe is packed with

Craving a simple, tasty treat? You’ll love these No-Bake Chocolate Peanut Butter Bars! They combine creamy peanut butter, honey, and

Ready to elevate your comfort food game? This Cheesy Cauliflower Bake is creamy, cheesy, and oh-so-satisfying. With just a few

Are you craving crispy French fries without the guilt? With this quick and easy air fryer recipe, you can enjoy
