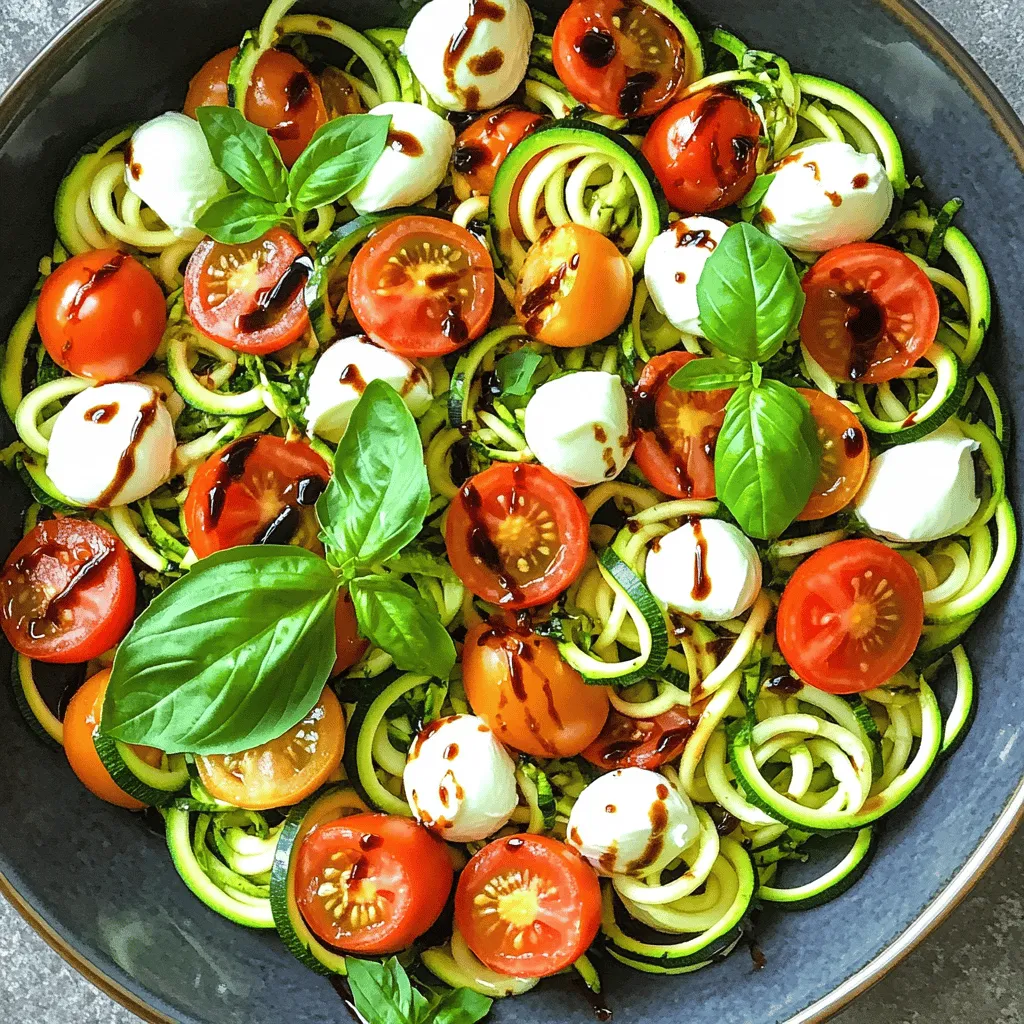
Caprese Zoodle Salad Fresh and Flavorful Dish
Looking for a fresh and flavorful dish? Try my Caprese Zoodle Salad! This vibrant meal combines spiralized zucchini, juicy cherry
Looking for a fresh and flavorful dish? Try my Caprese Zoodle Salad! This vibrant meal combines spiralized zucchini, juicy cherry
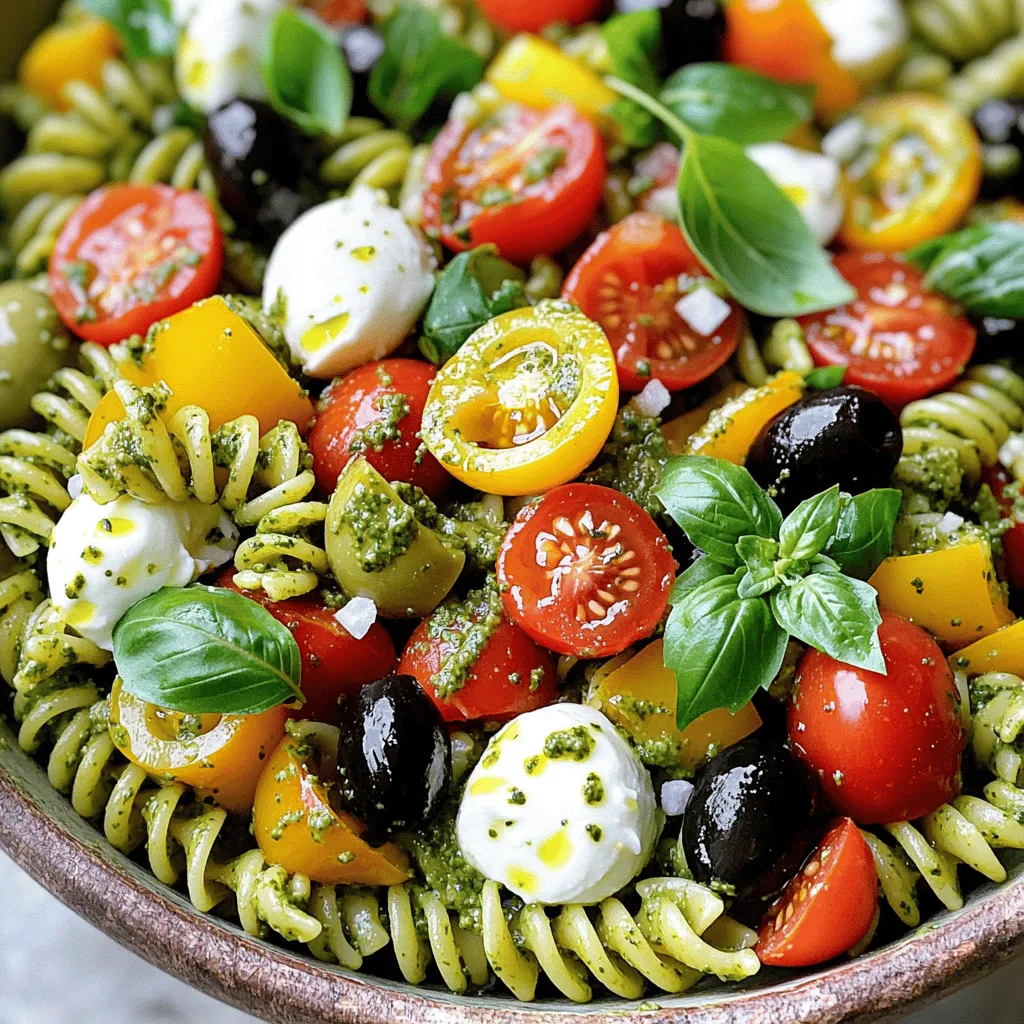
Looking for a fresh and tasty meal idea? You’ve come to the right place! My Pesto Pasta Salad is packed
![- 4 large russet potatoes - 1 cup shredded sharp cheddar cheese - 1 cup shredded pepper jack cheese - 1/2 cup sour cream - 1/4 cup sliced green onions - 1/4 cup cooked bacon bits (optional) - 1 jalapeño, finely diced - 2 tablespoons olive oil - 1 teaspoon garlic powder - 1 teaspoon smoked paprika - Salt and pepper to taste - Alternative cheeses like gouda or mozzarella - Spices such as cumin or chili powder for extra flavor - Baking sheet - Fork - Knife - Mixing bowl To make loaded potato skins, gather these ingredients first. The russet potatoes are the base. You want large ones for the best yield. The sharp cheddar and pepper jack bring a great taste. The sour cream adds creaminess, while green onions give a fresh crunch. The bacon bits and jalapeño add richness and spice, making every bite special. For cooking, you will need a few simple tools. A fork helps poke the potatoes. A knife is key for cutting them open. A mixing bowl is handy for combining ingredients. Finally, a baking sheet holds the potato skins as they bake to perfection. This recipe is fun and flexible. Feel free to customize with your favorite cheeses and spices. Check out the Full Recipe for more details on cooking this tasty snack! - First, preheat your oven to 400°F (200°C). - Next, scrub the potatoes under running water. Make sure they are clean. Dry them well. Use a fork to poke holes in each potato. - Then, rub the potatoes with olive oil and sprinkle salt over them. Place the potatoes directly on the oven rack. Bake for 45-60 minutes until tender. - Once the potatoes are done, let them cool for about 10 minutes. This helps you handle them. Reduce the oven temperature to 425°F (220°C). - Slice each potato in half lengthwise. Scoop out some flesh, leaving about 1/4 inch of skin. Keep the scooped potato for another dish, like mashed potatoes! - Brush the insides of the potato skins with more olive oil. Season them with garlic powder, smoked paprika, salt, and pepper. - Place the potato skins cut-side up on a baking sheet. - Fill each skin with a mix of cheddar and pepper jack cheese. Add diced jalapeños and bacon bits if you want them. - Bake for another 10-15 minutes until the cheese is melted and bubbly. - When done, let them cool a bit. Top with sour cream and sliced green onions. Enjoy! For the full recipe, check the [Full Recipe]. To get crispy potato skins, follow a few simple steps. First, bake the potatoes at 400°F for 45-60 minutes. This high heat helps cook them well. After baking, let them cool for 10 minutes. Then, slice them in half and scoop out some flesh. Leave a thin layer of potato for crispness. For seasoning, use salt and pepper generously. Garlic powder and smoked paprika also add great flavor. Brush the inside with olive oil before baking again. This step helps achieve that perfect crunch. To boost the taste, consider adding spices. A pinch of cayenne pepper can give a nice kick. Another great option is a sprinkle of onion powder for depth. Using different cheeses can also enhance the flavor. Try mixing mozzarella for stretchiness or feta for a tangy twist. The combination of sharp cheddar and pepper jack is a classic choice. Feel free to experiment! When serving, a good presentation matters. Place the potato skins on a large platter for a fun look. Stack them slightly askew for a casual feel. Garnish with green onions and a small bowl of sour cream. For gatherings, serve them with a side of mixed dips. Guacamole or salsa can complement the flavors well. These tips make your loaded potato skins a hit at every event! For the complete recipe, refer to the Full Recipe. {{image_2}} You can get creative with fillings for your loaded potato skins. For a vegetarian twist, try black beans, corn, and diced tomatoes. These give a fresh taste and a nice crunch. You can also add diced bell peppers for more color. If you prefer meat, pulled pork or shredded chicken works great. Both options add protein and flavor, making your snack more filling. Toppings can make your potato skins unique. Use different sour cream flavors like ranch or chipotle for a fun twist. You can also drizzle hot sauce or a zesty salsa on top for added flavor. Adjust the spice level based on your taste. If you love heat, add more jalapeños or some crushed red pepper. Change your potato skins with the seasons! In summer, use fresh vegetables like zucchini or bell peppers. For fall, roasted pumpkin or butternut squash can add a warm touch. During the holidays, try topping your skins with cranberry sauce or festive spices. These seasonal changes keep your dish fun and exciting. For the full recipe, check out the details above! To keep your loaded potato skins fresh, store them in the fridge. Place them in an airtight container. Make sure they cool down first. They will last for about 3 to 5 days. If you want to keep them longer, freeze them. Wrap each skin tightly in plastic wrap. Then, place them in a freezer bag. They can stay good for up to 3 months in the freezer. To reheat your potato skins, the oven works best. Preheat the oven to 350°F (175°C). Place the skins on a baking sheet. Heat for about 10 to 15 minutes. This keeps them crispy and tasty. You can also use a microwave, but they may turn soft. If you use the microwave, heat for about 1-2 minutes only. Leftovers last about 3 to 5 days in the fridge. After that, check for signs of spoilage. Look for any changes in color or smell. If they smell sour or look off, toss them out. If frozen, use them within 3 months for the best taste. To cook potato skins, you need about 45-60 minutes. First, bake the whole potatoes at 400°F (200°C) until soft. After scooping, bake the skins again at 425°F (220°C) for 10-15 minutes. This gives a crispy finish. Yes, you can make loaded potato skins ahead. Bake the potatoes and scoop them out. Store the potato skins in the fridge for up to two days. When ready to eat, fill them and bake as usual. This saves time and makes meal prep easy. Loaded potato skins pair well with many dishes. Try serving them with: - A fresh garden salad - Grilled meats like chicken or steak - Spicy salsa or guacamole - A cold beer or soft drinks These sides balance the richness of the potato skins. Enjoy your meal! For the full recipe, check out the complete guide. In this post, we explored how to make loaded potato skins from scratch. We covered the must-have ingredients, preparation steps, and cooking techniques to achieve crispy skins filled with cheese and toppings. The tips and variations offer ways to customize your dish for any occasion. Remember, you can adjust flavors and ingredients to match your tastes. Enjoying these potato skins can bring delight to any meal or gathering. Happy cooking and savor every bite!](https://mycookingcast.com/wp-content/uploads/2025/06/f0609b60-5642-4ee3-bc48-f6a1451d3f53.webp)
Looking for a snack that’s both delicious and super easy to make? Loaded potato skins are the perfect choice! With
![To make Simple Chicken Piccata, you need a few key items. Here’s what you’ll need: - 4 boneless, skinless chicken breasts - Salt and pepper to taste - 1/2 cup all-purpose flour - 4 tablespoons olive oil - 2 tablespoons unsalted butter - 2 cloves garlic, minced - 1 cup chicken broth - Juice of 1 large lemon (about 3-4 tablespoons) - 2 tablespoons capers, rinsed - Fresh parsley, chopped (for garnish) These ingredients create a bright and zesty dish that shines on any table. While the essential ingredients are great, you can add a few optional ones. These will take your dish to the next level: - White wine adds depth and richness. - Fresh herbs like thyme or basil for extra flavor. - A dash of red pepper flakes for a hint of spice. Feel free to mix and match based on your taste. Sometimes, you might not have all the ingredients. Here are some substitutes: - For chicken broth, you can use vegetable broth. - If you don’t have capers, try chopped green olives instead. - Use lemon zest if you want more lemony flavor. Always taste as you go. This helps you adjust flavors to your liking. For the full recipe, check the detailed instructions provided above. First, take your chicken breasts. Season both sides with salt and pepper. This step adds great flavor. Next, dredge each breast in flour. Shake off any extra flour. This helps create a nice crust when you cook them. Heat a large skillet over medium-high heat. Add 2 tablespoons of olive oil. When the oil is hot, add the chicken breasts. Cook for 4-5 minutes on each side. You want them golden brown and fully cooked. Once done, remove the chicken from the skillet and set it aside. In the same skillet, add the rest of the olive oil and the butter. Once the butter melts, add minced garlic. Sauté for about 30 seconds until you smell its nice aroma. Pour in the chicken broth and lemon juice. Scrape the bottom of the skillet to mix in all the flavorful bits. Stir in the rinsed capers. Let the sauce simmer for 2-3 minutes to reduce slightly. Finally, return the chicken to the skillet, coating it in the sauce. Cook for another minute to warm through. Enjoy your Simple Chicken Piccata! For the full recipe, check out the details above. To make the best chicken piccata, start with good chicken. Choose fresh, high-quality breasts. Season them well with salt and pepper. Dredge the chicken in flour lightly. This helps create a nice crust. Heat the skillet well before adding the chicken. This ensures a good sear. Cook the chicken until golden brown on both sides. Don’t overcrowd the pan; work in batches if needed. Keep a close eye on the cooking time. Aim for about 4-5 minutes per side. Chicken piccata shines on its own but loves good company. Serve it over a bed of pasta for a hearty meal. A side of steamed veggies adds color and nutrition. Garlic bread is a great choice, too. The crispy texture pairs well with the sauce. For drinks, a chilled white wine complements the lemon flavor. If you prefer non-alcoholic options, iced tea or sparkling water works well. Store any leftovers in an airtight container. Keep them in the fridge for up to three days. When reheating, use a skillet over low heat. Add a splash of chicken broth to keep it moist. You can also reheat in the microwave. Just cover it to prevent drying out. For best taste, enjoy it fresh. But the flavors will still be good for a few days. For a quick meal, the leftovers are perfect! You can even make a sandwich. Just add some greens and your favorite spread. For the full recipe, check out the Zesty Lemon Herb Chicken Piccata. {{image_2}} You can swap chicken for other proteins in chicken piccata. Fish works well here. Use thin fillets of tilapia or sole. They cook quickly and soak up flavors. Pork is another tasty choice. Pork chops or tenderloin also shine in this dish. Just adjust cooking times to ensure they are cooked through. If you want a vegetarian take, try using eggplant or mushrooms. Slice the eggplant into rounds and cook until golden. For mushrooms, use large portobellos. They have a nice texture and flavor. Both options absorb the lemon and caper sauce beautifully. Add some fresh spinach for extra color and nutrition. The sauce is where you can get creative! Try adding white wine for depth. This adds a nice zing to the dish. You can also mix in fresh herbs like thyme or basil. For a spicy kick, add red pepper flakes. Each variation can change the taste, making it fun to explore. Check the Full Recipe for the basic steps and more ideas. To keep your chicken piccata fresh, let it cool first. Place the chicken and sauce in a container. Use an airtight container to avoid air exposure. Store it in the fridge for up to three days. Label the container with the date for easy tracking. If you want to freeze chicken piccata, follow these steps. Cool the dish completely before freezing. Transfer the chicken and sauce into freezer bags. Remove as much air as possible to prevent freezer burn. You can freeze it for up to three months. Make sure to label each bag with the date and contents. When reheating chicken piccata, use a stovetop or microwave. For stovetop, place the chicken in a skillet over low heat. Add a splash of chicken broth or water to keep it moist. Cover the pan to trap steam, which helps to warm it evenly. For the microwave, heat in short intervals to avoid overcooking. Stir the sauce to blend flavors before serving. Enjoy your dish with its fresh taste! You can make Simple Chicken Piccata in just 20 minutes. The prep takes about 10 minutes. Cooking the chicken and sauce takes the remaining 10 minutes. It’s quick and easy. Yes, you can make chicken piccata ahead of time. Cook it, let it cool, and store in the fridge. When ready to serve, just reheat in a pan. Add a splash of chicken broth to keep it moist. If you don’t have capers, you can use green olives instead. They add a nice briny taste. You can also use chopped pickles for a similar flavor. Just remember, the taste will change a bit, but it will still be tasty. For the full recipe, check out the [Full Recipe]. Simple Chicken Piccata is a dish that shines with fresh flavors. We explored essential ingredients, plus options to elevate your meal. I shared easy steps for preparation and cooking. Cooking tips ensure your chicken turns out just right every time. You can even find variations to suit different tastes. Remember, proper storage makes leftovers just as tasty. With this info, you can cook or adapt this dish now. Dive into making it for your next meal. Enjoy the fresh flavors and have fun in the kitchen!](https://mycookingcast.com/wp-content/uploads/2025/06/abef3bbe-17be-4cbc-ac5e-2b194d1de162.webp)
Are you craving a quick and tasty dish? Simple Chicken Piccata is your answer! This classic meal is easy to
![- 12 cherry tomatoes - 12 mini mozzarella balls - 12 fresh basil leaves - 2 tablespoons balsamic glaze - 1 tablespoon extra virgin olive oil - Salt and pepper to taste - 12 wooden or bamboo skewers How do I pick ripe cherry tomatoes? Look for tomatoes that are bright and firm. The skin should have no blemishes. A sweet smell means they are ripe. What should I look for in fresh basil? Choose basil with bright green leaves. The leaves should be crisp and fragrant, not wilted. Avoid discolored leaves. Why is quality balsamic glaze important? A good balsamic glaze has rich flavor and sweetness. Avoid cheap versions that taste too acidic or thin. A thick, syrupy glaze adds the best taste to your skewers. Using quality ingredients makes your Easy Caprese Skewers taste amazing. These simple choices make a big difference. For the full recipe, check out the details above. Start by rinsing the cherry tomatoes and fresh basil leaves under cold water. This step ensures they are clean and ready to eat. After rinsing, pat both the tomatoes and basil leaves dry with a paper towel. This helps to remove excess water, which can make your skewers soggy. Next, prepare your mozzarella balls. If they come in water, drain them well. You want them dry so they will stick well to the other ingredients. If you have larger balls, cut them in half for better threading. This will make it easier to fit them onto the skewers. Now, it's time to assemble your skewers. Take a wooden or bamboo skewer and thread one cherry tomato onto it. Next, add a fresh basil leaf, followed by a mozzarella ball. Repeat this process until you use all the ingredients. End with a cherry tomato on top for a bright finish. For a visually appealing skewer, try to alternate the colors and shapes. This will make your skewers look more vibrant and inviting. Keep the ingredients snug but not too tight, allowing the flavors to blend nicely without falling apart. Once all your skewers are assembled, it's time to add some flavor. Drizzle the skewers with extra virgin olive oil and balsamic glaze. This adds a rich taste and enhances the overall experience. Aim for a light drizzle to avoid overpowering the fresh ingredients. Finally, season with salt and pepper to taste. Sprinkle it evenly over the skewers to ensure every bite has flavor. For an extra touch, you can drizzle a bit more balsamic glaze over the top before serving. This makes them look professional and appetizing. Make sure to check out the Full Recipe for additional tips and serving suggestions! To make stable skewers, start with a cherry tomato. Next, add a basil leaf. Then, thread a mozzarella ball. Repeat until all ingredients are on the skewer. End with another tomato. This order keeps everything balanced and colorful. Common mistakes include overcrowding the skewer and not using fresh ingredients. Avoid pushing the items too close together. Each piece should have space to shine. Fresh ingredients taste better and look more appealing. For serving, choose a large white platter. It makes the colors pop. You can also use wooden boards for a rustic feel. Arrange the skewers in a fan shape or in rows. This way, guests can easily grab one. Pair your skewers with a light white wine, like Sauvignon Blanc. It complements the flavors well. You can also serve them with other appetizers, like bruschetta or olives, for a tasty spread. To spice things up, try adding toppings like pesto or sun-dried tomatoes. These add depth to each bite. You can also sprinkle some Italian herbs for extra flavor. If you like heat, add sliced jalapeños or a pinch of chili flakes. This will give your skewers a fun kick. For the full recipe, check out the Easy Caprese Skewers Delight! {{image_2}} If you want to make your Caprese skewers vegan, you can swap out the mozzarella. Use marinated tofu or avocado instead. Both options add creaminess and taste great. You can also explore different veggies. Try bell peppers, zucchini, or artichokes. These add color and crunch, making your skewers even more exciting. Caprese skewers fit many themes. For an Italian night, pair them with pasta and wine. They add a fresh touch to the meal. In summer, these skewers shine at BBQs. Just serve them cold for a refreshing bite. For holidays, use colorful cherry tomatoes and festive garnishes. They brighten any gathering. Serving your skewers can be fun! Use a wooden board or a colorful plate to display them. You can even stand them upright in a jar! This makes them easy to grab. Add edible flowers or herbs for a pop of color. These simple touches impress your guests and make your dish stand out. For more details, check out the [Full Recipe]. To keep your leftover Caprese skewers fresh, store them in the fridge. Place them in an airtight container. This helps prevent the flavors from mixing too much. If you have extra cherry tomatoes or basil, store these separately. This keeps everything fresh for longer. - Best practices for refrigeration: Use a container that seals tightly. - How to store ingredients separately for freshness: Keep mozzarella balls in their liquid if possible. Store basil in a damp paper towel to avoid wilting. You can enjoy these skewers cold right from the fridge. The fresh flavors shine in their original state. If you prefer them warm, reheat them carefully. - When to reheat and when to eat cold: Serve cold for the best taste. Reheat if you like warm dishes. - Methods for reheating without compromising flavor: Use a microwave for a few seconds. Avoid overcooking them. This helps maintain the fresh taste and texture. Keeping these tips in mind ensures your Easy Caprese Skewers stay delicious and ready to enjoy! You can store Caprese skewers in the fridge for up to two days. After that, the ingredients may lose their freshness. Keep them in an airtight container to maintain flavor and texture. Yes, you can prepare Caprese skewers a few hours ahead of time. Just make sure to store them in the fridge until you are ready to serve. If you plan to make them the night before, add the balsamic glaze just before serving. This keeps the skewers fresh and tasty. If you don’t have balsamic glaze, you can use balsamic vinegar or a lemon vinaigrette. Both add a nice tangy flavor. You could also try a sweet chili sauce for a different twist. Each option will give your skewers a unique taste. This blog post covered making delicious Caprese skewers. We discussed key ingredients and how to choose the best ones. I shared step-by-step instructions to prepare and assemble your skewers. Tips for serving and creative variations made the process fun. Remember, using fresh ingredients enhances the taste. Don't hesitate to try new flavors or make it your own. Enjoy your culinary creation and impress your friends at your next gathering!](https://mycookingcast.com/wp-content/uploads/2025/06/ec4765c1-a50d-4f7a-a80f-518d49078d51.webp)
Looking for a quick and tasty party snack? These Easy Caprese Skewers are perfect! With just a few fresh ingredients,

Classic meatloaf is the ultimate comfort food, perfect for family dinners. It brings back memories of cozy kitchens and warm
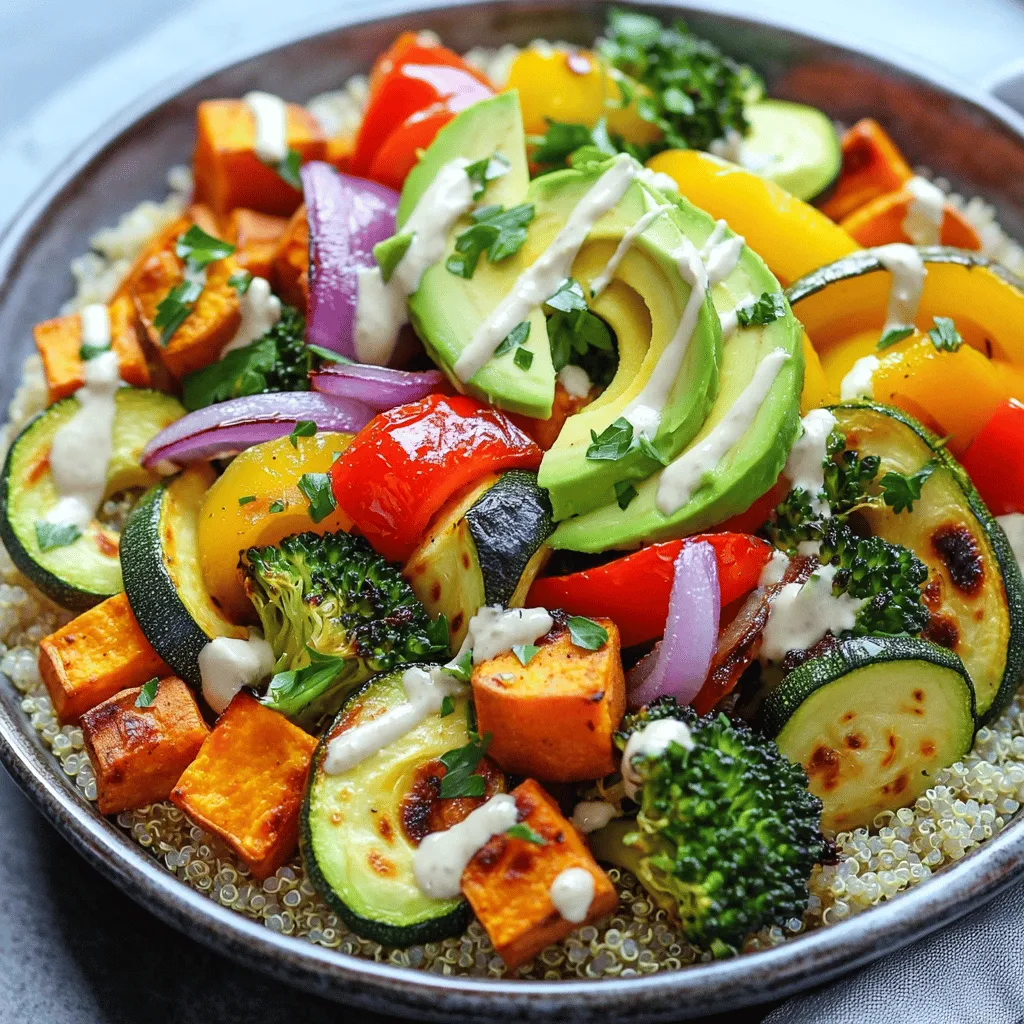
Are you ready to create a meal that’s both tasty and good for you? I’m excited to share my Healthy
![For a tasty chicken tortilla soup, gather these ingredients: - 2 tablespoons olive oil - 1 onion, diced - 2 cloves garlic, minced - 1 bell pepper, diced (any color) - 2 medium tomatoes, diced - 4 cups chicken broth - 1 teaspoon cumin - 1 teaspoon chili powder - 1 teaspoon smoked paprika - 1 pound cooked chicken, shredded - 1 can (15 oz) black beans, rinsed and drained - 1 cup corn (fresh or frozen) - Salt and pepper to taste - Tortilla chips, for serving - Fresh cilantro, chopped, for garnish - Avocado, diced, for garnish - Lime wedges, for serving Using fresh ingredients enhances the soup's flavor. Olive oil gives a nice base. Onions and garlic add depth. The bell pepper and tomatoes bring sweetness. Chicken broth provides a rich backdrop. Spices like cumin and chili powder give heat. Black beans and corn add texture and color. For the best results, use cooked chicken. You can shred leftover chicken or buy rotisserie chicken. This soup is easy to make and packed with nutrients. You can find the Full Recipe to help guide you through the cooking process. Enjoy your cooking! - Heat 2 tablespoons of olive oil in a large pot over medium heat. - Add 1 diced onion and sauté for about 3-4 minutes until it turns soft. - Stir in 2 minced garlic cloves and 1 diced bell pepper. Cook for 2 more minutes. - Next, add 2 diced tomatoes and 4 cups of chicken broth. Stir to mix well. - Bring the soup to a boil, then reduce the heat to simmer. - Let it simmer for about 15 minutes. This helps the flavors blend. - Now, add 1 can of black beans and 1 cup of corn. Cook for 5-7 minutes. - Season the soup with salt and pepper to taste. Adjust spices if needed. - Serve the soup hot. Top with tortilla chips, diced avocado, and fresh cilantro. - Add lime wedges on the side for a zesty kick. For a full step-by-step guide, check out the Full Recipe. To make your chicken tortilla soup shine, focus on spices. Cumin, chili powder, and smoked paprika bring depth. Use fresh spices for a better taste. Adjust them based on your heat level. If you like it spicy, add more chili powder or a dash of cayenne. Cooking time is also key. Simmer your soup for at least 15 minutes. This helps flavors mix well. If you want a thicker soup, cook it a bit longer. The chicken and beans will soak up some of the broth. Toppings can make your soup special. I love crumbled tortilla chips on top for crunch. Diced avocado adds creaminess, while cilantro gives a fresh kick. A squeeze of lime juice brightens the flavors. Pair your soup with sides like a simple salad or cornbread. A light beer or fruity soda makes a great drink choice. For the full recipe, check out the complete steps to create this dish. {{image_2}} You can switch up the protein in your chicken tortilla soup. Try turkey or beef for a new twist. If you want a vegetarian option, use beans or tofu. Both still pack a punch of flavor. They will still give you that hearty feel. To spice things up, add diced jalapeños to the soup. This gives it a nice kick! If you prefer a creamy texture, stir in sour cream before serving. This makes the soup rich and smooth. You can adjust these flavors based on your taste. For more tips, check the Full Recipe for easy steps to make this dish your own. You can store leftover chicken tortilla soup in the fridge. Use an airtight container. Keep it for up to three days. Before you reheat, stir the soup well. Heat it on the stove or in the microwave until hot. Add a splash of broth if it thickens too much. For long-term storage, freeze the soup. Use a freezer-safe container or bag. It can last up to three months in the freezer. When you’re ready to eat it, take it out and place it in the fridge overnight. This helps it thaw evenly. To reheat, warm it on the stove over low heat. Stir often to avoid burning. You can also use the microwave. Heat in short bursts, stirring in between. Enjoy your soup just like the first time! For the full recipe, check out the earlier section. How to make chicken tortilla soup thicker? To make your chicken tortilla soup thicker, add more beans or corn. You can also blend some of the soup and return it to the pot. This adds a creamy texture without using cream. Another method is to use less broth for a heartier soup. Can I use leftover rotisserie chicken? Yes, using leftover rotisserie chicken works great! Just shred it and add it to the soup. This saves you time and adds rich flavor to your dish. It’s a smart way to use what you have at home. Is this soup spicy? The spice level depends on your taste. The cumin and chili powder add warmth, but they aren’t too hot. If you want more heat, try adding jalapeños or extra chili powder. You can always adjust the spices to suit your liking. How long does this soup last in the fridge? Chicken tortilla soup lasts about 3 to 4 days in the fridge. Make sure to store it in an airtight container. If you want it to last longer, consider freezing it. Just remember to let it cool before freezing. You can find the full recipe [Full Recipe]. This blog post covered a delicious chicken tortilla soup recipe. You learned about the key ingredients and step-by-step cooking instructions. We shared tips for perfecting your soup and suggested variations for different tastes. Storage tips ensure your soup stays fresh. In conclusion, you can create a hearty meal with simple steps. Enjoy customizing your soup to fit your taste. Happy cooking!](https://mycookingcast.com/wp-content/uploads/2025/06/e0a7fe5b-d8f8-4d99-83cb-06f3f9771105.webp)
Looking for a quick and tasty meal? My Easy Chicken Tortilla Soup is just what you need! This simple and
. To make great pasta, start with a large pot. Use plenty of salted water. The salt adds flavor. Bring the water to a rapid boil. Add the pasta and stir it well. Cook it until al dente, which means firm but not hard. Remember to reserve some pasta water. This extra water helps later. To boost flavors, use fresh herbs like basil. They add a bright taste. A splash of lemon juice can also wake up the dish. If you like spice, try adding red pepper flakes. They give a nice kick. For richness, you can mix in some butter at the end. Serve your pasta in shallow bowls for a nice look. Drizzle with a touch of olive oil. This adds shine and flavor. A sprinkle of Parmesan cheese can make it even better. Add fresh basil leaves on top for color. This dish is great warm, but it also tastes good cold as a salad. Enjoy your delightful and fresh Pasta Primavera! For the complete recipe, refer to the Full Recipe. {{image_2}} You can make Pasta Primavera heartier by adding protein. Grilled chicken, shrimp, or tofu work great. For chicken, use grilled breasts, sliced thin. For shrimp, sauté them until pink. If you choose tofu, press and cube it, then sauté until golden. Mix these in with the veggies for a filling meal. If you need a gluten-free option, swap in gluten-free pasta. Brown rice or quinoa pasta are both good choices. They cook well and hold up in the dish. Make sure to follow the cooking time on the package. This keeps the texture just right. Pasta Primavera shines with fresh veggies. You can swap out the vegetables based on the season. In spring, add asparagus or peas. In summer, try bell peppers and corn. In the fall, use squash or kale. Each season offers its own flavors, keeping your dish exciting and fresh. To keep your pasta primavera fresh, store it in an airtight container. Place it in the fridge right after it cools. It will stay good for about 3 to 5 days. When you're ready to eat, check for any signs of spoilage, like strange smells or colors. You can freeze pasta primavera if you want to save some for later. Use a freezer-safe container or bag. Make sure to remove as much air as possible. It will last up to 2 months in the freezer. When you’re ready to eat, let it thaw in the fridge overnight. Reheat your pasta primavera on the stove for best results. Add a bit of olive oil or water to keep it moist. Heat it over low to medium heat until warmed through. You can also use the microwave. Just cover it with a damp paper towel to prevent drying out. For more tips and the full recipe, check out the vibrant pasta primavera! To make Pasta Primavera vegan, swap out the Parmesan cheese for a dairy-free option. Nutritional yeast adds a cheesy flavor without dairy. You can also load up on vegetables. Fresh veggies like asparagus, carrots, or peas work great. Use olive oil instead of butter for sautéing. This keeps it tasty and plant-based. Yes, you can use any pasta you like. Whole wheat pasta adds fiber. Gluten-free pasta is a good choice if you need it. You can try shapes like fusilli, farfalle, or even zucchini noodles. Each type gives a different texture and taste. Just make sure to adjust cooking times according to the pasta you choose. For extra protein, consider adding chickpeas or white beans. They blend well with the dish. You can also toss in some grilled chicken or shrimp. Tofu or tempeh are great plant-based options too. Just cook them separately and mix them in at the end. This will boost the meal's nutrition and keep it filling. This article covered how to make a tasty Pasta Primavera. We discussed key ingredients and useful garnishes. I shared step-by-step cooking instructions and tips for perfect pasta. You learned about variations, like adding proteins and gluten-free options. We touched on storage methods to keep your dish fresh. Pasta Primavera is easy to make and fun to customize. Enjoy creating your own version!](https://mycookingcast.com/wp-content/uploads/2025/06/911dd3e5-370d-499e-8df6-6c853599105b.webp)
Are you ready to whip up a simple, vibrant dish that bursts with flavor? My Simple Pasta Primavera recipe is

Looking for a quick, tasty snack that gives you energy? You’re in the right place! In this post, I’ll share
