![To make this refreshing drink, gather these key ingredients: - 1 ripe mango, peeled and diced - 1 cup dragon fruit, diced (preferably the pink-skinned variety) - 2 cups coconut water - 1 tablespoon honey or agave syrup (adjust to taste) - 1 lime, juiced - Fresh mint leaves for garnish - Ice cubes These ingredients blend to create a vibrant, fruity drink with a tropical flair. The mango adds sweetness, while the dragon fruit brings a unique texture and color. Coconut water gives it a hydrating touch, and lime juice adds a zing. You can customize your Mango Dragon Fruit Refresher to fit your taste. Here are some options: - A splash of pineapple juice for extra sweetness - Chia seeds for added texture and nutrients - A hint of ginger for a spicy kick - Coconut milk for creaminess Feel free to mix and match these ingredients. This way, you can make the drink your own. Choosing fresh fruit is key to a tasty drink. Here are a few tips: - Look for mangoes that are slightly soft when gently squeezed. This shows ripeness. - Choose dragon fruit that is bright in color and firm. Avoid any with dark spots. - For limes, pick those that feel heavy for their size. This means they are juicy. Using fresh ingredients will enhance the flavor and freshness of your Mango Dragon Fruit Refresher. Enjoy the vibrant flavors that come from fresh produce! Start by peeling the ripe mango. Cut it into small, bite-sized pieces. For the dragon fruit, cut it in half. Scoop out the bright pink flesh and dice it into cubes. This fruit looks great and has a mild flavor. Together, they make a perfect pair. Now, grab your blender. Add the diced mango and dragon fruit. Pour in the coconut water, honey, and lime juice. Blend on high until the mix is smooth, about 30 to 60 seconds. If it needs more sweetness, add more honey and blend briefly. This step makes the drink tasty and refreshing. Fill two glasses with ice cubes. Pour the blended mix over the ice. The cold drink will chill quickly. To make it look great, add fresh mint leaves on top. This adds a pop of color and flavor. Enjoy this easy and refreshing drink now! For the complete recipe, check out the [Full Recipe]. To adjust the sweetness of your Mango Dragon Fruit Refresher, taste first. After blending, you may find it needs more sweetness. Add honey or agave syrup slowly. Blend again to mix. If it’s still not sweet enough, add more. Remember, everyone's taste is different, so trust your palate. When blending, use high speed for a smooth texture. Start with the liquids first. This helps the blades move freely. Add your diced fruit next. Make sure the blender is not too full. You want enough room for the mixture to swirl well. If your blender struggles, stop and stir. This will help it blend more evenly. To create a creamier drink, use ripe fruit. The riper the mango, the creamier your refresher will be. You can also add a splash of coconut milk. This adds richness without overpowering the tropical flavors. Blend until it’s smooth and thick. Remember to taste before serving; you can always adjust if needed. Enjoy your bright and fresh drink! For the full recipe, check the details above. {{image_2}} You can make your Mango Dragon Fruit Refresher even more fun by adding other fruits. Berries like strawberries or blueberries add sweetness and color. You can also try adding pineapple for a tropical twist. Just dice the fruit and blend it in with the mango and dragon fruit. This adds more flavor and makes the drink even more refreshing. Want to spice things up? You can turn this drink into a fun cocktail. Adding a splash of rum or vodka works great. Mix in about one ounce of your favorite spirit when blending. This gives a nice kick while keeping the drink light and fruity. Serve it in a fancy glass and enjoy! If you want a dairy-free or vegan version, this drink is already perfect! The coconut water is a great base, and it keeps it light. You can also add a splash of almond milk for creaminess. Just blend it in with the other ingredients. This way, you keep the drink delicious while meeting any dietary needs. For the full recipe, check out the detailed instructions above! If you have leftover Mango Dragon Fruit Refresher, store it in a sealed jar. A glass jar works best. Keep it in the fridge for up to two days. The drink might separate, so shake it well before serving again. You can freeze this refresher if you want to save it longer. Pour the drink into ice cube trays. Once frozen, pop the cubes into a freezer bag. You can blend them later for a quick treat. To keep your ingredients fresh, store mangoes and dragon fruit at room temperature until ripe. After that, place them in the fridge. Coconut water should stay in a cool, dry place. Always check the expiration date on bottled products. Use fresh mint leaves right away for the best flavor. A Mango Dragon Fruit Refresher is a bright and tasty drink. It blends mango, dragon fruit, and coconut water. The drink is smooth and creamy. It is perfect for hot days or when you need a boost. The lime juice adds a nice tang. This drink is both refreshing and fun to make. You can find Mango Dragon Fruit Refreshers at many cafes and smoothie shops. Some grocery stores sell bottled versions too. But making it at home is easy and fun! You can adjust the flavors to your taste. Yes, you can prepare the drink ahead of time. Blend the ingredients and store them in the fridge. Just be sure to stir it well before serving. It tastes best when fresh, but it still stays good for a day or two. This drink is packed with nutrients. Mango is rich in vitamins A and C. Dragon fruit is high in fiber and antioxidants. Coconut water keeps you hydrated and adds electrolytes. It’s a great choice for a healthy snack or drink. To make your drink even more refreshing, try adding more ice. You can also mix in extra lime juice for a sharper taste. Fresh mint leaves add a cool flavor and aroma. If you want a bubbly version, use sparkling water instead of coconut water. For the full recipe, check out the detailed instructions earlier. This blog post shared how to make a Mango Dragon Fruit Refresher. You learned about the key ingredients and tips for choosing fresh produce. I offered step-by-step instructions for preparing and blending your drink. We covered how to customize sweetness and create variations, too. Keep experimenting with fruits and methods. Your drink can always improve. Enjoy your refreshing creation!](https://mycookingcast.com/wp-content/uploads/2025/06/5f190ba8-5cbb-47ff-9ca9-8c24c96de3e7.webp)
Mango Dragon Fruit Refresher Easy and Refreshing Drink
Craving a drink that’s both tasty and easy to make? The Mango Dragon Fruit Refresher hits the spot! This bright,
Craving a drink that’s both tasty and easy to make? The Mango Dragon Fruit Refresher hits the spot! This bright,
![Here’s what you will need to make the Almond Joy Protein Smoothie. Gather these items to create a tasty and nutritious blend. - 1 cup unsweetened almond milk - 1 banana, frozen - 1/4 cup almond butter - 2 tablespoons unsweetened cocoa powder - 1 tablespoon shredded coconut (plus extra for garnish) - 1 scoop vanilla protein powder - 1 tablespoon honey or maple syrup (optional) - Ice cubes (optional) These ingredients combine to create a rich, chocolatey flavor that reminds me of the classic candy bar. The almond milk gives it a smooth base, while the frozen banana adds natural sweetness and creaminess. Almond butter boosts the protein and brings a nutty taste. Cocoa powder offers that rich chocolate flavor, and shredded coconut gives it a fun texture. You can adjust the sweetness with honey or maple syrup based on your taste. Ice cubes are optional, but they help make the smoothie thicker. You can find the complete recipe in the [Full Recipe] section. Enjoy this smoothie as a quick breakfast or a post-workout snack! - First, combine 1 cup unsweetened almond milk and 1 frozen banana in your blender. - Blend until smooth. This step sets the base for your Almond Joy Protein Smoothie. - Next, add 1/4 cup almond butter, 2 tablespoons cocoa powder, 1 tablespoon shredded coconut, and 1 scoop vanilla protein powder. - If you want it sweeter, add 1 tablespoon of honey or maple syrup. This mix gives the smoothie its rich taste. - Now, blend on high speed until all the ingredients are creamy. - Taste your smoothie and adjust the sweetness if you like. If you want it thicker, toss in a few ice cubes and blend again. This Almond Joy Protein Smoothie is quick and easy. For the full recipe, check out the section above. Enjoy your delicious and nutritious treat! To make your Almond Joy Protein Smoothie shine, pick the best almond milk. Unsweetened almond milk has fewer calories and less sugar. You can try brands like Califia or Silk for great taste and nutrition. Next, choose a quality protein powder. Look for one with natural ingredients and a good flavor. A vanilla or chocolate flavor works well with this smoothie. For a creamier smoothie, use a frozen banana. It adds smoothness and a nice chill. You can also add a bit more almond butter for extra richness. If you need a thicker smoothie, add a few ice cubes before blending. This gives it a frosty texture that’s hard to resist. Garnishing your smoothie makes it look special. Sprinkle some shredded coconut on top for a tropical touch. You can also use a fancy glass or a mason jar for serving. Adding a colorful straw makes it fun to drink. Enjoying your Almond Joy Protein Smoothie is not just about taste; it’s also about how it looks! {{image_2}} You can change the flavor of your Almond Joy Protein Smoothie easily. Adding vanilla extract gives it a warm, sweet taste. Just a splash will do! You can also try different nut butters. Using peanut butter will add a rich, nutty flavor. Almond butter is great, but peanut butter makes it even more delicious! If you want to cut calories, try low-calorie sweeteners. Stevia or monk fruit work well. You can make the smoothie vegan-friendly by skipping the honey. Use maple syrup instead, or leave it out entirely. This makes it perfect for plant-based diets! You can boost the health benefits by adding superfoods. Try a tablespoon of chia seeds or flaxseeds for extra fiber. You can customize the smoothie to fit your diet, too. For keto fans, use unsweetened coconut and avoid bananas. Paleo eaters can skip the sweeteners and stick to whole foods. For the full recipe, check out the [Full Recipe]. To store your Almond Joy Protein Smoothie, pour any leftovers into a clean, airtight container. Seal it tightly to keep out air and moisture. You can keep it in the fridge for up to 24 hours. Make sure to enjoy it soon. The flavors stay fresh best within this time frame. If you want to save your smoothie for later, freezing is a great option. Pour the smoothie into ice cube trays or freezer-safe bags. These methods make it easy to store and portion. To thaw, just leave it in the fridge overnight or set it on the counter for a quick defrost. You can also use a microwave on low to thaw. When you're ready to drink your stored smoothie, check its consistency. If it’s too thick, add a splash of almond milk. Blend it again until smooth. This will help revive your smoothie and bring back that creamy texture. Always taste and adjust sweetness if needed after re-blending. An Almond Joy Protein Smoothie offers a tasty mix of nutrients. Each serving has about 350 calories. You get about 15 grams of protein, 20 grams of fat, and 30 grams of carbs. The almond butter and protein powder add healthy fats and protein. The banana gives natural sweetness and fiber. Cocoa powder provides antioxidants. Overall, it's a balanced, energizing drink. Yes, you can use other milk options. Coconut milk gives a richer flavor and creaminess. Soy milk is another good choice, as it has a similar protein content. Oat milk adds a mild taste and can also work well. Just choose a milk that fits your taste and diet. This smoothie can fit into a weight-loss plan. Its calorie count is moderate, and it fills you up. The protein and healthy fats keep you satisfied longer. The fiber from the banana also helps with fullness. Just watch your portion sizes if you aim to lose weight. This blog post shows you how to make a delicious Almond Joy Protein Smoothie. You learned about the simple ingredients and easy steps to blend a tasty drink. The tips enhance flavor and texture, while variations let you customize it. Proper storage keeps your smoothie fresh for longer. With this guide, you can enjoy a healthy treat anytime. Remember, smoothies can fit into any diet. Now go create your own mix and savor every sip!](https://mycookingcast.com/wp-content/uploads/2025/06/e67edb15-cc7d-40c6-95b1-1b3a5a0e3af4.webp)
Are you craving a tasty treat that also packs a punch of nutrition? Look no further! This Almond Joy Protein
![To make a tasty iced vanilla oat latte, you need a few key ingredients. Each one adds its own flavor and texture. Here’s what you’ll need: - 1 cup brewed espresso or strong coffee, cooled - 1 cup oat milk - 1 tablespoon vanilla extract - 1-2 tablespoons maple syrup (to taste) - 1/2 teaspoon cinnamon (optional) - Ice cubes - Oat flakes for garnish (optional) These ingredients come together to create a creamy and sweet drink. The oat milk makes it smooth, while the espresso gives it a nice kick. Want to jazz up your latte? You can add some fun flavors. Here are some ideas: - A dash of nutmeg for warmth - A scoop of cocoa powder for a mocha twist - A splash of almond extract for a nutty taste - A few chocolate chips for extra sweetness Feel free to experiment! Each add-in gives a new flavor. You can find your favorite mix. Before you start, gather the right tools. Here’s what you will need: - A coffee maker or espresso machine - A mixing spoon - A tall glass for serving - A measuring spoon - A straw (optional) Having these tools ready makes the process easy. You’ll enjoy making your iced vanilla oat latte even more! For the complete process, check out the Full Recipe. Start by brewing your espresso or strong coffee. Use your favorite method, like a French press or espresso machine. I recommend using fresh coffee beans for the best taste. Once brewed, let it cool to room temperature. This helps the flavors shine when mixed with oat milk. In a large glass, combine the cooled coffee with oat milk, vanilla extract, and maple syrup. Stir well to blend all the flavors. If you want a warm spice, add cinnamon. This gives your latte a comforting touch. Mix everything until smooth. Fill a tall glass with ice cubes. Leave some space at the top for the latte mix. Pour your oat latte over the ice slowly. This helps keep the layers nice. If you like, sprinkle oat flakes on top for crunch. Stir gently before drinking. Enjoy your iced vanilla oat latte! For the full recipe, check out the details above. To make your iced vanilla oat latte shine, focus on your coffee. Use fresh espresso or a strong brew. This gives you a bold base. The oat milk adds creaminess and a slight sweetness. Vanilla extract is key for that rich flavor. Maple syrup is a great natural sweetener. Adjust the amount to suit your taste. One common mistake is using hot coffee. Warm coffee can melt the ice fast, making it watery. Always cool your coffee before mixing. Also, don't skip the stirring step. Mixing well ensures all flavors blend. Finally, avoid cheap oat milk. Good-quality oat milk will make your drink taste better. Serve your iced vanilla oat latte in a tall glass. This not only looks nice but also allows for plenty of ice. Try adding a sprinkle of cinnamon on top. It adds a nice touch and extra warmth. For a fun twist, use oat flakes as a garnish. They add a nice crunch to each sip. Enjoy your drink outside on a sunny day for a refreshing treat! {{image_2}} You can enjoy a sugar-free iced vanilla oat latte. Start by swapping maple syrup for a sugar-free sweetener. Use stevia or monk fruit. This change keeps your drink sweet without extra calories. Mix it well with your coffee and oat milk. You still get that lovely vanilla flavor. Try different flavors to shake things up. Caramel gives your iced latte a rich, sweet twist. Add a tablespoon of caramel syrup to your mix. For a mocha version, blend in a tablespoon of cocoa powder. This adds a chocolatey depth. You can experiment with hazelnut or almond extracts too. Each option brings a new taste to your drink. If you prefer a warm drink, make a hot vanilla oat latte. Simply follow the same steps, but heat your oat milk. Combine it with your brewed coffee and vanilla. This hot version offers comfort on chilly days. It’s just as creamy and delicious as the iced version. Embrace the warmth with a sprinkle of cinnamon for added spice. For the complete recipe, check out the [Full Recipe]. If you have leftover ingredients from your iced vanilla oat latte, store them in the fridge. Keep oat milk sealed in its original container. This way, it stays fresh longer. Any unused brewed coffee should also go in a sealed container. It will last for up to a week in the fridge. Just remember, always check for any off smell before using. You can prep ahead to make your mornings easier. Brew a batch of coffee and let it cool. Store it in the fridge for easy use. You can also mix the oat milk, vanilla extract, and maple syrup in a jar. This way, you save time and enjoy your drink faster. Just shake the jar before pouring it over ice. Oat milk can spoil if not stored correctly. Always keep it in a cool place, away from sunlight. After opening, use it within seven to ten days. Before using, give it a good shake to mix any settled parts. If you notice any changes in texture or smell, it's best to discard it. You can check the [Full Recipe] for more details on making your iced vanilla oat latte! An Iced Vanilla Oat Latte is a cool coffee drink. It blends espresso with creamy oat milk and vanilla. This drink is sweet and smooth. You can enjoy it on a hot day. It’s a fun twist on classic iced coffee. Yes, you can use regular milk. However, it changes the taste and texture. Oat milk adds a nutty flavor and creaminess. If you prefer dairy, whole milk or almond milk works too. Just remember, it won’t be an oat latte anymore! To make a low-calorie version, use less maple syrup. You can also skip the syrup and use a sugar-free sweetener. Choose unsweetened oat milk for fewer calories. This way, you keep the flavor without the extra sugar. Oat milk is a great choice for many reasons. It is dairy-free and great for vegans. It also has fiber, which is good for digestion. Oat milk is often less allergenic than nut milks. Plus, it creates a creamy texture in drinks. You can find an Iced Vanilla Oat Latte at many coffee shops. Popular chains often have it on their menu. Some cafes may even offer it as a seasonal drink. Or, you can make your own at home with the full recipe! Making an Iced Vanilla Oat Latte at home is simple and fun. You learned about key ingredients, optional add-ins, and equipment needed. Each step helps you brew delicious coffee and combine flavors. I shared tips to avoid common mistakes and offered serving ideas. You can even explore variations to suit your taste. Remember, you can store leftovers well and keep your oat milk fresh. Enjoy your latte your way. Now, go ahead and make your perfect Iced Vanilla Oat Latte!](https://mycookingcast.com/wp-content/uploads/2025/06/b78d6125-e3d2-4d96-bd9d-b6cbabd1f12c.webp)
If you love coffee and want a smooth, sweet treat, you’ll adore an Iced Vanilla Oat Latte. This refreshing drink

If you crave a delicious blend of flavors, I have the perfect treat for you! My Salted Caramel Mocha Frappe

Looking for the perfect drink to cool off this summer? Blueberry Lemon Iced Tea is your answer! This refreshing blend
![To make a fresh and zesty mango salsa, gather these key ingredients: - 2 ripe mangoes, diced - 1 small red onion, finely chopped - 1 red bell pepper, diced - 1 jalapeño pepper, deseeded and minced - 1/4 cup fresh cilantro, chopped - Juice of 2 limes - Salt and pepper to taste These ingredients create a delightful mix of flavors and colors. The mangoes give it sweetness, while the onion and jalapeño add crunch and heat. You can boost your salsa with these optional ingredients: - 1 avocado, diced - 1/2 cup diced pineapple - 1 teaspoon honey for extra sweetness - A splash of orange juice These add-ins can change the taste and make your salsa even more exciting. Try mixing and matching to find your favorite combination. Choosing ripe mangoes is key for the best salsa. Here’s how: - Look for mangoes with a slight give when you press them. - Check for a fruity aroma near the stem. - Select mangoes with smooth, unblemished skin, showing slight color variations. By picking the right mangoes, you'll ensure your salsa is juicy and full of flavor. Start by gathering all your ingredients. You need two ripe mangoes, a small red onion, a red bell pepper, and a jalapeño pepper. Dice the mangoes into small pieces. Chop the red onion and red bell pepper finely. For the jalapeño, slice it open and remove the seeds. Then, mince it into small bits. This step helps control the heat. In a large mixing bowl, toss the diced mango, red onion, red bell pepper, and minced jalapeño together. This mix creates a colorful blend. Next, add 1/4 cup of fresh cilantro to the bowl. It adds a bright flavor. Now, squeeze the juice of two limes over the mix. This juice brightens all the flavors. Sprinkle some salt and pepper over the salsa to taste. This enhances the flavors even more. Gently fold all the ingredients together with a spatula. Be careful not to mash the mangoes. Let the salsa sit for about 15 minutes. This resting time helps the flavors blend well. Enjoy your fresh and tasty mango salsa! For the complete recipe, check the [Full Recipe]. To boost the zest in your mango salsa, add lime juice. Lime juice brightens the flavors. You can also try adding a pinch of chili powder. This gives a warm kick that pairs well with mango. If you like more heat, keep some jalapeño seeds in the mix. This will make it spicy! Fresh herbs, like cilantro, also enhance the taste. Try adding extra chopped cilantro for more freshness. Mango salsa shines when served with grilled fish or chicken. It adds a sweet and tangy contrast. Serve it with tortilla chips for a fun snack. You can also use it as a topping for tacos. It gives a fresh twist to any meal. For a light lunch, pair it with a salad or a wrap. The bright colors and flavors will impress your guests. When mixing flavors, balance is key. Aim for a mix of sweet, spicy, and tangy. Taste your salsa as you make it. If it seems too sweet, add more lime juice. If it’s too spicy, add more mango. Let the salsa rest for 15 minutes before serving. This allows the flavors to blend well. Each bite should burst with freshness! For the full experience, check out the Full Recipe and enjoy making your mango salsa. {{image_2}} To add heat to your mango salsa, include a diced serrano pepper. This pepper gives a nice kick. You can also mix in crushed red pepper flakes. Start with a small amount and taste. If you want more heat, add more. Another great option is to add a dash of hot sauce. This keeps the salsa fresh and zesty. Mix in other fruits to create a tropical twist. Pineapple is a great choice. Diced kiwi or papaya also works well. These fruits add sweetness and texture. You could even use diced avocado for creaminess. Combining mango with these fruits brightens the flavor. It makes the salsa more colorful, too. For a lighter salsa, swap out the jalapeño for diced bell pepper. This keeps the crunch but lowers the heat. You can also reduce the amount of mango and add more veggies. Try adding diced cucumber or zucchini. Both are low in calories and refreshing. This way, you still get all the flavor without the extra calories. For the complete recipe, check out the Full Recipe section. To store leftover salsa, place it in an airtight container. This keeps it fresh longer. Make sure to cover the salsa tightly. If you have a lot, divide it into smaller containers. This way, you can enjoy it in portions. Always refrigerate the salsa. It will stay fresh for up to three days. You can freeze mango salsa if you want to save it for later. First, use a freezer-safe container. Leave some space at the top for expansion. Salsa can last up to three months in the freezer. When you're ready to eat it, thaw it in the fridge overnight. Mix well before serving to restore its texture. Mango salsa is best when fresh. It tastes great for about three days in the fridge. After that, the flavors may fade. To keep it fresh, avoid adding too much salt. Salt can draw out moisture and cause spoilage. Always use fresh ingredients for the best taste. You can also taste it before serving to check for freshness. For the full recipe, check the section above. You can enjoy Easy Mango Salsa with many dishes. I love serving it with grilled chicken or fish. It adds a fresh touch to tacos and burritos. You can also use it as a dip with tortilla chips. Try it on a salad for a fruity twist. Pair it with rice or quinoa for a tasty side. The bright flavors work well with various meals. To change the spice level, you can control the jalapeño amount. For a milder salsa, use less jalapeño or remove the seeds. You can also add a pinch of sugar to balance heat. If you like more spice, try adding a dash of hot sauce. Another option is to mix in a bit of diced habanero. Always taste as you go to find your perfect heat. Yes, you can use frozen mangoes in this recipe. Just make sure to thaw them before use. Drain any excess liquid to keep your salsa from becoming watery. Frozen mangoes can work well when fresh ones are not available. Their sweetness remains, and they still taste great in salsa. For best results, let them sit in the fridge overnight to thaw. You can create a delicious mango salsa with simple steps. We covered what ingredients you need, how to prepare them, and tips to enhance flavor. You can even try spicy or tropical twists. Don't forget how to store leftovers or use frozen mangoes. In the end, enjoy your salsa with your favorite dish. It's fresh, fun, and easy to make.](https://mycookingcast.com/wp-content/uploads/2025/06/ae68f3e4-cd96-43f8-90e3-52ed84aab870.webp)
Are you ready to spice up your meals with a fresh and vibrant twist? My Easy Mango Salsa is a
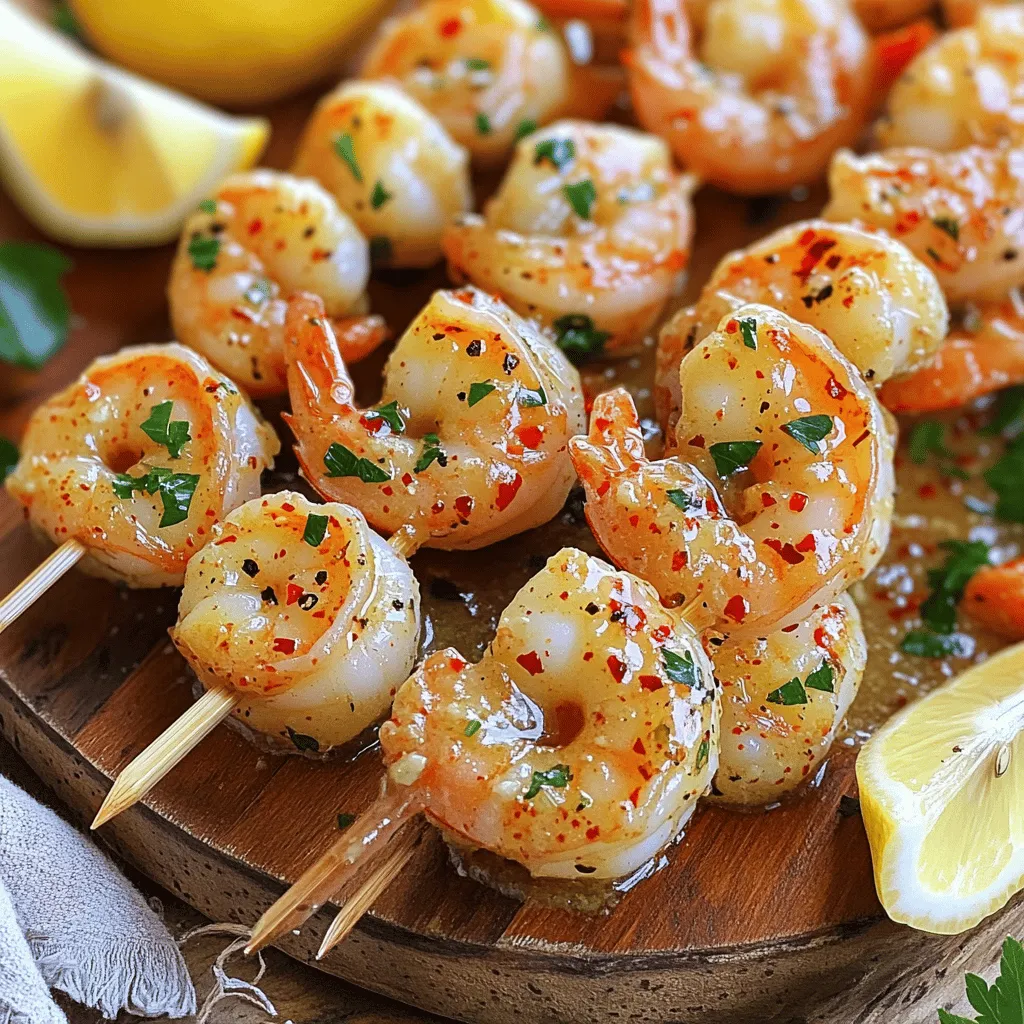
Looking for an easy and tasty meal? Try these garlic butter shrimp skewers! Packed with flavor, this simple recipe will

Are you ready to whip up a tasty treat? This Roasted Garlic Hummus recipe is both simple and scrumptious. You’ll

If you’re craving a bite of something zesty and satisfying, my Buffalo Chicken Meatballs are the perfect fix. These little
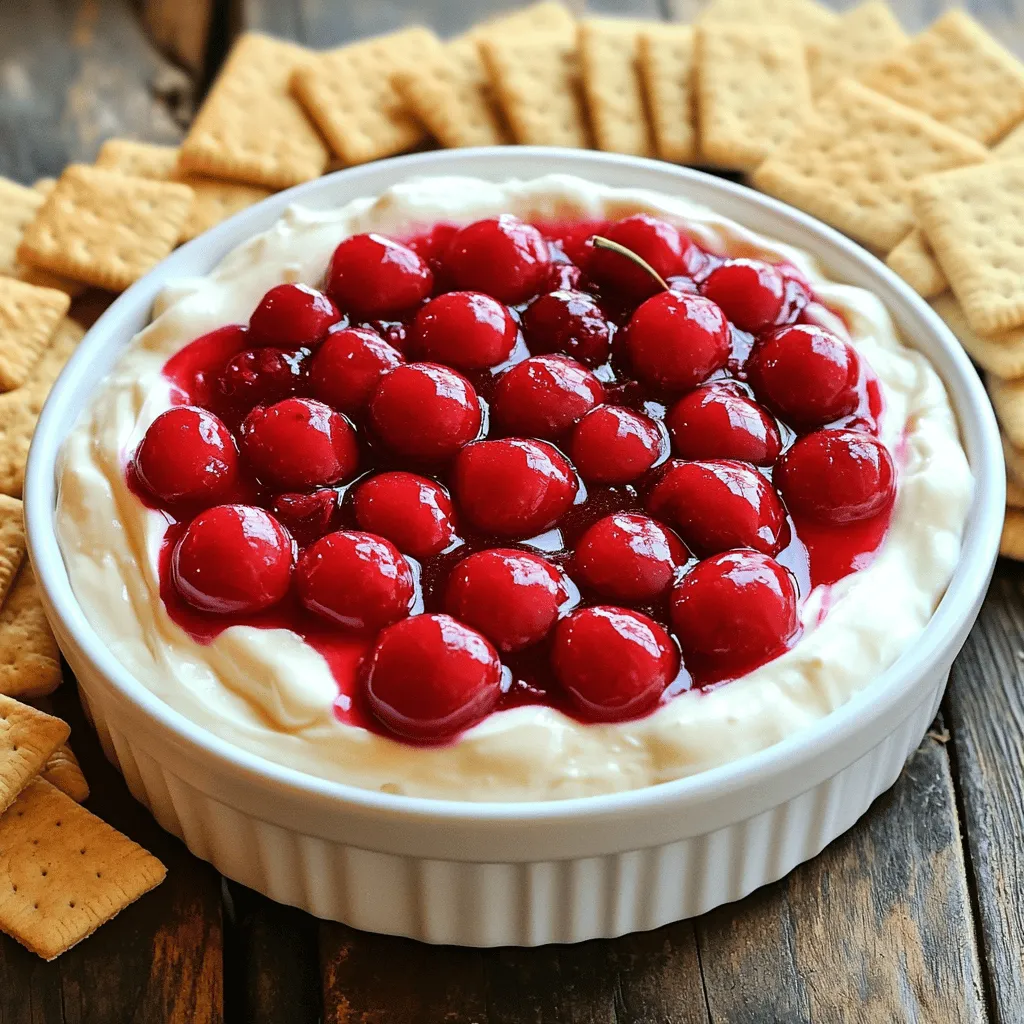
If you’re craving a sweet, creamy treat, you’ve come to the right place! My Cherry Cheesecake Dip is a fun
