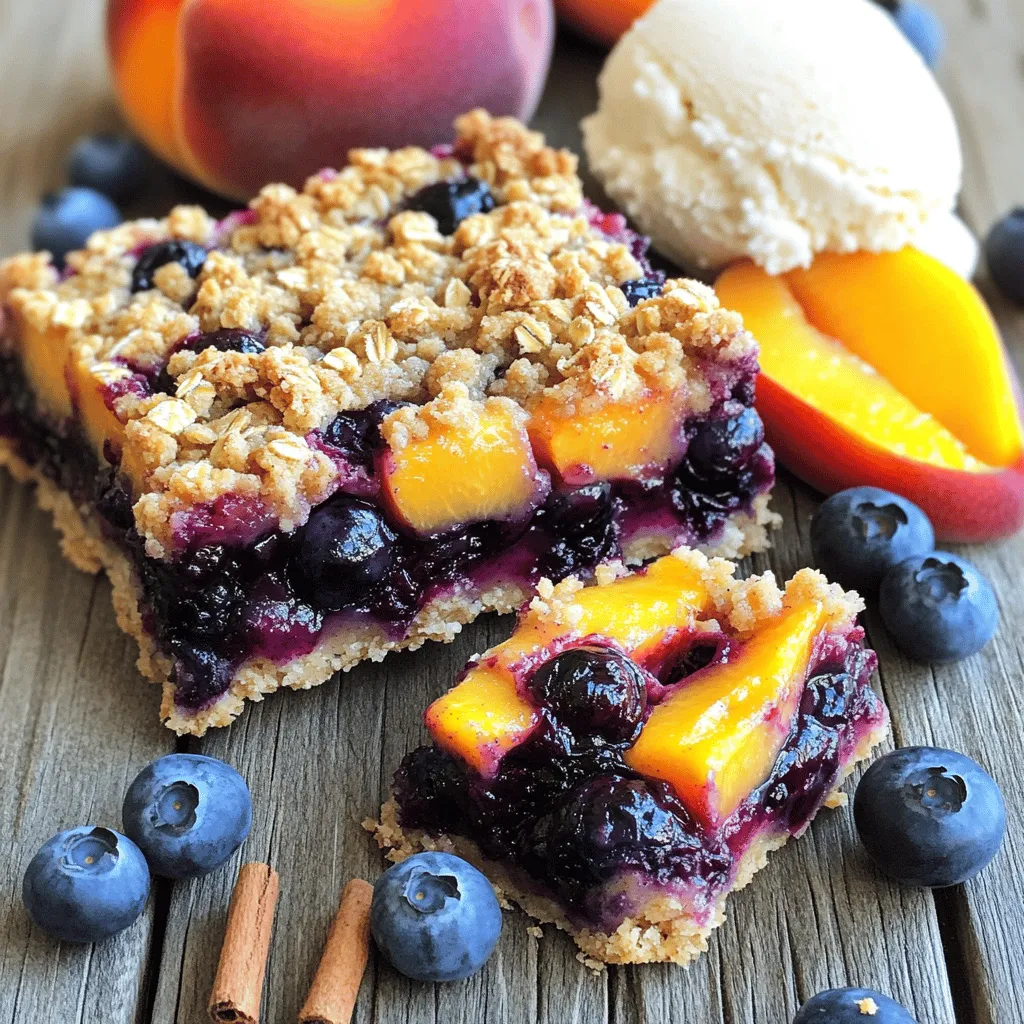
Blueberry Peach Crumble Bars Delightful and Easy Bake
Looking for a sweet treat that’s both simple and delicious? These Blueberry Peach Crumble Bars are just what you need!
Looking for a sweet treat that’s both simple and delicious? These Blueberry Peach Crumble Bars are just what you need!
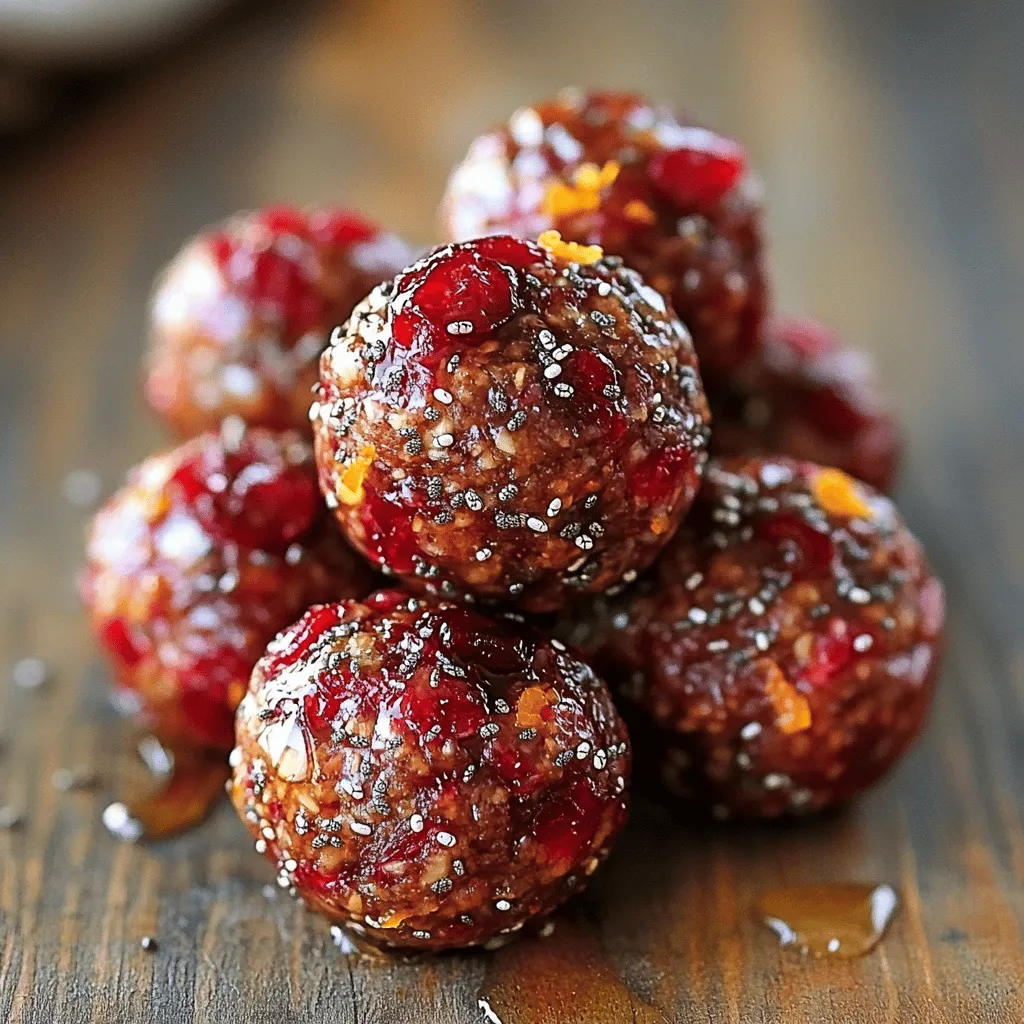
Looking for a tasty snack that energizes you throughout the day? I’ve got just the thing! My Cranberry Orange Energy
![To make peanut butter protein balls, you need simple, whole ingredients. Here’s what you need: - Natural peanut butter - Rolled oats - Honey or maple syrup - Protein powder - Mini dark chocolate chips - Chia seeds - Ground flaxseed - Vanilla extract - Salt Natural peanut butter gives these balls a creamy texture. Look for a brand with just peanuts and salt. Rolled oats provide fiber, making your snack filling. Honey or maple syrup adds sweetness. Choose a protein powder that you enjoy, and you can use vanilla or chocolate flavors. Mini dark chocolate chips add a fun touch. Chia seeds offer omega-3 fatty acids, while ground flaxseed boosts fiber. A splash of vanilla extract enhances the flavor and adds warmth. Finally, a pinch of salt balances the sweetness. These ingredients work together to create a healthy, tasty snack. You can find the full recipe in the section above. 1. Mixing the peanut butter and sweetener In a large bowl, combine 1 cup of natural peanut butter with 1/2 cup of honey or maple syrup. Stir until it is smooth and well mixed. This mix serves as a strong base and adds natural sweetness. 2. Incorporating dry ingredients Next, add 1/2 cup of rolled oats, 1/4 cup of protein powder, 1/4 cup of chia seeds, and 1/4 cup of ground flaxseed to the bowl. Also, include 1/2 teaspoon of vanilla extract and a pinch of salt. Mix everything together until it forms a sticky dough. The dry ingredients boost nutrition and flavor. 3. Forming protein balls Once your dough is ready, fold in 1/4 cup of mini dark chocolate chips. This step adds a delightful touch of sweetness. Now, with your hands, roll the mixture into small balls, about 1 inch in diameter. If the dough sticks to your hands, wet them slightly to make rolling easier. After forming the balls, place them on a parchment-lined tray or plate. Refrigerate the protein balls for at least 30 minutes. Chilling helps them firm up and makes them easier to handle. Once they are set, you can transfer them to an airtight container. They stay fresh in the fridge for up to a week or can be frozen for longer storage. For the full recipe, refer to the [Full Recipe]. To get the best texture, mix the peanut butter and sweetener well. I like to use a large bowl. This helps me blend everything evenly. Start with the peanut butter and honey, then add the oats and protein powder. The mix should feel sticky. If it’s too dry, add a bit more peanut butter. If it’s too wet, more oats will help. When rolling the balls, keep your hands slightly wet. This will stop the mixture from sticking to your hands. Take about a tablespoon of the mix, and roll it into a smooth ball. If you want, you can also use a small ice cream scoop. This can help keep the size even. Aim for about 1 inch in diameter for each ball. For a fun presentation, arrange the protein balls on a nice plate. You can drizzle melted chocolate over them to make them look fancy. If you have a small basket, place the balls inside for a rustic look. They make great snacks for parties or gatherings. Serve them as a quick boost after workouts or just for a tasty treat. For the complete recipe, check out the Full Recipe. {{image_2}} You can switch the nut butter for different flavors. Almond butter or cashew butter works great. Each nut butter gives a unique taste and texture. Try adding dried fruit, like raisins or cranberries, for a fruity kick. You can also mix in spices like cinnamon or cocoa powder to change things up. These simple swaps can make your peanut butter protein balls more exciting. If you're vegan, use maple syrup instead of honey. You can also choose vegan protein powder. For a gluten-free option, make sure to use gluten-free oats. These changes let everyone enjoy this tasty snack. You can feel good knowing it fits your diet and still tastes amazing. Store your peanut butter protein balls in an airtight container. Place them in the refrigerator. This keeps them fresh for about a week. If you notice them getting hard, try letting them sit at room temperature for a bit before enjoying. Always check for any signs of spoilage before eating. To freeze your peanut butter protein balls, follow these steps: - Place the balls on a parchment-lined tray. - Freeze them for about an hour until firm. - Once frozen, transfer them to a freezer-safe bag or container. Label the bag with the date. They can last in the freezer for up to three months. When you want one, just take it out and let it thaw in the fridge or at room temperature. This way, you have a healthy snack ready whenever you need it! For the full recipe, check out the previous section. Peanut butter protein balls stay fresh for about one week in the fridge. Store them in an airtight container to keep them from drying out. If you want them to last longer, freeze the balls. In the freezer, they can last for up to three months. Just thaw them in the fridge before you eat them. Yes, you can easily swap ingredients to fit your needs. If you are allergic to peanuts, try almond or sunflower butter instead. For a vegan option, use maple syrup instead of honey. You can also use gluten-free oats if needed. These changes keep the snack tasty and healthy. Absolutely! Peanut butter protein balls have many health benefits. They provide protein from the peanut butter and protein powder, which helps build muscle. The oats give you fiber, which is good for digestion. Chia seeds and flaxseed add omega-3 fatty acids, great for heart health. Plus, the mini dark chocolate chips add a touch of sweetness without too much sugar. Overall, these protein balls are a smart snack choice. Check out the Full Recipe for more details! These protein balls are easy to make and very tasty. You mix simple ingredients like peanut butter, oats, and chocolate chips. Remember to chill them for the best texture. You can also swap ingredients for different flavors or diets. Store them in the fridge or freeze for later. In short, these snacks are healthy, fun, and perfect for sharing. Try making them today!](https://mycookingcast.com/wp-content/uploads/2025/06/90f6cd08-b520-41d2-a735-70cacebe9f91.webp)
Looking for a tasty, healthy snack? Peanut Butter Protein Balls are here to save the day! Packed with protein, fiber,
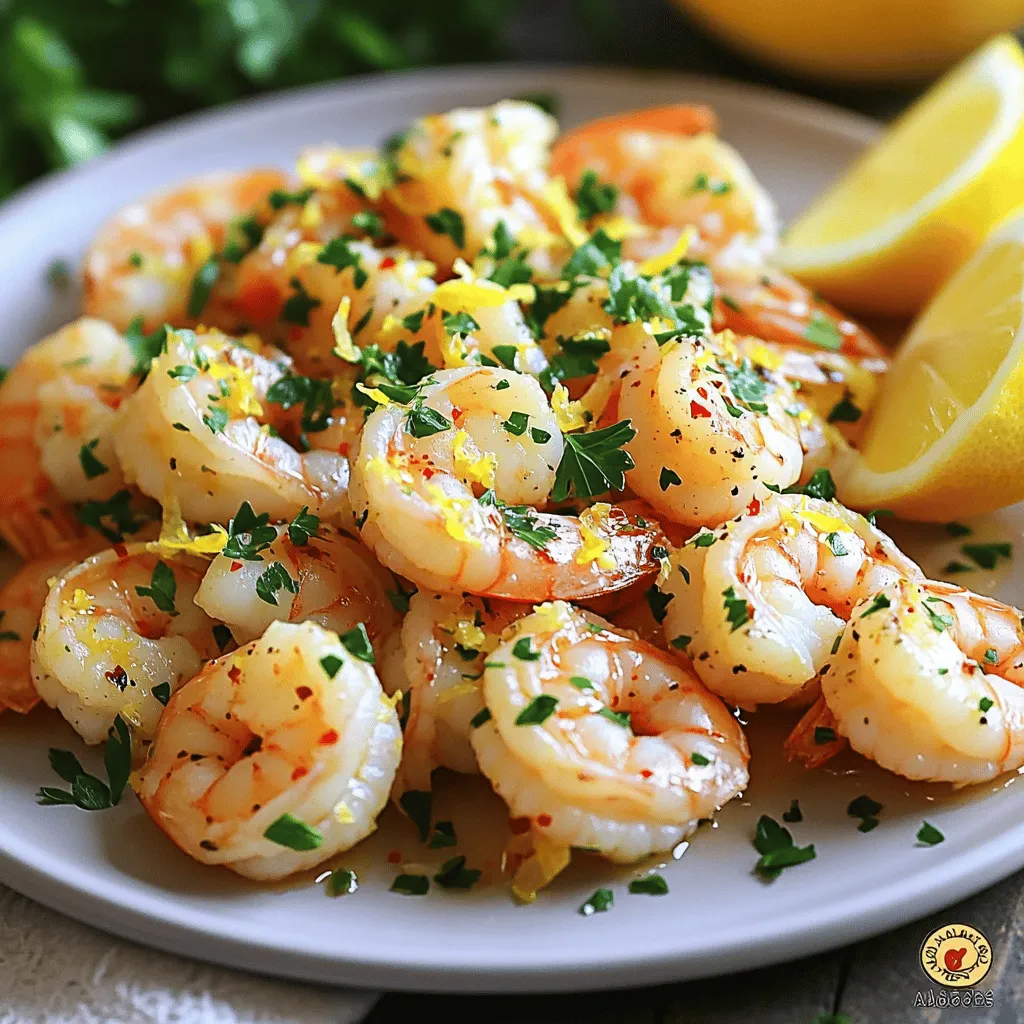
Are you ready to spice up your dinner? This Zesty Lemon Garlic Shrimp recipe is quick and full of amazing
![- 4 boneless, skinless chicken thighs - 1/4 cup honey - 1/4 cup soy sauce - 4 cloves garlic, minced - 1 tablespoon grated fresh ginger - 2 cups broccoli florets - 1 bell pepper, sliced - 1 cup carrots, sliced - Olive oil, salt, and pepper - Black sesame seeds - Fresh cilantro To make Honey Garlic Sheet Pan Chicken, you need simple ingredients. First, gather your main ingredients. The chicken thighs give you great flavor and texture. Honey and soy sauce create a sweet and savory glaze. Garlic adds a strong aroma, while ginger gives it a zing. Next, you'll want vibrant veggies. Broccoli, bell peppers, and carrots bring color and nutrients. They roast well and soak up the honey garlic sauce, making them tasty and healthy. For a finishing touch, you can add black sesame seeds and fresh cilantro. They look great and add a bit more flavor. This dish is not only easy to make but also fun to share. You can find the full recipe to guide you step by step. Enjoy cooking! - Preheat your oven to 400°F (200°C). - Line a large baking sheet with parchment paper for easy cleanup. - In a medium bowl, whisk together the honey, soy sauce, minced garlic, ginger, olive oil, and sesame oil until mixed well. - Place the chicken thighs on the baking sheet. Season them with salt and pepper. - Pour half of the honey garlic mixture over the chicken. Make sure they are well coated. - On the same sheet pan, add the broccoli florets, sliced bell pepper, and carrots. - Drizzle a little olive oil over the veggies and sprinkle with salt and pepper. Toss to mix them well. - Bake in the preheated oven for 25-30 minutes. You want the chicken to be cooked through, reaching an internal temperature of 165°F (75°C). The vegetables should be tender. - During the last 5 minutes of cooking, brush the reserved honey garlic mixture over the chicken for that extra glaze. This method gives you a simple yet flavorful dish. For the complete recipe, check out [Full Recipe]. To achieve tender chicken, start with the right cut. I love using boneless, skinless chicken thighs for this recipe. They stay juicy and flavorful. Make sure not to overcook them. Use a meat thermometer to check for doneness; it should reach 165°F. For perfectly roasted vegetables, cut them into similar sizes. This way, they cook evenly. Toss them with olive oil and seasonings before placing them on the pan. Adding spices or herbs can make a big difference. Consider using crushed red pepper for heat or fresh thyme for a hint of earthiness. You can also add rosemary for a nice touch. Marinating the chicken boosts the flavor even more. Let it sit for at least 30 minutes, or overnight if you can. The longer the chicken marinates, the deeper the flavor will be. Different ovens may have slight variations in cooking times. If you have a convection oven, reduce the temperature by 25°F for better results. Always keep an eye on the chicken as it cooks. Check its doneness at about 25 minutes. If it isn't done yet, continue baking. You want to make sure the chicken is fully cooked and the vegetables are tender. {{image_2}} You can change the protein in this dish for fun. If you want a plant-based option, use tofu. Firm tofu works best as it holds its shape. Just cut it into cubes and follow the same steps. You can also use shrimp for a quick twist. Cook shrimp until they turn pink. They won’t need as long in the oven. If you prefer more flavor, try bone-in chicken. The bones add richness to the dish. Bake the chicken for a little longer, about 35-40 minutes. Check the internal temperature to ensure it reaches 165°F (75°C). You can mix in different vegetables too. Zucchini, asparagus, or sweet potatoes are great choices. Cut them into even pieces for even cooking. Seasonal veggies, like squash in fall, work well too. Use what you have on hand. This recipe is flexible and fun. Want a kick? Add chili sauce to the honey mix. Start with one tablespoon and taste. You can always add more for extra heat. If you want a different flavor, try teriyaki sauce instead of soy sauce. It gives a sweet and savory twist. Just keep the same amount for balance. You can find the full recipe [here](#). To keep your Honey Garlic Sheet Pan Chicken fresh, store any leftovers in the fridge. Place the chicken and veggies in an airtight container. Make sure to cool them first. They will last about 3-4 days in the fridge. For longer storage, consider freezing. Place the chicken and vegetables in freezer bags. Remove as much air as possible to avoid freezer burn. These can last up to 3 months in the freezer. When reheating, I suggest using the oven. This method helps keep the chicken juicy and the veggies crisp. Preheat the oven to 350°F (175°C). Spread the chicken and veggies on a baking sheet. Heat for about 10-15 minutes. If you're in a hurry, you can use the microwave. Just be careful not to overcook it. Heat in short bursts, checking often to keep the texture nice. This dish pairs well with many sides. Rice or quinoa work great. You can also serve it with a simple salad. Try mixing leafy greens with a light dressing. Roasted potatoes or steamed rice are also excellent options. They will soak up the honey garlic sauce nicely. For a fun twist, add some crusty bread on the side to complete your meal. Check out the Full Recipe for more ideas on what to serve! Yes, you can use chicken breasts. They are leaner than thighs. However, they may dry out more easily. Thighs stay moist and tender during cooking. If you choose breast, watch the cooking time closely. To adjust sweetness, change the honey amount. Use less honey for less sweetness. You can add more honey for a sweeter taste. Start with a small amount, then taste the sauce. This helps you find the perfect balance. Yes, this dish is great for meal prep. Cook a big batch and store it. Keep the chicken and veggies in airtight containers. They stay fresh in the fridge for up to four days. Reheat in the oven for best results. For more tips, check the Full Recipe. This blog post covered a simple and tasty chicken recipe. You learned about key ingredients, step-by-step cooking, and tips for perfect flavor. I shared many ways to customize the dish, from different proteins to flavorful sauces. Storing tips help you keep leftovers fresh. Now, you can easily make this meal any time and enjoy it your way. Cooking should be fun and delicious. So, get in the kitchen and try it out!](https://mycookingcast.com/wp-content/uploads/2025/06/0104876c-77db-4efc-8eae-fafb8a090a4f.webp)
Ready for a dish that’s simple yet bursting with flavor? Honey Garlic Sheet Pan Chicken checks all the boxes! With
![Maple Dijon Roasted Brussels is a tasty side dish that packs flavor. You can serve it at any meal. The sweet maple syrup pairs well with the tangy Dijon mustard. The garlic adds depth, while the pecans give a nice crunch. This dish is sure to impress! To make this delicious dish, gather the following ingredients: - 1.5 pounds Brussels sprouts, trimmed and halved - 3 tablespoons olive oil - 2 tablespoons pure maple syrup - 1 tablespoon Dijon mustard - 2 cloves garlic, minced - Salt and pepper, to taste - ¼ teaspoon red pepper flakes (optional, for a spicy kick) - ¼ cup chopped pecans (optional, for crunch) - Fresh parsley, chopped (for garnish) You can swap out some ingredients if needed: - Use honey instead of maple syrup for a different sweetness. - Try whole grain mustard in place of Dijon for more texture. - If you don’t have pecans, walnuts or almonds work well, too. - For a nut-free option, skip the nuts entirely or use seeds. These substitutions keep the dish tasty and fun! First, gather your ingredients. You will need 1.5 pounds of Brussels sprouts, trimmed and halved. Next, get 3 tablespoons of olive oil, 2 tablespoons of pure maple syrup, and 1 tablespoon of Dijon mustard. Don’t forget 2 cloves of minced garlic, salt, and pepper. If you like a kick, add ¼ teaspoon of red pepper flakes. For some crunch, you can include ¼ cup of chopped pecans. Lastly, grab some fresh parsley for garnish. Now, preheat your oven to 400°F (200°C). This temperature makes the Brussels sprouts crisp and caramelized. Line a baking sheet with parchment paper for easy cleanup later. In a large bowl, mix the olive oil, maple syrup, Dijon mustard, minced garlic, salt, pepper, and red pepper flakes. Whisk this mixture well. It should blend into a smooth sauce. Next, add the halved Brussels sprouts to your bowl. Toss them gently in the maple-Dijon mixture. Make sure each sprout is fully coated. This step is key for flavor. Spread the Brussels sprouts evenly on the prepared baking sheet. They should sit in a single layer to roast evenly. If you opted for pecans, now is the time to sprinkle them over the sprouts. Place the baking sheet in your preheated oven. Roast the Brussels sprouts for 20 to 25 minutes. Don’t forget to stir them halfway through. This helps them cook evenly and get that nice caramelization. To achieve perfect caramelization, keep an eye on the sprouts as they roast. Look for a deep, golden brown color. This shows they are done. If they start to get too dark, reduce the oven temperature slightly. Adding salt helps draw out moisture from the sprouts. This moisture will caramelize and give them a sweet flavor. You can also try roasting them at a higher heat for a shorter time if you like them crispier. Once they are cooked, remove the baking sheet from the oven. Let the sprouts cool slightly. Finally, garnish with fresh chopped parsley before serving. Enjoy this tasty side dish with any meal! For the complete recipe, check out the [Full Recipe]. When picking Brussels sprouts, look for small, firm ones. They should feel heavy for their size. Their leaves must be bright green without yellow or brown spots. If the sprouts look wilted or shriveled, skip those. Fresh sprouts have a nice, tight bud and a strong smell. You can often find them on the stem; that means they are fresh! To boost the flavor of your Maple Dijon Roasted Brussels, consider adding bacon bits or lemon zest. Bacon gives a smoky taste, while lemon adds brightness. You can also try different nuts, like walnuts or almonds, for a unique crunch. Mixing in herbs such as thyme or rosemary will add depth. Experimenting helps you find your favorite flavor mix! One common mistake is overcrowding the baking sheet. Brussels need space to roast well. If they are too close, they will steam instead of caramelize. Another error is not preheating the oven. A hot oven is key for that crispy, golden finish. Lastly, avoid under-seasoning. Salt and pepper bring out the best flavors in your dish. Follow these tips to make your Brussels shine! {{image_2}} You can make Maple Dijon Roasted Brussels even heartier by adding protein. Try mixing in cooked bacon or diced chicken for added flavor. You could also use chickpeas for a plant-based option. Simply toss them in with the Brussels sprouts before roasting. The protein will soak up the delicious maple-Dijon sauce. This helps create a balanced meal that everyone will love. This recipe is easy to adapt for vegan and gluten-free diets. The main ingredients are already plant-based. Just ensure that your Dijon mustard is gluten-free. You can also skip the pecans if you have nut allergies. The maple syrup adds sweetness, while garlic gives it depth. These changes keep the flavor strong and satisfying without any animal products. You can switch up the flavors of this dish based on the seasons. In the fall, add cranberries or walnuts for a festive touch. In the winter, try adding some roasted carrots or sweet potatoes for extra warmth. For spring, toss in some fresh herbs like thyme or rosemary. These seasonal tweaks keep the dish exciting and fresh all year round. After you enjoy your Maple Dijon Roasted Brussels, store any leftovers in an airtight container. This helps keep them fresh. Place the container in the fridge, where they can last for up to four days. Make sure the Brussels sprouts cool down before sealing the container. This prevents excess moisture inside. To reheat your Brussels sprouts, preheat your oven to 350°F (175°C). Spread the sprouts on a baking sheet. Heat for about 10 to 15 minutes, or until warmed through. This method keeps them crispy. You can also use a microwave if you’re in a hurry. Just heat them in short bursts, stirring in between. If you want to save your Brussels sprouts for later, freezing is a great option. First, let them cool completely. Then, spread them in a single layer on a baking sheet. Place the sheet in the freezer for a few hours until they freeze solid. Once frozen, transfer them to a freezer-safe bag. They can last up to three months in the freezer. When you're ready to eat, thaw them in the fridge overnight before reheating. Yes, you can prepare the Maple Dijon Roasted Brussels in advance. To do this, follow the steps to coat the Brussels sprouts with the maple-Dijon mixture. Then, cover them and store in the fridge for up to 24 hours. When you are ready to cook, just spread them on the baking sheet and roast as directed. This method keeps the flavors fresh and makes meal prep easier. To make more servings, simply double the ingredients. Use three pounds of Brussels sprouts, six tablespoons of olive oil, and so on. Make sure your baking sheet can fit all the Brussels sprouts in a single layer. If not, use two sheets to ensure even roasting. This way, you keep that great flavor and texture. These roasted Brussels pair well with many dishes. Try serving them with grilled chicken or baked salmon for a complete meal. You can also serve them alongside quinoa or wild rice for a hearty option. They make a great side for holiday dinners or casual get-togethers. Feel free to get creative and mix them with your favorite proteins or grains! This post covered how to make Maple Dijon Roasted Brussels sprouts. We went over the main ingredients, preparation steps, and cooking tips. I shared ways to pick fresh sprouts and avoid common mistakes. Plus, I suggested substitutions and variations to suit your taste. Now you're ready to impress with this dish. Enjoy making it your own!](https://mycookingcast.com/wp-content/uploads/2025/06/f77358f2-1c38-43e2-a9c8-52025cd546fd.webp)
Looking for a tasty side dish that steals the show? Maple Dijon Roasted Brussels is your answer! This flavor-packed recipe
![- 2 cups vanilla ice cream - 1 cup milk (whole or almond) - 3-4 chocolate chip cookies - 2 tablespoons chocolate syrup The main ingredients of a Chocolate Chip Cookie Shake make it so rich. First, use two cups of vanilla ice cream. This gives your shake a creamy base. Next, add one cup of milk. You can use whole milk or almond milk for a dairy-free option. The milk helps blend everything smoothly. Then, crumble three to four chocolate chip cookies into the mix. These cookies add both flavor and texture. Finally, stir in two tablespoons of chocolate syrup. This syrup brings sweetness and a deep chocolate taste. - Whipped cream - Extra chocolate chips - Cookie crumbles Garnishes make your shake look and taste even better. You can top your shake with whipped cream. This fluffy layer adds fun and creaminess. For a little crunch, sprinkle extra chocolate chips on top. Cookie crumbles also make a great garnish. They add a nice touch and a bit more cookie goodness. You can get creative with your toppings based on what you love! Check the [Full Recipe] to see all the steps for making this delicious shake. - Step 1: Blend vanilla ice cream and milk Start by adding 2 cups of vanilla ice cream to your blender. Then, pour in 1 cup of milk. You can use whole milk or almond milk for a dairy-free option. Blend these together on medium speed. Keep blending until it is smooth and creamy. - Step 2: Add cookies and chocolate syrup Next, take 3-4 chocolate chip cookies and crumble them into pieces. Add these cookie pieces to the blender along with 2 tablespoons of chocolate syrup. Pulse a few times. You want the cookies to mix in but stay chunky. - Step 3: Adjust sweetness and blend Now, taste your shake. If you want it sweeter, add more chocolate syrup. Blend again briefly to mix in the syrup. This step ensures your shake is just the right level of sweetness. - Step 4: Pour into glasses Carefully pour the shake into tall glasses. Try to fill them evenly so each glass has the same amount. - Step 5: Top with whipped cream Now it’s time for the fun part! Add a generous dollop of whipped cream on top of each shake. This makes it look and taste even better. - Step 6: Garnish and serve Finally, sprinkle some extra chocolate chips or cookie crumbles on top for garnish. It adds a nice touch and makes your shake even more appetizing. Serve it right away, and enjoy this delicious treat! To craft a great shake, start by choosing the right ice cream. I recommend using rich vanilla ice cream. It adds a smooth base that pairs well with cookies. For a fun twist, try using cookie dough ice cream. Next, opt for cold milk. This helps create a thicker shake. You can use whole milk for creaminess or almond milk for a lighter option. The cold milk gives your shake a nice texture. When blending, I suggest using the pulse feature. This allows you to mix the shake without turning it into liquid. You want some cookie chunks to stay intact. If you blend too much, you lose that delightful crunch. Avoid over-blending to maintain the shake's texture. Blend just enough to mix the ingredients well. This keeps your shake creamy yet chunky, just how I like it. Check out the [Full Recipe] for more details on making this delicious treat! {{image_2}} You can easily adapt the Chocolate Chip Cookie Shake for different diets. For a vegan version, swap the vanilla ice cream with a plant-based option. Almond or coconut ice cream works well. Use almond milk instead of whole milk. This way, you'll keep the shake creamy and delicious without dairy. If you need gluten-free cookies, choose brands that use gluten-free flour. Many stores sell tasty gluten-free chocolate chip cookies. Just like with the vegan option, this keeps the shake flavorful and accessible to everyone. Want to mix things up? Try adding different cookies! Oreos are a fun choice. They bring a rich flavor and a twist to the classic shake. Just crumble them into the mix like you do with chocolate chip cookies. You can also add peanut butter for a nutty kick. Just two tablespoons can transform the shake. It adds creaminess and a punch of flavor. You can explore other mix-ins too, like crushed pretzels or even sprinkles. The options are endless! For more ideas, check the Full Recipe and get creative with your shake. If you have leftover shake, store it in an airtight container. This helps keep it fresh. You can put it in the fridge for up to two days. If you want it to last longer, freeze it. It can stay in the freezer for one month. Just remember, the shake may lose some creaminess when thawed. You can use leftover shake in fun ways. Pour it over ice cream for a sundae treat. Mix it into pancake batter for a sweet breakfast twist. You can also make milkshakes using the leftover shake as a base. When freezing shakes, pour them into ice cube trays. This way, you can blend them later for a quick treat. How can I make a dairy-free Chocolate Chip Cookie Shake? You can use almond milk or coconut milk instead of regular milk. Just swap the milk in the recipe. Use coconut or cashew ice cream for a creamy base. This way, you still get that rich taste without dairy. What are the nutritional facts of a Chocolate Chip Cookie Shake? A typical shake has about 600 calories. It can have 30 grams of fat and 75 grams of carbs. The exact numbers depend on the ice cream and milk you use. Check labels for precise info. Can I make this shake without a blender? Yes! You can use a large bowl and a whisk. Crush the cookies by hand. Mix the ice cream and milk in the bowl, then add the cookies and syrup. Stir well until smooth. It may take more effort, but it works! Where can I find the best Chocolate Chip Cookie Shake around me? Look at local ice cream shops or diners. Many places offer this shake. Check online reviews to find the best spot. You can also ask friends for their favorites! Are there healthier alternatives to traditional shakes? Yes! Try using Greek yogurt instead of ice cream. You can add fruits like bananas or strawberries for natural sweetness. This lowers calories and adds nutrients. How can I make my Chocolate Chip Cookie Shake thicker? Use less milk or add more ice cream. You can also freeze the milk for a thicker base. Blending for a shorter time helps keep it chunky too. In this blog post, you learned how to make a delicious Chocolate Chip Cookie Shake. We discussed key ingredients, step-by-step instructions, and helpful tips for the perfect shake. I also covered variations for different diets and ways to store leftovers. Enjoy experimenting with flavors and garnishes. Each shake is a treat, so have fun making it your own. Remember, the best shake is one you love. Get blending and savor every sip!](https://mycookingcast.com/wp-content/uploads/2025/06/7b865a27-5093-4762-80b5-6dcd91ae5284.webp)
Craving something sweet? You’ve hit the jackpot with this irresistible Chocolate Chip Cookie Shake! We’ll whip up a thick, creamy
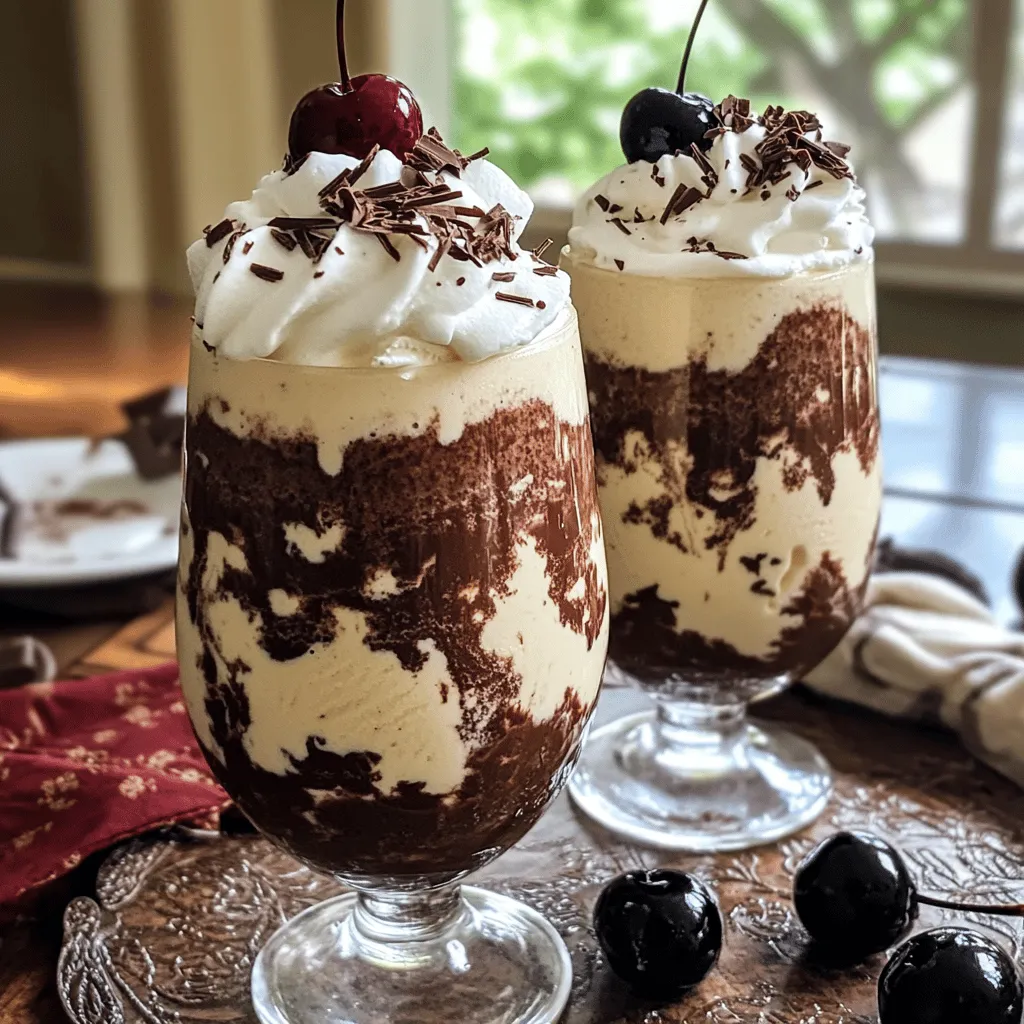
Are you craving a rich and creamy treat? The Black Forest Shake is a delightful dessert that combines vanilla ice
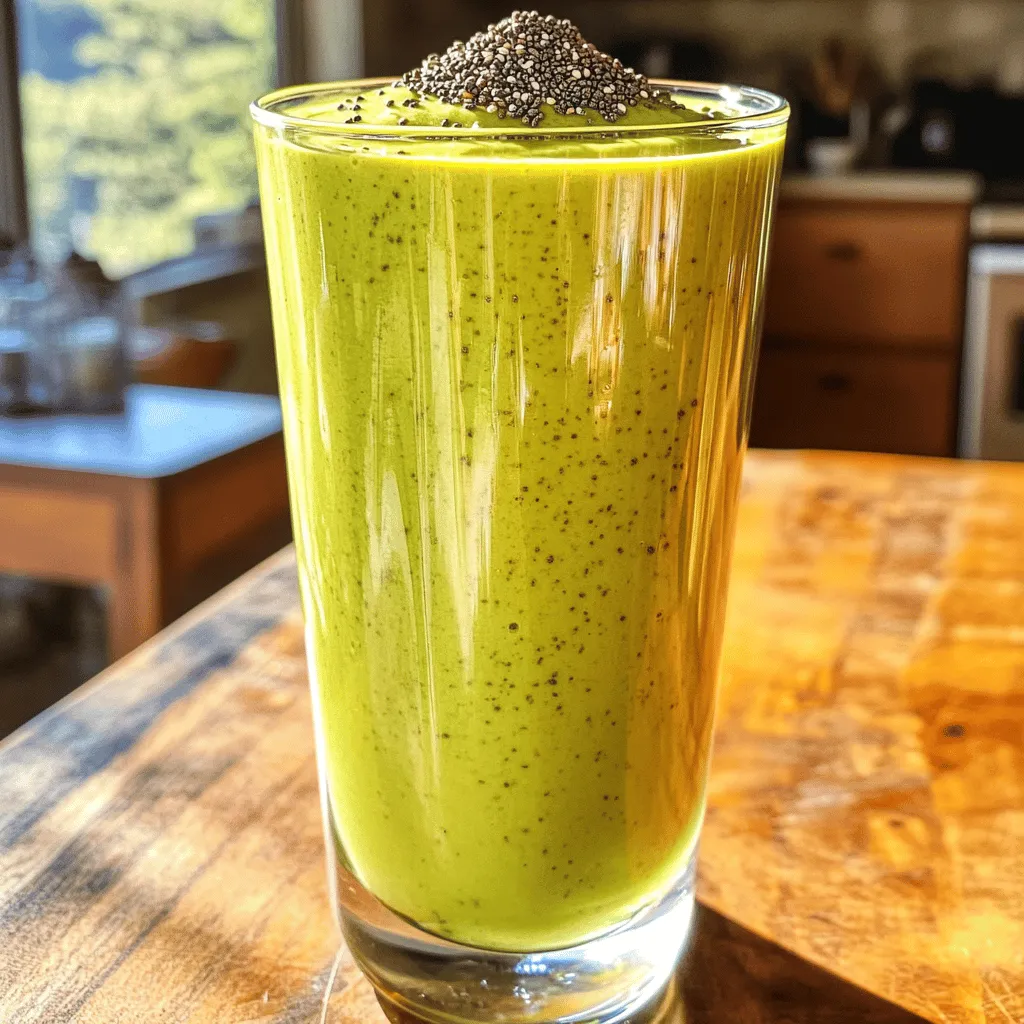
Are you looking for a tasty and nutritious shake? The Honey Matcha Protein Shake is a perfect choice! Packed with
![To make a refreshing Raspberry Peach Lemonade, gather these simple ingredients: - Fresh raspberries - Ripe peaches - Freshly squeezed lemon juice - Sugar - Water - Ice cubes - Garnishes Each ingredient plays a key role in creating a delicious drink. Fresh raspberries add a sweet-tart flavor, while ripe peaches bring a juicy sweetness. Fresh lemon juice gives the drink its bright, zesty kick. Sugar balances the tartness, making the drink smooth. The water helps mix everything well, and ice cubes keep it cool for hot days. Lastly, garnishes like mint leaves or lemon slices make your drink look pretty and add more flavor. For the full recipe, including all steps, check out the [Full Recipe]. Enjoy your time preparing this delightful drink! Start by blending the fresh raspberries and sliced peaches. Toss one cup of raspberries into the blender along with two ripe peaches. Blend until smooth. If you want a silky texture, strain the mixture through a fine-mesh sieve. This step removes seeds and pulp, giving you a clean puree. Now, take your raspberry-peach puree and add it to a large pitcher. Pour in one cup of freshly squeezed lemon juice, which usually comes from about four to six lemons. Add one cup of sugar to the mix. Stir well until the sugar completely dissolves. Next, add four cups of water to the pitcher. Mix it all together. Taste your lemonade. If it’s too sweet, add a bit more lemon juice. If it’s too tart, add more sugar or water. Adjust the flavors to suit your taste. Refrigerate your lemonade for at least 30 minutes before serving. This step helps the flavors blend and enhances the taste. Serve the lemonade over ice cubes in tall glasses. For a lovely touch, garnish each glass with lemon slices and fresh mint leaves. Enjoy your vibrant and fruity raspberry peach lemonade! For the full recipe, check out the details above. To make your raspberry peach lemonade taste just right, focus on sweetness and tartness. Start with the sugar amount in the recipe. If you like it sweeter, add more sugar. If you prefer it tart, use less sugar. You can also balance the taste by adding more lemon juice. For garnishes, fresh mint leaves and lemon slices work well. They add color and flavor. Place them on top of your drink for a nice look. You can even freeze some raspberries and peaches as ice cubes. They keep your drink cold and make it pretty! If you want to prep for a party, you can make this drink a day before. Just follow the recipe and store it in the fridge. It will taste great even after a few hours. When your guests arrive, serve it over ice. This makes it cool and refreshing. You can also have all your ingredients ready. Slice the peaches and wash the raspberries earlier. This way, you save time when preparing the drink. Using the right tools can make your lemonade even better. A good blender will help you make a smooth raspberry-peach puree. I recommend a high-speed blender for the best results. For serving, a large pitcher is useful. Look for one that holds at least 2 liters. This way, you can make a big batch for everyone to enjoy. A tall glass helps show off the pretty colors of your raspberry peach lemonade. For the complete recipe, check out [Full Recipe]. {{image_2}} You can boost the flavor of your Raspberry Peach Lemonade in fun ways. Adding herbs like basil or rosemary gives a fresh twist. Just toss in a few leaves when you blend the fruits. You can also try spices like ginger or cinnamon for a warm touch. Mixing different fruits can change the taste too. Instead of peaches, use mango or strawberries. Each fruit brings its own special flavor. You can even mix in a few slices of lime for a zesty kick. If you want a sweeter drink without sugar, try these options. Stevia is a great choice and has fewer calories. Honey adds a nice flavor, but it may change the taste. Maple syrup is another natural sweetener you can use. You can also use agave syrup, which dissolves easily. Adjust the amount based on your taste. Remember, each sweetener has its own flavor, so use what you like best. Want to make a spiked lemonade? It’s easy and fun! Add vodka or rum for a refreshing cocktail. Start with about 1-2 ounces of alcohol per serving. Mix it in after combining your lemonade. For a fruity twist, add a splash of peach schnapps or raspberry liqueur. These will enhance the flavors of the fruits. Always remember to serve responsibly and enjoy! For the full recipe, check out the Raspberry Peach Lemonade section above. To keep your raspberry peach lemonade fresh, store it in a sealed pitcher. This helps keep the flavors intact. If you have leftover lemonade, try to drink it within a few days. This drink tastes best when it's fresh. If you have any garnishes, like mint or lemon slices, add them just before serving. You can freeze raspberry peach lemonade for later use. Pour the lemonade into ice cube trays. Once frozen, pop them out and store in a bag. This way, you can enjoy a cool drink on a hot day. Just drop the cubes into a glass of water or soda for a fruity twist. In the fridge, raspberry peach lemonade lasts about 5 to 7 days. After that, it may lose its bright flavor. Check for any changes in smell or taste before using. Always give it a good stir before you serve. Even if it sits for a while, the flavors can settle. Enjoy your drink fresh and vibrant! How to make Raspberry Peach Lemonade using frozen fruits? You can use frozen raspberries and peaches. Just blend them as you would with fresh fruit. The taste will still be great. You may need to add a bit more water to balance the thickness. Can I use bottled lemon juice instead of fresh? Yes, you can use bottled lemon juice. However, fresh juice gives a better taste and flavor. It makes a big difference in your drink. Freshly squeezed juice is always best when you can get it. What are the health benefits of the ingredients? Raspberries are full of fiber and vitamins. Peaches are great for hydration and also have vitamins. Lemon juice helps with digestion and boosts your immune system. This drink is a tasty way to enjoy these benefits. What food pairs well with Raspberry Peach Lemonade? This drink goes well with light foods. Try it with salads, grilled chicken, or seafood. It also pairs nicely with spicy dishes, balancing the heat with its sweet flavor. Can I serve this drink at a party? Absolutely! This drink is perfect for parties. You can make a big batch in advance. Serve it in a large pitcher for guests to help themselves. What can I substitute for peaches? If you can't find peaches, use nectarines or apricots. Both fruits work well in this drink. You can also try using mango for a fun twist. This blog post covered how to make Raspberry Peach Lemonade. You learned about the key ingredients, including fresh fruit and lemon juice, and made a tasty puree. I shared tips to perfect the flavor and ideas for variations. You now know how to store your lemonade and how to handle common questions. In summary, you have all you need to make a refreshing drink. Enjoy sharing this refreshing lemonade with friends or at your next party!](https://mycookingcast.com/wp-content/uploads/2025/06/ae193e37-e2b1-40d0-899a-0e6b601cfca9.webp)
Summer is here, and nothing cools you down like a vibrant Raspberry Peach Lemonade! This refreshing drink bursts with flavor,
