Skip to content
DisclaimerTerms Of UseGDPR PolicyCookie Policy

My Cooking Cast

  • Home
  • Drinks
  • Appetizers
  • Dinner
  • Dessert
  • About
  • Contact
  • Privacy Policy
DisclaimerTerms Of UseGDPR PolicyCookie Policy

Emma

- 4 large eggs - 1 ripe avocado, mashed - 2 tablespoons Greek yogurt - 1 tablespoon Dijon mustard - 1 small red onion, finely chopped - 1 celery stalk, finely chopped - 1 tablespoon fresh lemon juice - 1 tablespoon fresh dill, chopped (or 1 teaspoon dried dill) - Salt and pepper to taste - Lettuce leaves for serving (optional) To make a tasty avocado egg salad, start with the main ingredients. Boil the eggs until they are firm and cool them down. You want a creamy base, so mash a ripe avocado in a bowl. Mix in Greek yogurt and Dijon mustard for that tangy flavor. Next, add some crunch with finely chopped red onion and celery. A splash of fresh lemon juice brightens the dish. Lastly, sprinkle in some fresh dill for an herbaceous note. Season your salad with salt and pepper to bring out the flavors. You can serve it on fresh lettuce leaves for a crisp bite. For the full recipe, check out the details above. Enjoy this creamy and delightful dish! - Boil the eggs in a medium saucepan. - Transfer to ice bath after boiling. - Peel and chop eggs. To start, place the eggs in a medium saucepan. Cover them with cold water and bring it to a boil. Once boiling, lower the heat. Let them simmer for about 9-12 minutes. This time helps you get the eggs just right. After cooking, care for the eggs. Transfer them to an ice bath. This cools them quickly and makes peeling easier. Once they cool down, peel and chop the eggs into small pieces. - Mash the ripe avocado. - Mix in Greek yogurt, Dijon mustard, and lemon juice. Next, grab a ripe avocado. Cut it open and scoop the green flesh into a bowl. Mash it well until it’s smooth. Now, add Greek yogurt, Dijon mustard, and fresh lemon juice. Stir everything together until it's creamy. The yogurt adds a nice tang. The mustard gives it a zesty kick. - Fold chopped eggs, onion, celery, and dill into the avocado mixture. - Season with salt and pepper to taste. Now, it’s time to combine! Gently fold the chopped eggs into your avocado mixture. Add in finely chopped onion, celery, and dill. Mix carefully so you don’t mash the eggs too much. Lastly, season with salt and pepper to taste. This brings all the flavors together in a delicious way. Enjoy your Avocado Egg Salad on a bed of lettuce or in a sandwich. For the full recipe, you can check the recipe section above. To make the perfect eggs, boil them gently. Start by placing the eggs in a medium saucepan. Cover them with cold water. Bring the water to a boil over high heat. Once boiling, reduce the heat to low. Simmer them for 9-12 minutes based on how firm you want the yolks. For soft yolks, aim for 9 minutes. For hard yolks, go for 12 minutes. After cooking, cool the eggs quickly. Transfer them to an ice bath right away. This stops the cooking process and makes peeling easier. Once cool, peel the eggs and chop them into small pieces. For a creamy avocado egg salad, use ripe avocados. A ripe avocado is soft and easy to mash. This gives your salad the right texture. If you want it creamier, adjust the Greek yogurt. Add more yogurt for a smoother blend. Just be careful not to overpower the avocado flavor. Spice up your salad with different herbs or spices. Fresh dill adds a lovely taste, but feel free to experiment. You can try chives, parsley, or even cilantro. Each herb brings its own twist. If you like a bit of heat, add a pinch of cayenne. This little kick can change the whole dish. It makes the flavors pop and keeps things interesting. For the full recipe, check out the Avocado Egg Salad with a Zesty Twist. {{image_2}} You can change the base of the salad for different diets. Use vegan mayonnaise instead of Greek yogurt. This keeps the creaminess while making it plant-based. Swap Dijon mustard for yellow mustard for a milder taste. Yellow mustard is sweeter and less sharp. Feel free to get creative with add-ins. Incorporate diced tomatoes or bell peppers for added texture. They bring a nice crunch and fresh flavor. You can also use cooked bacon bits for a savory twist. Bacon adds a salty richness that pairs well with the creamy avocado. How you serve your salad can change the dining experience. Serve on whole grain bread for sandwiches. This makes for a filling lunch option. You can also pair the salad with crackers as an appetizer. It’s perfect for a light snack or party platter. For the full recipe, check out the details above. Enjoy your culinary adventure! To store leftovers of avocado egg salad, place it in an airtight container. This keeps the salad fresh and safe. You can keep it in the fridge for up to three days. After that, the avocado may turn brown, and the taste may change. Always check for any signs of spoilage before eating. You can freeze avocado egg salad, but I don't recommend it. The texture changes when thawed. Avocados can become mushy, and eggs may lose their appealing look. If you must freeze it, put it in a freezer-safe container. Use it within a month for the best taste. To refresh the salad after refrigeration, give it a good stir. You might need to add a splash of lemon juice or a bit more Greek yogurt. This helps restore its creaminess. If the salad seems dry, gently fold in more mashed avocado. Always taste before serving to ensure it still has great flavor and texture. To make this dish healthier, you can swap Greek yogurt for low-fat yogurt. You can also reduce the amount of mayonnaise or use a lighter version. Adding more veggies, like spinach or cucumber, boosts nutrition without adding many calories. Yes, you can make this salad a day in advance. Just store it in an airtight container in the fridge. To keep it fresh, add lemon juice to slow browning. It’s a great way to save time for busy days. Avocados are full of healthy fats, fiber, and vitamins. Eggs provide protein and essential nutrients like Vitamin D. Together, they support good heart health and can help keep you full longer. This salad is a tasty way to enjoy these benefits. If you need an egg alternative, you can use tofu. Mashed or blended silken tofu works well. You can also try chickpeas, which add protein and texture. Both options will change the flavor but still taste great. This salad lasts about 2-3 days in the fridge. Keep it in an airtight container to maintain freshness. Always check for any changes in smell or texture before eating. Enjoy it while it’s still tasty! For more details, check out the Full Recipe. This blog post outlined a tasty avocado egg salad. We discussed key ingredients like eggs, avocado, and Greek yogurt. You learned step-by-step cooking and combining methods. We shared tips for creamy texture and flavor options. Dietary substitutes and storage tips helped you customize this dish. In the end, making this salad is easy and flexible. Enjoy it your way and share it with others!

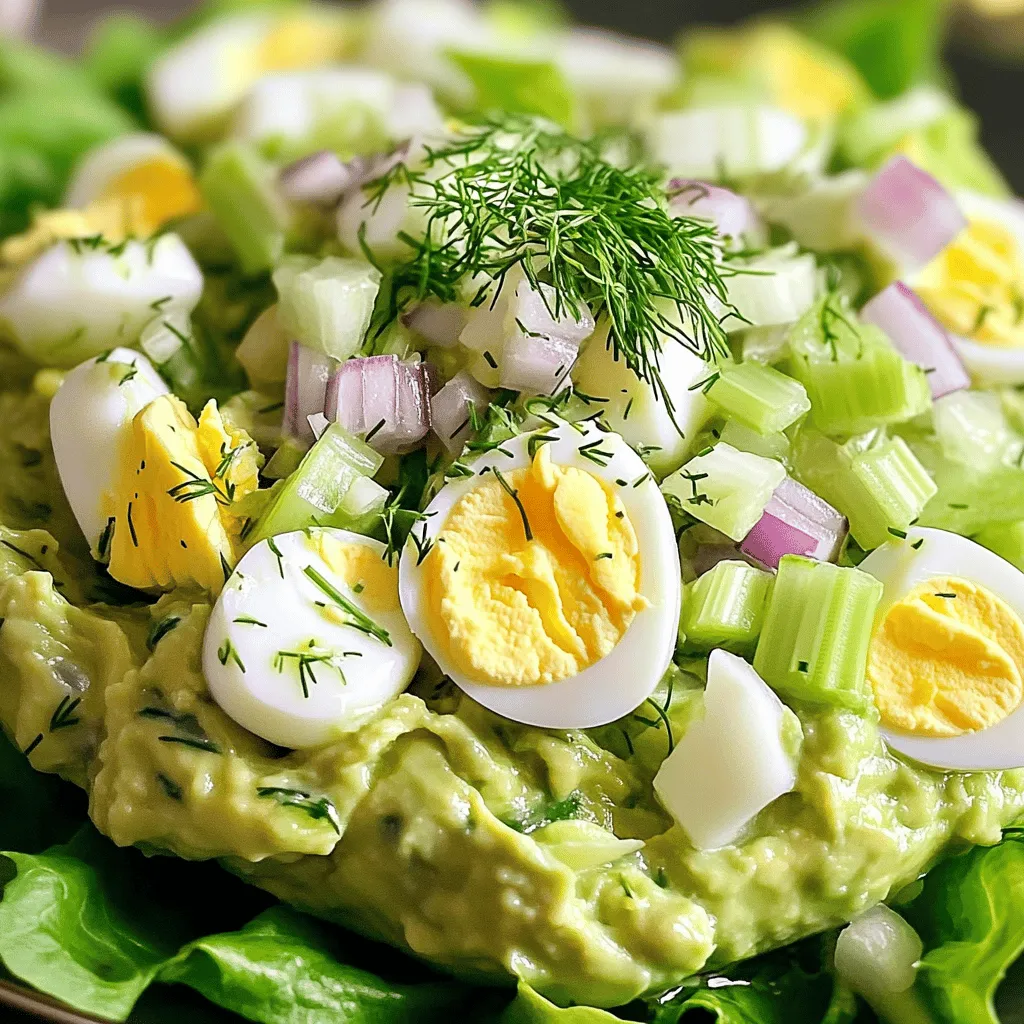
Avocado Egg Salad Creamy and Flavorful Delight

Are you ready to transform your lunch routine? This Avocado Egg Salad is a creamy and flavorful delight that combines

To make cheesy spinach stuffed shells, you need a few key ingredients. Each one plays a vital role in crafting this delicious dish. Here’s what you’ll need: - 20 jumbo pasta shells - 2 cups fresh spinach, chopped - 1 cup ricotta cheese - 1 cup mozzarella cheese, shredded - ½ cup Parmesan cheese, grated - 1 egg, beaten - 2 cloves garlic, minced - 1 teaspoon Italian seasoning - Salt and pepper to taste - 2 cups marinara sauce - Fresh basil leaves for garnish Each ingredient adds flavor and texture. The jumbo pasta shells hold the creamy filling. Fresh spinach gives a nice color and health boost. Ricotta cheese adds creaminess, while mozzarella brings the gooey melt we all love. Parmesan cheese gives a sharp taste that balances the dish. The egg helps bind the filling, making it easier to stuff the shells. Garlic and Italian seasoning add depth and warmth to the flavors. Salt and pepper enhance all the tastes. Finally, marinara sauce adds a tangy base that complements the cheesy goodness. For the full recipe, check out the details above. This dish is simple yet satisfying, perfect for family dinners or gatherings. First, gather your ingredients. You will need jumbo pasta shells, spinach, and various cheeses. This dish comes together quickly. Make sure your oven is preheated to 375°F (190°C) before you start cooking. Boil a large pot of salted water. Once it boils, add the jumbo shells. Cook them according to the package instructions. You want them al dente, so check them a minute early. Drain the shells and set them aside to cool. In a mixing bowl, combine the chopped spinach, ricotta cheese, half the mozzarella, Parmesan cheese, and a beaten egg. Add minced garlic, Italian seasoning, salt, and pepper. Mix everything well until it is fully combined. This filling is creamy and packed with flavor. Take each cooked shell and fill it with the cheese and spinach mixture. Place the stuffed shells upright in a baking dish. Pour marinara sauce over the shells, making sure they are well-coated. Sprinkle the remaining mozzarella on top. Cover the dish with foil and bake for 25 minutes. After that, remove the foil and bake for another 10-15 minutes. Look for bubbly, golden cheese. Garnish with fresh basil leaves before serving. Enjoy your delicious cheesy spinach stuffed shells! For the complete recipe, check the [Full Recipe]. Cooking pasta shells well is key. Start by using a big pot with lots of water. Add a good amount of salt; it helps flavor the shells. Bring the water to a boil before adding the shells. Cook them just until they are al dente. This means they should be firm, not mushy. Once done, drain them gently. Rinse with cold water to stop the cooking process. This keeps them from sticking together. Stuffing the shells can get messy, but I have a few tricks. Use a small spoon or a pastry bag to fill the shells. This keeps the filling inside and off your hands. If using a spoon, gather a good amount of filling and drop it in. Don’t overfill, as it will spill out while baking. Place the stuffed shells upright in the dish. This way, they stay neat and hold their shape. You can mix up the cheese filling in fun ways. Try adding feta for a tangy kick. Cream cheese can make the filling extra creamy. If you love spice, add some red pepper flakes. For a different flavor, mix in some sun-dried tomatoes or artichokes. You can also swap the spinach for other greens like kale or Swiss chard. Explore these options to find your favorite twist on the classic cheesy spinach stuffed shells recipe. For the complete recipe, check out the Full Recipe section. {{image_2}} You can switch up the cheeses in this dish. For a sharp taste, try using feta cheese instead of ricotta. Goat cheese also adds a creamy and tangy flavor. You can mix in some sun-dried tomatoes for a burst of flavor. If you want a richer taste, add a bit of cream cheese to the filling. For a vegetarian twist, keep the recipe as is. Just make sure your marinara sauce is meat-free. If you need a gluten-free option, use gluten-free jumbo shells. They cook similarly to regular pasta. Just follow the package instructions to ensure they are tender and hold the filling well. To add some heat, sprinkle in red pepper flakes to the filling. You can also use pepper jack cheese instead of mozzarella. For a creamier filling, add more ricotta or use a mix of cream cheese and sour cream. This will give your stuffed shells a rich texture and flavor that everyone will love. For the full recipe, check the details above. To store your leftover cheesy spinach stuffed shells, let them cool first. Place them in an airtight container. You can keep them in the fridge for up to three days. If you want them to last longer, consider freezing them. Freezing is a great option for meal prep. Arrange the stuffed shells in a single layer on a baking sheet. Freeze them for about two hours until solid. Once frozen, move them to a freezer-safe container. They can stay good for up to three months. Just remember to label the container with the date. When you’re ready to enjoy your leftovers, there are a few ways to reheat them. The oven works best. Preheat it to 350°F (175°C). Place the shells in a baking dish and cover them with foil. Heat for about 20 minutes until warmed through. You can also microwave them if you're short on time. Just be sure to cover them to keep the moisture in. Enjoy your delicious meal again! Yes, you can make cheesy spinach stuffed shells ahead of time. Prepare the dish as usual, but do not bake it. Cover the baking dish with plastic wrap or foil. Store it in the fridge for up to 24 hours. When ready, just bake it as per the recipe. This helps save time on busy days. Cheesy spinach stuffed shells pair well with many sides. Here are some great options: - A fresh green salad with a light vinaigrette - Garlic bread for a crunchy side - Roasted vegetables like zucchini or bell peppers - A bowl of minestrone soup for a warm touch These sides enhance your meal and add to the flavor. Absolutely! You can switch up the cheese in cheesy spinach stuffed shells. Here are some tasty alternatives: - Use feta cheese for a tangy twist - Try goat cheese for a rich flavor - Add cream cheese for extra creaminess Feel free to mix and match cheeses. Just keep the total amount the same to maintain the texture. This adds fun and variety to your dish. For the full recipe, check the details above. In this article, we covered how to make cheesy spinach stuffed shells. We looked at the key ingredients like jumbo pasta shells and fresh spinach. We went through easy prep steps, cooking, and assembly. I shared helpful tips for perfect pasta and stuffing. You learned about fun variations and storage tips. Cooking this dish can be fun and rewarding. With practice, you can impress everyone with your skills. Enjoy every bite and keep experimenting!

Cheesy Spinach Stuffed Shells Easy and Tasty Recipe

Ready to impress your taste buds? Cheesy Spinach Stuffed Shells are simple, tasty, and perfect for family dinners. With creamy

- Zucchini - Bell peppers - Red onion - Cherry tomatoes - Mushrooms When making grilled vegetable skewers, use fresh vegetables. Zucchini adds a nice crunch. Bell peppers give sweet flavor and color. Red onion brings a bit of sharpness. Cherry tomatoes add juiciness. Mushrooms provide a hearty texture. - Olive oil - Balsamic vinegar - Garlic powder - Dried oregano - Salt and pepper A good marinade makes a difference. Olive oil helps the veggies stay moist. Balsamic vinegar adds sweetness and tang. Garlic powder gives it a savory kick. Dried oregano offers a hint of earthiness. Salt and pepper enhance all the flavors. - Fresh basil - Other herbs and spices Garnishes can brighten your dish. Fresh basil adds a fragrant touch. You can use other herbs like parsley or thyme. Spices can also add extra flavor. Think about what you like! For the full recipe, check the recipe section above. To start, wash your vegetables well. For the zucchini, slice it into rounds about half an inch thick. Cut the bell pepper into bite-sized chunks. Chop the red onion into wedges, keeping them large enough to stay on the skewer. Cherry tomatoes can stay whole. For mushrooms, just cut them in half. Uniform sizes help them cook evenly. Try to keep all pieces about the same size. This way, each bite will have a mix of flavors and textures. Now, let's whisk together the marinade. In a bowl, combine two tablespoons of olive oil, one tablespoon of balsamic vinegar, one teaspoon of garlic powder, and one teaspoon of dried oregano. Add salt and pepper to taste. Mix until it’s well blended. Once your marinade is ready, pour it over the cut vegetables. Toss them gently to coat each piece. Let them marinate for at least 15 minutes. This will help the veggies soak up that tasty flavor. While your vegetables marinate, preheat your grill to medium-high heat. This is key for getting those nice grill marks. Next, take your skewers. Thread the marinated vegetables onto them. Alternate colors and types for a pretty look. This also helps with even cooking. When the grill is hot, place the skewers on it. Grill for about 10 to 12 minutes, turning them often. You want them to be tender and have a nice char. Once done, let the skewers rest for a couple of minutes. If you like, garnish with fresh basil. Now, you can enjoy these colorful grilled vegetable skewers! For the complete recipe, check out [Full Recipe]. For grilling vegetable skewers, the right temperature matters. Aim for medium-high heat, around 400°F (204°C). This heat allows the veggies to cook evenly and get nice grill marks. Check your grill with a hand test. Hold your hand above the grill; if you can hold it there for 5 seconds, it’s ready. Turning your skewers is key too. Rotate them every few minutes. This ensures even cooking and great char on all sides. You want all the veggies to have that perfect grilled flavor. Using different marinades can elevate your skewers. Try a mix of olive oil, balsamic vinegar, and spices. You can use garlic powder and dried oregano for a simple yet tasty base. Let your vegetables soak in the marinade for at least 15 minutes. This time allows the flavors to seep in. Herbs can add extra taste. Fresh basil, thyme, or rosemary work well. You can chop them finely and sprinkle on the skewers before grilling. This step will bring out more flavor in your veggies. Serving your grilled vegetable skewers can be fun and creative. Place them on a large platter for everyone to enjoy. You can alternate colors for a vibrant look. This adds to the visual appeal and makes the dish more inviting. For a nice touch, drizzle some balsamic glaze over the top. It gives a shiny finish and adds a sweet flavor. You can also sprinkle fresh herbs around the plate. These small details make your dish pop and look restaurant-quality. Try the Full Recipe for a delightful experience with these colorful grilled vegetable skewers! {{image_2}} You can use many seasonal veggies to change the flavor of your skewers. Try asparagus in spring or cherry tomatoes in summer. Fall brings great choices like sweet potatoes or Brussels sprouts. Each season offers new tastes and colors. You can also add fruits to your skewers. Pineapple and peaches taste sweet when grilled. They add a fun twist to your dish. Pairing fruits with veggies gives a nice mix of flavors. Explore Asian-inspired marinades for a unique flavor. Soy sauce, ginger, and sesame oil work well with veggies. This gives your skewers a tasty, bold profile. Mediterranean flavors are also great. Use olive oil, lemon juice, and herbs like thyme and rosemary. This adds a fresh and bright taste to your grilled veggies. You can choose between metal and wooden skewers. Metal skewers last longer and don’t burn. Wooden skewers need soaking in water to prevent burning on the grill. Try different skewer shapes for fun. Round skewers allow for easy turning. Flat skewers keep veggies from spinning. Get creative with your shapes and have fun grilling! For the full recipe, check out the detailed instructions. To store leftover grilled vegetable skewers, let them cool first. Place the skewers in an airtight container. This helps keep them fresh. You can also wrap them in plastic wrap or aluminum foil. For best results, store them in the fridge. Leftovers last about three days. When you want to enjoy the skewers again, reheating is key. The best method is to use a grill or stovetop. Heat the grill to medium-low. Place the skewers on for about 5 minutes. This method keeps them crispy. You can also use a microwave but be careful. The microwave can make the vegetables soggy. If you choose this method, use low power for a short time. Yes, you can freeze grilled vegetable skewers! First, let them cool completely. Wrap each skewer in plastic wrap. Then place them in a freezer bag. Squeeze out the air before sealing. This helps prevent freezer burn. When you want to eat them, take them out and thaw overnight in the fridge. Reheat them on the grill or stovetop for the best taste. To stop vegetables from sticking, start by preheating your grill. A hot grill helps create a nice sear. Here are best practices to follow: - Clean the grill grates before use. This removes any old food bits. - Apply oil to the grill grates. Use a paper towel or brush to spread a thin layer. - Lightly coat your vegetables with oil. This helps keep them moist and flavorful. By using these tips, your skewers will slide off easily and stay intact. Yes, you can cook grilled vegetable skewers in the oven. Here’s how to get those grilled flavors: - Preheat your oven to 400°F (200°C). - Place your skewers on a baking sheet lined with foil. - Use the broil setting for a few minutes at the end. This adds a nice char. This method gives you great taste, even without an outdoor grill. Pair your skewers with tasty dips. Here are some great options to try: - Hummus: Creamy and flavorful, it complements the veggies well. - Tzatziki: This cool yogurt dip adds a refreshing taste. - Chimichurri: A herby sauce that brings a zesty kick. These dips enhance the flavor of grilled vegetable skewers and make them even more enjoyable. Grilled vegetable skewers offer great flavor and nutrition. You learned about key ingredients, from fresh vegetables to marinades. The step-by-step guide helps you prepare, marinate, and grill delicious skewers. Remember to experiment with different veggies and marinades for variety and taste. Proper storage and reheating methods will keep leftovers enjoyable. With these tips, you can create tasty skewers every time. Enjoy your grilling journey and impress your friends and family with your skills!

Grilled Vegetable Skewers Flavorful and Healthy Delight

Are you ready to turn your summer barbecue into a flavor fiesta? Grilled vegetable skewers are here to steal the

- 8 oz spaghetti or linguine - 1 lb large shrimp, peeled and deveined - 4 cloves garlic, minced - 1 red chili, deseeded and finely chopped - 1/2 teaspoon red pepper flakes (optional) - 1/4 cup olive oil - 1/2 cup cherry tomatoes, halved - 1/4 cup fresh parsley, chopped - Juice of 1 lemon - Salt and pepper to taste - Grated Parmesan cheese (optional) Fresh ingredients make a big difference in taste. The shrimp should be large and firm. Look for bright, shiny shells. Garlic should be plump and aromatic. Fresh parsley adds a nice green touch to the dish. If you have a gluten allergy, use gluten-free pasta instead of regular pasta. You can also swap out large shrimp for scallops or chicken. Each option offers a unique flavor while keeping the dish vibrant and tasty. For extra zing, try adding a splash of white wine to the sauce. It enhances the flavor and brings a touch of elegance. Remember, you can find the Full Recipe at the end of this article for all the steps and tips. To make the best spicy garlic shrimp pasta, start with the right pasta. I love using spaghetti or linguine for this dish. 1. Cook the Pasta: Bring a large pot of salted water to a boil. Add the pasta and cook it based on the package instructions. Aim for al dente texture. This means the pasta should be firm but not hard. 2. Reserve Pasta Water: Before draining, save about half a cup of the pasta water. This water helps the sauce stick to the pasta later. Now, let’s get to the shrimp. This is where the magic happens. 1. Sauté Garlic and Chili: In a large skillet, heat olive oil over medium heat. Add minced garlic and chopped red chili. Cook for about 1-2 minutes. Keep an eye on the garlic; it can burn easily! 2. Cook the Shrimp: Add the shrimp to the skillet. Sprinkle with salt, pepper, and red pepper flakes if you want more heat. Cook for about 3-4 minutes. The shrimp will turn pink and opaque when they are done. 3. Check for Doneness: Perfectly cooked shrimp should curl slightly and feel firm to the touch. Now it's time to mix everything together to create a wonderful dish. 1. Add Tomatoes and Lemon: Stir in halved cherry tomatoes and cook for another two minutes. They should soften a bit. Then, add lemon juice and the reserved pasta water. Stir well to combine. 2. Combine Pasta: Add the drained pasta to the skillet. Toss everything together until the pasta is well coated in the sauce. Make sure the flavors mix throughout. 3. Mix Thoroughly: Mixing well is key. It ensures that every bite is full of flavor. This step-by-step guide will help you create a vibrant and flavorful meal. For the complete recipe, check the Full Recipe link. Enjoy your cooking! - To adjust heat levels, vary the chili used. You can use less chili if you prefer mild. - Prepare ingredients ahead. Chop the garlic and tomatoes before you cook. This saves time and keeps you organized. - For a restaurant-style look, use fresh parsley and lemon wedges. A sprinkle of red pepper flakes adds color too. - Avoid overcooking shrimp. They should turn pink and opaque in about 3-4 minutes. - Always season the pasta water. This gives the pasta flavor as it cooks. - Do not skip the reserved pasta water. It helps to create a creamy sauce that clings to the pasta. {{image_2}} For a vegetarian version, skip the shrimp and add more veggies. You can use mushrooms for a nice texture. Spinach and bell peppers bring color and taste. If you want a creamy pasta, add heavy cream or a soft cheese like ricotta. These changes make the dish richer and just as tasty. To switch up the flavor, try adding fresh herbs like basil or thyme. You can also use different spices, like paprika or oregano, for a new twist. If you want to pair it with a sauce, consider a light lemon butter sauce or a spicy marinara. For mixed protein options, shrimp goes well with chicken or even scallops. These changes keep your dish exciting and full of flavor. For the complete cooking guide, don't forget to check the Full Recipe. To keep your Spicy Garlic Shrimp Pasta fresh, follow these tips: - Refrigerate leftovers: Place the pasta in an airtight container. This helps prevent drying. - Reheat carefully: Use a skillet over low heat. Add a splash of water or olive oil. This keeps the texture nice. - Store sauce separately: If you have extra sauce, keep it in another container. This stops the pasta from getting soggy. Can you freeze Spicy Garlic Shrimp Pasta? Yes, you can! Here's how: - Best way to freeze: Let the pasta cool first. Then, place it in a freezer-safe container. - Thawing: Take it out the night before. Put it in the fridge to thaw slowly. - Recommended containers: Use plastic containers or freezer bags. Make sure to remove as much air as possible. What can I use instead of shrimp? You can use chicken, scallops, or even tofu. These options give you great flavor and work well with the sauce. How long does Spicy Garlic Shrimp Pasta last in the fridge? It lasts about 3 days in the fridge. Make sure to store it in an airtight container to keep it fresh. Can I prepare this dish in advance? Yes, you can prep the shrimp and sauce ahead of time. Cook the pasta fresh just before serving for the best taste. What wine pairs well with this dish? A crisp white wine, like Sauvignon Blanc, pairs nicely. It balances the spice and complements the shrimp. How do I adjust the spice level? You can add more or less red chili. For a milder dish, skip the red pepper flakes. Can I use frozen shrimp for this recipe? Absolutely! Just thaw them first. Make sure they are peeled and deveined for easy cooking. What if I don’t have cherry tomatoes? You can replace them with diced regular tomatoes or even sun-dried tomatoes for a different flavor. For the full recipe process, check out the Full Recipe link. This dish serves about 4 people. You can easily adjust the serving sizes based on your needs. In summary, we covered how to make spicy garlic shrimp pasta. I shared key ingredients, cooking instructions, and useful tips to avoid common mistakes. You can adjust the recipe to fit dietary needs or preferences. Remember, fresh ingredients make a big difference. Store leftovers properly to enjoy your meal later. With these steps and tricks, you’ll impress anyone at your table. Enjoy cooking and savor each bite!

Spicy Garlic Shrimp Pasta Quick and Flavorful Dish

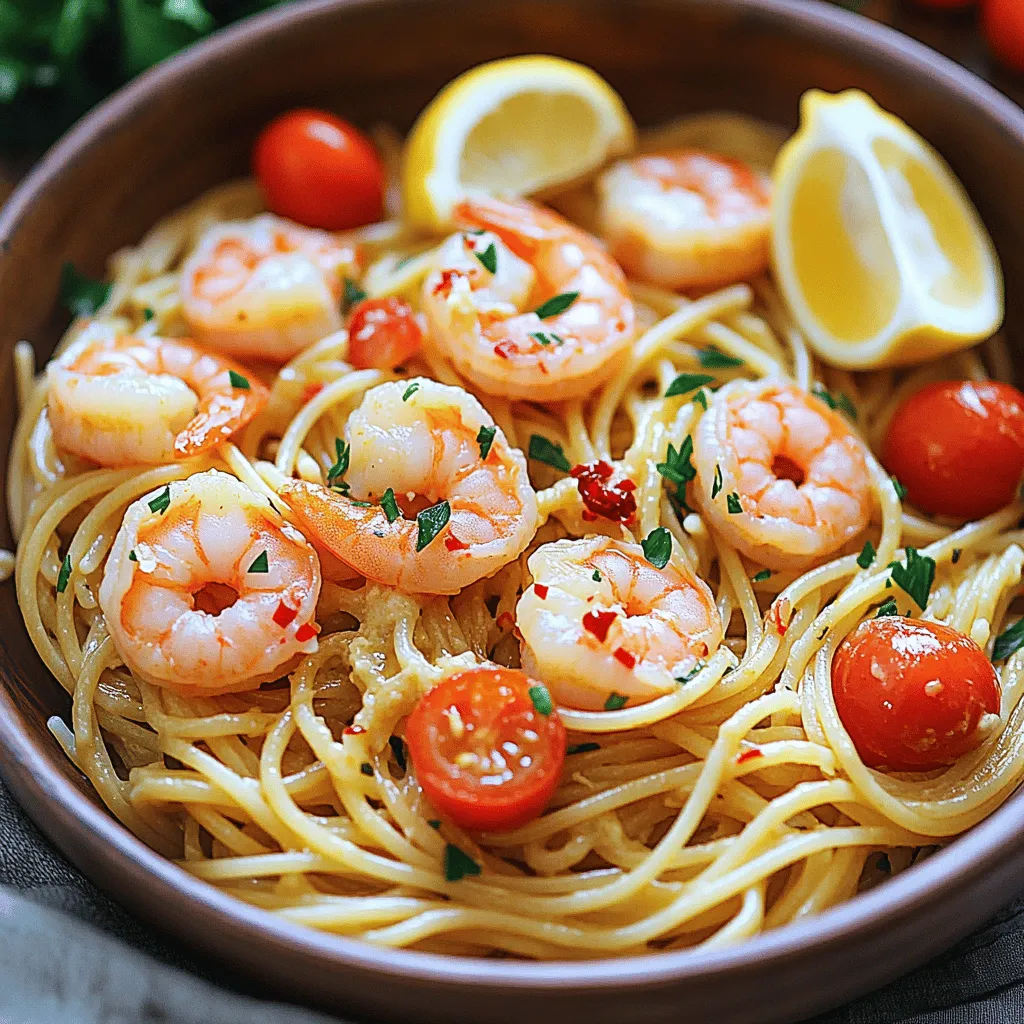
Craving a quick meal packed with bold flavors? My Spicy Garlic Shrimp Pasta recipe is here to satisfy your taste

- 1 ripe banana, frozen - 1 cup fresh blueberries, plus extra for topping - 1/2 cup Greek yogurt (plain or vanilla) - 1/2 cup almond milk (or any milk of choice) - 1 tablespoon honey or maple syrup (adjust for sweetness) - 1 tablespoon chia seeds - Granola, for topping - Sliced fruits (e.g., strawberries, kiwi) for garnish - A sprinkle of coconut flakes To make a great Blueberry Banana Smoothie Bowl, start with ripe and frozen bananas. They give the bowl a creamy texture. Fresh blueberries add a burst of flavor and nutrition. I love using Greek yogurt for its thickness and protein. Almond milk keeps it light and smooth, but you can choose any milk you like. Sweeten it with honey or maple syrup for that perfect touch. If you want to go the extra mile, consider adding chia seeds for some crunch. Granola on top adds a nice texture. You can also use sliced fruits for a colorful look. Finally, coconut flakes can give it a tropical vibe. All these ingredients come together for a tasty and healthy breakfast or snack. Check out the Full Recipe for more details! To make your smoothie bowl, start by gathering the ingredients. You need a ripe banana, fresh blueberries, Greek yogurt, almond milk, honey or maple syrup, and optional chia seeds. - Combine the banana, blueberries, yogurt, almond milk, and honey in the blender. - Blend until smooth. You want a creamy texture, so blend well. Once your smoothie is blended, it’s time to serve. - Pour the smoothie into a bowl. - Arrange your toppings artfully. Use fresh blueberries, granola, and sliced fruits for a colorful touch. To ensure you get the best texture, here are some tips. - Scrape down the sides of the blender during blending. This helps mix all ingredients well. - If the smoothie is too thick, adjust the consistency with extra almond milk. This makes it easier to eat. For the complete recipe, check out the Full Recipe section. Enjoy your delicious Blueberry Banana Smoothie Bowl! You can switch out the fruits in your smoothie bowl. If you want a twist, use strawberries or mango instead of blueberries. You can also try flavored yogurt. Vanilla or honey yogurt can add a nice touch. Adding spices can lift the taste of your smoothie bowl. A pinch of cinnamon or a drop of vanilla can work wonders. You can also experiment with sweeteners. Try agave or coconut sugar if you want something different. Make your bowl pop with colorful toppings. Use fresh fruit, nuts, or seeds for a bright look. Layer your ingredients for a visual appeal. This makes every bite exciting and fun to eat. {{image_2}} Smoothie bowls let you play with flavors and textures. Here are some fun ideas for you to try. For a sunny vibe, use pineapple and mango. These fruits add a bright sweetness. Swap almond milk for coconut milk. This change gives your bowl a creamy, tropical taste. Want a nutty flavor? Add almond or peanut butter to your mix. This boost gives a rich taste and adds protein. Don't forget to top your bowl with nuts, like almonds or walnuts. They add a nice crunch. Craving something sweet? Stir in cocoa powder for a chocolatey twist. This makes your smoothie bowl rich and satisfying. Use chocolate granola on top for extra flavor. It’s a delicious way to enjoy chocolate for breakfast. Explore these variations to find your favorite! For the full recipe, check out the Blueberry Banana Bliss Smoothie Bowl. To keep your smoothie bowl fresh, store leftovers in an airtight container. Place it in the fridge. It stays good for about one day. After that, the texture may change. Enjoy it soon for the best taste. You can freeze the smoothie base for later use. Just pour it into a freezer-safe bag or container. Make sure to remove as much air as possible. It can last up to three months in the freezer. When you want to use it, simply thaw it overnight in the fridge or on the counter for a few hours. This smoothie bowl is best enjoyed cold. If you freeze it, blend it again after thawing. This helps regain its smooth texture. Serve it in a bowl and add your favorite toppings. Fresh fruits and granola work well and add crunch. Enjoy your refreshing treat! For the complete recipe, check out the Full Recipe section! Yes, you can prepare this smoothie bowl ahead of time. To do this, blend all your ingredients and store the mixture in an airtight container. Keep it in the fridge for up to 24 hours. When you are ready to eat, stir it well. Add your toppings fresh for the best taste and look. You can use several alternatives for Greek yogurt. If you want a dairy-free option, try coconut yogurt or almond yogurt. Silken tofu is another great choice. It gives a creamy texture and adds protein. If you are not allergic to dairy, regular yogurt will also work. Yes, this smoothie bowl is gluten-free. All the ingredients listed are free from gluten. Just ensure that your toppings, like granola, are labeled gluten-free. Some granolas may contain gluten, so it is best to check the label. Absolutely! You can mix in many fruits. Try strawberries, raspberries, or mango for a fun twist. Each fruit brings its flavor and nutrition. Just remember to keep the balance of sweetness. You can even add spinach or kale for extra greens without changing the taste much. This blog post covers everything you need to know to make a delicious smoothie bowl. We discussed the main and optional ingredients, easy step-by-step instructions, and tips for a perfect blend. You learned how to customize flavors and explored different variations, from tropical to chocolatey. Remember, smoothies can be stored or frozen for later use. Enjoy creating your own tasty versions, and don't hesitate to try new fruits or toppings. Smoothie bowls are fun, healthy, and quick to make. You now have all the tools to get started!

Blueberry Banana Smoothie Bowl Refreshing and Nutritious

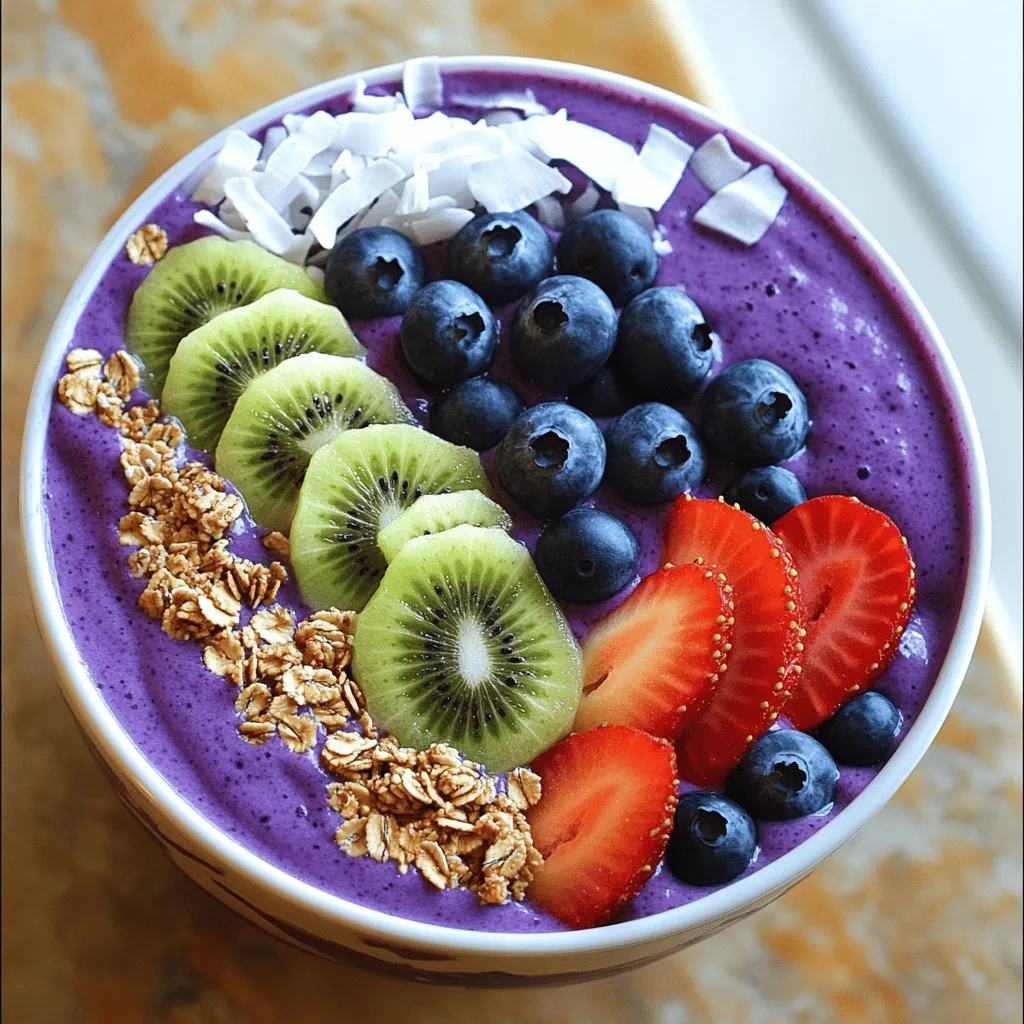
Are you ready to whip up a delicious and nutritious treat? The Blueberry Banana Smoothie Bowl is the perfect dish

- 1 medium cauliflower head - 4 cloves of garlic - 3 tablespoons olive oil - 1 teaspoon smoked paprika - 1 teaspoon sea salt - ½ teaspoon black pepper - 2 tablespoons grated Parmesan cheese (optional) - Fresh parsley for garnish To make Roasted Garlic Cauliflower Bites, you need a few simple items. Start with a medium head of cauliflower. Cut it into bite-sized florets. This helps them cook evenly. Next, you’ll need four cloves of garlic, minced well. Fresh garlic gives a strong flavor. You will also use three tablespoons of olive oil. This oil helps the cauliflower roast nicely. A teaspoon of smoked paprika adds a warm, smoky taste. Sea salt enhances all the flavors. Don’t forget half a teaspoon of black pepper for a little kick. If you like cheese, add two tablespoons of grated Parmesan. Finally, fresh parsley will make your dish look bright and fresh. - Alternatives for olive oil: You can use avocado oil or melted coconut oil. - Dairy-free cheese options: Try nutritional yeast or a cashew-based cheese. - Garlic alternatives: Garlic powder can work if you don’t have fresh garlic. If you don’t have olive oil, avocado oil is a great choice. It has a mild taste and is good for high heat. If you want a dairy-free version, nutritional yeast gives a cheesy flavor without the dairy. For garlic, if you can’t find fresh, garlic powder will do. Just use less since it's stronger. These substitutions help you create a tasty dish, no matter what you have on hand. If you want more details, refer to the Full Recipe for all the steps. 1. First, preheat your oven to 425°F (220°C). This step is key for crisp bites. 2. Next, cut the medium cauliflower head into bite-sized florets. Make sure they are uniform for even cooking. 3. In a large mixing bowl, combine the cauliflower florets, minced garlic, olive oil, smoked paprika, sea salt, and black pepper. Toss everything together until the cauliflower is well coated. 1. Spread the cauliflower evenly on a baking sheet lined with parchment paper. This helps prevent sticking and makes cleanup easier. 2. Roast the cauliflower in the preheated oven for 25-30 minutes. You want the edges to turn golden brown and the florets to be tender. Halfway through, toss the cauliflower to ensure even cooking. 3. If you want a cheesy flavor, sprinkle the grated Parmesan cheese over the cauliflower in the last 5 minutes of roasting. This gives a lovely, rich taste. For the full recipe, check out the details above! To make your roasted garlic cauliflower bites crispy, start by using a high oven temperature, like 425°F (220°C). This helps them brown nicely. Spread the florets out on the baking sheet in a single layer. If they touch, they may steam instead of roast. Even coating is key for flavor. Toss the cauliflower well with the garlic, olive oil, and spices. Make sure every piece is covered. This ensures even cooking and great taste in each bite. Don't forget to toss them halfway through roasting for best results. For dipping sauces, try ranch or garlic aioli. These pair well with the roasted flavor. You can also use a spicy sriracha sauce for a kick. These bites go great with main dishes like grilled chicken or fish. They can also be a fun addition to a veggie platter. Serve them as a side or a snack; they are versatile and delicious. For the full recipe, check out the earlier section! {{image_2}} You can change the taste of roasted garlic cauliflower bites by adding spices. Try cumin for a warm flavor. You can also use curry powder for a unique twist. If you want heat, add cayenne pepper. Just a pinch can bring a nice kick. You can also mix in Italian herbs for a fresh taste. Basil or oregano can enhance the flavor profile. To make a vegan version, skip the Parmesan cheese. The bites still taste great without it. You can also use nutritional yeast for a cheesy flavor. This option is full of nutrients and flavor. For gluten-free adaptations, all the ingredients are already gluten-free! Just ensure your spices are pure and free from gluten. This way, everyone can enjoy these tasty bites. After enjoying your roasted garlic cauliflower bites, store any extras properly. Place them in an airtight container. Keep them in the fridge for up to three days. This keeps them fresh and tasty. If you want to save them longer, freeze the bites. Place them on a baking sheet in a single layer. Once frozen, transfer them to a freezer-safe bag. They can last up to three months in the freezer. To reheat your cauliflower bites, use the oven for the best results. Preheat the oven to 350°F (175°C). Spread the bites on a baking sheet. Heat them for about 10-15 minutes until warm. This method helps maintain their crispiness. You can also use an air fryer. Set it to 350°F (175°C) and heat for about 5-7 minutes. Both methods keep the texture nice and crunchy. Enjoy your snack without losing that fresh taste! To make Roasted Garlic Cauliflower Bites, follow these steps: 1. Preheat your oven to 425°F (220°C). 2. Cut one medium cauliflower head into bite-sized florets. 3. Mince four cloves of garlic. 4. In a large bowl, mix the cauliflower, garlic, three tablespoons of olive oil, one teaspoon of smoked paprika, one teaspoon of sea salt, and ½ teaspoon of black pepper. Toss well. 5. Spread the mixture on a baking sheet lined with parchment paper. 6. Roast for 25-30 minutes until golden brown and tender. Toss halfway through for even cooking. 7. If you like cheese, sprinkle two tablespoons of grated Parmesan cheese during the last five minutes. 8. Garnish with fresh parsley before serving. You can find the full recipe above. Yes, you can use frozen cauliflower! Just thaw it first. Drain any excess water to avoid sogginess. This ensures the bites roast well and stay crispy. The flavor will still be great, even if it's not fresh. These bites pair well with many dishes. Here are some ideas: - Serve them with a creamy dip like ranch or garlic aioli. - They work great as a side dish with grilled chicken or fish. - Add them to a salad for extra crunch and flavor. - Enjoy them as a snack when you crave something healthy. Roasted garlic cauliflower bites are simple and tasty. You learned the key ingredients, like cauliflower and garlic. We covered how to prepare and roast them to perfection. I shared tips for crispy bites and tasty dipping sauces. You can even tweak the recipe for different diets and flavors. In the end, these bites are a great side or snack. Try them out! You'll impress anyone who eats them. Enjoy experimenting and savor the flavor.

Roasted Garlic Cauliflower Bites Flavorful Snack Idea

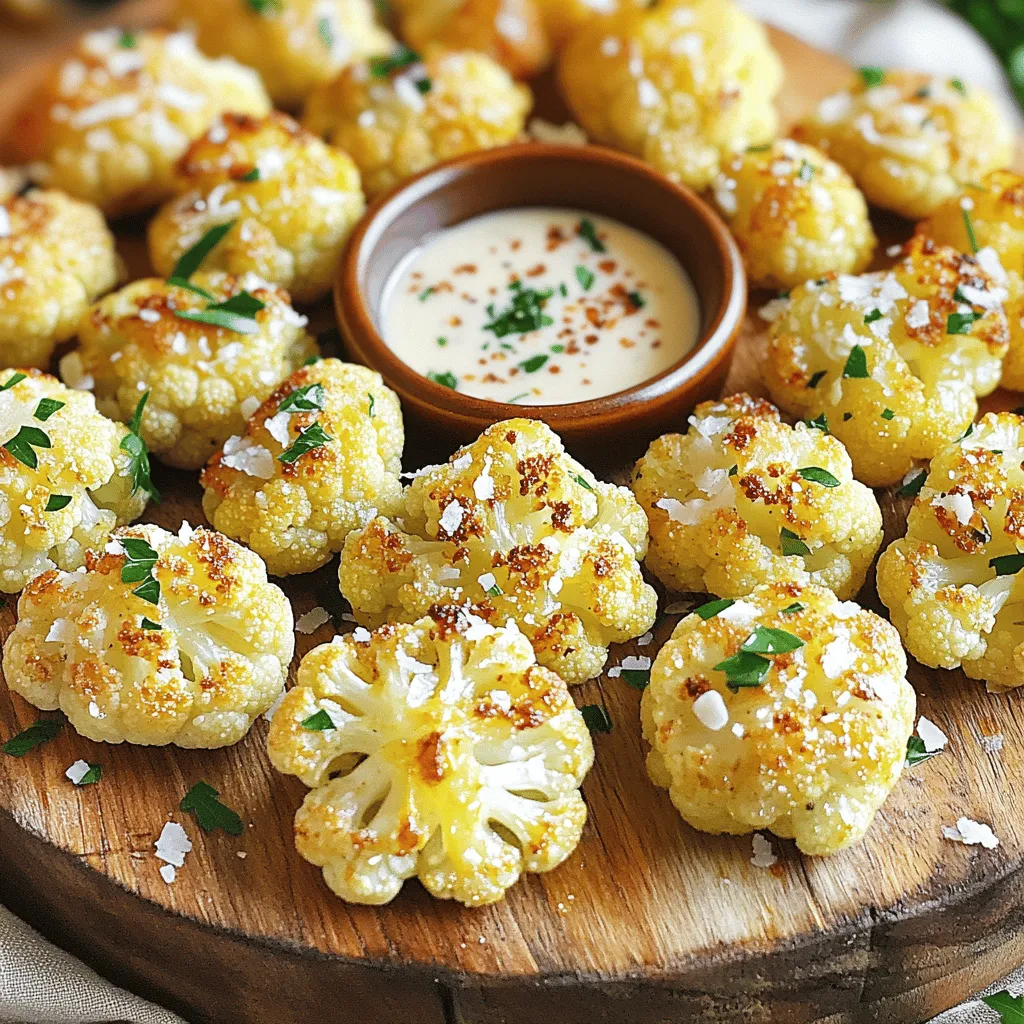
Looking for an easy and tasty snack? Roasted Garlic Cauliflower Bites are your answer! This simple dish packs flavor and

To make a Crispy Tofu Buddha Bowl, you need a blend of fresh and tasty items. Here’s what you'll use: - 1 block firm tofu, pressed and cut into cubes - 2 tablespoons cornstarch - 2 tablespoons soy sauce - 1 tablespoon sesame oil - 1 teaspoon garlic powder - 1 cup cooked quinoa - 1 cup broccoli florets - 1 cup shredded carrots - 1 avocado, sliced - 1 cup cherry tomatoes, halved These ingredients give your bowl a great texture and taste. The tofu adds protein, while quinoa provides energy. The veggies bring color and nutrients. Your bowl needs some extra flavor. Here are the seasoning items: - 2 tablespoons tahini - 1 tablespoon lemon juice - Salt and pepper to taste Tahini adds creaminess, while lemon juice gives a refreshing zing. Salt and pepper help enhance all the tastes. Garnishes make your bowl look and taste even better. You can use: - Sesame seeds for garnish - Fresh cilantro for garnish These toppings add a nice crunch and a pop of color. Plus, they boost the fresh flavor in each bite. For the full recipe, be sure to check the instructions! Start by preheating your oven to 400°F (200°C). This step makes the tofu crispy. Line a baking sheet with parchment paper for easy cleanup. Take your block of firm tofu and press it to remove excess water. Cut the tofu into cubes. In a bowl, mix the tofu cubes with soy sauce, sesame oil, garlic powder, and a pinch of salt and pepper. This mixture adds great flavor. Then, sprinkle cornstarch over the tofu. Toss gently until every piece is coated. This coating helps make the tofu extra crispy in the oven. While the tofu bakes, it's time to cook the veggies. Take your broccoli florets and steam them until they are tender-crisp, which takes about 5 minutes. This keeps them bright and fresh. Set the broccoli aside once they are done. You can also prep your carrots by shredding them. Slice the avocado and halve the cherry tomatoes. These fresh veggies will add color and crunch to your bowl. Now, let’s put everything together. Start with a base of cooked quinoa in each bowl. Quinoa is packed with protein and fiber. Next, add a mound of steamed broccoli, followed by shredded carrots. Place the sliced avocado and halved cherry tomatoes on top. Once your tofu is crispy, take it out of the oven and place it atop the veggies. In a small bowl, whisk tahini, lemon juice, and a bit of water until smooth. Drizzle this sauce over the bowl. Finally, sprinkle sesame seeds and fresh cilantro for garnish. Your Buddha bowl is now ready to enjoy! For the full recipe, refer to the details above. To get crispy tofu, start with firm tofu. Press it to remove extra water. Cut the tofu into cubes and toss them with soy sauce, sesame oil, and garlic powder. This mix adds flavor. For extra crunch, coat the tofu in cornstarch. Spread it on a baking sheet and bake at 400°F (200°C) for 25-30 minutes. Flip the tofu halfway through. It should be golden brown and crispy. You can mix and match flavors to make your bowl unique. Try adding different veggies like bell peppers or zucchini. Swap in quinoa for brown rice or farro. For a kick, add some chili flakes or sriracha. Dress it with tahini mixed with lemon juice for a creamy touch. The key is to balance flavors for a tasty dish. You can make parts of your bowl ahead of time. Cook the quinoa and veggies a day before. Store them in the fridge. You can even bake the tofu and reheat it later. This helps save time during busy days. Just assemble the bowl before serving. This makes dinner easy and delicious! {{image_2}} If you want to switch up the protein in your crispy tofu Buddha bowl, try chickpeas. They add a nice crunch when roasted. You can also use tempeh or seitan for a hearty option. Both have great textures and soak up flavors well. For a non-vegan choice, grilled chicken or shrimp works too. Feel free to change the vegetables based on the season. In spring, use asparagus or snap peas. In summer, zucchini and bell peppers shine. Fall brings sweet potatoes and Brussels sprouts, while winter is perfect for kale and root veggies. Just make sure to steam or roast them for the best taste. While tahini dressing is creamy and rich, you can switch it up easily. Try a simple lemon vinaigrette for a lighter taste. A spicy sriracha sauce adds a kick. For a nutty flavor, use almond butter instead of tahini. Each dressing gives a new twist to your bowl. Check the full recipe for more ideas on how to mix it up! To store your crispy tofu Buddha bowl, let it cool first. Place the bowl in an airtight container. Keep the tofu and veggies separate if possible. This helps maintain the tofu's crispiness. Store it in the fridge for up to three days. The quinoa can stay with the veggies. This makes meal prep easy for busy days. When reheating, I suggest using the oven or an air fryer. This keeps the tofu crispy. Preheat the oven to 350°F (175°C). Place the tofu on a baking sheet. Heat for about 10-15 minutes or until hot. If you use a microwave, do it in short bursts. This can make the tofu soft. The cooked quinoa lasts about five days in the fridge. Tofu can stay fresh for a week if unopened. Once you open it, use it within three to five days. Fresh veggies, like broccoli and carrots, are best eaten within a week. Always check for signs of spoilage, like strange smells or colors. A Buddha Bowl is a meal that has many healthy foods in one bowl. It often has grains, veggies, and protein. The name comes from the way it looks. It is usually colorful and full, like Buddha's belly. You can mix and match any foods you like. This makes it fun and easy to eat. To make this Crispy Tofu Buddha Bowl gluten-free, swap out soy sauce for tamari. Tamari is a gluten-free soy sauce. Always check the labels for any other ingredients. The cornstarch is already gluten-free, so you can use that without worry. Yes, you can use different types of tofu! Firm or extra-firm tofu works best for this recipe. Silken tofu is too soft and won't hold its shape. If you want a richer flavor, try marinated tofu. Just remember to adjust the cooking time if you use a different type. For the full recipe, check the main section above. In this article, I explored how to make the perfect Buddha bowl. We discussed key ingredients, seasoning options, and garnishes that enhance your dish. I shared step-by-step instructions, tips for crispy tofu, and clever variations. You can mix proteins and veggies to fit your taste. Remember, storing and reheating your bowl properly keeps it fresh. Making this dish is easy and fun. Enjoy your flavorful and nutritious meal!

Crispy Tofu Buddha Bowl Rich in Flavor and Nutrition

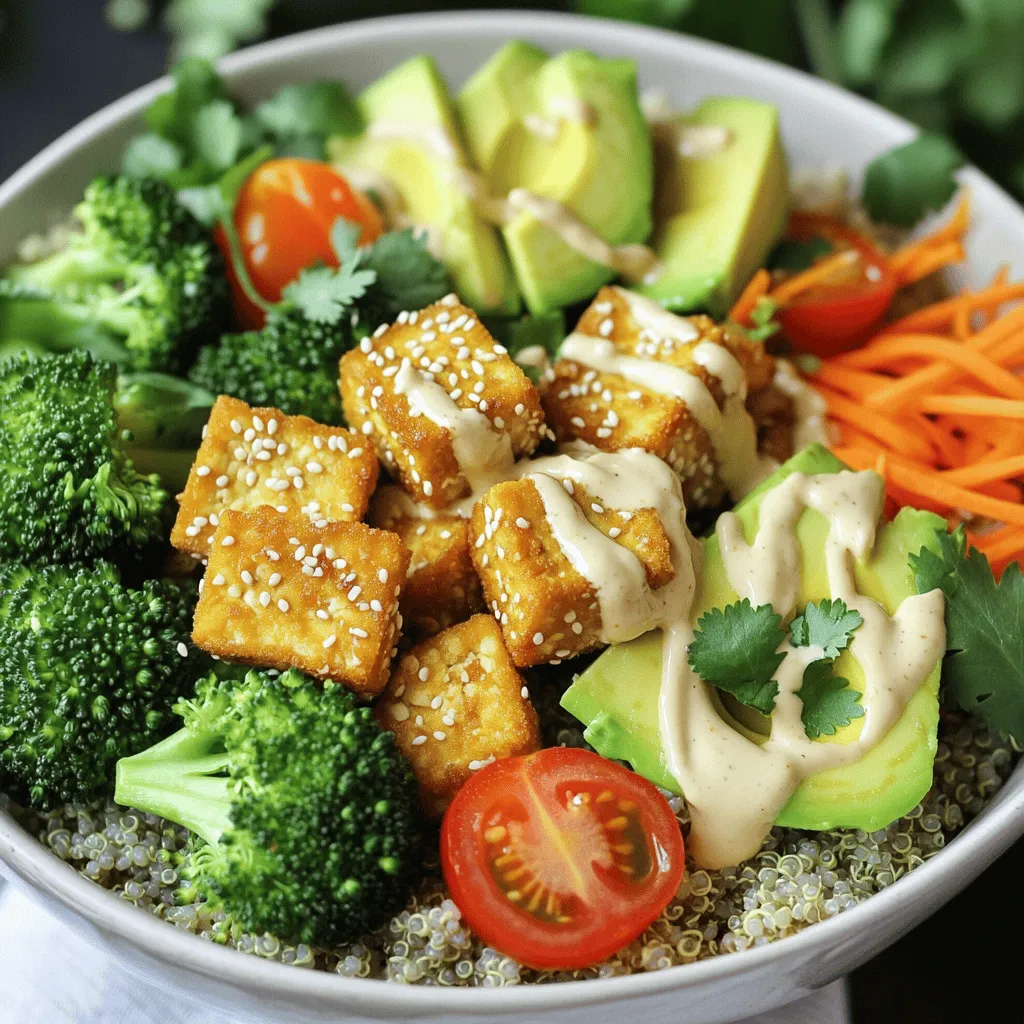
Ready for a meal that packs a punch of flavor and nutrition? My Crispy Tofu Buddha Bowl is just what

To make a tasty chicken tikka masala, gather these essential ingredients. Each one plays a key role in creating that rich flavor. - Chicken and Marinade Components - 500g boneless chicken breast, cubed - 1 cup plain yogurt - 1 tablespoon ginger-garlic paste - Spices and Seasoning - 2 tablespoons garam masala - 1 tablespoon cumin powder - 1 tablespoon coriander powder - 1 teaspoon turmeric powder - 1 teaspoon chili powder (adjust to taste) - Salt, to taste - Cooking Essentials - 2 tablespoons vegetable oil - 1 large onion, finely chopped - 1 can (400g) diced tomatoes - 1 cup heavy cream - Fresh cilantro, for garnish These ingredients make the dish flavorful and aromatic. Each spice adds depth. The yogurt helps the chicken stay tender. The heavy cream gives it a rich, creamy sauce. For the full recipe, check the main section. Combining Ingredients for the Marinade Start by mixing the yogurt, garam masala, cumin, coriander, turmeric, chili powder, ginger-garlic paste, and salt in a large bowl. Stir well until the mixture is smooth. This blend creates a rich and flavorful base for the chicken. Marinating Time Recommendations Next, add the cubed chicken to the marinade. Make sure each piece is well-coated. Cover the bowl and refrigerate for at least 1 hour. For the best flavor, marinate overnight if you can. This step allows the chicken to soak up all those wonderful spices. Sautéing Onions Heat vegetable oil in a large skillet over medium heat. Add the finely chopped onion and sauté until it turns golden brown and soft. This takes about 5 to 7 minutes. The onions add sweetness and depth to the dish. Cooking Chicken and Melding Flavors Remove any excess marinade from the chicken and add it to the skillet. Cook the chicken for about 6 to 8 minutes, stirring often. You want the chicken to lose its pink color. Then, add the canned diced tomatoes with their juices. Let the mix simmer for around 10 minutes. This allows the flavors to blend beautifully. Adding Cream for Richness Lower the heat and stir in the heavy cream. Cook for an additional 5 to 10 minutes. This makes the sauce thick and creamy, enhancing the overall taste. Taste and adjust the seasoning if needed. Your Chicken Tikka Masala is now ready to impress! For the full recipe, click here: [Full Recipe]. Marination Tips for Optimal Flavor To make your Chicken Tikka Masala shine, marination is key. Use plain yogurt for a tender texture. The spices in the marinade are essential. I recommend mixing together garam masala, cumin, coriander, turmeric, and chili powder. This mix adds depth to the chicken. Marinate it for at least one hour, but overnight is best. This allows the flavors to soak in deeply. Adjusting Spice Levels to Suit Your Taste Spice levels can be adjusted easily. If you like it milder, cut back on the chili powder. You can also add some sugar to balance the heat. For those who love a kick, add more chili powder or even fresh chopped chilies. Taste as you go to find your perfect balance. Presentation Ideas for Serving Serving your Chicken Tikka Masala is part of the fun. Use a large bowl or platter for a family-style meal. Garnish with fresh cilantro for a pop of color. A slice of lime adds brightness. For added texture, you can sprinkle some toasted nuts on top. Recommended Sides to Accompany the Dish To complete your meal, serve it with steamed basmati rice or warm naan. These sides soak up the rich sauce beautifully. You might also add a side of cooling cucumber raita. This contrast makes each bite delightful. Check out the Full Recipe for more tips on sides and serving ideas! {{image_2}} You can easily switch up the protein in your Chicken Tikka Masala. If you want a vegetarian dish, use chickpeas or paneer. Both options soak up the spices well. They give a nice texture and add protein. If you want a twist, consider using lamb or fish. Lamb has a rich taste that pairs perfectly with the spices. Fish like salmon works too, but cook it gently. It cooks faster, so keep an eye on it. Both options provide new flavors while keeping the dish delightful. Making Chicken Tikka Masala gluten-free is simple. Just use gluten-free yogurt and check the spice labels. Most spices are naturally gluten-free. If you want to lower the caloric content, swap heavy cream for coconut milk or Greek yogurt. Both options give creaminess without as many calories. You can also cut back on oil when cooking. This way, you keep the flavor while making it a bit lighter. For the full recipe and more details, check the Easy Chicken Tikka Masala section above. For the best taste and safety, store your Chicken Tikka Masala properly. - Refrigeration Guidelines: Let the dish cool completely before storing. Place it in an airtight container. It lasts for up to 3 days in the fridge. Always reheat thoroughly before serving. - Freezing Instructions: You can freeze Chicken Tikka Masala too. Use a freezer-safe container. It stays fresh for up to 3 months. Thaw in the fridge overnight before reheating. To keep your Chicken Tikka Masala tasty and warm, follow these tips. - Best Practices for Maintaining Flavor and Texture: Reheat on the stove over low heat. Stir often to prevent sticking. Add a splash of water or cream if it seems thick. This helps restore its creamy texture. Using these storage and reheating tips will ensure your Chicken Tikka Masala stays delicious, even days later. Can I make Chicken Tikka Masala in a slow cooker? Yes, you can! Just marinate the chicken as usual. Then, place the marinated chicken in your slow cooker. Add the diced tomatoes and cook on low for about 6 hours. When it’s nearly done, mix in the cream and let it warm through. How spicy is Chicken Tikka Masala typically? Chicken Tikka Masala can vary in spice. It usually has a mild to medium heat level. You can adjust the chili powder based on your taste. Start with a small amount and add more if you like it spicier. What can I substitute for heavy cream in this recipe? If you want to skip heavy cream, you can use coconut milk or Greek yogurt. Both add a nice creaminess. Coconut milk gives a sweet taste, while Greek yogurt will add tang. Just add it towards the end of cooking to keep it smooth. For the full recipe, check out Easy Chicken Tikka Masala. In this blog post, we explored how to make easy Chicken Tikka Masala. We reviewed the key ingredients, marinating process, and cooking steps. You learned tips for perfecting flavors and serving suggestions. We also discussed variations, storage techniques, and answered common questions. With this knowledge, you can create a delicious dish that suits your taste and lifestyle. Enjoy your cooking journey and feel free to try new variations for fun!

Easy Chicken Tikka Masala Quick and Flavorful Recipe

If you’re craving a dish that’s quick, easy, and packed with flavor, look no further! My Easy Chicken Tikka Masala

This Lemon Herb Quinoa Salad is bright and full of flavor. You will need fresh veggies and herbs to make it shine. The quinoa adds a nice, nutty base that pairs well with the lemon dressing. Here are the ingredients for this tasty dish: - 1 cup quinoa (rinsed) - 2 cups vegetable broth (or water) - 1 cup cherry tomatoes, halved - 1 cucumber, diced - 1 bell pepper (red or yellow), diced - 1/2 red onion, finely chopped - 1/4 cup fresh parsley, chopped - 1/4 cup fresh mint leaves, chopped - 1/4 cup feta cheese (optional) - Juice of 1 lemon - 2 tablespoons olive oil - Salt and pepper to taste If you need to swap some ingredients, here are some great options: - Use quinoa blends or bulgur instead of quinoa. - Swap cherry tomatoes for diced regular tomatoes. - Try cucumbers or zucchinis for a crunch. - Use any sweet bell pepper you like. - Replace feta cheese with a dairy-free option or skip it. - You can use lime juice instead of lemon juice for a twist. Feel free to mix and match! This salad is versatile, so you can make it your own. Check out the Full Recipe for more details. First, rinse 1 cup of quinoa under cold water. This helps remove any bitter taste. Next, in a medium saucepan, mix the rinsed quinoa and 2 cups of vegetable broth or water. Bring the mixture to a boil over medium-high heat. Once it starts boiling, lower the heat to low. Cover the pot and let it simmer for about 15 minutes. The quinoa will absorb the liquid and become fluffy. After cooking, remove it from the heat and let it cool. While the quinoa cools, prepare your vegetables. Take 1 cup of cherry tomatoes and cut them in half. Dice 1 cucumber and 1 bell pepper (red or yellow). Finely chop 1/2 red onion. In a large mixing bowl, add the tomatoes, cucumber, bell pepper, and red onion. Once the quinoa is cool, add it to the bowl with the veggies. Gently fold everything together so the flavors mix well. For the dressing, grab a small bowl. Whisk together the juice of 1 lemon, 2 tablespoons of olive oil, salt, and pepper. Pour this dressing over the quinoa salad. Toss gently to coat all the ingredients. Finally, stir in 1/4 cup of chopped fresh parsley, 1/4 cup of chopped mint leaves, and 1/4 cup of feta cheese if you like. Taste the salad and adjust the seasoning if needed. Chill in the fridge for at least 30 minutes to let the flavors meld together. For the full recipe, check out the detailed instructions provided above. To make the best lemon herb quinoa salad, rinse your quinoa well. This removes a bitter coating called saponin. Use vegetable broth for a richer flavor instead of plain water. Cooking the quinoa slowly lets it fluff up nicely. Once done, let it cool completely before mixing in your veggies. This keeps everything crisp and fresh. Serve your salad in a big, bright bowl. Sprinkle extra herbs on top for a pop of color. You can add lemon wedges on the side. This adds a fresh touch and lets people add more lemon if they like. Pair your salad with grilled chicken or fish for a hearty meal or enjoy it on its own. One common mistake is overcooking the quinoa. Keep an eye on it while it simmers. Another mistake is not letting the salad chill. Chilling helps the flavors blend well. Avoid using too much lemon juice or salt at first. You can always add more later, but you can’t take it out. For the full recipe, check the earlier section. {{image_2}} You can make this salad even better! Try adding sliced olives for a briny kick. Avocado gives a creamy touch. For some crunch, toss in roasted nuts. You can even add cooked chicken or chickpeas for more protein. These extras will boost the flavor and nutrition of your dish. This salad fits many diets. If you're vegan, skip the feta cheese. For gluten-free eaters, quinoa is a great choice. If you want low-carb, swap quinoa for cauliflower rice. This dish can adapt to fit your needs while still being tasty and fresh. You can change the salad with the seasons. In spring, add fresh peas or asparagus. Summer is perfect for sweet corn or diced mango. In fall, think about roasted butternut squash or apples. Winter brings cozy flavors like roasted beets or pomegranate seeds. These changes keep the salad exciting all year long. For the full recipe, check the [Full Recipe]. To store leftover Lemon Herb Quinoa Salad, allow it to cool first. Place it in an airtight container. It keeps well in the fridge for up to four days. If you plan to eat it later, leave out the feta cheese. It tastes best fresh, but you can add it just before serving. Use glass or plastic containers with tight-fitting lids. These work best for keeping your salad fresh. Glass containers prevent odors and stains. Plastic containers are lightweight and easy to handle. Choose a container that fits your leftover portion size. You can eat this salad cold or at room temperature. If you prefer it warm, gently reheat it in the microwave. Use a microwave-safe bowl. Heat in short intervals to avoid overcooking the salad. Stir between intervals to warm it evenly. Enjoy your Lemon Herb Quinoa Salad, full of flavor! For the full recipe, check out the complete details above. Yes, you can make this salad ahead of time. I often prepare it a day in advance. This allows the flavors to blend well. Just store it in an airtight container in the fridge. When you're ready to eat, give it a good stir. You can add a splash of lemon juice for freshness. If you need a substitute for quinoa, try using bulgur or couscous. Both have a nice texture and soak up flavors well. Brown rice is another good option. Just keep in mind that cooking times may vary for these grains. Adjust your cooking method accordingly for the best results. The salad lasts about 3 to 5 days in the fridge. Store it in a sealed container to keep it fresh. If you add feta cheese, use it within 3 days for the best taste. Always check for any off smells or changes in texture before eating. Enjoy this delicious dish as a quick lunch or side. This blog post covered how to make a tasty Lemon Herb Quinoa Salad. We discussed crucial ingredients, step-by-step instructions, and helpful tips to get it just right. You learned about fun variations to keep things fresh and smart storage advice for leftovers. Using these tips, you’ll create a salad that is not only delicious but also easy to customize. Enjoy your cooking adventure and make it your own!

Lemon Herb Quinoa Salad Fresh and Flavorful Dish

Looking for a bright and tasty dish? This Lemon Herb Quinoa Salad is just that! Packed with fresh herbs and

- 1 pound boneless, skinless chicken thighs - 1 cup plain yogurt - Spices: garam masala, cumin, coriander, turmeric, paprika To create a great Chicken Tikka Masala, start with the right meat. I prefer boneless, skinless chicken thighs. They stay juicy and tender. You need one cup of plain yogurt for the marinade. Yogurt helps to make the chicken soft and adds great taste. Next, we need some spices. Garam masala is key for that warm flavor. Ground cumin and coriander add depth. Turmeric gives a lovely color, and paprika adds a mild heat. - Fresh produce: garlic, ginger, onion, cilantro - Canned goods: diced tomatoes, coconut milk - Other: vegetable oil, lemon juice, salt, and pepper Fresh produce is vital. Use three cloves of minced garlic and one inch of grated ginger for a bright kick. One medium onion adds sweetness to the dish. Finally, fresh cilantro makes a nice garnish. You also need canned items. A can of diced tomatoes adds richness. Coconut milk brings creaminess and balances the spices. For cooking, have vegetable oil, lemon juice, salt, and pepper ready. They enhance the flavor and texture. You can find the full recipe for Easy Chicken Tikka Masala linked above. This dish is easy to make and so tasty! To start, mix yogurt, garam masala, cumin, coriander, turmeric, paprika, garlic, ginger, and lemon juice in a bowl. This mix is the heart of the dish. The yogurt tenderizes the chicken, while the spices add rich flavor. Next, cut the chicken into bite-sized pieces and add them to the marinade. Make sure each piece is coated well. Cover the bowl and refrigerate it for at least 1 hour. If you can, marinate it overnight for the best taste. Now, heat vegetable oil in a large skillet over medium heat. Once the oil is hot, add the chopped onion. Sauté the onion until it turns translucent. This step builds a great base for the dish. After that, add the marinated chicken to the skillet, leaving some marinade behind. Sauté the chicken until it's browned on all sides. This should take about 5-7 minutes. Then, stir in the diced tomatoes and the reserved marinade. Let this simmer for about 10 minutes. The chicken will soak up all those wonderful flavors. Now it’s time to make it creamy. Pour in the coconut milk and bring the mixture to a gentle simmer. Cook for another 15 minutes. Stir occasionally to prevent sticking. The sauce will thicken, and the chicken will cook through. Finally, season with salt and pepper to taste. Serve your Chicken Tikka Masala hot, garnished with fresh cilantro. Enjoy this with rice or naan for a complete meal! For the complete recipe, check the Full Recipe link. To make your Chicken Tikka Masala truly shine, marinate the chicken overnight. This step allows the spices to soak in deeply. You will taste the difference! If you want more heat, adjust the spice levels. Add more garam masala or chili powder for a kick. If you prefer mild flavors, use less spice. Always taste as you go! When serving your Chicken Tikka Masala, rice and naan are perfect sides. The rice soaks up the rich sauce, while naan is great for dipping. For a fresh touch, garnish your dish with chopped cilantro. It adds color and a burst of flavor. You can also add a squeeze of lemon for a zesty twist. Enjoy your meal with friends or family for the best experience! {{image_2}} You can change up the protein in this dish. Try using chicken breast for a leaner option. If you want a plant-based meal, use tofu or shrimp instead. These alternatives still soak up the amazing flavors. For a dairy-free version, switch to coconut yogurt. It keeps the creaminess without the dairy. Add fun and color by mixing in vegetables. Bell peppers or spinach work great. They not only boost nutrition but also add texture. You can also play with different spice blends. If you like it spicy, try adding cayenne pepper or chili powder. This will give your dish an exciting kick. Experimenting with flavors makes cooking fun and unique! To keep your Chicken Tikka Masala fresh, follow some simple steps: - Store in a container: Use an airtight container to avoid spills and keep flavors in. - Cool before refrigerating: Let the dish cool to room temperature first. This helps prevent condensation. Chicken Tikka Masala lasts about 3 to 4 days in the fridge. Always check for any off smells or changes in color before eating. Freezing Chicken Tikka Masala is a great way to save leftovers. - Use freezer-safe containers: Choose containers that seal tightly to prevent freezer burn. - Portion it out: Freeze in individual servings for easy reheating later. To reheat, thaw overnight in the fridge. Then, warm it on the stove over low heat. Stir often to ensure even heating. Avoid microwaving, as it can make the chicken tough. With these tips, your Chicken Tikka Masala will stay tasty and ready for your next meal! If you want to try this delicious dish, you can find the full recipe in the article. I recommend marinating the chicken for at least one hour. For the best taste, let it sit overnight. This time lets the spices soak into the meat. You will get a richer flavor this way. Yes! You can easily make this dish vegetarian. Use tofu, chickpeas, or paneer as your protein. These options will soak up the flavor just like chicken. They are great substitutes that keep the dish hearty. Chicken Tikka Masala pairs well with rice or naan. Both soak up the sauce nicely. You can also add a side salad or some roasted vegetables for a fresh touch. These sides complement the dish perfectly. Absolutely! You can prepare Chicken Tikka Masala ahead of time. Cook the dish and let it cool before storing it in the fridge. It stays good for about three to four days. Reheat it gently on the stove or in the microwave. You can check out the Easy Chicken Tikka Masala - Full Recipe for detailed steps and ingredients. It’s a quick and tasty way to enjoy this dish! This blog covered how to make easy Chicken Tikka Masala. We discussed essential ingredients, like chicken, yogurt, and spices. Then, I explained a step-by-step method for the cooking process. You learned tips for perfecting the dish and ideas for serving it. I also shared variations and safe storage methods. Now, you can enjoy a tasty meal right at home. Don't be afraid to experiment with flavors. Your Chicken Tikka Masala journey starts now!

Easy Chicken Tikka Masala Quick and Flavorful Recipe

Are you ready to impress your taste buds with an Easy Chicken Tikka Masala? This quick and flavorful recipe is

Older posts
Newer posts
← Previous Page1 … Page52 Page53 Page54 … Page107 Next →
© 2025 My Cooking Cast • Built with GeneratePress

Our Policies

  • Privacy Policy
  • GDPR Policy
  • Terms Of Use
  • Copyright Policy
  • Cookie Policy
  • Disclaimer

More Information​

  • Home
  • Contact
  • About
  • Dinner
  • Appetizers
  • Dessert
©2025, My Cooking Cast About Privacy Policy Back To Top