Skip to content
DisclaimerTerms Of UseGDPR PolicyCookie Policy

My Cooking Cast

  • Home
  • Drinks
  • Appetizers
  • Dinner
  • Dessert
  • About
  • Contact
  • Privacy Policy
DisclaimerTerms Of UseGDPR PolicyCookie Policy

Emma

To make my easy vegan lentil curry, gather these key ingredients: - 1 cup green or brown lentils, rinsed - 1 tablespoon coconut oil - 1 onion, finely chopped - 3 garlic cloves, minced - 1-inch piece of ginger, grated - 1 can (14 oz) coconut milk - 2 tomatoes, diced - 1 tablespoon curry powder - 1 teaspoon cumin - 1 teaspoon turmeric - 1 cup vegetable broth - 2 cups spinach or kale, chopped - Salt and pepper to taste - Fresh cilantro for garnish (optional) When choosing ingredients, focus on freshness. Here are some tips: - Lentils: Pick lentils that are dry and free from debris. Look for a vibrant color. - Onions: Choose firm onions with no soft spots. They should feel heavy for their size. - Garlic: Select garlic bulbs that are tight and dry. Avoid any that show signs of sprouting. - Ginger: Look for smooth, firm ginger without wrinkles. It should feel heavy and aromatic. - Spinach/Kale: Choose dark green leaves. They should be crisp and free from brown spots. - Tomatoes: Pick ripe tomatoes that are smooth, firm, and fragrant. If you have allergies, here are easy swaps you can try: - Coconut oil: Use olive oil or avocado oil if you prefer. - Coconut milk: Almond milk or soy milk can work, but the flavor will change. - Lentils: If you cannot have lentils, try using chickpeas or black beans instead. - Spinach/Kale: You can replace these with Swiss chard or collard greens. - Curry powder: A mix of turmeric, cumin, and coriander can serve as a substitute. These tips will help you make a flavorful lentil curry that suits your needs! You can find the full recipe at the beginning of the article. Start by gathering all your ingredients. This makes cooking smooth and fun. Here’s what you need: - 1 cup green or brown lentils, rinsed - 1 tablespoon coconut oil - 1 onion, finely chopped - 3 garlic cloves, minced - 1-inch piece of ginger, grated - 1 can (14 oz) coconut milk - 2 tomatoes, diced - 1 tablespoon curry powder - 1 teaspoon cumin - 1 teaspoon turmeric - 1 cup vegetable broth - 2 cups spinach or kale, chopped - Salt and pepper to taste - Fresh cilantro for garnish (optional) Chop the onion, garlic, and ginger before cooking. This saves time and keeps you organized. Rinse the lentils in cold water to remove any dirt. You want clean lentils for great taste. Now, let’s cook the curry. First, heat the coconut oil in a medium pot over medium heat. Add the chopped onion and sauté for about 5 minutes. You want the onion to be soft and clear. Next, stir in the minced garlic and grated ginger. Cook for 1-2 minutes until you smell the aroma. This builds flavor. Then, add the diced tomatoes along with curry powder, cumin, and turmeric. Cook for another 2-3 minutes. This lets the spices release their full flavor. Now, pour in the rinsed lentils, coconut milk, and vegetable broth. Mix everything well. Bring the mixture to a gentle boil. After that, reduce the heat to low and cover the pot. Simmer for about 25-30 minutes. The lentils should be tender when done. Finally, stir in the chopped spinach or kale. Cook for another 5 minutes until the greens are wilted. Season with salt and pepper. Taste and adjust if needed. Cooking times can change based on your stove and pot. If you use a pressure cooker, your lentils will cook faster. They may take only about 10-15 minutes. If you use a slow cooker, it may take 3-4 hours on low. Always check your lentils for doneness. Use a fork to see if they are tender. If they are not, give them a few more minutes. This way, you will always have a great curry. For the full recipe, check the complete instructions. To boost the taste of your vegan lentil curry, try adding a squeeze of lemon juice. This can brighten up the dish. You can also toss in some fresh herbs like cilantro or parsley. Fresh herbs add a nice touch and make the dish vibrant. If you love heat, add chili flakes or fresh chilies during cooking. Always rinse lentils before cooking. This helps remove dirt and any small stones. Use a pot with a heavy bottom to prevent sticking. Cook lentils on low heat for even cooking. Stir occasionally, so they do not stick to the pot. For a creamy texture, mash a few lentils with a fork or spoon. This gives your curry a thick feel. If it becomes too thick, add a splash of vegetable broth or coconut milk. For a soupier curry, adjust the liquid as you like. Keep an eye on the cooking time to avoid mushy lentils. Cook until just tender for the best results. Check out the Full Recipe for more details on making this dish. {{image_2}} When making lentil curry, you can choose different lentils. Green and brown lentils are the most common. They hold their shape well and add great texture. Red lentils cook faster and become creamy. They are perfect if you want a thicker curry. Black lentils, or beluga lentils, add a unique taste. They are small and shiny, adding a nice touch to your dish. You can even mix lentils for a fun twist. Each type brings its own flavor and feel. You can boost this curry with extra protein. Chickpeas are a great choice. They add a nice chew and blend well. Tofu is another option. It soaks up flavors and adds creaminess. If you want more veggies, try adding carrots or bell peppers. They add color and nutrients. Sweet potatoes also work well. They bring sweetness and a hearty texture. You can adjust based on what you have at home. Just chop them small so they cook evenly. Spices are the heart of lentil curry. You can change the flavor easily. Try adding garam masala for a warm, spicy kick. Cardamom adds a sweet and fragrant note. If you love heat, add more cayenne pepper or chili flakes. Fresh herbs like basil or mint can brighten the dish. For a smoky flavor, add smoked paprika. Each spice brings its own magic. Feel free to mix and match until you find your favorite blend. For the full recipe, check out the Easy Vegan Lentil Curry section. Once you finish your meal, let the curry cool down. Transfer it to an airtight container. Store it in the fridge. It will stay fresh for about 4 to 5 days. Make sure you label the container with the date. This way, you won't forget about it. If you want to keep your curry longer, freezing is a great option. Pour the cooled curry into freezer-safe bags or containers. Remove as much air as possible before sealing. This helps to prevent freezer burn. You can freeze the curry for up to 3 months. When you're ready to eat, just thaw it in the fridge overnight. To reheat, you have a few options. You can use the stove or the microwave. For the stove, pour the curry into a pot and warm it over medium heat. Stir often to heat evenly. For the microwave, place the curry in a bowl and cover it. Heat it for 1-2 minutes, stirring halfway. Check that it's hot throughout. Always taste and adjust the salt or spices if needed. Enjoy your Easy Vegan Lentil Curry again! To make your vegan lentil curry spicy, add chili powder or fresh chili peppers. Start with a small amount. You can always add more if you like heat. Mix in the spices when you add the curry powder. Another option is to use spicy curry paste instead of regular curry powder. This will boost the heat and flavor at the same time. Yes, you can make this curry in a slow cooker. First, sauté the onion, garlic, and ginger in a pan. This step adds more flavor. Then, add all ingredients to the slow cooker. Set it on low for 6-8 hours or high for 3-4 hours. Stir in the spinach or kale just before serving. This method makes the curry easy and hands-off. Lentils are a great source of protein and fiber. They help you feel full and satisfied. They are low in fat, which is good for heart health. Lentils also provide iron, folate, and potassium. These nutrients support energy levels and overall health. Including lentils in your diet can boost your nutrition. For the full recipe, check out the Easy Vegan Lentil Curry. In this blog post, we covered the key steps to making a delicious lentil curry. You learned about selecting fresh ingredients, cooking instructions, and tips for the best texture. We explored variations to add flavor and nutrients. Lastly, I shared storage and reheating tips for your leftovers. Cooking can be fun and easy. With this knowledge, you can create a tasty meal that pleases everyone. Enjoy exploring lentils and all their benefits. Happy cooking!

Easy Vegan Lentil Curry Flavorful and Quick Recipe

Looking for a quick, flavorful meal that’s also vegan? You’re in the right place! This Easy Vegan Lentil Curry is

- 2 large sweet potatoes, sliced into 1/4 inch rounds - 3 tablespoons olive oil - 1 teaspoon garlic powder - 1 teaspoon smoked paprika - 1/2 teaspoon ground cumin - 1/2 teaspoon salt - 1/4 teaspoon black pepper - 1 tablespoon fresh rosemary, finely chopped (or 1 teaspoon dried) - Optional: A sprinkle of chili flakes for a kick - Baking sheet - Parchment paper - Mixing bowl - Try serving with yogurt or avocado dip for a tasty combo. - Pair crispy sweet potato rounds with grilled chicken or fish for a complete meal. When I whip up crispy sweet potato rounds, I love using these ingredients. Each one adds a unique flavor. The sweet potatoes bring a natural sweetness. Olive oil helps achieve that golden crisp. Garlic powder and smoked paprika give a savory kick. Cumin adds warmth, while rosemary brings a fresh touch. If you like spice, chili flakes are a fun option! For my cooking setup, I always grab a baking sheet and line it with parchment paper. This step keeps the rounds from sticking and makes cleanup easy. A mixing bowl is key for tossing the sweet potatoes with the marinade. This ensures every round gets coated in those bold flavors. When serving, I like to present the rounds on a large platter. A sprinkle of fresh rosemary on top makes them look great. You can also add a small bowl of dip for fun. It makes sharing easy and delicious! For a side dish, these rounds pair well with grilled meats or salads. They add color and flavor to any meal. Check out the Full Recipe for more tips and methods to enjoy these tasty rounds! - Preheat the oven to 425°F (220°C). - Prepare the baking sheet with parchment paper. Start by preheating your oven. A hot oven helps the sweet potatoes get crispy. Next, line the baking sheet with parchment paper. This step keeps the sweet potatoes from sticking and makes cleanup easy. - Combine ingredients for marinade. - Toss sweet potatoes in the marinade. In a large bowl, mix together the olive oil, garlic powder, smoked paprika, ground cumin, salt, black pepper, and chopped rosemary. Stir well to create a tasty marinade. Once mixed, add the sweet potato rounds to the bowl. Toss them gently until every piece is coated with the marinade. This step adds flavor and helps in crisping. - Arrange sweet potatoes on the baking sheet. - Baking time and flipping suggestions. Lay the sweet potato rounds in a single layer on the prepared baking sheet. Make sure they do not touch. This space allows hot air to circulate, giving you that perfect crisp. Bake them for 25-30 minutes. Halfway through, flip the rounds for even cooking. You want them golden brown and tender. If you like a little spice, sprinkle some chili flakes on top during the last 5 minutes. To get crispy sweet potato rounds, slicing is key. Aim for 1/4-inch thick slices. This size helps them cook evenly and crisp up nicely. Use a sharp knife for clean edges. Spacing matters too. Arrange the sweet potato rounds on the baking sheet with space in between. This allows hot air to circulate, making them crispy. If they touch, they will steam instead of crisp. To amp up the flavor, try different seasonings. Garlic powder and smoked paprika are great starters. Fresh herbs like rosemary add a nice touch. You can also play with spices like cumin or even chili flakes for heat. Mixing flavors can create unique tastes. Try adding a dash of cinnamon for sweetness or a squeeze of lime for brightness. Get creative! One big mistake is overcrowding the baking sheet. When rounds are too close, they won’t crisp up. This leads to soggy sweet potatoes. Another mistake is not flipping the rounds. Turning them halfway through baking ensures even cooking. It helps both sides get that perfect golden brown. For the full recipe and more tips, check out the [Full Recipe]. Enjoy your crispy sweet potato rounds! {{image_2}} Air fryer instructions Using an air fryer is a great option! Preheat it to 400°F (200°C). Place the sweet potato rounds in a single layer in the basket. Cook for about 15-20 minutes. Shake the basket halfway through to ensure even cooking. You’ll get that perfect crispiness without all the oil. Pan-frying tips You can also pan-fry these rounds. Heat a skillet over medium heat and add a tablespoon of olive oil. Once hot, add the sweet potato rounds in a single layer. Cook for about 4-5 minutes on each side. Make sure to check for a golden brown color. It’s a quick way to enjoy crispy sweet potatoes! Gluten-free options This recipe is naturally gluten-free! All the ingredients work well for those avoiding gluten. Just ensure that your seasonings and any dips you choose are gluten-free as well. Spicing up with different seasoning blends You can mix and match spices to suit your taste. Try adding curry powder for a twist or Italian herbs for a new flavor. A pinch of cinnamon can sweeten the rounds even more. Get creative and find your favorites! Incorporating into salads Crispy sweet potato rounds add a tasty crunch to salads. Toss them in with greens, nuts, and a light vinaigrette. They bring color and flavor to any salad dish. Using as a side dish for grilling These rounds make a perfect side for grilled meats or veggies. Serve them alongside your favorite grilled chicken or steak. They complement the smoky flavors beautifully. For the full recipe, check the main section above. Enjoy your cooking! To keep your crispy sweet potato rounds fresh, use these simple steps: - Refrigeration tips: Place leftovers in an airtight container. Store them in the fridge for up to 3 days. Make sure they cool down before sealing to avoid moisture build-up. - Freezing instructions: For longer storage, freeze them. Lay the rounds in a single layer on a baking sheet. Once frozen, transfer them to a freezer bag. They can last for up to 2 months. To enjoy your sweet potato rounds again, reheating properly is key. - Best practices for keeping them crispy: Use the oven or air fryer. This method helps regain that crispy texture. Preheat your oven to 400°F (200°C) and bake for about 10 minutes. For air fryers, cook at 350°F (175°C) for 5-7 minutes. - Microwave vs. oven reheating: Microwaving is quick but may leave them soggy. If you're in a hurry, use the microwave for 30 seconds to 1 minute, then crisp them up in the oven. Knowing how long your sweet potato rounds last is important. - Timeframes for taste and texture retention: In the fridge, they stay good for about 3 days. If frozen, they remain tasty for up to 2 months. After that, they may lose their flavor and texture. Enjoy them fresh for the best experience! You can make crispy sweet potato rounds using an air fryer. Set your air fryer to 400°F (200°C). Toss the sweet potato rounds in oil and spices, just like you would for the oven. Place them in a single layer in the air fryer basket. Cook for about 15-20 minutes, flipping halfway for even crispiness. You can also pan-fry them. Heat a skillet over medium heat with a little oil. Cook the rounds for about 5-7 minutes per side until they are golden and crispy. Yes, you can use different types of sweet potatoes like purple or white. Each type has its own flavor and texture. Purple sweet potatoes are sweeter and have a creamier texture. White sweet potatoes are milder in taste, making them versatile. These variations can add a fun twist to your crispy rounds. Just keep in mind that cooking times may vary slightly based on thickness and moisture content. There are many great dips to pair with your crispy sweet potato rounds. Here are some popular options: - Yogurt-based dips add a cool contrast. - Avocado dip gives a creamy texture. - Spicy mayo adds heat and richness. - Honey or maple syrup can enhance the sweetness. Try mixing and matching to find your favorite combination! Peeling sweet potatoes is optional. The skin is nutritious and adds fiber. If you like the texture and color, keep the skin on. It also helps the rounds hold their shape during cooking. If you prefer a smoother texture, peeling is a good choice. Just make sure to wash them thoroughly to remove any dirt. You can make crispy sweet potato rounds with simple steps and ingredients. We covered key tips, from baking methods to flavor upgrades. With the right tools and techniques, you can achieve great results. Remember to space your sweet potatoes well and don’t skip the flipping step. Enjoy these tasty rounds as a snack or side. With endless serving ideas and flavor variations, they fit any meal. Try them and explore how you can make this dish your own!

Crispy Sweet Potato Rounds Tasty and Easy Recipe

Looking for a tasty snack that’s both easy and healthy? Crispy sweet potato rounds are the perfect choice! These crunchy
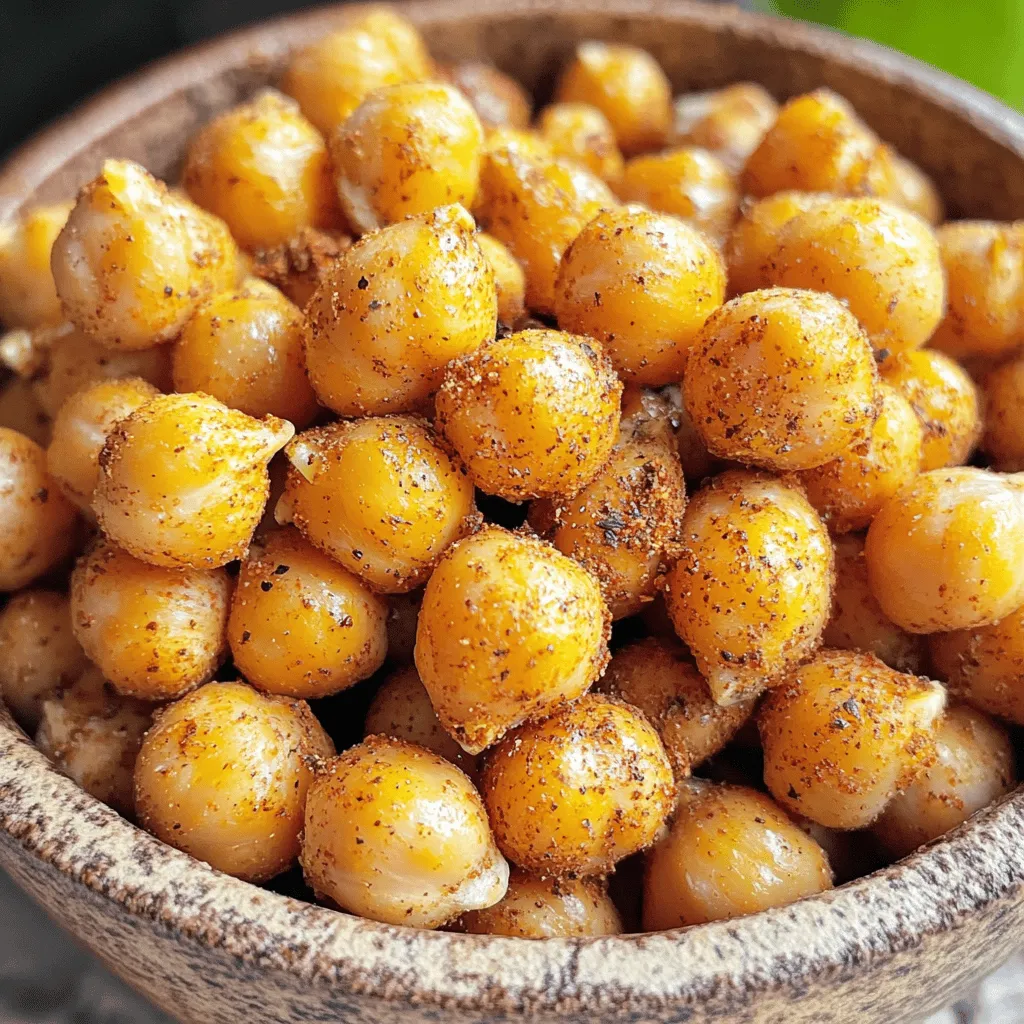
- 2 cans (15 oz each) chickpeas, drained and rinsed - 1 large onion, finely chopped - 3 cloves garlic, minced - 1 tablespoon ginger, minced - 2 tablespoons olive oil - 1 can (15 oz) diced tomatoes - 1 cup coconut milk - 2 tablespoons garam masala - 1 teaspoon turmeric powder - 1 teaspoon cumin powder - 1 teaspoon coriander powder - 1 tablespoon lemon juice - Fresh cilantro, chopped (for garnish) - Salt and pepper to taste Chickpea Tikka Masala is packed with flavor and nutrition. The chickpeas are the star here. They add protein and texture. I always use canned chickpeas for quick prep. Just rinse and drain them well. The onion, garlic, and ginger create a base that smells amazing. Olive oil helps sauté them, bringing out their sweetness. Next, diced tomatoes and coconut milk join the mix. They add richness and creaminess. The spices are key: garam masala gives warmth, while turmeric, cumin, and coriander offer depth. Don't forget the lemon juice at the end. It brightens the whole dish. Garnish with fresh cilantro for a pop of color. Salt and pepper enhance all the flavors. This simple list of ingredients makes a delightful dish that is sure to please everyone. If you want the full details on how to make it, check out the Full Recipe. - Step 1: Heat olive oil and sauté onions. In a large skillet, pour in the olive oil and set your heat to medium. Add the finely chopped onion. Cook it until it turns soft and clear. This step takes about five minutes. - Step 2: Add garlic and ginger. Once the onions are ready, stir in the minced garlic and ginger. Let them cook for one to two minutes. This will fill your kitchen with a lovely aroma. - Step 3: Combine chickpeas with onion mixture. Now, it’s time to add the chickpeas. Pour in the drained and rinsed chickpeas. Stir them into the onion mix. Let them cook for about two to three minutes. - Step 4: Add spices and cook. Next, sprinkle in the garam masala, turmeric, cumin, and coriander. Mix everything well. Let the spices coat the chickpeas. Cook for another two minutes to let the flavors blend. - Step 5: Mix in tomatoes and coconut milk. Pour in the diced tomatoes and coconut milk. Stir well to combine all the ingredients. This will bring a creamy texture to your dish. - Step 6: Simmer the mixture. Bring your mixture to a gentle simmer. Let it cook for fifteen to twenty minutes. Stir occasionally to make sure it doesn’t stick. This allows all the flavors to come together perfectly. You can follow these steps easily to make a delicious Chickpea Tikka Masala. For more details, check the Full Recipe. - Use fresh ingredients for the best flavor. Fresh ingredients make your Chickpea Tikka Masala taste vibrant and lively. Always choose ripe tomatoes and fresh herbs. - Adjust spice levels to taste. If you like it mild, cut back on the spices. For heat, add more chili or cayenne pepper to suit your taste. - Suggested cooking utensils. A large skillet or pot works best. A wooden spoon helps mix everything well. Use a sharp knife for chopping onions and garlic. - Best accompaniments like rice or naan. Serve your Chickpea Tikka Masala with warm basmati rice or soft naan bread. Both soak up the delicious sauce perfectly. - Garnishing options to enhance presentation. Fresh cilantro brightens the dish. You can also add a squeeze of lemon for a zesty touch. A dollop of yogurt gives a creamy finish. For the complete recipe, check the [Full Recipe]. Enjoy your cooking adventure! {{image_2}} You can easily switch up the beans in this dish. Try using black beans or lentils. Both will add great taste and protein. If you want a creamier texture, you can use cashew cream instead of coconut milk. It gives a rich flavor that pairs well with spices. If you like heat, add more chili. You can use fresh green chilies or red pepper flakes. This will make your Chickpea Tikka Masala extra spicy. For a boost in nutrition, toss in some vegetables. Spinach, bell peppers, or peas work great. They add color, texture, and vitamins to your meal. You can easily adjust the dish to fit your tastes. Enjoy exploring these fun variations! For the full recipe, check here. To store leftover Chickpea Tikka Masala, let it cool completely. Then, transfer it to an airtight container. This helps keep it fresh. Store it in the fridge for up to 4 days. Make sure to label the container with the date. When reheating, use a pot on the stove for the best flavor. Heat it slowly over medium heat. Stir often to stop it from sticking. You can add a splash of water or coconut milk if it gets too thick. This keeps the creamy texture intact. You could also use the microwave. Place it in a microwave-safe bowl and cover it. Heat it in short bursts, stirring between each. Enjoy your vibrant Chickpea Tikka Masala warm! For the full recipe, check out the complete guide. You can enjoy Chickpea Tikka Masala with various sides. Rice is a classic choice. It soaks up the sauce well. Naan bread adds a nice touch too. You might also like to add a simple salad. A refreshing cucumber salad can balance the dish nicely. Yes, you can freeze Chickpea Tikka Masala. Store it in an airtight container. It stays fresh for about three months. Thaw it in the fridge overnight before reheating. This dish tastes great even after freezing! To make it spicier, add more garam masala or chili powder. You can also stir in fresh chopped green chilies. Another option is to use spicy diced tomatoes. Start with a small amount and taste as you go. Yes, Chickpea Tikka Masala is gluten-free. Use gluten-free naan if you want bread on the side. Always check labels on canned ingredients to be safe. Tikka Masala likely comes from India or the UK. Many believe it was created by Indian chefs in Britain. It combines Indian and British flavors, making it unique. This dish has become popular worldwide. For the complete Chickpea Tikka Masala recipe, check out the [Full Recipe]. This blog shared a simple Chickpea Tikka Masala recipe. You learned what ingredients to use and how to prepare them. I included tips for storage and serving. You can also change flavors or ingredients to fit your taste. In conclusion, this dish is easy to make and full of flavor. Enjoy it with rice or naan for a complete meal. It’s a great option for any time you want a tasty vegan dish. Try making it for your next meal!

Chickpea Tikka Masala Simple Flavorful Delight

Are you ready for a dish that is both simple and bursting with flavor? Chickpea Tikka Masala is your new

When I create honey garlic roasted carrots, I love to keep the ingredient list simple yet flavorful. Here’s what you need: - 1 lb baby carrots (or regular carrots, peeled and cut into sticks) - 3 tablespoons honey - 2 tablespoons olive oil - 3 cloves garlic, minced - 1 teaspoon fresh thyme leaves (or ½ teaspoon dried thyme) - Salt and pepper to taste - 1 tablespoon lemon juice - Fresh parsley for garnish (optional) These ingredients work together to create a sweet and savory dish. The honey brings a rich sweetness, while the garlic adds depth. Fresh thyme enhances the flavor, giving it an earthy touch. When selecting carrots, look for ones that are firm and bright in color. Fresh carrots have the best taste and texture. If you can’t find baby carrots, regular ones work just as well. Just remember to peel and cut them into sticks for even cooking. The lemon juice adds a hint of brightness to balance the sweetness. And if you want to make it pop, garnish with fresh parsley. This adds color and freshness to your finished dish. For the full recipe, check out [Full Recipe]. 1. Preheat the oven to 400°F (200°C). This step warms the oven for roasting. 2. In a large bowl, mix the sauce. Combine honey, olive oil, minced garlic, thyme, lemon juice, salt, and pepper. Whisk well until it blends smoothly. 3. Add the carrots to the bowl. Toss them in the honey garlic mixture until they are well coated. This makes sure every bite is sweet and savory. 1. Spread the carrots on a baking sheet. Make sure they are in one single layer. This helps them cook evenly. 2. Roast in the oven for 25-30 minutes. Turn the carrots halfway through. This ensures they get golden and tender. 1. Once done, take the carrots out and let them cool for a few minutes. This helps them firm up. 2. Drizzle any remaining honey garlic mixture over the carrots. This adds more flavor. 3. If you like, garnish with fresh parsley. It adds color and a fresh taste to the dish. For the full recipe, check out the section above! Enjoy your sweet and savory delight with honey garlic roasted carrots. - How to choose the best carrots Look for bright, firm carrots. They should feel heavy for their size. Smaller carrots are sweeter and tenderer. If you can, buy organic to avoid pesticides. - Importance of even slicing for roasting Cutting carrots to the same size helps them cook evenly. If they are uneven, some may burn while others stay hard. Aim for pieces about one inch thick for the best results. - Alternative cooking methods You can use an air fryer for a crispier texture. Set it to 375°F and cook for about 15 minutes. You can also sauté them on the stovetop in a pan with oil for a quick and tasty option. - Adding spices for extra flavor Try adding a pinch of cumin or paprika for warmth. A dash of chili powder can add a kick. Just remember to start with small amounts. You can always add more if needed. - Experimenting with different herbs While thyme works great, you can try rosemary or dill. Fresh herbs bring new life to the dish. Chop them finely and mix them in with the carrots for a fresh taste. - Pairing with proteins like chicken or fish These carrots go well with roasted chicken or salmon. Their sweet and savory notes balance rich flavors beautifully. Serve them together for a complete meal. - Best sides to serve with honey garlic roasted carrots Serve with fluffy rice or creamy mashed potatoes. A simple green salad also pairs nicely. This adds freshness and crunch, rounding out your meal perfectly. {{image_2}} You can swap honey for maple syrup. This adds a unique flavor. Maple syrup gives a nice touch of sweetness. If you want a different taste, try that. You can also replace olive oil with butter. Butter adds a rich, creamy taste. Other oils like avocado oil work too. They all pair well with the honey garlic mix. To make this recipe vegan, use maple syrup instead of honey. This simple change keeps the flavor while making it plant-based. For a vegan option, you can also use coconut oil instead of butter. If you need low-sodium options, skip added salt. The garlic and thyme add great flavor without salt. You can also use low-sodium broth in the mix for extra taste. Consider using seasonal vegetables with your carrots. Sweet potatoes or parsnips roast well together. They add color and flavor to the dish. You can adapt this recipe for holidays, too. For fall, add a pinch of cinnamon for warmth. In spring, stir in some fresh herbs like dill or basil. Each season brings new flavors to explore with this dish. For the full recipe, check out the detailed steps above. To keep your honey garlic roasted carrots fresh, store them in the fridge. Place them in a sealed container. They will stay good for about three to five days. To reheat, simply place them on a baking sheet. Heat in a preheated oven at 350°F (175°C) for about 10 minutes. This keeps them crispy and tasty. If you want to store honey garlic roasted carrots for longer, freezing is a great option. First, let the carrots cool completely. Then, place them in a freezer-safe bag or container. Make sure to remove as much air as possible. They can last up to three months in the freezer. When you're ready to eat them, take the carrots out and thaw them in the fridge overnight. Reheat them in the oven at 350°F (175°C) until warm. In the refrigerator, honey garlic roasted carrots last about three to five days. Always check for signs of spoilage before eating. If they smell off or have a slimy texture, it’s best to toss them out. Fresh, well-stored carrots should still taste sweet and savory. Enjoy your tasty creation with confidence! For more details, check the Full Recipe. Can I use different types of carrots? Yes, you can use many types of carrots. While baby carrots work best, regular carrots are fine too. Just peel and cut them into sticks. You may also try rainbow carrots for extra color. How can I make this recipe spicy? To spice up your dish, add red pepper flakes or cayenne pepper. Mix in a pinch with your honey garlic sauce. This will give the sweet and savory flavors a nice kick! What should I do if my carrots are not caramelizing? If your carrots are not caramelizing, check your oven temperature. Make sure it is set to 400°F (200°C). Also, give them enough space on the baking sheet. Overcrowding can cause steaming instead of roasting. How do I make this a meal prep dish? To meal prep, roast a large batch of carrots. Store them in an airtight container. You can keep them in the fridge for up to five days. Reheat in the oven or microwave when ready to eat. What can I serve with honey garlic roasted carrots? These carrots pair well with many dishes. Serve them alongside grilled chicken or fish. They also work nicely with rice or quinoa. For a complete meal, add a fresh salad. For the full recipe, check out the [Full Recipe]. Honey garlic roasted carrots are simple yet flavorful. We discussed the key ingredients, easy steps to prepare, and roasting techniques. Tips on flavor enhancements and dietary variations make this dish adaptable. Additionally, I shared storage info to keep leftovers fresh and tasty. These carrots pair well with many foods and shine on any table. I encourage you to try this recipe. Enjoy the sweet and savory blend in your cooking!

Honey Garlic Roasted Carrots Sweet and Savory Delight

Honey garlic roasted carrots are a game-changer for your dinner table! This dish combines sweet honey and savory garlic for

- 1 can (15 oz) chickpeas - 1 tablespoon olive oil - 1 teaspoon garlic powder - 1 teaspoon smoked paprika - ½ teaspoon ground cumin - ½ teaspoon chili powder - Salt to taste - Freshly cracked black pepper to taste - You can add more spices like cayenne pepper for heat. - Fresh herbs like parsley or cilantro add a nice touch. - Zesty flavors from lemon or lime juice brighten the dish. Chickpeas are packed with protein. One serving gives you a good amount of fiber too. Olive oil is full of healthy fats that can help your heart. Air frying uses less oil than deep-frying, so it’s a healthier choice. You still get that crunchy texture, which is key for snacking. Enjoy these crispy air fryer chickpeas as a tasty treat that also fuels your body! For the full recipe, check out the detailed instructions above. Preheating the air fryer Start by preheating your air fryer to 400°F (200°C). This step is key for getting your chickpeas crispy. Drying chickpeas for optimal crispiness Next, take your chickpeas from the can and drain them. Rinse them under cool water. Then, use a clean kitchen towel or paper towels to pat them dry. The drier they are, the crispier they'll become. Seasoning the chickpeas In a mixing bowl, toss the dried chickpeas with 1 tablespoon of olive oil. Make sure they are well-coated. Now, add the seasonings: 1 teaspoon garlic powder, 1 teaspoon smoked paprika, ½ teaspoon ground cumin, and ½ teaspoon chili powder. Finish with salt and freshly cracked black pepper to taste. Mix well so every chickpea is seasoned nicely. Air frying process Place the seasoned chickpeas in the air fryer basket. Spread them out in a single layer. This helps ensure even cooking. Shaking the basket technique Set your air fryer to cook for 15-20 minutes. Halfway through, shake the basket. This keeps the chickpeas moving and helps them crisp up all around. Checking for doneness After 15 minutes, check your chickpeas. They should be golden brown and crunchy. If they need more time, cook them for a few extra minutes. Creative ways to enjoy crispy chickpeas You can enjoy these crispy chickpeas as a snack. They are perfect for munching on while watching a movie. Pairing with dips or spreads Try serving them with hummus or yogurt dip. They add a nice crunch and flavor to your dips. Adding to salads or soups You can also sprinkle them on salads or soups. They add texture and make your meal more filling. For the full recipe, refer to the main section. To get the best crispiness from your chickpeas, start by drying them well. After rinsing, use a clean towel to pat them dry. Moisture is the enemy of crunch. Set your air fryer to 400°F (200°C). This high heat helps crisp them up quickly. Cook for 15 to 20 minutes. A shorter time may leave them soggy. One big mistake is overcrowding the basket. If you pile in too many chickpeas, they won’t cook evenly. Always spread them out in a single layer. Another mistake is not shaking the basket. Shaking helps them cook evenly. Do this halfway through cooking to ensure all sides get crispy. Spices can take your chickpeas to the next level. Try adding cayenne for heat or lemon zest for brightness. Experiment until you find your perfect mix. Marinating your chickpeas before cooking also boosts flavor. Let them soak in your spice mix and oil for at least 30 minutes. This step makes each bite packed with taste. For the full recipe, check out the detailed steps to make these flavorful crisps! {{image_2}} You can change the flavor of your crispy air fryer chickpeas easily. For a spicy kick, add cayenne pepper or drizzle sriracha over the chickpeas. Just mix in one teaspoon of cayenne or a tablespoon of sriracha with the other seasonings. This will make your snack fiery and fun. If you prefer herbal flavors, try using fresh rosemary or thyme. Chop the herbs finely and mix them in with the chickpeas. The earthy taste will create a nice balance. Both options keep the dish fresh and exciting. These chickpeas fit many diets. They are vegan and gluten-free right from the start. You can enjoy them without worry. If you want to lower the salt, try using low-sodium seasoning. This way, you can control the salt content while still enjoying the taste. Don't stop at chickpeas! You can try other legumes too. For example, black beans work well in the air fryer. Just rinse and dry them like chickpeas. Season them and cook for about 15 to 20 minutes. You can also cook lentils in the air fryer. Use red lentils for a fun twist. Just make sure to adjust the cooking time since they cook faster than chickpeas. For more flavor ideas, check out the Full Recipe. Enjoy your crunchy snacks! After cooking your crispy air fryer chickpeas, let them cool. This step is key. If you store them warm, they might get soggy. Once cool, place them in air-tight containers. This helps keep them fresh. You want to avoid moisture that can ruin their crispiness. Crispy chickpeas taste best within a week. Store them properly, and they stay crunchy. If they smell off or feel soft, it’s time to toss them. You want to enjoy them at their best! To keep your chickpeas crispy, reheating is an art. The air fryer is perfect for this. Set it to 350°F (175°C) and heat for about 5 minutes. Check them often to avoid burning. This method revives their crunch, making them just as tasty as when they were fresh. Yes, you can use dried chickpeas. First, soak them overnight in water. This softens them and helps them cook faster. After soaking, boil them until tender. This may take about one hour. Then, drain and dry them well before air frying. The dried chickpeas will need more time in the air fryer than canned ones. Expect to cook them for about 25 to 30 minutes. Keep checking for doneness, shaking the basket every few minutes for even cooking. To add spice, use cayenne pepper or chili flakes to your seasoning mix. Start with a small amount, about ¼ teaspoon, and taste as you go. You can also drizzle hot sauce over the chickpeas after cooking for a fresh kick. Another option is to mix in some sriracha with the olive oil before tossing the chickpeas. This adds flavor and heat. Adjust the spice level to suit your taste. Air frying is a healthier option than traditional frying. It uses less oil, which cuts down on calories and fat. This method keeps the crispy texture while reducing unhealthy fats. Air frying also helps lock in nutrients, making your food more nutritious. With air frying, you can enjoy your favorite snacks without the guilt! Crispy chickpeas are easy to make and fun to eat. You start with simple, healthy ingredients like chickpeas and olive oil, adding your choice of spices. Air frying gives them a perfect crunch. Remember to dry your chickpeas for the best texture and avoid overcrowding. You can try different flavor options and even other legumes. Store any leftovers in an airtight container. Enjoy these crispy snacks solo or as part of meals. With practice, you'll master the art of making flavorful, healthy snacks. Give it a go!

Crispy Air Fryer Chickpeas Packed with Flavor Boost

Crispy air fryer chickpeas are a snack you cannot miss! They are quick, easy, and packed with flavor. I’ll guide

- 1 cup rolled oats - 1/2 cup pumpkin puree - 1/2 cup almond butter (or peanut butter) - 1/4 cup honey or maple syrup - 1/4 cup ground flaxseed - 1 teaspoon vanilla extract - 1 teaspoon pumpkin pie spice - 1/2 cup mini chocolate chips (optional) - Pinch of salt These ingredients form a perfect blend for energy bites. The oats give a good texture. Pumpkin puree adds moisture and flavor. Almond butter or peanut butter brings in healthy fats and protein. Honey or maple syrup sweetens the bites just right. Ground flaxseed packs a nutritional punch, adding fiber and omega-3s. Vanilla extract enhances all the flavors. Pumpkin pie spice gives that warm, cozy taste. Mini chocolate chips are optional, but they add fun sweetness. - Alternative nut butters - Different sweeteners - Add-ins like nuts or dried fruit You can change the nut butter to fit your taste. Try cashew or sunflower butter if you like. Sweeteners can vary too. Use agave or coconut sugar if you prefer. Add-ins can make these bites your own. Try adding nuts for crunch or dried fruit for sweetness. Each energy bite has around 100 calories, depending on what you add. They are a good source of carbs, proteins, and healthy fats. - Carbs: Oats and pumpkin give you energy. - Proteins: Almond butter or peanut butter adds protein for muscle health. - Fats: Healthy fats from nut butter and flaxseed help keep you full. Pumpkin is rich in vitamins and minerals. It boosts your immune system and improves vision. Flaxseed supports heart health and digestion. Each bite is a small powerhouse of nutrition. Enjoy them as a snack or a quick breakfast. For the full recipe, check out Healthy Pumpkin Energy Bites. To start, gather your dry ingredients. In a large mixing bowl, add 1 cup of rolled oats, 1/4 cup of ground flaxseed, and 1 teaspoon of pumpkin pie spice. Use a spoon to mix these together. This gives the bites a good base flavor and texture. Next, you need to combine the wet ingredients. In a separate bowl, add 1/2 cup of pumpkin puree, 1/2 cup of almond butter, and 1/4 cup of honey or maple syrup. Toss in 1 teaspoon of vanilla extract and a pinch of salt. Stir until everything is smooth and well mixed. This mixture adds moisture and a sweet flavor to the bites. Now, it’s time to form the energy bites. Pour the wet mixture into the bowl with the dry ingredients. Mix until everything is combined. If you like chocolate, fold in 1/2 cup of mini chocolate chips. Once mixed, cover the bowl and chill the mixture in the fridge for 30 minutes. Chilling helps it firm up, making it easier to roll into balls. After chilling, scoop out small portions, about 1 tablespoon each. Roll them into balls using your hands. Place the rolled bites on a parchment-lined baking sheet. After rolling all the bites, return them to the fridge for another 15 to 20 minutes. This step lets them set nicely. You can enjoy these bites right away. They also store well in an airtight container in the fridge for up to a week. They make a great snack or energy boost anytime! For more details, check out the Full Recipe. To keep your energy bites fresh, store them in an airtight container. The fridge is best for short-term storage. They will last about a week. If you want them to last longer, freeze them. In the freezer, they can stay good for up to three months. Just remember to separate layers with parchment paper. This prevents sticking. You can easily make these bites vegan. Swap honey for maple syrup. For gluten-free options, use certified gluten-free oats. You can also replace almond butter with sunflower seed butter. This keeps the texture smooth and creamy. Always check that your ingredients are gluten free. Want to spice things up? Add a pinch of cinnamon or nutmeg for warmth. You can also play with mix-ins. Try adding chopped nuts or dried fruits. For a chocolate twist, use dark chocolate chips instead of mini ones. These changes will give your bites a fun, new flavor. {{image_2}} You can change the flavor of your energy bites easily. Here are two fun ideas: - Pumpkin spice variation: Use extra pumpkin pie spice. This adds more warmth and flavor. You can also add a bit of cinnamon for a cozy touch. - Chocolate pumpkin energy bites: Mix in mini chocolate chips. They add sweetness and a rich taste. You can use dark chocolate chips for a healthier twist. Making energy bites fit your diet is simple. Here are some options: - Nut-free options: Use sunflower seed butter instead of nut butter. This keeps them safe for those with nut allergies. - Low-sugar alternatives: Swap honey or maple syrup for mashed banana. This gives natural sweetness without added sugar. You can change the bites based on the season: - Use of seasonal flavors: Try adding ginger or apple for a fresh taste. Both flavors work well with pumpkin and add a nice twist. - Holiday themed energy bites: For special occasions, mix in festive spices like nutmeg or cloves. You can even shape them into holiday-themed forms for fun treats. Feel free to get creative and enjoy the full recipe! To keep your Healthy Pumpkin Energy Bites fresh, store them in an airtight container. This helps keep moisture out. You can store them in the fridge for easy access. If you want to save some for later, freezing is a great option. Just place them in a freezer-safe bag or container. They will last longer this way. In the fridge, these bites last about one week. If you freeze them, they can stay good for up to three months. Check for signs of spoilage before eating. If they have a strange smell or look dry, it's best to toss them. Fresh energy bites should feel soft and smell sweet. If you find some bites have gone stale, don’t worry! You can blend them into smoothies for added flavor and nutrition. You can also break them up and sprinkle over yogurt or oatmeal. This makes a great topping and adds texture to your breakfast. Healthy Pumpkin Energy Bites last about one week in the fridge. Store them in an airtight container to keep them fresh. If you want to store them longer, you can freeze them for up to three months. Always check for signs of spoilage, like mold or a bad smell, before eating. Yes, you can use other sweeteners. Agave nectar works well as a liquid sweetener. You can also use stevia or monk fruit if you want a low-calorie option. Just make sure to adjust the amount to your taste. Remember, each sweetener has a different level of sweetness. Absolutely! Healthy Pumpkin Energy Bites are packed with good ingredients. They have oats, pumpkin, and nut butter, which provide fiber and protein. These bites are a tasty snack for kids. Plus, they can help with energy and focus. Always check for nut allergies before serving. In this blog post, we explored how to make tasty and healthy pumpkin energy bites. You learned about the key ingredients, step-by-step instructions, and tips for different diets. We also covered storage methods and ways to customize your bites. My final thought: These snacks are easy, fun, and good for you. Try them out, and enjoy experimenting with flavors and ingredients that you love. You’ll find they make a perfect treat or pick-me-up anytime!

Healthy Pumpkin Energy Bites Quick and Easy Recipe

Looking for a quick snack that’s both tasty and healthy? You’ve come to the right place! These Healthy Pumpkin Energy

To make Easy Greek Lemon Potatoes, you need a few simple ingredients. I love using fresh items that pack flavor. Here’s what you will need: - Baby potatoes: 2 lbs, halved for even cooking. - Olive oil: 1/4 cup to give them a rich taste. - Broth options: 1/2 cup of vegetable or chicken broth adds depth. - Lemon: Juice of 2 large lemons and zest of 1 for a bright kick. - Garlic and oregano: 4 cloves of minced garlic and 1 tablespoon of dried oregano for that classic Greek flavor. - Seasonings: Salt and pepper to taste, enhancing the potatoes’ natural flavor. - Garnish: Fresh parsley, chopped, adds color and freshness. This mix of ingredients makes for a dish that is not just tasty but also bright and vibrant. You can find the full recipe above for more details on how to bring it all together! 1. Preheat the oven: Start by setting your oven to 400°F (200°C). This step is key for getting those potatoes crispy. 2. Combine ingredients in a mixing bowl: In a large bowl, add the halved baby potatoes, olive oil, broth, lemon juice, lemon zest, minced garlic, oregano, salt, and pepper. Mix everything well. Make sure each potato is coated in that zesty goodness. 3. Transfer to a baking dish: Pour the potato mixture into a baking dish. Spread the potatoes out in a single layer. Don’t forget to pour any leftover liquid from the bowl over the potatoes. This will add flavor and moisture. 1. Bake covered and uncovered times: First, cover your baking dish with aluminum foil. Bake it in the preheated oven for 30 minutes. This helps the potatoes cook evenly. 2. Techniques for checking doneness: After 30 minutes, take off the foil. Gently stir the potatoes. Then, bake them uncovered for 25-30 more minutes. To check if they're done, poke a potato with a fork. If it goes in easily, they’re ready! 1. Cooling and garnishing tips: Once baked, take the dish out and let it cool for a few minutes. This helps the flavors settle. 2. Recommended serving suggestions: Before serving, sprinkle freshly chopped parsley on top. These Easy Greek Lemon Potatoes pair well with grilled meats or a fresh salad. Enjoy your flavorful dish! For the full recipe, check the details above. To cook larger potatoes, cut them into quarters. This helps them cook faster. For the best golden-brown finish, make sure to stir the potatoes halfway through baking. This allows them to brown evenly. If you want to change up the oil, you can use avocado or canola oil. For broth, vegetable or chicken broth works well. For fresh herbs, try thyme or basil for a new twist. These lemon potatoes pair great with grilled chicken or lamb. You can also serve them with a fresh salad. A simple Greek salad with feta and olives complements this dish perfectly. If you want more ideas, check the Full Recipe for inspiration. {{image_2}} You can make your Easy Greek Lemon Potatoes even better with a few tweaks. Adding cheese can boost flavor. Feta cheese crumbles mix well with the lemon and herbs. You can also try Parmesan for a nutty taste. Spices can add a nice kick. A pinch of red pepper flakes gives heat. If you like sweet flavors, try adding a bit of paprika. It can turn simple potatoes into a real treat. Using different herbs can change the dish too. Fresh thyme or rosemary works great. Both herbs add a nice earthiness that pairs well with lemon. You can also mix in some fresh dill for a bright twist. You can cook these potatoes in different ways. An Instant Pot can save time. Simply add all the ingredients and cook on high for about 10 minutes. The result will be tender and tasty potatoes. An air fryer is another option. It can give your potatoes a crispy finish. Just toss them in the air fryer for 20-25 minutes. You will need to shake the basket halfway through for even cooking. Grilling is another fun way to prepare them. Skewer the potatoes and grill them. This adds a smoky flavor that pairs well with the lemon. Baking in the oven remains a classic method. It gives good results with ease. For the full recipe, check out Easy Greek Lemon Potatoes. To keep your Easy Greek Lemon Potatoes fresh, store them in an airtight container. Place the cooled potatoes in the fridge. They can stay good for about 3 to 5 days. Always check for any signs of spoilage before using leftovers. You can freeze these potatoes too! To do this, let them cool completely. Then, place them in a freezer-safe bag or container. They can last up to 2 months in the freezer. When you're ready to enjoy them, thaw overnight in the fridge. For reheating, the oven works best. Preheat to 350°F (175°C) and bake until warm. You can also use a microwave, but the oven keeps them crispy. For the full recipe, check out the instructions above. How to make Greek lemon potatoes crispier? To make your Greek lemon potatoes crispy, try these steps: - Use small potatoes for even cooking. - Increase the oven temperature to 425°F (220°C) during the last 10 minutes. - Let them bake uncovered without foil to allow moisture to escape. These tips will help you get that nice golden crust! Can I use other types of potatoes? Yes, you can use other types of potatoes! - Yukon Golds work well for their creamy texture. - Russets will give a fluffier inside but may need extra time to cook. - Just make sure they are cut evenly for uniform cooking. Experiment and find your favorite! What’s the best way to adjust servings? To adjust servings, simply scale the ingredients. - For more servings, double the ingredients. - For fewer servings, halve them. - Keep the cooking time the same, but check for doneness sooner if you reduce the amount. This will keep your dish tasty no matter the size! How do I know if the potatoes are fully cooked? To check if the potatoes are done, use a fork. - Insert the fork into a potato; it should slide in easily. - Look for a golden brown color on the outside. - If they feel soft but not mushy, they're ready! Perfectly cooked potatoes will be tender and full of flavor! This guide covered everything from ingredients to cooking tips for delicious potatoes. You learned how to choose the right flavors and how to store extras. Remember, cooking is about creativity. Feel free to change and adapt recipes to suit your taste. Try new herbs or cooking methods to make each meal special. With these tips, you can cook perfect potatoes every time. Enjoy diving into new flavors and techniques!

Easy Greek Lemon Potatoes Flavorful and Simple Dish

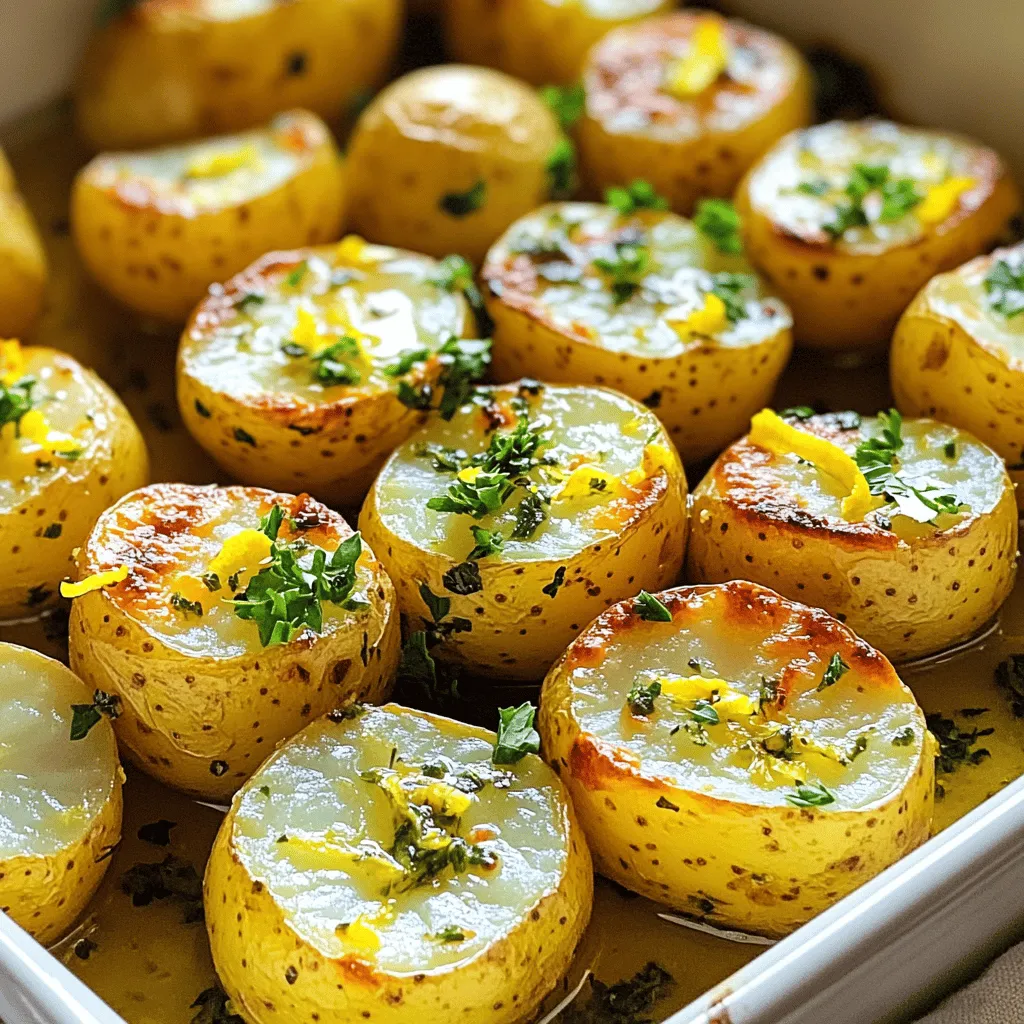
Looking for a simple yet flavorful dish to brighten your meals? Try my Easy Greek Lemon Potatoes! This dish combines

For the best spicy black bean burgers, you need a few key ingredients. These form the base of the recipe. Here’s what you’ll need: - 1 can (15 oz) black beans, drained and rinsed - 1/2 cup cooked quinoa - 1/2 cup breadcrumbs - 1 small red onion, finely chopped - 2 cloves garlic, minced - 1 small jalapeño, deseeded and minced - 1 tablespoon chili powder - 1 teaspoon cumin - 1/2 teaspoon smoked paprika - Salt and pepper to taste - 2 tablespoons fresh cilantro, chopped - 1 egg (or flax egg for vegan option) - Olive oil for frying These ingredients create a hearty and tasty burger. The black beans bring protein and fiber. Quinoa adds a nice texture and boosts nutrition. The spices give it a spicy kick. If you want to elevate your spicy black bean burgers, here are some optional ingredients: - Diced bell peppers - Corn kernels - Shredded cheese - Hot sauce for extra heat - Avocado for creaminess Adding these ingredients can give your burgers more depth. They can help you customize the flavor to your liking. Sometimes, you may not have all the ingredients on hand. Here are some substitutions you can try: - Swap black beans for kidney beans or pinto beans. - Use oats instead of breadcrumbs for a gluten-free option. - Replace quinoa with cooked rice or farro. - Try a different onion, like yellow or green onions. These alternatives won’t change the taste too much. They will still create delicious burgers. You can always adjust the spices for your taste. Check out the Full Recipe for more details on making these burgers. Start by gathering your ingredients. You need: - 1 can (15 oz) black beans, drained and rinsed - 1/2 cup cooked quinoa - 1/2 cup breadcrumbs (can use gluten-free if desired) - 1 small red onion, finely chopped - 2 cloves garlic, minced - 1 small jalapeño, deseeded and minced - 1 tablespoon chili powder - 1 teaspoon cumin - 1/2 teaspoon smoked paprika - Salt and pepper to taste - 2 tablespoons fresh cilantro, chopped - 1 egg (or flax egg for vegan option: 1 tablespoon ground flaxseed mixed with 2.5 tablespoons water) - Olive oil for frying You will want the beans to be soft. Mash them in a large bowl. I use a fork or potato masher. Leave some chunks for texture. Next, add cooked quinoa, breadcrumbs, and the chopped onion. Don't forget the garlic and jalapeño! Mix in the chili powder, cumin, smoked paprika, salt, and pepper. Finally, add chopped cilantro. If you use an egg, add it now to bind the mixture. Now it's time to shape your burgers. Take a scoop of the mixture and form it into a patty. You can make 4 to 6 patties, based on how big you want them. Press down gently to make them flat. Place them on a plate as you finish each one. This step is key to getting a nice, uniform shape. For cooking, heat olive oil in a skillet over medium heat. Wait until the oil is hot. Place the patties into the skillet with care. Cook them for about 5 to 6 minutes on one side. When they turn golden brown, flip them over. Cook the other side for the same time. This will give you a crispy texture on both sides. After cooking, let them rest on a paper towel to soak up extra oil. Enjoy your delicious spicy black bean burgers! Check the Full Recipe for more details. To get the best texture in your spicy black bean burgers, mash the black beans lightly. Leave some chunks for a nice bite. This adds depth and helps the burgers hold together. Mix in cooked quinoa; it gives a great crunch. The breadcrumbs also help bind the mixture. Use gluten-free breadcrumbs if needed. You can cook these burgers in a skillet or on the grill. A skillet gives you a nice, crispy crust. Heat olive oil over medium heat, then add your patties. Cook each side for 5-6 minutes until golden brown. Grilling adds a lovely smoky flavor. Just make sure your grill is hot before adding the patties. This prevents sticking. To boost the flavor of your burgers, try adding extra spices. You can use smoked paprika for a deep taste. A dash of lime juice brightens the flavors too. Fresh herbs like cilantro or parsley add a fresh note. If you like heat, add more jalapeño or some hot sauce. These simple tweaks can make your burgers even more delicious. For the full recipe, check out the detailed instructions! {{image_2}} You can make your spicy black bean burgers unique. Try switching up the spices. Instead of chili powder, use taco seasoning for a different kick. You can also add corn, diced bell peppers, or even shredded carrots. These not only add flavor but also boost nutrition. Toppings can take your burger to new heights. Here are some fun ideas: - Slices of avocado or guacamole - Fresh lettuce or spinach - Tomato slices or pico de gallo - Spicy mayo or chipotle sauce - Pickled jalapeños for extra heat - Cheese, like pepper jack or vegan cheese Mix and match these toppings to create your perfect bite. Serve these burgers on toasted buns for the best texture. You can also use lettuce wraps for a low-carb option. Pair your burgers with sides like sweet potato fries or a fresh salad. A zesty coleslaw adds crunch and balances the spice. For a complete meal, consider a side of grilled veggies or a hearty soup. Check the Full Recipe for more serving ideas. To keep your spicy black bean burgers fresh, store them in an airtight container. Make sure they cool down first. Place a layer of parchment paper between the burgers to avoid sticking. You can keep them in the fridge for up to three days. This way, you can enjoy a quick meal later. When you’re ready to eat your burgers again, reheating them is easy. I recommend using a skillet. Heat a small amount of olive oil over medium heat. Cook the burgers for about 3 minutes on each side. This method keeps them crispy and warm. You can also use an oven. Preheat it to 350°F, place the burgers on a baking sheet, and heat for about 10 minutes. If you want to save burgers for a later date, freezing is a great option. First, allow the burgers to cool completely. Then, wrap each one tightly in plastic wrap. Place them in a freezer-safe bag or container. They will last up to three months in the freezer. When you’re ready to eat, thaw them overnight in the fridge before reheating. This keeps them tasty and ready for your next meal. For the full recipe, check out the earlier sections. Spicy Black Bean Burgers last about 4 to 5 days in the fridge. Store them in an airtight container to keep them fresh. Make sure they cool down before sealing. If you want them to last longer, consider freezing them. Yes, you can make Spicy Black Bean Burgers vegan! Just replace the egg with a flax egg. To make a flax egg, mix 1 tablespoon of ground flaxseed with 2.5 tablespoons of water. Let it sit for a few minutes until it thickens. This will help bind your burger without using any animal products. Many sides pair well with Spicy Black Bean Burgers. Here are a few tasty options: - Sweet potato fries - Zesty coleslaw - Grilled corn on the cob - A fresh garden salad - Spicy potato wedges These sides add color and flavor to your meal. Enjoy your burgers with any of these delicious options! For the complete recipe, check out the Full Recipe section. In this blog post, we covered how to make tasty Spicy Black Bean Burgers. You learned about key ingredients, tips for cooking, and storage methods. I shared some fun variations and topping ideas to boost flavor. Remember, cooking is about enjoying the process. Don't be afraid to try new things and make the recipe your own! With the right ingredients and techniques, you can create a delicious meal any time. Get ready to impress your family and friends with your culinary skills!

Spicy Black Bean Burgers Flavorful and Simple Meal

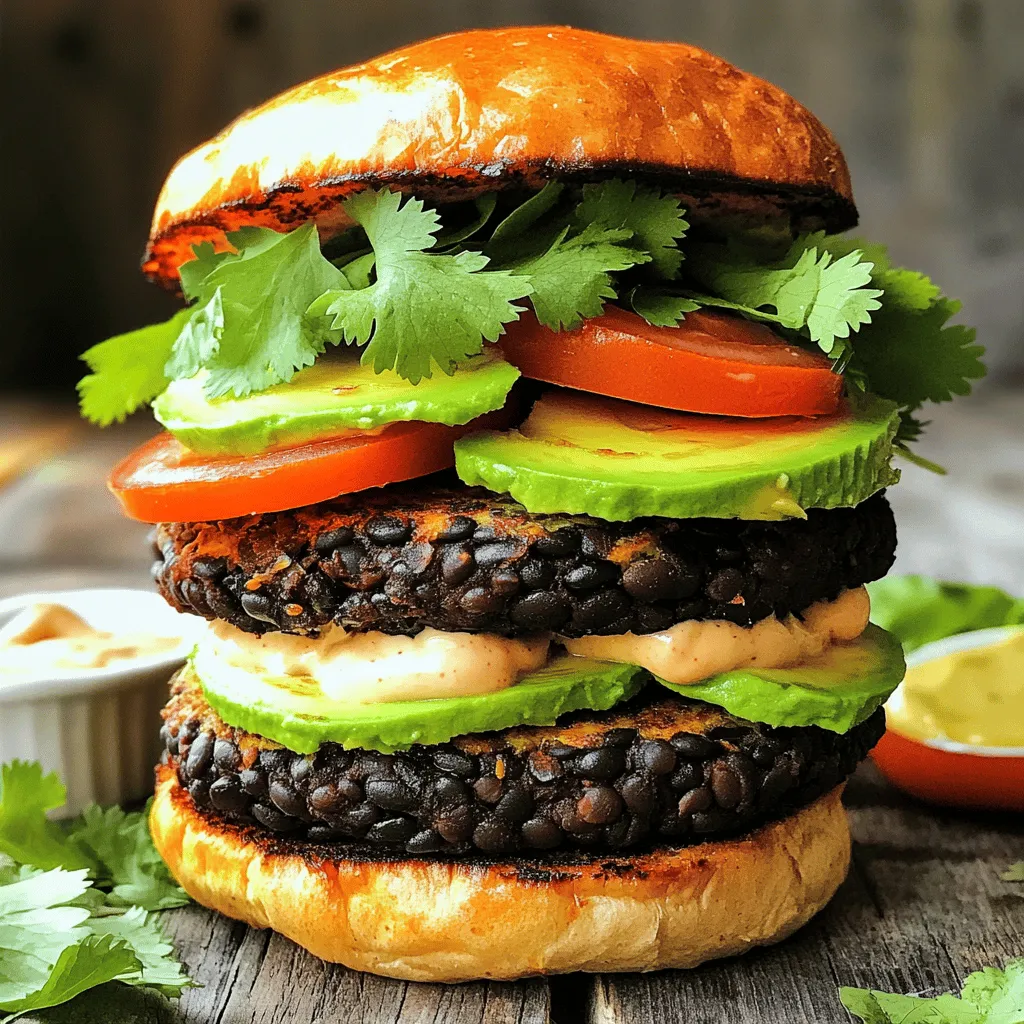
Are you ready to spice up your dinner? These Spicy Black Bean Burgers are simple to make and packed with

To make grilled pineapple chicken skewers, you need the following ingredients: - 1 lb chicken breast, cut into 1-inch cubes - 1 cup fresh pineapple chunks - 1 red bell pepper, cut into squares - 1 green bell pepper, cut into squares - 1 small red onion, cut into squares - 3 tablespoons soy sauce - 2 tablespoons honey - 1 tablespoon olive oil - 2 cloves garlic, minced - 1 teaspoon fresh ginger, grated - Salt and pepper to taste - Skewers (soaked in water if wooden) When preparing your ingredients, measure carefully. Use a sharp knife to cut the chicken and veggies into uniform pieces. This helps them cook evenly. For the marinade, whisk the soy sauce, honey, olive oil, garlic, ginger, salt, and pepper in a bowl until smooth. Marinate the chicken for at least 30 minutes for best flavor. If you have more time, marinate it up to 2 hours. This allows the flavors to soak in better. If you can’t find fresh pineapple, try using canned pineapple in juice. Drain it well before use. You can also swap chicken breast with chicken thighs for a juicier taste. For a vegetarian option, use firm tofu or mushrooms. For a fun twist, add zucchini or cherry tomatoes for extra color and flavor. First, we need to make the marinade. In a medium bowl, mix together soy sauce, honey, olive oil, minced garlic, grated ginger, salt, and pepper. This mix gives the chicken great flavor. Next, add the chicken cubes to the bowl. Make sure each piece gets covered in the marinade. Cover the bowl and place it in the fridge for at least 30 minutes. For even better flavor, let it marinate for up to 2 hours. This step is key for juicy, tasty chicken. While the chicken marinates, it’s time to prep the veggies and pineapple. Cut the red and green bell peppers and red onion into squares. Aim for similar sizes so they cook evenly. Also, cut your pineapple into chunks. Once everything is ready, grab your skewers. If you use wooden skewers, soak them in water for 30 minutes to prevent burning. This helps them last on the grill. Now, let’s fire up the grill! Preheat it to medium-high heat. While it heats, assemble your skewers. Alternate chicken, pineapple, and veggies on each skewer. This mix gives a colorful, tasty result. Once the grill is hot, oil the grates to stop sticking. Place the skewers on the grill and cook for about 12-15 minutes. Turn them occasionally for even cooking. The chicken should reach an internal temperature of 165°F. For extra flavor, brush on any leftover marinade during the last few minutes. When done, take them off the grill and let them rest for a few minutes. This helps keep them juicy. Check out the Full Recipe for detailed instructions. To get those beautiful grill marks, preheat your grill to medium-high heat. Oil the grates lightly to stop sticking. Place the skewers on the grill without moving them for about 4-5 minutes. Flip and repeat. The high heat creates the marks, making your dish look amazing. To keep chicken juicy, marinate it for at least 30 minutes. The soy sauce adds moisture and flavor. Use chicken breast, but don’t overcook it. Aim for an internal temperature of 165°F. Letting the skewers rest for a few minutes after grilling also helps lock in the juices. You can boost flavor by adding spices. Consider using smoked paprika or chili powder for a kick. Fresh herbs like cilantro or basil can also add a fresh touch. If you want a sweet twist, brush the skewers with a little honey during grilling. Check out the Full Recipe for more flavor ideas. {{image_2}} You can swap chicken for other proteins. Try shrimp for a lighter taste. Beef works great, too, adding a rich flavor. Tofu is perfect for a plant-based choice. Just make sure to adjust your marinating time for each type. Shrimp needs less time, while beef may need a bit more. For a vegetarian twist, use hearty vegetables. Zucchini, mushrooms, and eggplant grill well. You can also add firm tofu or tempeh for protein. If you're vegan, replace honey with maple syrup. This keeps the sweet flavor while being plant-friendly. These options still give you that great grilled taste. Get creative with your marinades! Try adding lime juice for a fresh zing. Teriyaki sauce can bring a sweet and savory kick. You can use a mix of herbs like thyme or basil for extra flavor. Experimenting with spices like cumin or paprika adds depth. Each change gives your skewers a new twist. For more ideas, check out the Full Recipe. After enjoying your grilled pineapple chicken skewers, you may have some left. To store them, let the skewers cool to room temperature. Then, place them in an airtight container. This keeps them fresh for up to three days in the fridge. If you want to save them longer, consider freezing. For freezing, remove the skewers from their container. Wrap them tightly in plastic wrap, then aluminum foil. This prevents freezer burn and keeps the flavors intact. Store them in the freezer for up to three months. When you’re ready to eat, thaw them in the fridge overnight. To reheat the skewers, you have a few options. You can use an oven, stovetop, or microwave. For the oven, preheat it to 350°F. Place the skewers on a baking sheet and heat for about 10-15 minutes. For the stovetop, heat a pan over medium heat and warm the skewers for about 5-7 minutes. If you use a microwave, cover the skewers with a damp paper towel and heat in short bursts until warm. These methods help keep the chicken juicy and the pineapple sweet. For the full recipe, check back to the main article! You should marinate the chicken for at least 30 minutes. This gives the chicken time to absorb flavors. For even better taste, try marinating for up to 2 hours. This longer soak adds depth and richness to your skewers. Yes, you can use canned pineapple in this recipe. However, fresh pineapple works best for flavor and texture. Canned pineapple is softer and has added juice. If you use it, drain well to avoid excess moisture. Grilled pineapple chicken skewers pair well with many side dishes. Here are a few ideas: - Rice: Jasmine or coconut rice adds a nice touch. - Salad: A light green salad with lemon vinaigrette complements the meal. - Grilled Vegetables: Grilled corn or zucchini enhances the summer vibe. - Dipping Sauces: Try a tangy barbecue sauce or a sweet chili sauce for extra flavor. For the full recipe, check the recipe section above. This blog post covered key tips for making delicious grilled chicken skewers. You learned about ingredients, how to prepare them, and the steps to grill them perfectly. I shared tips for keeping chicken juicy and ways to make it extra tasty. You also discovered variations, like alternatives for proteins and vegetarian options. Remember to store leftovers correctly for later enjoyment. Now you can impress your friends and family with your grilling skills! Enjoy the process and savor every bite. Happy cooking!

Grilled Pineapple Chicken Skewers Flavorful Summer Dish

Summer is here, and it’s time to fire up the grill! Grilled pineapple chicken skewers are a tasty treat that

This recipe is simple and fun. You need a few key ingredients: - 1 cup rolled oats - 1 cup milk (dairy or non-dairy) - 1/2 cup Greek yogurt (or plant-based yogurt) - 1/2 cup fresh blueberries (or frozen, thawed) - Zest of 1 lemon - 2 tablespoons lemon juice - 1 tablespoon maple syrup (optional, adjust for sweetness) - 1/2 teaspoon vanilla extract - Pinch of salt - Toppings: extra blueberries, sliced almonds, and a sprinkle of chia seeds These ingredients work together to create a bright, zesty flavor. The oats soak up the milk and yogurt, making them creamy and delicious. You can mix things up with some optional ingredients. Here are a few ideas: - Swap maple syrup for honey or agave syrup. - Use almond milk instead of regular milk for a nutty taste. - Add nuts or seeds for extra crunch. - Try different fruits like strawberries or raspberries. Feel free to get creative! The recipe lets you play with flavors. Each ingredient packs a punch of nutrition: - Rolled oats provide fiber, which aids digestion. - Greek yogurt adds protein, helping keep you full. - Blueberries are rich in antioxidants, great for your health. - Lemon juice boosts vitamin C and adds a refreshing zing. These ingredients not only taste great but also offer health perks. Enjoy the benefits while savoring your overnight oats. For the complete recipe, check out the Full Recipe. To start, gather all your ingredients. You will need rolled oats, milk, Greek yogurt, blueberries, lemon zest, lemon juice, maple syrup, vanilla extract, and a pinch of salt. This recipe takes only 10 minutes of your time, and you can prep it the night before. In a mixing bowl, combine one cup of rolled oats, one cup of milk, and half a cup of Greek yogurt. Add the zest of one lemon and two tablespoons of lemon juice for that fresh flavor. If you like it sweet, mix in one tablespoon of maple syrup. Don’t forget half a teaspoon of vanilla extract and a pinch of salt. Stir everything well. Make sure the oats soak up the milk and yogurt. Next, gently fold in half a cup of blueberries. This prevents them from getting crushed. Once mixed, divide the oat mixture into two jars or airtight containers. Seal the jars tightly and place them in the fridge overnight. This allows the oats to soak and the flavors to blend beautifully. In the morning, stir the oats again. If they are too thick, add a splash of milk. Top your oats with more blueberries, some sliced almonds, and a sprinkle of chia seeds for extra crunch and nutrition. Enjoy your creamy, zesty lemon blueberry overnight oats! For the full recipe, check the original instructions. To make great overnight oats, use old-fashioned rolled oats. They soak well and create a nice texture. Avoid quick oats, as they may turn mushy. Measure your ingredients carefully for the best results. Make sure to mix everything thoroughly, so each oat gets flavor. I like to let my oats sit overnight. This gives them time to get soft and tasty. You can tweak the sweetness to your taste. Start with the maple syrup. Add one tablespoon, then taste. If you want it sweeter, add more. You can also switch maple syrup for honey or agave. For extra flavor, try adding spices like cinnamon or nutmeg. These spices pair well with lemon and blueberries. Store your overnight oats in airtight jars or containers. This keeps them fresh and prevents spills. I recommend eating them within three days for the best flavor. If you want to save them longer, freeze the oats before adding toppings. Just thaw in the fridge overnight before eating. For a fun touch, add toppings like sliced almonds or chia seeds right before serving. {{image_2}} You can easily change the taste of your Lemon Blueberry Overnight Oats. Here are some ideas: - Add nuts: Chopped almonds or walnuts give a nice crunch. - Use spices: A sprinkle of cinnamon or nutmeg adds warmth. - Add sweet flavors: Try honey or agave for a different sweet taste. - Mix in seeds: Chia seeds or flaxseeds boost nutrition and texture. These small changes can make a big difference! You can adapt this recipe for different diets: - For vegan options: Use plant-based milk and yogurt. - To make it gluten-free: Ensure your oats are labeled gluten-free. - Sugar-free version: Skip the maple syrup or use a sugar substitute. These swaps let everyone enjoy this tasty dish without worry. You can switch ingredients based on what’s in season: - In spring: Try strawberries or raspberries instead of blueberries. - In summer: Peaches or cherries add a juicy twist. - In fall: Replace lemon with pumpkin puree for a cozy flavor. These seasonal changes keep your breakfast fresh and exciting! You can find the full recipe shared above for all the details. To keep your leftover lemon blueberry overnight oats fresh, use airtight containers. Make sure the lids fit snugly. You can store them in the fridge for up to three days. This way, you can enjoy a quick breakfast or snack anytime. You can freeze your overnight oats for later. Just fill your containers, leaving some space at the top. The oats will expand as they freeze. When you want to eat them, move a jar to the fridge overnight. They will thaw slowly and be ready the next day. For the best taste and texture, eat your overnight oats within three days. After that, they may lose their creaminess. If you freeze them, enjoy them within three months for the best flavor. Remember, quality is key for delicious oats! Check the [Full Recipe] for more details on preparing these tasty oats. You should soak overnight oats for at least 4 hours. However, I recommend soaking them overnight. This gives the oats time to absorb the liquid and flavors fully. The longer you soak, the creamier your oats will be. Yes, you can use frozen blueberries! Just thaw them before adding to the oats. They will soften and combine well with the other ingredients. Frozen blueberries are also a great option when fresh ones are out of season. Oats are very healthy! They are high in fiber, which helps digestion. They can also lower cholesterol levels and keep you full longer. Oats provide steady energy, making them a great choice for breakfast. To make more servings, simply double or triple the ingredients. Keep the same ratios for oats, milk, and yogurt. For example, if you want to serve four, use 2 cups of rolled oats and 2 cups of milk. This recipe is easy to adjust! For the full recipe, check the earlier sections. Lemon blueberry overnight oats are simple and full of flavor. We covered key ingredients, steps, and storage tips. You can easily adjust sweetness and explore fun variations. With these oats, you get a healthy meal that fits various diets. Remember to experiment with seasonal ingredients for a fresh twist. Make this versatile dish a regular part of your breakfast. Enjoy your delicious and nutritious oats, and make mornings easier!

Lemon Blueberry Overnight Oats Simplified Recipe

Looking for a tasty and easy breakfast? Lemon Blueberry Overnight Oats are here to save your mornings! With just a

Older posts
Newer posts
← Previous Page1 … Page51 Page52 Page53 … Page107 Next →
© 2025 My Cooking Cast • Built with GeneratePress

Our Policies

  • Privacy Policy
  • GDPR Policy
  • Terms Of Use
  • Copyright Policy
  • Cookie Policy
  • Disclaimer

More Information​

  • Home
  • Contact
  • About
  • Dinner
  • Appetizers
  • Dessert
©2025, My Cooking Cast About Privacy Policy Back To Top