Skip to content
DisclaimerTerms Of UseGDPR PolicyCookie Policy

My Cooking Cast

  • Home
  • Drinks
  • Appetizers
  • Dinner
  • Dessert
  • About
  • Contact
  • Privacy Policy
DisclaimerTerms Of UseGDPR PolicyCookie Policy

Emma

- 4 salmon fillets (about 6 oz each) - 3 tablespoons miso paste (white or yellow) - 2 tablespoons honey - 1 tablespoon soy sauce (or tamari for gluten-free) - 1 tablespoon rice vinegar - 1 tablespoon sesame oil - 2 cloves garlic, minced - 1 teaspoon grated ginger - Green onions, thinly sliced - Sesame seeds Choosing fresh salmon is key for this dish. Look for bright and shiny skin. The flesh should be firm and smell clean. If you can, buy wild-caught salmon for the best flavor and health benefits. Now, let’s talk about miso paste. There are different types. White miso is mild and slightly sweet. Yellow miso has a bit more depth. Both work well for this recipe. Using high-quality miso paste makes a big difference in taste. Always check the label for freshness and ingredients. For the full recipe, remember to check out the detailed steps to create this dish. Enjoy your cooking! To make the glaze, you start by whisking together the ingredients. In a bowl, mix: - 3 tablespoons miso paste - 2 tablespoons honey - 1 tablespoon soy sauce - 1 tablespoon rice vinegar - 1 tablespoon sesame oil - 2 cloves garlic, minced - 1 teaspoon grated ginger Whisk until it is smooth and well combined. The glaze should be thick but pourable. If it is too thick, you can add a little water to reach the right consistency. Next, you need to marinate the salmon. Place the salmon fillets in a shallow dish or zip-top bag. Pour the miso glaze over the salmon. Make sure each piece is well coated. For best flavor, let the salmon marinate for at least 30 minutes. If you want a stronger taste, marinate for up to 2 hours. Now, it is time to bake the salmon. Preheat your oven to 400°F (200°C). Line a baking sheet with parchment paper. After marinating, remove the salmon from the marinade and place the fillets skin-side down on the baking sheet. Save the leftover marinade for later. Bake the salmon for 12-15 minutes. It is done when it flakes easily with a fork. To add more flavor, heat the reserved marinade in a saucepan. Bring it to a boil, then let it simmer for about 5 minutes until it thickens. Brush this glaze over the salmon before serving. Enjoy your delicious dish! For the full recipe, check [Full Recipe]. To get the best glaze, start with the right consistency. If the glaze is too thin, you can thicken it. Simply simmer it longer on low heat until it reduces. This will make the glaze stick better to the salmon. Avoid overcooking your salmon. It should be flaky but not dry. Check it after 12 minutes in the oven. Make your plate pretty by serving the salmon on a clean white dish. You can add a side of steamed broccoli or rice for color and balance. For extra flair, drizzle some of the thickened glaze over the salmon. Garnish with green onions and sesame seeds for a pop of color and crunch. Salmon is packed with good nutrients. It is high in protein and omega-3 fatty acids. These fats help your heart and brain. Miso paste is also healthy. It is full of probiotics, which are great for your gut health. Plus, it adds a unique flavor to our dish. Enjoy the taste and health benefits of miso glazed salmon! {{image_2}} You can easily change the flavor of your miso glazed salmon. Adding a bit of chili paste gives it a nice kick. Start with a small amount, then taste and adjust. This step lets you control the spice level. If you want a sweeter taste, try using maple syrup instead of honey. It adds a unique flavor and keeps the dish vibrant. You have choices when it comes to cooking methods. Grilling the salmon gives it a smoky flavor that many love. Just make sure the grill is hot and the salmon is oiled to prevent sticking. If you prefer baking, follow the steps in the Full Recipe. You can also try pan-searing. This method will give you a nice crust on the salmon. Just heat some oil in a pan, place the fillets skin-side down, and cook until golden brown. Making dietary adjustments is simple with this recipe. For a gluten-free option, use tamari instead of soy sauce. This swap maintains the sauce's flavor without gluten. If you want a low-sodium version, reduce or omit the soy sauce. You can also dilute the miso paste with water to cut the salt. These changes let you enjoy miso glazed salmon while sticking to your dietary needs. After you enjoy your miso glazed salmon, store any leftovers in the fridge. Place the salmon in an airtight container. This helps keep it fresh for later. It’s best to eat the leftovers within three days for the best taste. If you want to save it for longer, freezing is a good option. Wrap each fillet in plastic wrap, then place them in a freezer bag. They can last for up to three months in the freezer. When you are ready to eat your leftovers, reheating them is key. The best way to reheat salmon is in the oven. Preheat your oven to 275°F (135°C). Place the salmon on a baking sheet and cover it with foil. Heat for about 15 minutes. This keeps the salmon moist and tender. You can also use the microwave, but be careful. Heat it in short bursts to avoid drying it out. You can keep miso glazed salmon in the fridge for about three days. If you freeze it, it can last up to three months. Always check for signs of spoilage before eating. If the salmon smells off or has a slimy texture, it’s best to toss it. Fresh salmon should have a light smell and firm texture. Always trust your senses! The best salmon for miso glazed salmon is wild-caught salmon. Wild salmon has a rich taste and firm texture. It also has more nutrients than farmed salmon. Farmed salmon is another option. It tends to be milder in flavor and is often more affordable. Popular types include: - Sockeye: Deep red color, rich flavor. - King (Chinook): High in fat, very buttery. - Coho: Milder flavor, good balance of fat. All these types work well with the glaze. Yes, you can use other types of fish. Miso glaze pairs well with mild fish. Here are some great options: - Trout: Similar texture to salmon. - Cod: Firm, flaky, and absorbs flavors well. - Halibut: Mild taste, cooks evenly. Adjust cooking times based on the fish you choose. To check if the salmon is done, use a food thermometer. The internal temperature should reach 145°F (63°C). If you don’t have a thermometer, look for these signs: - The salmon should flake easily with a fork. - The flesh should change from translucent to opaque. Keep an eye on it while baking. Overcooking can dry it out. Yes, you can make the miso glaze ahead of time. Store it in an airtight container. It lasts up to one week in the fridge. For best flavor, marinate the salmon for at least 30 minutes. You can marinate it for up to 2 hours. This allows the flavors to soak in. Miso glazed salmon is quite healthy. Salmon is rich in omega-3 fatty acids, which are good for your heart. It's also a great source of protein. Miso paste adds probiotics, which help your gut health. The glaze uses honey, which is a natural sweetener. Overall, this dish is both tasty and nutritious. For a full recipe, check out the [Full Recipe]. Miso glazed salmon is simple yet delicious. We covered key ingredients, like miso paste and fresh salmon. I shared steps to make the glaze and marinate the fish properly. You learned tips to present and store it well. This dish is not just tasty but also nutritious. I encourage you to try different flavors and cooking methods. With the right approach, you can enjoy a healthy, mouth-watering meal any time. Happy cooking!

Miso Glazed Salmon Flavorful and Easy Recipe Guide

If you’re looking for a delicious and easy way to elevate your dinner, miso glazed salmon is the answer! This

- 2 chicken breasts, boneless and skinless - 1 cup salsa verde - 1 cup cooked quinoa - 1 cup black beans, rinsed and drained - 1 avocado, sliced - 1 cup cherry tomatoes, halved - 1 tablespoon olive oil - 1/2 red onion, diced - 1 cup fresh cilantro, chopped - Juice of 1 lime - Salt and pepper to taste The main ingredients in this dish are simple yet packed with flavor. The chicken breasts get a burst of taste from the salsa verde. This sauce adds a tangy and zesty kick that makes every bite exciting. Quinoa serves as a great base. It adds texture and some protein, making the meal hearty. For additional ingredients, black beans bring fiber and richness. They pair well with the chicken and salsa. Fresh avocado adds creaminess. Sliced cherry tomatoes brighten the bowl with their sweetness. When it comes to seasoning, a few staples make all the difference. Olive oil helps cook the chicken perfectly. Fresh cilantro adds a pop of color and freshness. Lime juice gives a bright finish, bringing all the flavors together. Salt and pepper are essential to enhance the taste. For the full recipe, check out the detailed steps on how to create this delicious meal. Start by preparing the chicken. Place the chicken breasts in a bowl. Pour salsa verde over the chicken. Make sure each piece is fully coated. Cover the bowl and chill in the fridge. Marinate for at least 30 minutes. This step adds great flavor and helps keep the chicken juicy. Next, rinse the quinoa under cold water. This helps remove any bitterness. Then, follow the package instructions to cook it. Usually, you boil it in double the amount of water. Cook for about 15 minutes until the quinoa is fluffy. For fluffy quinoa, avoid stirring it too much while cooking. In a skillet, heat the olive oil over medium heat. Remove the chicken from the marinade and place it in the pan. Cook for about 6-7 minutes on each side. Check that the internal temperature reaches 165°F. After cooking, let the chicken rest for a few minutes. This makes it easier to slice. In a large bowl, mix the cooked quinoa, black beans, corn, cherry tomatoes, and diced red onion. Add half of the chopped cilantro for freshness. Squeeze lime juice over the mixture. Season with salt and pepper to taste. This combination adds color and texture to your dish. Now, divide the quinoa and black bean mixture into bowls. Slice the chicken and place it on top. Add sliced avocado and the remaining cilantro. This makes the dish look vibrant and inviting. You can also drizzle more salsa verde on top for extra flavor. For optional garnishes, consider adding more cilantro or a sprinkle of cheese. Serve fresh lime wedges on the side. The lime adds a zesty touch that brightens the dish. Enjoy your flavorful and simple meal! For the full recipe, check out the details provided. To get juicy chicken, marinate it well. Use salsa verde to add flavor. Let the chicken soak for at least 30 minutes. This helps it stay moist when cooked. Cook the chicken until it reaches an internal temperature of 165°F. Use a meat thermometer for best results. Remember, overcooking can make chicken dry. Adjust the seasoning to fit your taste. Add salt and pepper to the quinoa and bean mix. You can also sprinkle some chili powder for extra kick. If you like heat, add diced jalapeño or serrano peppers. This will spice up the dish nicely. Tasting as you go helps you find the right balance. Meal prep can save you time. Cook extra quinoa and beans for future meals. Store them in the fridge for quick use. You can also make the chicken in advance. Leftover chicken is great in salads or wraps. Use any leftover veggies to create other meals. This way, you reduce food waste and save time in the kitchen. For the full recipe, check out the details above. {{image_2}} You can switch out chicken for other proteins. Try pork or beef for a heartier meal. Both meats pair well with salsa verde. For a lighter option, use turkey. If you prefer seafood, shrimp works great too. Just adjust cooking times to ensure everything is cooked through. For plant-based options, consider using tofu or tempeh. Both absorb flavors well and add protein. You can marinate them in salsa verde just like chicken. Another choice is jackfruit, which has a meaty texture and soaks up the salsa flavor. Quinoa is a fantastic base, but you can use other grains too. Brown rice offers a nutty flavor and chewy texture. Farro or barley are also great alternatives. If you want something gluten-free, use millet or rice. For low-carb options, consider cauliflower rice. It cooks quickly and has a mild taste. Zucchini noodles, or “zoodles,” are another fun substitute. They add a fresh crunch to your bowl. Salsa verde is delicious, but feel free to experiment. Use mango salsa for a sweet twist. Peach salsa adds a nice touch of summer flavor. Try roasted tomatillo salsa for a smoky taste. You can also add spices and herbs to enhance flavor. Cumin and paprika give warmth. Fresh lime zest brightens everything up. Cilantro or fresh basil can elevate the dish further. Mix and match to find your perfect flavor profile. Keep leftovers in an airtight container. This helps keep food fresh. Store in the fridge. Salsa Verde Chicken Bowls last about 3 days. After that, they may lose flavor and texture. Always check for signs of spoilage before eating. You can freeze components of the dish. First, cool the chicken and quinoa completely. Then, place them in freezer bags. Remove as much air as possible. For best quality, use within 3 months. To reheat, defrost in the fridge overnight. Then, heat in a skillet until warm. You can also microwave for a quick meal. For easy storage, prep ingredients in advance. Chop veggies and cook grains ahead of time. Store them separately to keep them fresh. When ready to eat, just build your bowls! Layer quinoa, beans, chicken, and toppings. This makes meal planning simple and fun. For a full recipe, check out the complete steps! Yes, using store-bought salsa verde is easy and quick. Many brands offer tasty salsas. Look for ones with fresh ingredients and no added sugars. This way, you save time without losing flavor. You can still make your dish special with a good quality salsa. To make this dish gluten-free, check all your ingredients. Quinoa is naturally gluten-free and a great base. Ensure your salsa verde has no gluten ingredients. Most canned beans are gluten-free, but check the label. Fresh produce, like avocado and tomatoes, is also gluten-free. Yes, you can make parts of this recipe ahead of time. Cook the quinoa and beans a day before. Store them in the fridge. You can also marinate the chicken and keep it in the fridge for up to a day. This way, you save time on busy days. Just cook the chicken fresh for the best taste. You can serve many tasty sides with these bowls. Here are some ideas: - Tortilla chips for crunch - A green salad for freshness - Grilled veggies for a smoky flavor - A dollop of sour cream for creaminess These options add variety and balance to your meal. For the full recipe, check the details above. To wrap up, we explored how to make delicious salsa verde chicken bowls. We covered key ingredients like chicken, quinoa, and beans. I shared step-by-step instructions for cooking and assembling your bowls. You also learned tips for perfecting chicken and variations to keep things interesting. Remember, these bowls are easy to customize and great for meal prep. Enjoy experimenting with flavors and make this recipe your own!

Salsa Verde Chicken Bowls Flavorful and Simple Meal

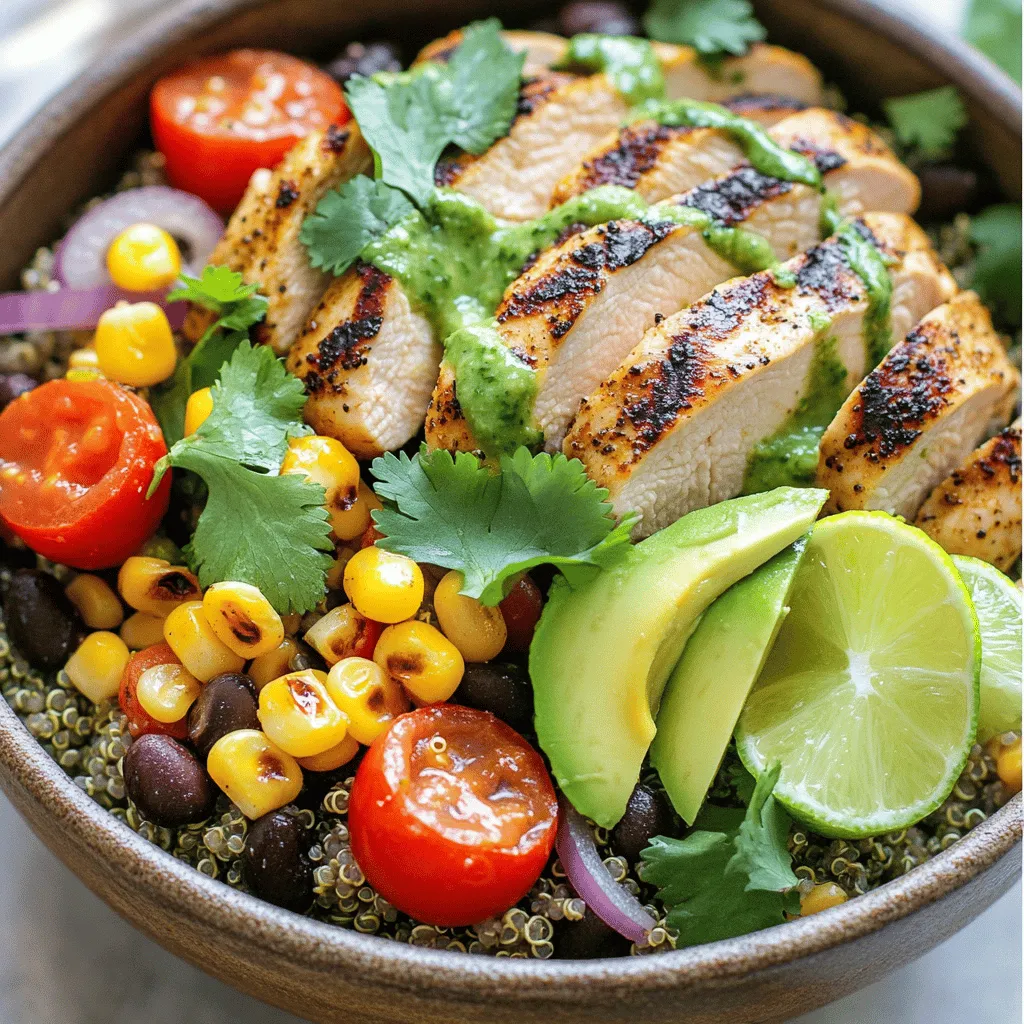
Craving something tasty yet simple? My Salsa Verde Chicken Bowls deliver just that! This meal combines juicy chicken, bright salsa

To make a tasty chickpea tuna salad, gather these simple ingredients: - 1 can (15 oz) chickpeas, drained and rinsed - 1 can (5 oz) tuna in water, drained - 1/4 cup Greek yogurt (or vegan mayo) - 1 tablespoon Dijon mustard - 1/2 red bell pepper, finely chopped - 1/4 red onion, finely chopped - 1/4 cup fresh parsley, chopped - 1 tablespoon lemon juice - Salt and black pepper to taste - Optional: 1 avocado, diced Each item plays a role. Chickpeas give protein and fiber. Tuna adds more protein and depth. Greek yogurt or vegan mayo keeps it creamy. Dijon mustard gives a zesty kick. The red bell pepper and onion add crunch and sweetness. Fresh parsley brings a burst of color and flavor. Lemon juice brightens the dish. Season to your taste with salt and pepper. If you want extra creaminess, toss in diced avocado. For the full recipe, check out the Chickpea Tuna Salad Delight 🥗. - Mashing the Chickpeas Start by taking a large bowl. Add the drained chickpeas. Use a fork to mash them lightly. It’s okay to leave some whole. This adds a nice texture to your salad. - Mixing in the Tuna Next, open the can of tuna. Drain it well and add it to the bowl. Gently fold the tuna with the chickpeas. Avoid breaking the tuna too much. This keeps the salad hearty. - Creating the Dressing In a small bowl, mix the Greek yogurt and Dijon mustard. Add the lemon juice and whisk until smooth. This dressing adds creaminess and a tangy flavor. - Combining Ingredients Pour the dressing over the chickpeas and tuna. Stir until everything is coated. Then, add the chopped red bell pepper, red onion, and parsley. If you like, toss in some diced avocado for creaminess. - Seasoning the Salad Now, it’s time to season! Sprinkle in salt and black pepper. Taste and adjust if needed. If you like more zing, add extra lemon juice or mustard. - Serving Suggestions Serve the salad right away or chill it for 30 minutes. This helps the flavors blend well. You can serve it in a colorful bowl. Garnish with extra parsley and lemon wedges for a bright look. It’s also great in lettuce wraps or with whole grain crackers. For the full recipe, check out the details above! How to Reduce Caloric Content To lighten up this chickpea tuna salad, swap Greek yogurt for low-fat yogurt. You can also use less yogurt or mayo. Adding more chickpeas means fewer calories per serving. You can also skip the avocado if you want to cut fat. Enhancing Flavor Profiles For more flavor, add garlic powder or smoked paprika. Fresh herbs like dill or cilantro can also boost taste. You can try using pickles or capers for a salty punch. A splash of hot sauce can add a nice kick! Presentation Tips Serve the salad in a bright bowl to make it pop. Adding fresh parsley or lemon wedges on top makes it look fancy. You can also serve it in lettuce cups for a fun twist. Pair it with whole grain crackers for a great crunch. For the full recipe, check out my instructions. {{image_2}} You can easily change this salad to fit your taste. Here are some ideas to try: - Vegan Alternatives: If you want a vegan option, replace the tuna with more chickpeas. You can also use a plant-based mayo instead of Greek yogurt. This keeps it creamy and tasty. - Adding Extra Veggies: Feel free to add any veggies you like! Diced cucumbers, shredded carrots, or even corn taste great in this salad. They add crunch and color. - Protein Boost with Other Ingredients: For more protein, add chopped hard-boiled eggs or some diced tofu. You can also mix in seeds like pumpkin or sunflower for a fun twist. These variations let you make the dish your own while keeping it delicious. For the full recipe, check the earlier section. Recommended Storage Containers Use an airtight container for storage. Glass or plastic containers both work well. Make sure the lid seals tight to keep air out. Best Practices for Chilling Let your chickpea tuna salad cool to room temp before storing. This helps avoid moisture build-up inside the container. Place it in the fridge, and it will stay fresh longer. Duration for Freshness Chickpea tuna salad stays good for about 3 to 5 days in the fridge. If you want to freeze it, eat it within a month for best taste. Just remember, the texture may change after freezing. You can find the Full Recipe for more details on making this salad. Chickpea tuna salad lasts about 3 to 5 days in the fridge. Store it in an airtight container. This keeps it fresh and tasty. If you notice any odd smells or changes in color, it's time to toss it. Yes, you can. Try using canned chickpeas for a completely vegan option. You can also use shredded chicken or canned salmon. These swaps keep the protein while adding new flavors. Serve it on whole grain crackers, in lettuce wraps, or with pita bread. You can also enjoy it on a bed of greens or as a sandwich filling. It makes a great picnic dish! Absolutely! This salad is perfect for meal prep. Make it ahead of time and store it in portions. It holds its flavor well, so you can enjoy it all week. Definitely! Feel free to add spices like garlic powder, cumin, or smoked paprika. These spices will give your salad a unique twist. Experiment to find your favorite flavors. For the full recipe, check out the earlier sections! This chickpea tuna salad combines simple ingredients and easy steps for a tasty dish. You learned about mashing chickpeas, mixing in tuna, and creating a flavorful dressing. We covered tips to perfect your salad, variations for different diets, and best storage practices. This salad is not just good for you; it's fun to make. You can enjoy it fresh or as meal prep. Dive in and create your unique version. You'll impress your friends and enjoy every bite.

Easy Chickpea Tuna Salad Quick and Tasty Delight

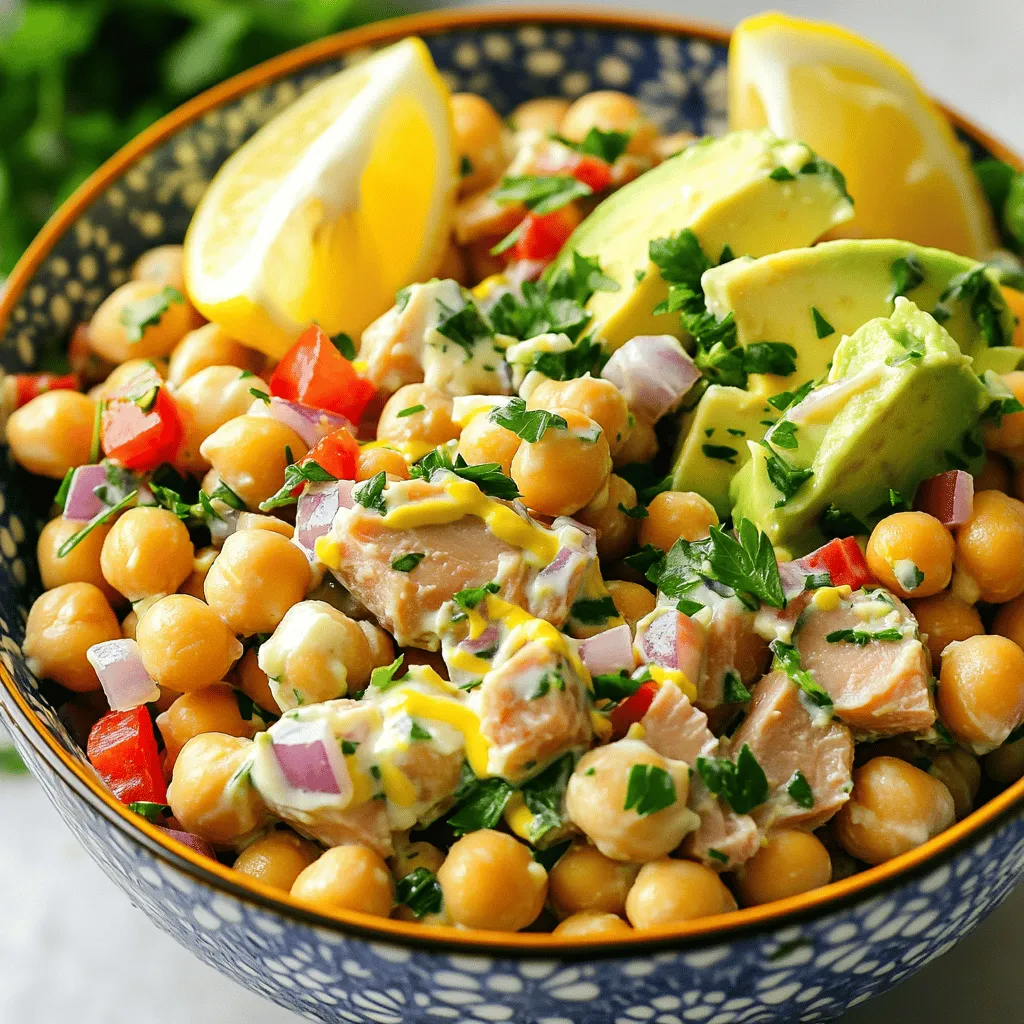
Looking for a quick and tasty meal? Try my Easy Chickpea Tuna Salad! This recipe packs flavor and nutrition in

- 2 boneless, skinless chicken breasts - 1 ripe pineapple, peeled and sliced into rings - 2 tablespoons soy sauce - 2 tablespoons honey - 1 tablespoon olive oil - 1 teaspoon garlic powder - 1 teaspoon ginger powder - Salt and pepper to taste - Fresh cilantro, for garnish (optional) To make grilled pineapple chicken, you need fresh and simple ingredients. The chicken breasts are the star of the dish. They need to be boneless and skinless for ease. The ripe pineapple adds sweet and tangy notes. Slice it into rings for grilling. For the marinade, we mix several key flavors. Soy sauce gives a salty taste. Honey adds sweetness, while olive oil keeps the chicken moist. Garlic powder and ginger powder bring a warm flavor. Don't forget salt and pepper for seasoning. This blend of flavors makes the chicken juicy and the pineapple caramelized. You can find the full recipe above to guide you through the steps. Enjoy your cooking! To begin, you need to make the marinade. In a bowl, whisk together these ingredients: - 2 tablespoons soy sauce - 2 tablespoons honey - 1 tablespoon olive oil - 1 teaspoon garlic powder - 1 teaspoon ginger powder - Salt and pepper to taste This mixture will add tons of flavor to your chicken. The soy sauce gives it a savory taste, while honey adds a sweet touch. Garlic and ginger boost the flavor even more. Next, it's time to marinate the chicken. Place 2 boneless, skinless chicken breasts in a large resealable bag or a shallow dish. Pour the marinade over the chicken. Seal the bag or cover the dish tightly. Refrigerate for at least 30 minutes, but you can let it sit for up to 4 hours. This step is key. It allows the flavors to soak into the chicken. Now, let’s get grilling! Preheat your grill to medium-high heat. When the grill is hot, remove the chicken from the marinade. Discard any leftover marinade. Place the marinated chicken on the grill. Cook for about 6-7 minutes on each side. The chicken is done when it reaches an internal temperature of 165°F (75°C). In the last 2 minutes of cooking, add the pineapple rings to the grill. Grill them until they are caramelized and have nice grill marks. This takes about 2-3 minutes per side. Once everything is done, take the chicken and pineapple off the grill. Let the chicken rest for a few minutes before serving. Enjoy the grilled chicken topped with the sweet, caramelized pineapple rings. For a fresh touch, you can add some cilantro on top. For the full recipe, check the detailed instructions above! To make Grilled Pineapple Chicken, you need the right grill temperature. Set your grill to medium-high heat. This usually means about 375°F to 450°F. I recommend cooking the chicken for 6-7 minutes on each side. Use a meat thermometer to check the chicken. It should reach 165°F, which means it is safe to eat. To ensure the chicken cooks evenly, pound it to an even thickness. This helps it cook through without drying out. Let the chicken rest after grilling. This keeps it juicy and tasty. You can add more flavor to your Grilled Pineapple Chicken with spices and herbs. Try adding paprika for a smoky taste. You can also use fresh herbs like basil or thyme for a fresh twist. For marinades, you can switch things up. Use coconut milk for a tropical vibe or lime juice for a zesty kick. This adds depth to your chicken. If you want a spicy touch, mix in some chili flakes. Experiment with different flavors to find what you love best! Check out the Full Recipe for more details on how to create this dish. {{image_2}} You can switch up the fruits you grill. Try using mango or peaches. They add a sweet twist. These fruits caramelize nicely, just like pineapple. You can also change the protein. Instead of chicken, you can use tofu or pork. Tofu soaks up flavors well. Pork adds a rich taste. All of these choices work great on the grill. Want to explore new flavors? Try an Asian-inspired marinade. Use soy sauce, sesame oil, and a splash of rice vinegar. This mix brings a nice tang. For a tropical twist, blend coconut milk, lime juice, and a bit of chili. This fruity mix gives a bright finish. You can find the Full Recipe for the grilled pineapple chicken here. Try these ideas to keep your meals exciting! To store grilled pineapple chicken, let it cool first. Place it in an airtight container. This keeps it fresh for up to four days in the fridge. If you want to keep it longer, freeze it. Wrap the chicken tightly in plastic wrap, then place it in a freezer bag. Properly stored, it can last up to three months in the freezer. To reheat grilled chicken, use the oven for the best results. Preheat the oven to 350°F (175°C). Place the chicken on a baking sheet. Cover it with foil to keep it moist. Heat for about 15-20 minutes or until it's warm throughout. You can also reheat it in the microwave. Place the chicken on a microwave-safe plate and cover it. Heat in short bursts, checking often to avoid drying it out. To know if your grilled pineapple chicken is ready, check the internal temperature. Use a meat thermometer. The chicken should reach 165°F (75°C). This means it is safe to eat. Look for clear juices when you cut into it. If the juices run clear, it’s done. The chicken should also be firm to the touch. Yes, you can grill chicken without marinating. But marinating adds a lot of flavor. It helps the chicken soak up the marinade. This makes it juicy and tasty. If you skip marinating, use extra spices. You can brush on some sauce while grilling too. It won’t be as rich, but it can still be good. Grilled pineapple chicken goes well with many sides. Here are some tasty options: - Rice: White or brown rice works great. - Salad: A fresh green salad adds crunch. - Grilled Veggies: Zucchini, bell peppers, and corn are perfect. - Coleslaw: The creaminess balances the grilled flavors. - Potato Salad: A cool potato salad is a nice touch. For more ideas, check out the Full Recipe to see how to create a complete meal. Grilled Pineapple Chicken blends sweet and savory flavors. We covered the ingredients, marinade, and grilling steps. I shared tips for perfect grilling and creative variations, too. Storing leftovers is easy and keeps meals fresh. Remember to double-check if your chicken is fully cooked. This dish can be a tasty main for any meal. Explore new flavors and enjoy your cooking adventure. Your next grill night will impress everyone!

Grilled Pineapple Chicken Flavorful and Juicy Recipe

Are you ready to elevate your grilling game? This Grilled Pineapple Chicken recipe blends juicy chicken with sweet, caramelized pineapple

To make a tasty Vegan Sweet Potato Curry, gather these fresh ingredients: - 2 medium sweet potatoes, peeled and diced - 1 can (400ml) coconut milk - 1 can (400g) chickpeas, drained and rinsed - 1 medium onion, diced - 3 cloves garlic, minced - 1 inch piece of ginger, grated - 2 tablespoons red curry paste - 1 bell pepper (any color), chopped - 2 cups baby spinach - 1 tablespoon olive oil - Salt and pepper to taste - Fresh cilantro for garnish - Lime wedges for serving This vegan curry is not only delicious but also nutritious. Each serving offers a great balance of carbs, protein, and healthy fats. Sweet potatoes provide fiber and vitamins, while chickpeas add protein. Coconut milk gives a creamy texture and healthy fats. You get many nutrients in one bowl, making it a wholesome meal. When picking sweet potatoes, look for firm ones with no soft spots. Choose ones with smooth skin for the best flavor. For onions, go for ones that feel heavy for their size. Garlic should be firm and dry. When selecting bell peppers, pick ones that are bright in color and have a firm skin. For spinach, choose fresh leaves that are vibrant and crisp. Using fresh ingredients makes your curry taste even better! For the full recipe, check out the complete guide. First, start by gathering your ingredients. You need sweet potatoes, coconut milk, chickpeas, onion, garlic, ginger, red curry paste, bell pepper, baby spinach, olive oil, salt, and pepper. 1. In a large pot, heat the olive oil on medium heat. 2. Add your diced onion. Cook it for about 5 minutes until it turns clear. 3. Now, stir in the minced garlic and grated ginger. Cook for 1 minute until it smells great. 4. Add the red curry paste to the pot. Mix it well with the onion and cook for 2 more minutes. 5. Next, toss in the diced sweet potatoes and chopped bell pepper. Mix it well to coat them in the curry flavors. 6. Pour in the coconut milk and add the drained chickpeas. Stir everything together and bring it to a gentle simmer. 7. Lower the heat to low, cover the pot, and cook for 20 minutes. This makes the sweet potatoes soft. 8. Finally, fold in the baby spinach and let it wilt in for 2-3 minutes. 9. Season with salt and pepper to your taste. Adjust if needed. 10. Serve the curry hot, garnished with fresh cilantro and lime wedges for extra flavor. To make this vegan sweet potato curry, you will use a few key techniques. - Sautéing: This helps to build flavor by cooking onions, garlic, and ginger first. - Simmering: This allows the sweet potatoes to cook down and absorb the curry flavors. - Wilting: Adding spinach at the end makes it fresh and bright. These techniques make your curry tasty and enjoyable. This recipe is quick and easy. Here’s the time breakdown: - Prep Time: 10 minutes to chop and prepare. - Cooking Time: 20 minutes for simmering. - Total Time: 30 minutes from start to finish. You can find the full recipe linked above to guide you through the process! When making vegan sweet potato curry, avoid these common mistakes: - Not peeling the sweet potatoes: The skin can be tough and bitter. - Overcooking the garlic: Burnt garlic makes the dish taste bitter. - Skipping the seasoning: Salt and pepper enhance flavor. Don’t skip them! - Adding spinach too early: It wilts too much and loses its bright color. To make your curry pop, try these tips: - Use fresh spices: Freshly grated ginger and minced garlic add more depth. - Experiment with herbs: Add fresh basil or cilantro for a bright finish. - Add a splash of lime juice: This brightens up the whole dish. - Top with nuts or seeds: Cashews or pumpkin seeds add crunch and flavor. Serve your vegan sweet potato curry in these tasty ways: - With rice or quinoa: These grains soak up the curry sauce. - In a bowl with naan: Use naan to scoop up the curry. - With a side salad: A fresh salad balances the meal. - Garnished with cilantro: This adds a nice touch and color. For the complete recipe, check out the Full Recipe section. Enjoy your cooking! {{image_2}} This vegan sweet potato curry is naturally gluten-free. You can enjoy it without worry. Just make sure your red curry paste has no gluten. Many brands are gluten-free, so check the label. If you want a thicker curry, use more sweet potatoes or add a bit of cornstarch mixed with water. Chickpeas add great protein to this dish. If you want more, try adding lentils. They cook well and soak up flavor. You can also use tofu for a different texture. Simply cube it and add it with the sweet potatoes. It makes the curry even heartier. Using seasonal veggies can change the flavor of your curry. In spring, add asparagus or peas for freshness. In summer, try zucchini or eggplant for a twist. In fall, pumpkin or butternut squash can enhance sweetness. In winter, root vegetables like carrots or parsnips work well. These swaps keep your curry exciting all year long. For the full recipe, check back to the main section. Store your vegan sweet potato curry in an airtight container. Let it cool first. Place it in the fridge. It stays fresh for up to four days. Keep it away from strong odors. This helps maintain the curry's flavor. To reheat, pour the curry into a pot. Heat it on low heat. Stir it often to avoid sticking. You can also use the microwave. Heat it in short bursts, stirring in between. Ensure it's hot all the way through before serving. You can freeze the curry for later meals. Use a freezer-safe container. Leave some space at the top for expansion. It lasts up to three months in the freezer. When you're ready to eat, thaw it in the fridge overnight. Reheat it like mentioned above for best results. Enjoy your homemade comfort food anytime! For the full recipe, check out the details above. Yes, you can make the curry ahead of time. It tastes even better the next day! Just store it in an airtight container in the fridge. Reheat it on the stove or in the microwave before serving. The flavors meld and deepen, making each bite delightful. If you don't have coconut milk, you can use almond milk or soy milk. These options add a different taste but still keep the dish creamy. You can also use vegetable broth for a lighter version. Just remember, it may change the flavor a bit. This vegan sweet potato curry is perfect for meal prepping. It keeps well in the fridge for about four days. You can also freeze it for up to three months. Make a big batch, portion it out, and enjoy it throughout the week. Check out the Full Recipe for more tips! In this blog post, we explored a delicious vegan sweet potato curry. We covered ingredients, cooking steps, and helpful tips. You learned how to choose fresh ingredients and avoid common mistakes. I also shared various ways to enhance flavor and serving ideas. Enjoy making this curry your own with seasonal swaps and gluten-free options. Remember, you can store leftovers and even freeze extras for later. With all this information, you can make a tasty meal that satisfies your cravings. Cook with confidence and enjoy every bite!

Vegan Sweet Potato Curry Flavorful and Simple Recipe

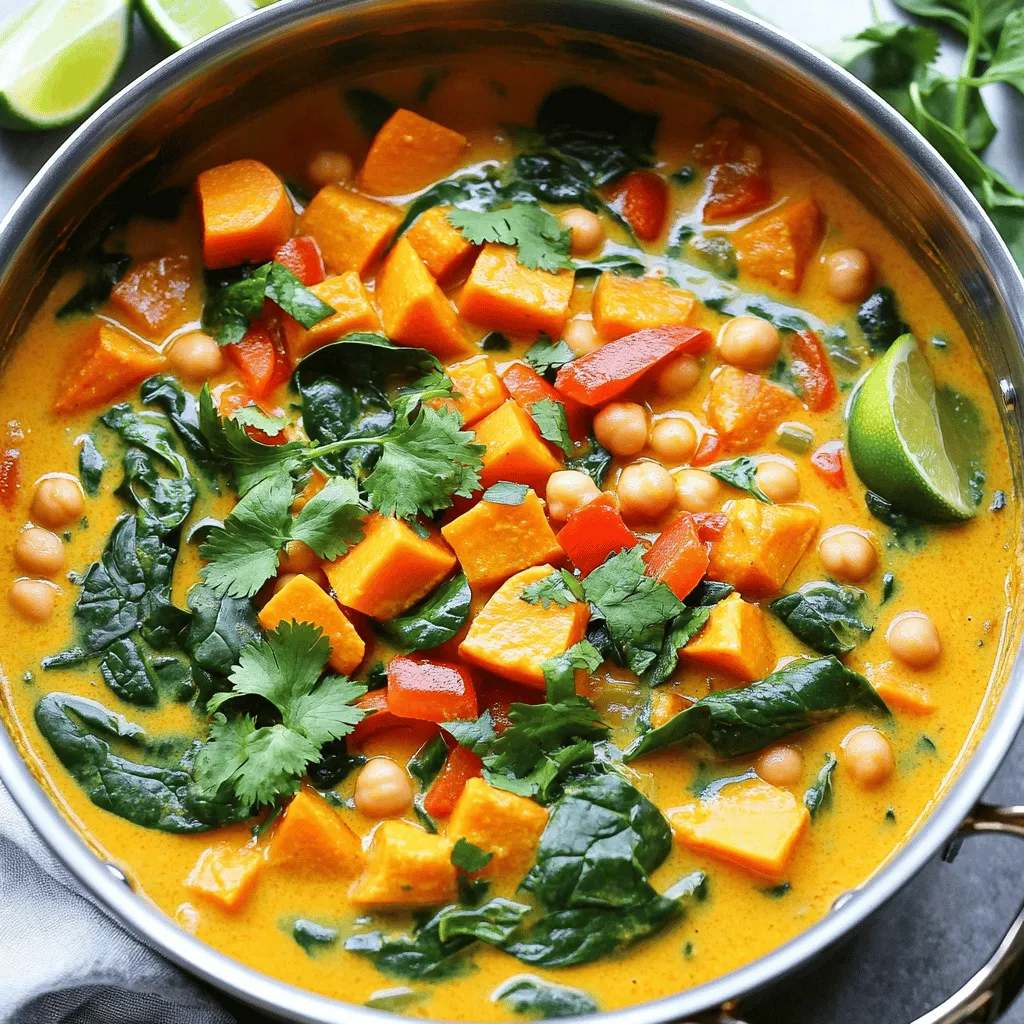
Are you ready to dive into a pot of warm and tasty comfort? This Vegan Sweet Potato Curry is not

- 5 cups fresh baby spinach - 1 cup mixed berries (strawberries, blueberries, raspberries) - ½ cup crumbled feta cheese - ¼ cup sliced almonds - ¼ red onion - 3 tablespoons olive oil - 2 tablespoons balsamic vinegar - 1 tablespoon honey - Salt and pepper to taste The Summer Berry Spinach Salad is a burst of color and flavor! Each ingredient plays a key role in creating a delicious and healthy dish. Benefits of spinach Spinach is a superfood. It is rich in vitamins A, C, and K. It also contains iron and calcium. Eating spinach helps with bone health and boosts your immune system. Benefits of berries Berries are full of antioxidants. Strawberries, blueberries, and raspberries fight free radicals. They are low in calories and high in fiber, which is great for digestion. Nutritional value of almonds Almonds add crunch and protein. They contain healthy fats and vitamin E. Including almonds helps keep your heart healthy. They also provide energy and keep you full longer. This salad is not just tasty; it is a powerhouse of nutrition! For the full recipe, check the details above. 1. Salad assembly: Grab a large salad bowl. Start with 5 cups of fresh baby spinach. This is your base. 2. Rinsing and slicing berries: Rinse 1 cup of mixed berries under cold water. Use strawberries, blueberries, and raspberries. If you use strawberries, slice them into thinner pieces. Add all the berries to the spinach in the bowl. 3. Toasting almonds: In a small skillet over medium heat, add ¼ cup of sliced almonds. Toast them for about 3-4 minutes. Stir them often until they turn golden and smell good. Remove them from heat and let them cool. 1. How to whisk dressing ingredients: In a small bowl, combine 3 tablespoons of olive oil, 2 tablespoons of balsamic vinegar, and 1 tablespoon of honey. Add salt and pepper to taste. Whisk everything together until it blends well. 2. Tips for emulsifying: Keep whisking the dressing until it looks smooth and thick. This helps the oil and vinegar mix better. 1. Tossing the salad: Drizzle the dressing over the salad. Toss gently to coat the spinach and berries well. Make sure every bite gets some flavor. 2. Presentation suggestions: Serve the salad on a large platter or in individual bowls. Add extra berries and a sprinkle of feta cheese on top for a beautiful finish. Enjoy your fresh and colorful Summer Berry Spinach Salad! For more details, check out the Full Recipe. To make this salad shine, serve it on a large platter. You can also use individual bowls. This adds a nice touch and makes the salad look inviting. For a protein boost, pair it with grilled chicken or shrimp. These proteins add flavor and keep you full longer. Want to make it vegan? Simply leave out the feta cheese. You can replace it with avocado for creaminess. If you need a gluten-free option, this salad is naturally gluten-free. For extra crunch, try using sunflower seeds instead of almonds. Feel free to swap berries too. Use blackberries or cherries if you prefer. To keep the salad fresh, store the dressing separately. Keep it in a small jar or container. When ready to eat, mix the salad and dressing just before serving. This helps the spinach stay crisp. Use airtight containers for the salad. Glass containers work best for storing leftovers. Check for freshness daily, and enjoy bites of summer! {{image_2}} You can make your summer berry spinach salad even better with some add-ins. Adding proteins like grilled chicken or shrimp boosts flavor and makes it more filling. You can also mix in other fruits. Try peaches or apples for a sweet twist. Nuts like walnuts or pecans add crunch and taste too. You have many choices for dressings. A classic balsamic vinaigrette works well. You can also try a creamy dressing for a different flavor. Making your dressing at home can be fun and fresh. It lets you control the taste and ingredients. Store-bought dressings save time but might have hidden sugars. Check the label for a healthier option. As the seasons change, your salad can change too. In fall, add roasted squash or apples. In winter, use hearty greens like kale or add nuts and dried fruits. This keeps your salad fresh and exciting all year round. You can explore new recipes for seasonal salads that highlight what’s in season. To keep your Summer Berry Spinach Salad fresh, store it in the fridge. This salad is best enjoyed within 1-2 days. For short-term storage, use an airtight container. This protects the salad from drying out. Long-term storage is not recommended due to the greens wilting. You cannot reheat this salad since it is best served cold. Store spinach in a breathable bag. This helps keep it crisp. Avoid washing spinach until you're ready to use it. As for berries, keep them in their original container. If they get wet, they can spoil faster. To prevent browning, add a little lemon juice to cut fruits. This keeps them looking fresh and tasty. If you want to prepare the salad in advance, consider jar layering. Start with the dressing at the bottom. Next, add the sturdier ingredients like spinach and almonds. Place berries on top to avoid crushing. Keep the salad in the fridge and add the dressing when ready to eat. This keeps everything fresh and crunchy. For the full recipe, refer back to the instructions above. How long does the salad last in the fridge? This salad lasts up to three days in the fridge. The spinach may wilt, so eat it sooner for the best taste. Can I prepare this salad in advance? Yes, you can prepare it a few hours ahead. Just wait to add the dressing until you serve it. This keeps the spinach fresh and crisp. What can I substitute for feta cheese? If you want a different cheese, try goat cheese or ricotta. Both add nice flavors and creaminess to the salad. How to keep spinach from wilting Store spinach in a clean, dry container. A paper towel inside helps absorb moisture. This keeps the leaves fresh longer. Ideal combinations for berries Mix strawberries, blueberries, and raspberries for a tasty blend. You can also use blackberries or cherries for variety. Each berry brings unique flavors and nutrients. Nutritional breakdown per serving Each serving has about 150 calories. It provides vitamins A, C, and E, along with healthy fats from almonds. This salad is both filling and nutritious. Modifications for larger groups To serve more people, simply double or triple the recipe. Adjust the ingredients as needed, keeping the same ratios for a balanced flavor. This blog post showed you how to make a delicious spinach berry salad. It covered the key ingredients and their health benefits. We discussed step-by-step instructions to prepare the salad and dressings. Then, I shared tips for serving and storing your salad to keep it fresh. Finally, you learned about variations and customization options to fit your taste. Remember, a healthy salad can be fun and easy to make. Enjoy experimenting with flavors and stay creative in your kitchen!

Summer Berry Spinach Salad Fresh and Flavorful Delight

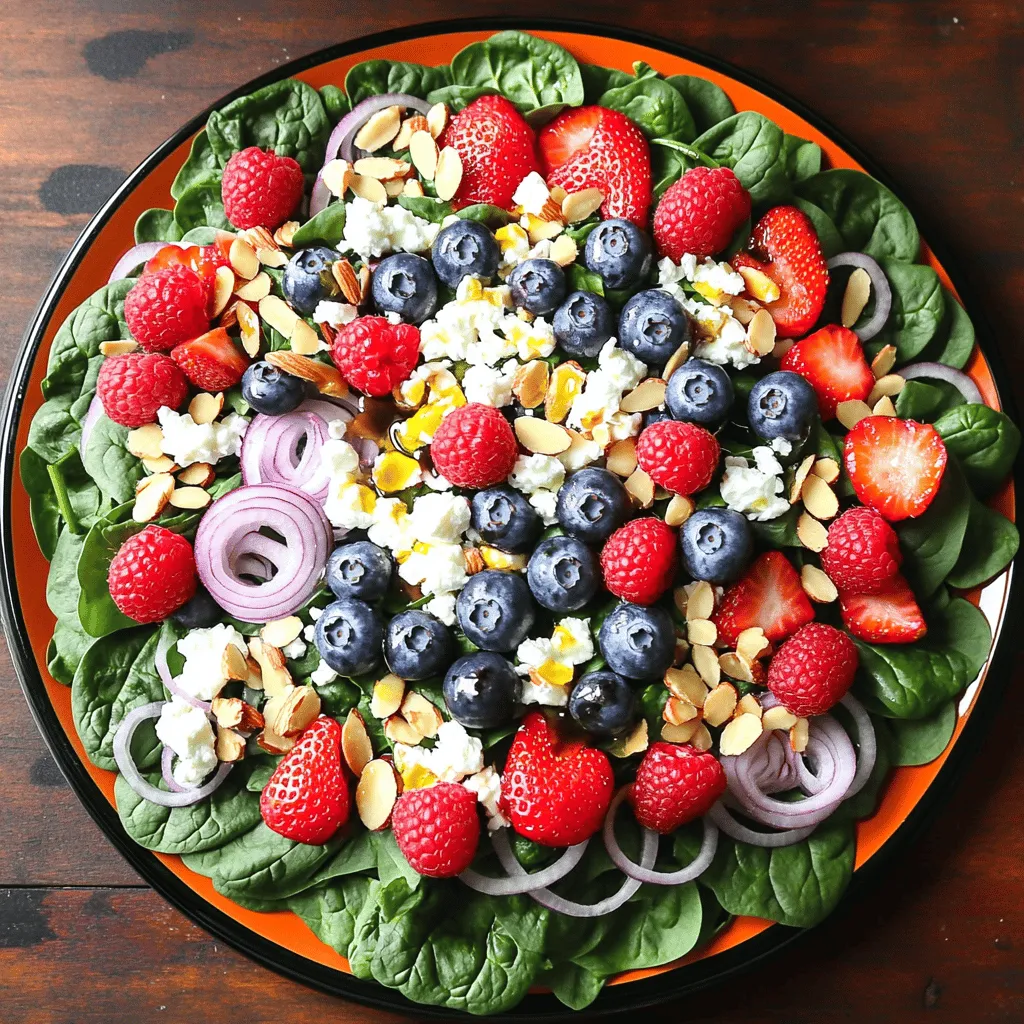
Summer is here, and it’s time to enjoy fresh, vibrant meals! The Summer Berry Spinach Salad is a perfect way

- 1 large head of cauliflower, cut into florets - 5 cloves of garlic, unpeeled - 3 tablespoons olive oil The main stars of this dish are simple yet packed with flavor. Cauliflower gives a creamy base. It is low in carbs and healthy. Garlic adds a rich, sweet taste after roasting. Olive oil helps to enhance the flavors and adds a bit of richness. - 1/4 cup unsweetened almond milk (or any milk of your choice) - 2 tablespoons butter (or vegan alternative) - Salt and pepper to taste For creaminess, almond milk is a great choice. It is dairy-free and light. You can easily swap it for regular milk if you prefer. Butter adds a nice depth of flavor. You can use a vegan option if needed. Salt and pepper bring all the flavors together. - Fresh chives, finely chopped (for garnish) Chives are the perfect finish. They add a fresh and mild onion flavor. Chives also make the dish look pretty. Just sprinkle them on top before serving. This little touch makes a big difference in presentation. For the full recipe, check the detailed instructions. Enjoy making this delicious side dish! First, wash your cauliflower under cold water. This step helps remove any dirt. Next, cut the cauliflower into small florets. Smaller pieces cook faster and blend easier. Now, it’s time to prepare the garlic. Take five cloves and leave them unpeeled. Roasting them in their skins adds a nice depth of flavor. You won't need to chop them; just set them aside for roasting. Start by preheating your oven to 400°F (200°C). A hot oven helps the cauliflower get that lovely golden color. On a baking sheet, toss the cauliflower florets and unpeeled garlic cloves with two tablespoons of olive oil. Make sure to coat them well. Season generously with salt and pepper. This seasoning brings out the natural flavors of the veggies. Roast them in the oven for 25-30 minutes. Check halfway through and give them a turn. You want them tender and golden brown when done. After roasting, remove the baking sheet from the oven. Let it cool for a few minutes. This cooling helps you handle the garlic safely. Squeeze the roasted garlic from their skins into a large mixing bowl. You’ll love the sweet, rich flavor it adds! Add the roasted cauliflower florets, almond milk, butter, and the last tablespoon of olive oil. Now, use a hand mixer or immersion blender to blend everything until it’s smooth and creamy. If you like a chunkier texture, blend a bit less. Taste your mash and adjust the seasoning with more salt and pepper if needed. Transfer it to a serving bowl and garnish with freshly chopped chives. This simple step adds a pop of color and flavor to your dish. Check out the Full Recipe for more details! To know when garlic is roasted, look for a deep golden color. The smell will be rich and sweet. When you squeeze the cloves, they should be soft and creamy. For cauliflower, you want it tender but not mushy. A fork should easily pierce the florets. Roast until they are nicely browned for the best flavor. If you want to change up the flavors, try using shallots or leeks instead of garlic. Fresh herbs like thyme or rosemary can add a nice touch. For a creamier mash, you can use cream cheese or sour cream. If you want a non-dairy option, almond milk works well. Coconut milk can give a sweet twist, too. One common mistake is over-roasting. This can make the garlic bitter. If you under-roast the cauliflower, it will be too crunchy. Blend carefully to avoid a gluey texture. You want it smooth, but a few chunks can add character to your mash. Keep these tips in mind to make a perfect side dish. For the full recipe, check here: [Full Recipe]. {{image_2}} You can easily change the flavor of roasted garlic cauliflower mash. For a cheesy twist, add grated Parmesan or nutritional yeast. These options bring a rich taste that pairs well with the garlic. If you love herbs, try adding rosemary or thyme. They add a fresh note and elevate the mash. Each of these cheese and herb options can make the dish unique. This mash fits many diets. For a vegan option, simply replace butter with a vegan alternative. Use almond milk or any plant-based milk. It’s also great for low-carb and keto diets since it swaps out potatoes. Want some heat? Add red pepper flakes for a spicy kick. This easy change can give your mash an exciting edge. Roasted garlic cauliflower mash is versatile. It pairs well with grilled chicken, beef, or fish. You can also serve it with roasted veggies for a complete meal. Use it as a base for rich sauces or stews. This mash can stand alone as a side dish or complement your main dish beautifully. Don’t forget to explore the full recipe for more tips! To store leftovers, let the mash cool completely. Then, place it in an airtight container. This keeps it fresh and tasty. I recommend using glass or plastic containers with tight-fitting lids. They work best for keeping flavors in. You can store the mash in the fridge for up to five days. If you want to save some for later, freezing is a great option. First, let the mash cool. Then, put it in a freezer-safe container. Make sure to leave some space at the top. The mash will expand when frozen. You can freeze it for up to three months. When you’re ready to eat, thaw it overnight in the fridge. For reheating, microwave it or warm it on the stove. Add a splash of almond milk if it seems dry. In the fridge, Roasted Garlic Cauliflower Mash lasts about five days. If it smells sour or looks dark, that’s a sign it has spoiled. Always trust your senses. If it doesn't smell right or has a strange texture, throw it away. Keeping track of how long it has been in the fridge helps you enjoy it at its best. To make this dish, start by roasting the cauliflower and garlic. First, preheat your oven to 400°F (200°C). Toss cauliflower florets and garlic cloves with olive oil on a baking sheet. Season with salt and pepper. Roast for about 25-30 minutes until tender and golden. After roasting, squeeze the garlic from its skin into a bowl. Add the roasted cauliflower, almond milk, and butter. Blend until smooth. Adjust seasoning to taste. Garnish with chives. You can find the Full Recipe to guide you. Yes, you can use frozen cauliflower. However, fresh cauliflower offers a better texture and flavor. Frozen cauliflower may have extra moisture, which can affect the mash's creaminess. If you use frozen, ensure to thaw and drain it well before cooking. Roasting fresh cauliflower gives it a nice caramelized flavor that enhances the dish. This mash pairs well with many dishes. Serve it alongside grilled chicken, steak, or fish. It also complements roasted vegetables and can replace traditional mashed potatoes. You can use it as a base for savory dishes or even enjoy it with a drizzle of olive oil. Feel free to get creative with your main courses! Absolutely! Roasted garlic cauliflower mash is simple and quick. Most of the time is spent roasting, so you can prep other dishes. The steps are straightforward, and you don’t need special skills. If you can chop and blend, you can make this dish. Perfect for anyone, from beginner cooks to seasoned chefs! Roasted garlic cauliflower mash is simple and tasty. We explored main ingredients like cauliflower and garlic, plus tips for roasting. You can mix in flavors and modify for diets. Proper storage keeps it fresh for later, too. Remember, practice makes perfect. Each step helps you make the best mash possible. Enjoy crafting your dish with these tools and knowledge. It’s rewarding to create delicious meals at home.

Roasted Garlic Cauliflower Mash Flavorful Side Dish

Are you ready for a tasty twist on a classic side dish? Roasted Garlic Cauliflower Mash is simple, flavorful, and

- 1 cup ricotta cheese - 2 large eggs - 1/4 cup granulated sugar - Zest of 2 lemons - 1/4 cup lemon juice (freshly squeezed) - 1 cup all-purpose flour - 2 teaspoons baking powder - 1/2 teaspoon baking soda - 1/4 teaspoon salt - 1/2 teaspoon vanilla extract - 2 tablespoons unsalted butter (melted) - Additional butter or oil for cooking - Fresh berries and maple syrup for serving (optional) Ricotta cheese gives these pancakes a soft, creamy texture. It adds moisture and richness. Eggs act as a binder, helping the pancakes hold their shape. Lemon juice and zest bring a bright, fresh flavor. Freshly squeezed lemon juice is best for taste. Flour provides structure, while baking powder and baking soda help the pancakes rise. Salt balances the sweetness. Vanilla extract adds warmth to the flavor. Melted butter contributes to the pancakes' richness and helps with browning. Use fresh lemons for the best flavor. Look for firm, bright lemons with smooth skin. When choosing ricotta, pick a brand with a creamy texture and no excess liquid. For eggs, choose large, fresh ones. Check the date on the package to ensure they are not expired. Fresh berries should be plump and vibrant. Wash them right before serving to keep them fresh. If you want the best results, follow the Full Recipe closely for perfect pancakes. To start, gather your ingredients. You will need ricotta cheese, eggs, sugar, lemon zest, lemon juice, flour, baking powder, baking soda, salt, vanilla extract, melted butter, and some extra butter or oil for cooking. 1. In a medium bowl, whisk the ricotta cheese, eggs, sugar, lemon zest, lemon juice, and vanilla extract. Mix until it is smooth and creamy. 2. In another bowl, mix the flour, baking powder, baking soda, and salt. Stir these dry ingredients well. 3. Gently add the dry mix to the ricotta mix. Stir until just combined. A few lumps are okay. 4. Fold in the melted butter. Let the batter rest for about 10 minutes to thicken a bit. 1. Heat a large non-stick skillet over medium heat. Lightly coat it with butter or oil. 2. Pour about 1/4 cup of batter onto the skillet for each pancake. 3. Cook until bubbles form on the surface, about 3-4 minutes. The edges should look set. 4. Carefully flip the pancakes. Cook the other side until golden brown, about 2-3 minutes. 5. Keep cooked pancakes warm in a low oven while you repeat with the rest of the batter. 6. Serve warm with fresh berries and maple syrup if you like. To make your pancakes extra fluffy, measure the flour carefully. Too much flour can make them dense. Also, let the batter rest so it can rise. Avoid stirring too much to keep air in the batter. This gives you light, fluffy pancakes that are sure to delight. For the full recipe, check the section above! When making Lemon Ricotta Pancakes, avoid overmixing the batter. Mixing too much makes the pancakes tough. You want some lumps in the batter. Another mistake is cooking at too high a heat. This can burn the pancakes outside while leaving them raw inside. Remember to flip them only when bubbles form on the surface. Lastly, don’t skip letting the batter rest. This helps the pancakes become light and fluffy. To make these pancakes, you need a few simple tools. A large bowl helps mix the batter easily. Use a whisk for smooth blending of the ricotta and eggs. A non-stick skillet is best for cooking pancakes evenly. A spatula helps flip the pancakes without breaking them. You might also want to have a ladle handy for pouring the batter. For the perfect texture, use fresh ricotta cheese. This makes the pancakes creamy and rich. Make sure to measure the flour correctly. Too much flour can lead to dry pancakes. The key is to add the dry ingredients gently. This keeps the batter light. Letting the batter rest is also crucial. It allows the baking powder to activate fully. When you cook the pancakes, keep the heat medium-low. This gives them time to rise and cook through without burning. {{image_2}} You can easily boost the flavor of your lemon ricotta pancakes. Try adding blueberries or strawberries to the batter for a fruity twist. You can also mix in some almond or coconut extract for a nutty touch. If you love spice, a pinch of cinnamon or nutmeg can add warmth. For a zesty kick, try adding more lemon zest or even some orange zest. If you need to make swaps, it’s simple. Use low-fat ricotta or Greek yogurt for a lighter pancake. For a gluten-free option, substitute the all-purpose flour with almond flour or a gluten-free blend. If you want to avoid sugar, you can use honey or maple syrup instead. Egg replacements like flax seeds or applesauce work well for vegan diets. Serving your pancakes can be fun! Top them with fresh berries, whipped cream, or a dollop of yogurt. Drizzle some maple syrup or honey for sweetness. You can even add a sprinkle of powdered sugar for a fancy touch. For a savory twist, try serving with lemon curd or a side of crispy bacon. Enjoy the variety and make each meal special! For the full recipe, check out the Lemon Ricotta Pancakes section above! To store leftover pancakes, first let them cool completely. Place them in an airtight container. Make sure to place parchment paper between layers to prevent sticking. They will stay fresh in the fridge for up to three days. You can also cover them tightly with plastic wrap if you prefer. If you want to save pancakes for later, freezing works well. Stack cooled pancakes with parchment paper in between. Place the stack in a freezer-safe bag or container. Remove as much air as possible to avoid freezer burn. They can last up to two months in the freezer. When you’re ready to eat, simply take out the desired amount. Reheating pancakes is easy. For the best results, use a non-stick skillet over low heat. Heat each pancake for about one to two minutes on each side. You can also use a microwave. Place a pancake on a microwave-safe plate and cover it with a damp paper towel. Heat for about 20-30 seconds. Enjoy your pancakes warm! For the full recipe, check out the Lemon Ricotta Pancakes section. To make Lemon Ricotta Pancakes from scratch, gather your ingredients first. You'll need ricotta cheese, eggs, sugar, lemon zest, lemon juice, flour, baking powder, baking soda, salt, vanilla extract, and melted butter. 1. Start by mixing the ricotta, eggs, sugar, lemon zest, lemon juice, and vanilla in a bowl. 2. In another bowl, mix flour, baking powder, baking soda, and salt. 3. Combine both mixtures gently. Don’t overmix; a few lumps are okay. 4. Fold in the melted butter. Let the batter rest for about 10 minutes. 5. Heat your skillet and add butter or oil. Pour 1/4 cup of batter for each pancake. 6. Cook until bubbles form, then flip until golden brown. This method gives you light and fluffy pancakes, perfect for breakfast. Check out the Full Recipe for detailed steps. Yes, you can substitute some ingredients. If you don’t have ricotta, you can use cottage cheese. If you want a dairy-free option, use almond or soy milk with a dairy-free yogurt. You can also replace all-purpose flour with whole wheat flour for a healthier choice. If you need a sweetener swap, try honey or maple syrup instead of sugar. Just remember, these changes may affect the taste and texture slightly. Lemon Ricotta Pancakes pair well with many toppings. Fresh berries like strawberries, blueberries, or raspberries add a burst of flavor. You can drizzle them with maple syrup for sweetness. Another great option is a dollop of whipped cream or yogurt. If you want to get fancy, sprinkle some powdered sugar on top or add a sprig of mint for color. Enjoy experimenting with your favorite toppings! In this blog post, we explored the art of making delicious lemon ricotta pancakes. We started with key ingredients and tips for using fresh finds. I shared step-by-step instructions for preparation and cooking, plus tricks for perfect texture. We covered common mistakes and recommended cooking tools. I also suggested flavor variations and storage methods for leftovers. In closing, remember that great pancakes come from care and the right ingredients. Enjoy cooking!

Lemon Ricotta Pancakes Fluffy and Fresh Delight

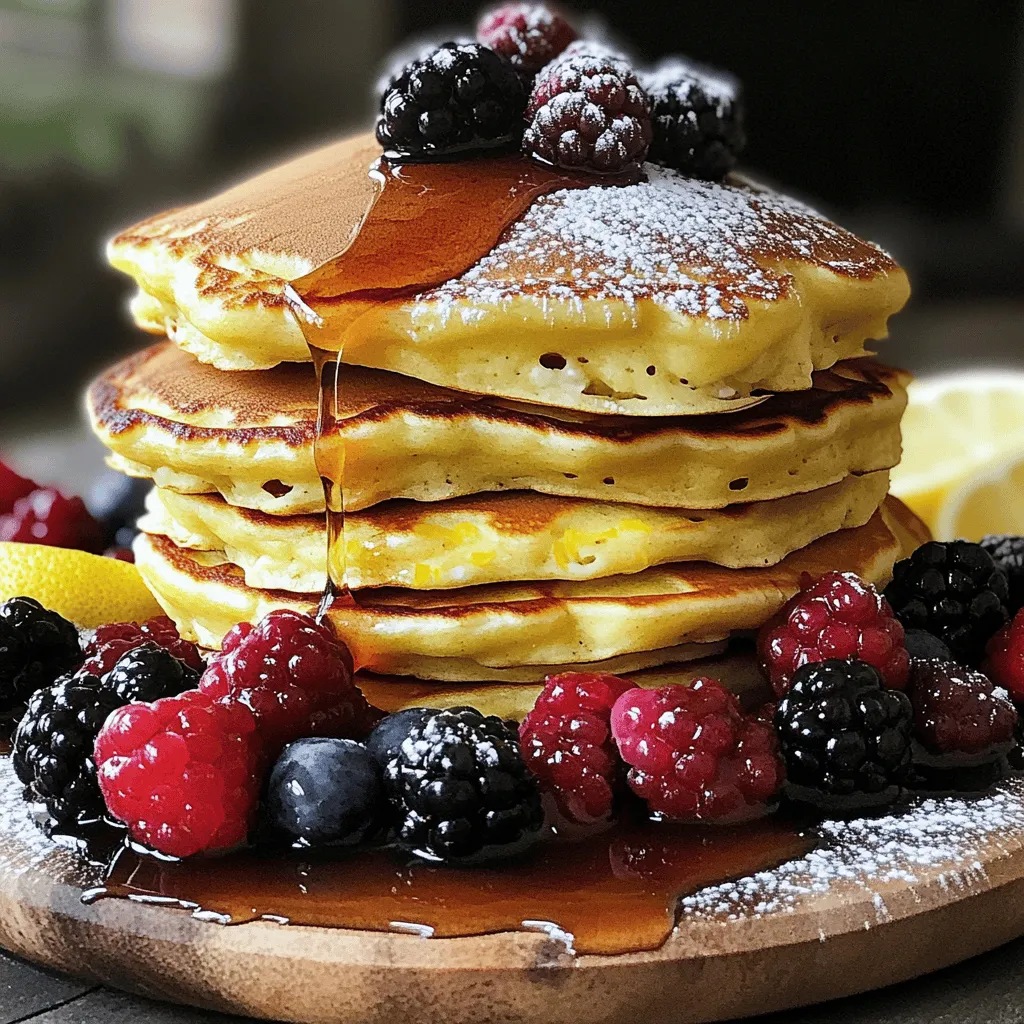
Are you ready to elevate your breakfast? Lemon Ricotta Pancakes are a fluffy and fresh delight that will brighten your

- 1 pound fresh green beans, trimmed - 4 tablespoons unsalted butter - 4 cloves garlic, minced The main ingredients make this dish shine. Fresh green beans give a crisp bite. The unsalted butter adds richness. Minced garlic provides a lovely aroma and flavor. - 1/2 teaspoon red pepper flakes (for added spice) - 1/4 cup toasted almond slices (for garnish) You can add red pepper flakes for a touch of heat. Toasted almond slices on top add crunch and beauty. These optional ingredients can elevate the dish. - 1 teaspoon lemon zest - 1 tablespoon lemon juice - Salt and pepper to taste Lemon zest brightens the flavor. Lemon juice adds a fresh tang. A pinch of salt and pepper completes the taste. These seasonings enhance the green beans well. For the full recipe, check out the complete instructions above. Enjoy cooking! First, take 1 pound of fresh green beans and trim the ends. Next, fill a large pot with salted water and bring it to a boil. Once boiling, add the green beans and blanch them for 3-4 minutes. This keeps them bright green and adds a nice crunch. After blanching, quickly transfer the beans to a bowl filled with ice water. This stops the cooking and helps them stay vibrant. Let them cool for about 5 minutes, then drain and set aside. Now, let’s move on to the garlic. In a large skillet, melt 4 tablespoons of unsalted butter over medium heat. Watch carefully as the butter melts and begins to bubble. Once bubbling, add 4 cloves of minced garlic. Sauté the garlic for about 30 seconds. You want it fragrant but not browned. Burnt garlic will ruin the dish, so keep a close eye on it. With the garlic ready, it’s time to mix everything together. Add the blanched green beans to the skillet with the garlic butter. Toss the beans gently to coat them well. Cook for an additional 4-5 minutes, stirring occasionally. You want them heated through. Finally, stir in 1 teaspoon of lemon zest, 1 tablespoon of lemon juice, and if you like a kick, add 1/2 teaspoon of red pepper flakes. Season with salt and pepper to taste. Mix well to spread the flavors. When done, transfer the green beans to a serving dish. For a nice touch, sprinkle 1/4 cup of toasted almond slices on top. Enjoy this simple yet flavorful dish! For the complete recipe, check out the [Full Recipe]. To avoid overcooking green beans, focus on timing. Blanch them in boiling water for only 3-4 minutes. This keeps them bright and crisp. After blanching, quickly put them in ice water. This step halts cooking and locks in color. When sautéing, cook them just until heated through, around 4-5 minutes. This way, they stay tender but not mushy. To elevate the taste of your garlic butter green beans, consider adding herbs. Fresh thyme or basil pairs well with garlic. You can also use a pinch of smoked paprika for a subtle smokiness. A sprinkle of freshly grated Parmesan cheese at the end adds a rich flavor. Experimenting with flavors can make your dish unique every time. For a beautiful presentation, arrange the green beans in a nice pattern on a platter. Sprinkle the toasted almonds evenly on top for texture. Add lemon wedges on the side for color and zest. This not only looks good but also enhances the dish’s taste. A well-presented meal impresses guests and makes eating more fun. {{image_2}} If you want a healthier option, consider using olive oil instead of butter. Olive oil gives a nice flavor and is good for your heart. You can also try coconut oil for a different taste. If you need a dairy-free option, margarine works well too. Just make sure to choose one that fits your diet. You can easily change the flavor of garlic butter green beans. Adding parmesan cheese creates a rich, savory taste. Just sprinkle it on top before serving. If you like mushrooms, sauté some in the butter before adding the green beans. They add a nice earthiness to the dish. For a spicy kick, increase the red pepper flakes or add some crushed red pepper. To make this dish vegan, simply swap out the butter for a plant-based butter or olive oil. This keeps the dish creamy while being animal-friendly. For a gluten-free option, this recipe is naturally gluten-free. Just ensure any added ingredients, like seasoning blends, are also gluten-free. You can enjoy this dish without worry! To store your leftover garlic butter green beans, place them in an airtight container. Keep them in the refrigerator for up to three days. Make sure the beans cool to room temperature before sealing. This helps keep them fresh and tasty. If you want to save garlic butter green beans for later, freezing is a great option. First, let the beans cool completely. Then, spread them out on a baking sheet in a single layer. Freeze them for about an hour. After they are frozen, place them in a freezer-safe bag. They can last for up to three months in the freezer. To reheat garlic butter green beans, use a skillet for the best results. Heat a small amount of butter over medium heat. Add the green beans and sauté for about three minutes. This method keeps them flavorful and maintains their crisp texture. You can also microwave them, but be careful not to overheat. Warm them in short bursts, stirring in between, to keep them from getting soggy. Enjoy your meal! Green beans stay fresh for about 5 to 7 days in the fridge. To keep them longer, store them in a plastic bag. Look for signs of spoilage, like wilting or brown spots. If they feel slimy or smell bad, it's best to toss them out. Yes, you can use frozen green beans for this recipe. They are convenient and save time. Just remember to thaw them before cooking. Frozen beans may not have the same crunch as fresh beans, but they still taste great. Garlic butter green beans pair well with many dishes. They go nicely with roasted chicken or steak. You can also serve them alongside rice or quinoa. For a lighter meal, try them with grilled fish. They add a fresh touch to any plate. If you want the full experience, check out the Full Recipe for more ideas. Garlic butter green beans are simple and tasty. We covered key ingredients, from fresh beans to garlic. You learned how to blanch beans and sauté garlic just right. Our tips help you avoid overcooking and improve flavor. You can even switch ingredients based on your diet and taste. Lastly, we discussed storage options to keep leftovers fresh. Enjoy making this dish; it adds a burst of flavor to any meal!

Garlic Butter Green Beans Flavorful and Simple Dish

Looking to add a quick and tasty side dish to your meals? Try my Garlic Butter Green Beans! This dish

- 2 medium sweet potatoes, peeled and diced - 4 cups fresh broccoli florets - 1 cup canned chickpeas, drained and rinsed - 1/2 red onion, finely chopped - 1/2 cup dried cranberries - 1/4 cup feta cheese, crumbled (optional) - 1/4 cup sunflower seeds The main ingredients in this salad are colorful and healthy. Sweet potatoes add a touch of sweetness and lots of nutrients. Fresh broccoli gives a nice crunch and bright green color. Chickpeas pack in protein and fiber to keep you full. Red onion adds a sharp bite, while cranberries bring a hint of tartness. If you choose to add feta cheese, it gives a creamy texture. Sunflower seeds provide a nutty flavor and extra crunch. - 3 tablespoons olive oil - 2 tablespoons apple cider vinegar - 1 tablespoon maple syrup - 1 teaspoon Dijon mustard - Salt and pepper to taste The dressing for this salad is simple yet flavorful. Olive oil provides healthy fats, while apple cider vinegar adds tang. Maple syrup gives a touch of sweetness that balances the flavors. Dijon mustard adds depth and a slight kick. Seasoning with salt and pepper enhances the taste. You can adjust these amounts to suit your taste. For the full recipe, check out the details provided above. - Preheat the oven to 400°F (200°C). - Toss diced sweet potatoes with olive oil, salt, and pepper. Roast for 25-30 minutes. To start, you want your oven hot. Preheating it to 400°F makes sure your sweet potatoes roast well. Next, dice your sweet potatoes into small cubes. Toss them in a bowl with some olive oil, salt, and pepper. This mix gives them flavor. Spread them out on a baking sheet. Make sure they have space to roast evenly. Bake them for about 25 to 30 minutes until they are tender and golden brown. Flip them halfway through for even cooking. - Boil water and blanch the broccoli florets for 2-3 minutes. - Plunge broccoli into ice water to stop cooking, then drain. While the sweet potatoes roast, get a pot of water boiling. Add your fresh broccoli florets to the boiling water. Blanch them for just 2 to 3 minutes. This keeps the bright green color and crisp texture. After that, quickly transfer the broccoli to a bowl of ice water. This stops the cooking process. Once cooled, drain the broccoli and set it aside. - In a large bowl, combine roasted sweet potatoes, blanched broccoli, chickpeas, onions, cranberries, and sunflower seeds. - Whisk together dressing ingredients and pour over the salad. Toss gently to combine. Now, grab a large bowl. In it, combine your roasted sweet potatoes, blanched broccoli, chickpeas, chopped red onion, dried cranberries, and sunflower seeds. Each of these adds a unique flavor and texture. Next, make your dressing in a small bowl. Whisk together olive oil, apple cider vinegar, maple syrup, Dijon mustard, salt, and pepper. Once mixed well, pour the dressing over the salad. Toss gently to combine everything. If you like, you can add feta cheese on top for extra creaminess. For the full recipe, check the details above. To get sweet potatoes perfectly caramelized, cut them into even cubes. This helps them cook evenly. Toss them in a tablespoon of olive oil, salt, and pepper. Spread them in a single layer on a baking sheet. Roast at 400°F (200°C) for 25-30 minutes. Flip them halfway through for even browning. They should be tender on the inside and crispy on the outside. Keep broccoli bright and crisp by blanching it. Boil water in a pot, then add the broccoli florets for 2-3 minutes. This quick cooking keeps the broccoli vibrant. After blanching, plunge it into ice water immediately. This stops the cooking and helps the color stay bright. Drain well before adding to the salad. Adjust the time for softer broccoli if you prefer. You can customize the dressing to fit your taste. Try adding garlic or herbs for a fresh twist. If you want a vegan option, replace the honey with maple syrup. For gluten-free, check that the Dijon mustard is gluten-free. Feel free to adjust the oil and vinegar ratios for more tang or richness. For the full recipe, check the details above. {{image_2}} You can make your sweet potato broccoli salad even better with fun add-ins. Try adding proteins like grilled chicken or tofu for extra heartiness. Both options blend well with the flavors in the salad. If you want more crunch, consider adding bell peppers or carrots. Fruits like apples or pears can also add a nice sweet touch. They pair well with the sweet potatoes and cranberries. The dressing can change the taste of your salad. Try a tahini dressing for a nutty flavor. Lemon vinaigrette is another great choice that gives a zesty kick. If you prefer creamy, mix in some yogurt or avocado. These options can make your salad richer and more filling. Just remember to taste as you go to find the right balance. You can keep your salad fresh by using seasonal ingredients. In the spring, add fresh peas or asparagus for a bright touch. Summer can bring in cherry tomatoes or cucumbers. In the fall, think about adding roasted butternut squash. Winter can call for kale or brussels sprouts. Adjust your ingredients based on what you find at the market. This way, your salad will always have a new twist throughout the year. To keep your Sweet Potato Broccoli Salad fresh, store it in an airtight container. Place it in the refrigerator. It stays good for about 3 to 5 days. Keep the dressing separate until you are ready to eat. This keeps the salad crisp and tasty. - Airtight container: Helps prevent air and moisture from spoiling your salad. - Dress separately: Mixing dressing too soon makes the salad soggy. - Use within 5 days: For the best flavor, enjoy your salad before this time. You can freeze Sweet Potato Broccoli Salad, but it may change texture. Freezing is best for the sweet potatoes and chickpeas. Here’s how to freeze and thaw it properly: 1. Prepare the salad: Leave out the dressing and any fresh items like cranberries or sunflower seeds. 2. Use a freezer-safe container: Store the salad in a container that seals well. 3. Label and date: Write the date on the container so you remember when to use it. To thaw, place the container in the fridge overnight. This will help the salad regain its texture. For the best taste, serve your salad chilled or at room temperature. This salad is perfect for lunch or dinner. It works well as a side for grilled meats or as a main dish for a light meal. - Garnish: Add extra sunflower seeds or cranberries for color and crunch. - Pair with protein: Try it with grilled chicken, shrimp, or tofu for a filling meal. - Occasions: Great for picnics, potlucks, or family gatherings. For a full recipe of this delicious dish, check the [Full Recipe]. Yes, you can prepare this salad ahead of time. It’s best to roast the sweet potatoes and blanch the broccoli the day before. Store the salad in the fridge in an airtight container. Keep the dressing separate until you are ready to eat. This way, the salad stays fresh and crunchy. You can use other legumes or proteins instead of chickpeas. Great options include black beans, kidney beans, or lentils. If you prefer meat, grilled chicken or turkey works well too. Choose what you like best! Yes, this salad is gluten-free. All the ingredients, like sweet potatoes, broccoli, and chickpeas, do not contain gluten. Always double-check labels on any packaged items, like dressings, to ensure they are gluten-free. You can store leftovers in the fridge for up to three days. Make sure to keep the salad in an airtight container. If the salad contains dressing, it might get soggy over time. Enjoy the leftovers within a few days for the best taste. Yes, you can make this salad vegan easily. Omit the feta cheese to keep it vegan. The salad will still be tasty and full of flavor. You can add extra sunflower seeds or nuts for more texture. In this post, I shared a simple recipe for Sweet Potato Broccoli Salad. You learned about the main ingredients, like sweet potatoes, chickpeas, and broccoli. I also provided tips on roasting, blanching, and dressing. You can modify the recipe with add-ins and seasonal flavors. Remember to store leftovers properly for the best taste. This salad is fresh, nutritious, and fun to make. Enjoy your cooking, and feel free to customize it to fit your taste!

Sweet Potato Broccoli Salad Flavorful and Nutritious Dish

Looking for a bright, tasty dish that’s also good for you? My Sweet Potato Broccoli Salad is just what you

Older posts
Newer posts
← Previous Page1 … Page47 Page48 Page49 … Page107 Next →
© 2025 My Cooking Cast • Built with GeneratePress

Our Policies

  • Privacy Policy
  • GDPR Policy
  • Terms Of Use
  • Copyright Policy
  • Cookie Policy
  • Disclaimer

More Information​

  • Home
  • Contact
  • About
  • Dinner
  • Appetizers
  • Dessert
©2025, My Cooking Cast About Privacy Policy Back To Top