Skip to content
DisclaimerTerms Of UseGDPR PolicyCookie Policy

My Cooking Cast

  • Home
  • Drinks
  • Appetizers
  • Dinner
  • Dessert
  • About
  • Contact
  • Privacy Policy
DisclaimerTerms Of UseGDPR PolicyCookie Policy

Emma

- 1 can (15 oz) chickpeas, drained and rinsed - 2 tablespoons olive oil - 1 teaspoon chili powder - 1 teaspoon smoked paprika - 1/2 teaspoon cumin - 1/2 teaspoon garlic powder - Zest of 1 lime - Juice of 1 lime - Salt and pepper to taste - Fresh cilantro, chopped (for garnish) Each ingredient plays a key role in flavor and texture. The olive oil helps the chickpeas crisp up nicely. The lime zest and juice add fresh tang. The spices give a bold kick, while salt brings all the flavors together. I recommend measuring carefully for the best results. You can add more than just cilantro. Try diced avocado or a sprinkle of queso fresco. For a spicy kick, drizzle hot sauce over the top. These options can elevate your snack and make it even more enjoyable. First, gather all your ingredients. You need a can of chickpeas, olive oil, and spices. The spices are chili powder, smoked paprika, cumin, garlic powder, lime zest, and lime juice. Don't forget salt and pepper to taste. 1. Preheat your oven to 400°F (200°C). Line a baking sheet with parchment paper. This step helps with easy cleanup. 2. Drain and rinse the chickpeas in a colander. This removes the brine and extra sodium. 3. Spread the chickpeas on a clean kitchen towel. Pat them dry. Removing moisture is key for crispiness. Now we're ready to season and roast. 1. In a mixing bowl, add the dried chickpeas. 2. Pour in the olive oil and sprinkle the chili powder, smoked paprika, cumin, and garlic powder. Add lime zest and juice. Season with salt and pepper. 3. Toss everything well. Make sure every chickpea gets coated. 4. Spread the chickpeas in a single layer on the baking sheet. Avoid crowding them. This helps them roast evenly. 5. Place the sheet in the oven. Roast for 25-30 minutes. Stir halfway through to ensure even browning. Watch closely to avoid burning. Once they're golden brown and crispy, it's time to finish up. 1. Remove the chickpeas from the oven. Let them cool slightly before tasting. 2. Feel free to adjust the seasoning if you want more flavor. 3. Garnish with fresh chopped cilantro. This adds a nice touch and extra flavor. For the full recipe, refer back to the ingredient section. Enjoy your crunchy snack delight! To get your chickpeas crispy, focus on drying them well. After rinsing, spread them on a kitchen towel. Pat them dry until no moisture remains. The drier they are, the crunchier they will be. Also, spread them in a single layer on the baking sheet. This simple step prevents steaming and helps them roast evenly. You can boost the flavor of your chickpeas easily. Try adding different spices like onion powder or cayenne for heat. Mixing in a splash of lime juice before serving adds freshness. A sprinkle of nutritional yeast gives a cheesy taste without dairy. Experiment with these ideas to make your snack unique. Avoid using too much oil. While it helps with crispiness, too much can make them soggy. Make sure not to crowd the chickpeas on the baking sheet. This leads to uneven roasting. Lastly, don't forget to stir them halfway through cooking. This helps them brown on all sides. Following these tricks will ensure you enjoy the best chili lime roasted chickpeas. For the full recipe, check the earlier section. {{image_2}} If you love heat, try adding cayenne pepper or crushed red pepper flakes. These spices give a nice kick. You can also mix in some hot sauce before roasting. For an extra spicy treat, add jalapeño powder to the mix. You can adjust the spice to fit your taste. Switching up the herbs can change the flavor. Try using oregano or thyme instead of cumin. You can also replace lime zest with lemon zest for a different twist. Fresh herbs like rosemary or dill bring a new taste. Experiment with your favorite spices to find what you love. Chili lime roasted chickpeas make a great snack. You can serve them in a bowl for parties. They also work well as a crunchy topping on salads. Try adding them to your grain bowls for extra texture. Pair them with a yogurt dip or guacamole for a fun snack. Check out the Full Recipe for more ideas! To store leftover chili lime roasted chickpeas, place them in an airtight container. This keeps them fresh and crunchy. Make sure the chickpeas are completely cool before sealing. If they are still warm, steam can build up inside and make them soggy. When you're ready to enjoy your leftovers, preheat your oven to 350°F (175°C). Spread the chickpeas on a baking sheet in a single layer. Bake for about 10 minutes, or until they are warm and crispy again. Avoid using the microwave, as it makes them soft and chewy. Chili lime roasted chickpeas last about 3-5 days in the fridge. If you want to keep them longer, consider freezing them. Place the cooled chickpeas in a freezer-safe bag. They can last up to three months in the freezer. When you want to eat them, just follow the reheating instructions above. Enjoy your crunchy snack delight anytime! Chickpeas are packed with protein and fiber. They help keep you full for longer. They also have vitamins and minerals that benefit your health. Eating chickpeas can support digestion and heart health. Plus, they are low in calories, making them a great choice for a snack. Roasting them adds crunch without extra fat. This makes them a tasty and nutritious option for any time of day. Yes, you can use dried chickpeas, but they need extra steps. First, soak them overnight in water. This softens them and cuts down cooking time. After soaking, cook them until they are tender. You can boil them on the stove or use a pressure cooker. Once cooked, drain and dry them well. Then, follow the same steps in the Full Recipe for roasting. Dried chickpeas can taste even better when roasted! Adjusting spice is easy! If you want less heat, cut back on the chili powder. You can also skip the smoked paprika if you prefer a milder flavor. For more heat, add extra chili powder or a pinch of cayenne. Taste the mix before roasting. This way, you can make sure it’s just right for you. Enjoy experimenting to find your perfect spice level! In this post, I covered ingredients, instructions, tips, variations, and storage for chickpeas. You have the knowledge to make them crisp, tasty, and healthy. Remember to choose your flavors wisely and avoid common mistakes. Explore spicy versions or herb mixes to keep things fresh. Store leftovers properly and enjoy your snack later. Chickpeas are versatile and easy to make, so have fun with them. In the end, great chickpeas can be yours with a little care and creativity. Enjoy your tasty adventure!

Chili Lime Roasted Chickpeas Crunchy Snack Delight

Looking for a tasty snack that’s simple to make? You’ve come to the right place! My Chili Lime Roasted Chickpeas

- 1 bunch of fresh asparagus, trimmed - 1 cup grated Parmesan cheese - 1/2 cup breadcrumbs (preferably panko for extra crunch) - 3 cloves garlic, minced - 1 teaspoon garlic powder - 1/2 teaspoon salt - 1/4 teaspoon black pepper - 2 large eggs, beaten - 2 tablespoons olive oil - 1 tablespoon fresh parsley, chopped (for garnish) These ingredients come together to create a tasty dish. Fresh asparagus gives the fries their nice crunch. Grated Parmesan adds a rich, cheesy flavor. I love using panko breadcrumbs for that extra crunch. Minced garlic brings in a lovely aroma and flavor. The eggs help the coating stick to the asparagus. Olive oil adds a nice crispiness when baking. A sprinkle of parsley gives it a fresh touch. - Calories per serving: Approximately 200 calories - Macronutrient breakdown: - Protein: 10g - Fat: 12g - Carbs: 15g This dish is not just tasty; it also packs some nutrients. Asparagus is high in fiber and vitamins A, C, and K. Parmesan cheese adds calcium and protein, while the olive oil provides healthy fats. Enjoy these fries as a snack or side dish that supports your health goals. For the full recipe, check out the complete guide to Garlic Parmesan Asparagus Fries. 1. Preheat your oven to 425°F (220°C). This high heat helps make the fries crispy. 2. Prepare your baking sheet by lining it with parchment paper. This keeps the fries from sticking. 3. Mix the breadcrumb coating in a shallow bowl. Combine breadcrumbs, grated Parmesan, minced garlic, garlic powder, salt, and black pepper. Make sure everything mixes well. 1. Dip each asparagus spear into the beaten eggs. Let any extra egg drip off. This step helps the coating stick. 2. Roll the asparagus in the breadcrumb mixture. Make sure each spear is fully coated. Place the coated asparagus on your prepared baking sheet. 1. Bake the asparagus in your preheated oven for about 15-20 minutes. The asparagus should be tender, and the coating should turn golden brown. 2. Check for doneness by looking for a crispy, golden color. If they look good, they are ready! Remove them from the oven. These steps will lead you to delicious Garlic Parmesan Asparagus Fries, a true crunchy delight. Check the Full Recipe for more details! To get those perfect fries, use panko breadcrumbs. They give a nice, crunchy texture. Regular breadcrumbs don’t have the same bite. Panko is light and airy, which helps your fries crisp up well. Drizzling olive oil over the asparagus is also key. It helps the coating turn golden and adds flavor. Just a little drizzle will do wonders. For dipping, try marinara or garlic aioli. Both pair well with garlic Parmesan asparagus fries. They add a tasty twist to each bite. You can also garnish with fresh parsley for color. This makes your dish look even more inviting. Serve it all on a long platter for a fun presentation. Make sure each asparagus spear is evenly coated. This helps every bite taste great. If the coating is uneven, some pieces may not get crispy. Baking times vary if you use thicker or thinner asparagus. Thinner spears cook faster, so keep an eye on them. Aim for 15 to 20 minutes in the oven. Check for a golden brown color to know they are done. You can find the full recipe in the previous section. {{image_2}} You can easily change the flavor of your garlic Parmesan asparagus fries. Here are some ideas: - Adding spices: Try adding paprika for a smoky taste or Italian seasoning for herbiness. A sprinkle of cayenne can also give it a nice kick. - Cheese alternatives: You can swap Parmesan with Romano cheese for a sharper flavor. Both cheeses melt well and add that tasty cheesy crunch. If you have dietary needs, there are simple swaps you can make: - Gluten-free options for breadcrumbs: Use gluten-free breadcrumbs or ground almonds. Both work well and keep the crunch. - Vegan substitutions for eggs and cheese: Use a flaxseed mixture instead of eggs. For cheese, nutritional yeast gives a cheesy flavor without dairy. Sometimes you want to make more or less of this dish. Here’s how to adjust: - Adjusting the recipe: If you need more servings, simply double the ingredients. If you need less, halve the amounts. - Ingredient ratios: For each pound of asparagus, use about 1 cup of breadcrumbs and 1/2 cup of cheese. This keeps the coating balanced and tasty. For the full recipe, check the original section on ingredients and instructions. To keep your garlic Parmesan asparagus fries fresh, use airtight containers. Glass containers work well, but plastic ones are fine too. Make sure to let the fries cool down before placing them in the container. Store in the fridge for up to three days. This way, they stay crispy and tasty. When reheating, you want to keep that crunch. The best way is to use an oven. Preheat it to 350°F (175°C). Place the fries on a baking sheet and heat for about 10 minutes. This restores their crunchiness. If you must use a microwave, place the fries on a plate. Heat in short bursts of 30 seconds. However, they may become soft. So, the oven is your best friend for reheating. You can freeze cooked asparagus fries, but they may lose some crunch. To freeze, let them cool completely. Place them in a single layer on a baking sheet. Freeze them for about an hour. Then, transfer to a freezer bag. This prevents them from sticking together. To thaw, move them to the fridge overnight. Reheat in the oven as described above for the best results. Enjoy your garlic Parmesan asparagus fries any time! For the full recipe, check out the earlier section. Can I make these ahead of time? Yes, you can prepare these asparagus fries in advance. You can coat them and place them on the baking sheet. Cover them with plastic wrap and store them in the fridge. Bake them just before serving. What can I substitute for Parmesan cheese? You can try different cheeses like Pecorino Romano or nutritional yeast for a vegan option. Both will give a nice flavor, but the texture might change slightly. How long do these take to cook? These fries take about 15 to 20 minutes to cook. Bake them at 425°F (220°C) until golden brown and crispy. What should I do if they aren’t crispy? If they aren't crispy, check your oven temperature. You may need to bake them a bit longer. Also, ensure you used enough olive oil. It helps them crisp up. Are asparagus fries healthy? Yes, asparagus fries are a healthy snack. They are lower in calories than regular fries and packed with vitamins. Asparagus is high in fiber and nutrients. Can I use other vegetables in this recipe? Absolutely! You can use zucchini, carrots, or even eggplant. Just cut them into fry shapes. Adjust cooking time as needed for different veggies. For the complete recipe, check the Full Recipe section. In this blog post, I covered how to make crispy baked asparagus fries. I shared ingredients, nutritional info, and step-by-step instructions. You learned tips for perfect crispiness and variations for more flavor. I also included storage information and FAQs to help. Asparagus fries can be a tasty and healthy snack. With these tips, you can enjoy them any time. Get creative with your flavors and enjoy your cooking!

Garlic Parmesan Asparagus Fries Crunchy Delight Recipe

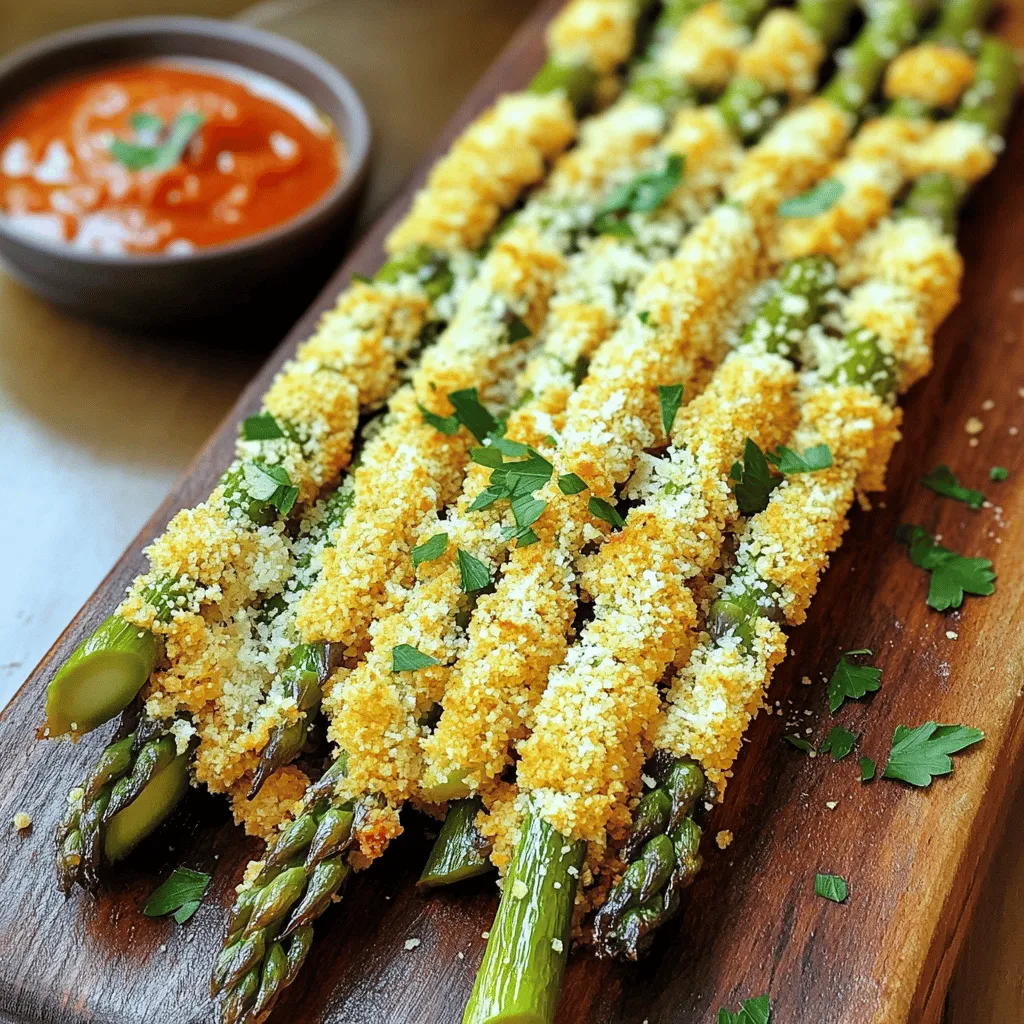
If you love crunchy snacks, you need to try my Garlic Parmesan Asparagus Fries! This easy recipe combines fresh asparagus

- 1 lb Brussels sprouts, trimmed and halved - 2 tablespoons olive oil - 1 teaspoon garlic powder - 1 teaspoon onion powder - 1 teaspoon smoked paprika - ½ teaspoon salt - ¼ teaspoon black pepper - 2 tablespoons balsamic glaze (for drizzling) - Fresh parsley, chopped (for garnish) Crispy Air Fryer Brussels sprouts are simple to make. First, gather the main ingredients. You need fresh Brussels sprouts, olive oil, and some tasty seasonings. The seasoning mix includes garlic powder, onion powder, smoked paprika, salt, and black pepper. The olive oil helps the seasoning stick. It also makes the sprouts crispy in the air fryer. For garnishes, you can drizzle balsamic glaze over the sprouts. It adds a sweet touch. Fresh parsley gives a nice color and taste. You can find the full recipe with all the steps to make this dish easily. Enjoy your cooking! - Preheat your air fryer to 375°F (190°C) for about 5 minutes. - In a large bowl, combine the halved Brussels sprouts and olive oil. - Add garlic powder, onion powder, smoked paprika, salt, and pepper. Toss until evenly coated. - Place Brussels sprouts in a single layer in the air fryer basket. - Air fry for 15-18 minutes, shaking the basket halfway through. This method gives you crispy Brussels sprouts every time. Don't forget to check the Full Recipe for more tips! To get the best crispy Brussels sprouts, avoid overcrowding the air fryer basket. If you pack them too tightly, they will steam instead of crisping up. You want each sprout to have room to breathe. Remember to shake the basket halfway through cooking. This helps them cook evenly and maximizes that crunch. Want to boost the flavor? Try adding a squeeze of lemon juice right before serving. This gives a fresh pop to each bite. You can also experiment with spices. A sprinkle of cayenne pepper adds a nice heat. Get creative! Mix different spices to find your favorite combo. Presentation matters! Serve your crispy Brussels sprouts on a decorative platter. Drizzle them with balsamic glaze to make them shine. A little flair goes a long way. For a finishing touch, garnish with finely chopped parsley. This adds a bright color contrast that looks great on the plate. For the complete method, check the Full Recipe. {{image_2}} If you don’t have an air fryer, you can still enjoy crispy Brussels sprouts. Oven-roasting is a great alternative. Preheat your oven to 425°F (220°C). Toss your halved Brussels sprouts with olive oil and seasoning just like in the air fryer recipe. Spread them on a baking sheet in a single layer. Roast for about 20-25 minutes, flipping halfway through. This method gives you a nice crunch too. Another option is sautéing on the stovetop. Heat a skillet over medium heat and add olive oil. Once hot, toss in the Brussels sprouts and seasonings. Cook for about 10-15 minutes, stirring often until they are golden and crispy. This method brings a lovely, rich flavor from the pan. Want to add some extra flavor? Try adding Parmesan cheese! Grate some cheese and sprinkle it over the Brussels sprouts in the last few minutes of cooking. The cheese melts and adds a creamy, salty touch that pairs well with the crispy texture. You can also incorporate nuts, like almonds or walnuts. Chop them into small pieces and toss them in with the sprouts before cooking. The nuts add a delightful crunch and a nutty flavor that complements the sprouts nicely. Adjusting the seasonings can give your Brussels sprouts a festive twist. For example, adding a pinch of cinnamon can bring warmth and spice for Thanksgiving. You might also try nutmeg or allspice for a holiday flavor boost. Using seasonal vegetables is another fun variation. You can mix in some diced squash or carrots to your air fryer. These veggies cook well with Brussels sprouts and add color and nutrition to your dish. This way, you can enjoy different flavors all year round. For the full recipe, be sure to check out the complete steps above! Store leftovers in an airtight container in the refrigerator for up to 3 days. This way, you keep the sprouts fresh. Make sure to let them cool down before sealing. Reheat in the air fryer at 350°F (175°C) for 5-7 minutes to regain crispiness. This method keeps them crunchy and warm. Avoid using the microwave if you want to keep that crispy texture. Freezing is not recommended for cooked Brussels sprouts due to texture changes. They tend to become mushy when thawed. It's best to enjoy them fresh or store them in the fridge for a short time. For the full recipe, check out the Crispy Air Fryer Brussels Sprouts section. Generally, 15-18 minutes at 375°F (190°C) for crispy results. This timing helps the sprouts get golden brown and crunchy. I like to check them halfway through. Give the basket a shake for even cooking. You’ll love the results! Yes, but fresh Brussels sprouts yield a better texture. Frozen ones can cook unevenly. If you use them, adjust the cooking time. They might need a few extra minutes. Fresh sprouts have that delightful crispness that makes this dish shine. These Brussels sprouts pair well with grilled meats, fish, or as a side for pasta dishes. They add a nice crunch to your meal. You can also toss them in salads or enjoy them as a snack. They are versatile and tasty! In this article, we covered how to make crispy air fryer Brussels sprouts using just a few key ingredients. You learned the main ingredients needed and the step-by-step process to prepare and cook them. We also explored tips for achieving the best texture, various cooking methods, and how to store leftovers. Overall, these Brussels sprouts offer a tasty and easy side dish option. Enjoy experimenting with different spices and garnishes to make this dish your own!

Crispy Air Fryer Brussels Sprouts Quick and Easy Recipe

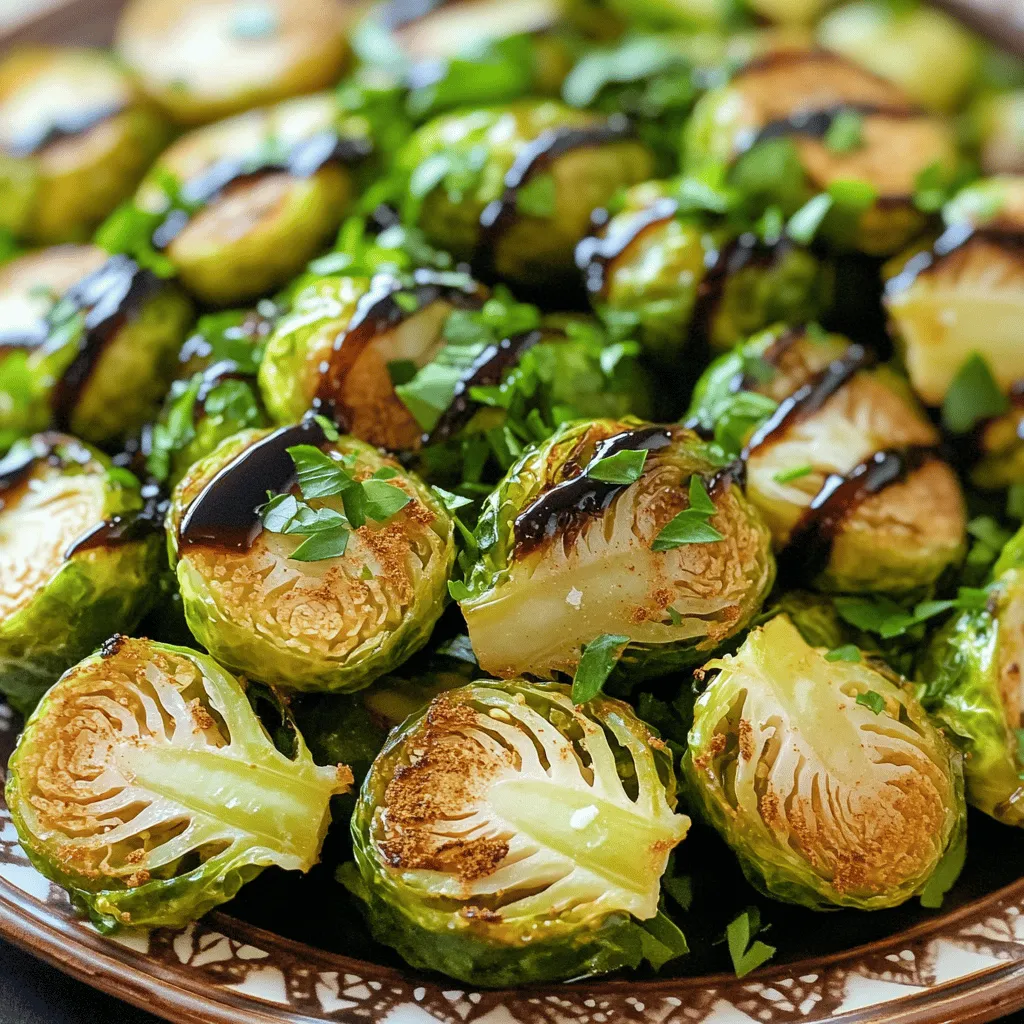
Are you ready to transform your Brussels sprouts into a crispy, flavorful masterpiece? In just a few simple steps, you

- 1 can (15 oz) chickpeas, drained and rinsed - 1 large cucumber, diced - 1 cup cherry tomatoes, halved - 1 red bell pepper, diced - 1 small red onion, finely chopped - 1/4 cup fresh parsley, chopped - 1/4 cup feta cheese, crumbled (optional) - Juice of 2 lemons - 3 tablespoons olive oil - 1 teaspoon Dijon mustard - 1 teaspoon honey (or maple syrup for vegan option) - Salt and pepper to taste - Additional parsley for garnish - Lemon wedges for serving You can use canned chickpeas to save time. Just drain and rinse them well. They add great protein to the salad. The cucumber gives a nice crunch and fresh taste. Cherry tomatoes add a burst of flavor and color. Red bell pepper brings sweetness, while red onion adds a slight bite. Parsley brightens the dish and adds a fresh touch. If you like cheese, feta can make it creamier. The dressing is simple and bright. Lemon juice gives the salad that zesty kick. Olive oil adds richness, while Dijon mustard gives depth. Honey balances the acidity, and salt and pepper bring all the flavors together. For a colorful and tasty meal, try this salad. It’s quick to make and easy to enjoy. Check out the Full Recipe for more details. Start by grabbing a large mixing bowl. In this bowl, combine the chickpeas, cucumber, cherry tomatoes, red bell pepper, red onion, and parsley. Make sure to mix them well. This base gives the salad its fresh crunch and vibrant colors. In a smaller bowl, whisk together the lemon juice, olive oil, Dijon mustard, honey, salt, and pepper. Mix it until everything is well combined. This dressing adds a zesty kick to the salad. The balance of tart lemon and sweet honey makes it special. Pour the dressing over the salad mixture. Toss gently to coat all the ingredients evenly. This step is crucial. You want every bite to be full of flavor. If you like cheese, sprinkle feta on top. Give it a light toss again. Taste the salad and adjust the seasoning. You might want to add more lemon juice, salt, or pepper. This helps you get the perfect flavor. Cover the salad with plastic wrap or a lid. Place it in the fridge for at least 30 minutes. This chilling time lets the flavors meld together. Trust me, this step makes a big difference! For the full recipe, check out the instructions above. To make the flavors pop, you can adjust the lemon juice. If you like it tangy, add more juice. For a milder taste, use less. Seasoning is key, so try different salts or pepper types. A pinch of cumin or smoked paprika can add depth. Always taste as you go; this helps you find the right balance. You can serve the salad in a large bowl for gatherings. This makes it easy for guests to help themselves. For a more elegant touch, try individual servings. Use small bowls or plates, and drizzle olive oil on top for a fresh look. Add a sprig of parsley or a lemon wedge for color. Letting the salad sit in the fridge is important. I suggest chilling it for at least 30 minutes. This allows the flavors to blend well. If you can, let it marinate longer for an even tastier dish. Just remember to cover it tightly to keep it fresh. For the best result, enjoy it within two days after making it. For the full recipe, check out the Zesty Lemon Chickpea Salad. {{image_2}} You can switch out some veggies in this salad. Try using bell peppers or carrots instead of red onion. They add crunch and taste. You could also use zucchini for a fresh twist. If you want something sweet, try corn. Each swap brings new joy to the dish. Making this salad vegan is simple. Just skip the feta cheese and use maple syrup instead of honey. For a gluten-free option, this salad is already good to go! All the ingredients are gluten-free, so enjoy without worry. You can make this dish fit anyone’s needs. Adding spices or herbs can change the flavor. For heat, sprinkle in some red pepper flakes. If you like fresh herbs, add basil or cilantro. You can also try a splash of balsamic vinegar for a tangy twist. Each option makes your salad unique and exciting. For the full recipe, check out the [Full Recipe]. You can keep your Zesty Lemon Chickpea Salad in the fridge for about three days. Make sure to store it in an airtight container. This helps keep the salad fresh and tasty. I find that the flavors blend well when it sits, but it does lose crunch over time. Freezing this salad is not the best idea. The veggies can become mushy when thawed. If you want to save time, consider freezing the dressing separately. You can mix it in when you make the salad fresh again. If you really want to freeze it, make sure to leave out the cucumbers and tomatoes. They do not freeze well. To refresh your salad, you can add a splash of lemon juice or olive oil. This brightens the flavors and makes it taste fresh again. If you made it ahead of time, let it sit at room temp for a few minutes. This helps the flavors come back to life. For a crunchy bite, add fresh cucumber and tomatoes just before serving. For the full recipe, refer to the complete guide provided. Yes, you can use canned chickpeas. They save time and effort. Just make sure to drain and rinse them well. This helps remove excess salt and any canning liquid. Using canned chickpeas makes this recipe quick and easy, perfect for busy days. You can store this salad in the fridge for up to three days. Keep it in an airtight container for best results. The flavors will blend better as it sits. However, if you add feta cheese, eat it sooner. The cheese may not stay fresh for long. Absolutely! This salad is great for meal prep. You can make it ahead and pack it for lunch. Just keep the dressing separate until you're ready to eat. This helps keep the salad crisp and fresh. Enjoy it throughout the week for a healthy meal! For the complete recipe, check out the Full Recipe section above. This salad combines fresh veggies and chickpeas for a healthy dish. We covered the main ingredients, dressing, and how to prepare it in a few easy steps. I also shared tips for flavor and storage. This could be a great meal prep option. Enjoy this vibrant salad as a side or light meal, and feel free to mix in your favorite veggies or herbs. Eating healthy can be simple and tasty!

Zesty Lemon Chickpea Salad Fresh and Flavorful Dish

Looking for a fresh and flavorful dish that’s easy to whip up? Meet my Zesty Lemon Chickpea Salad! Packed with

- 2 large eggplants, sliced lengthwise into 1/4-inch thick slices - 1 cup ricotta cheese - 1 cup grated mozzarella cheese, plus extra for topping - 1/2 cup grated Parmesan cheese - 1 egg - 2 cups marinara sauce - 1 teaspoon dried oregano - 1 teaspoon garlic powder - Salt and pepper to taste - Fresh basil leaves for garnish - 2 tablespoons olive oil Choosing the right eggplants Look for firm, shiny eggplants. They should feel heavy for their size. Avoid any that have soft spots or wrinkles. Fresh eggplants will have a bright color and green stems. Best cheese options for flavor and texture For a creamy filling, use quality ricotta. Mozzarella gives a lovely melt. Parmesan adds a nice salty kick. You can mix in different cheeses, like Fontina or Gouda, for more depth. - Baking dish - Baking sheet - Mixing bowl - Knife and cutting board These tools make prep easy and fun. A good knife helps slice your eggplants evenly. A baking dish holds your rollatini snugly, ensuring every bite is full of flavor. First, you need to preheat your oven to 375°F (190°C). This helps the eggplant cook evenly. Next, take your sliced eggplants and lay them on a baking sheet. Brush both sides with olive oil. Don’t forget to sprinkle them with salt and pepper. Bake the slices for about 20 minutes. Flip them halfway through. They should be tender and a bit caramelized when done. While the eggplant is baking, it’s time to make the cheese filling. Grab a mixing bowl and combine the ricotta cheese, mozzarella cheese, and Parmesan cheese. Add in one egg, dried oregano, and garlic powder. Season with salt and pepper. Mix everything well until it looks creamy and smooth. Once your eggplant slices have cooled a bit, you can start assembling. Spread a thin layer of marinara sauce on the bottom of your baking dish. Take an eggplant slice and place about 2 tablespoons of cheese filling at one end. Roll the slice tightly around the filling, then place it seam-side down in the dish. Repeat this step for each slice until all are filled and rolled. Now, pour the remaining marinara sauce over the rollatini. Sprinkle extra mozzarella cheese on top for that gooey finish. Cover the dish with aluminum foil and bake for 25 minutes. After that, remove the foil and bake for an additional 10 minutes. This final step makes the cheese on top bubbly and golden. Once baked, let the dish cool for a few minutes before serving. To make rolling eggplant slices easier, start by slicing them thin. Thin slices bend better! Bake them just right. This softens the eggplant and makes it flexible. Brush each slice with olive oil and sprinkle with salt. This adds flavor and helps them roll smoothly. When you fill them, use just enough cheese filling. Too much makes rolling hard. To boost the flavor, add extra herbs and spices. Fresh basil pairs well with eggplant. Try adding thyme or rosemary for a fragrant touch. You can also mix in red pepper flakes for a bit of heat. A pinch of nutmeg in the cheese filling brings warmth. Experimenting with flavors makes each rollatini unique and exciting! One common mistake is over-mixing the filling. This can make it too watery. Mix until just combined to keep a nice texture. Another mistake is undercooking the eggplant. Ensure your slices are tender before rolling. If they are tough, your rollatini will be hard to eat. Following these tips will lead to perfect eggplant rollatini every time! {{image_2}} You can make a meat lovers version by adding ground meat. Ground beef, turkey, or sausage works well. Cook the meat in a pan until it's browned. Then, mix it with your cheese filling. This adds a hearty touch to each roll. It’s a great way to satisfy those who love meat. For a vegan twist, replace dairy cheese with plant-based options. Use almond or cashew cheese as good substitutes. You can also make your own nut cheese. Combine soaked nuts with nutritional yeast and spices. This keeps the dish creamy and rich without any dairy. Vegan Eggplant Rollatini is just as tasty! Incorporate greens by adding spinach to the cheese filling. Sauté fresh spinach until it wilts, then mix it in. This boosts the nutrition and flavor. You can also add other greens like kale or Swiss chard. They add color and extra vitamins. This variation makes your meal more wholesome! For the full recipe, check out the [Full Recipe] section. After you make Eggplant Rollatini, you might have some left. To store it, use an airtight container. Glass containers work best as they keep the food fresh. Make sure to cool the rollatini first. This prevents steam from making it soggy. You can keep it in the fridge for up to three days. If you want to save some for later, freezing is a great option. First, let the rollatini cool completely. Next, wrap each piece in plastic wrap. This helps keep the air out. Then, place the wrapped pieces in a freezer-safe bag or container. You can freeze it for up to three months. When you’re ready to eat, just thaw it overnight in the fridge. When it’s time to enjoy your Eggplant Rollatini again, reheating is key. The best way is to use an oven. Preheat it to 350°F (175°C). Place the rollatini in a baking dish. Cover it with foil to keep it moist. Bake for about 20 minutes. You can also microwave it, but it may get a bit soggy. If you choose this method, heat it in short bursts and check often. Enjoy your tasty leftovers! Eggplant Rollatini pairs well with many side dishes. Here are some great options: - Garlic bread: A crispy, buttery slice goes well. - Side salad: A fresh, mixed greens salad adds crunch. - Roasted vegetables: Carrots, zucchini, and bell peppers bring color and flavor. - Pasta: Serve with a light marinara or olive oil pasta. - Grilled asparagus: This adds a nice touch of green. These sides balance the rich flavors of the rollatini and make your meal complete. Yes, you can make Eggplant Rollatini ahead of time. Here are some tips: - Prepare the eggplant: Slice and roast it a day before. - Make the filling: Mix your cheeses and spices early in the day. - Assemble: Roll the eggplant and place it in the baking dish. Cover with foil and store in the fridge for up to 24 hours. When you're ready to eat, just pop it in the oven. This saves time and makes dinner easier. Watery Eggplant Rollatini can be a common issue. Here’s how to fix it: - Salt the eggplant: Before cooking, sprinkle salt on the slices. Let them sit for 30 minutes. This draws out moisture. - Bake longer: If the rollatini is still watery, bake it a bit longer. This helps evaporate excess liquid. - Use thick sauce: A thicker marinara sauce can help prevent excess moisture. These tips help ensure your rollatini stays delicious and not soggy. For the complete instructions and ingredients, check out the [Full Recipe for Cheesy Eggplant Rollatini](#). In this blog post, we explored the delicious world of Eggplant Rollatini. We covered ingredients, steps, and helpful tips to make this dish perfect. Remember to select fresh eggplants and cheeses for the best taste. You can enjoy variations, like adding meat or going vegan. Proper storage and reheating will keep your leftovers tasty. With this guide, you can confidently craft a wonderful meal. Dive in and enjoy making your Eggplant Rollatini a hit at the table!

Eggplant Rollatini Flavorful and Easy Recipe Guide

If you love vibrant flavors and hearty meals, you’ll adore Eggplant Rollatini. This dish brings together tender eggplant slices wrapped

- 2 large apples (Honeycrisp or Fuji) - 1 teaspoon ground cinnamon - 1 tablespoon sugar (or coconut sugar) - Pinch of salt - 1 teaspoon lemon juice (to prevent browning) Baked cinnamon apple chips are simple to make. You need just a few ingredients. Start with two large apples. I love using Honeycrisp or Fuji for their sweet taste. They give the best flavor and texture. Next, you'll need ground cinnamon. This spice adds warmth and sweetness. A teaspoon is all you need. For sweetness, use one tablespoon of sugar. You can swap this for coconut sugar if you like. It adds a nice twist! Don't forget a pinch of salt. Salt brings out the apple's natural sweetness. If you want to keep your apples from turning brown, add lemon juice. Just a teaspoon does the trick. It keeps the slices looking fresh and bright. Gather these ingredients, and you are ready to start! Check out the Full Recipe for more details on making this crunchy snack. First, preheat your oven to 225°F (110°C). This low heat helps the apples dry out slowly. Line two baking sheets with parchment paper. This step keeps the chips from sticking. Next, wash the apples well under running water. Make sure to remove any dirt. Then, core the apples to get rid of the seeds. Use a sharp knife or a corer for this. Now, slice the apples into thin rounds, about 1/8 inch thick. A mandoline slicer works best for uniform slices. If you want, sprinkle a teaspoon of lemon juice on the slices. This step helps keep them from browning. In a small bowl, mix together one teaspoon of ground cinnamon, one tablespoon of sugar, and a pinch of salt. This mix gives your chips a sweet, warm flavor. Now, take the apple slices and arrange them in a single layer on the baking sheets. Make sure they do not overlap. This spacing is key for even baking. Once arranged, sprinkle the cinnamon-sugar mixture evenly over the apple slices. Cover them well for that perfect flavor. Place the baking sheets in the preheated oven. Bake the apple slices for about 1 to 1.5 hours. It's important to flip the slices halfway through. This ensures they crisp up evenly. Keep an eye on them to prevent burning. You want them to be crisp and slightly golden. Once done, take the apple chips out of the oven. Let them cool on the baking sheets. They will continue to crisp up as they cool. After cooling completely, store them in an airtight container. Enjoy your Baked Cinnamon Apple Chips as a tasty snack! For the full recipe, check out the details above. To make the best baked cinnamon apple chips, slice thickness matters. Aim for 1/8 inch thick slices. Thin slices bake evenly and crisp up nicely. If your slices are too thick, they may not get crunchy. Baking at a low temperature is key. Set your oven to 225°F (110°C). This gentle heat helps the moisture escape. Spread the slices in a single layer on your baking sheets. Overlapping slices will not crisp well. Flip the slices halfway through baking for even crisping. Keep an eye on them to avoid burning. While cinnamon is classic, feel free to mix things up. Try nutmeg for a warm twist. You can also use pumpkin spice for a fall flavor. If you like something fruity, consider adding cardamom or ginger. Experiment with sweet and savory blends too. A pinch of cayenne can add heat. You might also enjoy a dash of cocoa powder for a chocolatey note. For the best results, use a mandoline slicer. This tool makes uniform slices quickly. Even slices cook more evenly and look nicer. A sharp knife works too if you're careful. Choose baking sheets that are sturdy and flat. Heavy-duty sheets prevent warping. Line them with parchment paper for easy cleanup. This also helps the chips crisp up better. {{image_2}} Using different apples can change the taste of your chips. Honeycrisp offers sweetness and crunch, while Fuji gives a juicy bite. You might enjoy Granny Smith for a tart contrast. Each type brings its own flavor. Mixing varieties can create a well-balanced snack. Sweet apples pair well with cinnamon, while tart apples add a zing. You can play with these flavors to find your favorite. You can adjust the sugar to match your taste. If you like it sweeter, add a bit more. If you want less sweetness, cut back on the sugar. You can also try coconut sugar for a different twist. It has a nice caramel-like flavor. For a healthier option, consider using a sugar substitute like stevia or monk fruit. These alternatives can help you enjoy this snack without added calories. Spice up your apple chips by adding nutmeg or allspice. These spices can give a warm, cozy flavor. You can also try vanilla extract for a sweet touch. A little bit goes a long way, so start small. Experimenting with different spices can lead to fun new flavors. Get creative and find what you love best! You can find the full recipe for baked cinnamon apple chips above. To keep your apple chips fresh, use an airtight container. Glass jars work well. You can also use zip-top bags. Make sure to remove as much air as you can. This keeps them crispy. If you live in a humid area, add a small packet of silica gel. This helps absorb moisture and keep your chips from getting soggy. Apple chips can stay fresh for about two weeks. After that, they may lose their crunch. You’ll know they are stale if they feel soft or chewy. If they smell off, it’s best to throw them away. For long-term storage, consider placing them in the freezer. Just remember to thaw them before enjoying. For the full recipe, check the earlier section. Yes, you can use a dehydrator. First, slice the apples just like in the oven method. Lay the apple slices in a single layer on the dehydrator trays. Set the dehydrator to 135°F (57°C). Dry them for about 6 to 8 hours. Check the chips often until they are crisp and dry. This method helps keep the flavors intact while making them crunchy. To stop browning, use lemon juice. Before baking, sprinkle a little lemon juice on the apple slices. This juice slows down the oxidation process. You can also use a mix of water and lemon juice if you want to dip the slices. Other options include using vinegar or a product designed to prevent browning. Yes, Baked Cinnamon Apple Chips are a healthy snack! They have no added preservatives. Apples are rich in fiber and vitamins. The cinnamon adds flavor without extra calories. You can use less sugar or coconut sugar to make them even better for you. This snack is great for kids and adults alike. Enjoy them guilt-free! You learned how to make delicious baked cinnamon apple chips. We covered the main ingredients, step-by-step instructions, and helpful tips. You can choose different apple types and adjust the sweetness as you like. Store your chips properly for the best taste and crunch. In the end, these apple chips are a fun and healthy snack. Enjoy making and sharing them with others!

Baked Cinnamon Apple Chips Simple and Crunchy Snack

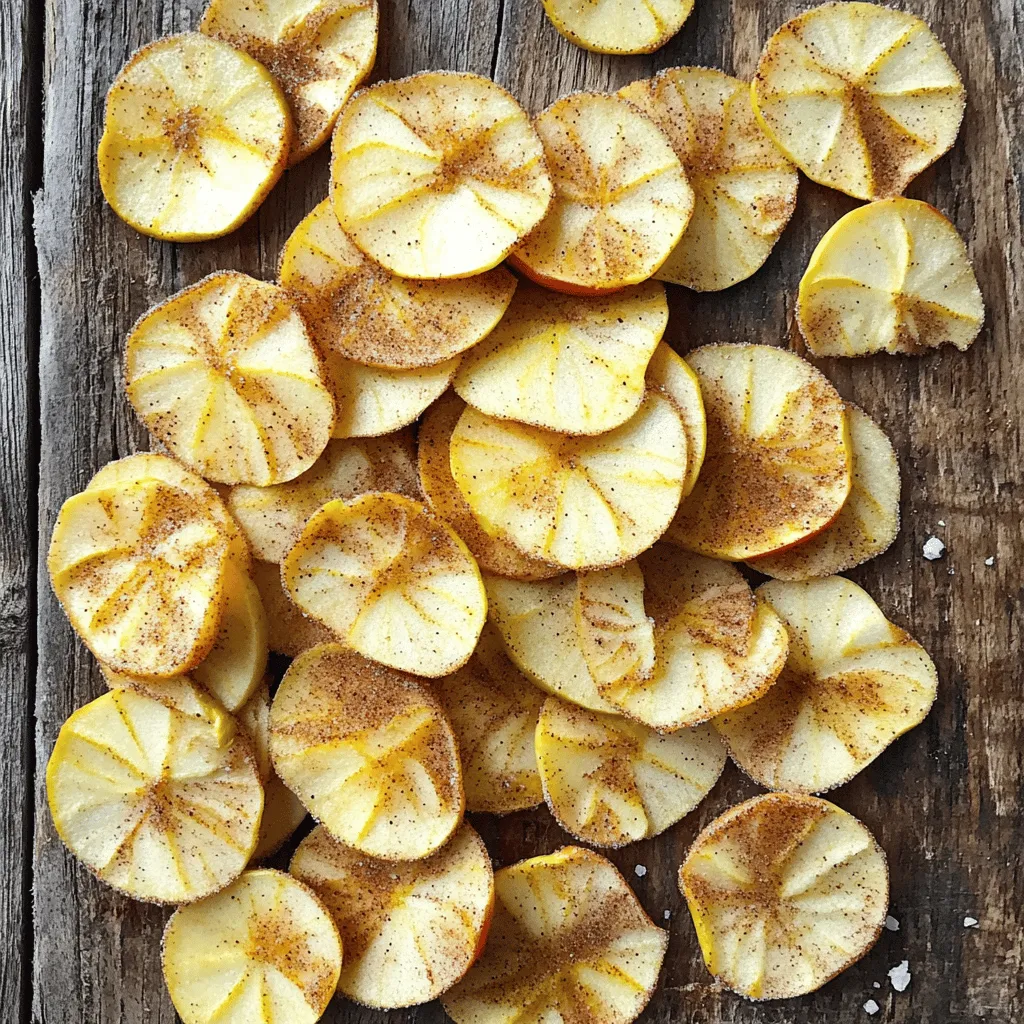
Looking for a crunchy, healthy snack that’s easy to make? Then you’ll love these Baked Cinnamon Apple Chips! With just

To make Taco Stuffed Zucchini Boats, you need fresh and tasty ingredients. Here’s the list you will need: - 4 medium zucchinis - 1 lb ground turkey or beef - 1 can (15 oz) black beans, rinsed and drained - 1 cup corn kernels (fresh or frozen) - 1 small onion, finely chopped - 2 cloves garlic, minced - 1 tablespoon chili powder - 1 teaspoon cumin - 1 teaspoon paprika - Salt and pepper to taste - 1 cup shredded cheddar cheese - 1 cup salsa - Fresh cilantro, chopped (for garnish) - Sour cream (for serving) Each of these items adds flavor and nutrition to your dish. Zucchini is low in calories but high in vitamins. Ground turkey or beef gives protein and heartiness. Black beans add fiber, while corn brings sweetness. The spices like chili powder and cumin wake up the taste. Using fresh cilantro as a garnish adds a pop of color and freshness. Don’t forget the sour cream; it makes every bite creamy and rich. You can find the full recipe for cooking these delicious boats in the next section, where I will guide you step-by-step through the process. - Preheat the oven at 375°F (190°C). - Cut the zucchinis in half lengthwise and scoop out the centers. Start by preheating your oven. This helps cook the zucchini evenly. Next, slice each zucchini in half. Use a spoon to scoop out the soft inside, making a boat shape. Save this flesh for later; it adds flavor to the filling. - Sauté onion and garlic in olive oil. - Brown the ground meat and add zucchini flesh, beans, corn, and spices. Grab a large skillet and heat a drizzle of olive oil over medium heat. Add the finely chopped onion and minced garlic. Stir them until the onion is soft and clear. Next, add your ground turkey or beef. Cook it until it turns brown, breaking it into small pieces. Now, mix in the reserved zucchini flesh, black beans, corn, chili powder, cumin, paprika, salt, and pepper. Cook this mixture for about five minutes. This allows all the flavors to blend nicely. - Fill zucchini shells with the prepared mixture. - Top with salsa and cheese. Take your cooked filling and spoon it into each zucchini shell. Press it down gently to fit more in. Once filled, pour salsa over each boat. Finally, sprinkle a generous layer of shredded cheddar cheese on top. - Cover and bake for 25 minutes, then uncover and bake for another 10 minutes. Place your stuffed zucchini boats in a baking dish. Cover the dish with foil and bake for 25 minutes. After that, remove the foil and bake for another 10 minutes. This makes the cheese melt and turn golden. For the full recipe, refer to the recipe section. Enjoy the delightful flavors of your taco stuffed zucchini boats! To pick the best zucchinis, look for small to medium sizes. They should be firm and smooth. Avoid zucchinis with soft spots or wrinkles. A bright green color signals freshness. If you can, choose organic zucchinis for better taste. Their skin holds many nutrients, so wash them well. To elevate your taco stuffed zucchini boats, try adding spices. A pinch of cayenne pepper adds heat. You can also try smoked paprika for a rich flavor. Fresh lime juice brightens the taste and adds freshness. Toppings like avocado, diced tomatoes, or jalapeños enhance the dish. Don’t forget fresh cilantro for a burst of flavor. For perfectly cooked zucchini, bake at 375°F (190°C). Start with covered baking for moistness, then uncover for browning. Ensure the filling is packed well into the zucchini boats. This helps them hold shape. Watch the cheese closely while it melts. You want it bubbly but not burnt. Let the boats cool a bit before serving; this helps the flavors settle. For the full recipe, check back on the main page. {{image_2}} You can switch the meat in Taco Stuffed Zucchini Boats. Ground turkey or beef works great. If you want a lighter option, try chicken. For a plant-based choice, use tofu or plant-based meat. Just crumble the tofu and cook it like the meat. It absorbs flavors well. You can make any of these changes without losing taste. To make this dish vegetarian-friendly, skip the meat entirely. Use extra black beans for protein. You can add mushrooms for a hearty texture. Make sure to cook the mushrooms until they are soft. This keeps them from being chewy. You can also add more veggies, like bell peppers or spinach. Toppings can take your zucchini boats to the next level. Here are some fun ideas: - Avocado or guacamole for creaminess - Jalapeños for extra heat - Diced tomatoes for freshness - Greek yogurt instead of sour cream - Fresh lime juice for a zesty kick - Crumbled tortilla chips for crunch Feel free to mix and match toppings. This way, you can find your favorite combo. For the full recipe, check out the recipe section above. To keep your Taco Stuffed Zucchini Boats fresh, store them in an airtight container. Place them in the fridge right after cooling. They stay tasty for up to three days. If you want to save them longer, freeze the boats. Wrap each one in plastic wrap and then place them in a freezer bag. They can last for up to three months in the freezer. When you're ready to enjoy leftovers, reheat them in the oven for the best flavor. Preheat your oven to 350°F (175°C). Place the zucchini boats on a baking sheet and cover them with foil. Heat for about 15-20 minutes until warm. You can also use the microwave, but the oven keeps the texture nice. Just heat them for about 2-3 minutes on a microwave-safe plate. These zucchini boats are best eaten fresh, but they can last in the fridge for up to three days. If frozen, they stay good for three months. For the best taste and quality, try to eat them within this time frame. Enjoy your Taco Stuffed Zucchini Boats while they are fresh and full of flavor! For the full recipe, click here. Yes, you can prepare Taco Stuffed Zucchini Boats in advance. Just follow the recipe steps but stop before baking. Cover the filled zucchini boats and store them in the fridge for up to 24 hours. When you are ready to eat, bake them as directed. This saves time during busy weeknights. To keep zucchini boats firm, start by salting the insides. After scooping, sprinkle salt inside and let them sit for 10 minutes. This draws out moisture. Next, pat them dry with paper towels before filling. Also, bake them just until tender, not overcooked. Taco Stuffed Zucchini Boats pair well with many sides. Consider serving them with: - Mexican rice - Refried beans - A fresh green salad - Tortilla chips with salsa - Guacamole These sides add flavor and texture to your meal. To spice up Taco Stuffed Zucchini Boats, add chopped jalapeños or hot sauce to the filling. You can also use spicy salsa instead of regular salsa. Another option is to sprinkle red pepper flakes on top before baking. Adjust the heat to fit your taste! For the full recipe, check out the details above. In this blog post, we explored how to make Taco Stuffed Zucchini Boats. You learned about the fresh ingredients, step-by-step cooking instructions, and tips for success. I shared ways to customize your dish with different proteins and toppings. Remember, the right storage keeps leftovers tasty. Enjoy this healthy meal that is quick and fun to prepare. Zucchini boats are not just easy; they are packed with flavor. Try them out and impress your friends and family!

Taco Stuffed Zucchini Boats Savory and Hearty Dish

Are you tired of the same old taco night? Let’s spice it up with Taco Stuffed Zucchini Boats! This hearty

- 1 lb ground turkey - 1 cup fresh spinach, chopped - 1/2 cup feta cheese, crumbled These main ingredients create a juicy and flavorful burger. Ground turkey is lean and healthy. It keeps the burger moist while providing protein. Fresh spinach adds a touch of color and nutrients. Feta cheese brings a creamy, salty taste that makes each bite special. - 1/4 cup red onion, finely chopped - 2 cloves garlic, minced - 1/4 cup breadcrumbs (preferably whole wheat) Red onion gives a nice crunch and a hint of sweetness. Garlic adds depth and a rich aroma. Breadcrumbs help bind everything together, making the patties easy to handle. They also add a bit of texture to the burgers. - 1 tsp dried oregano - 1 tsp salt - 1/2 tsp black pepper - Whole grain burger buns - Fresh arugula or lettuce, for topping - Sliced tomatoes, for topping Oregano enhances the flavor and gives a hint of earthiness. Salt and black pepper bring out the taste of the other ingredients. Whole grain burger buns add fiber and a nutty flavor. Topping your burger with fresh arugula or lettuce and sliced tomatoes adds freshness and crunch. For the full recipe, check out the Spinach Feta Turkey Burgers section. In a large bowl, combine the ground turkey, chopped spinach, crumbled feta cheese, red onion, minced garlic, breadcrumbs, beaten egg, oregano, salt, and black pepper. Use your hands or a spatula to mix these ingredients. Be careful not to over-mix. Over-mixing can make your burgers tough. You want a nice, well-blended mixture without being mushy. Next, divide the mixture into four equal portions. Shape each portion into a patty about 1-inch thick. This size helps the burgers cook evenly. If you want a burger that fits perfectly on a bun, aim for a width that matches your buns. Press the center of each patty slightly to help them cook evenly. Now it’s time to cook! Preheat your skillet or grill pan over medium heat. Add a drizzle of olive oil to the pan. Once the oil is hot, add the turkey patties. Cook for about 5-6 minutes on one side until they turn golden brown. Flip the patties and cook for another 5-6 minutes. Make sure the internal temperature reaches 165°F (75°C). During the last minute, you can toast your burger buns on the edges of the skillet if you like. Now you're ready to enjoy your homemade spinach feta turkey burgers! For a complete guide, check the Full Recipe. To keep your turkey burgers moist, you must not overcook them. Ground turkey can dry out quickly, so aim for an internal temperature of 165°F (75°C). Use a meat thermometer to check this. If you want extra juiciness, consider adding a little olive oil to the meat mix. For thickness, shape your patties to about 1 inch. This size helps them cook evenly and stay juicy. If you make them too thin, they may dry out. You can choose to cook your burgers on a skillet or a grill. A skillet gives a nice sear and keeps moisture in. Heat the skillet over medium heat and add olive oil. Cook for 5-6 minutes on one side, then flip. If you prefer grilling, heat the grill to medium-high. Grill the patties for about 5-6 minutes on each side. This method adds a smoky flavor. You can also cook the burgers in the oven. Preheat the oven to 400°F (200°C). Place the patties on a baking sheet and cook for about 20 minutes. This method is easy and helps keep the burgers moist. For the best toppings, consider fresh arugula or crisp lettuce. Sliced tomatoes add great flavor and color. You can also add avocado or a dollop of Greek yogurt for creaminess. As for sides, pair your burgers with sweet potato fries or a fresh salad. You can also serve them with grilled veggies to keep the meal light and healthy. For more details, check the Full Recipe for ideas on how to serve these burgers perfectly. {{image_2}} If you want to switch up the flavor, try different cheeses. Goat cheese adds a tangy touch. For a dairy-free option, use a vegan feta made from almonds or tofu. You can also try cottage cheese for a lighter option. When it comes to breadcrumbs, you have choices too. If you need gluten-free, use almond flour or gluten-free breadcrumbs. For added flavor, crushed cornflakes work well. They give a nice crunch to your burger. To make your burgers pop, add spices or herbs. Try a pinch of cumin for warmth. Fresh herbs like dill or parsley can brighten the flavor. They pair nicely with the spinach and feta. You can also mix in different vegetables. Chopped bell peppers or grated zucchini can add moisture and flavor. They keep the turkey burgers juicy and colorful. If you need gluten-free options, skip the breadcrumbs. Just use extra spinach or a bit of ground oats. This keeps the burger tasty and helps bind it. For low-carb diets, wrap your burger in lettuce instead of using a bun. You can also serve it over a salad. If you want a vegan version, swap turkey for a plant-based ground meat. Replace the egg with a flax egg. This is made by mixing flaxseed meal with water. It helps bind the mixture just like an egg. With these variations, you can enjoy Spinach Feta Turkey Burgers in many ways! For the complete recipe, check out the Full Recipe. To store leftover burgers, place them in an airtight container. Keep them in the fridge for up to three days. If you want to save them longer, freeze the patties. Wrap each burger in plastic wrap, then put them in a freezer bag. They can last up to three months in the freezer. When reheating your turkey burgers, the best method is to use a skillet. Heat the skillet over medium heat and add a little olive oil. Place the burger in the skillet and cook for about 4 minutes on each side. This will help keep the burger moist. You can also use the microwave, but be careful. Microwaving can make the burgers dry. You can prepare these burgers in advance for easy meals. Make the turkey mixture and form the patties. Store them in the fridge for up to two days. When you are ready to cook, just heat the skillet and cook them. For quick meals, you can serve the burgers with a salad or some roasted veggies. They are tasty and healthy, making dinner a breeze. If you're looking for the full recipe, check it out [here](#). Cook turkey burgers for about 10 to 12 minutes. Start by cooking them for 5 to 6 minutes on one side. After flipping, cook for another 5 to 6 minutes. Make sure the internal temperature reaches 165°F (75°C). This ensures they are safe and juicy. Using a meat thermometer will help you check the temperature easily. Yes, you can use ground chicken. Both ground turkey and chicken have similar textures and flavors. However, ground chicken may be slightly more moist. Ground turkey has a milder taste, which lets spices shine through better. When you cook, remember that chicken can vary in fat content. This change might affect your burger's juiciness. There are many tasty side dishes that pair well. You can serve them with sweet potato fries for a healthier option. A fresh salad with mixed greens and a light dressing complements the flavors. You might also enjoy grilled vegetables or a quinoa salad. All these options add color and nutrition to your meal. For the full recipe, check out the complete cooking instructions. Spinach feta turkey burgers are flavorful and easy to make. This guide covered key ingredients like ground turkey, fresh spinach, and feta cheese. You learned how to form, cook, and store the burgers. Tips for perfection and variations added fun to the process. Tailor the recipe to your tastes or needs. Enjoy these burgers with your favorite sides and toppings. With practice, you'll impress everyone at your next meal!

Spinach Feta Turkey Burgers Tasty and Healthy Meal

Looking for a tasty and healthy meal? Try these Spinach Feta Turkey Burgers! Packed with fresh spinach, savory feta, and

- 1 lb baby carrots or medium carrots - 2 tablespoons honey - 3 cloves garlic, minced - 2 tablespoons olive oil - 1 tablespoon balsamic vinegar - Salt and pepper to taste - Fresh thyme or parsley for garnish (optional) To create this dish, start with fresh carrots. You can use baby carrots or medium carrots cut into sticks. The honey adds sweetness, while garlic brings a nice punch. Olive oil helps the carrots roast well. Balsamic vinegar gives a tangy flavor, balancing the sweetness. Salt and pepper are key to enhance all the tastes. Don't skip the fresh herbs if you want to impress! - Additional herbs (rosemary or oregano) - Chili flakes for heat - Lemon juice for acidity If you want to get fancy, try adding fresh herbs like rosemary or oregano. They boost the flavor even more. For those who like some spice, chili flakes work great. A splash of lemon juice can add a nice zing. These optional ingredients can make your dish unique and even more delicious. For the full recipe, check out the instructions! - Preheat oven to 400°F (200°C). - Wash the carrots well. If using medium carrots, peel and cut them into sticks. - In a large bowl, combine: - 2 tablespoons honey - 3 cloves garlic, minced - 2 tablespoons olive oil - 1 tablespoon balsamic vinegar - Salt and pepper to taste - Whisk these ingredients until they blend well. - Toss the carrots in the honey-garlic mixture. Make sure they get coated all over. - Spread the carrots on a baking sheet in one layer. Roast them for 20-25 minutes. - Stir the carrots halfway through. This helps them cook evenly. - For the full recipe, check the details above. To get the best honey garlic roasted carrots, space is key. Avoid overcrowding the baking sheet. This lets the hot air move freely and gives you crisp edges. Use parchment paper on the sheet. It makes cleanup a breeze. You won’t have to scrub hard later! Try adjusting the seasoning to fit your taste. If you like it spicier, add chili flakes. For a tangy twist, some lemon juice works wonders. Don’t forget to play with cooking times. Larger carrots may need a bit more time. Smaller ones may cook faster. Keep an eye on them for perfect results. A great dish looks as good as it tastes. You can garnish your carrots with fresh thyme or parsley. This adds color and flavor. For serving, pair the carrots with roasted chicken or grilled fish. They balance each other well. You can also add them to a salad for some crunch and sweetness. For the full recipe, feel free to check the instructions above! {{image_2}} You can make honey garlic roasted carrots vegan by using maple syrup instead of honey. Maple syrup gives a sweet flavor and works well with garlic. For gluten-free options, check your balsamic vinegar. Most are gluten-free, but always read labels. You can also replace soy sauce with tamari, which is gluten-free. Try different sweeteners for a new taste. Agave nectar and brown sugar both work great. They add a unique twist to the dish. You can also add spices like cumin or paprika. These spices can enhance the flavor and add warmth. Feel free to swap carrots for other seasonal veggies. Sweet potatoes or parsnips can be fantastic choices. They roast nicely and soak up the honey garlic sauce too. For spring, consider using radishes or turnips. Their fresh taste will brighten any meal. To keep your honey garlic roasted carrots fresh, store them in an airtight container. Place them in the fridge. They will last up to four days. Avoid stacking them too high to prevent bruising. If you see any moisture inside the container, use a paper towel to absorb it. This helps keep the carrots crisp. When it’s time to reheat, the best way is in the oven. Preheat your oven to 350°F (175°C). Spread the carrots on a baking sheet. Heat them for about 10-15 minutes. This keeps them tender and tasty. You can also use leftovers in other dishes. Try adding them to salads for a sweet crunch. They work great in grain bowls or mixed into stir-fries. With these tips, you can enjoy your honey garlic roasted carrots even after the first meal. For the full recipe, check out the Honey Garlic Roasted Carrots section. Yes, you can use frozen carrots. First, thaw them in the fridge overnight. You can also run them under warm water for quicker thawing. After thawing, pat them dry with a towel. This helps the honey-garlic mix stick. Roasting time may be a bit longer, so check for tenderness after 25 minutes. You can store honey garlic roasted carrots in the fridge. They last about 3 to 5 days in an airtight container. If you want to keep them longer, consider freezing them. They will last up to 3 months in the freezer. Just remember to reheat them gently to keep the flavor. These carrots pair well with many dishes. Serve them with grilled chicken or fish for a complete meal. They also go great with quinoa or rice. For a vegetarian option, try them with a chickpea salad. They add a sweet touch to any plate. Check out the Full Recipe for more ideas! Honey garlic roasted carrots are easy to make and tasty. You learned about the key ingredients, from fresh carrots to honey and garlic. I shared steps for perfect roasting and tips for flavor boosts. You can even tweak the recipe for different diets or seasonal veggies. Store and reheat leftovers wisely to enjoy later. These carrots make a great side for any meal. Try them today, and enjoy their sweet and savory flavor!

Honey Garlic Roasted Carrots Flavorful and Simple Dish

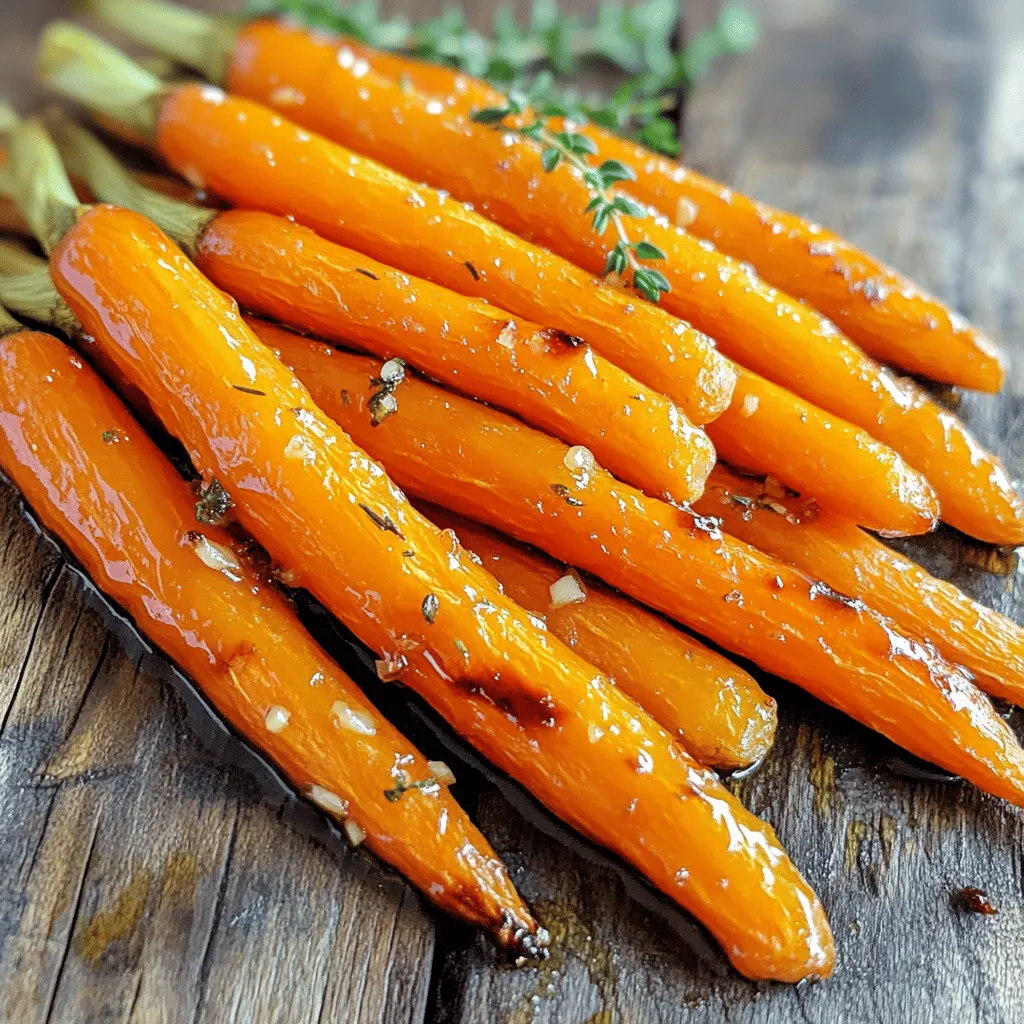
Looking to elevate your dinner game with a simple yet flavorful side dish? Honey Garlic Roasted Carrots are your answer!

- 1 cup quinoa, rinsed - 2 cups vegetable broth - 1 large head of broccoli, cut into florets - 1 cup sharp cheddar cheese, grated - 1/2 cup cream cheese, softened - 1/2 cup milk (dairy or any plant-based alternative) - 1/2 teaspoon garlic powder - 1/2 teaspoon onion powder - 1/4 teaspoon black pepper - 1/4 teaspoon salt (adjust to taste) - 1/4 cup breadcrumbs (for topping) - 2 tablespoons olive oil Gathering these ingredients is the first step to making a tasty broccoli cheddar quinoa casserole. Quinoa serves as a great base. It’s full of protein and cooks quickly. Broccoli adds a nice crunch and color. The sharp cheddar cheese melts beautifully, bringing a rich flavor. Cream cheese adds creaminess, while milk helps bind everything together. For seasonings, garlic and onion powder give it a savory kick. Adjusting the salt lets you control the flavor. Finally, the breadcrumb topping adds a crispy layer, which contrasts nicely with the creamy filling. You can find the full recipe for this dish in the complete article. Have fun collecting your ingredients, and let’s get ready to cook! - Preheat your oven to 375°F (190°C). - Bring the vegetable broth to a boil and add the rinsed quinoa. - Cover the pot and reduce the heat to a simmer. - Cook for about 15 minutes until all the liquid is absorbed. - Remove from heat and fluff with a fork. - Steam the broccoli florets until tender, about 4-5 minutes. - Drain and set the broccoli aside to cool. - Combine the cooked quinoa and steamed broccoli in a large bowl. - Add the cheeses, milk, garlic powder, onion powder, black pepper, and salt. - Stir until all ingredients are well mixed. - Transfer the mixture into a greased casserole dish. Spread it evenly. - In a small bowl, mix the breadcrumbs with olive oil until coated. - Sprinkle the breadcrumb mixture evenly over the top of the casserole. - Bake in the preheated oven for 25-30 minutes until golden and bubbly. Every step brings you closer to a warm, cheesy dish. Follow these steps, and you will create a delightful meal. For the complete details, check out the Full Recipe. To make your casserole creamy, I suggest using a mix of different cheeses. Sharp cheddar gives a nice bite, while cream cheese adds richness. Mixing in some mozzarella can also help you get that gooey texture you crave. Don't be afraid to experiment with flavors! To get the best bake, cover your casserole with foil for the first 15 minutes. This keeps the top from burning and helps the dish cook evenly. After 15 minutes, take off the foil. This will allow the top to crisp up nicely, giving you that perfect golden finish. I love to serve this casserole with a side salad or some crusty bread. A fresh salad brightens the meal and adds crunch. Crusty bread is perfect for scooping up all that cheesy goodness. These sides make the meal feel complete and satisfying. {{image_2}} You can easily boost the protein in your casserole. Add cooked chicken for a hearty touch. Shredded rotisserie chicken works well. You can also mix in chickpeas, which are great for a plant-based option. They add texture and nutrition without altering the flavor too much. If you want a vegan twist, swap the cheese for nutritional yeast. This ingredient gives a cheesy flavor without dairy. Use a plant-based milk like almond or oat milk instead of regular milk. These changes keep the dish creamy and delicious while being completely vegan. Feel free to change up the veggies. Instead of broccoli, try spinach or kale. They cook quickly and blend well with quinoa. You can also use a mix of your favorite vegetables. Carrots, bell peppers, or even peas can add color and flavor to your casserole. Each option makes this dish fun and unique. For the full recipe, check out the Cheesy Broccoli Quinoa Delight. Store leftover casserole in an airtight container in the fridge for up to 3 days. This keeps it fresh and tasty for quick meals later. Just scoop a portion out when you need it. Freeze in a sealed container for up to 2 months. This is great for meal prep. When you are ready to eat, just reheat thoroughly before serving. It’s a simple way to enjoy a hearty dish anytime. Bake in a preheated oven or microwave until warmed through. If using the oven, set it to 350°F (175°C) for best results. This method keeps the top nice and crisp. Enjoy your delicious broccoli cheddar quinoa casserole, warmed to perfection! For the full recipe, check out the Cheesy Broccoli Quinoa Delight. Yes, frozen broccoli can be used; just adjust cooking time accordingly. Frozen broccoli tends to cook faster, so check it often. You want it tender but not mushy. This makes it a great option for a quick meal. Substitute breadcrumbs with gluten-free options or omit them entirely. You can use crushed gluten-free crackers or cornflakes for a crunchy topping. This keeps the dish tasty and safe for those who need gluten-free meals. Yes, prepare the casserole and refrigerate it before baking. This is great for busy days. Just remember to let it sit at room temperature for about 30 minutes before baking. This helps it cook evenly and saves you time. Garnish with fresh herbs like parsley or chives for added flavor and presentation. This simple touch makes the dish look nice and enhances its taste. You can also serve it with a side salad or some crusty bread for a full meal. This quinoa casserole is easy and tasty. You learned about the key ingredients, helpful tips, and fun variations. Remember, you can change up the veggies and proteins to fit your taste. Store leftovers well for quick meals later. I encourage you to try this dish, and share with friends! Cooking can be fun and rewarding. Enjoy every bite.

Broccoli Cheddar Quinoa Casserole Quick and Hearty Meal

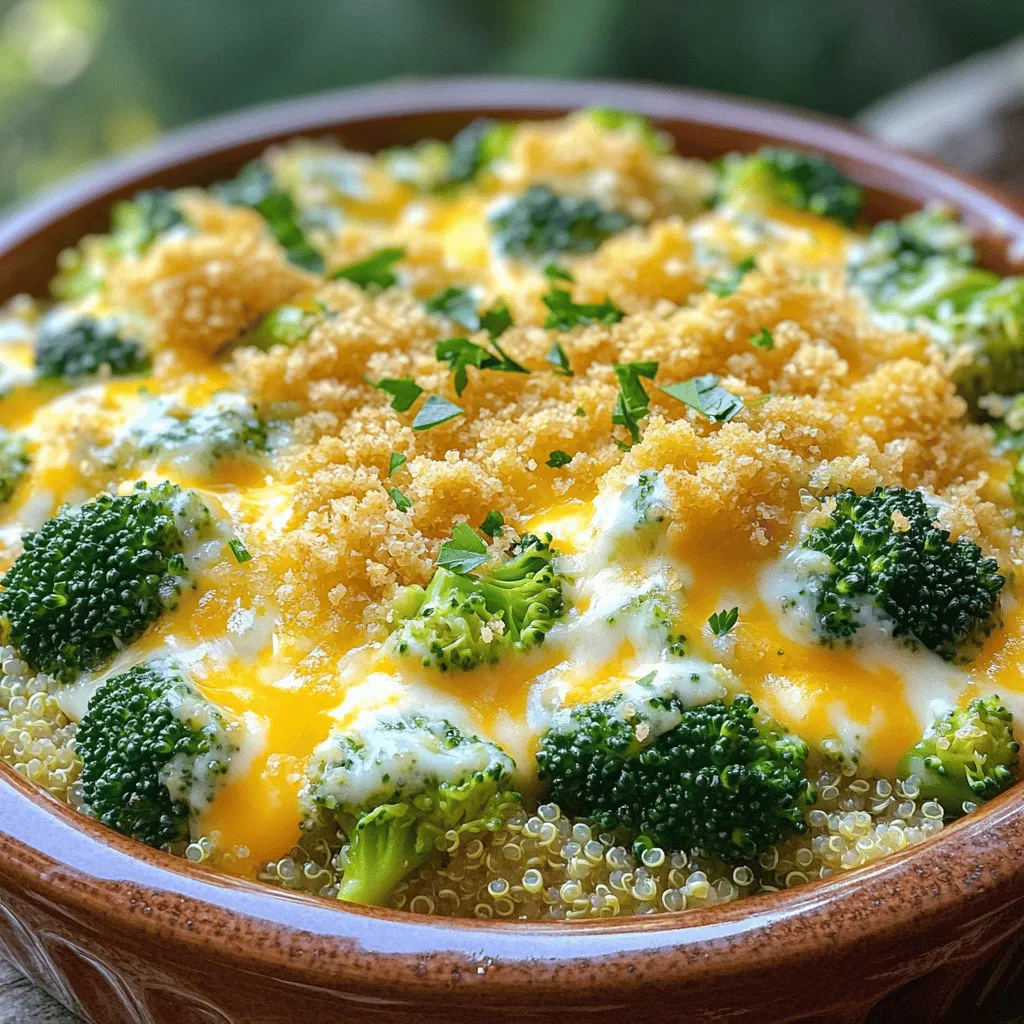
Craving a quick and hearty meal that’s packed with flavor? Look no further! This Broccoli Cheddar Quinoa Casserole combines wholesome

Older posts
Newer posts
← Previous Page1 … Page46 Page47 Page48 … Page107 Next →
© 2025 My Cooking Cast • Built with GeneratePress

Our Policies

  • Privacy Policy
  • GDPR Policy
  • Terms Of Use
  • Copyright Policy
  • Cookie Policy
  • Disclaimer

More Information​

  • Home
  • Contact
  • About
  • Dinner
  • Appetizers
  • Dessert
©2025, My Cooking Cast About Privacy Policy Back To Top