Skip to content
DisclaimerTerms Of UseGDPR PolicyCookie Policy

My Cooking Cast

  • Home
  • Drinks
  • Appetizers
  • Dinner
  • Dessert
  • About
  • Contact
  • Privacy Policy
DisclaimerTerms Of UseGDPR PolicyCookie Policy

Emma

- 1 cup all-purpose flour - 2 tablespoons sugar - 1 tablespoon baking powder - 1/2 teaspoon salt - 1 cup milk - 1 large egg - 2 tablespoons melted butter - 1 teaspoon vanilla extract - 1/4 cup brown sugar - 1 tablespoon ground cinnamon - 2 tablespoons melted butter - 4 oz cream cheese, softened - 1 cup powdered sugar - 2 tablespoons milk - 1/2 teaspoon vanilla extract To make the viral cinnamon roll pancakes, gather these key ingredients. The main ingredients create a fluffy base. You will need flour, sugar, baking powder, salt, milk, egg, melted butter, and vanilla extract. Next, for the cinnamon swirl, mix brown sugar, ground cinnamon, and melted butter. This mix gives your pancakes that sweet, warm flavor. Finally, for the cream cheese glaze, soften cream cheese. Combine it with powdered sugar, milk, and vanilla extract. This glaze adds a rich, sweet finish. For the full recipe, see the recipe section. Enjoy these pancakes with family or friends! First, mix 1/4 cup brown sugar, 1 tablespoon cinnamon, and 2 tablespoons melted butter in a small bowl. Blend until you create a thick paste. This mixture adds a sweet, rich flavor. Set it aside to thicken. It will swirl beautifully into your pancakes. In a large mixing bowl, combine 1 cup all-purpose flour, 2 tablespoons sugar, 1 tablespoon baking powder, and 1/2 teaspoon salt. In another bowl, whisk together 1 cup milk, 1 large egg, 2 tablespoons melted butter, and 1 teaspoon vanilla extract. Pour the wet ingredients into the dry mix. Gently stir until just combined. Do not overmix; a few lumps are okay. Preheat a non-stick skillet or griddle over medium heat. Lightly grease it with butter or cooking spray to keep pancakes from sticking. Pour 1/4 cup of pancake batter onto the skillet for each pancake. Before the batter sets, use a small spoon to swirl in the cinnamon mixture. This creates that iconic cinnamon roll look. Cook for 2-3 minutes. Look for bubbles on the surface and edges that look set. Flip the pancakes carefully and cook for another 1-2 minutes until golden brown. Enjoy the sweet aroma wafting through your kitchen as you cook! For the complete recipe, check out the Full Recipe. To get fluffy pancakes, avoid overmixing the batter. Stir gently until the wet and dry ingredients just combine. If you see lumps, that's okay! Lumps help keep pancakes soft. Also, use room temperature ingredients. This helps the batter mix evenly and rise better. Use a ladle for pouring the batter. This gives you even-sized pancakes. If the pan gets too hot, adjust the heat. You want a medium heat to cook them well without burning. Keep an eye on the pancakes; bubbles will form when they are ready to flip. Stack your pancakes high and drizzle them with cream cheese glaze. For an extra touch, sprinkle some cinnamon on top or add fresh fruit like bananas or berries. These add flavor and make your plate look great! Enjoy the sweet treat! For complete instructions, check the Full Recipe. {{image_2}} You can make your pancakes even more fun. Try adding chocolate chips or nuts to the batter. These will give a nice crunch and flavor. You can also experiment with different extracts like almond. A splash of almond extract adds a unique twist. Just remember, a little goes a long way! Want a healthier option? Substitute whole wheat flour for all-purpose flour. This switch adds fiber and nutrients. You can also use Greek yogurt instead of cream cheese in the glaze. This swap cuts calories while keeping it creamy and tasty. If you follow a gluten-free diet, don't worry! Gluten-free flour options are available. They work just as well in this recipe. For those who need dairy-free options, look for substitutes for cream cheese. There are great vegan cream cheese brands that taste amazing. With these adjustments, everyone can enjoy these pancakes! To keep your leftover pancakes fresh, store them in an airtight container. Make sure they cool first. When you want to enjoy them again, reheat in the microwave or toaster oven. This will bring back their warm, soft texture. If you want to save pancakes for later, freeze them. Place them in single layers, separated by parchment paper. This helps to prevent sticking. After that, store them in a freezer-safe bag for up to 2 months. You can enjoy a sweet treat whenever you want! To thaw frozen pancakes, put them in the fridge overnight. This makes them easy to reheat. If you’re in a hurry, you can reheat them directly from frozen. Just give them a quick blast in the microwave. They will taste almost like fresh! To make pancakes fluffier, focus on your mixing method. Here are some tips: - Use room temperature ingredients: This helps the batter mix better and traps more air. - Don’t overmix: Mix until wet and dry ingredients just combine. Lumps are okay! - Separate egg whites: Whip the egg whites and fold them into the batter last. This adds extra air. These steps help create that light, fluffy texture you want in a pancake. Yes! You can swap out the cream cheese glaze for many tasty options. Here are some ideas: - Maple syrup: A classic choice that pairs well with cinnamon. - Nut butter: Almond or peanut butter adds a nutty twist. - Chocolate sauce: For a sweet, decadent touch. - Yogurt: A tangy yogurt drizzle can balance the sweetness. Feel free to get creative with your glaze! You can add many toppings to enhance your pancakes. Here are some suggestions: - Fresh fruits: Berries, bananas, or apples add freshness. - Whipped cream: A dollop of whipped cream adds creaminess. - Nuts: Chopped pecans or walnuts give a nice crunch. - Extra cinnamon: A sprinkle of cinnamon can boost flavor. Mix and match to find your favorite combo! You now know how to make delicious viral cinnamon roll pancakes from scratch. We covered the key ingredients, step-by-step instructions, and useful tips to get the best texture. Remember to experiment with variations to personalize your pancakes. Storing leftovers is easy, and reheating them keeps them tasty. Whether you enjoy them plain or dressed with glaze, these pancakes are sure to impress. Try them out, and enjoy a delightful breakfast treat anytime!

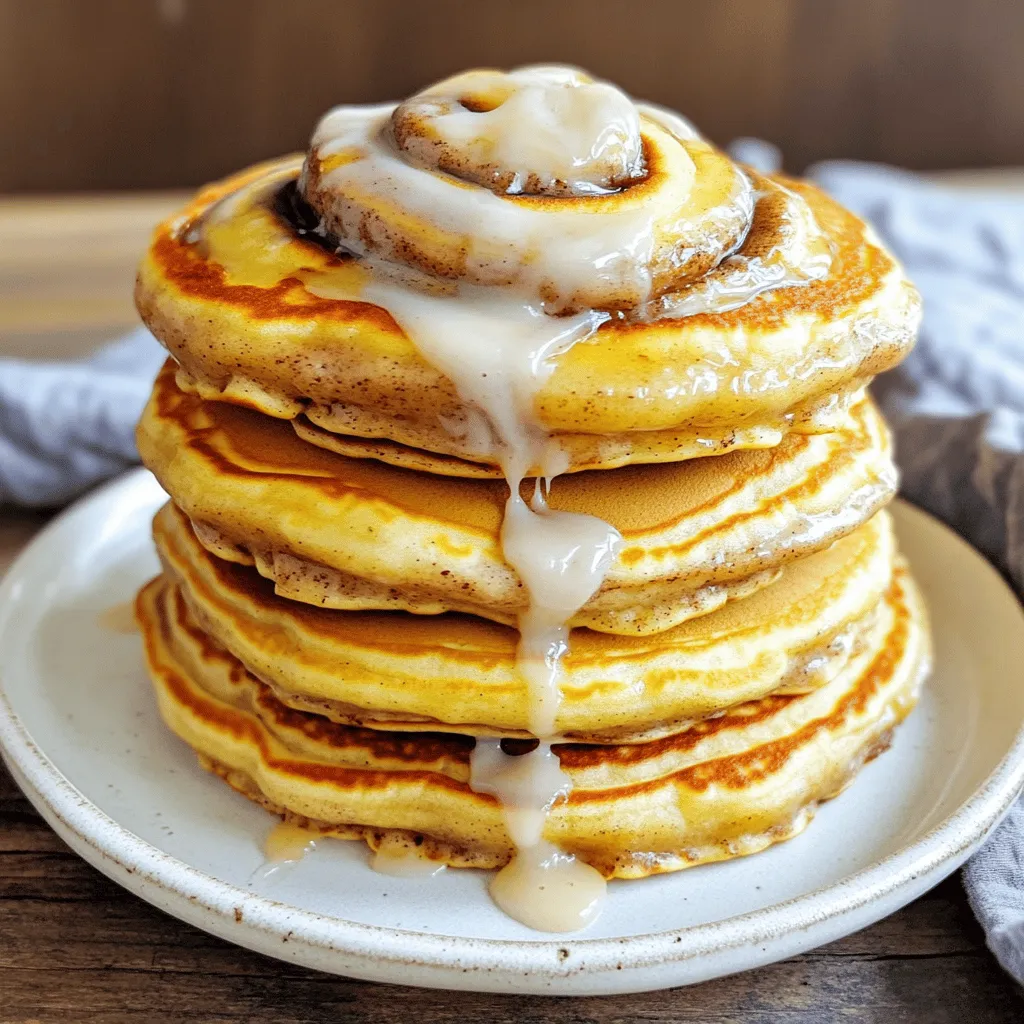
Viral Cinnamon Roll Pancakes Indulge in a Sweet Treat

Want to treat yourself to something sweet and exciting? These Viral Cinnamon Roll Pancakes are the perfect blend of fluffy

- 4 bone-in, skin-on chicken thighs - 1 lb baby potatoes, halved - 1 red onion, quartered - 4 cloves garlic, minced - 2 teaspoons dried oregano - 1 teaspoon dried thyme - 1 lemon, zested and juiced - 1/4 cup olive oil - Salt and pepper to taste - Fresh parsley, chopped for garnish - Feta cheese, crumbled for topping (optional) For this one-pan Greek chicken and potatoes recipe, you need a few simple items. First, the chicken thighs are key. They have skin that gets crispy, and they stay juicy. Next, baby potatoes add a nice, hearty touch. Halving them helps them cook evenly. You'll also need some fresh veggies. A red onion brings sweetness, while garlic adds great flavor. The seasonings are vital too. Dried oregano and thyme create that classic Greek taste. Lemon juice and zest give brightness to the dish. Don't forget salt and pepper. They help bring out all the flavors. For garnish, fresh parsley adds color, and feta cheese adds creaminess. You can skip the cheese if you prefer a lighter meal. This recipe is easy and delicious. You can find the full recipe above for detailed cooking steps. - Preheat your oven to 425°F (220°C). - In a small bowl, mix together olive oil, lemon juice, lemon zest, garlic, oregano, thyme, salt, and pepper. This is your marinade. - In a big bowl, add the halved baby potatoes and quartered red onion. Pour half of the marinade over them. Toss well to coat. - In another bowl, take your chicken thighs and add the rest of the marinade. Coat the chicken well. - Grab a large oven-safe skillet. Place the marinated potatoes and onions at the bottom. Lay the marinated chicken thighs on top. - Bake in the preheated oven for 40-45 minutes. The chicken should be golden brown and cooked through, while the potatoes become tender. - For an extra crispy skin, broil the dish for 3-5 minutes at the end. Keep an eye on it! - Once done, remove from the oven. Sprinkle with fresh parsley and crumbled feta cheese if you like. This One-Pan Greek Chicken and Potatoes dish is easy and full of flavor. For the full recipe, check the earlier section. Enjoy your meal! To ensure your chicken stays juicy and tender, you want to avoid overcooking. Use a meat thermometer to check the chicken's internal temperature. It should reach 165°F (74°C) for safe eating. The bone-in, skin-on thighs help keep the meat moist. The skin adds flavor and protects the chicken during cooking. For crispy skin, broil the chicken for a few minutes at the end. This step gives a nice crunch. Make sure the oven is hot enough before you start broiling. If you want even more crunch, dry the skin with paper towels before you season it. This helps get rid of excess moisture. Serving directly from the skillet makes the dish look inviting. It keeps the meal warm and makes for easy cleanup. Use a large spoon to scoop out portions. You can also place a colorful cloth under the skillet for a nice touch. Garnishing can elevate your dish. Fresh parsley adds a bright green color and fresh flavor. Crumbled feta cheese gives a creamy texture and salty taste. Lemon wedges on the side brighten the dish and allow guests to add more lemon flavor as they like. {{image_2}} You can change the protein in this dish. Try using chicken breast instead of thighs for a leaner option. If you want a vegetarian meal, use hearty vegetables like zucchini or eggplant. These will soak up the yummy flavors too. You can also switch up the seasonings. Instead of oregano, try rosemary or basil for a fresh twist. A bit of smoked paprika can add a nice kick. You can also use lemon pepper for a zesty flavor boost. Pair this dish with a crisp Greek salad. The fresh veggies and tangy dressing balance the rich chicken and potatoes well. You can also serve it with warm pita bread for a filling meal. For dietary needs, you can make this meal gluten-free by ensuring all ingredients are certified gluten-free. If you need a dairy-free option, simply skip the feta cheese. This dish is flexible to fit your needs. For the full recipe, check out the One-Pan Greek Chicken and Potatoes. To store your leftovers, let the dish cool down. Place the chicken and potatoes in an airtight container. This helps keep them fresh. You can store them in the fridge for about three days. Make sure to eat them within this time for safe consumption. To reheat, the best method is to use the oven. Preheat the oven to 350°F (175°C). Place the chicken and potatoes in an oven-safe dish. Cover it with foil to keep the moisture in. Heat for about 20 minutes or until warm. You can also use a microwave, but it may make the skin less crisp. If you want to keep the flavor and texture, add a splash of olive oil before heating. Enjoy your One-Pan Greek Chicken and Potatoes again! Can I use boneless chicken for this recipe? Yes, you can use boneless chicken. It cooks faster than bone-in. Adjust the cooking time to about 30-35 minutes. Check for a golden color to ensure it's cooked well. What can I substitute for olive oil? If you need a substitute for olive oil, try avocado oil or melted butter. Both give good flavor and work well with the chicken and potatoes. How do I ensure my potatoes cook through? To make sure your potatoes cook through, cut them into small, equal pieces. Halving baby potatoes helps them cook evenly. Place them at the bottom of the skillet. This way, they soak up all the flavors. What temperature should chicken be cooked to for safe consumption? Chicken should reach an internal temperature of 165°F (74°C). Use a meat thermometer to check. This ensures it is safe to eat and juicy. This blog post covered a simple recipe for chicken thighs and potatoes. You learned about key ingredients, preparation steps, and cooking methods that yield delicious results. I shared tips for juicy chicken and crispy skin, plus ways to present the dish beautifully. You can swap ingredients for variety and store leftovers correctly. Remember, cooking should be fun and rewarding. With these tips, you can make a meal that tastes great and impresses everyone. Enjoy your cooking adventure ahead!

One-Pan Greek Chicken and Potatoes Easy Weeknight Meal

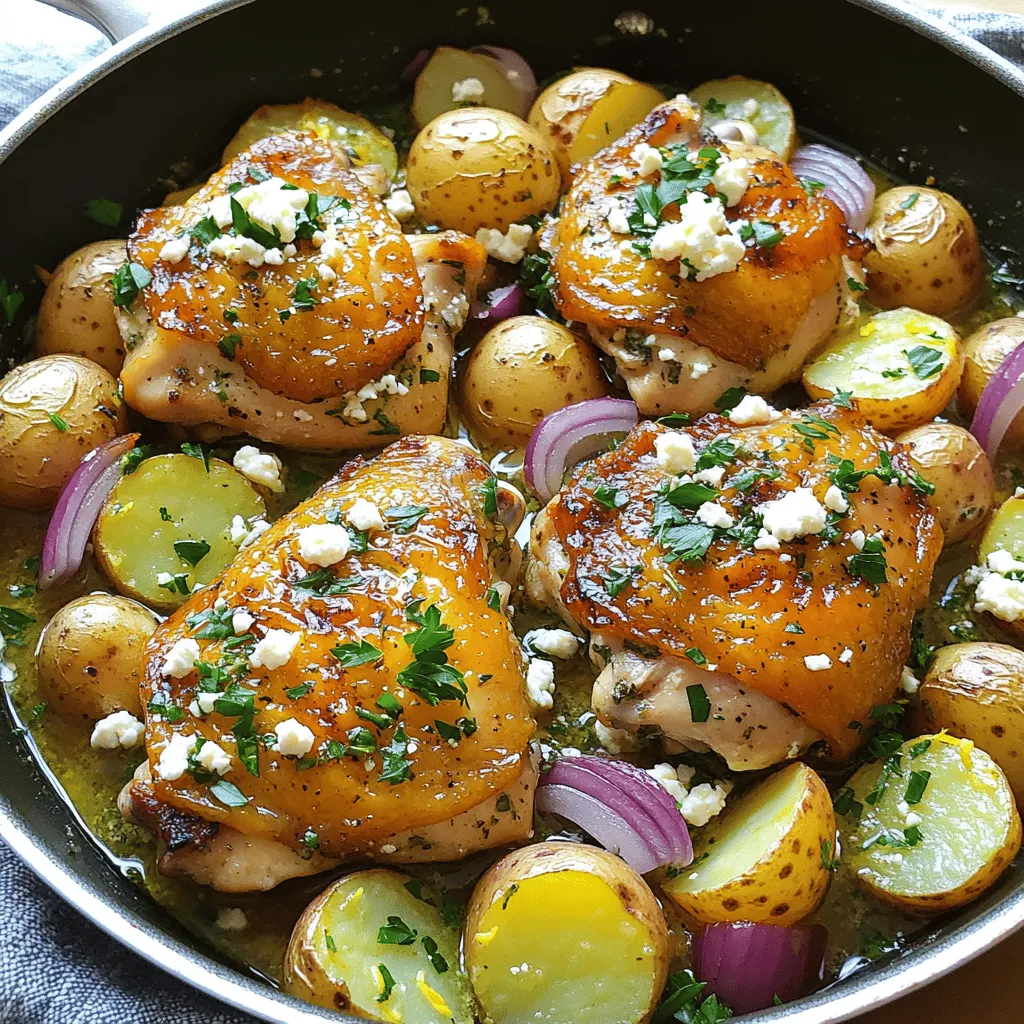
Looking for a quick and tasty meal? You’ll love this One-Pan Greek Chicken and Potatoes recipe. It’s easy to make,

- 20 jumbo pasta shells - 2 cups cooked chicken, shredded - 1 cup ricotta cheese - 1 cup mozzarella cheese, shredded - 1/2 cup grated Parmesan cheese - 2 cups Alfredo sauce (store-bought or homemade) - 1 teaspoon garlic powder - 1 teaspoon Italian seasoning - Salt and pepper to taste - Fresh parsley, chopped (for garnish) You can swap cooked chicken for cooked turkey or even diced mushrooms. For cheese, try goat cheese or feta for a twist. If you want to make homemade Alfredo sauce, use butter, heavy cream, and Parmesan cheese. This can be richer and fresher than store-bought. Measuring ingredients correctly is key. It ensures your dish turns out great. Use dry measuring cups for solids like cheese and flour. For sticky ingredients like ricotta, use a wet measuring cup. Spray it lightly with cooking oil before adding the cheese. This makes it easier to pour out. Always level off the top for accuracy. This small step can make a big difference in your cooking! 1. Preheating the oven Start by preheating your oven to 350°F (175°C). This step is key for even cooking. 2. Cooking the pasta shells Cook the jumbo pasta shells according to the package instructions. Aim for al dente, which means firm but not hard. Drain the shells and let them cool slightly. This helps with safe handling later. 1. Mixing the filling In a mixing bowl, combine the cooked chicken, ricotta cheese, half of the mozzarella cheese, grated Parmesan cheese, garlic powder, Italian seasoning, salt, and pepper. Mix well. This blend gives each shell a creamy and rich flavor. 2. Stuffing the shells technique Use a spoon to fill each cooked shell with about two tablespoons of the chicken mixture. Place the filled shells in the baking dish seam side up. This technique helps keep the filling inside while baking. 1. Layering the ingredients Spread one cup of Alfredo sauce on the bottom of a 9x13 inch baking dish. Arrange the stuffed shells in the dish. Then, pour the remaining Alfredo sauce over the shells, making sure they are well coated. This step ensures every bite is creamy and flavorful. 2. Baking times and temperature Cover the dish with aluminum foil and bake for 25 minutes. After that, remove the foil and bake for an additional 10-15 minutes. You want the cheese on top to be bubbly and golden brown. This will create a delicious crust that everyone loves. Now you are ready to enjoy your Chicken Alfredo Stuffed Shells! For the complete recipe, refer to the [Full Recipe]. To avoid overcooking the shells, watch them closely while boiling. Cook them just until al dente, which means they should still have a bit of firmness. This helps them hold their shape when stuffed. After cooking, rinse the shells in cold water. This stops the cooking process and makes them easier to handle. To ensure even filling distribution, use a tablespoon to scoop the filling. Place about two tablespoons of your mixture in each shell. This way, every shell gets a good amount of that creamy, cheesy goodness. It's key for great flavor in every bite. For great sides, serve your Chicken Alfredo Stuffed Shells with garlic bread. The bread soaks up the creamy sauce and adds a nice crunch. A fresh side salad is also a perfect match. Try a simple Caesar or mixed greens with a light dressing. These sides keep the meal light and fresh. To make your dish look special, use fresh parsley as a garnish. A sprinkle of parsley adds color and a fresh touch. You can also use a drizzle of extra Alfredo sauce on the plate for flair. For serving dishes, a large, shallow platter works best. This allows everyone to easily take their share. You can also use individual ramekins for a fun twist. Each person gets their own serving, making it extra special. For the full recipe, check out the detailed steps and ingredient list. {{image_2}} You can make Chicken Alfredo stuffed shells more exciting by adding vegetables. Spinach, zucchini, or mushrooms work well in the filling. Chop them small and mix them in with your chicken and cheese. This adds flavor and color, making the dish more nutritious. If you want to switch up the protein, consider using shredded rotisserie chicken or even turkey. You can also try using cooked sausage for a heartier taste. Each option gives the dish a different twist while keeping it delicious. While Alfredo sauce is a classic choice, you can explore other sauces. A creamy tomato sauce can give a fresh flavor. You could even try a pesto sauce for a fun twist. Each sauce will change the taste, so feel free to experiment. If you want a lighter meal, make a lighter version of Alfredo. Use low-fat milk or a cauliflower-based sauce. This keeps the dish creamy but cuts down on calories. You still get that rich flavor without all the heaviness. For gluten-free options, use gluten-free pasta shells. They cook similarly to regular shells. Just make sure to check the package for cooking times. This way, everyone can enjoy this tasty meal. If you need dairy-free adaptations, use dairy-free cheese and a plant-based Alfredo sauce. There are many great options available today. This way, you can cater to different dietary needs without losing flavor. For the full recipe, check the details above. Enjoy making these tasty variations! To keep your Chicken Alfredo Stuffed Shells fresh, store them in an airtight container. This helps keep moisture in and prevents drying out. Allow the shells to cool down before placing them in the fridge. They can last up to three days in the refrigerator. If you want them to last longer, consider freezing them. To freeze stuffed shells, first, let them cool completely. Then, place them in a single layer in a freezer-safe dish. You can also wrap them tightly in plastic wrap and then foil to avoid freezer burn. They can stay good in the freezer for up to three months. When you’re ready to eat them, thaw the shells overnight in the fridge. Once thawed, reheat them in the oven at 350°F (175°C) until warmed through. You can prepare Chicken Alfredo Stuffed Shells ahead of time. This saves you time on busy nights. Cook the shells and fill them with the chicken mixture. Then, cover them and place them in the fridge. You can bake them later, right before dinner. For even more time-saving tips, consider making the filling a day in advance. This way, you have a quick meal ready to go! To warm up Chicken Alfredo Stuffed Shells, preheat your oven to 350°F (175°C). Place the shells in an oven-safe dish. Cover them with foil to keep moisture in. Bake for about 20-25 minutes until hot. You can also use a microwave. Heat on medium power in a microwave-safe dish for about 2-3 minutes. Check to see if they are warm throughout. Yes, you can make Chicken Alfredo Stuffed Shells ahead of time. Prepare them in advance and store them in the fridge. Just cover the dish tightly with foil or plastic wrap. You can bake them the next day or even a few days later. Just remember to add a few extra minutes to the baking time if they are cold from the fridge. To prevent your stuffed shells from drying out, make sure to coat them well with Alfredo sauce. Cover the baking dish with foil while baking. This keeps steam in and helps keep the shells moist. You can also add a bit of chicken broth or extra sauce to the dish if you notice they are getting dry. Chicken Alfredo Stuffed Shells pair well with many sides. Consider a simple green salad with a light dressing. Garlic bread is also a great choice for crunch. Roasted vegetables or steamed broccoli add color and nutrition to your meal. For a light touch, fresh fruit can be a refreshing end. In this post, we covered how to make Chicken Alfredo Stuffed Shells. We discussed the key ingredients, smart substitutions, and precise measuring tips. You learned the step-by-step process, from preparation to baking. Plus, we shared cooking tips, serving ideas, and variations to suit your taste. Remember, these shells are easy to store and reheat. Whether you're a busy cook or an enthusiastic chef, this dish is versatile and fun to make. Enjoy creating your own versions!

Chicken Alfredo Stuffed Shells Flavorful Dinner Recipe

Get ready to elevate your dinner game with Chicken Alfredo Stuffed Shells! This flavorful dish combines jumbo pasta shells with

- 2 cups black beans, rinsed and drained - 1 cup corn kernels (fresh or frozen) - 1 bell pepper, diced (any color) - 1 small zucchini, diced - 1 small red onion, finely chopped - 2 cloves garlic, minced - 1 teaspoon ground cumin - 1 teaspoon smoked paprika - 1 tablespoon olive oil - 12 corn tortillas - 2 cups enchilada sauce (store-bought or homemade) - 1 ½ cups shredded Mexican cheese blend (or dairy-free cheese) - Fresh cilantro, for garnish - Avocado slices, for serving (optional) - Sour cream or Greek yogurt, for serving (optional) The key ingredients in this vegetarian enchilada casserole offer a burst of flavor. Black beans provide protein and fiber. Corn adds sweetness and texture. Bell pepper and zucchini bring freshness. Red onion and garlic add depth. Cumin and smoked paprika deliver warmth and spice. Corn tortillas form the base, while cheese binds the layers. For substitutions, you can swap black beans for pinto beans. Try any seasonal veggies in place of zucchini or bell pepper. Use a different cheese blend or omit it for a vegan option. Feel free to adjust the spices for your taste. - Fresh cilantro for garnish - Avocado slices for a creamy touch (optional) - Sour cream or Greek yogurt for tanginess (optional) Garnishes add flair and flavor. Fresh cilantro adds a bright note. Avocado slices provide creaminess that complements the dish. Sour cream or Greek yogurt can cool the spice and enrich each bite. For sides, consider a simple green salad or tortilla chips with salsa. They pair well with the casserole and add crunch. - Start by washing and chopping your veggies. Dice one bell pepper, one small zucchini, and chop one small red onion finely. - Mince two cloves of garlic. - Rinse and drain two cups of black beans. - If using fresh corn, cut it off the cob. Otherwise, use one cup of frozen corn. - Preheat your oven to 375°F (190°C). - Grease your 9x13 inch baking dish lightly to prevent sticking. - Begin with a thin layer of enchilada sauce at the bottom of your dish. - Place three corn tortillas over the sauce, overlapping them slightly. - Spread half of the veggie and bean mix on top of the tortillas. - Sprinkle one-third of the shredded cheese over the veggie mix. - Repeat these layers: sauce, tortillas, veggie mix, and cheese until all ingredients are used. - Finish with a layer of tortillas on top before pouring the remaining sauce over it. - Top with the last of the cheese for a gooey finish. - Cover your casserole with aluminum foil. - Bake in the preheated oven for 20 minutes. - After 20 minutes, remove the foil. Bake for another 10-15 minutes. The cheese should be bubbly and golden. - Once done, let the casserole cool for a few minutes before slicing it. - Garnish with fresh cilantro and serve with avocado slices or a dollop of sour cream if you like. - For the full recipe, check the complete instructions provided above. To make your vegetarian enchilada casserole pop, use fresh herbs. Cilantro and oregano are excellent choices. They bring a bright taste that lifts the whole dish. For spices, add ground cumin and smoked paprika. These add warmth and depth. I often use homemade enchilada sauce. It tastes fresher and allows me to control the heat. However, store-bought sauces work well too. Just look for low-sodium options for a healthier choice. You can bake this casserole in a traditional oven or use alternative methods. If you want a quicker option, try a slow cooker. Just layer the ingredients and cook on low for four hours. You can also prepare it on the stovetop. Start by cooking the veggies and beans in a large skillet. Then, layer them in a baking dish with tortillas and sauce. This method saves time and minimizes cleanup. For serving, cut the casserole into neat squares. Arrange them on a colorful plate for a vibrant look. Garnish with fresh cilantro for a pop of color. Adding avocado slices on the side makes the dish feel special. Consider a dollop of sour cream or Greek yogurt for creaminess. These toppings enhance the flavors and make it a feast for the eyes. {{image_2}} You can boost your casserole's protein by adding lentils or chickpeas. Both are great options. Lentils cook fast and add a nice texture. Chickpeas provide a hearty bite. They also soak up flavors well. When using lentils, try cooking them until tender first. For chickpeas, rinsing canned ones works best. Tofu or tempeh are also tasty choices. Tofu absorbs spices and flavors well. You can cube it and lightly fry it for extra flavor. Tempeh has a firmer texture and a nutty taste. Try crumbling it into your veggie mix. This gives your casserole a nice crunch. Feel free to add seasonal vegetables for extra taste. Spinach or kale adds color and nutrients. In summer, zucchini or bell peppers shine. In fall, consider adding butternut squash or sweet potatoes. You can also swap out veggies based on your likes. If you’re not a fan of onions, skip them. Use more bell peppers instead. The key is to mix what you enjoy. If you need gluten-free options, look for gluten-free tortillas. Many brands offer great choices. You can also make your own using rice flour. For cheese, consider vegan alternatives. There are many dairy-free cheeses available now. They melt nicely and taste good, too. You can choose mozzarella or cheddar-style options. This way, everyone can enjoy the casserole! For the full recipe, check the recipe section above. To keep your vegetarian enchilada casserole fresh, store leftovers in an airtight container. Let the casserole cool before sealing it. This helps keep moisture in and prevents sogginess. You can safely refrigerate the casserole for up to 4 days. You can freeze the casserole both before and after baking. If you freeze it before baking, wrap it well in plastic wrap and aluminum foil. This helps avoid freezer burn. It can last up to 3 months in the freezer. When ready to bake, simply thaw in the fridge overnight and then bake as instructed. If you freeze it after baking, let it cool completely first. Then, slice it into portions. Wrap each slice in plastic wrap. Place all slices in a freezer-safe bag. To reheat, thaw overnight in the fridge, then pop it in the oven at 350°F (175°C) for about 20-25 minutes. This keeps it warm and tasty. To make vegetarian enchilada sauce, start with simple ingredients. You need tomatoes, onion, garlic, and spices. Blend these ingredients until smooth. Cook the mix on the stove until it thickens a bit. This sauce adds a rich flavor to the casserole. You can make it spicy by adding more chili powder or jalapeños. Key ingredients to include: - Canned tomatoes or fresh tomatoes - Onion, finely chopped - Garlic, minced - Chili powder - Cumin - Salt and pepper Yes, you can make this recipe ahead of time. Prepare the casserole up to the baking step. Then, cover it and store it in the fridge. This method helps the flavors blend well. You can also freeze it for later use. Just remember to thaw it before baking. Tips for prepping in advance: - Chop vegetables the night before. - Assemble the casserole in advance. - Keep the enchilada sauce separate until baking. You can serve many delicious items with vegetarian enchilada casserole. Fresh salads or rice pair nicely. You might also enjoy tortilla chips on the side. Adding guacamole or salsa can enhance the meal. Complementary side dishes and foods: - Simple green salad - Mexican rice - Tortilla chips - Guacamole - Salsa For the complete vegetarian enchilada casserole instructions, refer to the [Full Recipe](#). This blog post covered everything you need for a delicious vegetarian casserole. We went through the key ingredients and steps, from prepping to cooking. I shared tips for enhancing flavors and alternative cooking methods too. You can customize with various vegetables and proteins, adapting to any diet. Proper storage tips help keep your leftovers fresh. Now, you’re ready to create a tasty dish that suits your taste. Enjoy the cooking process and impress your friends and family with your skills!

Vegetarian Enchilada Casserole Flavorful and Easy Meal

Are you ready to enjoy a delicious, meat-free dinner? This Vegetarian Enchilada Casserole packs bold flavors into every layer. With

To make easy lemon bars, gather these simple ingredients: - 1 cup all-purpose flour - 1/2 cup powdered sugar (plus extra for dusting) - 1/4 teaspoon salt - 1/2 cup unsalted butter, melted - 2 large eggs - 1 cup granulated sugar - 1/4 cup freshly squeezed lemon juice - Zest of 1 lemon - 1/2 teaspoon baking powder You can customize your lemon bars with some optional ingredients: - Add a pinch of vanilla extract for extra flavor. - Use lime juice or orange juice for a different twist. - Top with fresh berries for a fruity touch. With these ingredients, you will create a bright and tangy dessert. Each bite will burst with lemon flavor. The combination of sweet and tart makes them a delight. For the full recipe, check below. 1. Make the crust: Start by preheating your oven to 350°F (175°C). Grease an 8x8 inch baking dish or line it with parchment paper. In a medium bowl, mix together 1 cup of all-purpose flour, 1/2 cup of powdered sugar, and 1/4 teaspoon of salt. This mix gives the crust a sweet and light taste. Pour in 1/2 cup of melted unsalted butter. Stir until it turns into a crumbly dough. Press this dough evenly into the bottom of your baking dish. 2. Bake the crust: Place the crust in your oven for 15 minutes. You want it to look lightly golden. This step sets the base for your lemon bars. 3. Prepare the lemon filling: While the crust is baking, grab a new bowl. Whisk together 2 large eggs and 1 cup of granulated sugar until smooth. This mix should look a bit frothy. Add in 1/4 cup of freshly squeezed lemon juice, the zest of 1 lemon, and 1/2 teaspoon of baking powder. Mix well until everything is combined. 4. Combine and bake: After removing the crust from the oven, pour the lemon mixture over the hot crust. Return the dish to the oven and bake for another 20 to 25 minutes. Look for a set filling that is lightly browned on top. 5. Cool and serve: When done, take the dish out and let it cool for at least 15 minutes. Then, transfer it to a wire rack to cool completely. Dust the top with powdered sugar before cutting into squares or bars. Now, you have a delightful treat ready to enjoy! For the full recipe, check out the detailed instructions above. To make the best lemon bars, avoid common mistakes. Here are some tips to help you succeed: - Use fresh lemons. Fresh juice and zest give the best flavor. Bottled lemon juice lacks the bright taste you need. - Don’t skip the cooling step. Let the bars cool in the pan before cutting. This helps them set properly and keeps their shape. - Watch the baking time. Overbaking can lead to a dry texture. Look for a light golden top and a slight jiggle in the center. For the perfect texture, try these tricks: - Chill the crust. After pressing the crust into the pan, chill it for 15 minutes before baking. This helps it hold its shape. - Beat the eggs well. Mix the eggs and sugar until smooth and frothy. This creates a light filling. - Sift the powdered sugar. This helps avoid lumps and gives a smooth finish on top. Recommended tools for this recipe include: - 8x8 inch baking dish. This size is perfect for even baking. - Whisk and mixing bowls. These help combine ingredients smoothly. - Zester. A good zester gets the most flavorful zest without the bitter white pith. By following these tips, you can make lemon bars that impress everyone. For the complete recipe, check the Full Recipe section. {{image_2}} You can change the flavor of your lemon bars easily. Try using different citrus fruits. For a twist, use lime, orange, or grapefruit juice. Each fruit adds its own special taste that kids and adults will love. Adding fresh herbs can also boost flavor. Mint, basil, or rosemary can add a fun twist. Just chop them finely and mix them into the lemon filling. This can give your bars a fresh and unique taste. If you're looking for gluten-free options, swap the all-purpose flour for almond flour or coconut flour. These flours work well and keep the yummy taste. For a vegan version, replace eggs with flaxseed meal. Mix one tablespoon of flaxseed meal with three tablespoons of water. Let it sit for a few minutes until it thickens. This will help bind the mixture just like eggs do. For the full recipe, refer to the main section. Enjoy your lemon bars with these fun variations! To keep your lemon bars fresh, store them in an airtight container. This keeps them moist and tasty. You can leave them at room temperature for up to three days. If you want to save them longer, place them in the fridge. They last up to a week when chilled. For longer storage, freeze your lemon bars. First, cut them into squares. Wrap each square in plastic wrap, then place them in a freezer bag. They can stay frozen for up to three months without losing flavor. When you want to enjoy your frozen lemon bars, take them out and let them thaw at room temperature. If you prefer a warm treat, you can reheat them in the oven. Set your oven to 350°F (175°C) and bake for 5-10 minutes. This warms them through without losing their tangy goodness. For a delicious finish, dust with powdered sugar before serving. Now, you can enjoy your lemon bars anytime! For the full recipe, check out the earlier section. What is the best way to slice lemon bars? Use a sharp knife for clean cuts. First, cool the bars completely. Dust with powdered sugar. Then, cut into squares or rectangles. For neat edges, wipe the knife with a damp cloth after each slice. Can I make lemon bars ahead of time? Yes, you can make lemon bars a day before. Let them cool completely and store in the fridge. This helps the flavors meld nicely. Just remember to dust with powdered sugar before serving. How can I adjust the sweetness of the lemon filling? To change the sweetness, add or reduce sugar. For a less sweet filling, cut back on granulated sugar. Taste the mix before baking to find the right balance. You can also add more lemon juice for a tangy kick. For the full recipe, check out the section above! We explored the best ways to make lemon bars, from ingredients to baking tips. You learned about customizing flavors, storing them right, and solving common problems. Remember, the key is to follow each step carefully for tasty results. Baking is fun and can be easy with the right tips. Enjoy your lemon bars fresh or as a snack later. Keep experimenting and make them your own!

Easy Lemon Bars Delightful and Tangy Dessert Recipe

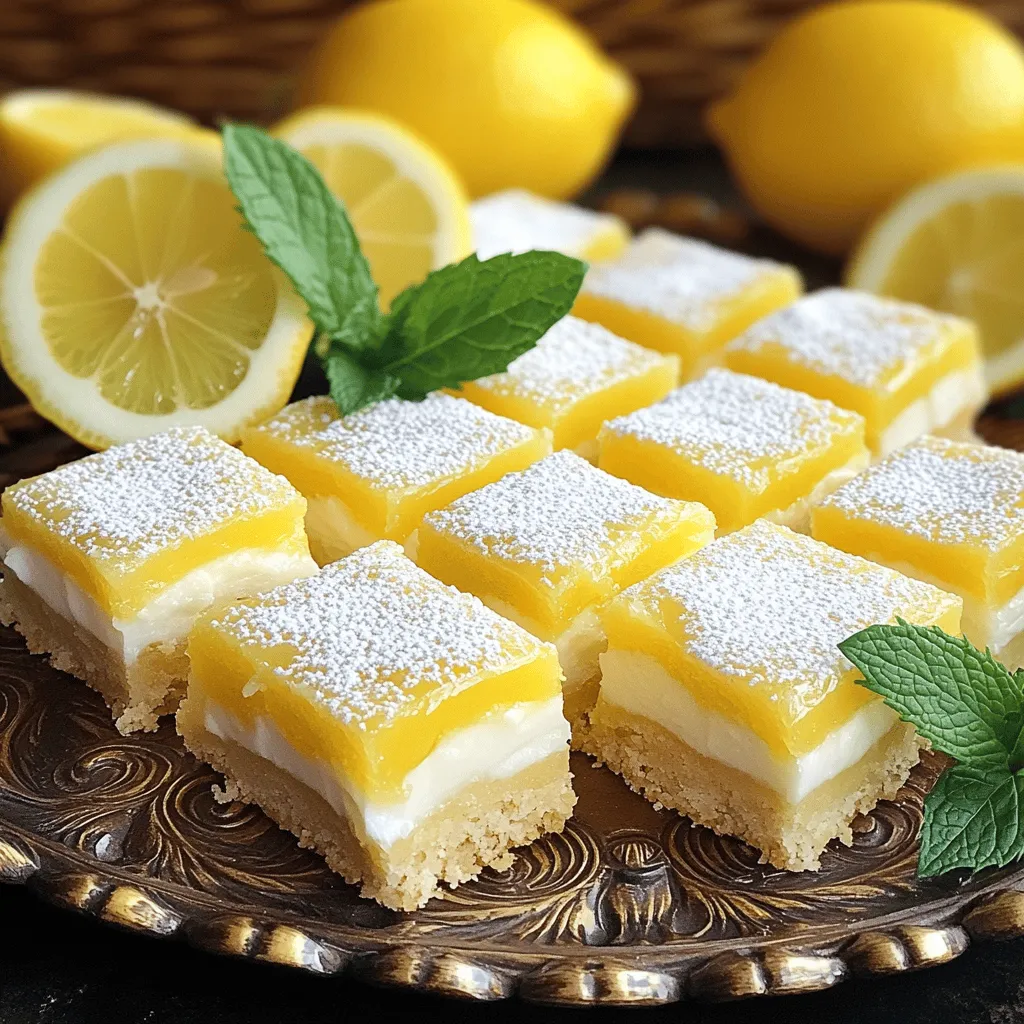
If you crave a sweet treat with a zesty twist, then you’ll love my Easy Lemon Bars! This delightful dessert

- Chickpeas: I always choose canned chickpeas for this recipe. They save time and still taste great. Rinse them well to remove excess salt. If you prefer dry chickpeas, soak them overnight and cook until tender. - Tahini: Look for good quality tahini. It should be smooth and creamy, not too thick. This adds richness to your hummus. A fresh jar will give the best flavor. - Olive Oil: Extra virgin olive oil works best. It adds depth and a fruity taste. You can try different types, like light or flavored oils, but remember that quality matters for taste. - Additional spices and herbs: You can add a pinch of smoked paprika for a smoky taste. Fresh herbs like cilantro or dill can brighten the flavor. Try ground garlic or chili powder for a kick. - Toppings for serving: Garnish your hummus with paprika and chopped parsley for color and taste. A drizzle of olive oil on top makes it look fancy too. You can also use toasted pine nuts for a nice crunch. - Substitutions for dietary restrictions: If you need a nut-free option, skip tahini or use sunflower seed butter. For a low-sodium version, use no-salt-added chickpeas. - Homemade vs. store-bought variations: Homemade hummus tastes fresher and lets you control the flavors. Store-bought options are quick and easy if you’re short on time. Just read labels to avoid unwanted additives. For the full recipe, check out the Roasted Garlic Hummus Delight. To roast garlic perfectly, start by preheating your oven to 400°F (200°C). Take whole garlic bulbs and slice off the top part. Drizzle olive oil over the cut sides. Wrap each bulb in aluminum foil. Bake for about 30-35 minutes. The cloves should feel soft when pressed. To create a caramelized sweetness, let the garlic cool slightly before handling. Squeeze the soft cloves out of their skins. This roasted garlic will add a rich flavor to your hummus. Next, we blend the hummus. In a food processor, combine the chickpeas, tahini, olive oil, roasted garlic, lemon juice, ground cumin, and salt. Blend until the mixture is smooth. This step is key for a creamy texture. If you find the hummus too thick, adjust the consistency. Slowly add water, one tablespoon at a time, until you reach the desired creaminess. Don’t forget to taste! Adjust flavors by adding more salt or lemon juice if needed. Now it’s time to serve your hummus. Transfer it to a bowl and create a smooth surface. Drizzle some extra olive oil on top. Sprinkle paprika and fresh parsley for a nice finish. For snacks, pair your hummus with pita bread, crunchy veggies, or warm naan. These choices will enhance the experience of your delicious roasted garlic hummus. Check the Full Recipe for more details! Over-roasting garlic can lead to a bitter taste. Aim for a golden brown color. When you roast garlic, wrap it in foil. This helps it cook evenly and keeps it soft. Blending for too long or too short can change your hummus texture. Blend until smooth, but don’t overdo it. A grainy texture means you need to blend a bit more. If it feels too thick, you can add water. Deepening the flavor of your hummus is easy. Try adding spices like smoked paprika or a pinch of cayenne pepper. These spices give your hummus a warm kick. Mixing in unique ingredients can also boost flavor. Consider adding ingredients like roasted red peppers or fresh herbs. These additions can create a new twist on the classic recipe. Fixing hummus that is too thick is simple. Add water slowly, one tablespoon at a time. Blend after each addition until you reach the right thickness. If your hummus is too runny, try adding more tahini or chickpeas. Understanding how tahini and water work together is key. Tahini adds creaminess, while water helps reach your desired consistency. For the full recipe, check out the Roasted Garlic Hummus Delight. {{image_2}} You can change the flavor of your roasted garlic hummus easily. For a roasted red pepper hummus, add one cup of roasted red peppers. Blend them in with the other ingredients. This gives a sweet, smoky taste. You will love the bright color too! If you want a spicy hummus, add in a pinch of cayenne pepper or some diced jalapeños. This kick will make your hummus stand out. You can adjust the heat to fit your taste. Just remember to start small! Using fresh herbs and vegetables can really boost your hummus. Try tossing in some fresh basil or cilantro. These herbs add a burst of flavor. You can also mix in seasonal veggies like roasted zucchini or carrots. This can change up your hummus for each time of year. Incorporating seasonal flavors makes cooking fun. For instance, in the summer, add fresh tomatoes or corn. In the fall, you can use roasted squash. These small changes can make a big difference! You can give your hummus an international flair too. For a Mediterranean twist, add olives or sun-dried tomatoes. These ingredients bring robust flavors and a touch of the sea. Just chop them up and blend them in. If you want to try an Asian-style hummus, mix in some sesame oil or miso paste. These will add a unique flavor. It’s a fun way to explore new tastes in a familiar dish. Each version is a new adventure for your palate! For the full recipe, check out the Roasted Garlic Hummus Delight. To keep your roasted garlic hummus fresh, store it in an airtight container. This helps to keep out air and moisture. Place the container in the fridge right after serving. It will stay fresh for about a week. You can freeze roasted garlic hummus too! Use a freezer-safe container and leave some space at the top. The hummus will expand as it freezes. It can last for up to three months in the freezer. When ready to eat, thaw it in the fridge overnight. Hummus can go bad if not stored properly. If it sits out at room temperature for more than two hours, toss it. It can also spoil in the fridge after about a week. Watch for signs of spoilage. If you see mold or notice a sour smell, it’s time to let it go. A change in color or texture can also mean it’s gone bad. Always trust your senses! If your hummus seems dry, don’t worry! Add a little olive oil or water to bring it back to life. Blend it again until it’s smooth. This will help refresh the texture and flavor. You can also use leftover hummus in fun ways! Try spreading it on sandwiches or as a dip with veggies. It makes a great topping for baked potatoes too. Let your creativity shine! To make roasted garlic, first, preheat your oven to 400°F (200°C). Take whole garlic bulbs and slice off the top. Drizzle with olive oil and wrap in aluminum foil. Bake for about 30-35 minutes. The garlic should be soft and golden brown. You can also roast garlic at lower temperatures, around 350°F (175°C), but this may take longer. Yes, homemade hummus is often healthier than store-bought. You control the ingredients, so you can use fresh, whole foods. Store-bought hummus may have preservatives and extra salt. Homemade hummus can also have less fat and calories if you use less oil. Plus, you can add fresh herbs or spices for extra nutrients. You can use raw garlic, but it will taste very different. Raw garlic has a sharp, strong flavor, while roasted garlic is sweet and mild. Roasted garlic is easier on the stomach and better for digestion. If you prefer a milder taste, stick with roasted garlic in your hummus. Making roasted garlic hummus takes about 50 minutes total. You will spend about 10 minutes prepping the ingredients. Roasting the garlic takes around 30-35 minutes. Blending the hummus takes just a few minutes. This makes it a quick and easy recipe for any meal. Roasted garlic hummus pairs well with many foods. You can serve it with pita bread, fresh veggies, or crackers. It also works great as a spread on sandwiches or wraps. Add some olives or cherry tomatoes for a colorful appetizer. Enjoy it at parties or enjoy it as a healthy snack at home. For the full recipe, check out Roasted Garlic Hummus Delight. In this article, I covered the key ingredients and steps for making delicious roasted garlic hummus. You learned about essential elements like chickpeas and tahini, as well as optional add-ins to customize your flavor. I shared tips to avoid common mistakes and enhance your hummus. Different variations, storage tips, and FAQs give you all the tools you need. Enjoy crafting your perfect hummus. Experiment, taste, and share the joy of your creations. The possibilities are endless, and I hope you find the perfect blend for your palate.

Roasted Garlic Hummus Simple and Flavorful Recipe

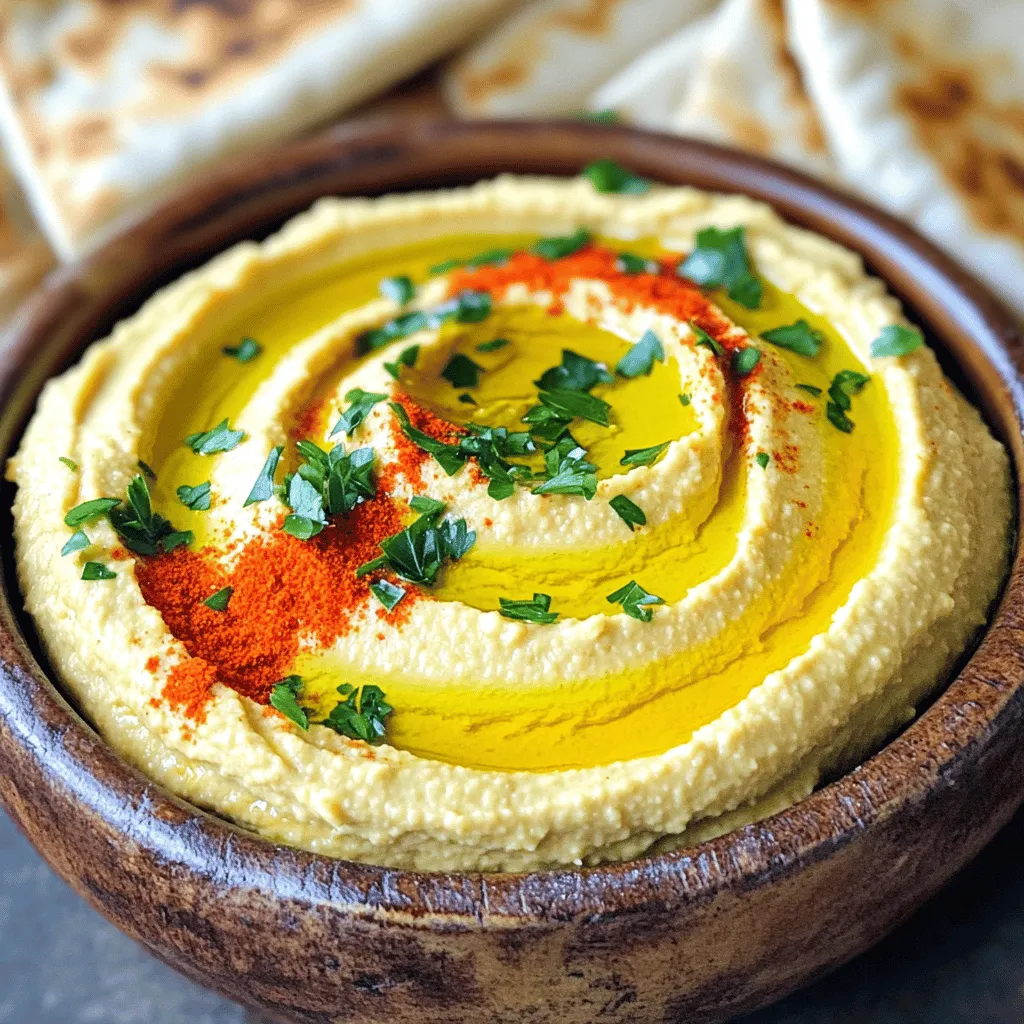
If you crave a creamy, flavorful dip that’s simple to make, you’re in the right place. This Roasted Garlic Hummus

- 4 large ripe tomatoes - 1 cup grated Parmesan cheese - 1/2 cup breadcrumbs (preferably panko) - 3 cloves garlic, minced - 2 tablespoons fresh basil (or 1 tablespoon dried) - 1 teaspoon dried oregano - 1/4 teaspoon red pepper flakes (optional) - 2 tablespoons olive oil - Salt and pepper to taste When I make Baked Parmesan Tomatoes, I always start with the freshest ingredients. You want ripe tomatoes that are firm yet juicy. They should be bright in color and free from blemishes. The Parmesan cheese gives the dish its rich, savory flavor. I prefer using freshly grated cheese for the best taste. Breadcrumbs, especially panko, add a delightful crunch to the topping. For optional ingredients, I often add garlic for its wonderful aroma. Fresh basil brightens the dish with its herbal notes. Dried oregano adds a hint of earthiness. If you like a bit of heat, consider red pepper flakes. They elevate the overall flavor without overwhelming the dish. Finally, olive oil is a must. It not only helps with browning but also adds a smooth richness. Don't forget to season with salt and pepper. This will bring out all the flavors in your tomatoes. For the full recipe, you can check out the details earlier in the article. - Preheat your oven to 375°F (190°C). - Slice the tops off the tomatoes and scoop out seeds and pulp. To start, you want those tomatoes ready for stuffing. Preheating your oven sets the stage for a perfect bake. When cutting the tops, make sure to keep the sides intact. This way, they hold their shape. After slicing, gently scoop out the seeds and pulp. I like to use a spoon for this. Save the insides for another dish or toss them. - Combine Parmesan cheese, breadcrumbs, garlic, basil, oregano, and seasonings in a bowl. - Mix until well combined for perfect consistency. Next, grab a bowl and mix the magic! Combine grated Parmesan cheese, breadcrumbs, minced garlic, and chopped basil. Add oregano, salt, and pepper as well. If you like a kick, toss in red pepper flakes. I always mix until it's smooth and well blended. This ensures every bite is packed with flavor. - Fill each hollow tomato with the cheese mixture. - Bake for 25-30 minutes or until the tops are golden. Now it’s time to fill those tomatoes! Use a spoon to pack the cheese mixture into each hollow tomato. Press down gently to fit it all in. Place them in a baking dish, making sure they stand upright. Bake in your preheated oven for 25-30 minutes. The tops should turn a nice golden brown, and the tomatoes will feel tender. For the full recipe, check the section above. Enjoy this savory treat! - Bake in a single layer for even cooking. This helps the heat move around each tomato. - Avoid overfilling to prevent spillage. The cheese and bread mix should stay inside the tomato. - Allow tomatoes to sit in salt for a few minutes before filling. This helps draw out moisture and enhances the taste. - Experiment with different herbs and spices for unique variations. Try thyme, parsley, or even a hint of cumin for a twist. - Pair with a side salad or garlic bread for a complete meal. This adds freshness and texture. - Serve as an appetizer or side dish. They are great for gatherings or cozy dinners. Follow the Full Recipe for detailed steps and enjoy this savory delight! {{image_2}} You can switch up the cheese for a new taste. Try mozzarella for a creamy melt. Feta adds a tangy twist that pairs well with tomatoes. Fresh herbs also change the flavor. Use thyme for a woodsy note or parsley for brightness. If you love heat, add more red pepper flakes. This will make your dish zesty. You can also layer in jalapeños for extra spice. They bring a nice kick to each bite. For those who crave meat, add cooked bacon bits to the filling. Sausage also works well for a savory bite. For a heartier meal, use ground turkey or beef. This turns your baked tomatoes into a filling dish. To explore the full experience, check out the Full Recipe! To keep your Baked Parmesan Tomatoes fresh, cool them completely first. This step is key to avoid steam build-up. Once cooled, place them in airtight containers. This helps keep the flavors and texture intact. For quick meals, you can freeze the tomatoes before baking. Just prepare them as usual, but do not bake. Wrap them tightly and place them in the freezer. When you're ready to eat, reheat them in the oven. This will keep the cheese nice and melty. If stored in the fridge, eat the leftovers within 3 days. This ensures you enjoy the best taste and texture. If you freeze them, they can last up to 3 months. Just remember to label your containers to track the dates. Yes, you can prepare and refrigerate them, then bake on serving day. This makes meal prep easy. Just follow the recipe steps until filling the tomatoes. Cover them tightly with plastic wrap. When you're ready to bake, take them out of the fridge and pop them in the oven. They will still taste fresh and delicious. They pair well with salads, meats, or bread. A crisp green salad adds a nice touch. You can also serve them with grilled chicken or fish for a hearty meal. Garlic bread is great for soaking up any leftover juices. These tomatoes make a perfect side dish or appetizer. They should be tender and the tops golden brown. You can check them with a fork. If the fork goes in easily, they are ready. The cheese topping should look crispy and inviting. Trust your eyes and nose; the aroma will also tell you when they are done. Absolutely! Experiment with different cheeses for varied flavors. Mozzarella adds a nice stretch, while feta gives a tangy kick. You might also try goat cheese for a creamy texture. Feel free to mix cheeses for more depth. The key is to find what you enjoy the most. In this post, we covered how to make baked Parmesan tomatoes. You learned about essential ingredients like ripe tomatoes, Parmesan cheese, and breadcrumbs. I shared tips on preparing the filling, baking, and serving ideas. You can even try different flavors with optional spices or other cheeses. Baked Parmesan tomatoes are not only tasty but also easy to customize. They make a great dish for any meal. Enjoy the cooking process and share your results!

Baked Parmesan Tomatoes Savory and Flavorful Dish

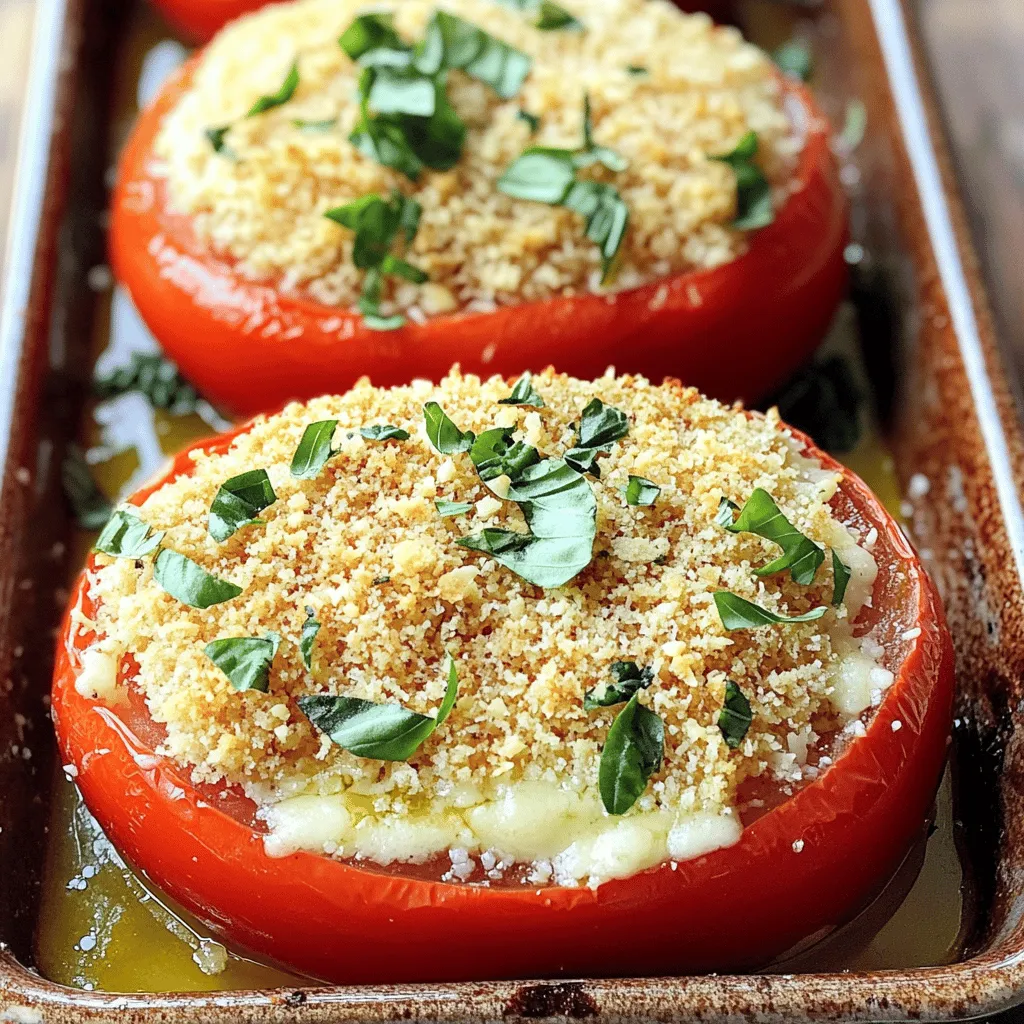
Looking for a simple yet tasty dish? Baked Parmesan Tomatoes are your answer! This savory treat packs a punch of

To make a great sweet potato casserole, you need a few main items: - 4 medium sweet potatoes, peeled and cubed - 1/2 cup brown sugar - 1/4 cup unsalted butter, melted These ingredients give the casserole its rich taste and creamy texture. Sweet potatoes are the star, adding natural sweetness and color. Brown sugar brings a warm flavor, while butter adds richness. You can enhance your casserole with these optional items: - 1 cup mini marshmallows - 1/2 cup crushed pecans - 2 eggs, beaten Mini marshmallows create a sweet, gooey topping. Crushed pecans add a nice crunch. Eggs help bind the mixture for a smoother texture. To boost flavor, include these spices: - 1/2 teaspoon cinnamon - 1/4 teaspoon nutmeg - 1/2 teaspoon vanilla extract - 1/4 teaspoon salt Cinnamon and nutmeg give warmth and depth. Vanilla adds sweetness and aroma. Salt balances the flavors and enhances the overall taste. For the full recipe, you can check out the Sweet Potato Delight Casserole. To make the sweet potato casserole, start by prepping the sweet potatoes. - Prepping the sweet potatoes: Peel and cube 4 medium sweet potatoes. This step helps them cook evenly. - Boiling and mashing: Next, boil the cubed sweet potatoes in water for 15-20 minutes. They should be fork-tender. Drain them and let them cool for a few minutes. After cooling, mash them in a large bowl until smooth. - Mixing the ingredients: Now, add the following to the mashed sweet potatoes: 1/2 cup brown sugar, 1/4 cup melted unsalted butter, 1/2 teaspoon cinnamon, 1/4 teaspoon nutmeg, 1/2 teaspoon vanilla extract, and 1/4 teaspoon salt. Stir well. Finally, mix in 2 beaten eggs until everything is combined. Now it’s time to bake the casserole. - Transferring to baking dish: Transfer the sweet potato mixture into a greased 9x13-inch baking dish. Spread it out evenly. - Adding toppings: If you like, sprinkle mini marshmallows on top. Then, in a bowl, mix 1/2 cup crushed pecans with a bit of brown sugar. Sprinkle this mixture over the casserole for added crunch. - Baking time and temperature: Preheat your oven to 350°F (175°C). Bake the casserole for 25-30 minutes. It should be heated through and the top will be golden brown. Once your casserole is done, it’s time to serve. - Portioning the casserole: Cut the casserole into squares for easy serving. - Garnishing tips: For a nice touch, you can add a sprinkle of extra crushed pecans or a drizzle of maple syrup on top. - Ideal pairing options: This dish pairs well with roasted turkey or glazed ham. Serve it alongside green beans or a fresh salad for a balanced meal. For the full recipe and more details, check the [Full Recipe]. To get the best sweet potato casserole, cook the sweet potatoes well. Boil them until they are fork-tender. This usually takes about 15 to 20 minutes. Drain them, and let them cool a bit before mashing. The way you mash the sweet potatoes matters too. Use a potato masher or a fork. Avoid using a blender or food processor. This keeps the texture nice and creamy without making it gummy. You can customize the flavor with spices. Adding cinnamon and nutmeg gives warmth and depth. Start with half a teaspoon of cinnamon and a quarter teaspoon of nutmeg. Taste as you go. This way, you can find the perfect mix for your taste buds. Balancing sweetness is key. Sweet potatoes are naturally sweet, but brown sugar adds a nice touch. Adjust the sugar to your liking. If you want it less sweet, cut back on the brown sugar a bit. Layering your sweet potato casserole can make it look fancy. Spread the sweet potato mix evenly in the dish. If you add mini marshmallows, sprinkle them on top for a nice finish. Choosing the right serving dish helps too. A 9x13-inch baking dish works well. It allows for even cooking and easy serving. Plus, it looks great on the table. For the full recipe, check out the details shared earlier. {{image_2}} You can switch up your sweet potato casserole with different sweeteners. Instead of brown sugar, try maple syrup or honey for a nice twist. These options add a unique flavor while keeping it sweet. If you want a dairy-free version, substitute butter with coconut oil or vegan butter. This change works well and keeps the dish tasty and rich. For toppings, consider using sliced almonds instead of crushed pecans. Almonds add a nice crunch and a hint of nuttiness. You can also add other fruits like cranberries for a pop of color and tartness. This adds a fun layer of flavor to your casserole. If you have dietary needs, you can easily adjust the recipe. For a vegan option, skip the eggs and use flaxseed meal mixed with water. This keeps it plant-based and just as delicious. For gluten-free eaters, ensure all your ingredients are certified gluten-free. If you want a lower sugar option, you can use sugar-free sweeteners like stevia or erythritol. These swaps let everyone enjoy the dish while meeting their dietary goals. For the full recipe, check out the Sweet Potato Delight Casserole. To keep your sweet potato casserole fresh, store it in the fridge. Place it in an airtight container. If you do not have one, cover the dish tightly with plastic wrap. This helps prevent drying out and keeps it tasty. Make sure it cools down before sealing. It will stay fresh for up to four days. When reheating, keep it moist. You can use the oven or microwave. For the oven, set it to 350°F (175°C). Cover the casserole with foil to hold in moisture. Heat for about 15-20 minutes or until warm. In the microwave, use a microwave-safe dish. Heat in short bursts, stirring in between. You can freeze the casserole too. Just wrap it well in plastic wrap and foil. It will last up to three months in the freezer. In the fridge, your sweet potato casserole lasts about four days. If you freeze it, follow the wrapping tips. Thaw it overnight in the fridge before reheating. Avoid refreezing after it has been thawed. This keeps your dish safe and tasty. For the full recipe, check the details above. Can I make this ahead of time? Yes! You can prepare the sweet potato mixture a day before. Store it in the fridge. When ready, transfer it to a baking dish and bake it fresh. What can I use instead of eggs in the recipe? You can use applesauce or mashed bananas. About 1/4 cup replaces one egg. This keeps it moist and adds a bit of sweetness. What if I don’t have brown sugar? You can use white sugar mixed with molasses. For each cup of brown sugar, mix 1 cup of white sugar with 1 tablespoon of molasses for a similar taste. Can I use canned sweet potatoes? Yes, you can! Drain and mash them well. Use about 2 cups for this recipe. This saves time and still tastes great. Why did my casserole turn out watery? This can happen if the sweet potatoes have too much water. Make sure to drain them well after boiling. Also, avoid adding extra liquid. How to tell if the casserole is done baking? Check if the top is golden brown and the edges are bubbling. You can also insert a fork or knife; it should come out clean when it’s done. For a detailed guide, check the Full Recipe for Sweet Potato Delight Casserole. This blog post covered how to make a delicious sweet potato casserole. We explored key ingredients, from sweet potatoes to spices. You learned step-by-step instructions for preparing and baking the dish. I shared tips for texture and flavor, plus fun variations for your recipe. Remember, storage and reheating methods can keep your casserole fresh. With these insights, you can create a delightful meal for any occasion. Enjoy experimenting in the kitchen and making this dish your own!

Sweet Potato Casserole Irresistible Holiday Dish

If you’re looking for a dish that brings holiday cheer, look no further! Sweet potato casserole is the perfect treat

You need 4 ears of fresh corn. Look for corn with bright green husks. The kernels should feel plump and firm. Fresh corn makes this dish pop with flavor. This mixture is key to tasty corn. You need: - 4 tablespoons unsalted butter, melted - 3 cloves garlic, minced Melt the butter first. Then stir in the minced garlic. This mix adds rich flavor to each bite. To bring everything together, gather these items: - ½ cup grated Parmesan cheese - 1 teaspoon paprika - ½ teaspoon salt - ¼ teaspoon black pepper - Fresh parsley, chopped for garnish - 1 tablespoon lemon juice (optional) The Parmesan cheese gives a creamy touch. Paprika adds a warm color. Salt and pepper enhance all the flavors. Lastly, fresh parsley brightens the dish. You can add lemon juice for a zesty twist. For the complete cooking guide, check the Full Recipe. Start by husking your corn. Remove all the green leaves and silk. Rinse the ears under cold water to clean them. You want to make sure your corn is fresh and sweet for the best flavor. Use a sharp knife to trim any rough ends. Grab a small bowl and add melted butter. Next, add minced garlic, paprika, salt, and black pepper. Mix these well until everything blends together. This garlic butter will give the corn a rich taste. You can also adjust the garlic level based on your preference, adding more if you love that flavor. You can cook your corn in two ways: grilling or baking. If you grill, preheat to medium-high heat. This method gives the corn nice char marks. Grill each ear for about 10-12 minutes. Be sure to turn them every few minutes for even cooking. If you choose to bake, preheat your oven to 400°F (200°C). Wrap the corn in foil and bake for 20-25 minutes. This method keeps the corn moist and tender. Both ways are tasty, so choose what works best for you. For the full recipe, check the detailed ingredients and steps provided earlier. Enjoy your cooking! To get those lovely grill marks, start with hot grill grates. Place the corn at a 45-degree angle on the grill. This angle helps create nice diagonal marks. Flip it every few minutes for even charring. Don’t rush—let it sit long enough to get those marks without burning. Even cooking is key for perfect corn. Rotate the ears often while grilling. If using the oven, wrap each ear in foil. This traps heat and cooks the corn uniformly. Check for tenderness by piercing with a fork. The corn should be soft but not mushy. Serve your garlic Parmesan corn on a wooden platter for a rustic look. Add fresh lemon wedges for a zesty kick. You can sprinkle extra Parmesan on top for added flavor. For a colorful touch, garnish with chopped parsley. This makes each ear look inviting and fresh. You can find the full recipe in our earlier sections to guide you through each step. {{image_2}} You can boost the cheesy flavor of Garlic Parmesan Corn on the Cob in fun ways. Try adding a mix of cheeses for a richer taste. You can use mozzarella for creaminess or feta for a salty kick. Mixing these cheeses with the Parmesan gives a unique twist. You can also sprinkle extra cheese on top before serving for a cheesy crust. This makes the dish even more indulgent. If you love heat, add some spice to your corn. Mix red pepper flakes into the garlic butter for a fiery kick. You can also try adding jalapeños or hot sauce to the mix. This gives the corn a zesty flavor that pairs well with the cheese. For a smoky taste, use chipotle powder instead of paprika. This small change can create a whole new dish. Fresh herbs can make Garlic Parmesan Corn on the Cob really pop. You can add chopped fresh basil or cilantro for a fresh twist. They add a bright flavor that balances the richness of the cheese and butter. Thyme and rosemary can also work well if you like more earthy notes. Just sprinkle them on top right before serving. This adds color and flavor, making your dish stand out. Explore these variations to find your favorite way to enjoy Garlic Parmesan Corn on the Cob. For the full recipe, check the main article. After enjoying Garlic Parmesan Corn on the Cob, you may have some left. Store leftover corn in an airtight container. Keep it in the fridge. It stays fresh for about three days. If you want to keep it longer, consider freezing. Reheating corn on the cob is easy. You can use the microwave or stovetop. For the microwave, wrap the corn in a damp paper towel and heat for 1-2 minutes. Check to see if it’s warm. On the stovetop, place the corn in boiling water for about 3-5 minutes. This method helps keep the corn juicy. To freeze corn on the cob, first cook it. Once it cools, wrap each ear in plastic wrap or aluminum foil. Place them in a freezer bag. Remove as much air as you can. Corn can stay in the freezer for up to six months. When you’re ready to eat, thaw the corn overnight in the fridge before reheating. For the full recipe, check out the complete Garlic Parmesan Corn on the Cob instructions. To pick the best corn, look for fresh, green husks. The silk at the top should be brown and slightly sticky. Press the kernels through the husk; they should feel firm. If you can, choose organic corn. It often tastes sweeter and has better quality. You can use frozen corn, but it will not taste the same. Fresh corn has a crisp bite and a sweet flavor. If using frozen, thaw it first. Then, add the garlic butter mixture just like fresh corn. Cook it on the grill or in the oven until hot. If you do not have Parmesan cheese, try Pecorino Romano. It has a similar taste but is saltier. You can also use nutritional yeast for a vegan option. It gives a cheesy flavor without dairy. Grated cheddar works too, but it changes the dish’s taste. For the best results, stick to cheese with a strong flavor. For the full recipe and more details, check out the [Full Recipe]. This blog post shared tips for making tasty corn on the cob. You learned about fresh corn, garlic butter, and seasonings, plus ways to grill or bake it. We explored tricks for good grill marks and even cooking. You can try cheesy, spicy, or herb styles too. Don’t forget how to store and reheat leftovers. Always choose the best corn for great flavor. Use this guide to make corn on the cob a fun and delicious treat. Enjoy your cooking adventure!

Garlic Parmesan Corn on the Cob Tasty Side Dish

If you’re looking for a side dish that wows, you’ve found it! Garlic Parmesan Corn on the Cob delivers bold

- 2 pounds baby Yukon gold potatoes, halved - 1 cup mayonnaise - 2 tablespoons Dijon mustard - 1 tablespoon apple cider vinegar - 1 cup celery, finely diced - 1/2 cup red onion, finely chopped - 1/4 cup fresh dill, chopped - 2 tablespoons fresh chives, chopped - Salt and pepper to taste - Optional: Hard-boiled eggs, chopped To make a great potato salad, start with the right potatoes. Baby Yukon gold potatoes work best because they are creamy and hold their shape well. You need two pounds for this recipe. Next, the dressing brings the flavor. You will need one cup of mayonnaise, which adds creaminess. Two tablespoons of Dijon mustard give a nice kick. Apple cider vinegar adds some tang. Fresh herbs and vegetables brighten up the dish. Use one cup of finely diced celery for crunch. Half a cup of finely chopped red onion adds sweetness. For fresh flavor, add a quarter cup of chopped dill and two tablespoons of chopped chives. If you want extra protein, consider adding hard-boiled eggs. They make the salad richer and heartier. - Cooking pot - Mixing bowls - Whisk For the cooking process, a good pot is key. Use a cooking pot to boil the potatoes. Mixing bowls are important to combine the ingredients. A whisk helps blend the dressing smoothly. Once you gather these ingredients and tools, you will create a tasty potato salad. For the full recipe, make sure to check the detailed instructions. To start, place the halved baby Yukon gold potatoes in a large pot. Cover them with cold water and add a pinch of salt. Bring the pot to a boil over medium-high heat. When it starts boiling, reduce the heat to medium-low. Let the potatoes simmer for about 10 to 12 minutes. You want them fork-tender, but not mushy. Overcooked potatoes will fall apart later. Once they are cooked, drain the potatoes carefully. You can let them cool slightly in a large bowl. This makes them easier to handle later. Be patient; you want to avoid burns when mixing them with the dressing. In a separate bowl, whisk together the mayonnaise, Dijon mustard, and apple cider vinegar. Add a sprinkle of salt and pepper to taste. Whisk until the mixture is smooth and creamy. This dressing is the heart of your potato salad. Feel free to adjust the flavor as you like. If you want a bit of zest, add more vinegar. If you like it creamier, add more mayo. Make it your own! Once the potatoes are cool enough to touch, gently fold them into the dressing. Use a spatula to combine them without breaking the potatoes. You want to keep them intact for a nice texture. Next, add in the finely diced celery, chopped red onion, fresh dill, and chives. Stir until everything is evenly coated. If you want extra protein, fold in chopped hard-boiled eggs at this point. After mixing, taste the salad and adjust the seasoning if needed. Add more salt and pepper to enhance the flavor. Cover the bowl with plastic wrap and refrigerate for at least one hour. This lets all the flavors blend beautifully together. To avoid mushy potatoes, choose waxy types like Yukon Gold. They hold their shape well. Cook them until fork-tender, about 10 to 12 minutes. Then, drain and let them cool in a large bowl. This helps keep them firm and prevents them from turning into mush. When mixing, fold gently. You want the potatoes to stay intact, not break apart. Adding spices can make your potato salad pop. Try adding paprika or garlic powder for a twist. Fresh herbs like parsley or tarragon can also brighten the dish. Mustard can change the flavor too. You can use whole grain, honey mustard, or even spicy brown mustard for variety. Each adds a different taste and kick to the salad. For a beautiful presentation, serve the salad in a shallow dish. Garnish with extra dill or chives on top. This adds color and makes it look fresh and inviting. Pair your potato salad with grilled meats, sandwiches, or even as a side for a picnic. It complements many meals and is always a hit! {{image_2}} You can find many styles of potato salad across the world. One popular type is German-style, which often uses vinegar instead of mayonnaise. This gives it a tangy flavor. You can add bacon bits and fresh herbs for extra taste. Southern-style potato salad is rich and creamy. It usually includes sweet pickles or relish. Some people add hard-boiled eggs for extra protein. You can mix in diced bell peppers or pimento for a colorful twist. If you want a vegan potato salad, you can swap out the mayonnaise. Try using avocado or a plant-based mayo. This keeps it creamy without eggs or dairy. You can also add tahini for a nutty flavor. For gluten-free options, potato salad is a great choice since potatoes are naturally gluten-free. Just make sure any added ingredients, like mustard or pickles, are also gluten-free. Always check the labels to be safe. In summer, you can add fresh veggies like cucumbers or radishes. These give a nice crunch and extra flavor. You can also toss in fruits like apples or grapes for a sweet touch. For holidays, consider adding roasted red peppers or cranberries. These give your salad a festive look and taste. You can even include spices like paprika or dill to bring out seasonal flavors. For the full recipe, check out the Full Recipe section! To keep your potato salad fresh, store it in an airtight container. This helps prevent any odors from other foods. Always let the salad cool completely before sealing it. It will last in the fridge for about 3 to 5 days. If you notice any changes in smell or texture, it's best to throw it away. You can freeze potato salad, but it may change in texture. To freeze, place the salad in a freezer-safe container. Leave some space at the top for expansion. When you’re ready to eat it, defrost it in the fridge overnight. After thawing, stir it well to mix the ingredients again. If it seems dry, add a bit of mayonnaise to restore creaminess. Avoid freezing potato salad with hard-boiled eggs, as they can become rubbery. Yes, making potato salad a day early is a great idea. It helps the flavors blend well. You can prepare the salad and store it in the fridge. This way, you save time on the day of your picnic or BBQ. The longer it sits, the better it tastes! The best potatoes for potato salad are Yukon Gold or red potatoes. They hold their shape well after cooking. These types also have a nice creamy texture. This makes your salad taste rich and satisfying. Avoid starchy potatoes like Russets, as they can turn mushy. Potato salad should not sit out for more than two hours. If it is hot outside, reduce that time to one hour. Bacteria can grow quickly in warm temperatures. To keep it safe, place the salad in a cooler or on ice. Enjoy your delicious potato salad while keeping food safety in mind! This guide provided all the key steps to make great potato salad. We covered potato types, dressing tips, and added flavor ideas. Don’t forget to store it right and try different styles. Making it ahead can save time. Sometimes, sticking to basics works best, but feel free to be creative. Embrace the process, enjoy the flavors, and make every bite special. With these tips, you can create a memorable dish for any occasion.

Classic Potato Salad Easy and Flavorful Recipe

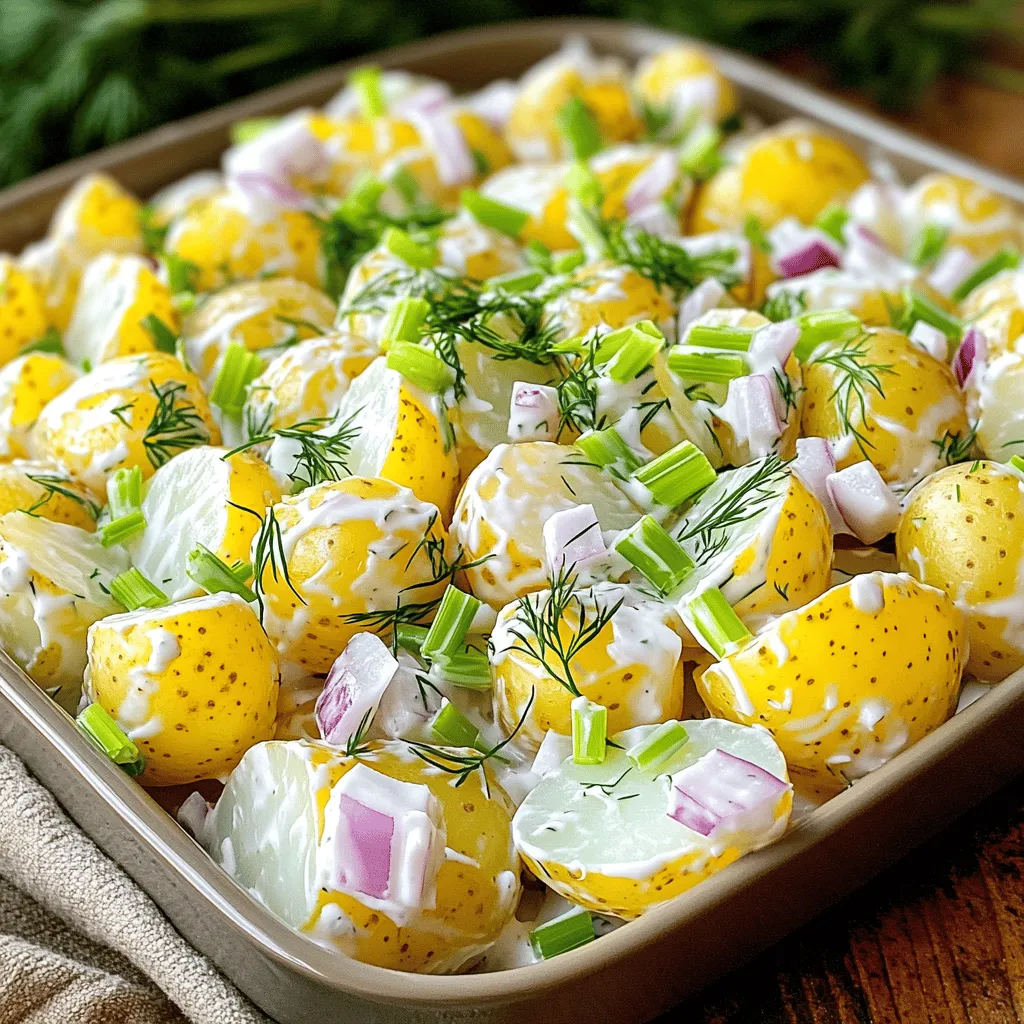
Looking for the perfect side dish? My classic potato salad recipe is both easy and full of flavor! With just

Older posts
Newer posts
← Previous Page1 … Page41 Page42 Page43 … Page106 Next →
© 2025 My Cooking Cast • Built with GeneratePress

Our Policies

  • Privacy Policy
  • GDPR Policy
  • Terms Of Use
  • Copyright Policy
  • Cookie Policy
  • Disclaimer

More Information​

  • Home
  • Contact
  • About
  • Dinner
  • Appetizers
  • Dessert
©2025, My Cooking Cast About Privacy Policy Back To Top