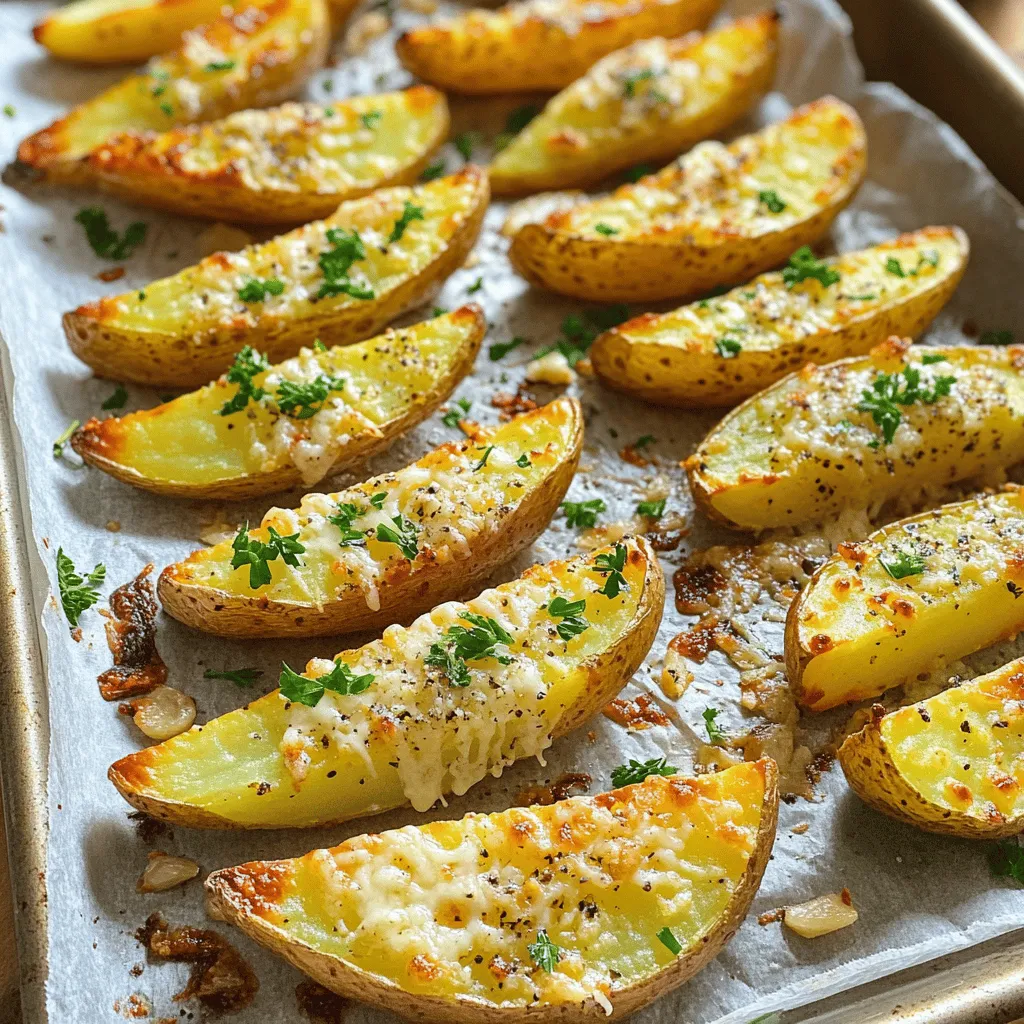
Crispy Garlic Parmesan Potato Wedges Delicious Snack
Are you ready for a snack that’s easy and super tasty? Crispy Garlic Parmesan Potato Wedges are the perfect choice!
Are you ready for a snack that’s easy and super tasty? Crispy Garlic Parmesan Potato Wedges are the perfect choice!
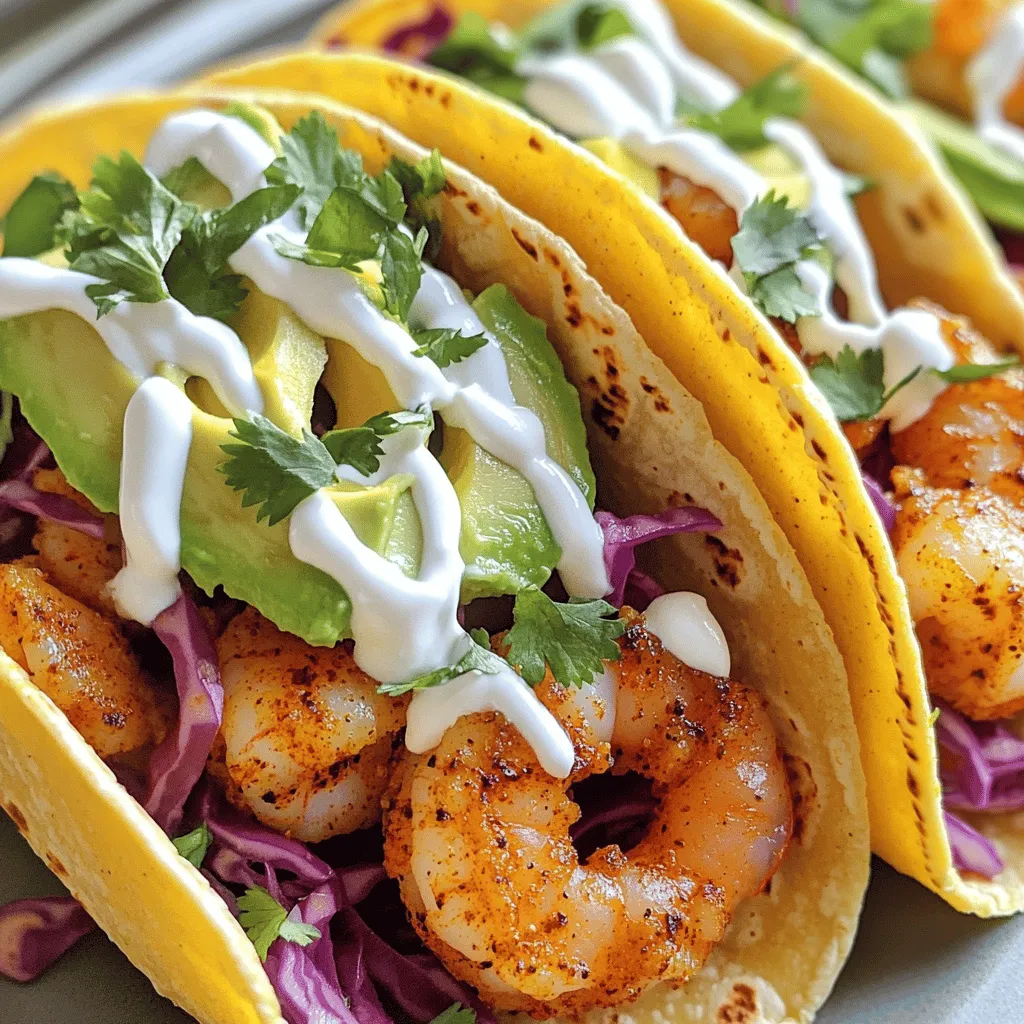
Get ready to spice up your dinner routine with my Spicy Cajun Shrimp Tacos! This easy meal packs bold flavors
. - Storing Leftovers: After you enjoy your Cheesy Chicken Alfredo Lasagna, store leftovers in an airtight container. It keeps the lasagna fresh and prevents it from drying out. Make sure it cools down before sealing. This helps maintain its creamy texture. - Reheating Instructions: To reheat, place a slice in the microwave. Heat it for about 1-2 minutes, checking to make sure it warms evenly. For a crispier top, you can also use the oven. Set it to 350°F (175°C) and bake for 15-20 minutes. - Freezing Unbaked Lasagna: If you want to freeze your lasagna before baking, cover the dish tightly with plastic wrap and then with aluminum foil. This helps keep air out and prevents freezer burn. Label it with the date for easy tracking. - Thawing and Baking Frozen Lasagna: When ready to bake, remove the lasagna from the freezer and thaw it overnight in the fridge. Once thawed, bake it at 375°F (190°C) for about 45 minutes or until hot and bubbly. - How Long it Lasts in the Fridge: Your lasagna can last in the fridge for about 3-5 days when stored properly. Always check for freshness before eating. - Signs of Spoilage: Look for changes in color or smell. If the cheese looks dry or has mold, it’s best to throw it away. Always prioritize safety when it comes to food. For the full recipe, make sure to check the recipe section above. Can I use no-boil lasagna noodles? Yes, you can use no-boil lasagna noodles. They save time and effort. Just layer them as you would regular noodles. The sauce will cook them in the oven. How can I make this recipe gluten-free? To make this dish gluten-free, use gluten-free lasagna noodles. Many brands offer great options. Ensure your Alfredo sauce and other ingredients are also gluten-free. What to serve with Cheesy Chicken Alfredo Lasagna? This lasagna pairs well with a fresh salad. A simple green salad or garlic bread works nicely. You can also serve it with steamed veggies for more color and flavor. This blog post shared a full recipe for Cheesy Chicken Alfredo Lasagna. We covered essential ingredients, detailed steps, and helpful cooking tips. Variations let you switch meats and sauces to fit your taste. Store leftovers properly to enjoy later and answered common questions for clarity. In closing, this recipe offers delicious results with simple steps. Get creative and make it your own! Enjoy the flavors that come together in this lasagna.](https://mycookingcast.com/wp-content/uploads/2025/07/68bc65d6-2565-4554-ba8a-7f3921e48887.webp)
Are you ready for a dish that will wow your family and friends? My Cheesy Chicken Alfredo Lasagna One-Pan Delight
![- 12 oz pasta (penne or spaghetti) - 2 cups fresh basil leaves, packed - 1/2 cup raw cashews, soaked - 1/4 cup nutritional yeast - 3 cloves garlic, minced - 1/4 cup olive oil - 1 tablespoon lemon juice - Salt and pepper, to taste - Cherry tomatoes, for topping - Additional fresh basil leaves for garnish Gather these ingredients to create a delicious vegan creamy pesto pasta. The main ingredients like pasta, fresh basil, and soaked cashews form the base of your dish. Cashews add creaminess, while basil brings a fresh taste. You can find common pantry staples like nutritional yeast and garlic in many kitchens. They enhance the flavor and provide a cheesy taste without dairy. Olive oil and lemon juice add richness and brightness to the dish. Don't forget the seasoning! Salt and pepper will bring out the best flavors in your pasta. Top it with cherry tomatoes and fresh basil for a beautiful finish. You can check the [Full Recipe] for a complete guide. To start, you need to boil salted water. This adds flavor to the pasta. Once the water is boiling, add 12 oz of pasta. You can use penne or spaghetti. Cook the pasta until it is al dente. This means it should be firm but not hard. After cooking, drain the pasta and set it aside. Next, it's time to make the pesto. In a blender, combine the soaked cashews, fresh basil leaves, nutritional yeast, and minced garlic. Blend this mixture until it is smooth and creamy. If you want a stronger flavor, add a pinch of salt or a dash of lemon juice. Now comes the fun part. With the blender running, slowly drizzle in 1/4 cup of olive oil. This helps create that creamy texture. If the pesto is too thick, add a little water to thin it out. Once blended, toss the cooked pasta with the creamy pesto sauce in a large mixing bowl. Make sure the pasta is evenly coated. Taste it and adjust the seasoning with more salt, pepper, or lemon juice if you like. Finally, gently fold in some halved cherry tomatoes for a fresh burst of flavor. You can find the full recipe for this delicious dish to make it perfectly every time. To get a rich and creamy texture, soak the cashews first. Soaking them for at least two hours softens them. This step is key for a smooth pesto. When blending, add olive oil slowly. If the pesto is too thick, pour in a bit of water. This will help you reach your desired consistency. Brighten up your dish with fresh lemon juice. This adds a nice zing that lifts the flavor. You can also play with the garlic and salt levels. Taste as you go. This lets you find the right balance for your palate. Make your dish pop with color. Serve the pasta with halved cherry tomatoes on top. They not only look great but taste amazing too. Finish it off by garnishing with fresh basil leaves. A sprinkle of nutritional yeast can add a cheesy touch, making your dish look beautiful and inviting. {{image_2}} If you want to make this dish nut-free, you can swap cashews for sunflower seeds. They give a nice creaminess too. You can also choose whole grain or gluten-free pasta. This keeps it healthy and suitable for everyone. To make your meal more filling, add chickpeas or lentils. They are easy to mix in and boost protein. You can also toss in sautéed mushrooms or spinach. These ingredients add flavor and extra nutrition to your dish. Try adding roasted seasonal vegetables. They can enhance the taste and make your dish colorful. You can also play with different herbs like parsley or arugula. This will give your pesto pasta a fresh twist and keep it exciting. For the full recipe, check out the details above. Store leftovers in an airtight container for up to 3 days. This keeps the pasta fresh. When you reheat, do it gently. This helps maintain the creamy texture of the sauce. You can freeze this pasta for up to 2 months. Before you freeze, let it cool completely. Thaw it in the fridge before reheating. When you heat it up, add a splash of water. This helps restore the creaminess. Store basil separately. This keeps its flavor intact and vibrant. If you have extra pesto, consider freezing it for future use. Pesto can brighten many dishes, so it’s great to have on hand! Yes, use gluten-free pasta varieties. There are many good options. Look for rice, quinoa, or chickpea pasta. These work well and taste great. Substitute olive oil with vegetable broth or water. This change keeps the recipe light. You still get a smooth texture without added fats. You can skip it or use a dairy-free cheese alternative. Many brands make good substitutes. These options still give a cheesy flavor. Simply scale the ingredients proportionally for desired servings. If you want to feed more people, just double or triple the amounts. This makes it easy. Yes, you can prepare the pesto ahead and mix with pasta before serving. This saves time on busy days. Just keep the pesto in the fridge for up to three days. In this post, we explored how to make creamy basil pesto pasta. You learned about the main ingredients, including pasta and fresh basil. We covered step-by-step instructions for cooking and blending. Tips for texture and flavor, along with variations, added fun. Remember to store leftovers well to keep them fresh. Experiment with different ingredients to suit your taste. Making this dish is easy and rewarding. Enjoy the rich flavors and healthy benefits it offers!](https://mycookingcast.com/wp-content/uploads/2025/07/928f57b2-1357-48f3-b20e-4d7b01e4c937.webp)
Craving a delicious, plant-based meal that’s quick to whip up? My Vegan Creamy Pesto Pasta recipe is here to satisfy
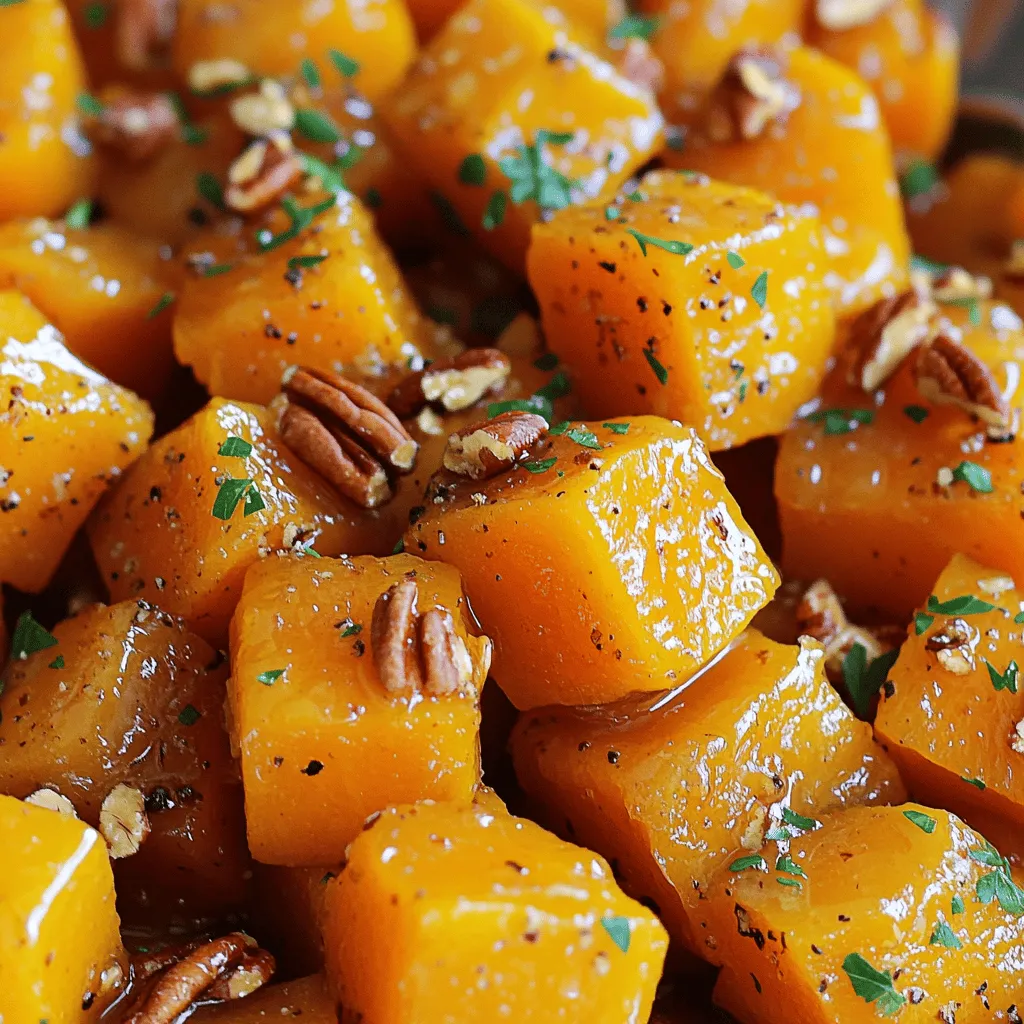
Looking for a side dish that makes your taste buds dance? Maple Glazed Butternut Squash is the answer! This sweet
![- 2 cups cooked chicken, shredded - ½ cup buffalo sauce - 1 bag (13 oz) tortilla chips I love using shredded chicken for this dish. It absorbs the buffalo sauce well. You can use rotisserie chicken or cook your own. Just make sure it is tender and easy to shred. The buffalo sauce adds that spicy kick. You can choose mild or hot sauce based on your taste. Fresh tortilla chips are a must. They hold the toppings well and give that satisfying crunch. - 1 cup shredded cheddar cheese - 1 cup shredded Monterey Jack cheese - ½ cup sliced jalapeños (fresh or pickled) - ½ cup sour cream - ½ cup green onions, chopped - 1 avocado, diced - Fresh cilantro for garnish Layering the cheeses makes the nachos rich and gooey. Cheddar gives a sharp taste, while Monterey Jack adds creaminess. Jalapeños bring heat and flavor. You can use fresh or pickled ones based on your preference. Sour cream helps cool down the spiciness. Diced avocado adds creaminess too. Green onions and cilantro bring freshness to each bite. - Additional spices or sauces - Alternative cheeses - Accompaniments (like extra buffalo sauce) For a flavor boost, try adding spices like garlic powder or chili powder. You can switch up the cheeses too. Pepper Jack or Gouda are great options for a fun twist. If you want more heat, serve extra buffalo sauce on the side. These little changes make your nachos even more special. For the full recipe, check out the details I shared earlier. 1. Preheating the oven Start by preheating your oven to 350°F (175°C). This step is key for getting the cheese nice and gooey. 2. Preparing the buffalo chicken mixture In a mixing bowl, combine 2 cups of shredded chicken with ½ cup of buffalo sauce. Mix well until the chicken is fully coated. This mixture gives the nachos that bold, spicy kick we love. 1. Layering tortilla chips Take a large baking sheet and spread out one bag of tortilla chips. Make sure they form an even layer. This helps every chip get topped. 2. Distributing toppings Evenly distribute the buffalo chicken mixture over the chips. Next, sprinkle 1 cup each of shredded cheddar and Monterey Jack cheese on top. Finally, add ½ cup of sliced jalapeños. This layering adds flavor and texture. 1. Time and temperature recommendations Place the baking sheet in your preheated oven. Bake for 15-20 minutes. Keep an eye on the cheese; it should melt and bubble nicely. 2. Checking for doneness When you see the cheese melted, take the nachos out. Let them cool for a few minutes. Then, drizzle ½ cup of sour cream over the top. Add diced avocado and chopped green onions for extra flavor. Finish with fresh cilantro for garnish. Enjoy this tasty treat! For the complete recipe, check the [Full Recipe]. To make the best nachos, you must melt the cheese right. Use a mix of cheeses for a rich flavor. Cheddar and Monterey Jack melt well together. Spread the cheese evenly to ensure every chip gets that gooey goodness. Layering is key. Start with a base of tortilla chips. Then add your buffalo chicken mix. Don’t forget to sprinkle cheese and jalapeños on top. This way, everything melts together nicely. One common mistake is overloading the chips. Too many toppings can make the chips soggy. Stick to a balance. Choosing the right chicken is also important. Use cooked chicken that is moist and flavorful. Shredded chicken works best. It absorbs the buffalo sauce well, giving each bite a kick. Want to kick up the heat? Add some cayenne pepper or a pinch of chili powder. These spices add depth and warmth. To balance the heat, use creamy elements like sour cream. Avocado also adds a nice touch. It cools the spice and gives a creamy texture. Use these tips to create a flavor experience with your nachos. For the full recipe, check out the Loaded Buffalo Chicken Nachos recipe! {{image_2}} You can switch up the protein in your nachos to keep things fresh. Pulled pork adds a sweet and smoky taste. It pairs well with the buffalo sauce. You can use shredded beef for a heartier option. This gives the dish a rich flavor that many love. If you want to go meatless, try using black beans or lentils. Both add protein and fiber. These options keep the dish filling and tasty. You can even mix in some grilled veggies for extra crunch and flavor. Want to try something new? BBQ chicken nachos are a fun twist. Just swap out the buffalo sauce for your favorite BBQ sauce. The sweet and tangy flavor works great with cheese and chips. Another option is Greek-style nachos. Use feta cheese, olives, and fresh veggies like tomatoes and cucumbers. Drizzle with a bit of olive oil and lemon juice. This gives a fresh taste that is different from the usual nacho flavors. For those needing gluten-free options, look for gluten-free tortilla chips. Many brands offer tasty choices that don’t have gluten. This way, everyone can enjoy the dish. If you want to make it vegan, replace the chicken with jackfruit or chickpeas. You can also use vegan cheese and sour cream. These swaps keep the nachos creamy and delicious while fitting your dietary needs. With these variations, you can make loaded buffalo chicken nachos to suit any taste. Check out the Full Recipe to get started on your nacho adventure! To keep your Loaded Buffalo Chicken Nachos fresh, store leftovers in an airtight container. Make sure to let them cool to room temperature first. This helps avoid moisture build-up, which can make the chips soggy. Place the nachos in the fridge right away. They will stay fresh for about three days this way. When it comes to reheating, you have two main options: microwave or oven. The microwave is quick, but it can make the chips chewy. To use the microwave, place nachos on a plate and heat for about one to two minutes. If you want crispy chips, the oven is best. Preheat your oven to 350°F (175°C). Place nachos on a baking sheet and heat for about 10 minutes. This keeps the chips crispy and the cheese melty. Leftover nachos can last for up to three days in the fridge. After that, they start to lose their flavor and texture. If you want to save them longer, consider freezing them. However, the chips may not stay crispy after thawing. For best taste, enjoy your nachos fresh or within a few days. For more details on preparing these delicious nachos, check the Full Recipe. Yes, you can prep some parts ahead. Cook and shred the chicken in advance. Mix it with buffalo sauce and store it in the fridge. You can also slice your jalapeños and chop the green onions ahead. When you are ready to eat, just layer the chips and toppings. Bake them for about 15 to 20 minutes right before serving. This keeps them fresh and crispy. These nachos are great on their own, but side dishes can add fun. Try serving them with a fresh salad. A simple green salad with a light dressing works well. You could also pair them with a cool drink. A cold soda or iced tea can balance the spicy flavor. For a twist, serve them with ranch dressing for dipping. Want more heat? Start by using hotter buffalo sauce. You can also add diced fresh jalapeños on top. For an extra kick, sprinkle some crushed red pepper flakes. If you like it super hot, try adding sliced habaneros. Just remember, a little goes a long way! Loaded Buffalo Chicken Nachos are a tasty treat. We discussed key ingredients like chicken, buffalo sauce, and chips. Toppings add flavor, and optional enhancements boost the taste. I shared simple steps for prep, assembly, and baking. Plus, I gave tips to avoid common mistakes. You can even mix things up with different proteins and flavors. Whether you store leftovers or reheat, they still taste great. Enjoy serving these nachos to friends and family for game days or parties!](https://mycookingcast.com/wp-content/uploads/2025/07/1066b54b-1082-437a-ab7f-543ce0801082.webp)
Loaded Buffalo Chicken Nachos are the ultimate snack for any party. With layers of crunchy tortilla chips, spicy buffalo chicken,
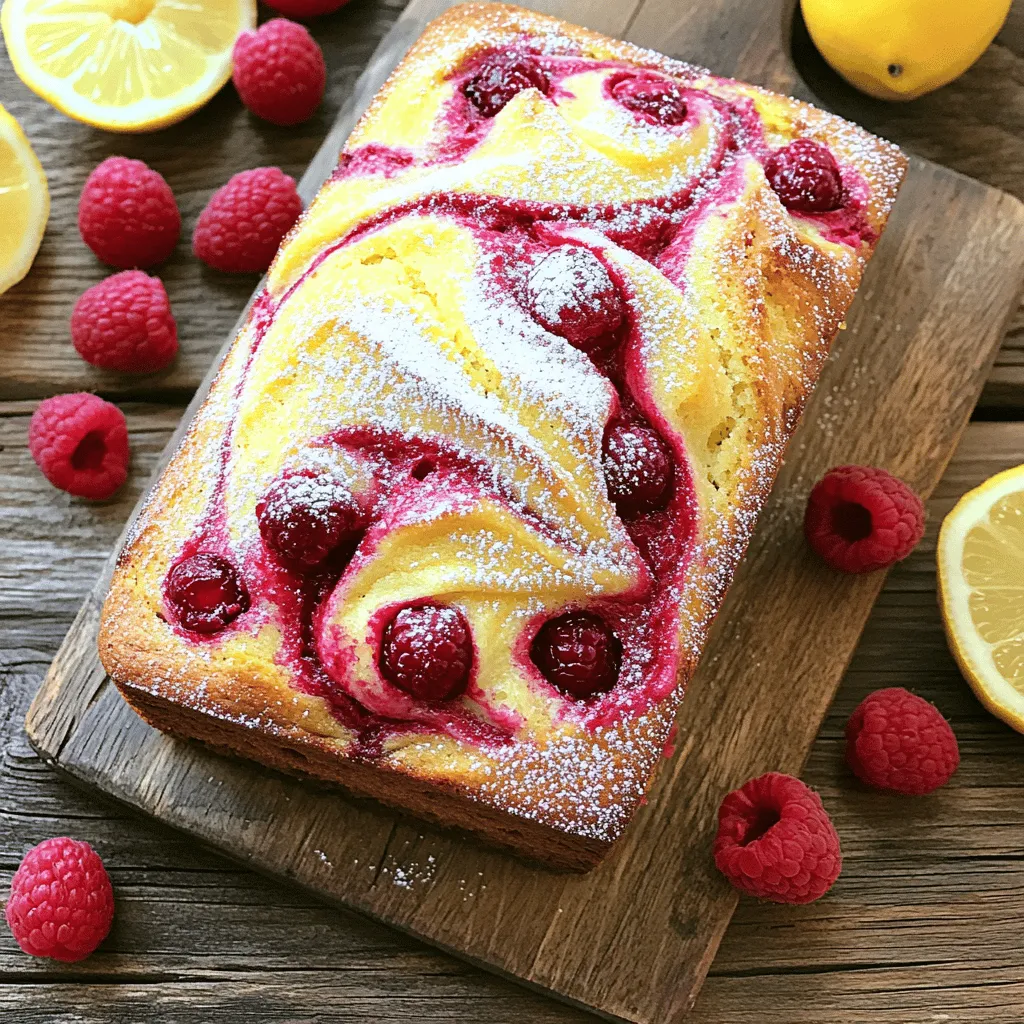
If you’re craving something bright and delicious, you’re in the right place! This Easy Lemon Raspberry Loaf is a tasty
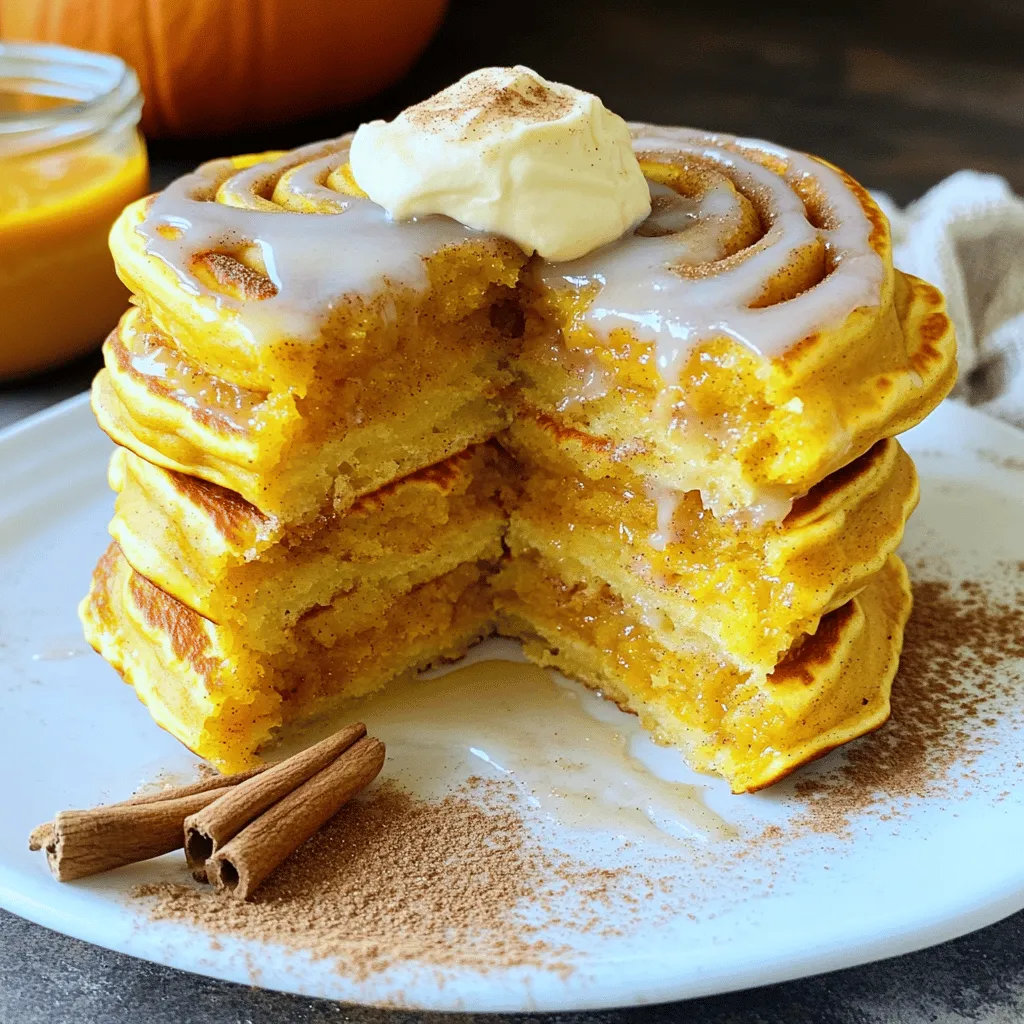
Get ready to savor the joy of fall with my Pumpkin Spice Cinnamon Roll Pancakes! These fluffy delights combine the

Are you ready to indulge in a sweet treat that’s all the rage? These Viral Strawberry Cheesecake Cookies are not
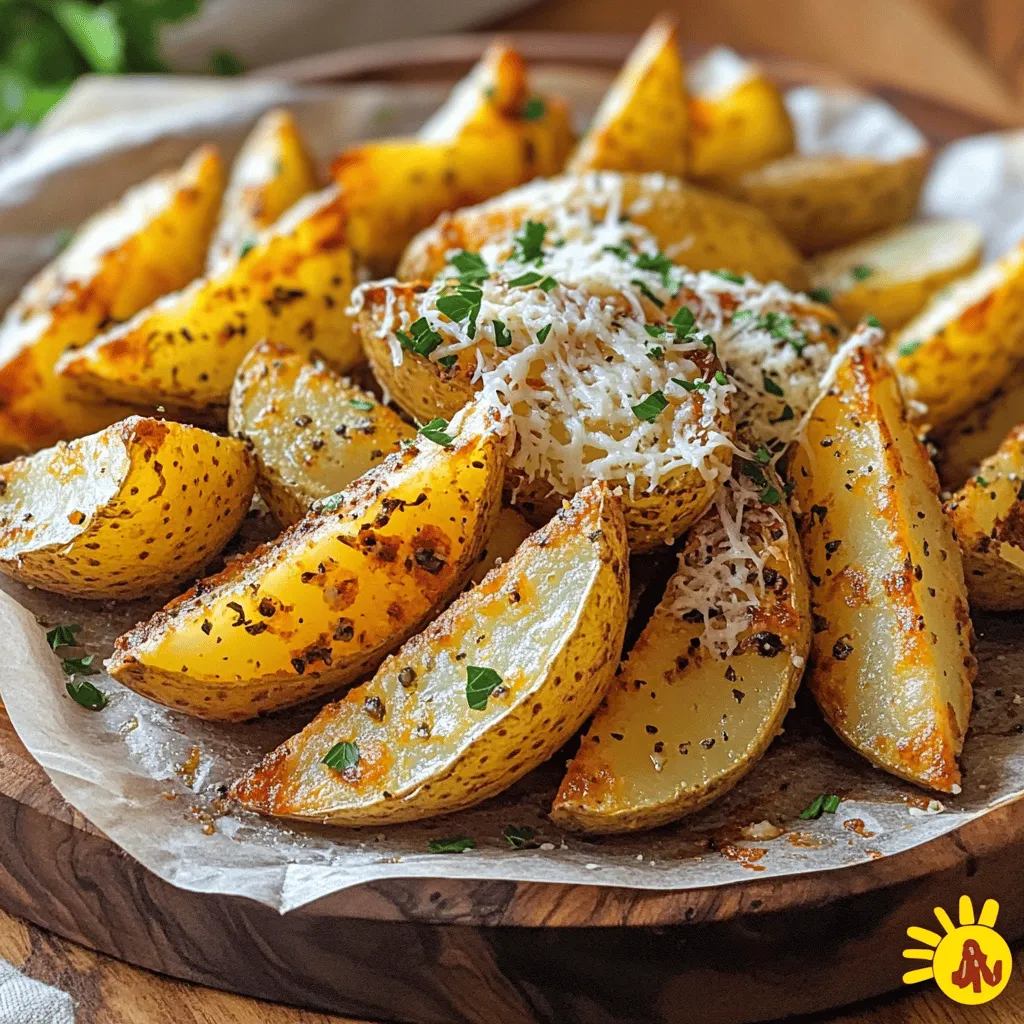
Are you ready to enjoy the perfect snack? Crispy Garlic Parmesan Potato Wedges offer a crunchy bite and a burst
