Skip to content
DisclaimerTerms Of UseGDPR PolicyCookie Policy

My Cooking Cast

  • Home
  • Drinks
  • Appetizers
  • Dinner
  • Dessert
  • About
  • Contact
  • Privacy Policy
DisclaimerTerms Of UseGDPR PolicyCookie Policy

Emma

To make this delightful raspberry swirl cheesecake, gather the following ingredients: - 1 ½ cups graham cracker crumbs - ½ cup unsalted butter, melted - 1 tablespoon sugar - 16 oz cream cheese, softened - 1 cup granulated sugar - 1 teaspoon vanilla extract - 3 large eggs - 1 cup sour cream - 1 cup fresh raspberries, plus extra for garnish - 3 tablespoons raspberry jam These ingredients create the perfect balance of creamy cheese and tart raspberry. The graham cracker crumbs form a crunchy base that pairs well with the smooth filling. Using fresh raspberries adds a burst of flavor. I love how the raspberry jam enhances the fruitiness and makes the swirl look beautiful. You can find the full recipe in the article. It includes the steps to bring this treat to life. First, preheat your oven to 325°F (163°C). In a bowl, mix 1 ½ cups graham cracker crumbs, ½ cup melted unsalted butter, and 1 tablespoon sugar until combined. Press this mixture firmly into the bottom of a 9-inch springform pan to form the crust. Bake this crust for 10 minutes, then let it cool. Next, in a large mixing bowl, beat 16 oz of softened cream cheese until smooth. Gradually add 1 cup of granulated sugar, mixing until well blended. Now, add 1 teaspoon of vanilla extract and 3 large eggs, one at a time, mixing well after each. Make sure to scrape down the bowl as you go. Finally, stir in 1 cup of sour cream until the mixture is creamy. For the raspberry sauce, combine 1 cup of fresh raspberries with 3 tablespoons of raspberry jam in a small bowl. Gently mash them with a fork to get a chunky sauce. Pour the cheesecake batter over the cooled crust. Using a spoon, dollop the raspberry mixture on top of the cheesecake batter. Use a knife or toothpick to swirl the raspberry sauce through the batter to create a lovely marbled effect. To avoid cracks on the surface of your cheesecake, follow these steps: - Bake at a low temperature. This helps the cheesecake cook evenly. - Let the cheesecake cool slowly in the oven. This prevents sudden changes in temperature. - Avoid opening the oven door too often. Each time you open it, heat escapes. For the right texture, make sure to: - Use room temperature cream cheese. Cold cream cheese can lead to lumps. - Mix until smooth, but don’t overmix. Overmixing adds air and can cause cracks. Here are some essential baking tools for your cheesecake: - 9-inch springform pan for easy removal. - Mixing bowls in various sizes for different tasks. - A hand mixer or stand mixer for smooth batter. For mixing, I recommend: - A rubber spatula for scraping down the sides. - A whisk for blending smaller ingredients, like vanilla or sugar. To make your cheesecake look stunning, try these garnishes: - Fresh raspberries on top for a pop of color. - A dusting of powdered sugar adds a nice touch. For pairing options, consider: - A cup of coffee to balance the sweetness. - A glass of dessert wine for a lovely finish. For the full recipe, check out the Raspberry Swirl Cheesecake section. {{image_2}} You can easily change the flavor of your cheesecake. Adding different fruits makes it fun. Try using strawberries, blueberries, or even mangoes for a new twist. Each fruit gives a fresh taste and color. For the crust, you can swap out graham crackers. Use crushed Oreos or nuts for a unique base. These options add texture and flavor to your cheesecake. If you need a gluten-free option, use gluten-free graham crackers or almond flour for the crust. This way, everyone can enjoy the dessert. For a vegan cheesecake, replace cream cheese with a mix of silken tofu and coconut cream. Use flax eggs instead of regular eggs. Both modifications keep the cheesecake creamy and delicious. If you want to make mini cheesecakes, use a muffin tin instead of a springform pan. Line the tin with paper liners for easy removal. Pour in the batter, filling each cup about three-quarters full. Bake them for about 20-25 minutes. Check for a slight jiggle in the center. Let them cool before serving. Mini versions are perfect for parties or a quick treat. To store leftover cheesecake, let it cool completely. Cover the cheesecake tightly with plastic wrap. You can also place it in an airtight container. This keeps it fresh and prevents it from drying out. Make sure to refrigerate within two hours of baking. The ideal refrigeration method is to keep the cheesecake in the back of the fridge. This area stays colder and helps maintain its texture. Avoid placing it in the door, as it can get warmer there. If you want to freeze portions for later use, slice the cheesecake first. Wrap each slice in plastic wrap, then place them in a freezer bag. This helps keep the cheesecake fresh for up to three months. For thawing, move the cheesecake to the fridge the night before you want to eat it. Allow it to thaw slowly for the best texture. You can also thaw it at room temperature for a couple of hours if you’re in a hurry. In the fridge, cheesecake lasts about five to seven days. Keep an eye on it, and eat it within this time for the best taste. You can tell if it has spoiled by checking for mold or a sour smell. If the texture becomes grainy or overly watery, it’s best to throw it away. Enjoy your raspberry swirl cheesecake delightfully and safely! How do you prevent cracks in cheesecake? To avoid cracks, bake at a low temperature. Use room-temperature cream cheese. Mix gently and do not overbeat. Let it cool slowly in the oven to prevent sudden temperature changes. Can I use frozen raspberries instead of fresh? Yes, you can use frozen raspberries. Thaw them first and drain excess liquid. This keeps your cheesecake from becoming too watery. How long should the cheesecake cool before serving? Let the cheesecake cool for at least one hour in the oven. Then, refrigerate for at least four hours. Overnight is even better for the best taste and texture. What’s the best way to remove the springform pan? Run a knife around the edge of the cheesecake. This helps separate it from the pan. Then, carefully release the sides of the springform. What is the difference between no-bake and baked cheesecake? No-bake cheesecake uses gelatin or whipped cream to set. Baked cheesecake uses eggs and bakes in the oven. Baked cheesecake is denser and creamier. Can I add chocolate to this recipe? Yes, you can add chocolate! Melt some chocolate and swirl it in the batter. It adds a rich flavor and pairs well with raspberry. For the full recipe, check out the Raspberry Swirl Cheesecake. You now have a complete guide to making raspberry swirl cheesecake. We covered all the ingredients you need, step-by-step instructions, and helpful tips for the best result. You can explore flavor variations and modifications to fit your needs. Don't forget proper storage techniques to keep your cheesecake fresh. Whether for a gathering or a cozy night in, this dessert will impress everyone. Enjoy making this treat and savor every delightful bite. Happy baking!

Raspberry Swirl Cheesecake Delightful and Creamy Treat

Get ready to indulge in a dessert that’s both delightful and creamy: Raspberry Swirl Cheesecake! This recipe combines rich cream

- 1 cup all-purpose flour - 2 large eggs - 1 1/2 cups milk - 2 tablespoons melted butter - 1 tablespoon sugar - 1/2 teaspoon vanilla extract - 1/4 teaspoon salt - 1/2 cup chocolate hazelnut spread - 1/4 cup chopped hazelnuts (toasted) - Powdered sugar (for dusting) - Fresh fruit (berries or banana slices for serving) - Whipped cream (optional, for serving) These simple ingredients create a rich and delightful treat. The all-purpose flour gives the crepes their structure. Eggs add richness and help bind the batter. Milk ensures the crepes are soft and tender. The melted butter adds flavor and keeps the crepes from sticking. Sugar balances the flavors, while vanilla extract gives a nice hint of sweetness. Salt enhances all the flavors and makes every bite better. The chocolate hazelnut spread is the star of the show. It provides a creamy, sweet filling that pairs perfectly with the crunchy, toasted hazelnuts. Dusting with powdered sugar adds a touch of elegance. Fresh fruit adds color and freshness, while whipped cream makes it feel extra special. For the full recipe, check out the details above. This list sets you up for a delicious experience! Start by mixing the dry ingredients. In a large bowl, whisk 1 cup of all-purpose flour, 1 tablespoon of sugar, and 1/4 teaspoon of salt. This step is key because it helps blend all the dry parts well. Next, add the wet ingredients. In another bowl, whisk 2 large eggs. Then mix in 1 1/2 cups of milk, 2 tablespoons of melted butter, and 1/2 teaspoon of vanilla extract. Gradually pour this mix into the dry mixture. Stir until smooth with no lumps. Resting the batter is important. Let it sit for at least 30 minutes. This helps the gluten relax, making your crepes tender and easy to cook. Now it’s time to heat the skillet. Use a non-stick skillet over medium heat. Lightly grease it with butter to prevent sticking. Pouring and cooking the batter is next. Use about 1/4 cup of the batter for each crepe. Pour it into the pan and swirl the batter to coat the bottom evenly. Cook for 1-2 minutes. Watch for the edges to lift and the bottom to turn golden. Flip it and cook for another minute. Stacking the cooked crepes is simple. Place them on a plate as you finish each one. This keeps them warm and ready for filling. Start by spreading the filling. Take a cooked crepe and spread 1 tablespoon of chocolate hazelnut spread on one half. This spread adds that rich, sweet flavor we love. Next, add hazelnuts. Sprinkle 1/4 cup of chopped, toasted hazelnuts on top of the spread. This gives a lovely crunch to every bite. Folding techniques are key to a neat presentation. Fold the crepe in half over the filling, then fold it in half again to shape a triangle. Place it on a serving plate. For the full recipe, check out the complete guide and enjoy making these delightful treats! To make great crepes, start with the right batter. The batter should be smooth and pourable. If it is too thick, add a bit more milk to thin it out. Letting it rest for 30 minutes helps improve texture. When it comes to flipping, practice makes perfect. Use a non-stick pan for easy cooking. Gently lift the edges with a spatula. Then, quickly flip the crepe using your wrist. If it tears, don’t worry! You can always use it for taste testing. Fruits make a great addition to your crepes. Fresh berries or banana slices are perfect. They add color and taste. You can also sprinkle more toasted hazelnuts on top. For drinks, try pairing with hot chocolate or coffee. Their rich flavors complement the crepes well. Presentation is key for impressing your guests. Plate the crepes neatly, overlapping them slightly. To make them look fancy, use a squeeze bottle for chocolate drizzle. It creates a lovely design on the plate. For garnishing, a dusting of powdered sugar adds a nice touch. You can also add a few fresh berries on the side. This makes your dish look even more delightful. Explore the [Full Recipe] for more ideas and details! {{image_2}} You can switch up the flavors in your crepes easily. Instead of chocolate hazelnut spread, try peanut butter. It adds a nice twist. You can also use fruit preserves like strawberry or raspberry. These spreads give a sweet, fruity kick. Adding spices can change the game too. A sprinkle of cinnamon gives warmth. Nutmeg can add a unique flavor. Just a pinch goes a long way, and it makes your crepes special. If you need a gluten-free option, swap the all-purpose flour. Use a gluten-free flour blend instead. These blends work well in crepes, so don’t worry about texture. For a vegan version, replace the eggs and milk. Use flax eggs and almond milk. You can also use a plant-based butter. These swaps keep the crepes tasty while fitting your diet. Seasonal fruits can enhance your crepes. In spring and summer, add fresh berries. Blueberries, strawberries, or raspberries work great. In fall, try sliced apples or pears. They add a nice crunch. You can also create holiday-themed variations. For Halloween, add orange zest and chocolate. For Christmas, use peppermint extract in your filling. These ideas bring fun and festivity to your crepes. For the complete recipe, check the Full Recipe. To keep your leftover crepes fresh, stack them with parchment paper between each one. This method prevents sticking. Place the stack in an airtight container or wrap it tightly with plastic wrap. - Fridge: Store crepes in the fridge for up to 3 days. - Freezer: For longer storage, freeze crepes for up to 2 months. Just make sure they are well-wrapped to avoid freezer burn. When it’s time to enjoy your crepes again, reheating them properly is key to keeping their texture. - Oven: Preheat your oven to 350°F (175°C). Place the crepes on a baking sheet and cover them with foil. Heat for about 10 minutes or until warm. - Microwave: Place a crepe on a microwave-safe plate. Cover it with a damp paper towel. Heat for 15-20 seconds. Check to see if it’s warm enough. - Skillet: Heat a non-stick skillet over low heat. Add the crepe and warm it for about 30 seconds on each side. This method keeps the outside nice and soft. Enjoy your Chocolate Hazelnut Stuffed Crepes warm, just like when you first made them! For more details, check out the Full Recipe. To keep crepes from sticking, pan temperature is key. Start with a medium heat. If the pan is too hot, crepes will burn. If it's too cool, they will stick. A non-stick skillet works best. Next, use the right amount of grease. I recommend a light coat of butter or oil. Use a paper towel to spread it evenly. Add grease before cooking each crepe. This will help them slide right off. Yes, you can make crepe batter ahead of time. Store it in the fridge for up to 24 hours. Just cover the bowl with plastic wrap or a lid. This lets the flavors blend. Make sure to stir it well before cooking. If you want to store it longer, freeze the batter. Pour it into a freezer-safe container and label it. It can last for about two months. When you’re ready, thaw it in the fridge overnight. If you want a different taste, there are many options. For a fruity flavor, try fruit preserves or jams. Creamy peanut butter is also a great choice. You can mix in some cocoa powder for a chocolate twist. For a healthier option, use almond butter. Each filling gives a unique taste to your crepes. Get creative and find your favorite! For the full recipe, check out Chocolate Hazelnut Stuffed Crepes. You learned how to make delicious crepes from scratch. We covered key ingredients, step-by-step instructions, and tips for perfecting them. Don’t forget the fun of variations and creative presentations. Crepes are versatile and can suit any taste. Feel free to experiment with flavors, ingredients, and toppings. With practice, you'll impress everyone at the table. Enjoy your crepes, whether for breakfast or dessert!

Chocolate Hazelnut Stuffed Crepes Delightful Recipe

Are you ready to elevate your breakfast game? Let’s dive into the world of Chocolate Hazelnut Stuffed Crepes! This delightful

Making a tasty Cranberry Pecan Chicken Salad is simple. Here are the ingredients you need: - 2 cups cooked chicken breast, shredded - 1 cup fresh spinach, chopped - 1/2 cup dried cranberries - 1/2 cup pecans, chopped - 1/2 cup Greek yogurt - 2 tablespoons honey - 1 tablespoon apple cider vinegar - 1 teaspoon Dijon mustard - Salt and pepper to taste - Fresh parsley for garnish (optional) You can swap some ingredients for different flavors or needs. Here are a few ideas: - Use shredded rotisserie chicken for quick prep. - Replace Greek yogurt with sour cream for a creamier taste. - Try walnuts instead of pecans for a different crunch. - Use maple syrup instead of honey for a vegan option. - Spinach can be switched with mixed greens or kale. Knowing the nutrition helps you plan meals. Here’s what you get per serving: - Calories: 350 - Protein: 30g - Carbohydrates: 25g - Dietary Fiber: 5g - Sugars: 10g - Fat: 15g - Sodium: 300mg This salad is a great mix of protein and healthy fats, plus it has fiber from spinach and cranberries. Enjoy making your Cranberry Pecan Chicken Salad with these details in mind! For the full recipe, check the earlier section. To make the cranberry pecan chicken salad, follow these steps: 1. Start with 2 cups of cooked chicken breast. Shred it into small pieces. 2. Take 1 cup of fresh spinach. Chop it up and add it to a large bowl. 3. Next, add 1/2 cup of dried cranberries to the bowl. 4. Chop 1/2 cup of pecans and toss them in as well. 5. In a small bowl, mix 1/2 cup of Greek yogurt, 2 tablespoons of honey, 1 tablespoon of apple cider vinegar, and 1 teaspoon of Dijon mustard. Whisk this until smooth. 6. Pour the dressing over the chicken and spinach mixture. Toss gently to coat everything well. 7. Add salt and pepper to taste. Adjust it to your liking. 8. Cover the salad and chill it in the fridge for 30 minutes. This helps the flavors mix. 9. When you are ready to serve, place the salad on a plate. You can garnish with fresh parsley if you want. I recommend checking out a cooking video for a visual guide. This can help you see the steps clearly. Watching someone make the salad can make it easier to follow along. You can find great videos on popular cooking sites or YouTube. They will show you how to chop, mix, and serve the salad. Here are some common mistakes to watch out for: - Not shredding the chicken properly: Ensure the pieces are small for even mixing. - Skipping the chill time: Don’t skip chilling the salad. It makes a big difference in flavor. - Overdressing the salad: Don’t add too much dressing at once. Start small and add more if needed. - Using stale nuts: Always check that your pecans are fresh. Stale nuts can ruin the taste. Follow these steps and tips for a delicious cranberry pecan chicken salad. For a complete guide, refer to the Full Recipe. To make your cranberry pecan chicken salad shine, focus on fresh ingredients. Use cooked chicken that is juicy and tender. Shred it finely for better texture. The spinach should be bright and crisp. Dried cranberries add sweetness, so choose plump ones. Toast the pecans lightly in a pan for a nutty crunch. This step enhances their flavor. Serve this salad on a bed of greens for a colorful plate. It pairs well with whole-grain bread or crackers. You can also enjoy it in a wrap for lunch. For a light dinner, add a side of roasted vegetables. The mix of warm and cold will excite your taste buds. While I love the Greek yogurt dressing, you can switch it up. Try using avocado for creaminess. A simple olive oil and lemon juice mix works well too. If you want a spicy kick, add some sriracha or chili flakes. Each dressing gives a new life to the same base salad. For the full recipe, check the earlier section. {{image_2}} You can easily make this salad fit many diets. For a gluten-free option, check your yogurt for gluten. Most are safe, but it's good to confirm. If you follow a keto diet, swap honey for a sugar-free sweetener. This keeps the carbs low while still adding sweetness. To boost flavor, think about adding fresh herbs like dill or basil. These herbs add a burst of freshness. You might also try adding diced apples or celery for crunch. Want more protein? Toss in some cooked quinoa or chickpeas. For a spicy kick, add jalapeños or a dash of cayenne. This salad is so versatile! You can serve it in many ways. Try it as a wrap in a whole wheat tortilla. It makes for a tasty lunch on the go. Another fun idea is to serve it in a bowl on top of mixed greens. This adds more color and nutrition. You could also stuff it in avocado halves for a unique and tasty dish. Whatever you choose, enjoy the fresh flavors! To store leftover cranberry pecan chicken salad, place it in an airtight container. Make sure the lid seals well. This keeps the salad fresh and prevents any odors from other foods. It’s best to store it in the fridge right after serving. This way, you can enjoy it later without losing flavor. The salad lasts about 3 to 4 days in the fridge. If you want to keep it longer, freezing is an option. However, the texture may change after thawing. To freeze, place the salad in a freezer-safe container. Leave some space at the top for expansion. Use it within a month for the best taste. When reheating, do it gently. Use the microwave on low power and stir often. This helps keep the chicken tender. You can also let it sit at room temperature for a while. If the salad feels dry, add a bit of Greek yogurt or honey to refresh it. Enjoy your meal! You can use sour cream instead of Greek yogurt. It adds creaminess and tang. Plain yogurt also works well. If you want a dairy-free option, try silken tofu or vegan yogurt. Both give a smooth texture to the salad. Yes, this salad is great for meal prep! You can make it ahead of time. Just keep the dressing separate until you are ready to eat. This keeps the salad fresh and crunchy. Store it in airtight containers in the fridge for up to three days. Absolutely! Leftover rotisserie chicken is perfect for this salad. It saves time and adds great flavor. Just shred the chicken and mix it with the other ingredients. This makes the salad even easier to prepare. Check out the Full Recipe to see how quick it is to whip up! Cranberry Pecan Chicken Salad offers tasty ingredients and clear steps for easy making. You learned about swaps, storage tips, and meal prep options. The salad is simple to make and fun to enjoy with friends. Don't hesitate to try different flavors and servings. Customize the recipe to fit your taste and needs. Remember, cooking should be easy and enjoyable. Your next kitchen adventure starts with this delicious salad!

Cranberry Pecan Chicken Salad Fresh and Flavorful Dish

Looking for a fresh and flavorful dish that’s packed with goodness? My Cranberry Pecan Chicken Salad combines juicy chicken, sweet

- 4 boneless, skinless chicken breasts - 1 cup cherry tomatoes, halved - 8 ounces fresh mozzarella, sliced - 1/2 cup balsamic vinegar - 1 tablespoon honey - 2 tablespoons olive oil - 2 cloves garlic, minced - 1 teaspoon dried oregano - Salt and pepper to taste - Fresh basil leaves for garnish Using fresh herbs can make a big difference. Fresh basil and oregano add amazing flavor. If you must use dried herbs, choose high-quality ones. For balsamic vinegar, pick a good brand. The best balsamic has a rich, sweet flavor. It enhances the dish and balances the chicken. If you want a different taste, try using different cheeses. Goat cheese or feta can add a nice twist. For a gluten-free option, this recipe is already safe. If you're dairy-free, use a vegan cheese or skip the cheese. You can still enjoy the rich balsamic glaze with the chicken and tomatoes. To create the balsamic marinade, mix the balsamic vinegar, honey, minced garlic, olive oil, oregano, salt, and pepper in a bowl. This blend gives the chicken a sweet and tangy flavor. Best practices for marinating include using a resealable bag. Place the chicken breasts in the bag and pour the marinade over them. Seal the bag tightly. Let the chicken marinate in the fridge for at least 30 minutes. For a stronger flavor, marinate for up to 2 hours. Start by searing the chicken to lock in the flavors. Heat a large oven-safe skillet over medium-high heat. Remove the chicken from the marinade, saving the marinade for later. Sear each breast for about 4 to 5 minutes on each side until they are browned. This step adds depth to the dish. For baking, preheat your oven to 400°F (200°C). After searing, reduce the heat to medium. Pour the reserved marinade over the chicken and add the halved cherry tomatoes. This will keep the chicken moist as it bakes. Layering tomatoes and mozzarella is key. Sprinkle the halved cherry tomatoes around the chicken. Next, layer the fresh mozzarella on top of each breast. This step adds creaminess and flavor. Timing matters when adding ingredients. Add tomatoes and mozzarella after searing but before baking. This ensures they meld together nicely while adding flavor. Bake for 20 to 25 minutes. Check that the chicken reaches an internal temperature of 165°F (74°C) before serving. Enjoy your Balsamic Glazed Caprese Chicken! For more details, check the Full Recipe. To achieve the perfect sear, heat an oven-safe skillet over medium-high heat. Add olive oil and let it get hot. Place the chicken breasts in the pan without crowding them. Sear for about 4-5 minutes on each side until browned. This locks in flavors and gives a nice crust. To check chicken doneness, use a meat thermometer. Insert it into the thickest part of the chicken. Look for an internal temperature of 165°F (74°C) for safety. For a beautiful presentation, use a large white plate. This makes the colors pop. Place the chicken in the center. Arrange the cherry tomatoes around it. Add the melted mozzarella on top for a delicious look. Garnish with fresh basil leaves. This not only adds color but also enhances the dish's flavor. Consider adding fresh herbs like thyme or rosemary for extra flavor. You can also use crushed red pepper flakes for a bit of heat. To adjust sweetness and acidity, add more honey for sweetness. For more tang, increase the balsamic vinegar. Taste as you go to get your ideal balance. For the full recipe, check the details in the recipe section. {{image_2}} You can change the herbs in this dish for new flavors. Try using fresh basil, thyme, or rosemary. Each herb brings its own taste. For a twist, add some Italian seasoning. It gives a warm and cozy flavor. Adding vegetables boosts nutrition and color. You can toss in sliced bell peppers, zucchini, or spinach. They cook well with the chicken and add crunch. Roasting vegetables alongside the chicken also makes the meal more filling. To make this dish shine, serve it with sides that balance its rich flavors. A light salad with mixed greens works great. You can add olives and a squeeze of lemon for zest. Garlic bread also complements the dish nicely. Its crunchy texture contrasts with the soft chicken. When it comes to drinks, try pairing it with a crisp white wine like Pinot Grigio. If you want a non-alcoholic option, a sparkling water with lemon is refreshing. Both will enhance the flavors and make your meal feel special. To turn this recipe into a full meal, consider adding a grain. Quinoa or couscous works well. They soak up the balsamic glaze and add fiber. You can also serve it over pasta for a heartier option. For a complete dinner experience, add a dessert. A simple fruit salad or sorbet can cleanse the palate. This combination makes your meal satisfying and memorable. For the full recipe, check out the [Full Recipe]. After cooking, let the Balsamic Glazed Caprese Chicken cool. Place leftovers in an airtight container. Store in the fridge for up to three days. To freeze, wrap each chicken breast tightly in plastic wrap. Then, place them in a freezer-safe bag. This way, you can keep portions fresh for up to three months. When reheating, use the oven for the best results. Preheat it to 350°F (175°C). Place the chicken on a baking dish. Cover with foil to keep it moist. Heat for about 15 to 20 minutes. For a faster method, use the microwave. Set it on medium power for 2 to 3 minutes. Check to make sure it’s warm throughout. Avoid overcooking, as that can make the chicken dry. In the fridge, the dish will last about three days. If you freeze it, it can stay good for three months. Always check for signs of spoilage like an off smell or a change in color. If you see any of these signs, it’s best to discard the chicken. For the full recipe, check the details above. Balsamic Glazed Caprese Chicken is a tasty dish that combines chicken, tomatoes, and mozzarella. You start with juicy chicken breasts. A balsamic vinegar marinade adds rich flavor. You then top the chicken with fresh cherry tomatoes and mozzarella. Bake it until melted and bubbly. Finally, garnish with fresh basil for a pop of color. Yes, you can prep this recipe ahead of time. Marinate the chicken in the balsamic mixture. You can do this the night before. Store it in the fridge until you’re ready to cook. This helps the flavors blend well. Just sear and bake when you want to serve it. To lower calories, use less oil in the marinade. You can also choose reduced-fat mozzarella. Additionally, skip the honey or use a sugar-free substitute. Serve the chicken with a side of veggies instead of carbs. This way, you still enjoy a delicious meal without the extra calories. This recipe blends simple ingredients for a tasty dish. You marinate chicken in a balsamic mix, then cook it to lock in flavor. Layer it with fresh tomatoes and mozzarella for a beautiful plate. Remember to check chicken doneness and consider your serving sides. Feel free to adjust flavors and make it your own. With proper storage, you can enjoy leftovers for days. Now, create your own balsamic glazed Caprese chicken and impress everyone at the table. Happy cooking!

Balsamic Glazed Caprese Chicken Quick and Flavorful Dish

Looking for a quick and tasty meal? Balsamic Glazed Caprese Chicken might just be your new favorite dish. With juicy

To make Garlic Butter Herb Shrimp Scampi, gather these key items: - 1 pound large shrimp, peeled and deveined - 4 tablespoons unsalted butter - 4 cloves garlic, minced - 1 teaspoon red pepper flakes (optional) - 1 lemon, juiced and zested - 1/4 cup fresh parsley, chopped - 1/4 cup fresh basil, chopped - Salt and pepper to taste - 8 ounces linguine or spaghetti - Olive oil for drizzling For customization, you can add: - A splash of white wine for depth - Cherry tomatoes for a pop of color - Spinach for added nutrition When picking shrimp, look for: - Wild-caught shrimp for the best flavor - Frozen shrimp can be great too; just thaw properly I encourage you to check the [Full Recipe] for all the steps and tips to perfect this dish. This recipe is not just tasty; it’s easy and fun to make! To cook the pasta, start by boiling water in a large pot. Add salt to the water to enhance the flavor. Once the water boils, add 8 ounces of linguine or spaghetti. Cook it until it is al dente, which means it should be firm yet tender. This usually takes about 8 to 10 minutes. After cooking, drain the pasta but save 1 cup of the pasta water. This water helps adjust the sauce later. Now, let's clean the shrimp. Use 1 pound of large shrimp, peeled and deveined. Rinse them under cold water to remove any grit. Pat them dry with a paper towel. Season the shrimp with salt and pepper. Heat 2 tablespoons of butter in a large skillet over medium-high heat. Add the shrimp in a single layer. Cook for 2 to 3 minutes on each side until they turn pink and opaque. Remove them from the skillet and set them aside. In the same skillet, melt the remaining 2 tablespoons of butter. Once it melts, add 4 minced garlic cloves and, if you like spice, 1 teaspoon of red pepper flakes. Sauté the garlic for about 1 minute until it is fragrant. Be careful not to burn the garlic, as it can taste bitter. Timing is key here; you want to add the garlic after the butter melts but before it browns. Add the cooked shrimp back into the skillet. Pour in the juice and zest of 1 lemon, along with 1/4 cup of chopped parsley and 1/4 cup of chopped basil. Toss everything together. This allows the shrimp to be coated in the garlic butter mixture. Next, add the drained pasta to the skillet. If the dish seems dry, add some reserved pasta water, a little at a time, until it reaches your desired consistency. Toss well to mix all the ingredients. Now you have a flavorful delight ready to serve! For the full recipe, check out the details in the earlier sections. To make your Garlic Butter Herb Shrimp Scampi even better, think about using extra herbs. Fresh thyme, oregano, or dill can add a nice twist. You can also try a pinch of smoked paprika for depth. Lemon plays a key role in this dish. It helps balance the rich butter and garlic. The bright juice cuts through the fat, making each bite refreshing. Don't skip the lemon zest, either. It adds a burst of flavor and aroma. You can cook shrimp in different ways. Grilling gives shrimp a smoky flavor. Just marinate them in the garlic butter mix before grilling. This adds a nice char and depth. To avoid overcooking shrimp, watch the color. They should turn pink and opaque in just 2-3 minutes per side. Remove them from heat as soon as they change color. You want them tender, not rubbery. Serving shrimp scampi in a large pasta bowl looks impressive. You can layer the pasta first, then add the shrimp on top. This creates a beautiful contrast. Garnish with extra chopped herbs for color. A slice of lemon on the side adds flair. Drizzling a little olive oil gives it a shiny finish. Your dish will be both tasty and visually appealing! {{image_2}} You can swap out the pasta to change things up. Instead of linguine, try fettuccine or penne. Each pasta type brings a new texture to the dish. You can even use whole wheat or chickpea pasta for a healthier option. Adding vegetables is a great way to enhance the dish. You can toss in spinach, cherry tomatoes, or zucchini. These vegetables add color and nutrients. If you want more protein, consider adding chicken or scallops. They pair well with the garlic butter sauce. For those who need gluten-free options, you can use gluten-free pasta. Brands like Barilla or Banza offer great choices. Just make sure to follow their cooking times for the best results. If you want a dairy-free version, use olive oil instead of butter. You can also find dairy-free butter for a similar taste. Just keep an eye on the flavors. Using fresh herbs and lemon juice will keep your dish bright and tasty. Feel free to explore and make this dish your own. Check the Full Recipe for more ideas! To store Garlic Butter Herb Shrimp Scampi, first, let it cool. Place the dish in an airtight container. Make sure to cover it well. Refrigerate and eat within three days for the best taste. The shrimp may lose some texture over time but will still be safe to eat. Reheat your shrimp scampi in a skillet. Use low to medium heat to avoid overcooking the shrimp. Add a splash of water or broth to keep it moist. Stir gently until everything is warmed through. If you want to boost the flavor, squeeze a little lemon juice before serving. This will bring back the dish’s bright taste. For more tips, check out the Full Recipe for additional ideas on enhancing your meals. How long does it take to make? It takes about 25 minutes to make Garlic Butter Herb Shrimp Scampi. You can prep in 10 minutes and cook in 15. Can I make this dish ahead of time? I recommend making this dish fresh. It tastes best right after cooking. However, you can prepare the shrimp and sauce ahead. Just reheat gently before serving. What to serve with shrimp scampi? Shrimp scampi pairs well with garlic bread, a fresh salad, or steamed veggies. You can also serve it over rice or with crusty bread. Can I use frozen shrimp instead of fresh? Yes, you can use frozen shrimp. Make sure to thaw them completely before cooking. This helps them cook evenly and stay tender. How can I adjust the spice level? You can adjust the spice by adding more or less red pepper flakes. For a milder dish, skip the flakes. For more heat, add extra flakes or even a dash of hot sauce. Where to find the full recipe for Garlic Butter Herb Shrimp Scampi? You can find the full recipe for Garlic Butter Herb Shrimp Scampi in the detailed recipe section above. In this blog post, we covered how to make Garlic Butter Herb Shrimp Scampi. We explored the ingredients, learned about cooking techniques, and discovered tips for perfecting the dish. You can customize it to your taste and dietary needs. Remember, timing is key for the sauce to shine. Enjoy experimenting with flavors and presentation. With practice, you will serve a delicious dish that impresses everyone. Now, gather your ingredients and start cooking!

Garlic Butter Herb Shrimp Scampi Flavorful Delight

If you love seafood, you’ll adore my Garlic Butter Herb Shrimp Scampi. This dish bursts with rich flavors from garlic

- Chicken and Marinade Components - 2 boneless, skinless chicken breasts - 1 tablespoon olive oil - 1 teaspoon chili powder - 1 teaspoon cumin - 1 teaspoon smoked paprika - Salt and pepper, to taste The chicken is the star in this dish. I use a mix of spices to wake up the flavor. The olive oil helps the spices stick and adds moisture. - Base Ingredients: Rice or Quinoa - 1 cup cooked brown rice or quinoa You can choose either brown rice or quinoa. Both are healthy and fill you up. They serve as the perfect base for the burrito bowl. - Toppings and Flavor Enhancers - 1 can (15 oz) black beans, rinsed and drained - 1 cup corn kernels (fresh or frozen) - 1 red bell pepper, diced - 1 avocado, diced - 1 cup cherry tomatoes, halved - 1/2 cup red onion, finely chopped - 1/2 cup fresh cilantro, chopped - Juice of 1 lime - Optional toppings: shredded cheese, sour cream, salsa These toppings add crunch and color. Black beans and corn boost the protein. Fresh veggies like bell pepper and tomatoes add a juicy bite. Add lime juice for a fresh zing, and top it off with optional cheese or sour cream for extra creaminess. This mix of flavors makes this bowl so tasty! For the full recipe, check out the instructions to create this delicious dish. Marinating Techniques for Maximum Flavor To get the best taste from your chicken, start by marinating it. Mix olive oil, chili powder, cumin, smoked paprika, salt, and pepper in a bowl. Coat the chicken breasts well. Let them sit for at least 20 minutes. For even better flavor, marinate them for up to 2 hours in the fridge. Cooking the Chicken: Grilling vs. Skillet You can cook the chicken either on a grill or in a skillet. If you use a grill, preheat it to medium-high heat. Grill each side for about 6-7 minutes. Use a skillet? Heat it up the same way. Cook until the chicken reaches 165°F (75°C). This ensures it's safe to eat. After cooking, let the chicken rest for 5 minutes. This makes it juicy. Slicing and Resting Guidelines When the chicken has rested, slice it into strips. This helps it stay tender. The marinated chicken packs a punch of flavor. Make sure to let it rest. This keeps all the juices inside. Layering the Ingredients for Best Presentation Begin your burrito bowl with a base of cooked brown rice or quinoa. This adds heartiness to the dish. Then, layer on the black beans, corn, diced red bell pepper, cherry tomatoes, and red onion. Adding fresh cilantro on top brings a bright touch. Adding Toppings: Tips for Balance of Flavors Next, add the sliced chicken on top. Diced avocado adds creaminess and a nice texture. Squeeze lime juice over everything. This gives a zesty flavor that ties it all together. Optional Ingredients for a Creative Twist If you like variety, consider adding optional toppings. Shredded cheese, sour cream, or salsa can enhance your bowl. Feel free to mix in your favorite ingredients for a new twist on this classic dish. This recipe is versatile, so have fun with it! For the full recipe, check out the instructions above. Avoiding Common Mistakes The main mistake is overcooking the chicken. Use a meat thermometer to check the temperature. Aim for 165°F (75°C). This step keeps the chicken juicy. Another mistake is not letting the chicken rest. Resting helps the juices stay inside. Best Tools for Cooking Chicken Use a grill pan or a skillet for cooking chicken. A digital meat thermometer is key for perfect results. Tongs help flip the chicken without losing juices. A sharp knife is great for slicing. Ensuring Perfectly Cooked Rice/Quinoa Follow the cooking instructions on the package. For fluffy rice, rinse it to remove excess starch. The same goes for quinoa; rinse it well. Use a 2:1 water-to-rice ratio. For quinoa, use a 2:1.5 ratio. Ideal Pairings (Sides and Drinks) Pair your burrito bowl with a fresh salad. A simple lime vinaigrette adds a nice touch. For drinks, try a light beer or iced tea. Both will balance the flavors well. Presentation Ideas for Impressing Guests Serve in clear bowls to show off the colorful layers. Use a sprinkle of cilantro on top for color. A wedge of lime adds a pop of freshness on the side. Meal Prep Ideas with Leftovers Store leftover chicken for quick meals. Use it in salads or sandwiches. Mix leftover rice or quinoa with fresh veggies for a speedy lunch. You can also freeze portions for later use. {{image_2}} You can switch up the protein in your burrito bowls. Tofu works great for a vegan option. If you prefer beef, use ground beef or steak strips. Both options add new tastes. For gluten-free meals, use quinoa or rice as your base. Double-check labels on beans and sauces to ensure they are gluten-free. You can also swap in seasonal veggies. Use sweet potatoes in the fall or zucchini in the summer for fresh flavors. Want more heat? Add jalapeños or a dash of hot sauce. For a milder taste, skip the spicy ingredients. Adjust the heat to fit your family’s preference. You can also play with regional flavors. Adding homemade salsa, pico de gallo, or even a mango salsa brings a twist. Each option offers a fresh spin on the classic recipe. Garnishes add both flavor and color. Try fresh cilantro, lime wedges, or sliced radishes. You can even add a sprinkle of crushed tortilla chips for crunch. Each choice can make your bowl unique and fun. For the full recipe, check out the detailed steps to create your perfect Southwest Chicken Burrito Bowls! Best Practices for Refrigeration Store your burrito bowls in the fridge right away. Use airtight containers to keep them fresh. Leftovers can last up to three days when stored correctly. Make sure to cool the food before sealing it. This helps avoid moisture build-up. Freezing Tips for Longer Shelf Life If you want to save them longer, freeze your burrito bowls. Use freezer-safe containers or bags. Label them with the date. They can last up to three months in the freezer. To eat, just thaw in the fridge overnight before reheating. Recommended Containers for Storage Choose glass or BPA-free plastic containers. These are safe for food and easy to clean. Opt for containers with tight lids to keep air out. For portion control, use smaller containers. This way, you can grab a single serving easily. Oven vs. Microwave: Pros and Cons The oven gives even heat but takes longer. Preheat to 350°F (175°C) and cover with foil. This keeps moisture in. The microwave is quicker but may make some parts soggy. Heat in short bursts and stir to keep it even. Keeping Ingredients Fresh After Reheating Add fresh toppings after reheating. This includes avocado, cilantro, or cheese. They keep their taste and texture better when added last. Avoid reheating these delicate ingredients to maintain their quality. Safety Tips for Storing Cooked Chicken Always cool cooked chicken before storing. Store it separately if possible to keep it safe. Avoid leaving it out for more than two hours. Checking your fridge temperature helps ensure your food stays safe to eat. How long does the chicken need to marinate? The chicken should marinate for at least 20 minutes. For the best flavor, marinate it for up to 2 hours in the fridge. This gives the spices time to soak in. Can I make these burrito bowls ahead of time? Yes, you can make these burrito bowls ahead of time. Prepare the chicken and toppings in advance. Store them in the fridge. When ready to eat, just assemble the bowls. What are the best toppings for a Southwest Chicken Burrito Bowl? Great toppings include diced avocado, shredded cheese, and fresh cilantro. You can also add salsa, sour cream, or lime juice for extra zest. What to do if the chicken turns out dry? If your chicken turns out dry, try using a meat thermometer next time. Cook until it reaches 165°F. You can also add a drizzle of olive oil or lime juice to keep it moist. How can I enhance the flavor if I’m short on spices? If you lack spices, use fresh herbs like cilantro or parsley. Squeeze some lime juice on the chicken. This will boost the flavor without extra spices. Tips for making the dish more kid-friendly? To make it kid-friendly, cut the chicken into smaller pieces. You can also skip the spices or use milder ones. Let kids add their own toppings for fun! This blog post explored creating a delicious Southwest Chicken Burrito Bowl. We covered essential ingredients, cooking methods, and assembly tips. You learned how to avoid common mistakes and how to wow your guests with great presentation. We also highlighted variations and storage tips. Remember, this dish is flexible and fun. Use what you have and enjoy the process. A great meal starts with confidence in the kitchen. Happy cooking!

Savory Southwest Chicken Burrito Bowls Made Easy

Craving a burst of flavor in a bowl? You’ve come to the right place! In this post, I’ll guide you

To make Blueberry Crumble Breakfast Bars, you will need: - 2 cups rolled oats - 1 cup whole wheat flour - 1/2 cup brown sugar, packed - 1/4 cup coconut oil, melted - 1/2 teaspoon salt - 1 teaspoon cinnamon - 1/2 teaspoon baking powder - 1 teaspoon vanilla extract - 1 1/2 cups fresh blueberries (or frozen, thawed and drained) - 1/4 cup honey or maple syrup - 1 tablespoon lemon juice You can adjust the measurements if needed. For a gluten-free option, use gluten-free oats and flour. If you want a nut-free recipe, swap coconut oil with canola oil. You can also use agave syrup instead of honey for a vegan version. Remember, these swaps may change the taste slightly, but they will still be delicious. Each serving of Blueberry Crumble Breakfast Bars offers a good mix of nutrients. Here’s a quick look: - Calories: 150 - Protein: 3g - Carbohydrates: 25g - Dietary Fiber: 3g - Sugars: 6g - Fat: 5g These bars provide energy and are rich in fiber. They are perfect for a busy morning or a snack. Enjoy making these tasty bars with the full recipe! First, gather your ingredients. You will need: - 2 cups rolled oats - 1 cup whole wheat flour - 1/2 cup brown sugar, packed - 1/4 cup coconut oil, melted - 1/2 teaspoon salt - 1 teaspoon cinnamon - 1/2 teaspoon baking powder - 1 teaspoon vanilla extract - 1 1/2 cups fresh blueberries - 1/4 cup honey or maple syrup - 1 tablespoon lemon juice Now, preheat your oven to 350°F (175°C). Line an 8x8 inch baking pan with parchment paper. Let some paper hang over the edges. This makes it easy to lift the bars out later. Next, take a big bowl and mix the rolled oats, whole wheat flour, brown sugar, melted coconut oil, salt, cinnamon, and baking powder. Stir until everything is mixed well. Set aside 1 cup of this mixture for the crumble topping. In the rest of the mixture, add vanilla, honey or maple syrup, and lemon juice. Mix well until you have a crumbly dough. Press the dough evenly into the bottom of your prepared pan. Make sure it covers the whole bottom. This creates a solid base for your bars. In a separate bowl, gently fold the blueberries into the reserved crumble mixture. Sprinkle this blueberry-oat mixture over the pressed dough. Now, put the pan in your preheated oven. Bake for 25-30 minutes. You want the edges to turn golden brown, and the blueberry filling should bubble a bit. When the bars are done, carefully remove them from the oven. Let them cool in the pan for about 10 minutes. Then, use the parchment paper to lift them out. Let the bars cool completely on a wire rack. Once cooled, cut them into squares or rectangles. Now, you can enjoy your tasty Blueberry Crumble Breakfast Bars! For the full recipe, check out the detailed instructions above. To make the perfect crumble, focus on the texture. Your oat mixture should feel sandy, not wet. Use cold coconut oil for a flakier crumble. Mix in the oil until the oats are coated. This will help each bite be crisp and tasty. Don't overmix when adding the blueberries. Gently fold them in to keep their shape. A key mistake is pressing the dough too hard. You want it firm but not dense. This can make your bars tough. Also, don't skip the parchment paper. It helps lift the bars out easily. Overbaking is another common error. Keep an eye on the edges. They should be golden brown, but not too dark. If you need substitutes, there are great options. For whole wheat flour, use almond flour for a nutty taste. You can also swap honey for agave syrup. If you want a nut-free option, coconut oil works well. For oats, quick oats can replace rolled oats, but the texture will change slightly. Always remember to adjust baking time based on your changes. For more details, check out the Full Recipe. {{image_2}} You can boost the taste of your Blueberry Crumble Breakfast Bars in fun ways. Try adding chopped nuts like almonds or walnuts for crunch. You can also mix in some shredded coconut for a tropical twist. A sprinkle of chia seeds adds fiber and texture, too. For a sweet touch, consider drizzling a bit of honey or maple syrup on top before baking. While blueberries shine in this recipe, many fruits work well. Raspberries, strawberries, or chopped peaches can be great substitutes. You can even use a mix of your favorite fruits. Just make sure to adjust the sweetness based on how tart or sweet the fruit is. To make these bars vegan, replace honey with maple syrup. You can also use a flaxseed egg instead of a traditional egg if the recipe called for one. For gluten-free options, swap whole wheat flour with almond flour or gluten-free oats. Be sure to check that your baking powder is gluten-free as well. These small changes let everyone enjoy these tasty bars! To keep your Blueberry Crumble Breakfast Bars fresh, store them in an airtight container. This helps lock in moisture and flavor. You can place a piece of parchment paper between layers to prevent sticking. Avoid storing them in direct sunlight or near heat sources. When stored correctly at room temperature, these bars last about 3 to 5 days. If you want them to last longer, place them in the fridge. In the fridge, they can stay fresh for up to a week. For even more longevity, freeze them. They can last up to 3 months in the freezer. If you want to enjoy your bars warm, reheating is easy. Simply place a bar in the microwave for 15 to 20 seconds. You can also use the oven. Preheat it to 350°F (175°C), then warm the bars for about 5 to 10 minutes. This makes them taste fresh again! Yes, you can use frozen blueberries. Just make sure to thaw and drain them first. This keeps the bars from getting too watery. Frozen blueberries work well and still taste great in these bars. To make these bars vegan, swap the honey for maple syrup. You can also use a plant-based butter instead of coconut oil. These simple swaps keep the flavor while making them vegan-friendly. If you don’t have coconut oil, you can use vegetable oil or unsalted butter. Both options work well and won’t change the taste too much. Choose what you have on hand for a quick fix. Yes, you can easily double the recipe to make larger batches. Just use a bigger baking pan, like a 9x13 inch one. This way, you’ll have more bars to enjoy or share! You can tell the bars are done when the edges are golden brown. The blueberry filling should be bubbling a bit. If you poke a toothpick in the center and it comes out clean, they are ready to cool. You learned about the key ingredients for Blueberry Crumble Breakfast Bars and how to measure them. We covered the steps to prepare, bake, cool, and serve this tasty treat. You also discovered useful tips for perfecting your bars and common mistakes to avoid. Plus, we explored tasty variations and how to store your bars for freshness. In closing, you now have all the tools to make and enjoy these delicious bars anytime. So, get baking and experiment with your own flavors!

Blueberry Crumble Breakfast Bars Tasty and Easy Recipe

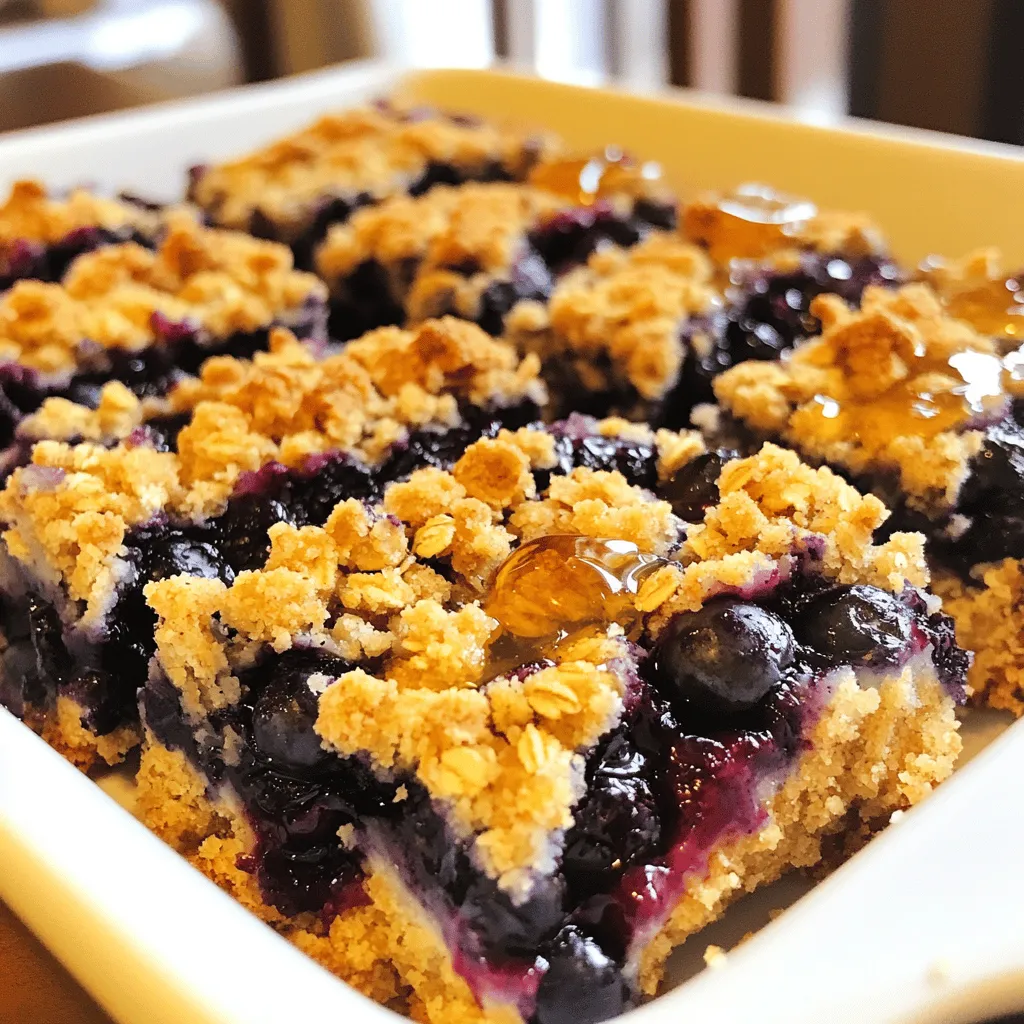
Do you want a tasty start to your day? These Blueberry Crumble Breakfast Bars are just what you need! They

- 4 salmon fillets - 1/4 cup honey - 4 cloves garlic, minced The main stars of this dish are the salmon fillets. They provide a rich, buttery flavor that pairs perfectly with the sweet and savory glaze. The honey adds natural sweetness, while the minced garlic gives it a bold kick. - 2 tablespoons soy sauce (or tamari for gluten-free) - 1 tablespoon lemon juice - 1 tablespoon olive oil These additional ingredients enhance the glaze. The soy sauce adds umami, while the lemon juice brightens the flavor. Olive oil helps the glaze stick to the salmon and adds richness. - Salt and pepper to taste - 2 green onions, thinly sliced for garnish - Sesame seeds for garnish Garnishing the dish makes it look stunning. Adding salt and pepper boosts the flavor. Green onions add a fresh crunch, and sesame seeds bring a lovely texture. For the complete recipe, check out the Full Recipe section. To start, you need to make the honey garlic glaze. Gather these ingredients: - 1/4 cup honey - 4 cloves garlic, minced - 2 tablespoons soy sauce (or tamari for gluten-free) - 1 tablespoon lemon juice - 1 tablespoon olive oil In a small saucepan, combine the honey, minced garlic, soy sauce, lemon juice, and olive oil. Stir well to mix everything together. Cook this mixture over medium heat. Watch it closely, and let it simmer for about 3-5 minutes. You want it to thicken slightly. Once it does, remove it from the heat and set it aside. Next, preheat your oven to 400°F (200°C). While it heats, season your salmon fillets with salt and pepper. You will need four fillets for this recipe. Place them skin-side down on a lined baking sheet. Make sure they are spaced out so they cook evenly. Now, take your thickened glaze and generously brush it over the top of the salmon fillets. Be sure to save some glaze for later. Bake the salmon in the preheated oven for 12-15 minutes. You know it’s done when it flakes easily with a fork. If you want a caramelized top, broil the salmon for the last 2-3 minutes. Just keep an eye on it so it doesn’t burn. Once the salmon is cooked, drizzle the reserved glaze over the top. For a beautiful finish, garnish with thinly sliced green onions and sesame seeds before serving. Enjoy your dish! How can you tell when salmon is done cooking? Look for the flesh to turn opaque and flake easily with a fork. The internal temperature should reach 145°F (63°C). To ensure even cooking, try to select fillets of similar thickness. This way, they will cook at the same rate. What are the best techniques for glazing salmon? Start by brushing the glaze on before cooking. This allows the salmon to absorb the flavor. Halfway through cooking, brush on more glaze for added richness. For a caramelized finish, broil the salmon for a couple of minutes at the end. What can you add to the glaze for extra flavor? You can try adding spices like paprika or ginger. Fresh herbs like thyme or cilantro also work great. Just mix these into the glaze before cooking to infuse the taste throughout. What sides pair well with honey garlic glazed salmon? Steamed broccoli and fluffy rice are classic choices. You can also serve it with a fresh salad or roasted vegetables for a colorful plate. A squeeze of fresh lemon juice adds a nice touch, too. How can you present the dish for a beautiful plate? Serve the salmon on a nice platter, garnished with sesame seeds and green onions. Arrange sides around the salmon for a colorful display. A drizzle of the reserved glaze adds shine and flavor. What are some recommended sides that complement this dish? Consider serving with roasted potatoes or quinoa salad. These sides add texture and balance the sweetness of the glaze. For the full recipe, check the original details above. {{image_2}} You can cook Honey Garlic Glazed Salmon in different ways. Each method gives a unique flavor and texture. - Grilling: Grilling adds a smoky taste. Preheat your grill to medium-high heat. Place the salmon on the grill once it’s hot. Grill for about 6-8 minutes on each side. Brush with glaze while cooking. This method keeps the salmon juicy and gives it beautiful grill marks. - Baking: Baking is simple and works well for busy days. Preheat your oven to 400°F (200°C). Place the salmon on a lined baking sheet. Bake for 12-15 minutes. This method is great for even cooking and a tender result. - Slow Cooker: Using a slow cooker makes salmon very tender. Just coat the salmon with the glaze. Place it in the slow cooker on low for about 2-3 hours. This method lets the flavors blend well. You can swap some ingredients for healthier options. - Alternative Sweeteners: Try using maple syrup or agave nectar instead of honey. This change can reduce the calories and still taste great. - Other Proteins: If you don’t have salmon, use chicken or tofu. Both also soak up the glaze well. Just adjust the cooking time as needed. Chicken takes longer, about 20-25 minutes, while tofu needs about 15 minutes. Honey Garlic Glazed Salmon can be served in many ways. - As an Appetizer: Cut the salmon into small pieces. Serve with toothpicks and extra glaze for dipping. This makes a tasty starter for parties. - As a Main Dish: Serve the salmon on a platter. Pair it with rice and steamed veggies. This creates a balanced meal full of flavor. - Incorporating into Salads: Break the salmon into chunks and add it to a fresh salad. Mix in greens, cherry tomatoes, and avocado. Drizzle with the reserved glaze for extra taste. - In Rice Bowls: Place the salmon over a bed of rice. Add some steamed broccoli and sesame seeds. This makes a colorful and healthy meal. For the full recipe, check out the Honey Garlic Glazed Salmon section above. To keep leftover Honey Garlic Glazed Salmon fresh, store it in the fridge. Let the salmon cool down first. Place it in an airtight container. This helps prevent air from drying it out. When using a container, I recommend glass or BPA-free plastic. These materials help maintain flavor and texture. Make sure to close the lid tightly. Reheating salmon can be tricky. You want it warm, not dry. The best way is to use the oven. Preheat your oven to 275°F (135°C). Place the salmon on a baking sheet. Cover it with foil to keep moisture in. Heat for about 15 minutes. You can also use the microwave. But be careful. Use a microwave-safe plate and cover it loosely with a paper towel. Heat in short bursts of 30 seconds. Check often to avoid overcooking. Honey Garlic Glazed Salmon lasts about 3 days in the fridge. After that, the quality drops. If you want to keep it longer, freezing is a good option. Wrap the salmon tightly in plastic wrap, then place it in a freezer bag. It can last up to 3 months in the freezer. When you’re ready to eat it, thaw it in the fridge overnight. This keeps the flavor fresh. You can enjoy your delicious salmon again without losing taste! What type of salmon is best for this recipe? I recommend using wild-caught salmon. It has a rich flavor and good texture. Sockeye and king salmon are popular choices. Farmed salmon works too, but it may have more fat. Choose what you like best. Can I use fresh garlic vs. garlic powder? Yes, you can use fresh garlic for a stronger taste. Mince four cloves for this recipe. Garlic powder can work in a pinch, but it won’t have the same punch. Fresh garlic brings a bright flavor that enhances the glaze. What are the health benefits of salmon? Salmon is a great source of omega-3 fatty acids. These fats help your heart and brain. Salmon also offers protein, vitamins, and minerals. Eating salmon regularly can boost your mood and keep you healthy. How many calories are in Honey Garlic Glazed Salmon? Each serving of Honey Garlic Glazed Salmon has about 350 calories. This number may vary based on the size of your salmon fillet. It is a nutritious meal that fits well into a balanced diet. What to do if the glaze is too thin or thick? If your glaze is too thin, simmer it longer on low heat. This will help it thicken. If it’s too thick, add a splash of water or broth. Stir well until you reach the right consistency. How to prevent salmon from sticking to the baking sheet? To stop sticking, use parchment paper or a silicone mat. This creates a non-stick surface. You can also lightly grease the sheet with oil. This will help your salmon slide right off after baking. You now have all the tools to make tasty Honey Garlic Glazed Salmon. We discussed key ingredients, like fresh salmon, honey, and garlic, along with delicious enhancements. You learned steps for the glaze and tips for cooking perfectly. Remember to explore variations and proper storage for leftovers. With these insights, you can enjoy this dish with anyone. Get started on this simple yet delightful meal today. Your kitchen is waiting for the sweet and savory aromas!

Honey Garlic Glazed Salmon Flavorful and Simple Recipe

If you love sweet and savory dishes, this Honey Garlic Glazed Salmon recipe is for you! With just four main

Creamy Tomato Spinach Orzo is a rich, tasty dish. It takes about 25 minutes to make. This recipe serves four people. You can find the full recipe below. - 1 cup orzo pasta - 2 tablespoons olive oil - 3 cloves garlic, minced - 1 medium onion, diced - 1 can (14 oz) diced tomatoes, with juices - 2 cups vegetable broth - 1 cup heavy cream or coconut cream - 4 cups fresh spinach - ½ cup grated Parmesan cheese (or nutritional yeast for a vegan option) - Salt and pepper to taste - 1 teaspoon dried oregano - 1 teaspoon red pepper flakes (optional for heat) - Fresh basil leaves, for garnish These ingredients come together to create a creamy and comforting meal. The orzo pasta adds a delightful texture. Fresh spinach gives it a vibrant green color. The tomatoes and cream combine for a rich flavor that is hard to resist. Each bite offers a taste of home. 1. Heating olive oil and cooking onion Start by taking a large pot and heating two tablespoons of olive oil over medium heat. Add one diced onion. Cook it for about 3-4 minutes until it turns soft and clear. 2. Adding garlic, tomatoes, and vegetable broth Next, stir in three minced garlic cloves. Cook for one minute until you smell the garlic. Then, add one can of diced tomatoes with their juices and two cups of vegetable broth. Bring this to a boil. 3. Cooking the orzo Once your mixture boils, add one cup of orzo pasta. Turn the heat down to a simmer. Cook the orzo for about 8-10 minutes or until it is soft but not mushy. 1. Stirring in cream and spinach After cooking the orzo, it’s time to add one cup of heavy cream or coconut cream. Stir well to mix it with the tomatoes and orzo. Then, add four cups of fresh spinach. Stir until the spinach wilts, which takes about 2-3 minutes. 2. Adding Parmesan and seasoning Now, mix in half a cup of grated Parmesan cheese or nutritional yeast if you want a vegan option. Add one teaspoon of dried oregano and red pepper flakes if you like heat. Don’t forget to season with salt and pepper to taste. 1. Letting the dish thicken Remove the pot from heat and let it sit for a few minutes. This helps the dish thicken and makes it creamier. 2. Serving suggestions Serve the creamy tomato spinach orzo in wide, shallow bowls. Garnish with fresh basil leaves on top. For a complete meal, enjoy it with crusty bread. You can find the Full Recipe to guide you through all the steps. To get perfect orzo texture, follow a few simple steps. First, use plenty of water for boiling. This helps the orzo cook evenly. Stir the pasta often to prevent it from sticking together. Cook until just tender, about 8-10 minutes. Remember, you want it al dente, so don’t overdo it. For sautéing spinach, heat your pan before adding oil. This helps the spinach wilt quickly, keeping its bright green color. Add a pinch of salt to draw out moisture and enhance the flavor. Cook until just wilted, about 2-3 minutes. Herbs can take your dish to the next level. Fresh basil and oregano work great with this orzo. Add them at the end for a fresh taste. You can also use dried herbs, but reduce the amount slightly. For spice adjustments, try adding more red pepper flakes if you love heat. A squeeze of lemon juice can brighten the flavors too. Just a little can make a big difference. One common mistake is overcooking the orzo. Keep an eye on the timer to ensure it’s just right. Remember, it will continue to cook in the sauce. Another pitfall is misjudging seasoning levels. Always taste as you go. Start with a little salt and pepper, then adjust based on your preference. This way, you can create a dish that suits your taste perfectly. {{image_2}} You can easily change this recipe to fit your needs. If you want a vegan dish, use coconut cream instead of heavy cream. It gives a nice, creamy texture and a hint of sweetness. For pasta, orzo is great, but you can swap it for gluten-free pasta. Rice or quinoa works too if you want to try something new. Add fun flavors by mixing in proteins like chicken or shrimp. Cook them before you add the garlic and onion for a tasty twist. You can also use different herbs and spices. Fresh basil, parsley, or thyme can add a fresh kick. Want heat? Try adding more red pepper flakes or some chili powder for a spicy touch. If you are looking for gluten-free options, swap orzo for a gluten-free pasta. There are many good brands out there. To lighten the dish, use less cream. You can cut it by half or use more vegetable broth. This keeps the flavor while making the meal a bit healthier. After you enjoy your Creamy Tomato Spinach Orzo, store any leftovers in the fridge. Let the dish cool down first, then transfer it to an airtight container. This keeps the flavors fresh and prevents it from drying out. If you have a large batch, divide it into smaller portions. This way, you can grab a quick meal later. To reheat your orzo, use a pot on the stove. Add a splash of water or broth to help it stay creamy. Heat over low to medium heat, stirring often. This helps keep the texture smooth. You can also use the microwave. Just cover the bowl with a damp paper towel to trap steam. Heat in short bursts, stirring in between. If you want to save the orzo for later, freezing works well. Cool it completely, then place it in a freezer-safe container. Leave some space at the top, as it will expand when frozen. To thaw, move it to the fridge overnight. For quick thawing, place the container in cold water. Reheat as mentioned above for best results. For a full recipe, check the details provided above. Orzo is a small, rice-shaped pasta. It cooks quickly and absorbs flavors well. You can find it in stores near other pasta types. Orzo pairs nicely with soups, salads, and casseroles. It adds texture and heartiness to dishes like Creamy Tomato Spinach Orzo. Yes, you can make this dish ahead of time. Just cook it and let it cool. Then, store it in an airtight container in the fridge. When ready to eat, reheat it on the stove. Add a splash of broth or cream to bring back its creaminess. To make Creamy Tomato Spinach Orzo dairy-free, use coconut cream instead of heavy cream. Nutritional yeast can replace Parmesan cheese for a cheesy flavor. These swaps keep the dish rich and tasty without dairy. Orzo pairs well with many sides. Here are a few ideas: - A simple green salad - Garlic bread - Roasted vegetables - Grilled chicken or fish These sides create a balanced meal and enhance the flavors of the orzo. Yes, you can freeze the leftovers. Place them in a freezer-safe container. Make sure to leave some space for expansion. Thaw in the fridge overnight before reheating. You may need to add a bit of liquid to restore the creamy texture. You now have a complete guide for making Creamy Tomato Spinach Orzo. We covered ingredients, step-by-step instructions, cooking tips, variations, and storage advice. This dish is simple but full of flavor. Remember to avoid common mistakes like overcooking orzo and misjudging seasoning. Feel free to experiment with different herbs and protein options. Enjoy this comforting meal whenever you need a quick and satisfying dish. With these tips, you can create a delightful orzo that your family will love. Happy cooking!

Creamy Tomato Spinach Orzo Flavor-Packed Delight

If you’re craving a quick and tasty meal, you’re in for a treat! Creamy Tomato Spinach Orzo is not just

- 1 can (15 oz) black beans, rinsed and drained - 1 cup corn kernels (fresh, frozen, or canned) - 1 medium red bell pepper, diced - 1 small red onion, finely chopped - 1 cup cherry tomatoes, halved - 1 avocado, diced - 1/4 cup fresh cilantro, chopped - 2 tablespoons lime juice - 1 tablespoon olive oil - 1 teaspoon cumin - Salt and pepper to taste When making Fiesta Black Bean Corn Salad, you want the best taste. Here are some tips: - Fresh vs. canned: I love using fresh ingredients. They give the best flavor. If you use canned beans, make sure to rinse them well. This removes extra salt and keeps the salad light. - Organic vs. non-organic: Organic veggies often taste better and have fewer chemicals. If you can, buy organic bell peppers and tomatoes. - Substituting ingredients: If you have a food allergy or dislike an ingredient, swap it out! Use kidney beans for black beans or add corn if you want more crunch. You can also replace avocado with diced mango for a sweet twist. These tips ensure your salad is not only healthy but also packed with flavor. For the full recipe, check out the [Full Recipe]. To start, gather your main ingredients. In a large mixing bowl, combine: - 1 can of black beans, rinsed and drained - 1 cup of corn kernels - 1 diced red bell pepper - 1 finely chopped red onion - 1 cup of halved cherry tomatoes Next, gently fold in the diced avocado and chopped cilantro. Be careful not to mash the avocado; you want it to stay chunky. Now, let’s create the dressing. In a small bowl, whisk together: - 2 tablespoons of lime juice - 1 tablespoon of olive oil - 1 teaspoon of cumin - Salt and pepper to taste This will give your salad a fresh, zesty flavor. When you pour the dressing over the salad, ensure even distribution. Gently stir the mix so every bite gets flavor. For the best taste, let the salad sit for 10-15 minutes. This time allows the flavors to meld. You will notice a delightful change! For serving, use a large, colorful bowl. This makes the salad look vibrant and inviting. Garnish with extra cilantro and lime wedges. These final touches add a festive look and a burst of flavor. Enjoy your delicious creation! For the full recipe, check out the detailed instructions and enjoy making this fresh dish! To make your salad pop with flavor, try adding fresh lime zest. It gives a bright kick. You can also toss in some diced jalapeños for heat. If you like a sweeter taste, add diced mango or pineapple. When serving, choose a large, colorful bowl. It makes the salad look festive. Garnish with extra cilantro and lime wedges for a pretty touch. Store any leftovers in an airtight container. This keeps the salad fresh for up to three days. One common mistake is overmixing the ingredients. This can turn the avocado mushy. Instead, gently fold the salad. Another mistake is not letting the flavors meld. Letting it sit for 10-15 minutes enhances the taste. If your salad needs more flavor, try adding a pinch of salt or a splash of lime juice. This helps balance the taste. If you want more crunch, add some chopped nuts or seeds. For creaminess, mix in more avocado or a dollop of Greek yogurt. For the full recipe, check out the detailed steps to create this vibrant dish. {{image_2}} You can easily swap some ingredients in Fiesta Black Bean Corn Salad. If you want, use pinto beans or kidney beans instead of black beans. Both options bring their own taste and texture. For grains, try quinoa or brown rice for added fiber. Seasonal veggies can make this dish even better. In summer, add fresh zucchini or cucumbers. In fall, consider roasted butternut squash or sweet potatoes. These changes keep the salad fresh and fun all year. This salad can fit different diets. For a vegan option, skip the cheese (if you add any). The salad is already packed with plant-based goodness. It’s also gluten-free since it uses no grains with gluten. If you're watching your carbs, reduce the corn. You can add more beans or veggies instead. For a low-fat version, use less olive oil or replace it with a splash of vegetable broth. While the lime dressing is tasty, you can try other options. A balsamic vinaigrette adds a sweet tang. A cilantro-lime dressing gives a fresh kick. For a spicy twist, try a chipotle dressing to add some heat. Experimenting with dressings can change the flavor. This keeps the salad exciting and new every time you make it. For the full recipe, check out the detailed instructions. To store leftovers, place the Fiesta Black Bean Corn Salad in an airtight container. This helps keep it fresh. Make sure to seal it well to prevent air from getting in. If you plan to eat it later, store it in the fridge. It’s best to keep it cold to maintain flavor and texture. For refrigeration tips, always let the salad cool to room temperature before sealing it. This prevents moisture buildup inside the container. If you add avocado, eat it within a day or two. The avocado can brown quickly. The salad can last about 3 to 5 days in the refrigerator. After that, the flavors may fade, and the ingredients might lose their crunch. Keep an eye on the salad. If it smells off or looks different, it’s best to throw it away. You can serve the salad cold or at room temperature. If you prefer it warm, gently heat it in a pan. Avoid high heat to prevent mushiness. Stir it often to warm it evenly without cooking it too much. Whether cold or warm, this salad remains a tasty option. Enjoy it as a side dish or a light meal! For the complete recipe, check the [Full Recipe]. Can I make Fiesta Black Bean Corn Salad in advance? Yes, you can make this salad ahead of time. It stays fresh for about a day in the fridge. Just remember to add the avocado right before serving to keep it from browning. Is this salad healthy? Absolutely! This salad is full of fiber, vitamins, and healthy fats. The black beans and corn provide protein, while the colorful veggies add nutrients. Can I freeze leftover salad? Freezing is not a good idea for this salad. The veggies will lose their crunch and texture when thawed. It’s best enjoyed fresh. What dishes pair well with this salad? This salad works great with grilled meats, tacos, or as a side to any Mexican dish. You can also enjoy it with tortilla chips for a fun snack. Is it suitable for meal prep? Yes, this salad is perfect for meal prep. Make a big batch and portion it out for lunches. Just keep the dressing separate until you’re ready to eat. Can I use black-eyed peas instead of black beans? Yes, black-eyed peas can replace black beans. They will change the flavor a bit but still taste great. What can I substitute for lime juice? If you don’t have lime juice, lemon juice works well. It adds a nice tang, too. This blog post covered how to create a tasty Fiesta Black Bean Corn Salad. You learned about fresh ingredients, preparation steps, and key tips for assembly. Remember to avoid overmixing, and let flavors meld for the best taste. Variations like dietary swaps and alternative dressings can keep things fresh. Store leftovers safely and use them within a few days for peak flavor. Enjoy your salad as a side or meal prep option. It’s a healthy choice that’s easy to make and fun to customize!

Fiesta Black Bean Corn Salad Flavorful and Fresh Dish

Looking for a fresh and vibrant dish that’s packed with flavor? You’ve found it! My Fiesta Black Bean Corn Salad

Older posts
Newer posts
← Previous Page1 … Page30 Page31 Page32 … Page106 Next →
© 2025 My Cooking Cast • Built with GeneratePress

Our Policies

  • Privacy Policy
  • GDPR Policy
  • Terms Of Use
  • Copyright Policy
  • Cookie Policy
  • Disclaimer

More Information​

  • Home
  • Contact
  • About
  • Dinner
  • Appetizers
  • Dessert
©2025, My Cooking Cast About Privacy Policy Back To Top