Sheet Pan Honey Dijon Chicken Flavorful Family Meal
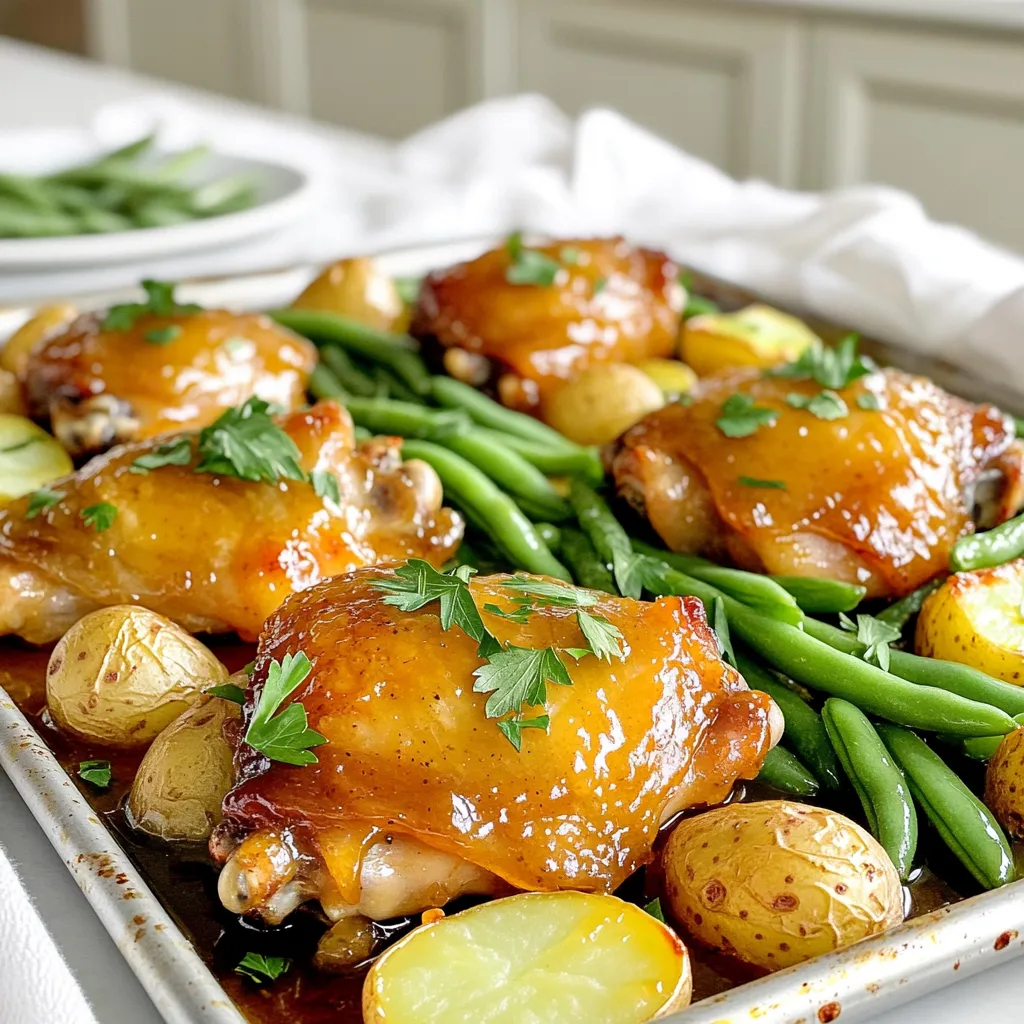
Looking for a delicious and easy family meal? This Sheet Pan Honey Dijon Chicken recipe is just what you need!
Looking for a delicious and easy family meal? This Sheet Pan Honey Dijon Chicken recipe is just what you need!
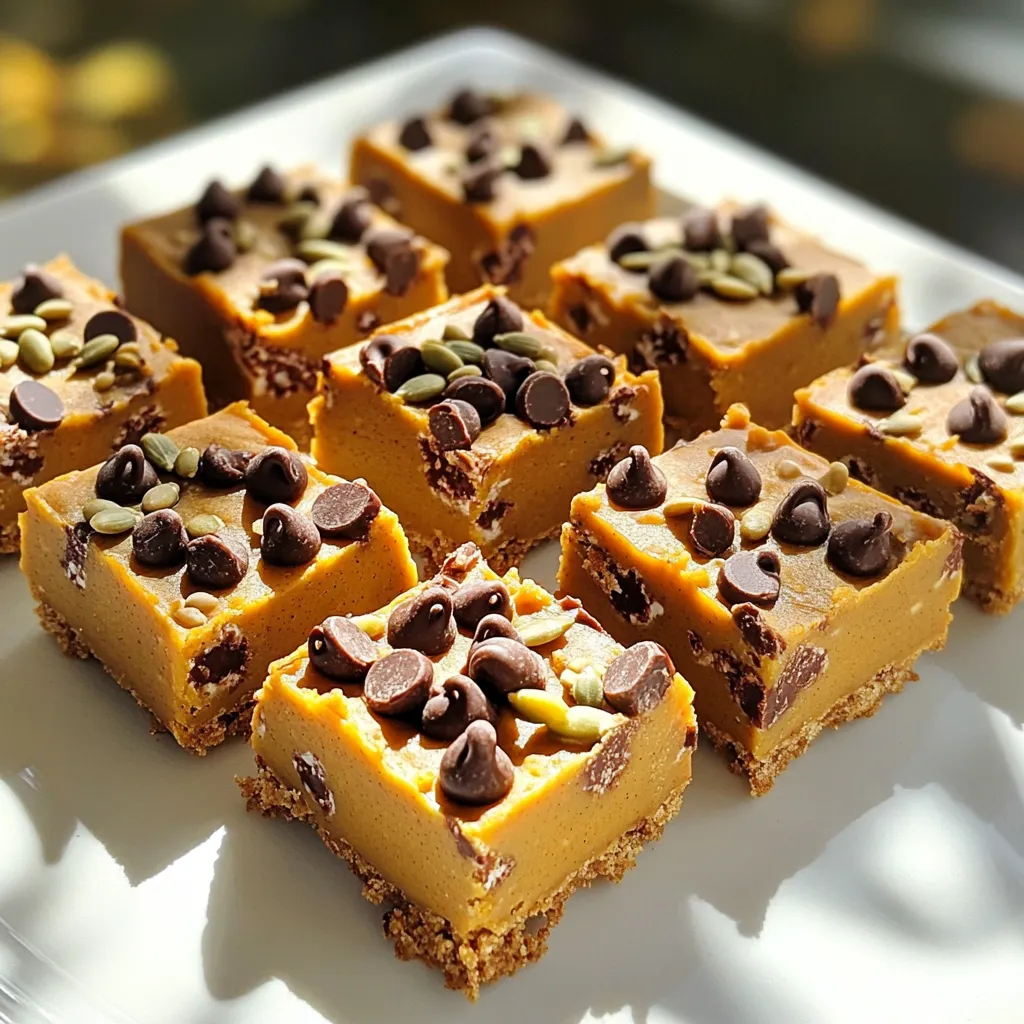
Looking for a tasty treat that’s easy to make? These No Bake Pumpkin Chocolate Chip Bars are perfect for you!
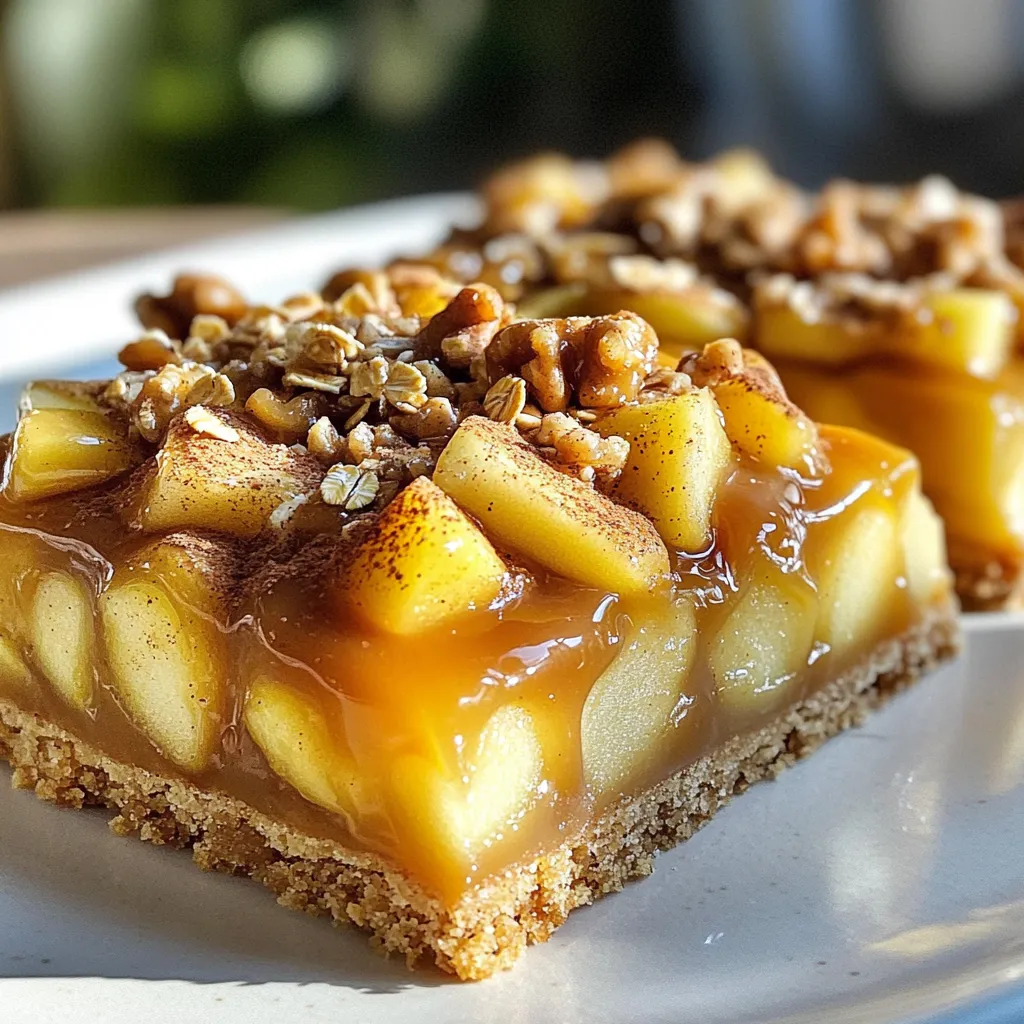
Are you ready to delight your taste buds with a treat that combines sweet caramel and crisp apples? My Caramel
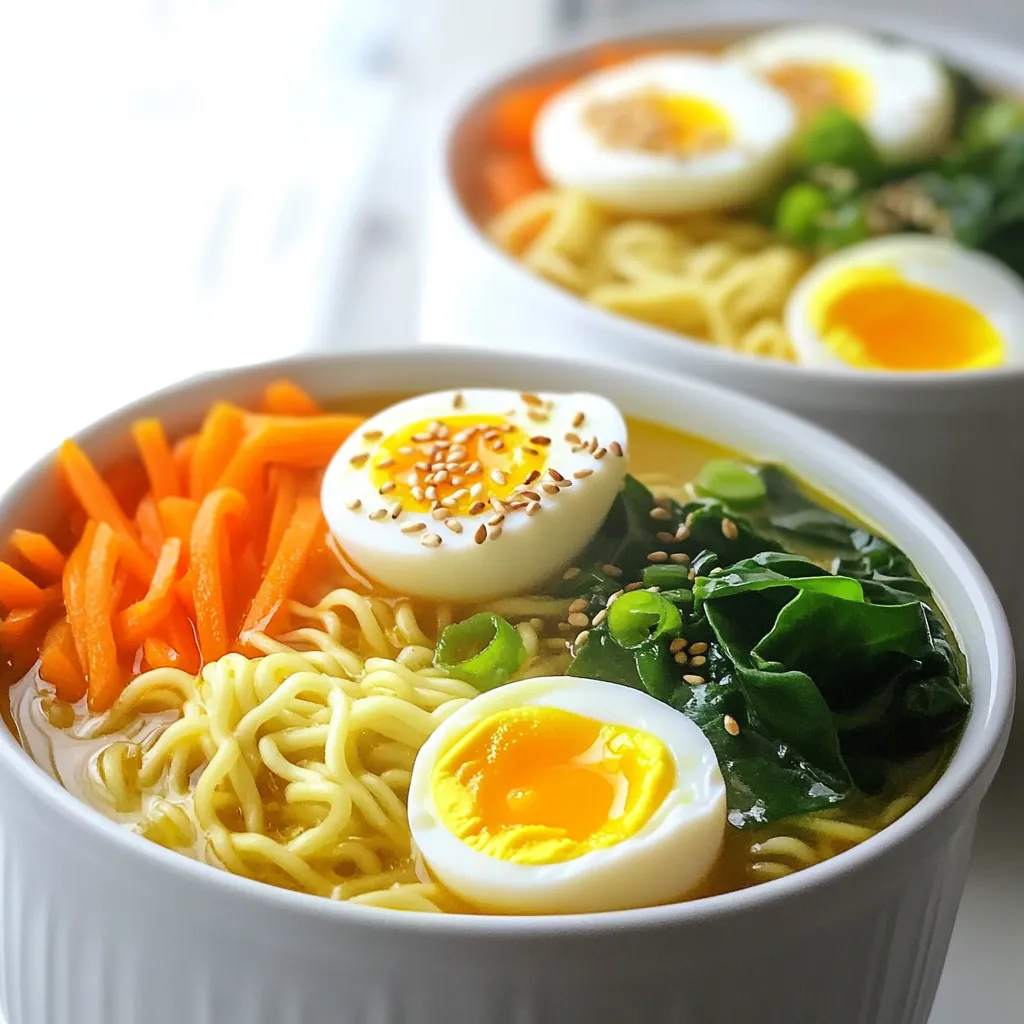
Are you craving a quick, tasty meal that packs a punch? Look no further! My Minute Spicy Garlic Ramen is
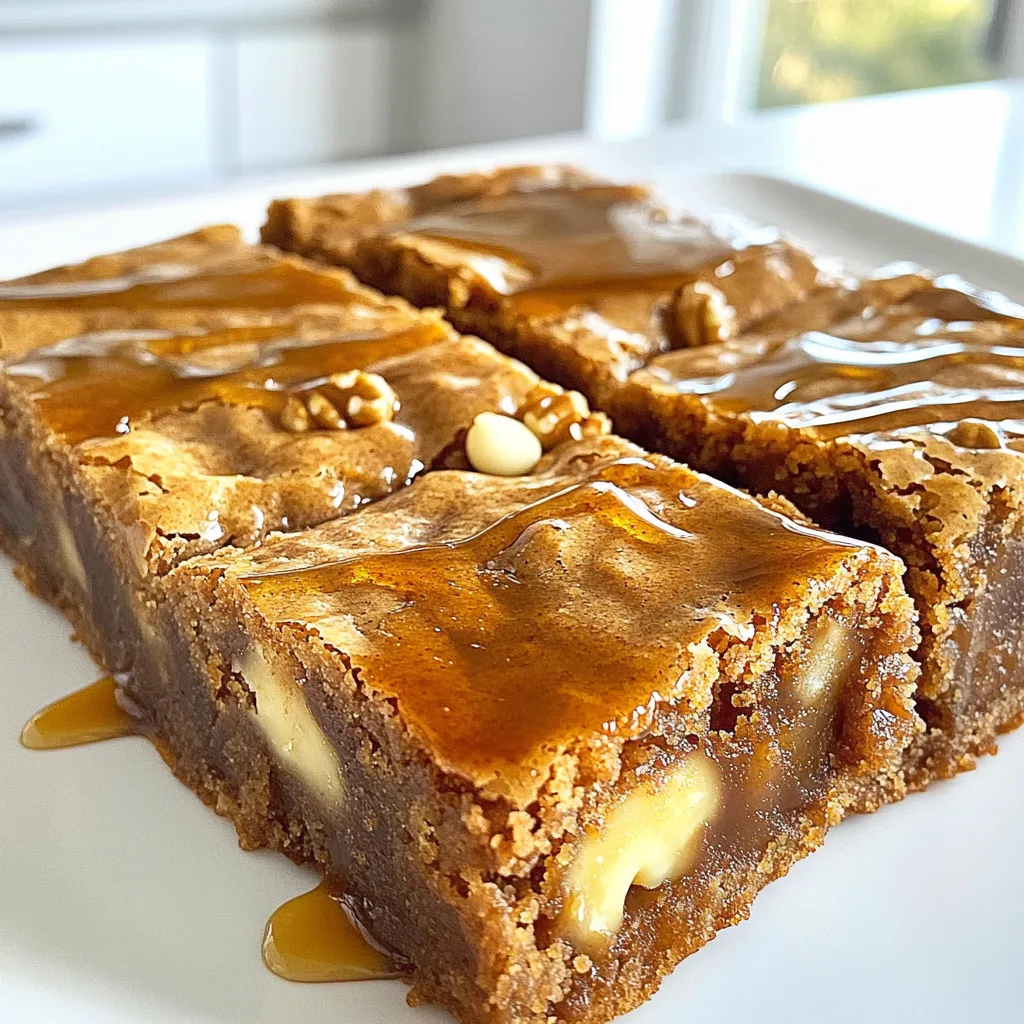
Craving something sweet and easy? You’re in the right place! These Maple Cinnamon Blondies are simple to make and packed
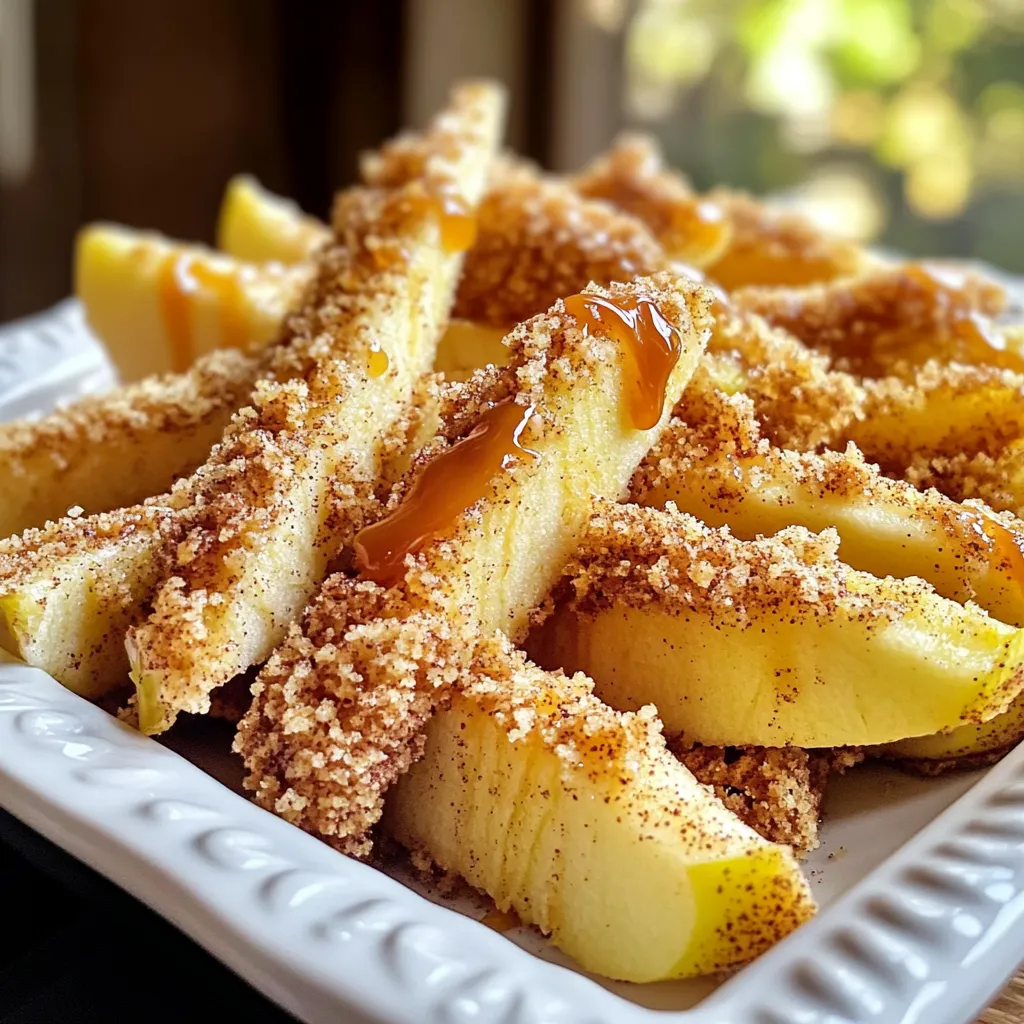
If you love sweet treats that are easy to make, you’re in for a treat! My Air Fryer Cinnamon Apple
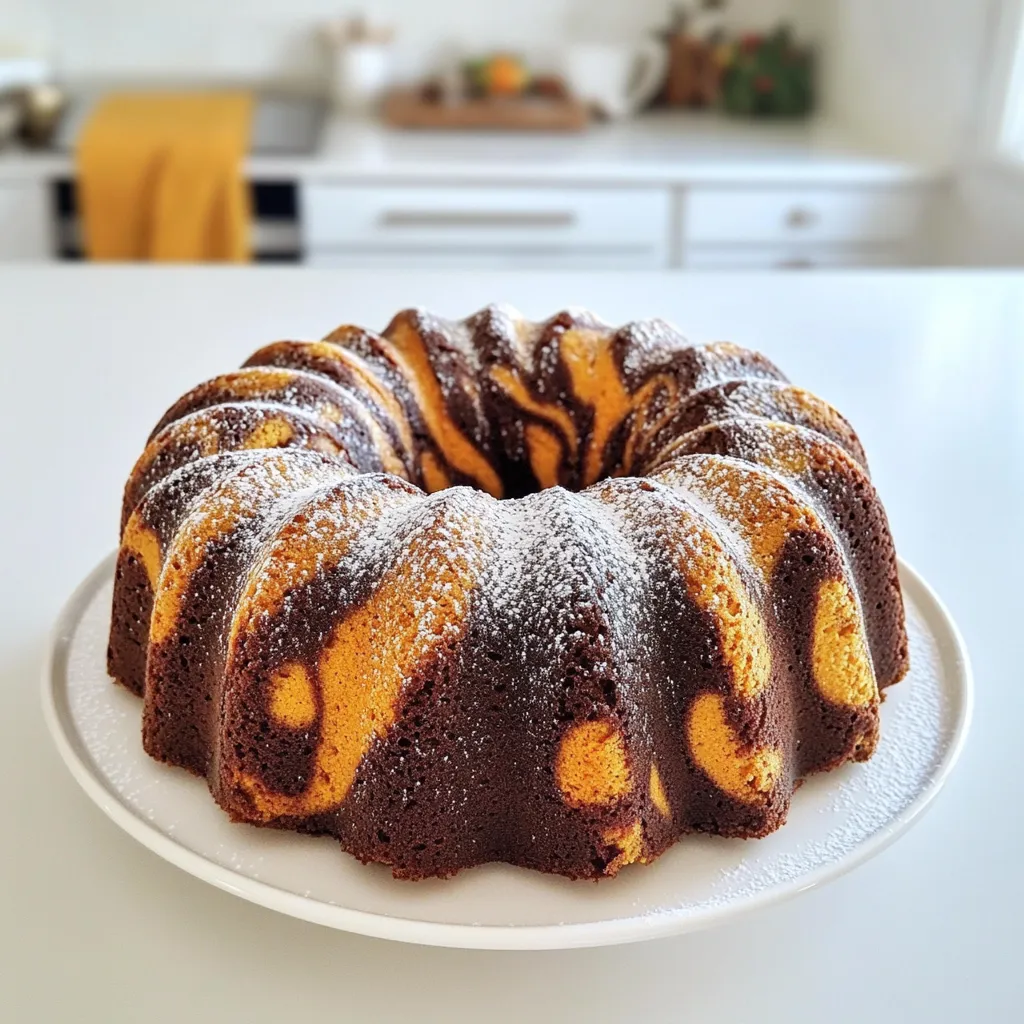
Dive into the cozy world of autumn flavors with my Pumpkin Marble Bundt Cake! This dessert blends warm spices and
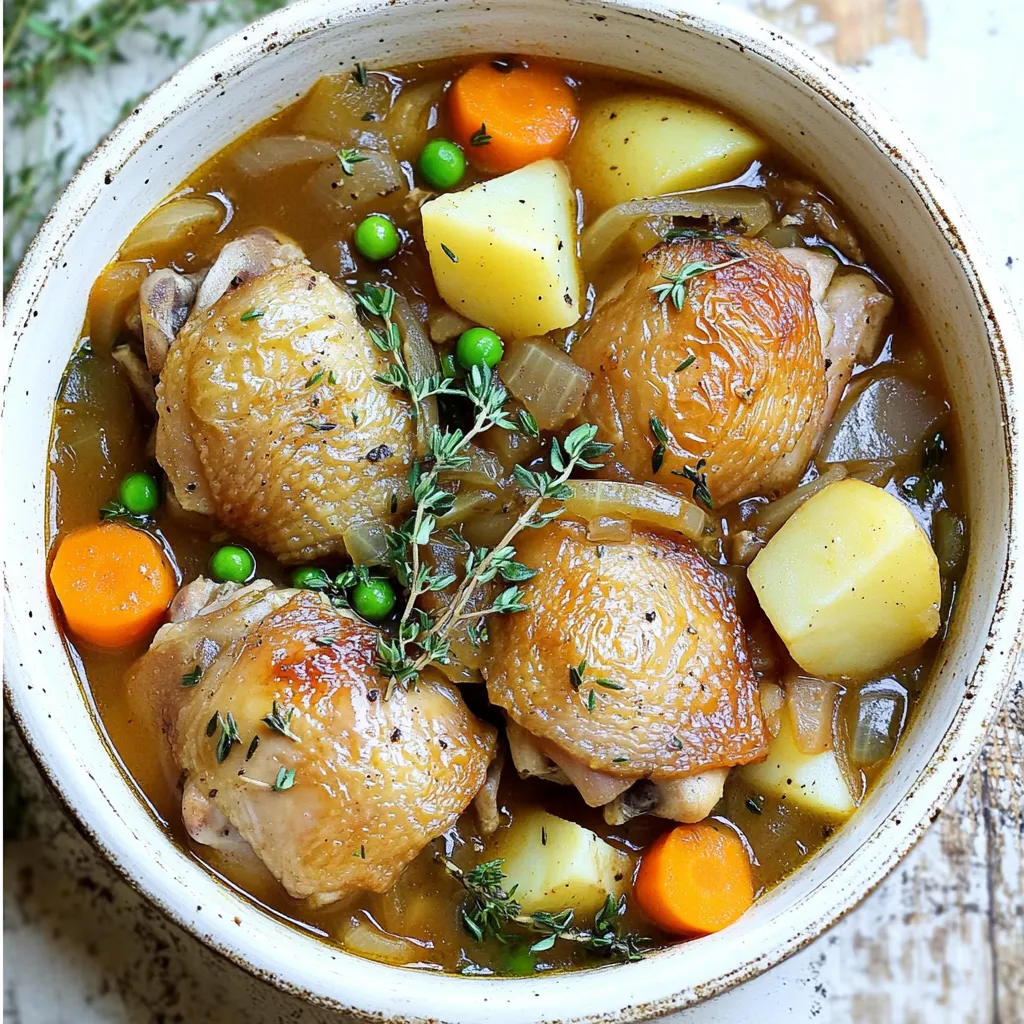
Looking for a cozy meal that’s easy to make? My Slow Cooker Rustic Chicken Stew is just what you need.

Are you ready to elevate your snack game? Cheesy Garlic Pull-Apart Bread is a treat you won’t resist! Imagine warm,

Looking for a tasty and healthy snack? Meet Chocolate Peanut Butter Energy Balls! These little bites are packed with flavor
