Skip to content
DisclaimerTerms Of UseGDPR PolicyCookie Policy

My Cooking Cast

  • Home
  • Drinks
  • Appetizers
  • Dinner
  • Dessert
  • About
  • Contact
  • Privacy Policy
DisclaimerTerms Of UseGDPR PolicyCookie Policy

Emma

To make a Cilantro Lime Quinoa Salad, you need fresh and simple ingredients. Here’s what you will gather: - 1 cup quinoa, rinsed - 2 cups vegetable broth or water - 1 cup cherry tomatoes, halved - 1 bell pepper (red or yellow), diced - 1 cup corn (fresh or canned) - 1/2 red onion, finely chopped - 1 cup black beans, rinsed and drained - 1 avocado, diced - 1/4 cup fresh cilantro, chopped - Juice of 2 limes - 3 tablespoons olive oil - Salt and pepper to taste - 1 teaspoon chili powder (optional) These ingredients bring a burst of flavor and color. Quinoa serves as the base. It is high in protein and gluten-free. You can use vegetable broth or water for cooking. The broth adds a rich taste. The veggies add crunch and sweetness. I love using cherry tomatoes and bell peppers for color. Fresh corn gives a nice sweetness, too. Black beans add protein and fiber, making this salad filling. The dressing is simple yet bright. Lime juice and olive oil mix well with salt and pepper. You can add chili powder if you want some heat. Finally, fresh cilantro adds a lovely herb flavor. It makes this dish stand out. Gather all these ingredients, and you are ready to create a fresh, tasty salad! - First, bring 2 cups of vegetable broth to a boil in a medium saucepan. - Once the broth boils, add 1 cup of rinsed quinoa. Stir it gently. - Reduce the heat to low and cover the pot. Let it simmer for 15 minutes. - After 15 minutes, check if the quinoa is fluffy and the liquid is gone. - Fluff the quinoa with a fork and let it cool for a bit. - While the quinoa cooks, grab a large mixing bowl. - Chop 1 cup of cherry tomatoes in half. - Dice 1 bell pepper, either red or yellow. - If using fresh corn, cut it off the cob. If canned, drain it well. - Finely chop 1/2 red onion. - Rinse and drain 1 cup of black beans. - Dice 1 avocado and add it to the bowl. - Mix all these ingredients well in your bowl. - Once the quinoa cools, add it to the bowl with the veggies. - In a small bowl, whisk together the juice of 2 limes, 3 tablespoons of olive oil, salt, and pepper. - If you want a bit of heat, add 1 teaspoon of chili powder. - Pour the dressing over the quinoa and vegetables. Toss gently to mix. - Finally, fold in 1/4 cup of chopped cilantro. Taste and adjust the seasoning if needed. - Let the salad sit for 10-15 minutes to blend the flavors before serving. To get the best quinoa, start by rinsing it well. Use a fine mesh strainer. Rinsing helps remove the bitter coating called saponin. This step makes your quinoa taste much better. After cooking, fluff the quinoa with a fork. This helps separate the grains. It should be light and airy, not sticky. Let it cool a bit before mixing it into the salad. Adjusting seasoning is key. Taste your salad before serving. If it needs more zing, add a pinch of salt or extra lime juice. For a kick, try adding chili powder. It brings a warm heat that many enjoy. For dressings, olive oil and lime juice work well. You can also add a splash of vinegar for extra flavor. These simple dressings make your salad fresh and vibrant. For serving, you can use a large bowl or individual cups. This makes it easy for guests to help themselves. Arrange the salad in a colorful way to show off the ingredients. Garnish with lime wedges and extra cilantro leaves. This adds a pop of color and makes the dish look more appealing. A sprinkle of chili powder on top can also add a nice touch. {{image_2}} You can change the beans in your salad. Try using chickpeas for a new taste. You might also enjoy kidney beans or pinto beans. Seasonal veggies can add color and flavor too. In summer, consider adding cucumbers or zucchini. In fall, roasted sweet potatoes or butternut squash work well. This salad is naturally gluten-free. You can enjoy it without worry if you avoid gluten. It’s also great for vegans and vegetarians since all the ingredients are plant-based. If you want protein, add more beans or some tofu. Want to spice things up? Add a pinch of cumin or some fresh oregano. Fresh herbs like basil or mint can brighten the dish. You can also mix in fruits. Diced mango or pineapple brings sweetness and fun. These additions make your salad unique and delicious. After making your cilantro lime quinoa salad, store it in an airtight container. This keeps the salad fresh. Place it in the fridge within two hours of making it. The cool air helps maintain its taste and crunch. The salad can last up to three days in the fridge. Before serving, stir it gently and adjust the seasoning if needed. If you want to save some for later, you can freeze the salad. First, pack it in a freezer-safe container. Make sure to leave some space at the top, as the salad may expand. It’s best to freeze it without the avocado, as it won’t thaw well. This way, you keep flavors fresh. You can freeze the salad for up to three months. To eat, thaw it overnight in the fridge, then stir and serve. Freshness is key with this salad. If stored properly, it lasts about three days in the fridge. Check for signs of spoilage, like off smells or a change in color. If the salad looks or smells bad, it’s best to toss it. Enjoy your salad while it’s fresh for the best taste and texture! Yes, you can make this salad ahead of time. It tastes even better after sitting. Just keep it in the fridge. The flavors mix and get stronger. I suggest mixing in the avocado right before serving to keep it fresh. You can serve this salad with grilled chicken, shrimp, or fish. It pairs well with tacos or burritos too. For a lighter meal, try it with a side of roasted vegetables. This salad also works great as a filling lunch. To make fluffy quinoa, rinse it well before cooking. This removes bitter saponins. Use a 2:1 ratio of broth to quinoa. Bring the broth to a boil, then lower the heat. Cover and let it simmer until all the liquid is absorbed. Fluff it with a fork afterward. Absolutely! You can use brown rice, farro, or couscous. Each grain has its own taste and texture. Just adjust the cooking time based on the grain you choose. Make sure to check the package for cooking instructions. Store leftovers in an airtight container in the fridge. They can last for up to three days. Use them in wraps or as a topping for tacos. You can also mix them into soups for added flavor. This blog post covered how to make a tasty Cilantro Lime Quinoa Salad. We started with fresh ingredients like quinoa, veggies, and beans. Next, I shared steps for cooking and mixing them. Tips helped you perfect the flavor and presentation. You learned variations for dietary needs and how to store the salad safely for later. In conclusion, this salad is versatile and easy to make. It offers great flavors and nutrition. Enjoy creating your own version!

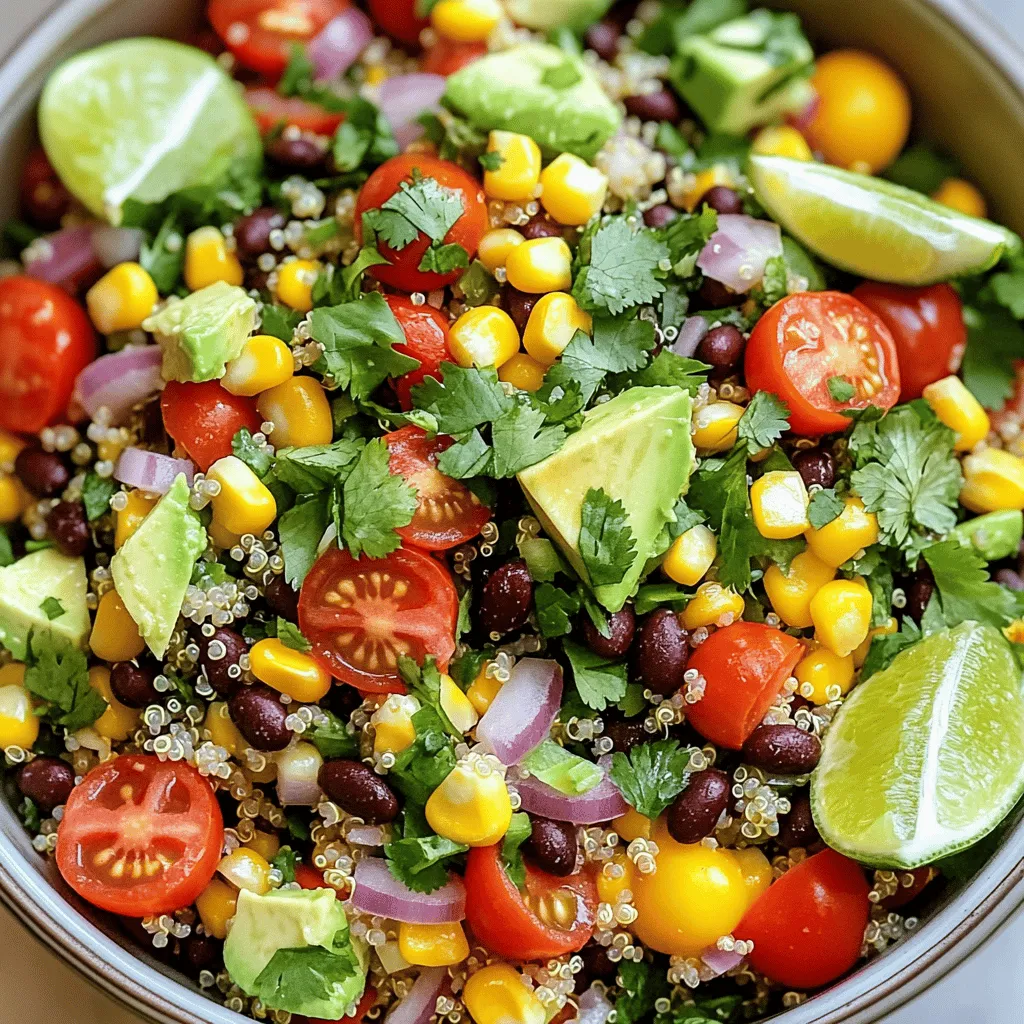
Cilantro Lime Quinoa Salad Fresh and Colorful Dish

Are you ready to brighten up your meal with a vibrant, fresh dish? My Cilantro Lime Quinoa Salad is colorful,

To make these tasty cookie butter cheesecake bites, gather these items: - 8 oz cream cheese, softened - 1/2 cup cookie butter - 1/4 cup powdered sugar - 1 teaspoon vanilla extract - 1/2 teaspoon cinnamon - 1 cup graham cracker crumbs - 4 tablespoons unsalted butter, melted - A pinch of salt - Mini chocolate chips or crushed cookies for garnish You can swap some ingredients if needed. Here are some ideas: - Use mascarpone cheese instead of cream cheese for a creamier texture. - Coconut sugar can replace powdered sugar for a healthier option. - For a nutty flavor, try almond butter in place of cookie butter. - If you don’t have graham crackers, use crushed digestive biscuits instead. Garnishes can add a fun touch to your bites. Consider these options: - Drizzle extra cookie butter on top for more flavor. - Use crushed cookies for a crunchy finish. - Add mini chocolate chips for a sweet surprise. - Fresh fruit like raspberries can brighten the plate visually. These simple ingredients and swaps make your cookie butter cheesecake bites fun and easy to create! First, get your mixing bowl. Take the softened cream cheese and beat it until smooth. I use an electric mixer for this. It makes the job quick and easy. Next, add the cookie butter, powdered sugar, vanilla extract, and cinnamon to the bowl. Mix until everything is creamy and well combined. This step is key for a rich flavor. Now, grab another bowl. In this bowl, mix the graham cracker crumbs with the melted butter and a pinch of salt. Stir until the crumbs are evenly coated. This mixture should feel slightly damp. It holds together well when pressed. Line a mini muffin tin with paper liners or lightly grease each cup. Take about a tablespoon of the graham cracker mixture and press it into the bottom of each muffin cup. This will form a nice crust for your cheesecake bites. Next, it's time to fill the cups. Spoon the cookie butter cheesecake mixture over the crusts. Fill each cup almost to the top. Use a spatula to smooth the tops. This step makes them look neat and tasty. Finally, refrigerate the cheesecake bites for at least two hours. This helps them set and become firm. Before you serve, add mini chocolate chips or crushed cookies on top for fun and flavor. Enjoy making these delightful treats! To make your Cookie Butter Cheesecake Bites just right, focus on texture. Start with room temperature cream cheese. This helps it blend smoothly. Be sure to mix the cookie butter and cream cheese well. You want a creamy, lump-free filling. Adding powdered sugar gives a sweet touch. Cinnamon enhances the flavor, so don’t skip it. For a richer flavor, use high-quality cookie butter. Many people rush the chilling time. Avoid this by letting the bites set for at least two hours. This step helps them firm up nicely. Another mistake is not pressing the crust firmly enough. Make sure to pack the graham cracker mixture tightly in each cup. This keeps the bites from falling apart. Lastly, don’t skip the garnish. Mini chocolate chips or crushed cookies add a nice finish. You’ll need a few basic tools for this recipe. A mixing bowl and an electric mixer are essential. A mini muffin tin is perfect for shaping your bites. If you don’t have liners, just grease the tin well. A spatula helps smooth the tops of your cheesecake bites. For serving, a nice platter makes them look fancy. Enjoy the process and have fun! {{image_2}} You can change up the flavors in your cookie butter cheesecake bites. Here are some fun ideas: - Nut Butters: Swap cookie butter for peanut butter or almond butter. This adds a nutty taste. - Spices: Add a dash of nutmeg or ginger for a warm twist. These spices pair well with cinnamon. - Extracts: Try using different extracts like almond or maple. They can add depth to the flavor. - Fruit: Mix in some finely chopped apples or bananas. These fruits bring a fresh, sweet note. If you want a gluten-free treat, there are simple swaps to make. Here’s what to do: - Graham Crackers: Use gluten-free graham cracker crumbs. They are easy to find at stores. - Cookie Butter: Check for gluten-free cookie butter brands. Most are safe, but always read labels. - Thickener: Instead of graham crackers, use almond flour for the crust. It offers a nice texture. These cheesecake bites are perfect for any event. Here are some serving ideas: - Parties: Serve them on a pretty platter. Drizzle cookie butter on top for a wow factor. - Holidays: Add festive sprinkles or seasonal spices. They make great treats for gatherings. - Gifts: Package them in cute boxes. They make lovely homemade gifts for friends and family. - Everyday Treats: Enjoy them with coffee or tea. They are a delightful snack any time of day. Store your cookie butter cheesecake bites in an airtight container. Place a layer of parchment paper between layers to keep them from sticking together. These bites stay fresh in the fridge for up to five days. If you want to keep them longer, freezing is a great option. To freeze your cheesecake bites, first let them set fully in the fridge. Then, place them in a single layer on a baking sheet. Freeze them for about an hour. Once frozen, transfer the bites to a freezer bag or container. They will stay good for up to three months. When you are ready to enjoy them, just thaw in the fridge overnight. These cookie butter cheesecake bites taste best when fresh. However, they last well in the fridge for up to five days. If frozen, the texture may change slightly, but the taste remains great. Always check for any signs of spoilage before eating. Yes, you can use low-fat cream cheese. It will change the texture slightly. The bites may be less rich but still tasty. This is a good choice if you want fewer calories. Just ensure it is softened before mixing. To make these bites vegan, swap the cream cheese for a plant-based cream cheese. Use coconut cream or cashew cream for a rich texture. Replace butter with coconut oil or vegan butter. For sweetening, use powdered sugar made from cane sugar or agave syrup. Serve these bites cold on a pretty platter. Drizzle extra cookie butter on top. Sprinkle crushed cookies or mini chocolate chips for flair. These bites are perfect for parties and gatherings. You can also pair them with coffee or tea for a delightful treat. You now have all the tools to make delicious cookie butter cheesecake bites. We covered the key ingredients, step-by-step instructions, and helpful tips. Explore variations and storage methods for the best results. Remember to avoid common mistakes to ensure your bites turn out great. With these insights, you'll impress friends and family at any event. Enjoy the process and share your tasty results!

Cookie Butter Cheesecake Bites Delightful No-Bake Treat

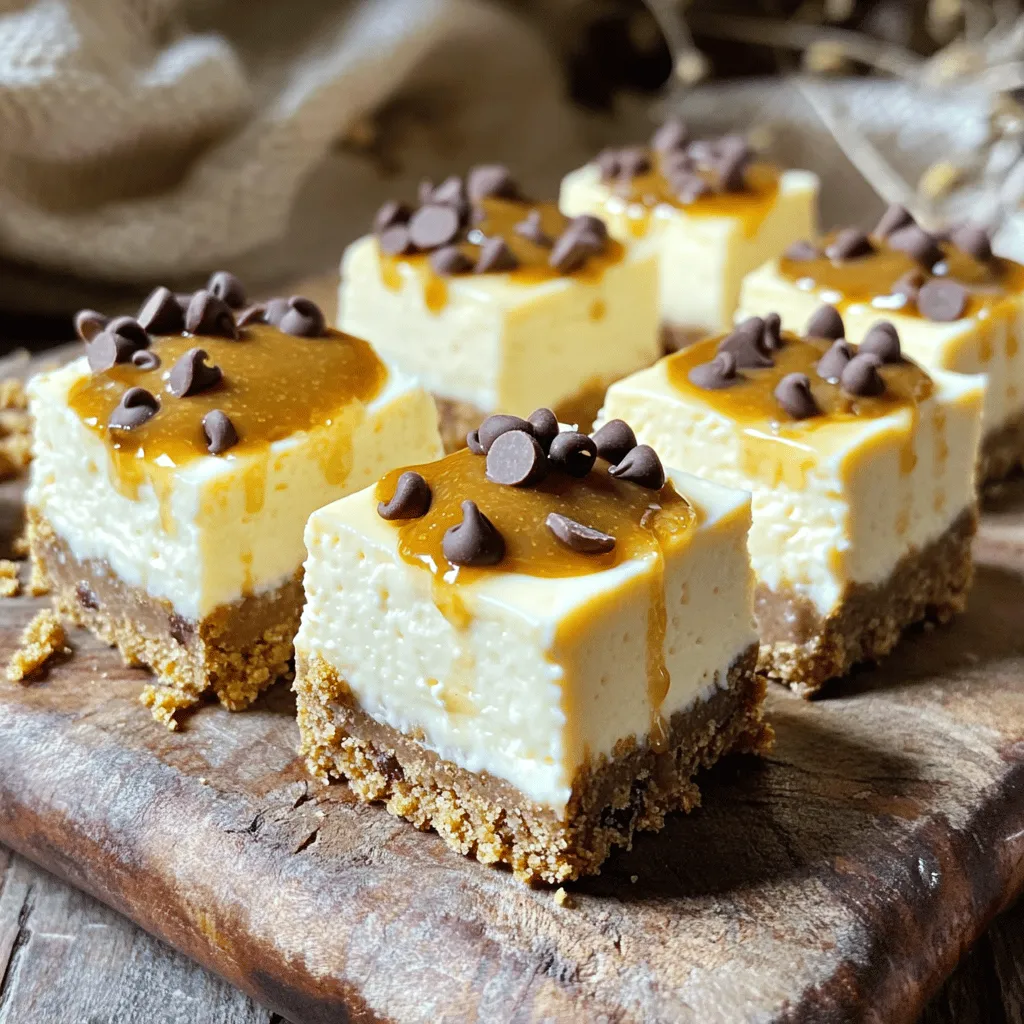
Are you ready to treat yourself? These Cookie Butter Cheesecake Bites are easy and fun to make. You won’t need

To make your Sweet Potato Chickpea Buddha Bowl, you will need the following ingredients: - 1 large sweet potato, peeled and diced - 1 can (15 oz) chickpeas, drained and rinsed - 2 cups cooked quinoa - 1 cup baby spinach - 1 avocado, sliced - 2 tablespoons olive oil - 1 teaspoon smoked paprika - 1 teaspoon cumin - Salt and pepper to taste - 2 tablespoons tahini - 1 tablespoon lemon juice - Chopped fresh parsley for garnish You can enhance your Buddha Bowl with these tasty toppings: - Sliced radishes for crunch - Cherry tomatoes for sweetness - Cucumber slices for freshness - Feta cheese for a creamy touch - Nuts or seeds for added texture This bowl is a powerhouse of nutrients. Here's why each key ingredient is a winner: - Sweet Potatoes: They are high in fiber and rich in vitamins A and C. - Chickpeas: Packed with protein and iron, they help keep you full. - Quinoa: A complete protein, it contains all nine essential amino acids. - Spinach: This leafy green is full of iron, calcium, and vitamins. - Avocado: Full of healthy fats, it supports heart health. This combination gives you a balanced meal that fuels your body well. First, you will want to prep your ingredients. Start by peeling the large sweet potato. Once peeled, dice it into small cubes. This helps them cook evenly. Next, grab your can of chickpeas. Drain them in a colander and rinse them under cold water. This removes extra salt and preserves their flavor. Lastly, gather your other ingredients, like quinoa, spinach, avocado, and spices. Having everything ready makes cooking easier and faster. To cook the sweet potatoes, preheat your oven to 425°F (220°C). In a large bowl, toss the diced sweet potatoes with 1 tablespoon of olive oil. Add the smoked paprika, cumin, salt, and pepper. Mix well to coat every piece. Spread the sweet potatoes on a baking sheet in a single layer. Roast them for 25-30 minutes. Flip them halfway through to ensure even cooking. They should come out tender and slightly caramelized. While the sweet potatoes are roasting, heat a pan over medium heat. Add 1 tablespoon of olive oil and the rinsed chickpeas. Sprinkle in a pinch of salt and pepper. Sauté the chickpeas for about 5-7 minutes until they turn slightly crispy. This adds a nice texture to your bowl. Now it's time to assemble your Buddha bowl. Start with the cooked quinoa. Divide it among your serving bowls. Next, top each bowl with the roasted sweet potatoes and sautéed chickpeas. Add a handful of fresh baby spinach to each bowl. Then, place a few slices of avocado on top for creaminess. Drizzle the tahini dressing over everything. To make the dressing, whisk together tahini, lemon juice, and water in a small bowl. Finally, garnish with chopped fresh parsley for a pop of color. For a great look, arrange each ingredient neatly to create a colorful display. To get sweet potatoes just right, start by cutting them into even pieces. This helps them cook evenly. Toss the sweet potatoes with olive oil, smoked paprika, cumin, salt, and pepper. Lay them flat on a baking sheet. Roast them at 425°F (220°C) for 25-30 minutes. Flip them halfway to achieve that golden caramelization. For crispy chickpeas, pat them dry after rinsing. Heat olive oil in a pan over medium heat, add the chickpeas, and cook for 5-7 minutes. This will give them a nice crunch. When serving your Buddha bowl, make it colorful and fun. Start with a base of cooked quinoa. Then, add a layer of roasted sweet potatoes and crispy chickpeas. Next, pile on fresh baby spinach and avocado slices. You can sprinkle chopped parsley on top for a fresh touch. Pair your bowl with a side of lemon wedges for an extra zing. You might also enjoy some crusty bread or a light salad with it. While tahini dressing is a star, you can mix it up! Try a yogurt-based dressing for a creamy twist. Combine Greek yogurt, lemon juice, and a pinch of salt for a fresh taste. You can also use a simple vinaigrette. Mix olive oil, lemon juice, salt, and pepper for a tangy option. For a spicy kick, add some sriracha or chili flakes to your tahini. Each dressing brings its own flavor to your Buddha bowl! {{image_2}} You can easily switch ingredients to fit your taste. If you want a different base, use rice or farro instead of quinoa. For a creamy touch, try using roasted butternut squash in place of sweet potatoes. If you're not a fan of chickpeas, swap them for black beans or lentils. These swaps keep the bowl fresh and fun. This Buddha bowl can fit many diets. To make it gluten-free, ensure your grains are certified gluten-free. For nut-free options, check your tahini or try sunflower seed butter instead. If you want a lower-carb meal, replace quinoa with cauliflower rice. These simple changes make the dish suitable for everyone. Want to boost the flavor? Add fresh herbs like cilantro or dill. A sprinkle of feta or goat cheese can give a tangy kick. For a spicy twist, try adding cayenne pepper or red pepper flakes. You can also drizzle some sriracha or a spicy sauce to add heat. Experiment with these flavors to make your bowl truly yours. To keep your Sweet Potato Chickpea Buddha Bowl fresh, store leftovers in an airtight container. Put the bowl in the fridge within two hours after cooking. This helps prevent germs. Keep the quinoa, sweet potatoes, chickpeas, and spinach separate if you can. This way, each part stays fresh longer. You can enjoy your meal for up to three days. When it's time to eat, reheating is easy. Use the microwave for quick warming. Place the quinoa, sweet potatoes, and chickpeas in a bowl. Heat for 1-2 minutes, stirring halfway. This helps them warm evenly. If you prefer the oven, set it to 350°F (175°C). Spread the components on a baking sheet. Bake for about 10-15 minutes. This keeps the texture nice and crispy. You can freeze the components for later meals. First, let them cool completely. Then, put each part in freezer-safe bags. Label the bags with dates. You can freeze them for up to three months. To enjoy later, thaw the components overnight in the fridge. Reheat them as described above. This way, you can enjoy a healthy meal anytime! Yes, you can make this recipe ahead of time. Start by roasting the sweet potatoes and sautéing the chickpeas. Let them cool, then store them separately in the fridge. You can keep them for up to four days. Cook your quinoa and store it in an airtight container as well. When ready to eat, just reheat the sweet potatoes and chickpeas. Assemble your bowl with fresh spinach, avocado, and tahini dressing. This method saves time and keeps your meals fresh. To add spice to your bowl, try using cayenne pepper or red pepper flakes. You can sprinkle these on the sweet potatoes before roasting. If you like sauces, drizzle some hot sauce over the finished bowl. Another option is to mix sriracha into your tahini dressing for a creamy, spicy kick. Adjust the spice level to your taste. Enjoy exploring different heat levels! If you don't have tahini, you can use almond butter or peanut butter. They give a nice creaminess too. Another option is to blend sunflower seeds with a bit of water and lemon juice. This will mimic tahini's texture and flavor. Greek yogurt also works if you want a tangy taste. Feel free to experiment with these options to find what you love best! This blog post covered how to make a delicious Buddha bowl. We discussed key ingredients like sweet potatoes, chickpeas, and quinoa. You learned preparation and cooking steps for perfect results. We shared tips for serving and dressing variations. You can adapt the recipe for different diets and flavors. In the end, Buddha bowls are fun and healthy meals. Enjoy experimenting with your favorite ingredients!

Sweet Potato Chickpea Buddha Bowl Nourishing Delight

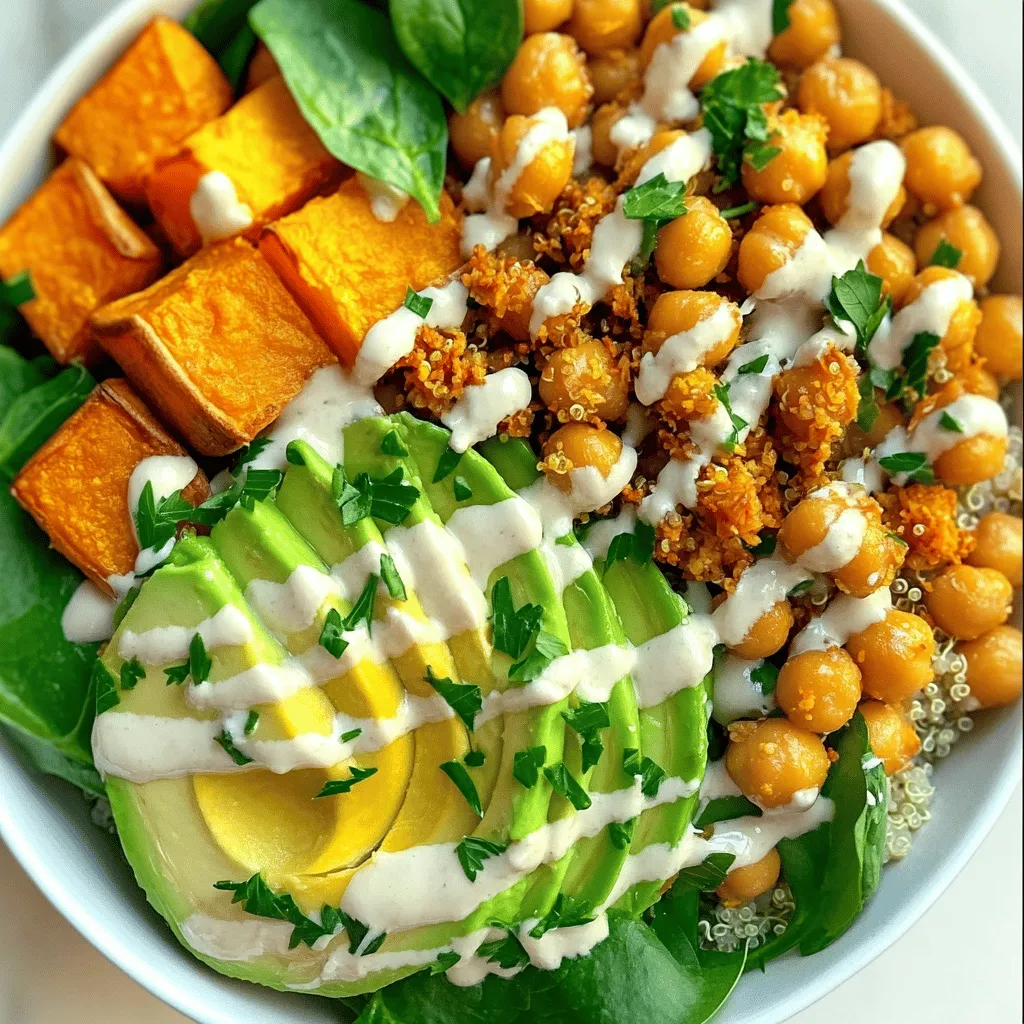
Are you ready to elevate your meal prep game? The Sweet Potato Chickpea Buddha Bowl is a nourishing delight packed

- 4 cod fillets (about 6 ounces each) - 2 tablespoons olive oil - 3 tablespoons fresh lemon juice - Zest of 1 lemon - 2 tablespoons fresh dill, chopped (or 1 tablespoon dried dill) - 2 garlic cloves, minced The main stars of this dish are the cod fillets. They are mild and flaky, making them perfect for this recipe. I recommend using fresh cod for the best taste. The olive oil adds richness, while the fresh lemon juice and zest bring brightness. Fresh dill gives a lovely herbaceous flavor. Minced garlic adds a nice kick and depth to the dish. - Salt and black pepper to taste - Lemon slices for garnish - Optional: Fresh dill sprigs for garnish Salt and black pepper enhance the flavors of the cod. Lemon slices add a fresh look when you serve the dish. You can also use fresh dill sprigs as a pretty garnish. These small touches make your dish look and taste even better. Start by rinsing the cod fillets under cold water. This helps clean them. After rinsing, pat them dry with paper towels. Drying the fillets helps the seasoning stick better. Next, we will make a flavorful marinade. In a small bowl, whisk together the olive oil, fresh lemon juice, lemon zest, chopped dill, minced garlic, salt, and black pepper. Mix until well combined. Now, place the cod fillets on a baking sheet lined with parchment paper. Brush the lemon dill mixture generously over each fillet. Make sure every piece is coated. Let the cod marinate for about 10 minutes. This allows the flavors to soak in. Now, preheat your oven to 400°F (200°C). This step is essential for even cooking. Once the oven is hot, it’s time to bake the cod. Place the marinated fillets in the oven. Bake them for 12 to 15 minutes. Check for doneness by seeing if the fish flakes easily with a fork. If it does, it’s ready! Cooking time might change a bit based on the thickness of the fillets. After baking, remove the cod from the oven. Let it rest for a couple of minutes. This helps to keep the fish moist. Serve it hot, garnished with lemon slices and fresh dill sprigs if you want. Enjoy your delicious Lemon Dill Baked Cod! Marinating the cod is key for great taste. Let the fish sit in the lemon dill mix for at least 10 minutes. This short time allows the cod to soak up all the flavors. If you skip this step, the fish may taste bland. To know if the cod is done, look for it to flake easily with a fork. The fish should be opaque and white when cooked. If it still looks pink or translucent, give it a few more minutes in the oven. There are other ways to cook cod if you want to mix things up. You can pan-sear it for a crispy outside. Just heat olive oil in a skillet and cook each side for 4-5 minutes. Using a broiler is another great choice. Broiling gives the cod a nice, crispy finish. Place it on a broiler pan and cook for 5-7 minutes. Keep an eye on it to avoid burning. {{image_2}} You can switch out cod for other fish types. Try using halibut, tilapia, or salmon. Each fish brings a unique taste. These options can also work well with the lemon and dill flavors. When it comes to dill, fresh is best. Fresh dill packs a punch with taste. If you can't find it, dried dill is fine. Use half the amount of dried dill as fresh. It still adds nice flavor but lacks some freshness. Want to mix things up? Add other herbs and spices. For a kick, try adding red pepper flakes. Thyme or parsley can also enhance the dish. Each new herb brings a twist that makes this recipe special. Consider serving Lemon Dill Baked Cod with sides or sauces. Roasted vegetables pair well and add texture. A simple green salad gives a fresh touch. You can even serve it with a light garlic sauce or a yogurt dip. These options elevate your meal and impress your guests! To store leftover Lemon Dill Baked Cod, first let it cool. Place the cod in an airtight container. This keeps the fish fresh and safe. You can keep it in the fridge for up to three days. If you have many leftovers, consider portioning them out. This makes it easy to grab a meal later. To reheat the cod, use an oven or a skillet. Preheat the oven to 350°F (175°C). Place the cod on a baking sheet. Cover it with foil to keep it moist. Heat for about 10 minutes, or until warm. If using a skillet, add a splash of water. Cover the skillet with a lid and heat on low. This method also helps to keep the fish from drying out. Enjoy your leftovers just as much as the first time! Baking cod at 400°F takes about 12 to 15 minutes. The cod will be done when it flakes easily with a fork. Keep an eye on it as cooking time might change based on the thickness of the fillets. Thicker pieces may need a bit more time. Yes, you can use frozen cod fillets. If you use frozen, do not thaw them first. Just add a few extra minutes to the baking time. The fish will still taste great. Just make sure to check that it cooks through. Lemon Dill Baked Cod pairs well with many sides. Here are some ideas: - Steamed broccoli - Roasted asparagus - Rice or quinoa - A fresh salad with mixed greens - Mashed potatoes These options balance the light flavor of the cod and make a full meal. For the complete recipe, including ingredients and steps, please refer back to the main recipe section. It includes all the details you need to make this dish shine. In this post, we covered making Lemon Dill Baked Cod. We explored essential ingredients like cod fillets, olive oil, fresh lemon juice, dill, and garlic. I shared the steps for preparing and baking the cod, along with tips for the best flavor. We also discussed variations and how to store leftovers. I hope you're inspired to try this easy and tasty recipe. Enjoy your meal!

Lemon Dill Baked Cod Flavorful and Simple Recipe

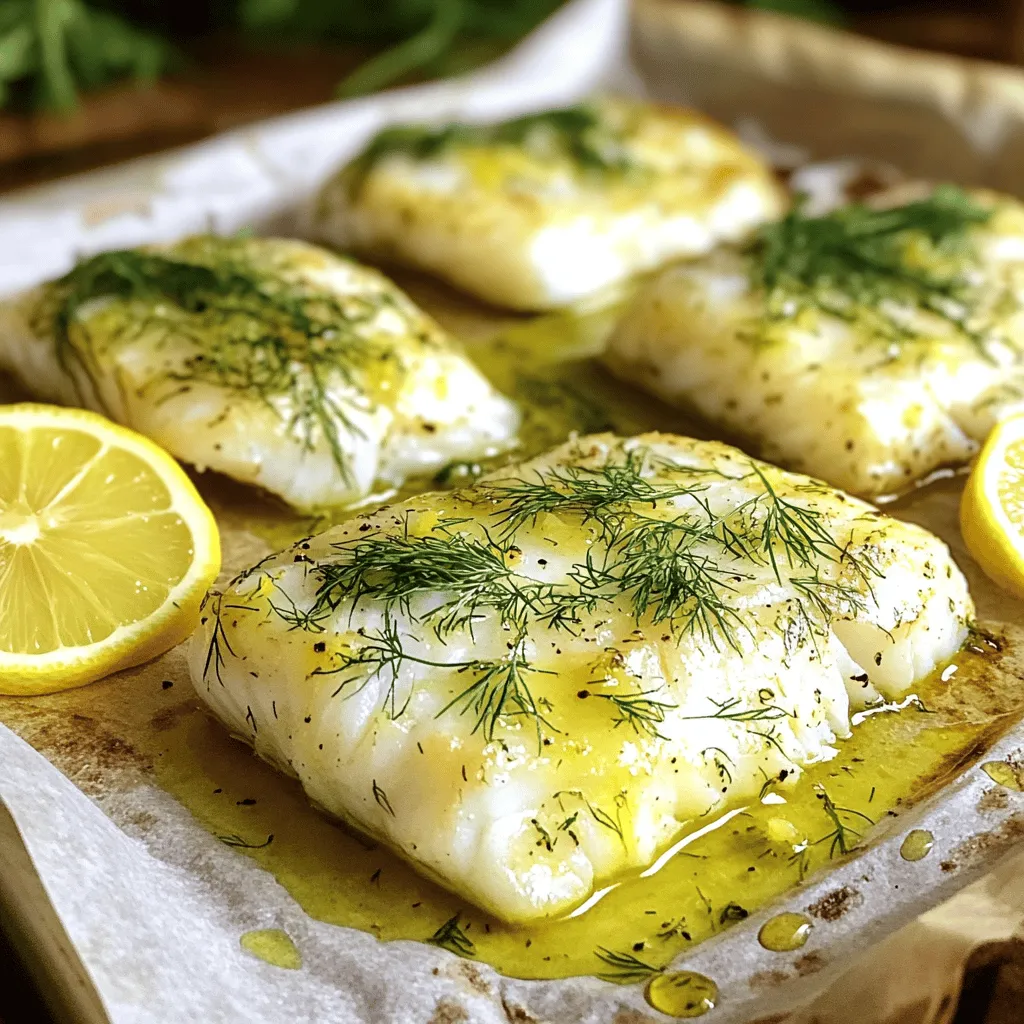
Looking to impress your dinner guests with a delicious yet simple dish? This Lemon Dill Baked Cod recipe brings bright

To make Raspberry Dark Chocolate Chunk Cookies, you need these key items: - 1 cup unsalted butter, softened - 3/4 cup brown sugar, packed - 1/4 cup granulated sugar - 2 large eggs - 1 teaspoon vanilla extract - 2 cups all-purpose flour - 1/2 teaspoon baking soda - 1/2 teaspoon baking powder - 1/4 teaspoon salt - 1 cup dark chocolate chunks - 1 cup fresh raspberries (lightly mashed) - 1/2 cup rolled oats These ingredients work together to create a wonderfully rich and fruity cookie. The butter and sugars mix to provide a creamy base. The eggs give it structure, while the chocolate and raspberries add flavor bursts. You can enhance your cookies with these optional ingredients: - 1/2 cup chopped nuts (like walnuts or pecans) - 1/2 teaspoon cinnamon for warmth - A pinch of sea salt for a sweet-salty twist Adding nuts gives texture. Cinnamon adds warmth, and sea salt balances sweetness. If you need to change up the ingredients, here are some great swaps: - Use coconut oil instead of butter for a dairy-free option - Swap brown sugar for coconut sugar for a lower glycemic index - Use gluten-free flour for a gluten-free version These substitutions keep the cookies delicious while fitting different diets. Remember, swapping ingredients may change the texture or flavor slightly, but it can still be tasty! 1. Start by preheating your oven to 350°F (175°C). 2. Line a baking sheet with parchment paper. This helps the cookies not stick. 3. In a bowl, cream together 1 cup of softened butter, 3/4 cup of brown sugar, and 1/4 cup of granulated sugar. Mix until it looks light and fluffy. 4. Beat in 2 large eggs, one at a time. Then add 1 teaspoon of vanilla extract. Mix well. 5. In another bowl, whisk together 2 cups of all-purpose flour, 1/2 teaspoon of baking soda, 1/2 teaspoon of baking powder, and 1/4 teaspoon of salt. 6. Gradually add the dry mix to the wet mix. Stir just until combined. 7. Gently fold in 1 cup of dark chocolate chunks, 1 cup of lightly mashed fresh raspberries, and 1/2 cup of rolled oats until everything is mixed evenly. 1. Using a tablespoon, scoop out portions of dough. Place them on the baking sheet, leaving space between each cookie. 2. Bake for 10-12 minutes. The edges should be lightly golden, and the centers should look set. 1. Once done, remove the cookies from the oven. 2. Let them cool on the baking sheet for 5 minutes. 3. Transfer the cookies to a wire rack to cool completely. 4. For a beautiful presentation, place the cookies on a decorative plate. Sprinkle a few whole raspberries around. Optionally, dust with powdered sugar for extra flair. To make soft and chewy cookies, start with room-temperature butter. This helps create a light and fluffy mix. When you cream the butter and sugars, mix until just combined. Over-mixing can lead to tough cookies. Use a light touch when folding in the dark chocolate and raspberries. This way, you keep the dough airy. Also, be careful not to overbake. Cookies should be golden at the edges but soft in the middle. One common mistake is using cold butter. Cold butter does not blend well and can lead to dense cookies. Another pitfall is not measuring flour correctly. Too much flour can make cookies dry. Use a spoon to fluff the flour before scooping it into your measuring cup. Lastly, don’t skip the cooling step. Letting cookies cool on a wire rack helps them set properly. For extra flavor, consider adding a pinch of cinnamon or nutmeg to the dry mix. You can also swap half of the dark chocolate for white chocolate for a fun twist. For a lovely presentation, place cookies on a decorative plate. Add fresh raspberries around the cookies for color. Dusting with powdered sugar can add charm and sweetness. These small touches make your cookies shine at any gathering. {{image_2}} You can make these cookies gluten-free. Replace all-purpose flour with a gluten-free blend. Look for a mix that contains xanthan gum. This will help hold the cookies together. Adjust the amount based on the package instructions. I suggest using 2 cups of the blend for the best results. To make these cookies vegan, swap out the butter and eggs. Use a plant-based butter and a flax egg. To make a flax egg, mix 1 tablespoon of ground flaxseed with 2.5 tablespoons of water. Let it sit for a few minutes until it thickens. This will help bind the dough just like eggs do. You can change up the flavors in your cookies. Try adding chopped nuts, like walnuts or pecans. They add a nice crunch. You can also add a hint of almond extract for a unique taste. For a tropical twist, include coconut flakes or even a splash of orange zest. Each option makes the cookies even more special. To keep your cookies fresh, place them in an airtight container. This helps keep them soft and moist. You can store them at room temperature for up to five days. If you want to keep them longer, consider freezing them. Freezing these cookies is easy! First, let them cool completely. Next, place the cookies in a single layer on a baking sheet. Freeze them for about an hour. Once frozen, transfer them to a freezer bag. This way, they won't stick together. You can freeze them for up to three months. To ensure your cookies stay fresh, avoid exposing them to air. If you notice any signs of staleness, you can refresh them by warming them in the oven for a few minutes. This will help restore their soft texture. Always check for any mold or odd smells before eating. Yes, you can use frozen raspberries. They work well in this recipe. Just make sure to lightly thaw them first. This way, they won’t add too much extra moisture to the dough. Frozen raspberries might be a bit softer, but they taste great. To get chewy cookies, use more brown sugar than white sugar. Brown sugar adds moisture. Also, do not overbake them. Pull the cookies out when the edges are golden, but the center looks a bit soft. Let them cool on the tray for a few minutes. This helps them stay chewy. These cookies pair well with ice cream, like vanilla or chocolate. You can also serve them with a glass of milk or a cup of tea. For a fun twist, add fresh raspberries on the side for extra flavor. In this post, we covered key ingredients for cookies, from main and optional elements to substitutions. We outlined clear steps for preparation, baking, cooling, and serving. I shared tips for texture, common mistakes to avoid, and ideas for enhancing flavor. You learned about gluten-free and vegan options, along with storage tips and frequently asked questions. Baking cookies is fun and rewarding. Use these tips to make your cookie time a success. You'll impress everyone with delicious treats!

Raspberry Dark Chocolate Chunk Cookies Delightful Treat

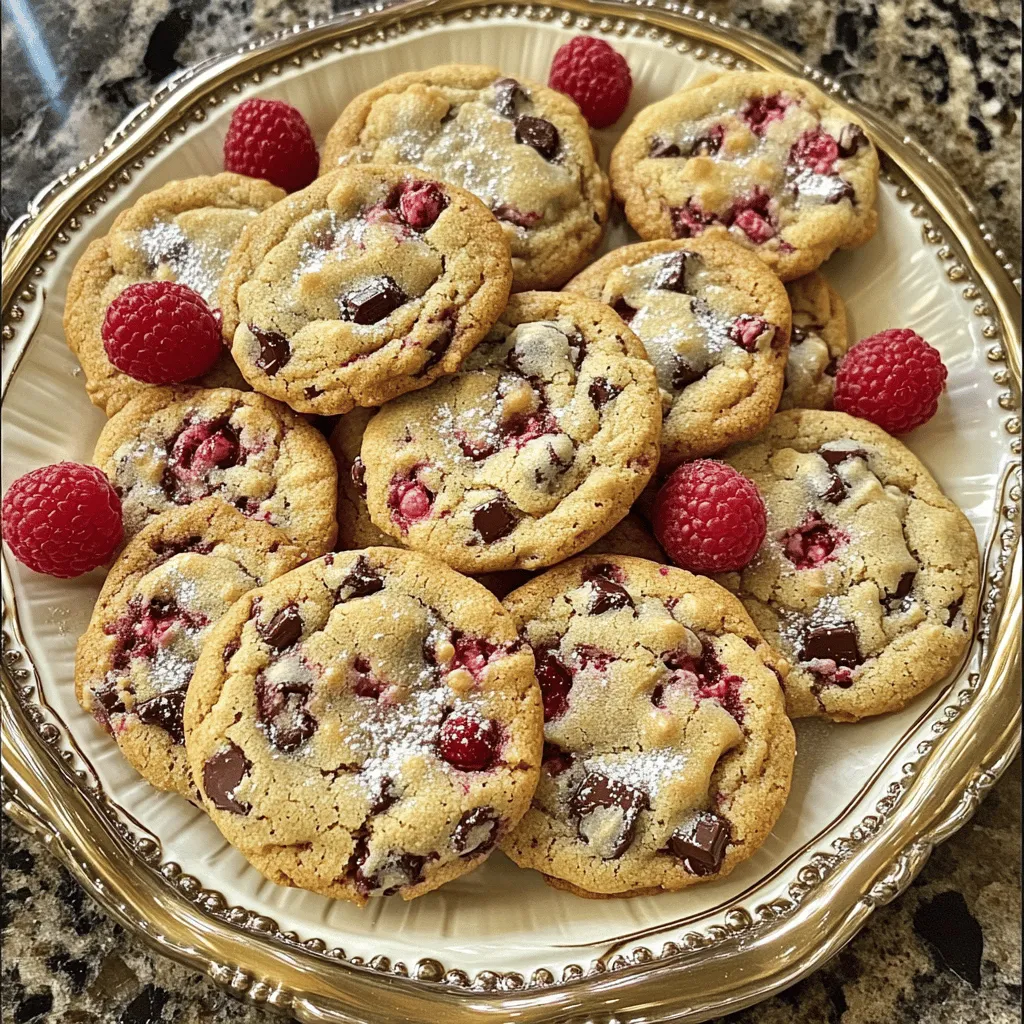
Craving a sweet treat that pairs tartness with rich chocolate? Look no further! These Raspberry Dark Chocolate Chunk Cookies are

- 2 cups cooked chicken, shredded - 1 cup buffalo sauce - 1 cup ranch dressing The main stars of this dish are the cooked chicken, buffalo sauce, and ranch dressing. The chicken adds protein and texture. The buffalo sauce gives it a spicy kick. The ranch dressing brings creaminess and balances the heat. Together, they create a rich base that makes this casserole so tasty. - 2 cups cooked pasta (penne or rotini) - Gluten-free options For pasta, I suggest using penne or rotini. These shapes hold the sauce well and add a nice bite. If you need a gluten-free option, try using gluten-free pasta. Just cook it according to the package instructions. This way, everyone can enjoy the dish! - 1 cup diced celery - 1 cup diced bell peppers (any color) - ½ cup green onions, chopped - 1 teaspoon garlic powder - ½ teaspoon salt - ½ teaspoon pepper - 1 teaspoon olive oil Next, we add some veggies for crunch and flavor. Diced celery and bell peppers brighten the dish. Green onions add freshness. Garlic powder, salt, and pepper enhance the taste. A drizzle of olive oil helps everything brown nicely in the oven. You can even garnish with more green onions or a bit of ranch dressing before serving. 1. First, preheat your oven to 350°F (175°C). This is important for even cooking. 2. Next, take a large mixing bowl. Combine the shredded chicken, buffalo sauce, ranch dressing, cooked pasta, diced celery, diced bell peppers, garlic powder, salt, and pepper. Mix until everything combines well. 1. Grease a 9x13 inch casserole dish. Spread half of the chicken mixture evenly in the dish. 2. Next, sprinkle half of the shredded cheddar cheese over the chicken mixture. This adds a nice cheesy layer. 3. Then, layer the remaining chicken mixture on top of the cheese layer. Finally, top with the rest of the cheddar cheese. 1. Cover the casserole with foil. Bake it in the preheated oven for 25 minutes. This keeps it moist. 2. After 25 minutes, remove the foil. Bake for an additional 10-15 minutes. You want the cheese to be golden and bubbly. 3. Once baked, take it out of the oven. Let it cool for a few minutes before serving. To get the best texture, you need to watch the baking time. Bake your casserole covered for 25 minutes. Then, remove the foil. Bake for another 10 to 15 minutes. This helps the cheese get golden and bubbly. When it comes to cheese, I recommend using sharp cheddar. It melts well and adds great flavor. You can also mix in Monterey Jack for a creamier taste. Want to boost the flavor? Try adding extra spices! A pinch of cayenne pepper can give a nice kick. You can also sprinkle in some smoked paprika for a deeper taste. Feel free to swap the buffalo sauce too. BBQ sauce works well if you want a sweeter taste. You can even use a mix of both for a fun twist! For side dishes, I love serving this casserole with a fresh salad. A simple Caesar salad or coleslaw goes great with it. Presentation matters! Serve it in the casserole dish for a rustic look. Add a sprinkle of green onions on top for color. A drizzle of ranch dressing on the side makes it even better! {{image_2}} You can make this dish healthier with a few simple swaps. Start by using low-fat ranch dressing instead of the regular kind. This cuts calories without losing flavor. You can also use low-fat shredded cheese. It melts well and keeps the taste light. Adding more vegetables is another great idea. Consider adding broccoli, spinach, or zucchini. These veggies boost nutrition and add color to your meal. They also help balance the richness of the cheese and sauce. If you want a twist, try different sauces. Swap out buffalo sauce for BBQ sauce for a sweeter taste. You can also mix in some hot sauce for extra heat. This keeps the dish exciting and new. Cheese is another area to explore. Instead of cheddar, try mozzarella or pepper jack. Each cheese brings its unique flavor and texture. Mixing cheeses can also create a creamy, rich topping. For those who need gluten-free options, use gluten-free pasta. Many brands offer great choices that taste just as good. You can also check labels on sauces to ensure they meet gluten-free standards. If you want a vegetarian version, try using meat substitutes like chickpeas or tofu. They absorb flavors well and provide protein. This way, everyone can enjoy the casserole, no matter their dietary needs. To keep your Buffalo Ranch Chicken Casserole fresh, store it in the fridge. Use airtight containers for best results. This helps prevent the casserole from drying out. You can also cover it tightly with plastic wrap or foil. Leftovers will last about 3 to 4 days in the fridge. You can reheat this casserole in the microwave or oven. If you use the microwave, heat it in short bursts. Check every minute to avoid overcooking. For the oven, preheat it to 350°F (175°C). Cover the casserole with foil to keep it moist. Bake for about 15 to 20 minutes until warm. You can freeze Buffalo Ranch Chicken Casserole for longer storage. First, let it cool completely. Then, wrap it tightly in plastic wrap and then in foil. This helps avoid freezer burn. To thaw, move it to the fridge overnight before baking. You can also bake it directly from frozen but add extra time. Buffalo Ranch Chicken Casserole lasts about 3 to 4 days in the fridge. Make sure to store it in an airtight container. This keeps it fresh and tasty. Check for any signs of spoilage before eating. Yes, you can make this casserole ahead of time. Prepare the dish and store it in the fridge before baking. Just cover it with foil. When ready, bake it for about 25 minutes. Then, remove the foil and bake until the cheese is bubbly. You can use hot sauce or BBQ sauce if you want a different flavor. Mix it with ranch dressing for a nice taste. Adjust the amount to suit your heat level. - For a milder version, try a sweet BBQ sauce. - For a spicier kick, use extra hot sauce. This casserole has a mild to medium spice level. The buffalo sauce gives it a nice kick, but the ranch dressing cools it down. If you prefer less heat, use less buffalo sauce. Adjust it to fit your taste. This makes it great for everyone! In this blog post, I covered how to make a delicious Buffalo Ranch Chicken Casserole. We looked at key ingredients like cooked chicken, buffalo sauce, and ranch dressing. I shared step-by-step instructions for perfect preparation and baking. Plus, I offered tips for texture and flavor. Don’t forget about variations for health and diet needs. Now you can create this tasty dish with ease. Enjoy making it your own and sharing it with others!

Buffalo Ranch Chicken Casserole Easy and Tasty Recipe

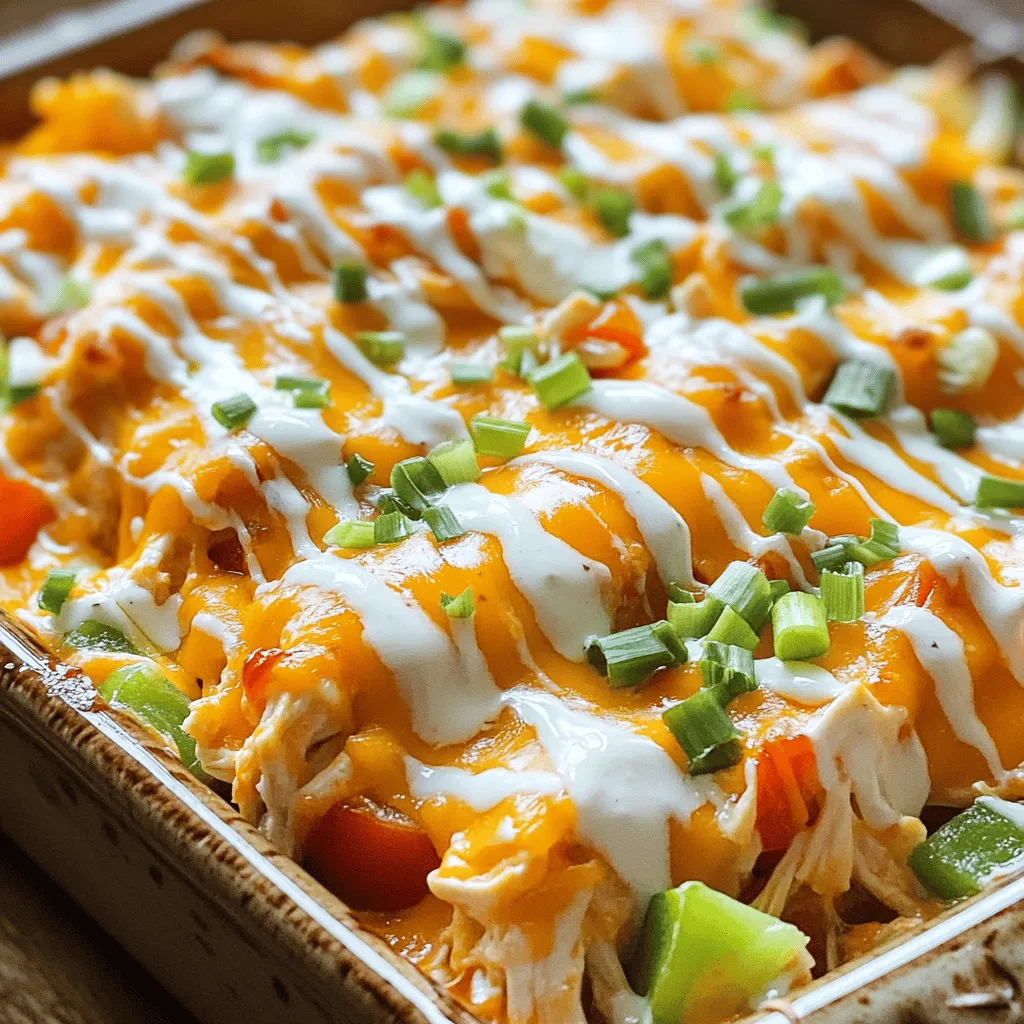
Get ready to spice up your dinner with my Buffalo Ranch Chicken Casserole! This easy and tasty recipe combines tender

- 2 boneless, skinless chicken thighs - 4 cups chicken broth - 2 packs of instant ramen noodles (discard flavor packets) - 1 tablespoon sesame oil - 2 cloves garlic, minced - 1 inch ginger, grated - 2 tablespoons soy sauce - 1 tablespoon sriracha (adjust to taste) - 1 teaspoon chili paste (optional for extra heat) - 1 cup bok choy, chopped - 1 carrot, julienned - 2 green onions, sliced - 2 boiled eggs, halved - Chopped cilantro for garnish - Sesame seeds for garnish Add a teaspoon of chili oil for more heat. You can also use a splash of rice vinegar for tang. A bit of miso paste can deepen the broth’s flavor. If you like crunch, try adding crushed peanuts or fried onions. Top your ramen with fresh herbs like basil or mint for a twist. Thinly sliced radishes add a nice crunch. You can also sprinkle some nori strips on top for added flavor. A dash of lime juice brightens the dish and balances the spice. First, you need to marinate the chicken thighs. In a medium bowl, combine: - 2 tablespoons soy sauce - 2 cloves garlic, minced - 1 inch ginger, grated - 1 tablespoon sriracha Mix these well. This blend adds rich flavor to the chicken. Let the chicken sit in this mix for 15 to 20 minutes. The longer you marinate, the more flavor it gets. Next, heat 1 tablespoon of sesame oil in a large pot over medium-high heat. Once hot, add the marinated chicken thighs. Sear them for about 5 to 7 minutes on each side until they turn brown. Remove the chicken and set it aside. In the same pot, pour in 4 cups of chicken broth. Bring it to a boil, then lower the heat to a simmer. Add 1 cup of chopped bok choy and 1 julienned carrot. Cook these for about 3 minutes until they soften. Now, it's time to add the ramen noodles. Break the 2 packs of instant ramen noodles in half and drop them into the pot. Cook according to the package instructions, usually about 3 to 4 minutes. While the noodles cook, slice the seared chicken into strips. Add the chicken back into the pot and mix everything. Taste the broth and adjust with more soy sauce or sriracha if needed. This simple process brings together all the flavors. Enjoy your spicy chicken ramen bowls, packed with taste and warmth! To cook chicken thighs just right, start with marinating them. Use soy sauce, garlic, ginger, and sriracha. Let the chicken sit for 15-20 minutes. This helps the flavors soak in. Heat sesame oil in a pot. Sear the thighs for 5-7 minutes on each side until they are golden brown. Then, remove them and set aside. This method gives you juicy, flavorful chicken. If you like spice, use sriracha and chili paste. Start with one tablespoon of sriracha. After cooking, taste the broth. Add more sriracha or chili paste if you want it spicier. Remember, you can always add more heat, but you can’t take it away. Make it your own by finding the right balance for your taste. Using homemade broth makes a big difference. You can simmer chicken bones and vegetables for hours. This creates a rich, deep flavor. If you don't have time, store-bought broth works too. Just choose a low-sodium option for better control over seasoning. You can add extra garlic or ginger to boost the taste even more. This extra effort rewards you with a broth that sings with flavor. {{image_2}} You can make a great vegetarian version of spicy ramen. Instead of chicken, use tofu. Tofu absorbs flavors well and adds protein. You can also use vegetable broth for a rich base. Add in mushrooms for umami and more texture. Don't forget to toss in your favorite vegetables like bell peppers or spinach. If you want to try different proteins, consider shrimp or pork. Shrimp cooks quickly and adds a sweet taste. Slice pork tenderloin into thin pieces for a hearty option. For a lighter meal, grilled chicken breast works nicely too. Just remember to adjust cooking time based on your choice. Get creative with your veggie choices in spicy ramen. In addition to bok choy and carrots, you can add snap peas or zucchini. Sweet corn adds a nice crunch and sweetness. For a bit of heat, try adding sliced jalapeños. Mix and match to create your perfect bowl! To keep your spicy chicken ramen fresh, store it in an airtight container. Let the ramen cool down first. Then, cover it tightly. It stays good in the fridge for up to three days. Keep the toppings separate. This helps keep them fresh and crisp. When you're ready to enjoy your ramen again, reheat it on the stove. Heat it over medium heat. Stir gently to mix the broth and noodles. You can also use a microwave. Place it in a microwave-safe bowl. Heat in short bursts, stirring in between. This way, it warms evenly. You can freeze the ramen for later meals. Portion it into freezer-safe containers. Leave some space at the top for expansion. It stays good for up to three months. When you want to eat it, thaw it in the fridge overnight. Reheat as usual before serving. Yes, you can use regular ramen. Regular ramen takes longer to cook. Follow the package instructions for timing. Instant ramen cooks quickly, which makes it easy for busy nights. Regular ramen often has a better texture. It can hold up well in broth. To make your ramen less spicy, reduce the sriracha. Start with a smaller amount. You can also skip the chili paste. Adding more chicken broth can help balance the heat. Incorporating more veggies like carrots can add sweetness. Creamy toppings like a soft-boiled egg can also tone down spice. If you don't have bok choy, try spinach or kale. Both greens add nice texture and flavor. You can also use napa cabbage for a similar crunch. Other options include shredded cabbage or Swiss chard. Each of these will fit well in your ramen bowl. You learned how to make spicy chicken ramen with tasty ingredients and helpful tips. We covered steps like marinating chicken and cooking broth. Remember to customize your dish with extra flavors and toppings. You can even switch proteins or try vegetarian options. Storing and reheating ramen properly keeps it fresh. With these insights, you can make a delicious meal that suits your taste. Enjoy your cooking adventure and explore your ramen creations!

Spicy Chicken Ramen Bowls Flavorful and Satisfying Meal

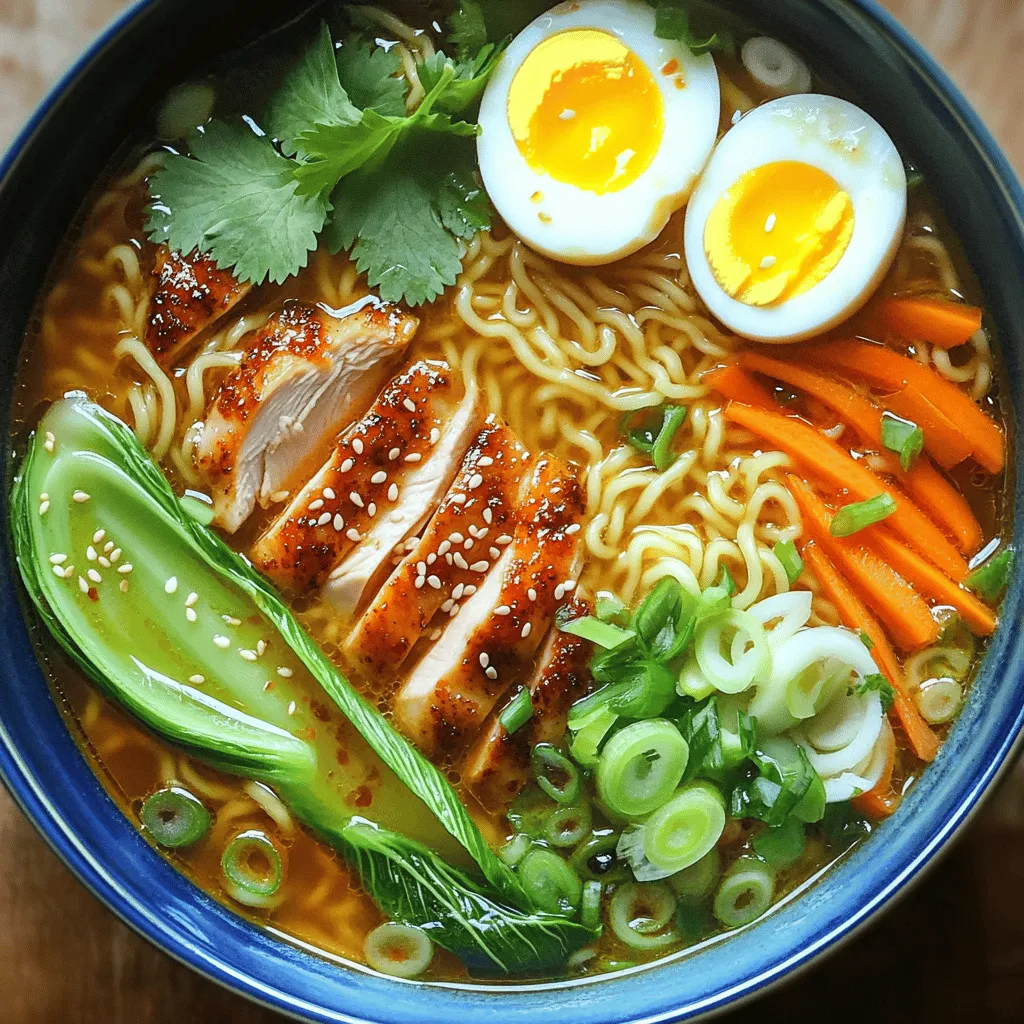
Craving a meal that’s both spicy and satisfying? You’re in the right place! My Spicy Chicken Ramen Bowls are a

- 2 ripe mangoes, peeled and diced - 1 cup full-fat coconut milk - 1/2 cup Greek yogurt (or dairy-free option) - 2 tablespoons honey or maple syrup - 1 tablespoon lime juice - A pinch of salt - Optional garnishes: Shredded coconut, diced mango For these creamy coconut mango popsicles, I love using ripe mangoes. They bring a sweet and fruity flavor. Make sure to peel and dice the mangoes well. This helps them blend smoothly. I choose full-fat coconut milk for its rich taste. It adds creaminess that makes these popsicles special. If you're looking for a dairy-free option, Greek yogurt works great. You can also find non-dairy yogurt for a vegan treat. Sweetness is key. I use honey or maple syrup, but you can adjust this based on your taste. The lime juice adds a refreshing twist. A pinch of salt helps bring out all the flavors. For a fun touch, you can add shredded coconut or diced mango as garnishes. These extras give texture and make your popsicles look beautiful. Now, let’s get ready to blend these delicious ingredients! To start, you need to peel and dice the mangoes. First, grab a ripe mango. Hold it steady on the cutting board. Use a sharp knife to slice off the sides, avoiding the pit. Once you have the two large pieces, make grid cuts in the mango flesh. Then, scoop the cubes out using a spoon. This method helps you get perfect pieces without waste. Next, measuring the coconut milk and yogurt is easy. Use a liquid measuring cup for the coconut milk. Pour it in slowly to avoid spills. For the yogurt, a dry measuring cup works best. Scoop the yogurt and level it off with a knife for precision. This ensures you get the right amount for creamy popsicles. Now, let’s blend everything together. In a blender, combine the diced mango, coconut milk, yogurt, honey, lime juice, and a pinch of salt. Blend until the mixture is smooth and creamy. You want no chunks of mango left. If you like it sweeter, taste the mixture. Add more honey or syrup if needed. Blend again to mix in any extra sweetness. Pouring the mixture into popsicle molds is fun! Use a ladle or a measuring cup to fill the molds. Leave a little space at the top. This space lets the popsicles expand as they freeze, preventing spills. If you want, sprinkle shredded coconut or small mango pieces into the molds for extra flavor. Now, insert the popsicle sticks. Make sure they stand straight in the mixture. Freeze the molds for at least 4 to 6 hours. This time helps the popsicles become solid and easy to remove. When ready, run warm water over the outside of the molds for a few seconds. This warms the mold and helps release the popsicles easily. Enjoy your creamy coconut mango popsicles! To make your popsicles super creamy, choose full-fat coconut milk. This milk gives a rich and smooth texture. Avoid light coconut milk, as it may not blend well. Use freshly squeezed lime juice for the best flavor. It adds a bright taste that balances the sweetness. A little lime juice goes a long way in enhancing the fruitiness of mango. Get creative with how you enjoy your popsicles. Try dipping them in melted dark chocolate. This adds a fun twist! You can also serve them alongside fresh fruit, like berries or sliced bananas. Pair your popsicles with other desserts. They go well with fruit salad or a scoop of sorbet. Each bite will be a burst of flavor. Enjoy your summer treat! {{image_2}} If you want a dairy-free treat, you can swap Greek yogurt for dairy-free yogurt. Look for brands made from coconut or almond. They provide a creamy texture just like yogurt. For sweeteners, try maple syrup or agave nectar. These plant-based sweeteners add a nice touch to your popsicles. Add spices to make your popsicles more exciting! A dash of cinnamon or ginger adds warmth. You can also mix in other fruits. Pineapple or passion fruit works well for a tropical twist. Try blending in berries for added color and flavor. The options are endless, so feel free to get creative! To keep your creamy coconut mango popsicles fresh, store them in an airtight container. This helps prevent freezer burn and keeps flavors intact. If you use popsicle molds, you can leave them in the molds for easy access. However, transferring them to a container saves space in your freezer. You can wrap popsicles in plastic wrap for added protection. They will stay good for about 3 months in the freezer. Removing popsicles from molds can be tricky. First, run warm water over the outside of the molds for a few seconds. This helps loosen the popsicles. Gently pull on the popsicle stick while twisting the mold slightly. If a popsicle does not come out, return it to the freezer for a few minutes. Be careful not to tug too hard, as this can break the popsicle. Following these steps helps you enjoy your treats without any mess! Yes, you can use frozen mango. Just let it thaw a bit before blending. Frozen mango makes it easier to blend into a smooth mix. It also gives your popsicles a nice chill. This option is great when fresh mango is not in season. These popsicles can last up to three months in the freezer. To keep them fresh, store them in an airtight container. This prevents freezer burn. Enjoy them within this time for the best flavor and texture. Yes, you can skip the yogurt. Just use more coconut milk instead. This will still give you a creamy texture. You may want to add a little extra sweetener to balance the flavor. Many fruits work well with coconut. Pineapple adds a tropical twist. Banana gives a nice creaminess. Berries like strawberries and blueberries add a pop of color and flavor. You can mix and match for fun flavors! To make tasty mango coconut popsicles, you need simple ingredients and easy steps. Start with fresh mangoes and coconut milk, add Greek yogurt, honey, and lime juice. Follow tips to achieve the perfect creaminess and blend until smooth. Freeze in molds and enjoy with creative toppings. Experiment with dairy-free options or fruity mixes for fun twists. Store them properly to keep them fresh longer. Enjoy your homemade treats that are both delightful and simple!

Creamy Coconut Mango Popsicles Refreshing Summer Treat

Looking for a tasty way to cool down this summer? You’ll love these creamy coconut mango popsicles! Combining sweet mangoes

To make this dish, you need a few key items: - 1 pound Brussels sprouts, trimmed and halved - 3 tablespoons balsamic vinegar - 2 tablespoons honey - 2 tablespoons olive oil - 2 cloves garlic, minced - Salt and pepper to taste These core ingredients create the rich, tangy flavor and that delightful caramelization. If you want to take your Brussels sprouts to the next level, consider these: - 1/4 cup toasted walnuts, chopped - 2 tablespoons fresh parsley, chopped (for garnish) The walnuts add crunch, while parsley gives a fresh touch. You can mix and match to suit your taste. This dish is not just tasty; it is also healthy. Here’s a quick look at the nutrition per serving: - Calories: 180 - Protein: 3g - Carbohydrates: 15g - Fat: 12g - Fiber: 4g Balsamic glazed Brussels sprouts are a great side dish packed with nutrients. Enjoy guilt-free! First, take 1 pound of Brussels sprouts. Trim off the dry ends and cut them in half. This helps them cook evenly. Next, place them in a large bowl. In the same bowl, add 3 tablespoons of balsamic vinegar, 2 tablespoons of honey, and 2 tablespoons of olive oil. Then, add 2 cloves of minced garlic, salt, and pepper. Whisk these together until they mix well. Now, toss the halved Brussels sprouts in the glaze. Make sure they are fully coated. Spread them out on a baking sheet lined with parchment paper. Roast them in a preheated oven at 400°F for 20-25 minutes. Stir them halfway through for even cooking. In the last 5 minutes, sprinkle 1/4 cup of chopped walnuts on top. Once done, take them out and let them cool a bit. Drizzle any leftover glaze over the sprouts. Finally, garnish with 2 tablespoons of chopped fresh parsley before serving. To get that nice caramelization, start by cutting the Brussels sprouts in half. This helps them cook evenly. Toss them well in the balsamic mixture. Make sure every piece is coated. Lay them out flat on a baking sheet. This gives them room to roast well. Stir them halfway through cooking. It ensures all sides caramelize nicely. Roasting at 400°F (200°C) gives a sweet, brown finish. If you want to change things up, try using maple syrup instead of honey. It adds a different sweet touch. You can also swap walnuts for pecans or almonds. They bring a nice crunch. For a spicy kick, add crushed red pepper flakes. Fresh thyme or rosemary can also add great flavor. Don’t be afraid to get creative! Balsamic glazed Brussels sprouts pair well with many dishes. They go great with roasted chicken or pork. Serve them alongside quinoa for a healthy meal. You can also include them in a salad with mixed greens. Their sweet and savory taste adds depth to any plate. Enjoy exploring different combinations! {{image_2}} You can easily make this dish vegan. Just swap honey for maple syrup. This keeps the sweet flavor while making it plant-based. The rest of the recipe stays the same. The balsamic glaze pairs nicely with the Brussels sprouts, even without honey. Feel free to add more veggies to this dish. Carrots, sweet potatoes, or even bell peppers work well. Just cut them into similar sizes as the Brussels sprouts. This way, they cook evenly. Toss them in the same balsamic mixture for extra flavor. You can change up the nuts and herbs for new tastes. Try pecans or almonds instead of walnuts. Each nut brings a different crunch and flavor. For herbs, consider thyme or rosemary. These add a lovely aroma and taste to the dish. Experiment to find your perfect mix! After your meal, let the Brussels sprouts cool. Place them in an airtight container. Store in the fridge for up to three days. This keeps them fresh and tasty. To reheat, preheat your oven to 350°F (175°C). Spread the sprouts on a baking sheet. Bake for about 10-15 minutes. This method helps keep them crisp. You can also use the microwave. Heat in 30-second bursts until warm. If you want to freeze them, first cool the sprouts completely. Spread them in a single layer on a baking sheet. Freeze for about one hour, then transfer to a freezer bag. They can last up to three months. When ready to eat, thaw in the fridge overnight. Reheat as described above for the best taste. Yes, you can use frozen Brussels sprouts. They will cook well in this dish. Just make sure to thaw them first. Pat them dry before you mix them with the glaze. This helps them crisp up nicely. The flavor will still shine through, but fresh sprouts taste better. If you need a substitute for honey, try maple syrup or agave nectar. Both options add sweetness. They also blend well with balsamic vinegar. You can even use brown sugar mixed with a little water. This will help to mimic the sweetness of honey. To add some heat, sprinkle red pepper flakes into the balsamic glaze. You can also add diced jalapeños or a dash of hot sauce. Mix these in when you whisk the glaze. Start with a small amount and taste it. You can always add more if you like it spicier. Balsamic glazed Brussels sprouts are a flavorful side dish anyone can make. We covered essential ingredients, steps for the glaze, and tips for the best results. You learned how to customize the dish with various variations and pairings. Remember, enjoy experimenting and make this dish your own. Whether it’s a family dinner or a gathering, these sprouts will impress everyone. Now, go ahead and cook up some deliciousness!

Balsamic Glazed Brussels Sprouts Flavorful Side Dish

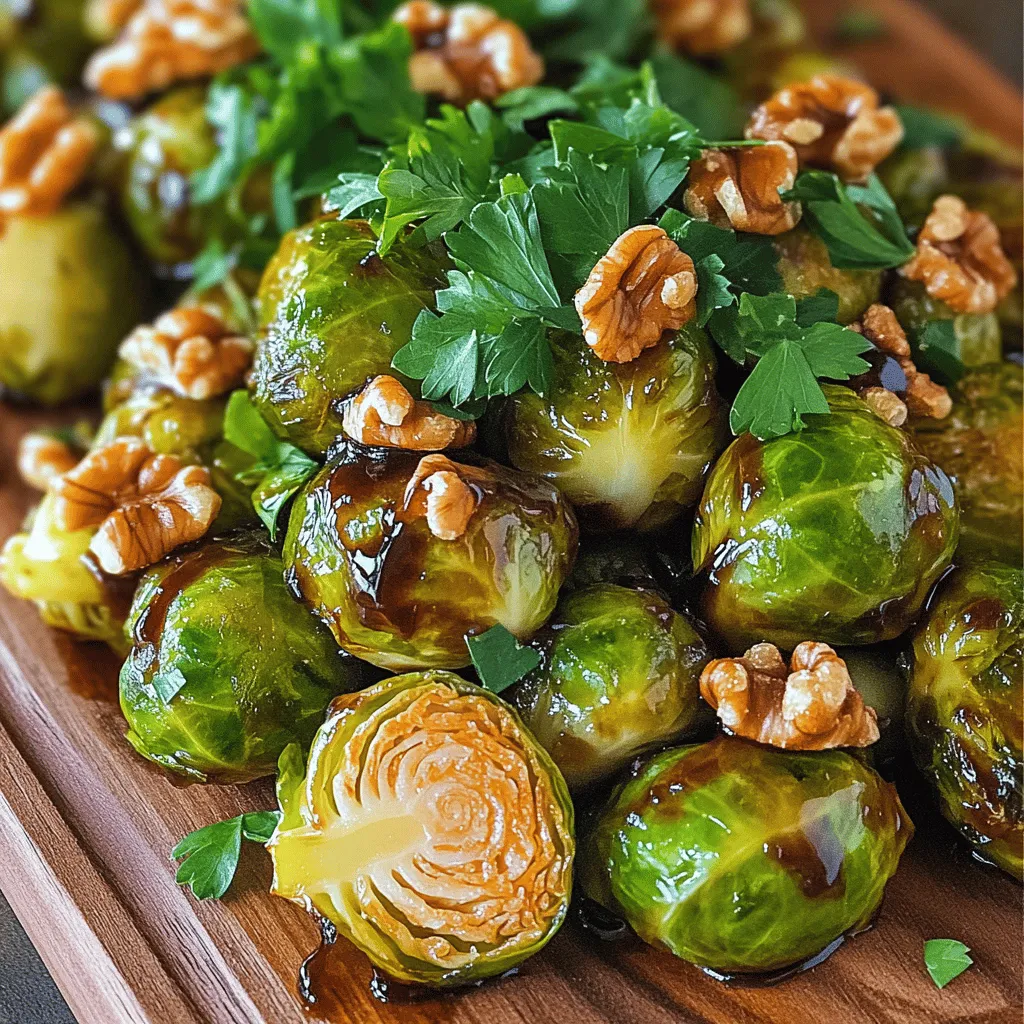
Get ready to transform your meals with my Balsamic Glazed Brussels Sprouts! This flavorful side dish will impress everyone at

To make these brownies, you need a few key ingredients: - 1 cup unsalted butter, melted - 2 cups granulated sugar - 1 teaspoon vanilla extract - 4 large eggs - 1 cup all-purpose flour - 1 cup unsweetened cocoa powder - 1/2 teaspoon baking powder - 1/4 teaspoon salt - 1 cup fresh strawberries, hulled and halved - 1 cup semi-sweet chocolate chips - 2 tablespoons coconut oil (for dipping) These ingredients create a rich base for the brownies. The butter gives moisture, while granulated sugar adds sweetness. Vanilla extract brings warmth and depth to the flavor. Eggs help bind everything together, making the brownies nice and fudgy. The cocoa powder is what makes them chocolatey and delicious. You can add some optional ingredients to boost the flavor: - Chopped nuts (like walnuts or pecans) - A pinch of espresso powder - Sea salt flakes for topping Nuts add texture and crunch. Espresso powder enhances the chocolate flavor without making it taste like coffee. Sea salt flakes on top create a nice contrast with the sweetness. When selecting strawberries, look for: - Bright red color - Firm texture - Fresh green leaves Fresh strawberries make a big difference. Choose berries that smell sweet and feel firm. Avoid any with soft spots or dark patches. This ensures you get the best flavor for your brownies. Start by preheating your oven to 350°F (175°C). Grease a 9x13 inch baking dish. In a large bowl, whisk together 1 cup of melted unsalted butter and 2 cups of granulated sugar. Mix until smooth. Next, add 1 teaspoon of vanilla extract and 4 large eggs, one at a time. Make sure to mix well after each addition. In another bowl, sift together 1 cup of all-purpose flour, 1 cup of unsweetened cocoa powder, 1/2 teaspoon of baking powder, and 1/4 teaspoon of salt. Gradually add this dry mix to your wet ingredients, stirring until just combined. Now, gently fold in 1 cup of hulled and halved fresh strawberries. This step adds a burst of flavor to your brownies. Pour the brownie batter into the prepared baking dish. Spread it out evenly to ensure even baking. Slide it into the oven and bake for 25 to 30 minutes. To check if they are done, insert a toothpick into the center. It should come out with a few moist crumbs. Once they are baked, let the brownies cool completely in the pan on a wire rack. This cooling time is key for firm brownies that hold their shape. After your brownies cool, it’s time to melt the chocolate. In a microwave-safe bowl, combine 1 cup of semi-sweet chocolate chips and 2 tablespoons of coconut oil. Heat in 30-second intervals, stirring until smooth. Dip each halved strawberry into the melted chocolate. Let any excess chocolate drip off. Then, place the dipped strawberries on a parchment-lined tray. Once done, arrange the chocolate-covered strawberries onto the cooled brownies, pressing them slightly into the surface. To set the chocolate, let them sit at room temperature for about 30 minutes or refrigerate for quicker results. Enjoy this delightful treat! To make brownies moist and fudgy, use the right ratio of butter and sugar. The melted butter brings richness. The sugar adds sweetness and moisture. Do not overmix the batter. Mix just until combined to keep air out. This helps the brownies stay dense and rich. Also, bake them just until a toothpick shows a few moist crumbs. Overbaking makes them dry. Melt chocolate slowly for the best results. I recommend using a microwave-safe bowl. Heat the chocolate chips and coconut oil in 30-second bursts. Stir in between each burst. This helps prevent burning. When the chocolate looks shiny and smooth, it's ready. Be patient! If you rush, you might end up with a lumpy mess. For special occasions, presentation is key. Cut the brownies into equal squares. Place them on a nice platter. Drizzle extra melted chocolate on top for flair. Add whole strawberries around the brownies for color. You can also use edible flowers for a touch of elegance. These simple tricks will impress your guests and make your treats more inviting. {{image_2}} You can easily swap ingredients in this recipe. If you want gluten-free brownies, use almond flour instead of all-purpose flour. This gives a nutty taste and works well with chocolate. For a dairy-free option, replace unsalted butter with coconut oil or a vegan butter substitute. You can also use flax eggs instead of regular eggs. Just mix 1 tablespoon of ground flaxseed with 2.5 tablespoons of water for each egg. This makes a great binder for your brownies. Toppings can change the game for these brownies. Instead of strawberries, try raspberries or blueberries. Their tartness goes great with chocolate. You can also sprinkle crushed nuts on top for crunch. Chopped pecans or walnuts add a nice texture. For a sweeter twist, use marshmallows or caramel drizzle. These toppings add fun flavors and textures. Mixing in other fruits can make these brownies unique. Bananas can add moisture and a rich taste. Just mash one ripe banana and fold it into the batter. You can also use peaches or cherries. Their sweetness pairs well with chocolate. For a tropical flavor, think about adding pineapple chunks. This combination creates a fun twist that surprises your taste buds. To keep your brownies fresh, store them in an airtight container. Place a layer of parchment paper between the brownies and the lid. This helps them breathe and prevents them from getting soggy. You can leave them at room temperature for up to three days. If you want them to last longer, refrigerate them. They will stay fresh for about a week in the fridge. You can also freeze these brownies for later enjoyment. First, let the brownies cool completely. Then, cut them into squares. Wrap each square tightly in plastic wrap. Place the wrapped brownies in a freezer-safe bag or container. They can last for up to three months in the freezer. When you’re ready to eat them, just take out what you need. To enjoy your brownies warm, preheat your oven to 350°F (175°C). Place the brownies on a baking sheet and cover them with foil. Heat for about 10-15 minutes. This warms them without drying them out. You can also microwave a single square. Heat it for about 10-15 seconds, checking to make sure it doesn’t melt too much. Enjoy your delicious chocolate dipped strawberry brownies warm! Yes, you can make these brownies ahead of time. Just bake them and let them cool. Once cool, wrap them tightly in plastic wrap. Store them in an airtight container at room temperature for up to three days. For longer storage, freeze the brownies. Wrap them well and place them in a freezer bag. They can last up to three months in the freezer. When you are ready to enjoy, just thaw them at room temperature. To cut brownies nicely, first, let them cool completely. This helps them hold their shape. Use a sharp knife for clean cuts. You can warm the knife under hot water and wipe it dry. This helps create neat edges. Cut the brownies into squares or rectangles. Arrange them on a platter for a lovely display. Drizzling melted chocolate on top adds a nice touch as well. To prevent the chocolate from cracking, use good quality chocolate chips. Mix in a little coconut oil as it helps to keep the chocolate smooth. When melting the chocolate, do it slowly in short bursts in the microwave. Stir often to keep it smooth. Once you dip the strawberries, let them set at room temperature. If you chill them too fast, the chocolate may crack. These chocolate dipped strawberry brownies are a fun treat. We covered key ingredients, baking steps, and tips for the best flavor. Remember to choose ripe strawberries and melt chocolate carefully. You can modify the recipe for dietary needs or add different toppings. Store leftovers properly for the best taste. With these tips, you can impress guests at any event or enjoy a sweet snack. Have fun making these delicious brownies!

Chocolate Dipped Strawberry Brownies Delightful Treat

Indulge in the ultimate sweet treat with my Chocolate Dipped Strawberry Brownies! These fudgy brownies come topped with fresh strawberries

Older posts
Newer posts
← Previous Page1 … Page24 Page25 Page26 … Page106 Next →
© 2025 My Cooking Cast • Built with GeneratePress

Our Policies

  • Privacy Policy
  • GDPR Policy
  • Terms Of Use
  • Copyright Policy
  • Cookie Policy
  • Disclaimer

More Information​

  • Home
  • Contact
  • About
  • Dinner
  • Appetizers
  • Dessert
©2025, My Cooking Cast About Privacy Policy Back To Top