Skip to content
DisclaimerTerms Of UseGDPR PolicyCookie Policy

My Cooking Cast

  • Home
  • Drinks
  • Appetizers
  • Dinner
  • Dessert
  • About
  • Contact
  • Privacy Policy
DisclaimerTerms Of UseGDPR PolicyCookie Policy

Emma

- 2 ribeye steaks (about 1-inch thick) - 8 oz cremini mushrooms, sliced - 4 cloves garlic, minced - 4 tablespoons unsalted butter - 2 tablespoons olive oil Ribeye steaks are rich and juicy. They bring great flavor to this dish. Choose steaks about one inch thick for best results. Cremini mushrooms add earthiness and depth. They pair well with the garlic and butter. Fresh garlic gives a bold taste. It adds aroma while cooking. Butter provides richness and helps create a lovely sauce. Olive oil is perfect for searing. It has a high smoke point, which is ideal for cooking steaks. - Salt and pepper to taste - 1 teaspoon fresh thyme leaves (or ½ teaspoon dried thyme) - Fresh parsley, chopped, for garnish Salt and pepper are key for flavor. They enhance the taste of the steak and mushrooms. Fresh thyme adds a hint of herbal notes. It brings brightness to the dish. Fresh parsley is a great garnish. It adds color and freshness to the plate. Always taste as you cook to adjust the seasoning. This will help ensure a delicious meal every time. Bringing to Room Temperature Take the ribeye steaks out of the fridge. Let them sit for about 30 minutes. This helps the meat cook evenly. Seasoning the Steaks Pat the steaks dry with a paper towel. Generously season both sides with salt and pepper. This simple step adds great flavor. Searing Technique Heat olive oil in a large skillet over medium-high heat. Once hot, carefully place the steaks in the skillet. Sear one side for 4-5 minutes. Look for a golden crust. Adjusting for Doneness Flip the steaks and sear the other side for 3-4 minutes for medium-rare. If you like it more done, adjust cooking times. Remove the steaks and cover them with foil to keep warm. Cooking Method In the same skillet, reduce heat to medium. Add the sliced cremini mushrooms. Sauté them for about 5 minutes until they soften and release moisture. Timing and Texture You want the mushrooms to be tender but not mushy. Stir them occasionally for even cooking. Adding Garlic and Thyme Push the mushrooms to one side of the skillet. Add the butter and minced garlic to the empty side. Let the butter melt, then mix the garlic with the mushrooms. Sprinkle in the thyme. Final Cooking Steps Cook for an additional 2-3 minutes. This allows the garlic to become fragrant. Return the steaks to the skillet and spoon some mushroom mixture over them. Let it cook for another minute on low heat to meld the flavors. Using a Meat Thermometer A meat thermometer helps you cook steak just right. For medium-rare, aim for 130°F. Insert the thermometer in the thickest part of the steak. This step ensures juicy and tender meat every time. Choosing the Right Thickness Select ribeye steaks that are about 1-inch thick. This thickness gives you a nice sear while keeping the inside tender. Thicker steaks need more time, while thinner steaks cook faster. Choosing Fresh vs. Dried Herbs Fresh thyme adds a bright flavor that dried herbs can't match. Use 1 teaspoon of fresh thyme leaves. If you only have dried thyme, use ½ teaspoon. Fresh herbs give depth to your dish. Cooking Time Recommendations Sauté mushrooms for about 5 minutes until soft. This time allows them to release moisture. After that, add garlic and thyme. Cook for 2-3 more minutes to build flavor. Recommended Side Dishes Pair your steak with roasted vegetables or mashed potatoes. A simple green salad adds freshness. These sides complement the rich flavors of the steak and mushrooms. Pairing with Wine Choose a bold red wine, like Cabernet Sauvignon. It matches the richness of the steak. A glass of this wine enhances your meal and makes it feel special. {{image_2}} If you want to switch things up, try using other cuts of steak. Ribeye is great, but you can use sirloin or flank steak. These cuts may be leaner but still hold flavor. Sirloin has a nice beefy taste, while flank is perfect for marinating. Each option brings a unique texture and flavor. You can swap out cremini mushrooms for other types. Button mushrooms are mild and tender. They are easy to find and work well in this dish. Portobello mushrooms add a meaty texture and a rich flavor. Slice them thick for a hearty bite. Both options will still taste fantastic with garlic and butter. Feel free to add more veggies to your skillet. Asparagus or bell peppers can add color and crunch. Zucchini or spinach can bring a fresh twist. Just sauté them along with the mushrooms. This adds flavor and nutrition. You can create a colorful and tasty meal with these additions. To keep your Garlic Butter Mushroom Steak Skillet fresh, store leftovers in the fridge. Place the steak and mushrooms in an airtight container. Make sure to cool them to room temperature first. They will stay good for up to three days. Label the container with the date to track freshness. When it's time to enjoy your leftovers, reheating is key. Use a skillet for best results. Warm it on low heat to avoid drying out the steak. Add a splash of broth or water to keep moisture. Stir the mushrooms gently. This helps maintain flavor and texture. If you want to save some for later, freezing works well. Wrap the steak and mushrooms tightly in plastic wrap. Then, place them in a freezer bag. Remove as much air as possible. They can freeze for up to three months. When ready to eat, thaw in the fridge overnight before reheating. To know if your steak is done, use these cooking times: - Rare: 120°F internal temperature, about 2-3 minutes per side. - Medium Rare: 130°F, about 4-5 minutes per side. - Medium: 140°F, about 6-7 minutes per side. - Medium Well: 150°F, about 8-9 minutes per side. - Well Done: 160°F, about 10-11 minutes per side. You can also use a meat thermometer for accuracy. This tool helps you get perfect doneness every time. Yes, you can make this dish without mushrooms. Some alternatives include: - Zucchini slices - Bell peppers - Asparagus - Spinach These options add flavor and texture. Choose what you like best or have on hand. Here are some ideal side dishes to serve: - Mashed potatoes - Roasted vegetables - Garlic bread - A fresh salad These sides balance the rich flavors of the steak and mushrooms. They also help round out your meal. To keep your steak juicy, follow these tips: - Let the steak rest after cooking. This helps the juices redistribute. - Avoid cutting into the steak right away. Let it sit for about 5-10 minutes. - Use a meat thermometer for perfect doneness. Overcooking can dry it out. These methods ensure a tender, juicy steak every time. In this blog post, I covered key ingredients like ribeye steak, cremini mushrooms, and garlic. I shared step-by-step instructions for preparing, cooking, and combining flavors. You learned tips for perfectly cooked steak and enhancing mushroom taste. I also offered variations and best storage practices. Cooking can be simple and fun. With these steps, you can enjoy a great meal. Happy cooking!

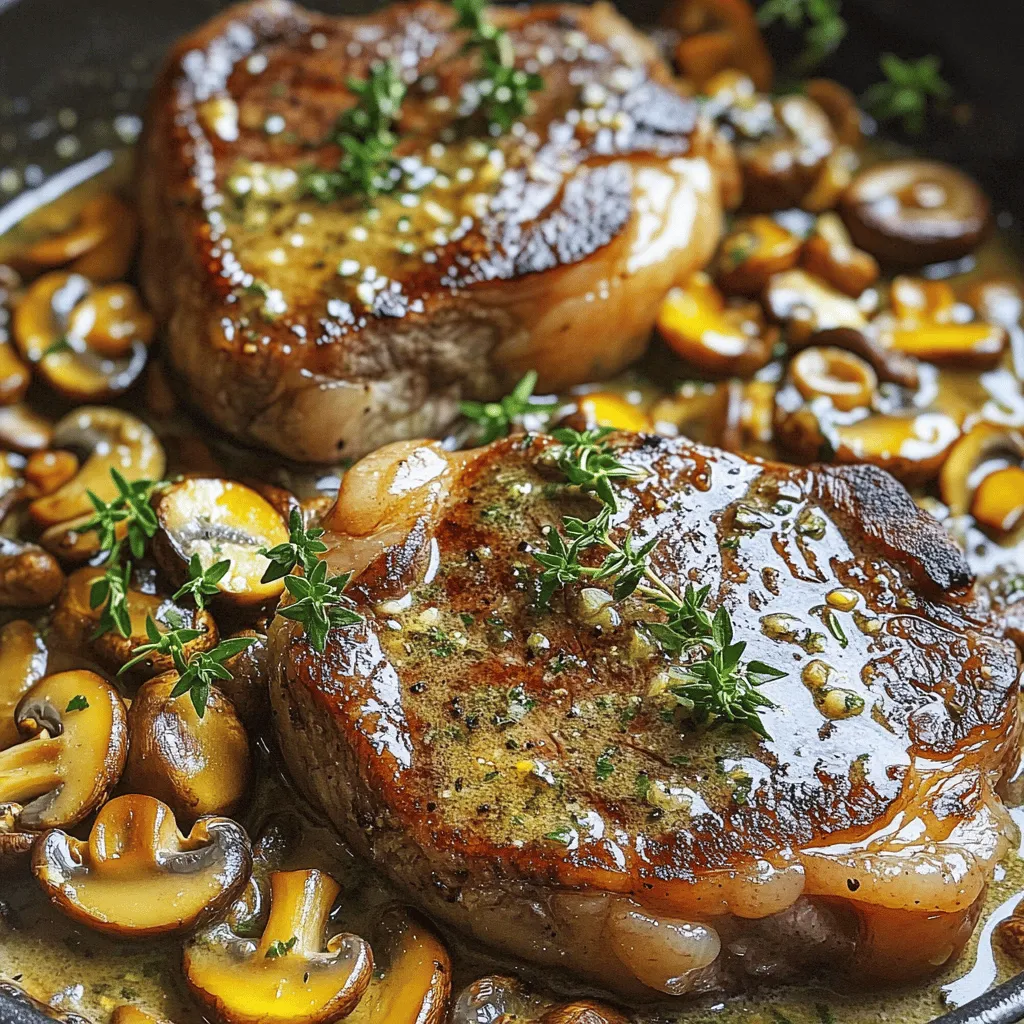
Garlic Butter Mushroom Steak Skillet Irresistible Meal

Craving a hearty meal that bursts with flavor? This Garlic Butter Mushroom Steak Skillet is your answer! Juicy ribeye steaks,

- 2 cups cooked jasmine rice (preferably day-old) - 1 cup kimchi, chopped - 1/2 cup green onions, sliced (reserve some for garnish) - 1 carrot, diced - 1/2 cup bell pepper, diced (red or green for color) - 2 cloves garlic, minced - 2 tablespoons soy sauce - 1 tablespoon gochujang (Korean chili paste) - 1 tablespoon sesame oil - 2 tablespoons vegetable oil - 2 large eggs - Salt and pepper to taste - Sesame seeds for garnish (optional) If you don’t have jasmine rice, use any long-grain rice. You can swap out kimchi for pickled vegetables. If you lack green onions, use chives or shallots instead. For bell peppers, zucchini works great too. If you don’t have gochujang, try sriracha or chili flakes for heat. - 1 cup = 240 ml - 1 tablespoon = 15 ml - 1 teaspoon = 5 ml - 1/2 cup = 120 ml These conversions help make your cooking smooth and easy. Always keep a measuring cup handy for best results. Before you start cooking, gather all your ingredients. This makes the process faster. Use day-old jasmine rice for the best texture. Fresh rice can be too sticky. Chop the kimchi, green onions, carrots, and bell peppers ahead of time. This helps them cook evenly. 1. Heat the Oil: Start by heating the vegetable oil and sesame oil in a large skillet over medium-high heat. 2. Cook the Vegetables: Add the diced carrots and bell peppers. Stir-fry for about 3-4 minutes until they soften. 3. Add Garlic and Kimchi: Stir in minced garlic and the chopped kimchi. Cook for another 2-3 minutes. This lets the kimchi caramelize and adds depth to the dish. 4. Add Rice: Turn the heat to high and add the cooked rice. Break up any clumps with your spatula. Mix the rice with the veggies well. 5. Season the Rice: Drizzle soy sauce and gochujang over the rice mixture. Stir to coat the rice in sauce. Season with salt and pepper to taste. 6. Push to One Side: Push the rice mixture to one side of the skillet. This creates space to scramble the eggs. 7. Cook the Eggs: Crack the eggs into the empty space. Scramble them until just set, then mix with the rice. 8. Add the Green Onions: Toss in the reserved green onions. Stir everything together for another minute. 9. Serve Hot: Remove the skillet from heat and serve the fried rice immediately. Serve the spicy kimchi fried rice in individual bowls. Garnish with sesame seeds and extra green onions for a pop of color. A side of additional kimchi adds a nice touch and enhances the meal. Enjoy your delicious creation! To make great fried rice, start with day-old rice. Fresh rice is too moist. Spread cooked jasmine rice on a plate to cool. This helps it dry out. You can use a rice cooker or a pot. If using a pot, add water and rice in a 2:1 ratio. Bring it to a boil, then cover and simmer for about 18 minutes. Let it sit for 10 minutes after cooking. Fluff with a fork before using. Boost the taste of your fried rice with bold ingredients. Use quality kimchi for a spicy kick. Gochujang adds heat and depth. Pair it with soy sauce for umami flavor. Consider adding sesame oil for a nutty touch. You can also toss in some fresh herbs. Chopped cilantro or basil adds freshness. A splash of lime juice can brighten the whole dish. Watch out for overcooking the vegetables. They should be tender but still crisp. Avoid using too much soy sauce; it can make the rice soggy. Stir-fry on high heat to ensure everything cooks quickly. Don’t skip the step of scrambling the eggs separately. Mixing them in at the end keeps them fluffy. Lastly, always taste and adjust seasoning before serving. {{image_2}} You can easily boost the protein in your spicy kimchi fried rice. Here are some great options: - Chicken: Cook diced chicken and add it with the vegetables. - Tofu: Use cubed tofu for a plant-based protein boost. - Shrimp: Sauté shrimp until pink and mix them in. - Beef: Thinly slice beef and stir-fry it for a savory kick. Adding protein makes it heartier and more filling. If you want a vegetarian or vegan version, you can swap a few ingredients: - Eggs: Skip the eggs or use tofu scramble instead. - Kimchi: Make sure your kimchi is vegan, as some contain fish sauce. - Soy Sauce: Use a gluten-free sauce if needed. - Vegetables: Add more veggies like broccoli, zucchini, or peas for extra nutrients. You can still enjoy all the flavor without any meat. Feel free to play with seasonings to make the dish your own: - Sriracha: Add sriracha for more heat and flavor. - Teriyaki Sauce: Use teriyaki for a sweet touch. - Coconut Aminos: A great soy sauce alternative for a sweeter taste. - Garlic Powder: Sprinkle garlic powder for extra flavor without fresh garlic. Experimenting with these options can bring new life to this dish. To store leftover spicy kimchi fried rice, let it cool first. Place it in an airtight container. This keeps the rice fresh and tasty. You can store it in the fridge for up to three days. Make sure to label the container with the date. This way, you won’t forget how long it has been in there. When you’re ready to eat your leftovers, use the microwave or stove. If using the microwave, place the rice in a bowl. Add a splash of water to keep it moist. Cover the bowl loosely and heat for 1-2 minutes. Stir halfway through to heat evenly. If using the stove, warm a skillet over medium heat. Add a bit of oil, then stir-fry the rice until it's hot. This method will help revive the flavors. You can freeze spicy kimchi fried rice for longer storage. Portion the rice into freezer-safe bags or containers. Remove excess air to prevent freezer burn. It can last for up to three months in the freezer. When you want to enjoy it again, thaw it overnight in the fridge. Reheat it using the tips above for the best taste. The best type of kimchi is napa cabbage kimchi. It has a great balance of flavor and crunch. You can also use radish kimchi if you like a sharper taste. Look for kimchi that is well-fermented, as this adds depth to your dish. Store-bought options are fine, but homemade kimchi can elevate your meal. Yes, you can prepare Spicy Kimchi Fried Rice in advance. Cook the rice and veggies, then store them separately in the fridge. This helps maintain texture. When you are ready to eat, just heat it all up in a skillet. Add the eggs at the end to keep them fluffy and fresh. To make the dish less spicy, reduce the amount of gochujang. Start with one teaspoon instead of a tablespoon. You can also add more rice to balance the heat. Mixing in some extra veggies or a splash of coconut milk can help tone down the spice level, making it more mild and enjoyable. This post covered all you need for a great dish. We discussed the key ingredients, offered helpful substitutions, and shared measurement tips. You learned step-by-step cooking instructions and serving ideas to impress. I also revealed useful techniques to avoid common mistakes, plus unique variations to suit your taste. Lastly, we talked about storage and reheating tips, ensuring nothing goes to waste. Embrace these insights and enjoy crafting your own delicious meals!

Spicy Kimchi Fried Rice Flavorful and Easy Recipe

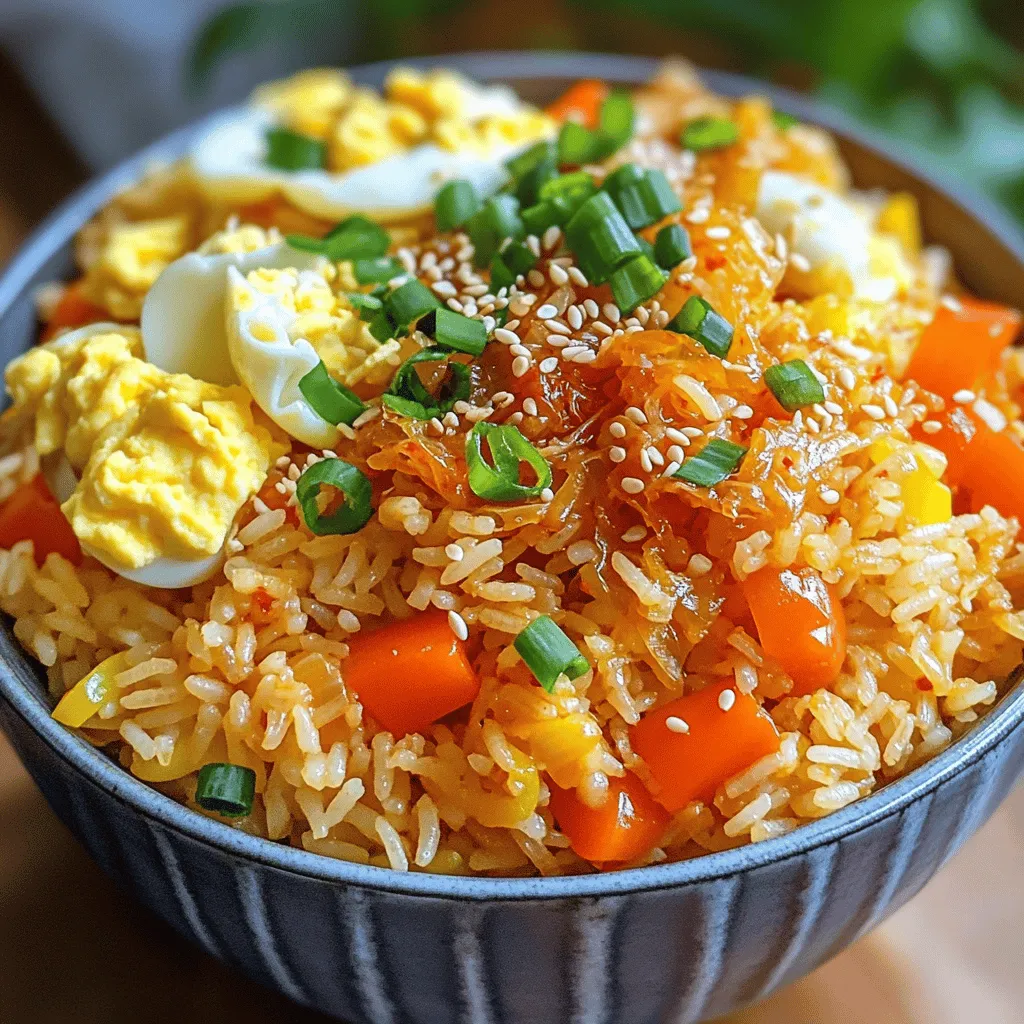
If you’re craving a dish that bursts with flavor, you’ve come to the right place! This Spicy Kimchi Fried Rice

For this tasty Lemon Blueberry Cheesecake Bars recipe, you will need: - 1 cup graham cracker crumbs - 1/3 cup melted unsalted butter - 1/4 cup granulated sugar (for crust) - 16 oz cream cheese, softened - 1 cup powdered sugar - 1/2 cup sour cream - 1/4 cup fresh lemon juice - Zest of 1 lemon - 2 large eggs - 1 cup fresh blueberries (plus extra for topping) Each of these ingredients plays a key role in making your bars rich and flavorful. If you need to swap some ingredients, here are some ideas: - Use crushed cookies instead of graham crackers for the crust. - If you need a dairy-free option, try vegan cream cheese. - For a lower-sugar option, use a sugar substitute in the crust and filling. Store leftover bars in an airtight container in the fridge for up to five days. When choosing blueberries, look for these signs: - They should be plump and firm, not mushy. - Choose berries with a deep blue color; this means they are ripe. - Avoid any berries with white or green spots, as they are not fully ripe. Fresh blueberries add the best flavor and texture to your cheesecake bars. Always wash them gently before using. Start by preheating your oven to 350°F (175°C). This ensures the crust bakes evenly. Next, grab a medium bowl. Combine 1 cup of graham cracker crumbs, 1/3 cup of melted unsalted butter, and 1/4 cup of granulated sugar. Mix until it looks like wet sand. Now, take a baking pan, about 8x8 inches, and line it with parchment paper. Leave some paper hanging over the edges. This will help you lift the bars out later. Press the graham cracker mix firmly into the bottom of the pan. This forms your crust. Bake it for 10 minutes. You want it to be slightly golden. Once done, take it out and let it cool. In a large mixing bowl, put 16 oz of softened cream cheese. Beat it with an electric mixer until it is smooth and creamy. This step is key for a great texture. Gradually add in 1 cup of powdered sugar, 1/2 cup of sour cream, 1/4 cup of fresh lemon juice, and the zest of 1 lemon. Mix until everything is combined. Now, add 2 large eggs one at a time. Mix well after each addition. This helps to avoid lumps. Finally, gently fold in 1 cup of fresh blueberries. Make sure they are evenly distributed in the batter. Pour the cheesecake batter over the cooled crust. Spread it evenly. Bake for about 25 to 30 minutes. The edges should be set, but the center can still jiggle slightly. This is normal. Once done, take it out of the oven. Let it cool at room temperature for about 1 hour. Then, refrigerate it for at least 3 hours, or until it is fully chilled. After chilling, lift the cheesecake bars out using the parchment paper. Cut them into squares. Top with extra fresh blueberries for a beautiful finish before serving. Enjoy your delicious lemon blueberry cheesecake bars! To get a smooth and creamy cheesecake, start with room temperature cream cheese. Cold cream cheese can make lumps. Use an electric mixer to beat the cream cheese until it’s very smooth. Mix in the other ingredients slowly. This helps keep the air out and avoids cracks. One common mistake is overbaking the cheesecake. Check it at 25 minutes. The edges should be set, but the center should jiggle a bit. If you bake too long, the bars can become dry. Another mistake is not letting them cool properly. Chill for at least three hours before cutting. This helps the bars set well. These cheesecake bars are best served chilled. You can top them with fresh blueberries for a burst of flavor. A sprinkle of lemon zest adds a nice touch too. For a fun twist, serve them with whipped cream or a scoop of vanilla ice cream. Enjoy them at parties or just as a sweet treat at home! {{image_2}} You can change the fruit in this recipe to make it your own. Try strawberries, raspberries, or peaches. Each fruit brings a unique taste. For strawberries, just chop them small. Raspberries add a nice tartness. Peaches give a sweet, juicy flavor. You can also mix two fruits for fun flavors! For a gluten-free option, swap graham cracker crumbs for almond flour or gluten-free cookies. Almond flour gives a nutty taste. Gluten-free cookies can work too. Just crush them well and mix with melted butter. Press it into the pan like before. You won’t miss the gluten at all! You can boost the flavor of your cheesecake bars with a few extras. Add a splash of vanilla or almond extract to the filling. This adds depth to the taste. You can also use lemon zest from two lemons for more zing. Experiment with flavors to find your favorite mix! Store your lemon blueberry cheesecake bars in an airtight container. This keeps them fresh. Place a layer of parchment paper between layers to avoid sticking. Keep the bars in the fridge for best taste and texture. You can freeze these cheesecake bars for longer storage. First, cut them into squares. Wrap each square in plastic wrap, then place them in a freezer bag. They will stay fresh for up to three months. To enjoy, just thaw them in the fridge overnight. In the fridge, these bars last about five days. Make sure to keep them covered. If they start to dry out, they may lose their creamy texture. Enjoy them within this time for the best flavor! Yes, you can use frozen blueberries. They work well in this recipe. Just toss them in flour before adding them to the mix. This helps them hold their shape. Frozen berries may make the batter a bit more watery. So, be ready for a softer texture. Check for the edges. They should be set, while the center should jiggle slightly. The cheesecake continues to cook a bit after you take it out. If it looks too soft, give it a few extra minutes. Watch closely, as overbaking can ruin the creamy texture. These bars shine on their own, but you can add more flavor. Serve with whipped cream for a light touch. A scoop of vanilla ice cream pairs well too. Fresh mint leaves can add a nice color and taste. Enjoy these bars with a cup of tea or coffee for a perfect treat! You now know how to make tasty lemon blueberry cheesecake bars. We covered the best ingredients, tips for a great texture, and ways to store them. Remember to try different fruit and enhance flavors for fun twists. Avoiding common mistakes can make a big difference. Enjoy your baking, and share these delicious bars with friends and family. With practice, you’ll become a cheesecake pro in no time. Happy baking!

Lemon Blueberry Cheesecake Bars Tasty Dessert Recipe

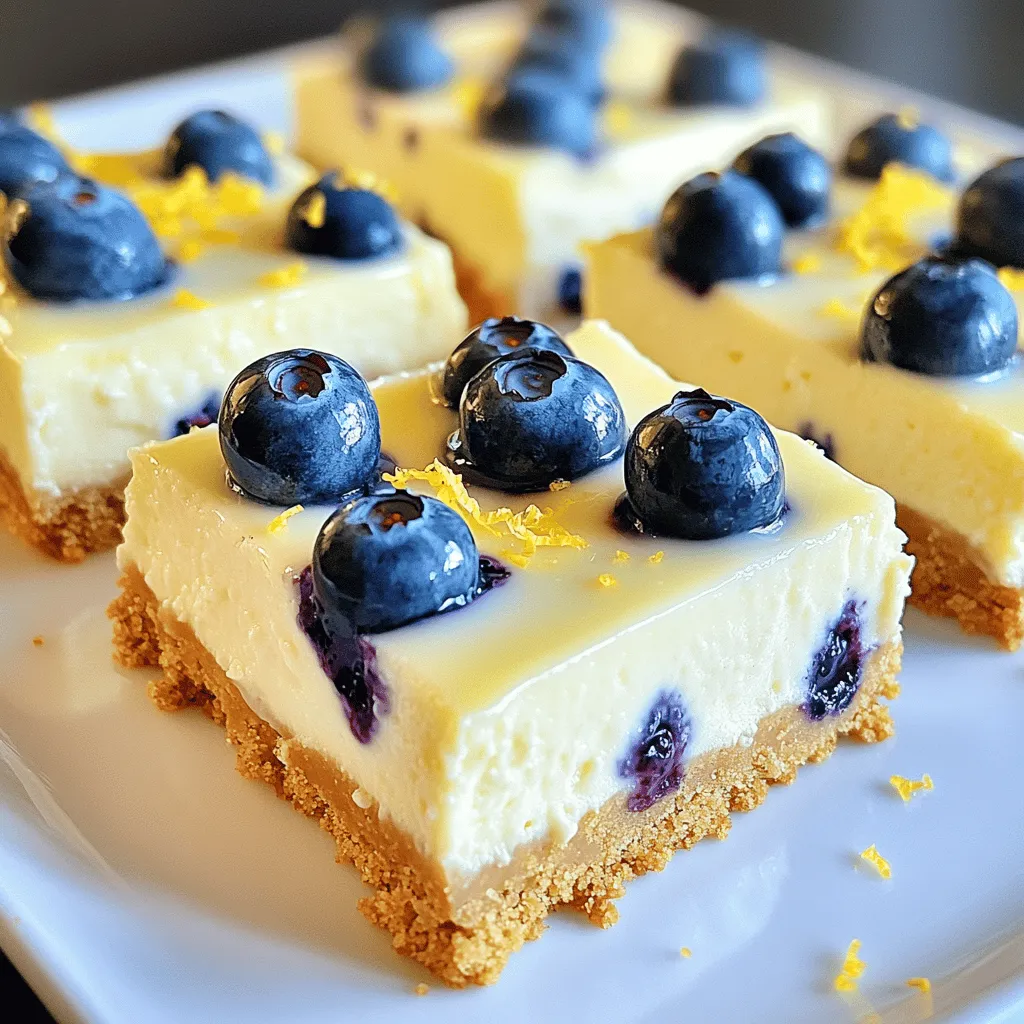
Are you ready to dive into a tasty treat that blends zesty lemon and sweet blueberries? My Lemon Blueberry Cheesecake

To make a Chocolate Peanut Butter Protein Smoothie, you need fresh, simple ingredients. Here’s what you’ll need: - 1 frozen banana - 1 cup almond milk (or milk of your choice) - 2 tablespoons natural peanut butter - 1 scoop chocolate protein powder - 1 tablespoon cocoa powder - 1 tablespoon honey or maple syrup (optional for extra sweetness) - 1/2 teaspoon vanilla extract - Ice cubes (optional, for a thicker texture) Each ingredient plays a key role in this smoothie. The frozen banana adds natural sweetness and creaminess. Almond milk keeps it light and adds a nutty flavor. Natural peanut butter brings a rich taste and healthy fats. Chocolate protein powder boosts protein and gives a deep chocolate flavor. Cocoa powder enhances the chocolate taste while keeping it healthy. You can use honey or maple syrup if you want more sweetness. Vanilla extract adds depth and a lovely scent. Lastly, ice cubes help make the smoothie frosty and thick. Gather all these items, and you’re ready to blend up a delicious treat! - Gather all ingredients. You need a frozen banana, almond milk, and peanut butter. Also, get chocolate protein powder, cocoa powder, sweetener, vanilla extract, and ice cubes. - Blend the base ingredients. Start by adding the frozen banana to your blender. Next, pour in the almond milk. - Incorporate optional sweeteners. Add peanut butter, chocolate protein powder, cocoa powder, and vanilla extract. If you want a sweeter drink, include honey or maple syrup. - Add ice for desired consistency. If you like your smoothie thick, toss in some ice cubes. - Blend until smooth and creamy. Mix everything on high speed. Stop to scrape down the sides if needed. - Adjust sweetness and re-blend if necessary. Taste your smoothie. If it's not sweet enough, add more sweetener and blend again. - Serve in a glass or bowl. Pour your delicious smoothie into a tall glass or bowl. Enjoy right away! You can change the almond milk to any nut milk or dairy milk. This gives you more flavor options. If you want it sweeter, try different sweeteners like stevia or agave. Want to add more nutrition? Toss in spinach or protein-rich seeds like chia or flaxseeds. They blend right in and boost your smoothie. Make your drink look special! You can sprinkle cocoa powder on top for a rich touch. Mini chocolate chips also add a fun twist. For a cool serving option, use a fun reusable straw. It makes sipping your smoothie even more enjoyable! {{image_2}} You can switch up the fruits in your smoothie. Try adding berries like strawberries or blueberries. They add a nice flavor and color. You can also mix in Greek yogurt for extra protein. This makes the smoothie creamier and gives it a nice tang. When autumn comes, add a sprinkle of pumpkin spice to your smoothie. It gives a cozy taste that fits the season. In summer, top your smoothie with coconut flakes. They add a fun crunch and a tropical vibe. I recommend you drink your Chocolate Peanut Butter Protein Smoothie fresh. This way, you get the best taste and nutrients. If you can't finish it, store it in the fridge. It stays good for up to 24 hours. Just remember, it will taste better when fresh! Want to keep some for later? You can freeze it! Pour the smoothie into small containers. This makes it easy to grab a portion when you want one. When it's time to enjoy, just thaw it out. After thawing, blend it again for the best taste and smoothness. This keeps the texture creamy and delicious. It takes just 5 minutes to make this tasty smoothie. You gather your ingredients first. Then, you blend them all together. It’s quick and easy! Yes, you can make this smoothie vegan. Use almond milk or any plant-based milk. Choose natural peanut butter without added ingredients. Skip the honey and use maple syrup instead for sweetening. This smoothie is great for meal prep. You can blend it ahead of time. Store it in the fridge for up to 24 hours. For longer storage, freeze it in portions. Just blend again after thawing to enjoy! This blog post covers how to make a delicious Chocolate Peanut Butter Protein Smoothie. You learned the simple ingredients, easy steps, and helpful tips for customization. Remember, you can swap almond milk, play with sweeteners, and add extra nutrients. Store it fresh for the best taste or freeze it for later. Enjoy these flavors anytime you want a boost! This smoothie is also great for quick meal prep. Fuel your day with this tasty treat!

Chocolate Peanut Butter Protein Smoothie Delightful Treat

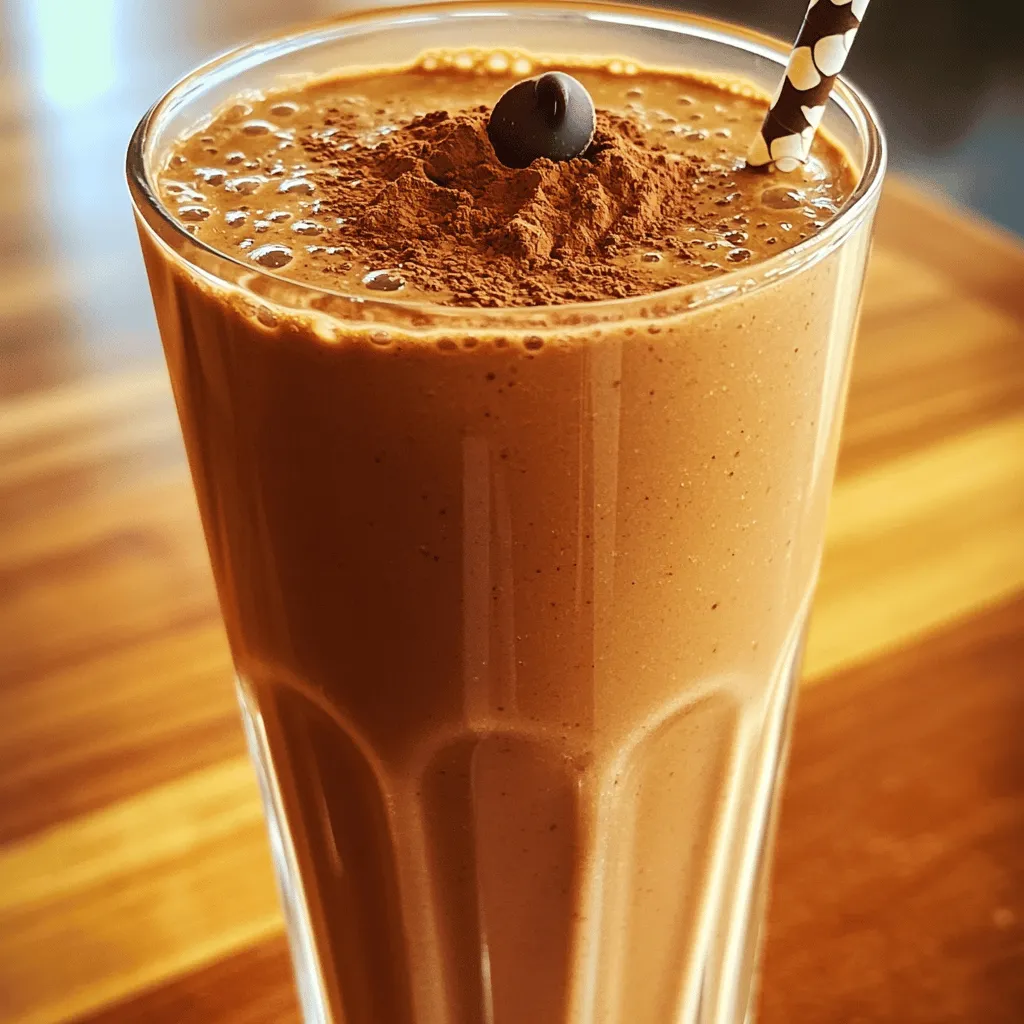
Craving a sweet treat that packs a protein punch? The Chocolate Peanut Butter Protein Smoothie is the answer! This tasty

To make Greek Yogurt Ranch Dip, you need these key items: - 1 cup plain Greek yogurt - 1/4 cup mayonnaise - 1 tablespoon lemon juice - 1 teaspoon dried dill - 1 teaspoon garlic powder - 1 teaspoon onion powder - 1/2 teaspoon salt - 1/4 teaspoon black pepper - 1 tablespoon fresh chives, finely chopped - 1 tablespoon fresh parsley, finely chopped Each ingredient adds flavor and texture to the dip. The Greek yogurt serves as the creamy base. Mayonnaise adds richness. Lemon juice gives a nice zing. Dill, garlic, and onion powders bring in classic ranch flavors. Chives and parsley offer fresh notes. Greek yogurt is high in protein and low in fat. It helps build muscle and keeps you full. Mayonnaise adds some good fats, but use it wisely. Lemon juice is rich in vitamin C, boosting your immune system. Dried dill has antioxidants and supports digestion. Garlic powder can help keep your heart healthy. Onion powder has anti-inflammatory properties. Salt and pepper enhance flavor but should be used in moderation. Chives and parsley also add vitamins and minerals. If you want to switch things up, here are some options: - Use low-fat Greek yogurt instead of regular for fewer calories. - Swap mayonnaise with more yogurt for a lighter dip. - Try apple cider vinegar if you don’t have lemon juice. - Fresh dill can replace dried dill for a stronger taste. - Use fresh garlic instead of garlic powder for a bolder flavor. These swaps can keep the dip tasty while fitting your needs. Start by grabbing a medium mixing bowl. Add 1 cup of plain Greek yogurt and 1/4 cup of mayonnaise. Mix them well until they blend smoothly. This base gives a creamy texture without too many calories. Next, add 1 tablespoon of lemon juice. This gives a nice tangy taste. Then, sprinkle in 1 teaspoon of dried dill, 1 teaspoon of garlic powder, and 1 teaspoon of onion powder. These spices really boost the flavor. Don't forget to add 1/2 teaspoon of salt and 1/4 teaspoon of black pepper. Mix everything thoroughly. You want to make sure the spices spread evenly in the dip. Now, fold in 1 tablespoon of finely chopped fresh chives and 1 tablespoon of finely chopped fresh parsley. These herbs add freshness and a pop of color. Taste the dip and adjust the salt or pepper if needed. Cover the bowl with plastic wrap or a lid. Chill it in the fridge for at least 30 minutes. This helps the flavors meld together. When ready to serve, enjoy it with fresh vegetable sticks, crackers, or chips. To make your dip extra creamy, use full-fat Greek yogurt. This adds a rich texture. Mixing in mayonnaise also helps. It brings a nice smoothness to the dip. Try blending the yogurt and mayonnaise well before adding spices. This step ensures a uniform and creamy base. To boost flavor, add fresh herbs like chives and parsley. These herbs give a bright taste. You can also try adding more garlic powder or onion powder for extra punch. Lemon juice adds freshness, so don’t skip it. Taste the dip as you mix to find your perfect flavor balance. Serve your dip with fresh veggie sticks like carrots and cucumbers. They add a nice crunch. You can also use crackers or chips for a fun snack. Arrange everything on a platter for a colorful display. This makes sharing easy and enjoyable. {{image_2}} You can change the flavor of Greek yogurt ranch dip by using various herbs. For example, try adding oregano for a Mediterranean twist. Fresh basil also brings a nice touch. You can use thyme, tarragon, or even cilantro. Each herb adds a unique taste. Mix and match to find your favorite blend. Want some heat? Add hot sauce or diced jalapeños to your dip. Start with a few drops of hot sauce. Stir it in and taste. If you want more heat, add more. Diced jalapeños also work well. They add crunch and spice. This variation is perfect for those who love bold flavors. You can make this dip dairy-free. Use non-dairy yogurt instead of Greek yogurt. Almond, coconut, or soy yogurt all work nicely. The taste may vary, but it will still be tasty. Just follow the same recipe steps. You will have a dip that everyone can enjoy, no matter their diet. To keep your dip fresh, store it in an airtight container. Make sure the lid fits snugly. This helps to keep out air and moisture. If you don't have a container, use plastic wrap tightly over the bowl. This dip needs to be kept in the fridge. It works best when served cold. Greek yogurt ranch dip can last about 3 to 5 days in the fridge. Always check for off smells or changes in color before eating. If you notice any of these signs, it's best to toss it. To keep it fresh, always use clean utensils when serving. This avoids adding germs to the dip. You can freeze this dip, but note it may change texture. To freeze, place it in a freezer-safe container. Leave some space at the top for expansion. When you're ready to eat, thaw it in the fridge overnight. Stir well before serving. You might need to add a bit more yogurt to restore its creaminess. Yes, you can make Greek Yogurt Ranch Dip ahead of time. This dip tastes even better after chilling. Prepare it and store in the fridge for up to three days. The flavors will blend nicely. Just remember to cover it well to keep it fresh. You can serve this dip with many tasty options. Here are some ideas: - Fresh vegetable sticks like carrots, celery, and cucumbers - Crunchy crackers - Crispy tortilla chips - Pita bread or chips These choices make a great snack for parties or movie nights. Yes, Greek Yogurt Ranch Dip is usually healthier. It has less fat than regular ranch dip. Greek yogurt adds protein and creaminess without extra calories. Plus, using fresh herbs boosts flavor without extra salt. This dip is a smart choice for tasty snacking. This blog post covered how to make Greek yogurt ranch dip. You learned about essential ingredients and how they boost health. We discussed easy steps to prepare and serve it. I offered tips to make it creamy and flavorful. You can even find variations for different tastes. In conclusion, Greek yogurt ranch dip is simple and tasty. It pairs well with veggies or chips. Enjoy making your dip fresh, healthy, and fun!

Greek Yogurt Ranch Dip Flavorful and Light Snack

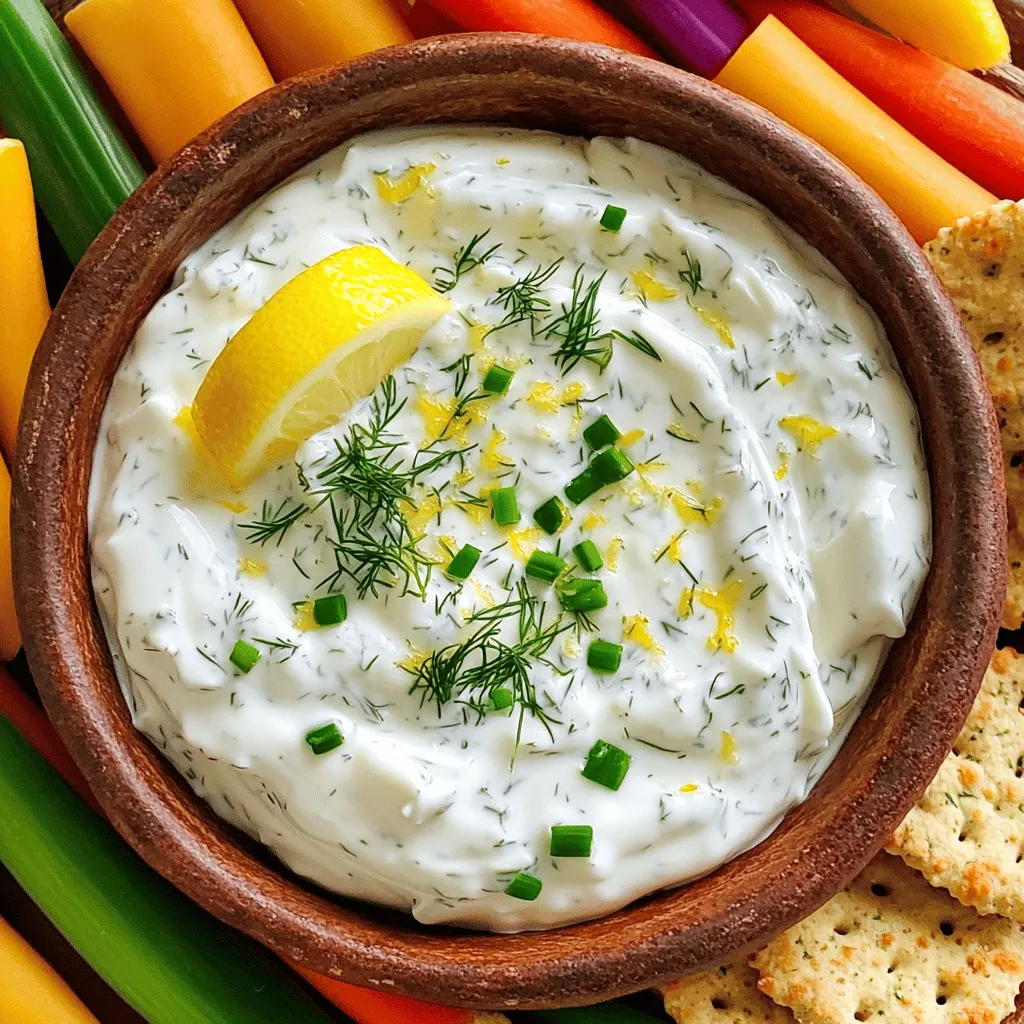
Looking for a snack that’s both tasty and light? You’re in the right place! Greek Yogurt Ranch Dip offers rich

- 1 large spaghetti squash - 2 cups fresh spinach, chopped - 1 cup canned artichoke hearts, drained and chopped - 1 cup cream cheese, softened - 1/2 cup sour cream - 1 cup shredded mozzarella cheese - 1/4 cup grated Parmesan cheese - 2 cloves garlic, minced - 1 teaspoon lemon juice - 1/2 teaspoon red pepper flakes (optional) - Salt and pepper to taste - Olive oil for drizzling For the best flavors, I recommend these brands: - Spaghetti Squash: Look for fresh, firm squash from your local farmer's market. - Cream Cheese: Philadelphia is a classic choice for smooth texture. - Mozzarella Cheese: Galbani offers creamy, melt-in-your-mouth cheese. - Artichoke Hearts: Del Monte offers quality canned artichokes. - Sour Cream: Daisy is a great pick for rich flavor. Each serving of Spinach Artichoke Stuffed Spaghetti Squash is packed with nutrients. Here’s a quick look: - Calories: Approximately 300 - Protein: 12g - Carbohydrates: 18g - Fat: 22g - Fiber: 4g - Vitamins: High in Vitamin A from spinach and healthy fats from cheese. This dish is a wonderful choice for a healthy meal. You get fiber from the squash and greens, plus protein from cheese. Enjoy the taste while nourishing your body! Start by preheating your oven to 400°F (200°C). This step warms the oven for the squash. Next, take a large spaghetti squash and cut it in half lengthwise. Be careful with the knife! Scoop out the seeds using a spoon. Drizzle a bit of olive oil on the cut sides. Then, sprinkle salt and pepper on top for flavor. Place the squash halves cut-side down on a baking sheet. Roast them in the oven for about 30-40 minutes. You want them to be fork-tender when done. While the squash roasts, it's time to make the filling. Heat a drizzle of olive oil in a large skillet over medium heat. Add two cloves of minced garlic and sauté for about one minute until you smell the garlic. Then, add two cups of chopped fresh spinach and one cup of drained and chopped canned artichoke hearts. Cook until the spinach wilts, which should take about 3-4 minutes. In a mixing bowl, combine the sautéed spinach and artichokes with one cup of softened cream cheese, half a cup of sour cream, half a cup of shredded mozzarella cheese, and a quarter cup of grated Parmesan cheese. Add one teaspoon of lemon juice and, if you like spice, half a teaspoon of red pepper flakes. Mix everything well until it's smooth. Taste and add salt and pepper as needed. Once the spaghetti squash is done, remove it from the oven. Use a fork to scrape the squash strands loose from the skin. Mix these strands with your creamy spinach-artichoke filling until well combined. Pour this mixture back into the squash halves. Don't forget to top with the remaining half cup of mozzarella cheese! Return the stuffed squash to the oven and bake for an additional 15-20 minutes. You're looking for the cheese to be bubbly and golden. When it's ready, take it out and let it cool slightly before serving. Enjoy your Spinach Artichoke Stuffed Spaghetti Squash! When cooking spaghetti squash, the goal is to make it tender and easy to shred. Start by preheating your oven to 400°F (200°C). Cut the squash in half lengthwise, and scoop out the seeds. Drizzle olive oil on the cut sides and sprinkle salt and pepper. Place the squash cut-side down on a baking sheet. This method helps steam the squash, making it soft and fluffy inside. Roast for about 30-40 minutes, until you can easily pierce it with a fork. To avoid a soggy filling, make sure to drain and chop the artichoke hearts well. Excess water from the artichokes can make the mixture too watery. Also, cook the spinach until just wilted. If you overcook it, it releases too much water. Lastly, use cream cheese and sour cream that are at room temperature. This helps them mix better and prevents adding extra moisture. For a stunning presentation, serve the stuffed squash on a colorful platter. After baking, let it cool slightly. Garnish with fresh herbs like parsley or basil to add a pop of color. You can also sprinkle some extra Parmesan cheese on top for a nice touch. This not only makes your dish look appetizing but also enhances the flavors, making it a feast for the eyes and the palate. {{image_2}} This dish is already gluten-free! The main ingredients, like spinach, artichokes, and spaghetti squash, have no gluten. Just be sure to check your cream cheese and sour cream labels. Most brands are gluten-free, but it's wise to confirm. You can enjoy this recipe without worry! To make this dish vegan, swap out the cream cheese and sour cream with vegan alternatives. Look for brands that use nuts or tofu to create creamy textures. Instead of mozzarella and Parmesan, you can use vegan cheese or nutritional yeast for a cheesy flavor. This keeps the dish rich and satisfying while sticking to vegan guidelines. Want to make your stuffed squash even tastier? Here are some ideas: - Herbs: Fresh herbs like basil or thyme add a nice touch. - Spices: Add a pinch of smoked paprika for a hint of heat. - Nuts: Chopped walnuts or pine nuts can give a crunchy texture. - Lemon Zest: Grate some lemon zest for a bright, fresh flavor. - Sun-Dried Tomatoes: These can add a delicious sweet-tart flavor to the mix. Experiment with these variations to find your favorite twist on this classic dish! After you enjoy your Spinach Artichoke Stuffed Spaghetti Squash, let it cool down. Place any leftovers in an airtight container. This keeps them fresh and tasty. Store in the fridge for up to three days. Label the container with the date to track freshness. To reheat, take the stuffed squash from the fridge. Preheat your oven to 350°F (175°C). Place the squash in a baking dish. Cover it with foil to keep moisture in. Heat for about 20 minutes or until warm. If you're in a hurry, you can use the microwave. Heat in short bursts, stirring in between, until warm. If you want to save some for later, freezing is a great option. First, allow the stuffed squash to cool completely. Then, wrap each half tightly in plastic wrap. Place them in a freezer bag or airtight container. They can last up to three months in the freezer. When you're ready to eat, thaw them in the fridge overnight before reheating. Yes, you can use frozen spinach. Just make sure to thaw and drain it well. This helps prevent excess water in your dish. Frozen spinach is convenient and saves time. It also packs great nutrients, just like fresh spinach. You will know the spaghetti squash is done when it feels fork-tender. After about 30-40 minutes, check by poking it with a fork. If it easily pierces the flesh, it is ready. The strands should pull apart easily, resembling spaghetti. This dish pairs well with a fresh salad. A simple side salad with mixed greens works great. You could also serve it with garlic bread or a light soup. These sides balance the rich flavors of the stuffed squash. Enjoy your meal! This article covered how to make Spinach Artichoke Stuffed Spaghetti Squash. We talked about ingredients, brands, and nutrition. You learned step-by-step instructions for preparing the dish. I shared tips on cooking and serving it well. We also discussed gluten-free and vegan options. Finally, I provided storage tips and answered common questions. With these insights, you can enjoy this dish with ease. Get cooking and share your results!

Spinach Artichoke Stuffed Spaghetti Squash Delight

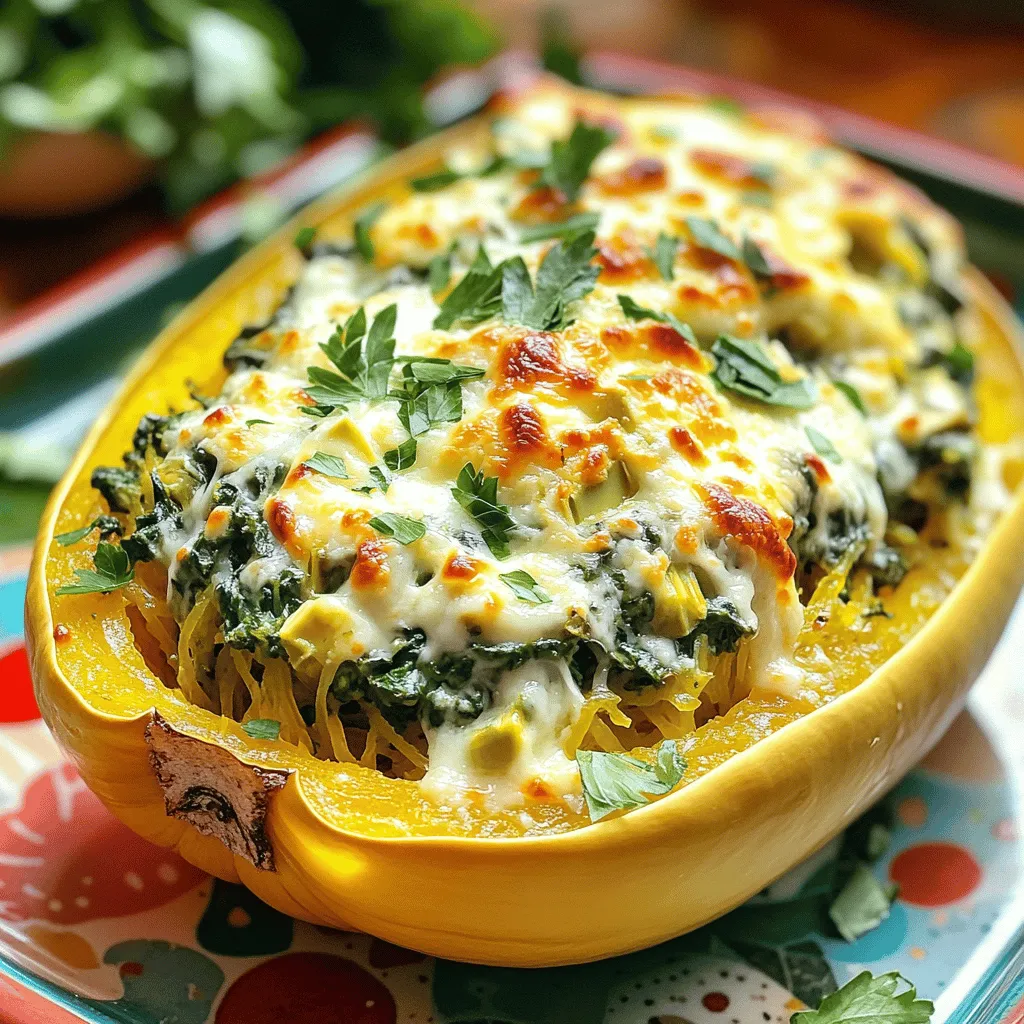
Are you ready to enjoy a delicious and healthy twist on your favorite comfort food? In this blog post, I’ll

- 1 lb ground chicken or turkey - 1/2 cup bread crumbs - 1/4 cup grated Parmesan cheese - 1/4 cup finely chopped green onions - 1 large egg - 1 teaspoon garlic powder - 1 teaspoon ginger powder - Salt and pepper to taste - 1 cup pineapple chunks (fresh or canned, drained if canned) - 1/2 cup sweet chili sauce - 2 tablespoons soy sauce In this recipe, we start with the meatball base. Ground chicken or turkey gives a light flavor. Bread crumbs help bind the meatballs. Grated Parmesan cheese adds a savory touch. Next, we mix in green onions for freshness. The egg helps hold everything together. Garlic and ginger powder bring a nice warmth. Remember to season well with salt and pepper. For the sauce, pineapple chunks bring sweetness. Sweet chili sauce adds a sticky, spicy kick. Soy sauce gives depth and saltiness. Together, these ingredients make a tasty blend that coats the meatballs perfectly. - Preheat the oven: Set your oven to 400°F (200°C). This heat cooks the meatballs evenly. - Prepare the meatball mixture: In a big bowl, mix ground chicken or turkey with bread crumbs, grated Parmesan, chopped green onions, the egg, garlic powder, ginger powder, salt, and pepper. Use your hands to blend everything well. - Form meatballs and bake: Shape the mixture into small balls, about 1 inch wide. Place them on a baking sheet lined with parchment paper. Bake for 15 to 20 minutes until they are golden and cooked through. - Prepare the sweet chili sauce: In a medium saucepan over medium heat, mix sweet chili sauce and soy sauce. Stir until warm. Add pineapple chunks and let it simmer for 3 to 5 minutes. This thickens the sauce and blends the flavors. - Coat meatballs with sauce: When the meatballs finish baking, add them to the saucepan. Gently stir to coat each meatball in the sweet chili sauce and pineapple. - Serve with garnishes: Move the meatballs to a serving dish. Top with sesame seeds and fresh cilantro for a tasty finish. To ensure your meatballs are cooked through, aim for an internal temperature of 165°F. Use a meat thermometer to check this easily. If you don’t have one, cut a meatball in half. The meat should look white with no pink. For the perfect sauce consistency, simmer the sweet chili sauce and soy sauce together. Add pineapple chunks and let it thicken for 3-5 minutes. Stir gently to avoid breaking the pineapple pieces. You want a thick sauce that coats the meatballs well. Pair these meatballs with rice or noodles. They also go well with a fresh salad. You can serve them as an appetizer or a main dish for dinner. For presentation, arrange the meatballs on a platter. Drizzle extra sauce over them. Add a sprinkle of sesame seeds and fresh cilantro on top. This makes the dish look colorful and inviting. If you want alternatives for ground meat, try using ground beef or pork. For a vegetarian option, use lentils or chickpeas mashed as a base. For gluten-free options for bread crumbs, use crushed gluten-free crackers or oats. They work well and keep the meatballs moist. You can also use almond flour for a different texture. {{image_2}} You can change the meat in this recipe. Ground pork or beef works well. For a vegetarian option, use lentils or chickpeas. You might also add bell peppers or grated carrots to your meatball mix. These add flavor and texture. Want more heat? Use chili garlic sauce instead of sweet chili sauce. This adds a spicy kick. If you prefer it sweeter, mix in a little brown sugar. This will make the sauce rich and tasty. You can cook these meatballs on the stove or bake them. Baking gives them a nice golden color. If you are busy, try a slow cooker. Just mix everything in and let it cook slowly. This option is great for busy days. To keep your Sweet Chili Pineapple Meatballs fresh, store them in an airtight container. Make sure they cool down before sealing. This helps prevent moisture buildup, which can make them soggy. You can keep them in the fridge for up to three days. For longer storage, freezing is a great option. To freeze the meatballs, let them cool completely first. Place them in a single layer on a baking sheet. Freeze for about an hour until they are firm. Then, transfer them to a freezer-safe bag or container. This method stops them from sticking together. You can freeze them for up to three months. When you are ready to eat, thaw them in the fridge overnight before reheating. For the best texture, reheat your meatballs in the oven. Preheat the oven to 350°F (175°C). Place the meatballs on a baking sheet and cover them with foil. Heat for about 15 minutes. This keeps them moist and hot. You can also reheat them in the microwave, but be careful not to overcook. Microwave them in short intervals, stopping to check often. Sweet Chili Pineapple Meatballs are quick to make. The total cooking time is about 35 minutes. You can prep the meatballs in 15 minutes. Then, bake them for 15 to 20 minutes. This gives you a tasty meal in no time. Yes, you can use fresh pineapple. Fresh pineapple gives a brighter taste. It also has a firmer texture. Canned pineapple is easy and convenient. If you use canned, drain it well. Both options work well in this recipe. You can serve these meatballs with many sides. Here are some great options: - Steamed rice or jasmine rice - Quinoa or couscous - Stir-fried veggies like bell peppers and broccoli - A fresh salad with a light dressing - Noodles, like rice noodles or soba These sides balance the sweet and spicy flavors of the meatballs. Enjoy your meal! In this article, we explored the delightful recipe for Sweet Chili Pineapple Meatballs. We covered key ingredients like ground chicken, breadcrumbs, and pineapple. Then, we went through preparation and cooking steps, along with handy tips for perfect results. I also shared variations to keep your meals exciting and storage advice for leftovers. Now you can enjoy delicious meatballs any night of the week! Experiment with flavors and methods to make this dish your own. Happy cooking!

Sweet Chili Pineapple Meatballs Flavorful Dinner Delight

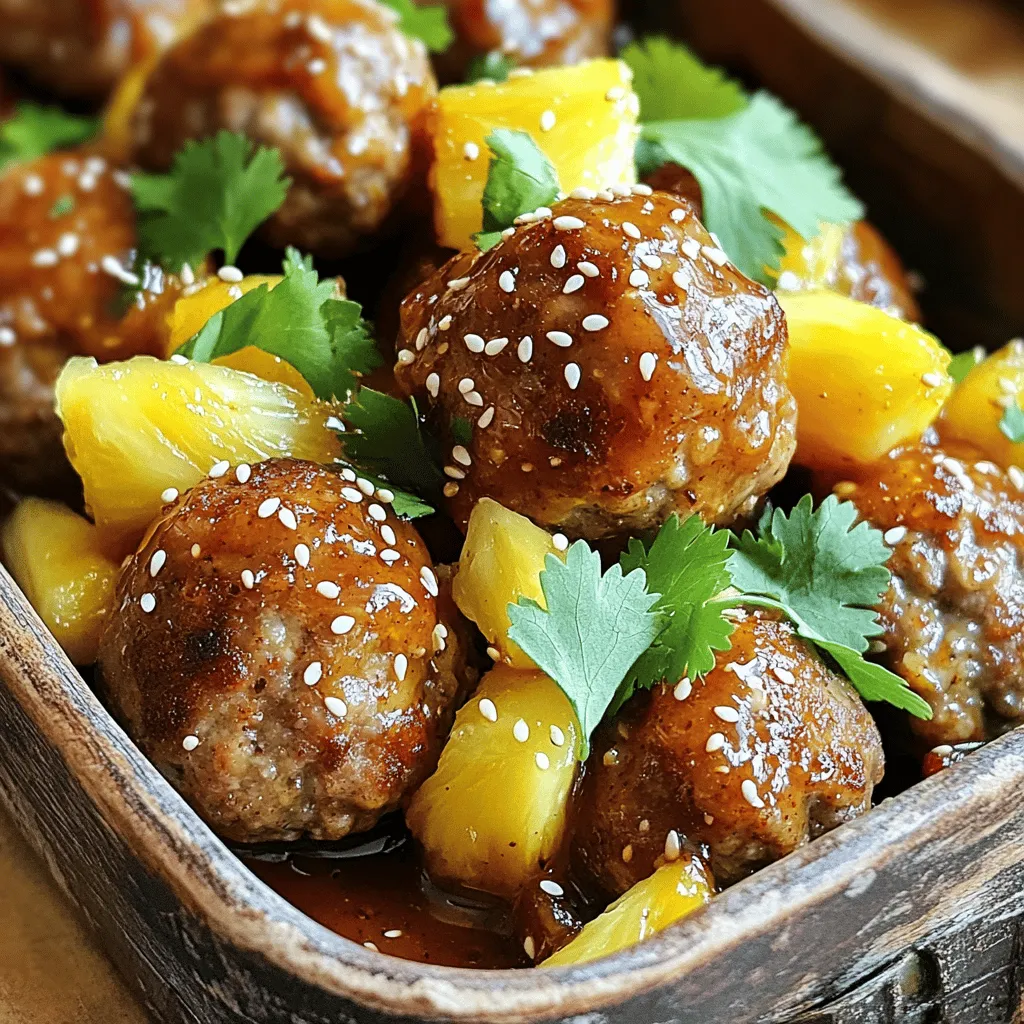
If you’re in search of a dinner that packs a punch, look no further than Sweet Chili Pineapple Meatballs! These

- 2 cups fresh cherries, pitted and chopped - 1 cup heavy cream - 1 cup whole milk - 3/4 cup granulated sugar - 1 teaspoon vanilla extract - 1 pinch of salt - 1/2 cup dark chocolate chips - Ice cream maker - Mixing bowls - Whisk - Airtight container When making cherry chocolate chip ice cream, you need fresh ingredients for the best taste. Start with two cups of fresh cherries. Make sure to pit and chop them first. This gives great flavor and texture. Next, you will need one cup of heavy cream. This rich cream adds a smoothness to the ice cream. One cup of whole milk works well too. Together, these two create a creamy base. You will also need three-quarters of a cup of granulated sugar. This sweetens the ice cream. A teaspoon of vanilla extract adds warmth to the flavor. Just a pinch of salt balances the sweetness. Don't forget the chocolate! Half a cup of dark chocolate chips goes in at the end. They add a delightful surprise in each bite. For tools, an ice cream maker is a must. It helps churn the mixture to a soft-serve texture. You will also need mixing bowls for combining ingredients. A whisk will help dissolve the sugar into the cream and milk mix. Finally, an airtight container is needed for freezing the ice cream. Using these fresh ingredients and tools, you can create a delicious homemade cherry chocolate chip ice cream. - Start by chopping 2 cups of fresh cherries. - Place the cherries in a bowl and mix them with 1/4 cup of sugar. - Let the cherries sit for about 15 minutes. This helps them release their juices. - In a large bowl, whisk together 1 cup of heavy cream and 1 cup of whole milk. - Add 1/2 cup of sugar, 1 teaspoon of vanilla extract, and a pinch of salt. - Make sure to whisk until the sugar dissolves fully. This will ensure a smooth base. - Gently fold the cherry mixture into the cream base. Mix just enough to combine. - Cover the bowl with plastic wrap or a lid. - Place the bowl in the refrigerator for at least 2 hours. This will help the flavors meld. - Once chilled, pour the mixture into your ice cream maker. - Churn the mixture according to the manufacturer's instructions for 20-25 minutes. - In the last 5 minutes of churning, slowly add 1/2 cup of dark chocolate chips. - This will ensure the chips are evenly distributed throughout the ice cream. - Transfer the soft ice cream into an airtight container. - Freeze it for at least 4 hours or until it becomes firm. - For serving, scoop the ice cream into bowls or cones. Enjoy with whole cherries on top or a drizzle of chocolate sauce! To get a creamy consistency in your ice cream, start with cold ingredients. Use heavy cream and whole milk straight from the fridge. Mix them well until the sugar dissolves completely. This helps create a smooth base. Chilling the mixture is key. After mixing, let it sit in the fridge for at least two hours. This cooling time allows the flavors to blend better. It also makes the ice cream smoother when you churn it. You can add fun flavors to your ice cream. Consider using almond extract for a nutty taste. A splash of orange juice adds a fresh twist. You can even mix in crushed cookies or nuts for extra crunch. When it comes to chocolate, don't be shy! Try milk chocolate or even white chocolate chips. Each type of chocolate brings a new taste. Experiment to find your favorite combo. One mistake many make is over-churning the ice cream. Churning too long can make it icy instead of creamy. Stick to the recommended time of 20-25 minutes in your ice cream maker. Another common error is not allowing enough time for freezing. After churning, transfer your ice cream to an airtight container. Freeze it for at least four hours. This step is vital for achieving the right texture. {{image_2}} You can make this cherry chocolate chip ice cream lighter. Use low-fat milk instead of whole milk. This change cuts some fat without losing flavor. You can also swap granulated sugar for a sugar substitute. This option is great for those watching their sugar intake. For a dairy-free choice, try using coconut or almond milk. These milks give a different taste but still keep it creamy and smooth. Cherries are delicious, but you can mix in other fruits, too. Try adding diced strawberries or blueberries for a fun twist. Seasonal fruits work well, like peaches in summer or apples in fall. You can even make a berry blend with raspberries and blackberries. Each fruit gives the ice cream a fresh taste and color. If you want more chocolate flavor, switch dark chocolate for milk or white chocolate. Each type brings its own sweetness. You can also add chocolate swirls. To do this, simply melt chocolate and swirl it into the ice cream right before freezing. These options let you customize your cherry chocolate chip ice cream to suit your taste. To keep your cherry chocolate chip ice cream fresh, store it in an airtight container. A good option is a hard plastic container with a tight lid. This helps to keep out air and prevent freezer burn. Make sure to fill the container to the top, leaving little space for air. If you have leftovers, press a piece of plastic wrap directly on the ice cream before sealing the lid. This adds extra protection. Homemade cherry chocolate chip ice cream lasts about two to three weeks in the freezer. After this period, it may lose its flavor and texture. Signs that your ice cream has gone bad include ice crystals forming on the surface or a strange odor. If it smells off or looks different, it's best to throw it away. When you're ready to enjoy your ice cream, the best way to thaw it is by placing it in the fridge for about 20 minutes. This helps soften it without melting too much. If you're in a hurry, you can leave it out at room temperature for 5 to 10 minutes. After thawing, if your ice cream feels grainy, stir it gently to improve the texture. Enjoy your delicious treat! Yes, you can! If you don't have an ice cream maker, use a freezer-safe bowl. Pour the mixture into the bowl and freeze it. Every 30 minutes, stir it with a fork. This helps break up ice crystals. Keep stirring until it reaches a creamy texture. It may take about 4 to 6 hours to freeze fully. This method gives you a tasty treat without special tools. Absolutely! Frozen cherries work great in this recipe. Just let them thaw and drain any extra juice. You may need to adjust the sugar, depending on how sweet the cherries are. Frozen fruit is handy for off-seasons. They can still add that delicious cherry flavor. Serving this ice cream can be fun! Use chilled bowls to keep it from melting too fast. You can add a few whole cherries on top for a nice look. Drizzle a bit of chocolate sauce over the scoops for extra flavor. This presentation is sure to impress friends and family at gatherings. Enjoy your delightful homemade treat! Making homemade cherry chocolate chip ice cream is fun and rewarding. You learned about ingredients and tools needed. The step-by-step guide helps you prepare this treat with ease. Remember to chill and churn for the best texture. You can also explore flavor variations or healthier options. Store it right to keep it fresh longer. With these tips, you can impress anyone with your tasty ice cream. Enjoy each scoop!

Cherry Chocolate Chip Ice Cream Easy Homemade Delight

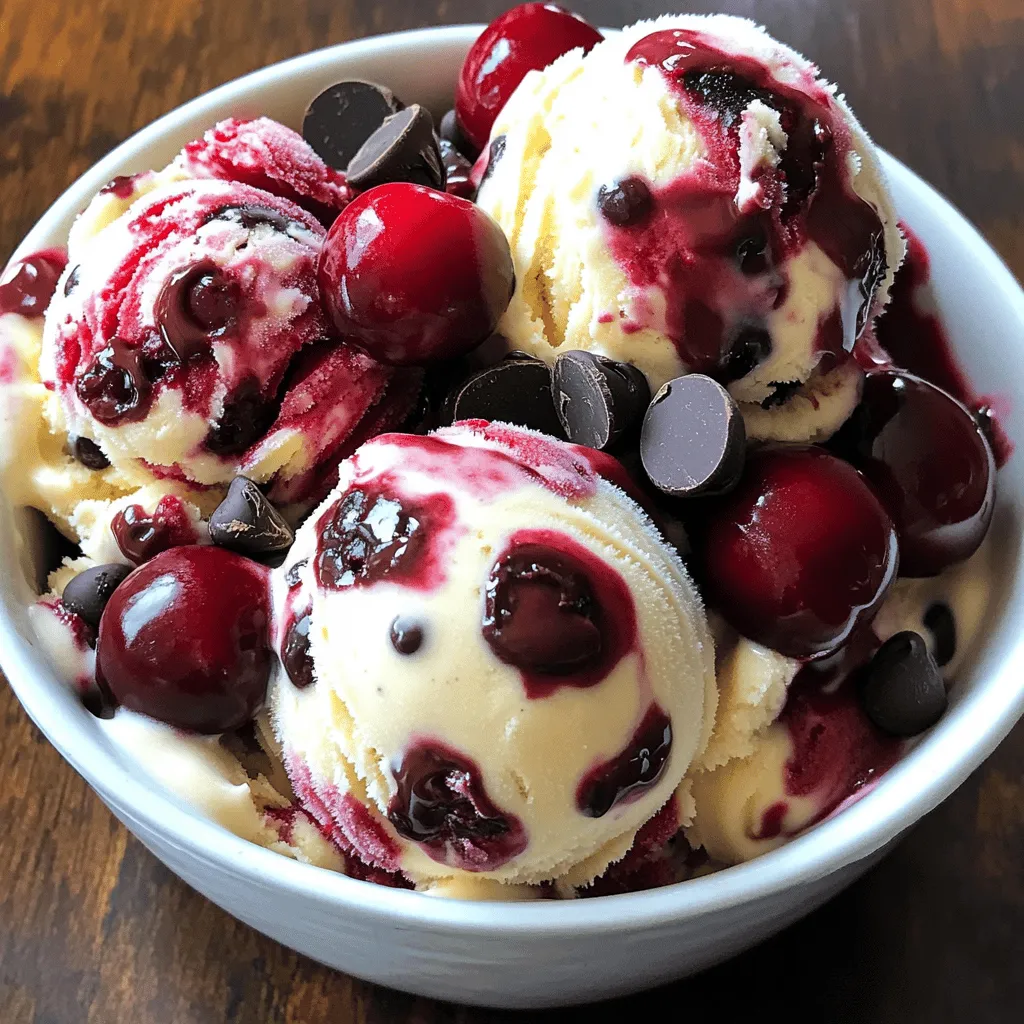
Are you ready to treat yourself to a delicious dessert? This Cherry Chocolate Chip Ice Cream is a simple and

- 1 pound baby carrots (or regular carrots cut into sticks) - 3 tablespoons unsalted butter - 1/4 cup brown sugar The main ingredients make this dish simple and sweet. Baby carrots are tender and cook quickly. If you use regular carrots, just cut them into sticks. Unsalted butter adds rich flavor. The brown sugar gives the carrots their sweet glaze. - 1/2 teaspoon ground cinnamon - 1/4 teaspoon nutmeg - Salt and pepper to taste Spices turn plain carrots into a treat. Ground cinnamon adds warmth. Nutmeg adds a nice touch. Salt and pepper balance the sweetness. These spices make each bite tasty and special. - 1/4 cup vegetable broth or water - Fresh parsley, chopped (for garnish) Liquid helps cook the carrots and form the glaze. Vegetable broth adds depth. If you need a lighter option, use water. Fresh parsley brightens the dish and makes it pretty. It adds color on top of the glazed carrots. 1. Melting the butter: Start by placing a large skillet on medium heat. Add 3 tablespoons of unsalted butter. Watch it melt until it bubbles. The smell will be wonderful! 2. Coating the carrots: Next, add 1 pound of baby carrots to the melted butter. Use a spatula to toss the carrots well. Make sure each carrot gets coated in that tasty butter. 1. Adding spices and sugar: Sprinkle 1/4 cup of brown sugar over the carrots. Then, add 1/2 teaspoon of ground cinnamon and 1/4 teaspoon of nutmeg. Stir everything together so the sugar and spices spread evenly. 2. Incorporating liquid: Now, pour in 1/4 cup of vegetable broth or water. This will help create the glaze. The mixture should start to bubble a little. 1. Simmering covered: Cover the skillet with a lid. Let the carrots simmer for about 10 to 12 minutes. Stir occasionally. Check if they are tender by poking them with a fork. 2. Thickening the glaze: After the carrots are tender, remove the lid. Increase the heat to medium-high. Cook for an extra 3 to 5 minutes. This will help the glaze thicken and caramelize. The carrots will shine with a sweet glaze, ready to serve! To get the perfect glaze, you need to watch the heat. Start with medium heat when melting the butter. After you add the sugar and spices, keep stirring. This helps the sugar dissolve well. When you pour in the broth or water, make sure it simmers. Simmering helps the carrots soak up all those sweet flavors. Stir often as the carrots cook. This keeps them from sticking and helps them cook evenly. If you want to change things up, there are great options. For butter, you can use olive oil or coconut oil. Both will add a nice flavor. If you need a sugar swap, try honey or maple syrup. Both work well and add a unique taste. You can also use other veggies. Try parsnips, sweet potatoes, or even green beans. Each will bring a new twist to your dish. Brown sugar glazed carrots pair well with many proteins. They go great with roasted chicken or grilled pork. You can also serve them with fish for a light meal. When it comes to presentation, use a nice dish. Arrange the carrots in a circle for a pretty look. Sprinkle fresh parsley on top for color. This little touch makes the dish pop. Enjoy your sweet delight! {{image_2}} You can add a kick to your brown sugar glazed carrots. Just sprinkle in some cayenne or chili powder. Start with a pinch, then taste the mix. This twist gives sweet carrots a nice heat that many love. The spicy flavor works well with the brown sugar. It makes a fun change for your taste buds. To bring in fresh flavors, try adding herbs like thyme or rosemary. These herbs complement the sweetness of the carrots. Just chop a small amount and toss it in during cooking. The herbs add a lovely aroma and depth to the dish. This variation is perfect for impressing guests at dinner. If you want a different sweetener, use maple syrup instead of brown sugar. Maple gives a rich flavor that pairs well with carrots. Substitute an equal amount of maple syrup for the brown sugar. This option works great if you love that unique maple taste. Your carrots will have a delightful twist that everyone will enjoy. To store leftover brown sugar glazed carrots, let them cool first. Place them in an airtight container. They will keep well in the fridge for up to four days. Just make sure the lid seals tight to keep them fresh. To reheat glazed carrots, use the microwave or stove. For the microwave, place them in a bowl and cover it. Heat in short bursts, stirring in between, until warm. On the stove, add a splash of water to a pan. Heat over medium until they are hot, stirring gently. This helps keep the glaze nice and sticky. Yes, you can freeze brown sugar glazed carrots! After cooling, place them in a freezer-safe bag or container. They can last for up to three months in the freezer. When you’re ready to eat, thaw them in the fridge overnight before reheating. To make brown sugar glazed carrots, you start by melting butter. Heat a large skillet over medium heat and add 3 tablespoons of unsalted butter. Then, add 1 pound of baby carrots. Toss them in the melted butter until they are well coated. Next, sprinkle 1/4 cup of brown sugar, 1/2 teaspoon of ground cinnamon, and 1/4 teaspoon of nutmeg over the carrots. Stir to combine all the flavors. Pour in 1/4 cup of vegetable broth or water and bring the mixture to a simmer. Cover the skillet and let the carrots cook for 10-12 minutes. Stir them occasionally until they become tender. After that, remove the lid and turn the heat to medium-high. Cook for an additional 3-5 minutes to thicken and caramelize the glaze. Finally, season with salt and pepper to taste. Transfer the glazed carrots to a dish and garnish with fresh parsley. Yes, you can use frozen carrots! They work fine in this recipe. However, they may need a bit more time to cook. Start by adding them to the skillet and follow the same steps. Just keep an eye on them, as frozen carrots may release extra water. Adjust the cooking time until they are tender and glazed. Brown sugar glazed carrots pair well with many dishes. You can serve them alongside roasted chicken or grilled salmon. They also complement pork chops beautifully. For a vegetarian option, try them with quinoa or a fresh salad. The sweet flavor of the carrots adds a nice contrast to savory dishes. This blog post covered making delicious brown sugar glazed carrots. We explored ingredients like carrots, butter, and spices. You learned step-by-step how to prepare and cook the dish. I also shared tips for the perfect glaze and serving ideas. Finally, you discovered variations and storage tips for leftovers. Try this recipe to impress your family and friends. Enjoy the sweet, rich flavor of these glazed carrots!

Brown Sugar Glazed Carrots Simple and Sweet Delight

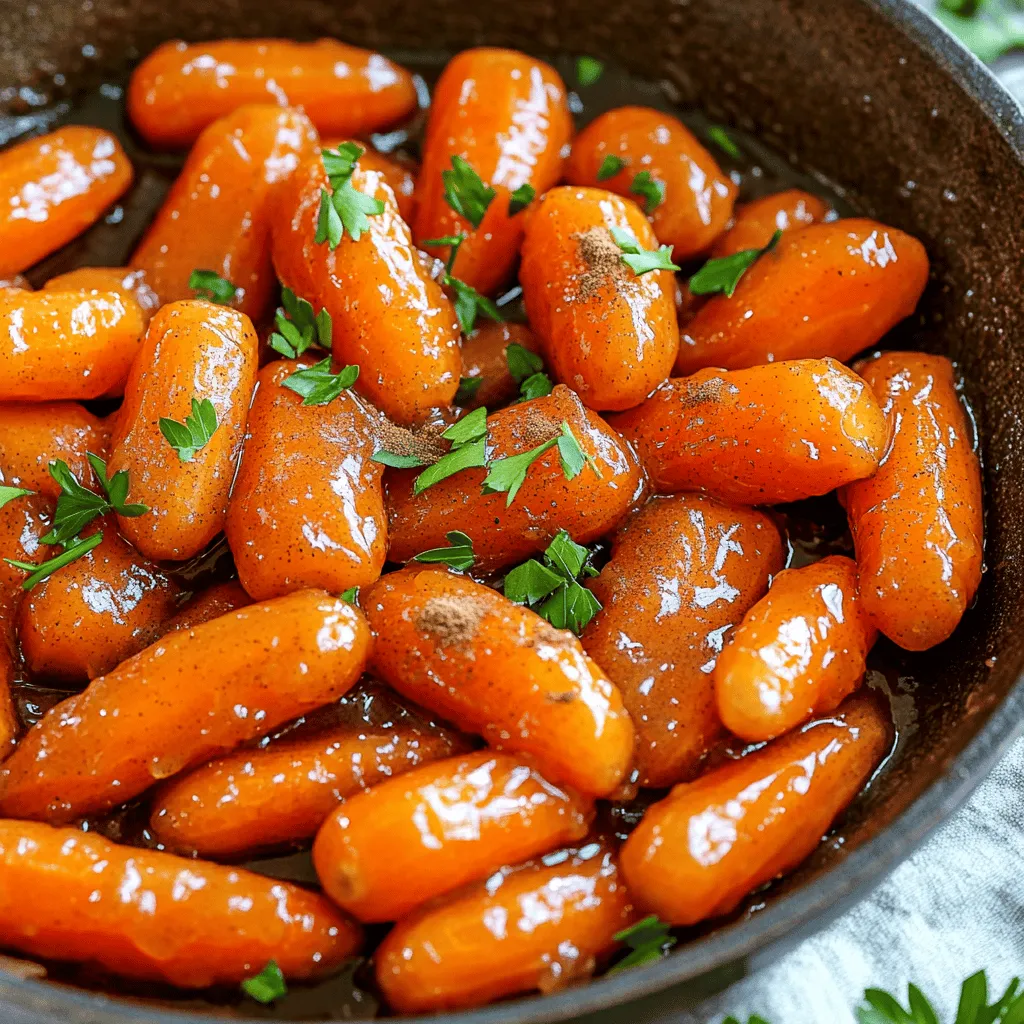
Looking for a side dish that’s both easy to make and packed with flavor? Brown sugar glazed carrots are your

To make Spicy Black Bean Soup, gather these main ingredients: - 2 cans (15 oz each) black beans, drained and rinsed - 1 medium onion, diced - 2 cloves garlic, minced - 1 red bell pepper, diced - 1 jalapeño, finely chopped (seeds removed for less heat) - 1 can (14 oz) diced tomatoes with green chilies - 4 cups vegetable broth - 1 tablespoon olive oil - 1 teaspoon ground cumin - 1 teaspoon smoked paprika - Salt and pepper to taste These ingredients create a rich and hearty base for your soup. Black beans add protein and fiber. The onion and garlic provide depth of flavor. The bell pepper and jalapeño add texture and spice. You can enhance your soup with these tasty toppings: - Fresh cilantro, for garnish - Avocado slices, for topping - Lime wedges, for serving These toppings add freshness and a burst of flavor. Cilantro brings a bright note, while avocado adds creaminess. Lime juice adds a zesty kick that complements the spices. Using a good-quality vegetable broth boosts the soup's flavor. You can choose low-sodium broth to control salt levels. For spices, stick to ground cumin and smoked paprika for warmth. If you like heat, feel free to add hot sauce. Each ingredient plays a role in making your soup flavorful and satisfying. Start by heating olive oil in a large pot over medium heat. Add the diced onion and cook for about 5 minutes. Stir until the onion turns translucent. Then, mix in the minced garlic, diced red bell pepper, and finely chopped jalapeño. Cook for another 2-3 minutes until the veggies soften. Next, sprinkle in the ground cumin and smoked paprika. Stir well to coat the vegetables. Cook this for about 1 minute. The spices will become fragrant and lift the dish's flavor. Now, add the canned black beans and the diced tomatoes with their juices. Pour in 4 cups of vegetable broth. Stir everything together and bring the mixture to a gentle boil. Reduce the heat to low and cover the pot. Let the soup simmer for 20-25 minutes. This allows the flavors to meld together, creating a rich and tasty soup. For a creamy soup, use an immersion blender. Blend about half of the soup right in the pot. If you don't have an immersion blender, carefully transfer half of the soup to a blender. Blend until smooth and pour it back into the pot. Taste the soup now. Adjust the seasoning by adding salt and pepper as needed. If you like it spicier, add a dash of hot sauce for extra heat. Ladle the soup into bowls. Top each bowl with fresh avocado slices and chopped cilantro. Serve with lime wedges on the side. The lime adds a nice zing that brightens the flavors. Enjoy your delicious Spicy Black Bean Soup! To control the heat in your spicy black bean soup, adjust the jalapeño. Remove the seeds for less heat or keep them for more. You can also add hot sauce during cooking to spice it up. Start with a small amount, then add more to taste. Always remember, you can add heat, but you cannot take it away! You will need some basic kitchen tools for this recipe. Here’s what I recommend: - A large pot for cooking the soup - A cutting board and knife for chopping veggies - A wooden spoon for stirring - An immersion blender for a creamy texture (optional) - Measuring cups and spoons for accurate ingredients Want to save time? Use canned black beans to skip cooking them from scratch. Pre-chopped veggies are also a great option if you’re in a hurry. You can prepare the soup in just 30 minutes! For even quicker meals, make a big batch and freeze leftovers for later. {{image_2}} You can easily make this soup vegetarian or vegan. The base is already plant-based. Just use vegetable broth and skip any meat toppings. This way, everyone can enjoy it. Feel free to swap ingredients based on your needs. If you don’t like black beans, try pinto or kidney beans. Prefer a different pepper? Use green bell pepper or poblano for a milder taste. You can also add corn for some sweetness. Adjust the heat to fit your taste. If you like it mild, remove the jalapeño seeds. For more kick, add extra jalapeños or a pinch of cayenne pepper. You can also toss in some chili powder for an added layer of flavor. After enjoying your spicy black bean soup, let it cool completely. Then, pour it into an airtight container. Make sure to seal it well. Store the soup in the fridge. It can last for about 3 to 4 days. When you are ready to enjoy your leftovers, take the soup out of the fridge. Pour it into a pot. Heat it over medium heat. Stir it often to warm it evenly. You can also use a microwave. Place the soup in a microwave-safe bowl. Heat it in short bursts, stirring in between. If you want to keep the soup for a longer time, freezing is a great option. First, let the soup cool. Then, pour it into freezer-safe bags or containers. Leave some space at the top for expansion. Label the bags with the date. You can freeze the soup for up to 3 months. When ready to eat, thaw it in the fridge overnight before reheating. Black beans are full of fiber, which helps digestion. They are also high in protein, making them great for energy. These beans contain iron, which is good for blood health. Plus, they have antioxidants that fight free radicals. Eating black beans can help keep your heart healthy too. Yes, you can make this soup ahead of time. It actually tastes better the next day. Store it in the fridge for up to three days. Just reheat it on the stove when you're ready to eat. To make more soup, simply double the recipe. Use four cans of black beans and eight cups of broth. Adjust the spices and veggies to taste. This way, you can feed a crowd easily. Yes, you can use low-sodium vegetable broth. Also, rinse the beans well to reduce sodium. This keeps the soup healthy without losing flavor. To make it spicier, add more jalapeño or hot sauce. You can also use spicy diced tomatoes. For a milder soup, leave out the jalapeño seeds. You can also reduce the amount of spices used. You learned how to make Spicy Black Bean Soup with easy steps and tips. We explored key ingredients, from beans to spices, and I shared ways to adapt it for your needs. Storing and reheating leftovers can help you enjoy this meal later. Remember to adjust spice levels for your taste. This soup is simple, tasty, and healthy. Enjoy crafting your own unique version!

Spicy Black Bean Soup Simple and Flavorful Recipe

Are you ready to spice up your dinner routine? This Spicy Black Bean Soup is not only simple to make

Older posts
Newer posts
← Previous Page1 … Page23 Page24 Page25 … Page106 Next →
© 2025 My Cooking Cast • Built with GeneratePress

Our Policies

  • Privacy Policy
  • GDPR Policy
  • Terms Of Use
  • Copyright Policy
  • Cookie Policy
  • Disclaimer

More Information​

  • Home
  • Contact
  • About
  • Dinner
  • Appetizers
  • Dessert
©2025, My Cooking Cast About Privacy Policy Back To Top