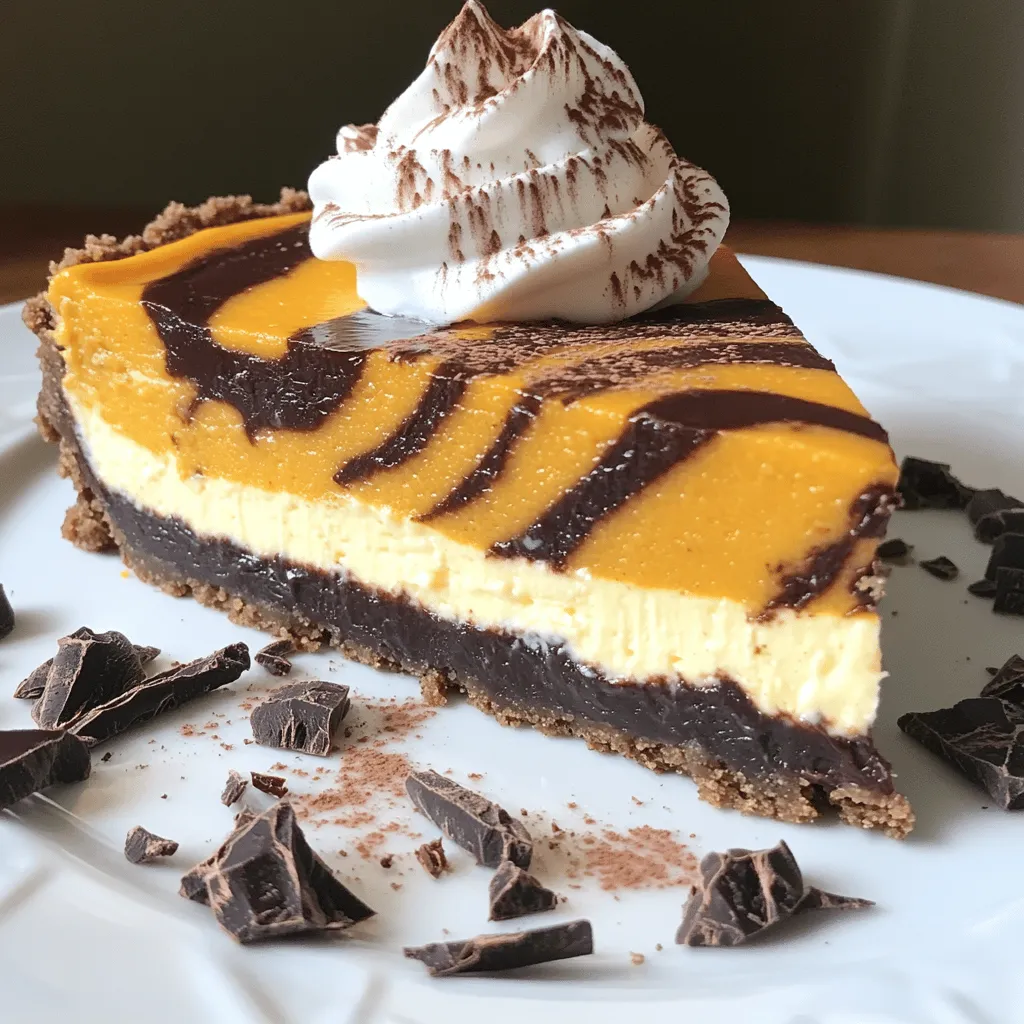
Pumpkin Chocolate Swirl Cheesecake Delightful Treat
Get ready to indulge in a dessert that combines fall flavors with rich chocolate! This Pumpkin Chocolate Swirl Cheesecake is
Get ready to indulge in a dessert that combines fall flavors with rich chocolate! This Pumpkin Chocolate Swirl Cheesecake is

When the weather turns chilly or you’re feeling under the weather, nothing warms you up like a bowl of Turmeric
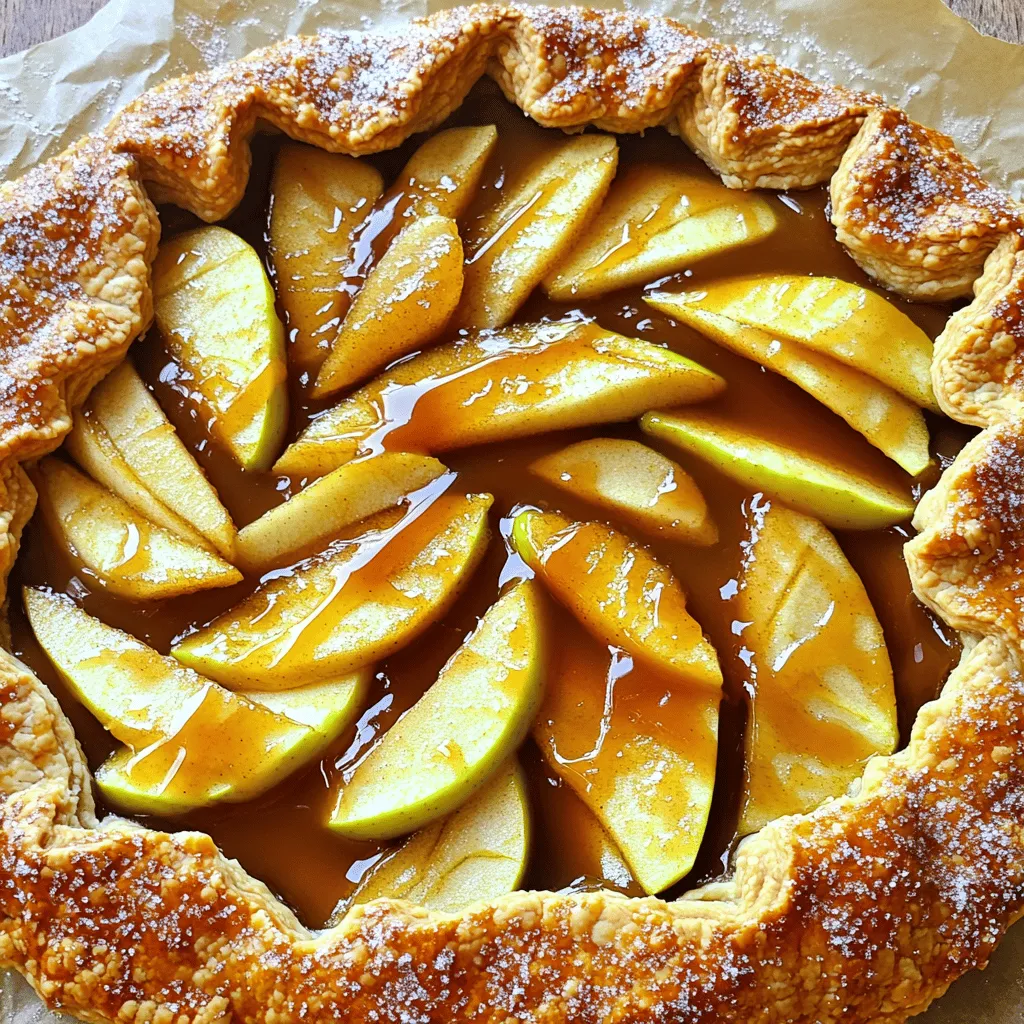
Are you ready to impress your friends and family with a stunning dessert? The Caramel Apple Galette is simple to
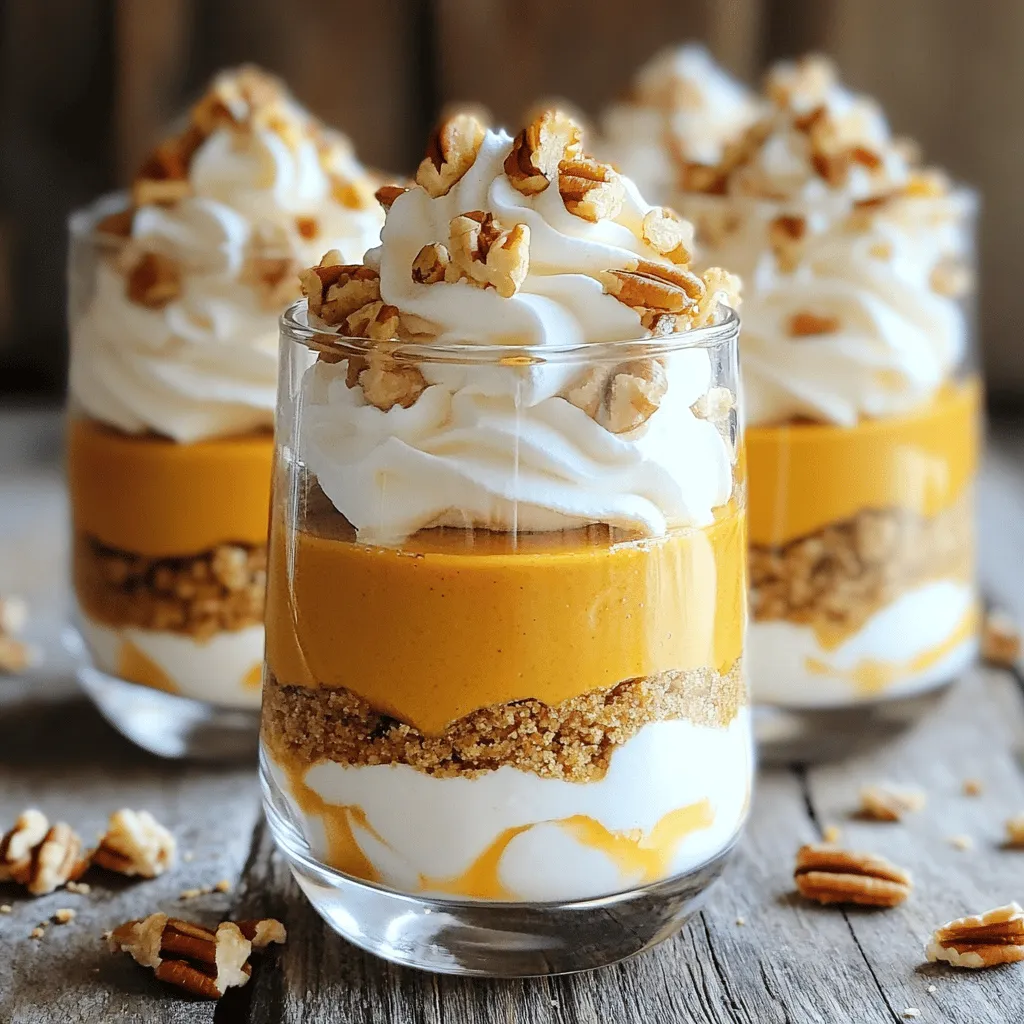
Are you ready to enjoy a delightfully creamy dessert that brings fall to your table? Pumpkin Cheesecake Parfaits are the
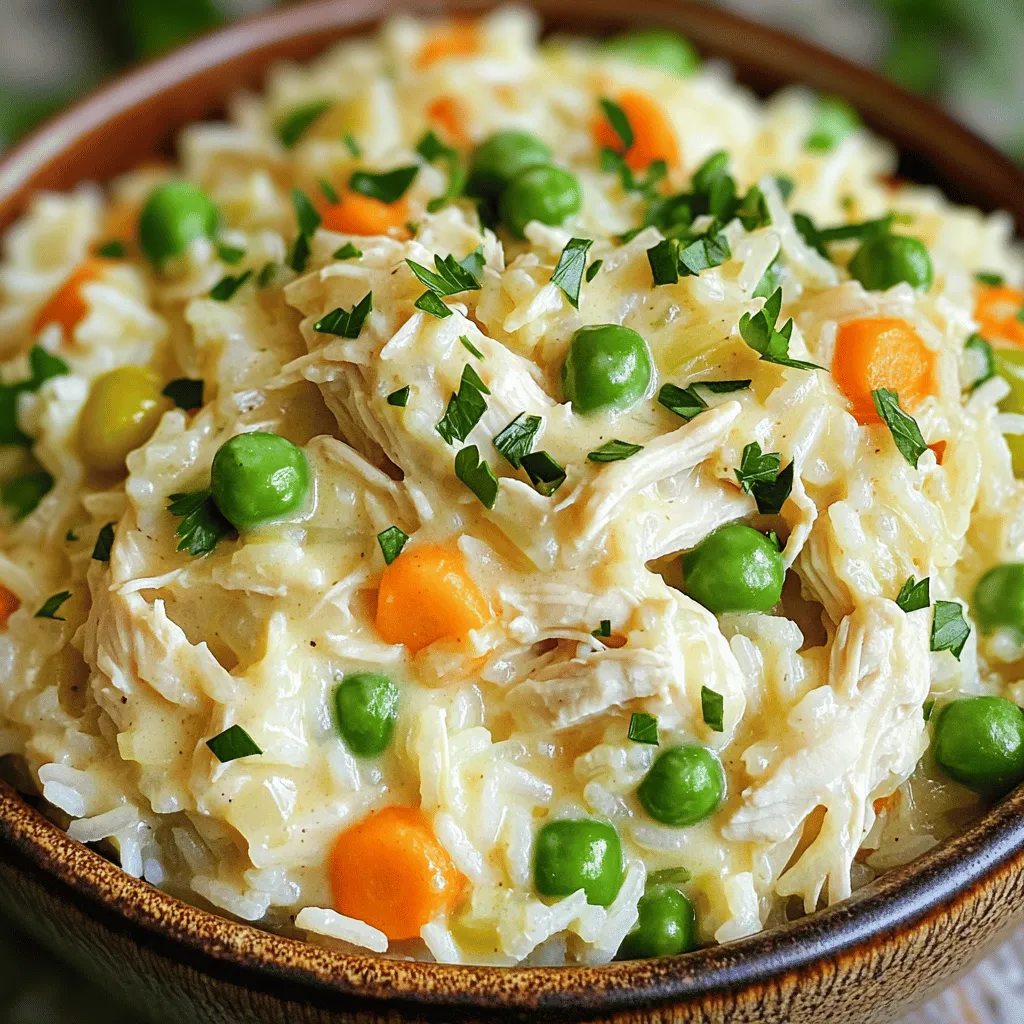
Are you ready to enjoy a warm, creamy meal that your family will love? This Creamy Ranch Chicken & Rice
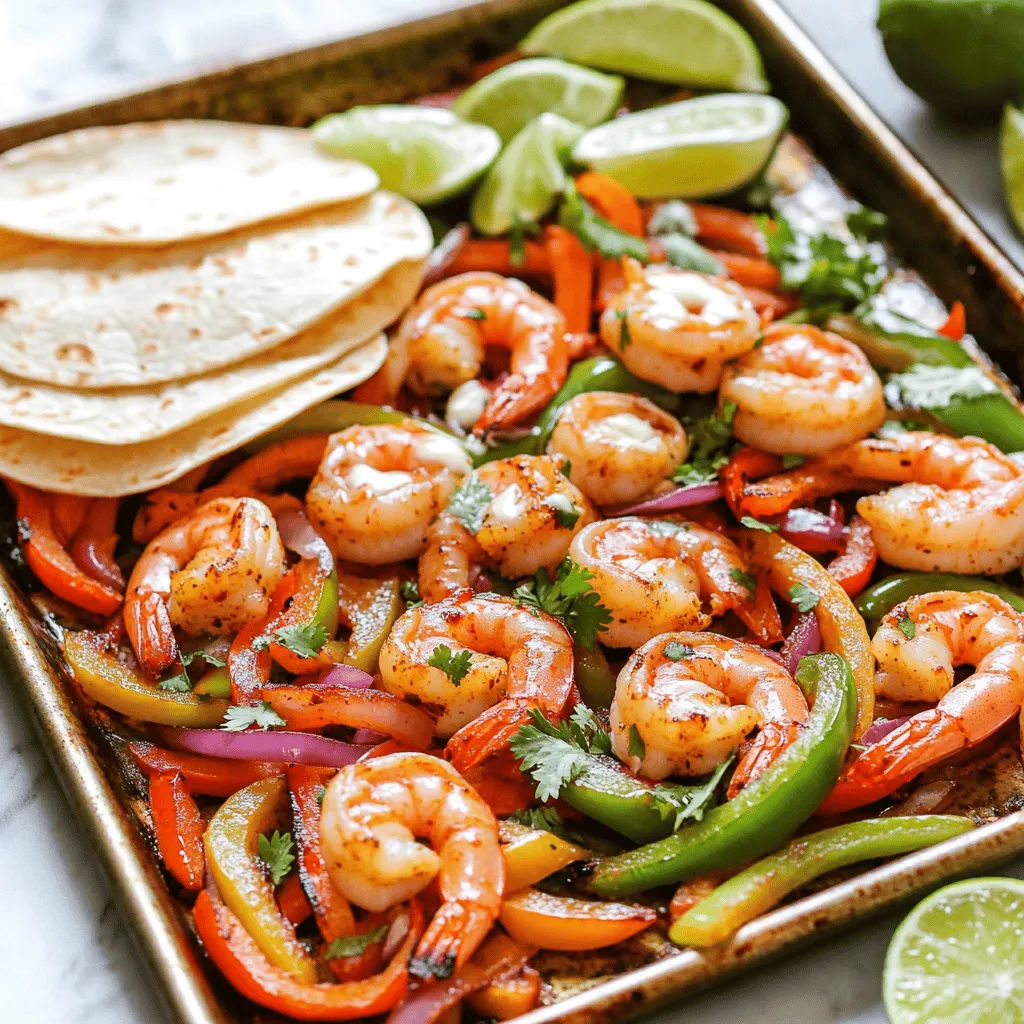
Welcome to your new favorite meal: Garlic Butter Shrimp Fajitas Sheet Pan Delight! If you crave bold flavors and simple
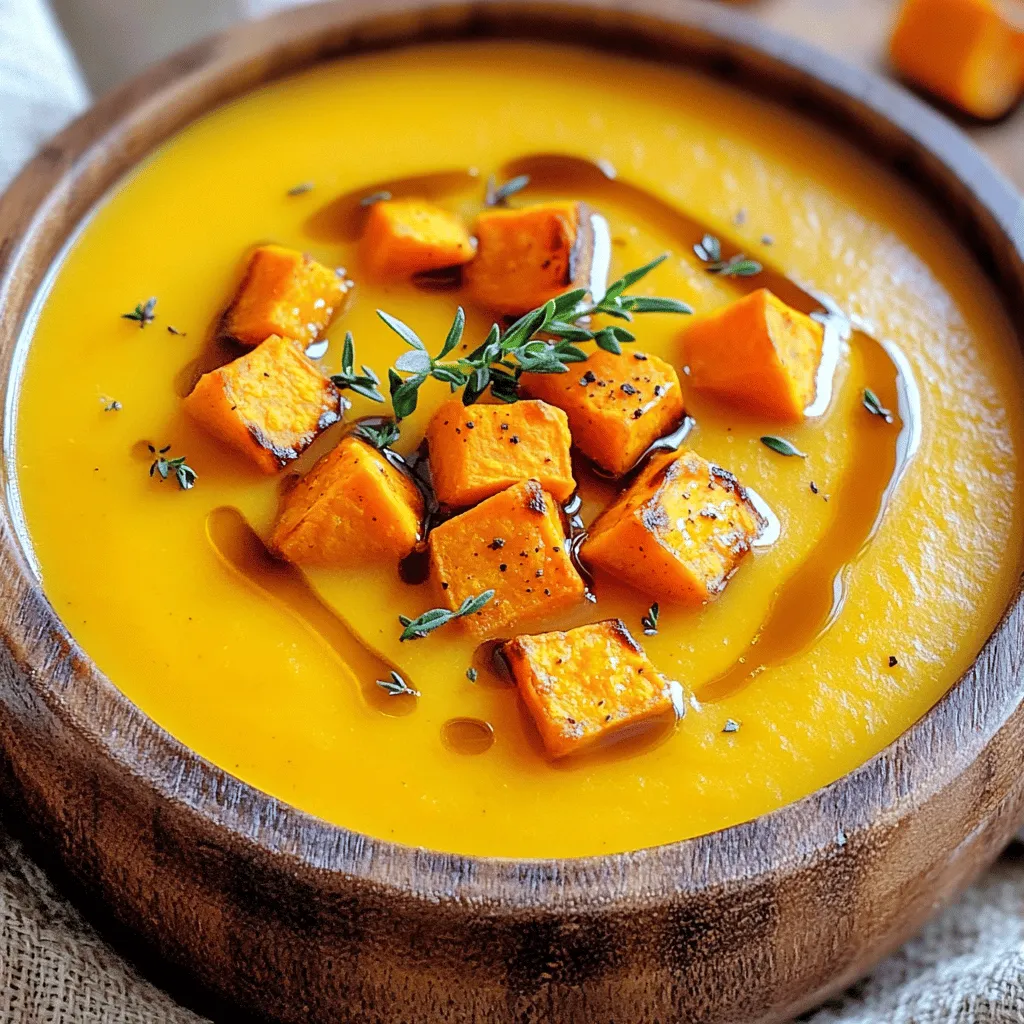
Warm up with a bowl of Maple Roasted Sweet Potato Soup, the perfect cozy treat for chilly days. This rich
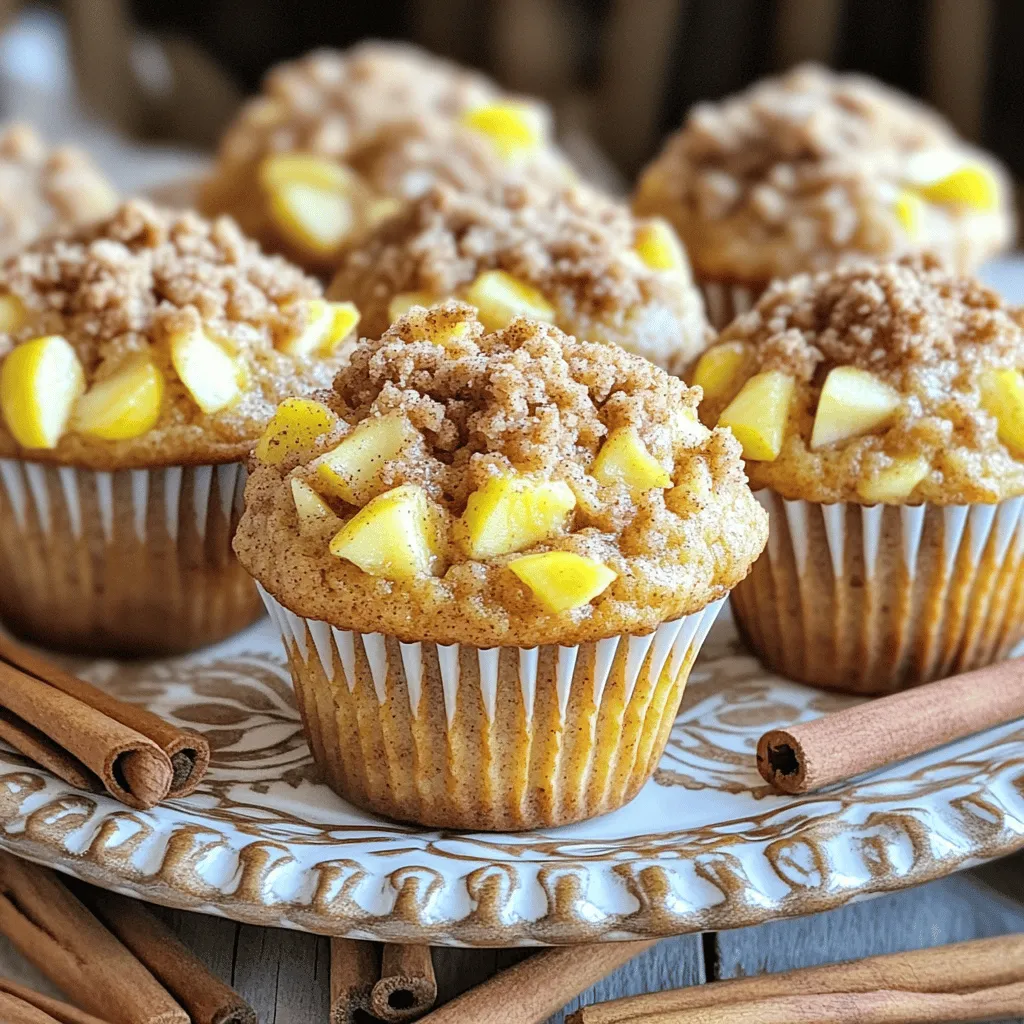
Craving a warm, comforting treat? You’re in for a treat with my Cinnamon Apple Streusel Muffins! This easy recipe combines
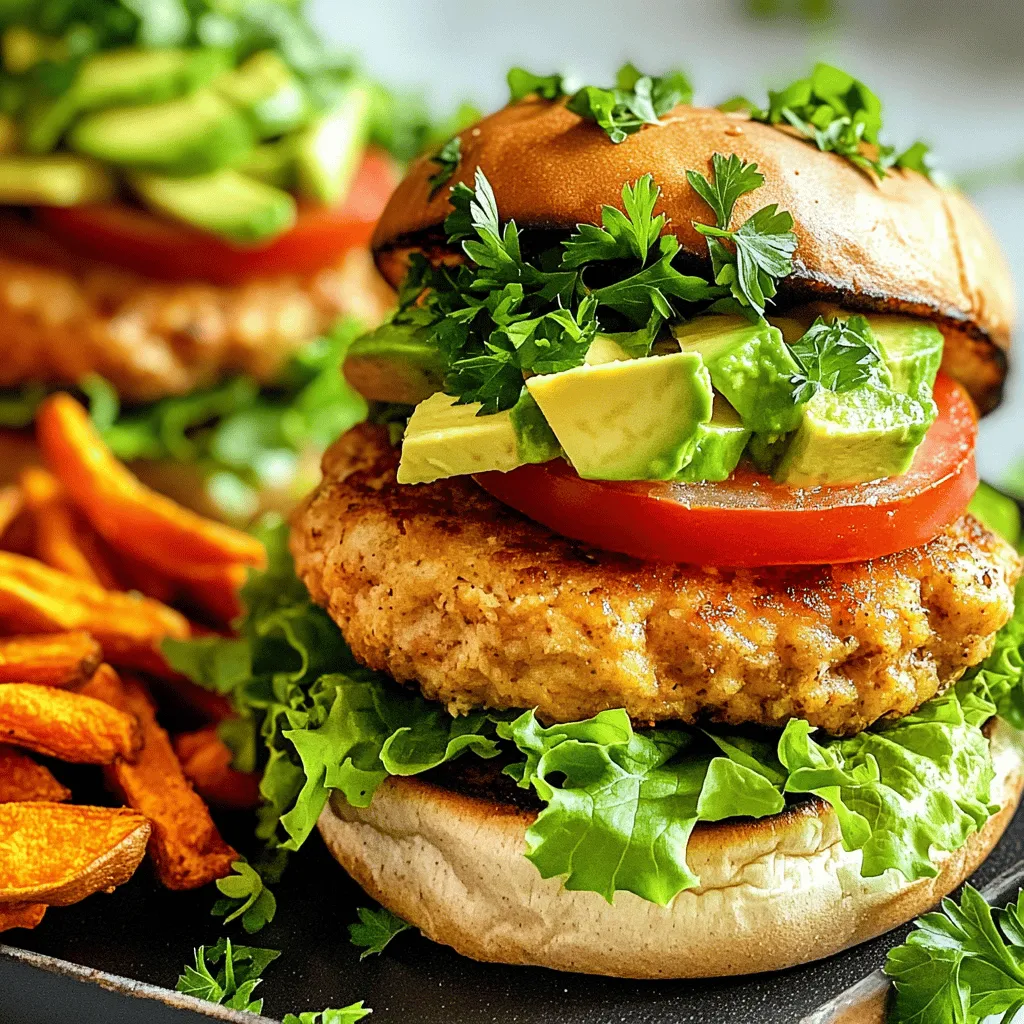
Looking for a quick and tasty meal? These Air Fryer Chicken Burgers are perfect! With just a few simple ingredients,

Looking to impress family or guests? This Slow Cooker Butter Chicken is rich, creamy, and full of flavor. I’ll guide
