Skip to content
DisclaimerTerms Of UseGDPR PolicyCookie Policy

My Cooking Cast

  • Home
  • Drinks
  • Appetizers
  • Dinner
  • Dessert
  • About
  • Contact
  • Privacy Policy
DisclaimerTerms Of UseGDPR PolicyCookie Policy

Emma

To make tasty Buffalo Cauliflower Tacos, you need simple, fresh ingredients. Here’s what you will need: - 1 medium head of cauliflower, cut into florets - 1 cup all-purpose flour (or gluten-free flour) - 1 cup water - 1 teaspoon garlic powder - 1 teaspoon onion powder - 1 teaspoon smoked paprika - ½ teaspoon cayenne pepper (adjust to taste) - Salt and pepper to taste - 1 cup buffalo sauce (store-bought or homemade) - 8 small corn or flour tortillas - 1 cup red cabbage, shredded - ½ cup cilantro, chopped - 1 avocado, sliced - Lime wedges for serving These ingredients create a bold flavor and a satisfying crunch. Cauliflower serves as a healthy base. The spices give it a kick, while the buffalo sauce adds heat. Tortillas hold everything together, and fresh toppings bring a burst of color and taste. Each element plays a role in making these tacos delicious and fun! {{ingredient_image_1}} 1. First, preheat your oven to 450°F (230°C). Line a baking sheet with parchment paper. This helps the cauliflower crisp up without sticking. 2. In a mixing bowl, add 1 cup of flour, 1 teaspoon garlic powder, 1 teaspoon onion powder, 1 teaspoon smoked paprika, and ½ teaspoon cayenne pepper. Mix well. Add salt and pepper to taste. Gradually pour in 1 cup of water. Stir until the batter is smooth and slightly thick. 1. Take each cauliflower floret and dip it into the batter. Let the excess batter drip off. 2. Place each battered floret on the prepared baking sheet. Make sure they are spaced out evenly. This helps them cook properly. 1. Bake the cauliflower for about 20 minutes. Flip them halfway through for even cooking. 2. After the initial bake, take the cauliflower out. Toss each piece in 1 cup of buffalo sauce until well coated. 3. Return the sauced cauliflower to the baking sheet and bake for another 10 minutes. This step makes them extra crispy and flavorful. To get crispy cauliflower, start by adjusting your cooking times. Bake at 450°F (230°C) for the best crunch. Flip the florets halfway through cooking to ensure even crisping. Next, focus on the batter. You want a smooth and slightly thick mix. If it’s too thin, the cauliflower won't get crunchy. If it’s too thick, it won’t coat well. Aim for a batter that sticks but doesn't drown the florets. For more flavor, try adding spices. A bit of cumin or chili powder can give your tacos a kick. You can also mix in some fresh herbs like parsley or dill for a fresh taste. When it comes to buffalo sauce, you have options. Store-bought sauce is quick and easy. If you want to make it from scratch, combine hot sauce, melted butter, and a dash of vinegar. This gives you control over the heat level and flavor. Serve these tacos with sides that complement their bold taste. A simple cucumber salad or a bowl of guacamole works well. You can also offer dips like ranch or blue cheese dressing for extra flavor. Think about how you present your tacos. Stack them neatly on a plate and add a sprinkle of cilantro on top. Lime wedges on the side not only look great but add a zesty finish when squeezed over the tacos. Pro Tips Choose Fresh Cauliflower: Look for a head of cauliflower with tight, compact florets and fresh green leaves for the best flavor and texture. Adjust Spiciness: Feel free to adjust the amount of cayenne pepper in the batter or buffalo sauce to suit your heat preference. Experiment with Toppings: Add your favorite toppings like diced tomatoes, jalapeños, or a drizzle of ranch dressing to customize your tacos. Make it Gluten-Free: Substitute the all-purpose flour with a gluten-free flour blend to make these tacos suitable for gluten-sensitive diets. {{image_2}} You can easily make this dish vegan or gluten-free. For a gluten-free option, swap all-purpose flour with gluten-free flour. This keeps the texture and flavor intact. You can also use other veggies like broccoli or zucchini to change things up. These vegetables soak up the flavor well and add fun textures. Buffalo sauce comes in many styles. If you want a milder taste, choose a mild buffalo sauce. For spice lovers, use a hot sauce with extra heat. You can also add toppings like shredded cheese or black beans for a twist. They boost flavor and add creaminess or protein. Tortilla choices are flexible. If you want to skip the carbs, use large lettuce leaves as wraps. They make a fresh and crunchy option. You can also add garnishes to your tacos. Try sour cream for creaminess or pickles for a tangy bite. These little extras really enhance your meal. To store leftover buffalo cauliflower, place it in an airtight container. This helps keep it fresh. Make sure to let it cool before sealing. For best results, store it in the fridge within two hours of cooking. This way, it stays safe to eat. Try to eat the leftovers within three days for the best taste and texture. Use glass or BPA-free plastic containers. These materials help protect the cauliflower from absorbing other fridge smells. Plus, they are easy to clean. If you have a lot of leftovers, divide them into smaller portions. This makes it easier to reheat later. To reheat buffalo cauliflower without losing crunch, use an oven or an air fryer. These methods keep your tacos crispy. Preheat your oven to 400°F (200°C). Spread the cauliflower on a baking sheet. Bake for about 10-15 minutes, or until hot. If you’re using an air fryer, set it to 350°F (175°C). Heat for about 5-7 minutes. Check to ensure the cauliflower doesn't burn. Avoid using the microwave, as it can make the cauliflower soggy. Enjoy your tacos just as crispy as when they were fresh! Cutting cauliflower for tacos is simple. Start with a medium head of cauliflower. First, remove the leaves and the core. Then, slice the cauliflower into quarters. Use a sharp knife to cut each quarter into small florets. Aim for pieces that are about 1 to 2 inches wide. This size helps them cook evenly and fit well in tacos. If some florets are larger, cut them down to match. Yes, you can use frozen cauliflower. It is a great time saver. When using frozen cauliflower, thaw it first. You can do this in the fridge overnight or in the microwave for a few minutes. After thawing, make sure to drain excess water. This will help the batter stick better. The cooking time may be a bit shorter since the pieces are smaller. Making homemade buffalo sauce is easy and quick. You need just a few basic ingredients. Use 1 cup of hot sauce, ½ cup of melted butter, and a splash of vinegar. Combine the hot sauce and melted butter in a bowl. Whisk until smooth. Add vinegar for a tangy flavor. You can also mix in garlic powder or cayenne for extra heat. Adjust the heat to your liking. Toppings can really enhance your tacos. I suggest using shredded red cabbage for crunch. Fresh cilantro adds a burst of flavor. Sliced avocado gives a creamy touch. Lime wedges are perfect for a fresh squeeze. You can also add diced tomatoes or jalapeños for more flavor. Try mixing and matching to find your favorite combination! You learned how to make tasty Buffalo Cauliflower Tacos. We covered essential ingredients, prep steps, and baking tips. I shared ways to customize flavors and ensure crispiness. Proper storage and reheating help maintain texture. Remember, these tacos are flexible for different diets and taste preferences. You can make them your own. Enjoy your cooking journey with this fun and healthy dish!

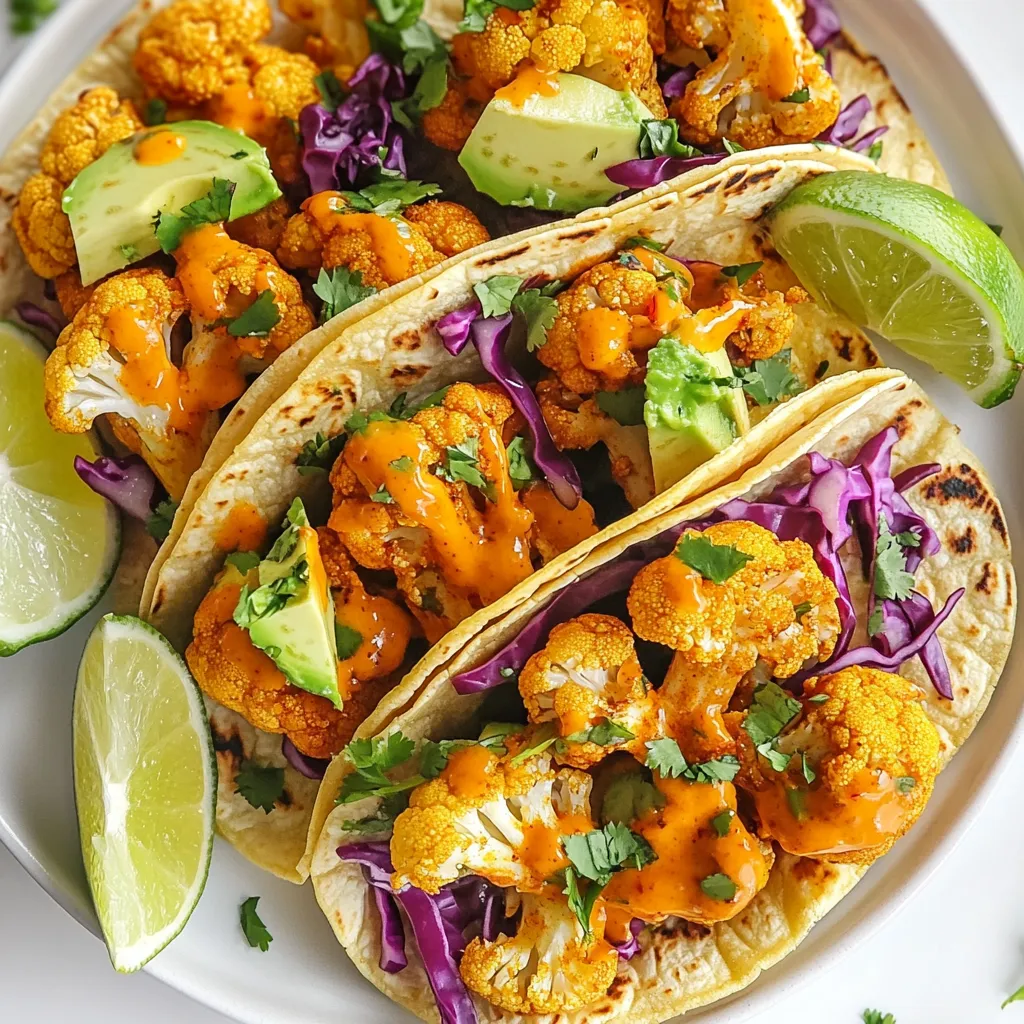
Buffalo Cauliflower Tacos Bold and Flavorful Meal

Are you ready to spice up your taco night? Buffalo Cauliflower Tacos bring bold flavors without the meat! With a

- 1 cup quinoa, rinsed - 1 can (15 oz) black beans, drained and rinsed - 1 red bell pepper, diced - 1 cup cherry tomatoes, halved - 1 small red onion, finely chopped - 1 avocado, diced - 1/4 cup fresh cilantro, chopped In this salad, quinoa and black beans shine. Quinoa is a grain that cooks fluffy and light. Black beans add protein and rich flavor. Fresh vegetables bring crunch and color. The red bell pepper adds sweetness, while cherry tomatoes burst with juice. The red onion gives a sharp bite, and avocado adds creaminess. - Juice of 2 limes - 2 tablespoons olive oil - 1 teaspoon cumin - 1/2 teaspoon chili powder - Salt and pepper to taste The dressing is where the magic happens. Lime juice adds brightness and tang. Olive oil smooths the dressing and brings richness. Cumin and chili powder give warmth and depth. A touch of salt and pepper rounds out the flavors. - Fresh cilantro - Lime wedges Garnishes add the final touch. Fresh cilantro gives a herbaceous note and color. Lime wedges let you add more zing to each bite. These additions elevate your salad and make it more vibrant. {{ingredient_image_1}} Start by pouring 2 cups of water or vegetable broth into a medium saucepan. Bring it to a boil over high heat. This broth adds flavor to the quinoa. Once it boils, you are ready for the next step. Add 1 cup of rinsed quinoa to the boiling water. Stir it once, then lower the heat. Cover the pot and let it simmer for about 15 minutes. You want the quinoa to absorb all the liquid. Once done, remove it from the heat and let it cool. This cooling step is important for mixing later. In a large bowl, add one can of drained and rinsed black beans. Then, toss in a diced red bell pepper, halved cherry tomatoes, finely chopped red onion, and diced avocado. Gently mix these fresh ingredients. This mix brings color and taste to your salad. Once the quinoa has cooled, add it to the vegetable mix. Use a spatula to fold it in gently. This helps keep the quinoa fluffy. Make sure everything is well combined, so each bite is full of flavor. In a small bowl, whisk together the juice of two limes, 2 tablespoons of olive oil, 1 teaspoon of cumin, and 1/2 teaspoon of chili powder. Season it with salt and pepper to taste. Whisk until smooth. This dressing adds zesty flavor to the salad. Drizzle the dressing over the quinoa and vegetable mix. Use a spatula to gently fold everything together. Make sure the dressing coats all the ingredients. The salad needs to sit for 10-15 minutes. This wait lets the flavors blend and deepen. To get fluffy quinoa, rinse it well before cooking. This step removes bitterness. Use a fine mesh strainer and rinse under cool water. Bring water or broth to a boil before adding quinoa. Reduce heat and cover. Cook for about 15 minutes until all liquid is gone. Remove it from heat and let it cool. When mixing ingredients, do it gently. This helps keep the avocado intact. A light hand keeps the salad looking fresh and bright. Tossing too hard can mash your veggies. For more flavor, adjust your spices. Add extra cumin or chili powder for a kick. If you like it spicy, try a pinch of cayenne pepper. Taste the dressing before adding it to the salad. You can add salt and pepper to suit your taste. Let the salad sit for 10-15 minutes after mixing. This helps the flavors blend. The lime juice softens the veggies and makes them tasty. Serve the salad in a bright bowl. Use a large bowl to show off the colors. Layer the ingredients for a fun look. Start with quinoa, then add beans, and top with veggies. For garnishing, add fresh cilantro leaves on top. Squeeze lime wedges around the bowl. This adds color and freshness. Your salad will look as good as it tastes! Pro Tips Rinse the Quinoa: Always rinse quinoa under cold water before cooking to remove its natural coating, called saponin, which can impart a bitter taste. Customize Your Veggies: Feel free to substitute or add your favorite vegetables to the salad, such as corn, cucumber, or zucchini for added texture and flavor. Let It Chill: For the best flavor, let the salad chill in the refrigerator for at least 30 minutes before serving, allowing the ingredients to meld beautifully. Avocado Tips: To prevent the avocado from browning, add it just before serving or toss it with lime juice for extra protection against oxidation. {{image_2}} Substitute for Quinoa You can replace quinoa with rice or couscous. Brown rice adds more fiber. If you want a gluten-free option, try millet or amaranth. These grains give a nice texture and taste. Alternate Beans and Vegetables You can use chickpeas or kidney beans instead of black beans. Each bean offers a different flavor. Try adding corn, cucumber, or shredded carrots for more crunch. The salad will still taste great! Vegan and Gluten-Free Options This salad is already vegan and gluten-free. All the ingredients are plant-based. You can enjoy it without worry if you follow these diets. Add-ons for Protein To boost protein, add grilled chicken, shrimp, or tofu. These will make the salad more filling. Nuts or seeds like pumpkin or sunflower seeds work too. They add a nice crunch! Different Citrus or Oil Choices Try lemon juice or orange juice instead of lime. Each citrus gives the salad a unique twist. You can also switch olive oil for avocado oil for a richer flavor. Experimenting with Fresh Herbs Add fresh parsley, basil, or mint for a fresh taste. Each herb brings its own unique flavor. Mixing different herbs can make the salad even more exciting! Store the Zesty Quinoa Black Bean Salad in an airtight container. This keeps it fresh. It lasts about 3 to 5 days in the fridge. If you notice any change in smell or appearance, it’s best to toss it. Can it be frozen? Yes, but I recommend freezing only the quinoa and beans. Fresh veggies do not freeze well. To freeze, pack the salad tightly in a freezer-safe container. When you’re ready to use it, thaw the quinoa and beans overnight in the fridge. Avoid using the microwave to thaw, as it can change the texture. Reheat the quinoa and beans in a saucepan over low heat. You can add a splash of lime juice for extra flavor. Mix in fresh veggies right before serving to keep them crisp. For a fresh taste, add a bit more lime juice and olive oil. Toss in some chopped cilantro or diced avocado to make it vibrant again. This really brings back that zesty flavor! To cook quinoa, start by rinsing it well. This step removes bitter saponins. Use a fine mesh strainer for best results. Rinsing helps make the quinoa taste great. For cooking, you can use water or vegetable broth. I prefer broth for extra flavor. Bring the liquid to a boil, then add the rinsed quinoa. Lower the heat, cover the pot, and let it simmer for about 15 minutes. Once done, let it cool before using. You can also cook quinoa in a rice cooker or Instant Pot. Follow the same water ratio, but adjust the time as needed. Yes, you can make this salad ahead! I recommend prepping the quinoa and veggies in advance. Mix them together just before serving. This keeps everything fresh and crisp. Store the salad in an airtight container in the fridge. It will stay good for up to three days. If you add avocado, do this right before serving to avoid browning. Quinoa is a complete protein. It has all nine essential amino acids. This makes it great for vegetarians and vegans. It also has fiber, which helps digestion. Black beans are rich in protein and fiber too. They support heart health and keep you full. Compared to other grains, quinoa has more protein and fiber than rice or wheat. Together, they make a powerful combo for your meals! This blog post showed you how to make a healthy quinoa salad. We covered the main ingredients, like black beans and fresh vegetables. You learned easy steps to cook quinoa, combine ingredients, and whip up a tasty dressing. My final thoughts? This salad is versatile and packed with nutrition. You can customize it to suit your tastes. Enjoy trying different flavors and storing leftovers for later. Happy cooking!

Zesty Quinoa Black Bean Salad Fresh and Flavorful Dish

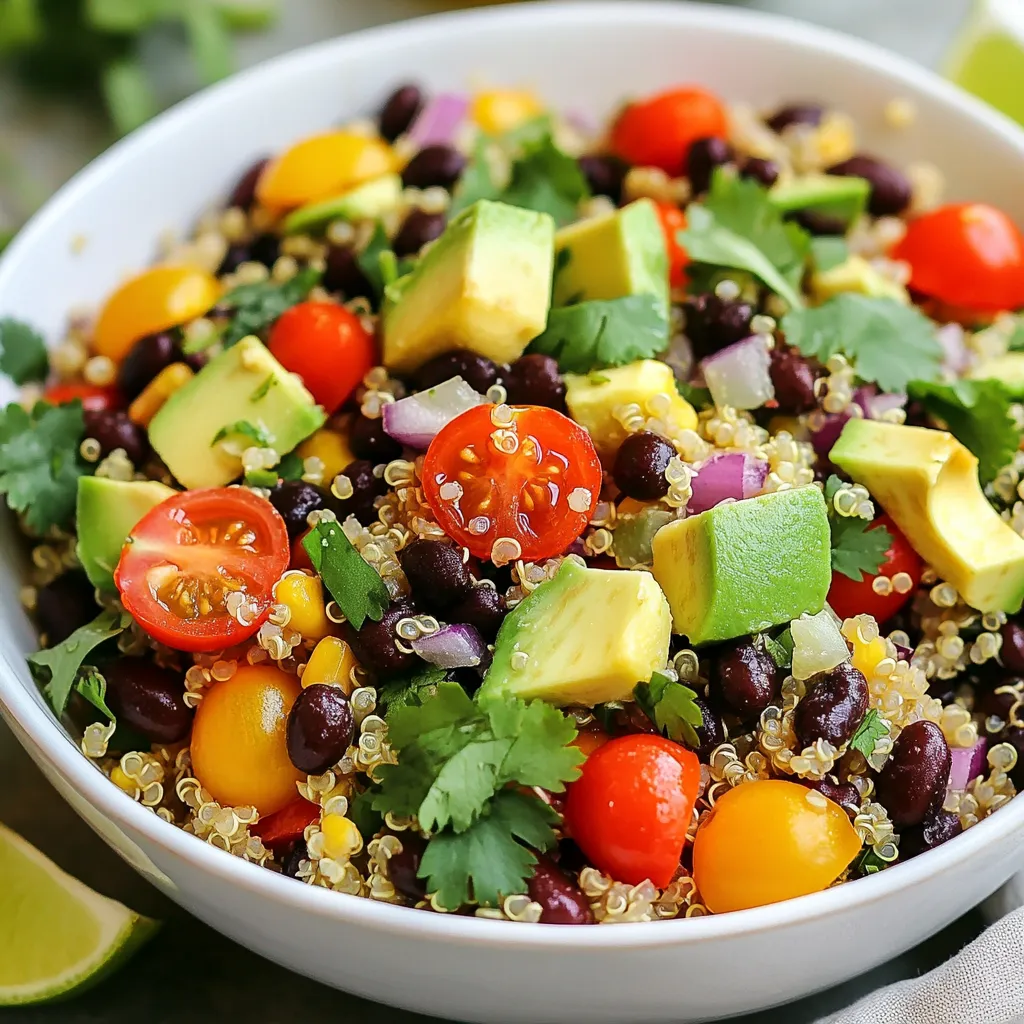
Are you ready to create a dish that bursts with flavor? My Zesty Quinoa Black Bean Salad is the perfect

Newer posts
← Previous Page1 … Page129 Page130
© 2025 My Cooking Cast • Built with GeneratePress

Our Policies

  • Privacy Policy
  • GDPR Policy
  • Terms Of Use
  • Copyright Policy
  • Cookie Policy
  • Disclaimer

More Information​

  • Home
  • Contact
  • About
  • Dinner
  • Appetizers
  • Dessert
©2025, My Cooking Cast About Privacy Policy Back To Top