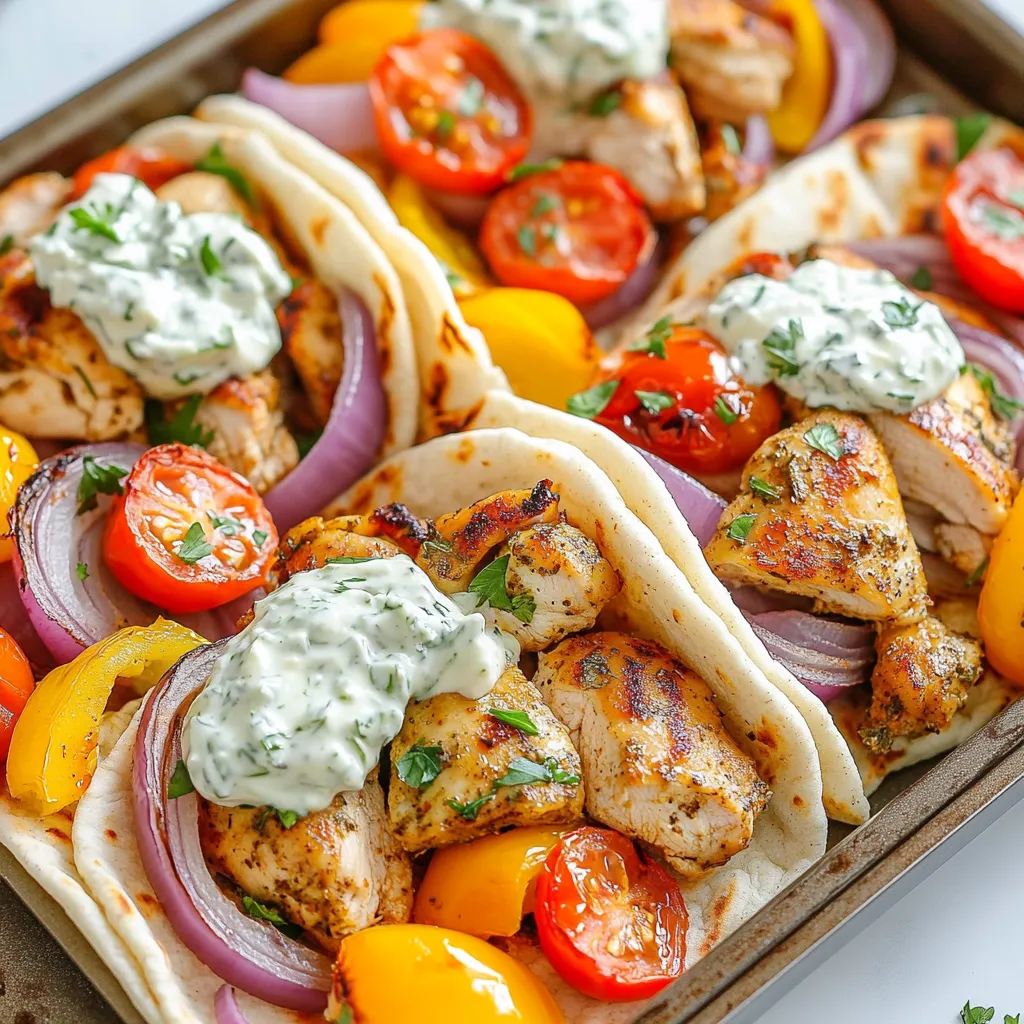
Sheet Pan Greek Chicken Gyros Flavorful Meal Solution
Craving a meal that’s both easy and full of flavor? Look no further than Sheet Pan Greek Chicken Gyros! This
Craving a meal that’s both easy and full of flavor? Look no further than Sheet Pan Greek Chicken Gyros! This
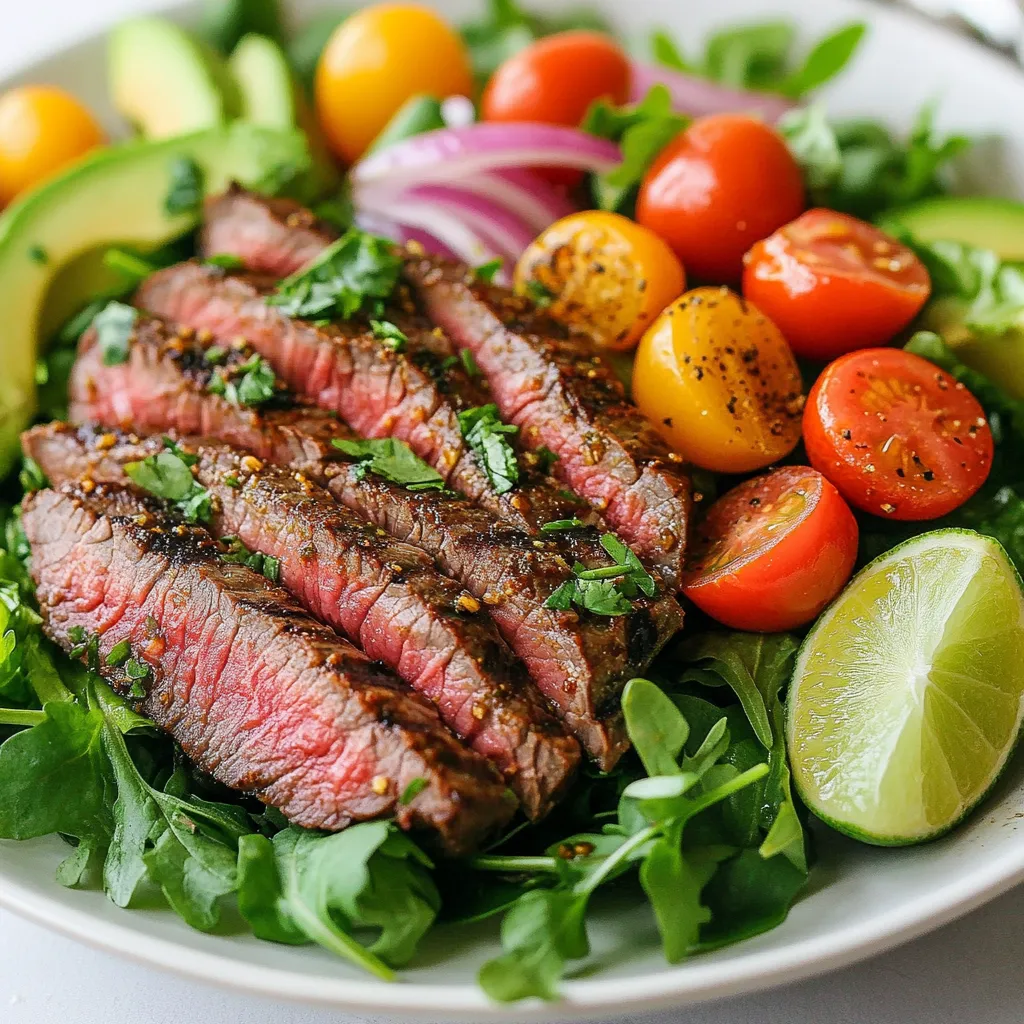
Looking for a fresh and tasty meal? My Chili Lime Steak Salad checks all the boxes! This recipe bursts with

Craving a fun and sweet snack? Air Fryer Cinnamon Sugar Pretzel Bites are the answer! These warm bites combine the
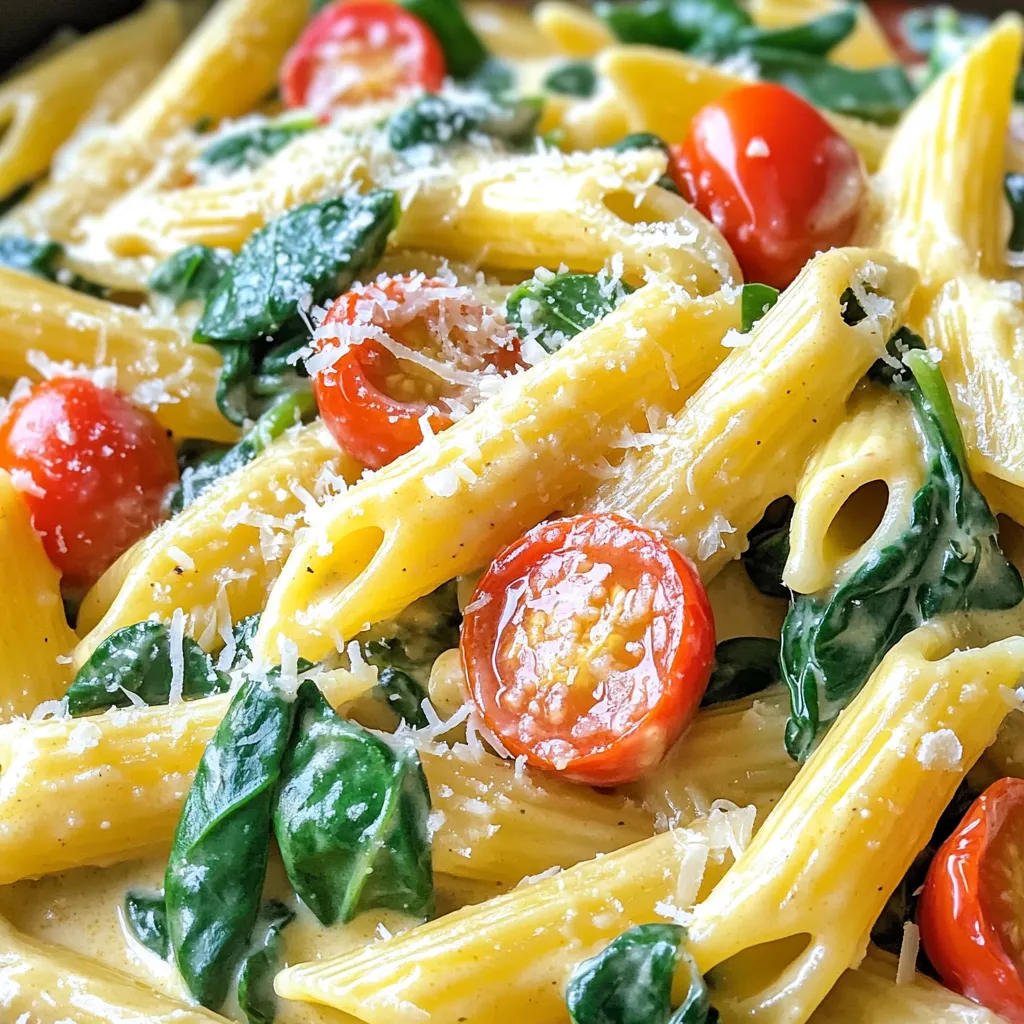
Are you ready to savor a dish that combines creamy goodness with bold flavors? My Slow Cooker Creamy Garlic Tuscan
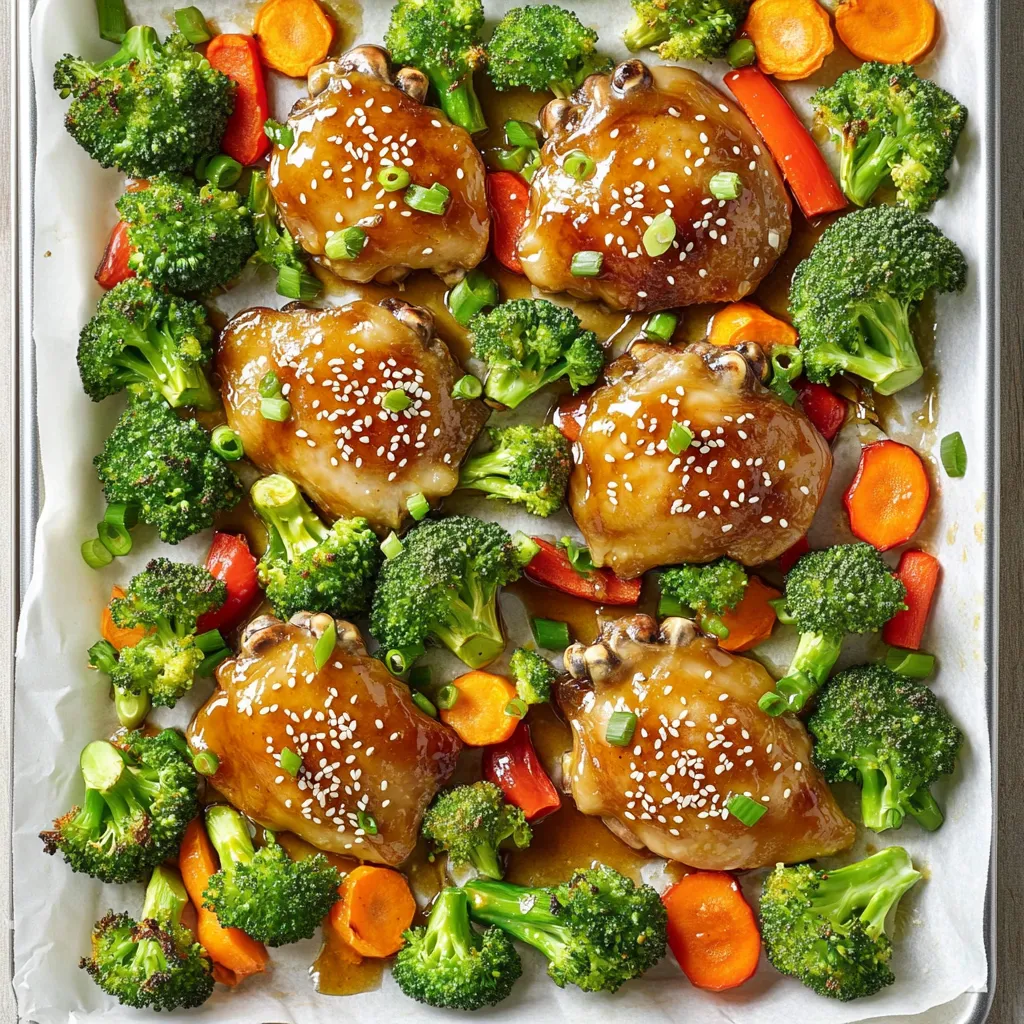
Ready to impress your family at dinner time? My Sheet-Pan Honey Garlic Chicken Thighs recipe is your secret weapon! With
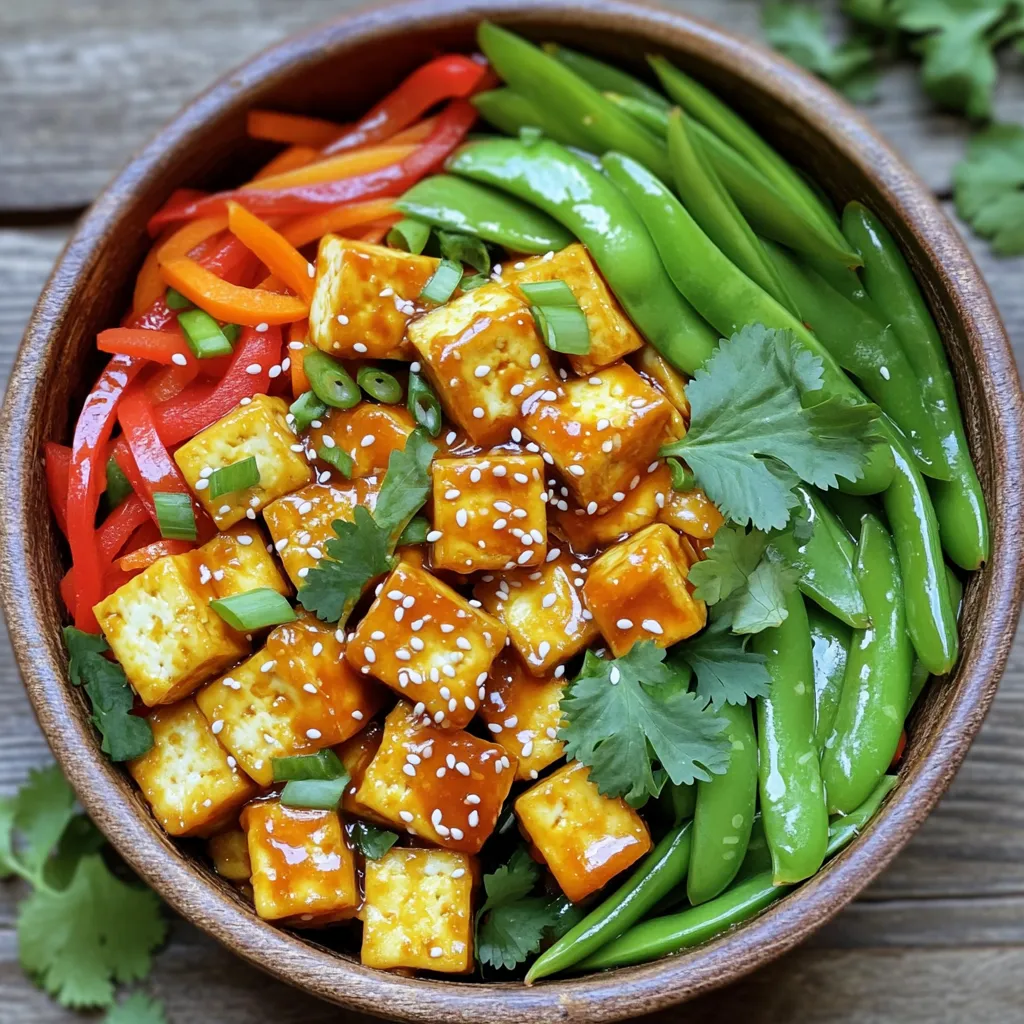
Looking for a quick meal that’s both tasty and healthy? My Minute Sweet Chili Tofu Stir-Fry is your answer! This
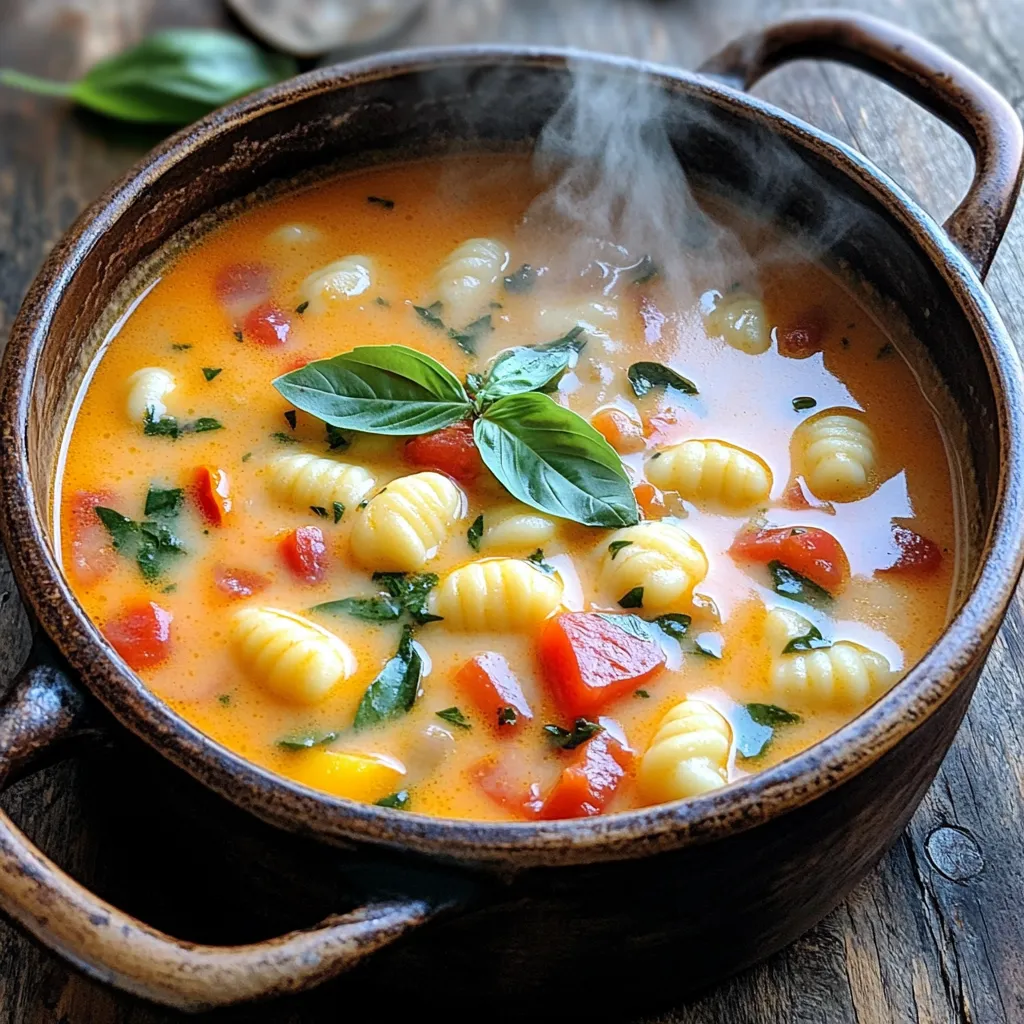
Looking for a hearty, comforting dish that’s easy to make? This One-Pot Creamy Tomato Gnocchi Soup is your answer! You’ll

Indulge in a treat that’s easy, delicious, and no-bake! My No-Bake Chocolate Peanut Butter Cheesecake Cups are a dream come
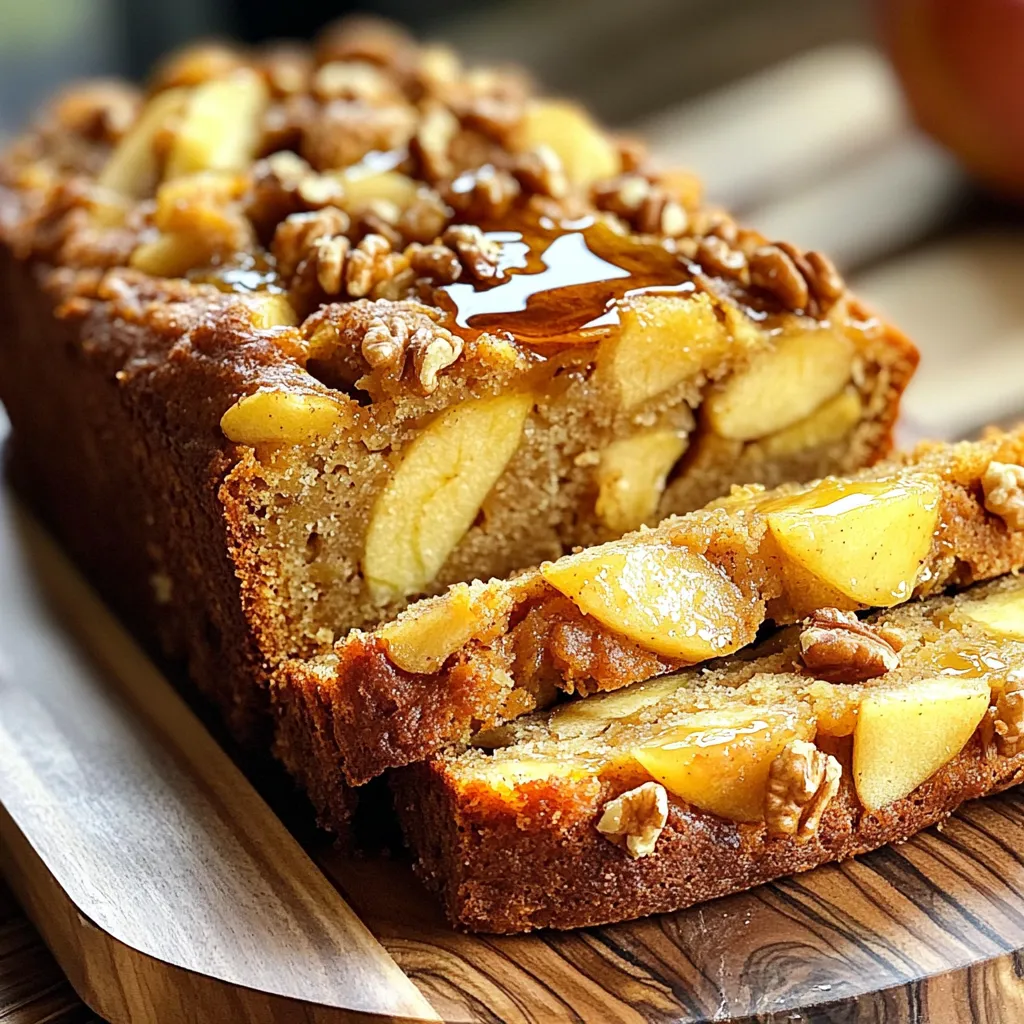
Baking an Apple Walnut Loaf isn’t just about flavor; it’s also a delightful experience! In this post, I’ll guide you

Fall is here, and nothing says cozy like a Pumpkin Spice Cinnamon Roll Bake. This recipe is a simple way
