Skip to content
DisclaimerTerms Of UseGDPR PolicyCookie Policy

My Cooking Cast

  • Home
  • Drinks
  • Appetizers
  • Dinner
  • Dessert
  • About
  • Contact
  • Privacy Policy
DisclaimerTerms Of UseGDPR PolicyCookie Policy

Emma

To make Spicy Shrimp Lo Mein, gather fresh, tasty ingredients. Here’s what you need: - 8 oz lo mein noodles - 1 lb large shrimp, peeled and deveined - 2 tablespoons vegetable oil - 1 tablespoon sesame oil - 1 red bell pepper, thinly sliced - 1 cup snap peas, trimmed - 3 cloves garlic, minced - 2 inches ginger, grated - 2 tablespoons soy sauce - 1 tablespoon chili garlic sauce (adjust to taste) - 1 tablespoon oyster sauce - 2 green onions, sliced (for garnish) - Sesame seeds (for garnish) - Salt and pepper to taste These ingredients make the dish rich and full of flavor. Lo mein noodles give it a nice base. Shrimp adds protein and a sweet taste. The bell pepper and snap peas bring crunch and color. Garlic and ginger add warmth and depth. The sauces and chili garlic sauce bring the spicy kick. This mix creates a balance that makes every bite exciting. {{ingredient_image_1}} Start by boiling a big pot of water. Add 8 oz of lo mein noodles. Cook them as the package says, till they are al dente. When done, drain the noodles. Toss them with a bit of sesame oil. This keeps them from sticking together. Next, take a large skillet or wok. Heat 2 tablespoons of vegetable oil over medium-high heat. Add 1 lb of large shrimp, peeled and deveined. Sprinkle some salt and pepper on them. Sauté for 2-3 minutes. The shrimp should turn pink and be fully cooked. Take them out of the skillet and set them aside. In the same skillet, add 3 cloves of minced garlic and 2 inches of grated ginger. Stir for about 30 seconds. You want it to smell good. Then, add 1 thinly sliced red bell pepper and 1 cup of trimmed snap peas. Stir-fry for 3-4 minutes. The veggies should look bright and be a bit tender. Put the cooked shrimp back in the skillet. Add the lo mein noodles next. Pour in 2 tablespoons of soy sauce, 1 tablespoon of chili garlic sauce, and 1 tablespoon of oyster sauce. Toss everything for 2-3 minutes. Make sure the noodles and shrimp get coated well with the sauces and are hot. After mixing, take the skillet off the heat. Serve it hot. Garnish with sliced green onions and a sprinkle of sesame seeds. Enjoy your meal! For this dish, use lo mein noodles. They have a soft and chewy texture. You can find them in Asian markets or the pasta aisle. If you can’t find lo mein noodles, you can use spaghetti. Just make sure to cook them until they are al dente. This helps them hold their shape in the stir-fry. Cooking shrimp is easy but needs your attention. Start with a hot skillet to get a nice sear. Add the shrimp and watch them closely. They should turn pink and opaque, which takes about 2-3 minutes. Overcooking shrimp makes them rubbery. Remove them from the skillet right when they're done for the best taste. You control the heat in your dish! If you like it spicy, add more chili garlic sauce. Start with one tablespoon, then taste. If it’s not hot enough, add more. For a milder flavor, reduce the chili sauce or leave it out. You can still enjoy the other flavors without the heat. To boost the taste, try adding fresh herbs like cilantro or basil. A splash of lime juice adds brightness too. For a savory touch, use a splash of rice vinegar. These small additions can take your spicy shrimp lo mein to the next level. Experiment to find your favorite flavor combinations! Pro Tips Fresh Shrimp is Best: For the best flavor and texture, use fresh shrimp rather than frozen. If using frozen, ensure they are fully thawed and patted dry before cooking. Adjust Spice Level: Control the heat by adjusting the amount of chili garlic sauce. Start with a small amount and taste as you go to achieve your desired spice level. Perfectly Cooked Noodles: To avoid mushy noodles, cook the lo mein just until al dente. Rinse them under cold water after draining to stop the cooking process. Veggie Variations: Feel free to mix and match vegetables based on your preference or what you have on hand. Broccoli, carrots, and bok choy are great alternatives. {{image_2}} You can really mix it up with this recipe. Try adding broccoli or carrots. They add crunch and color. You can also use bok choy or mushrooms for more flavor. Just make sure to chop them small. This helps them cook fast and blend well. If you want a change from shrimp, chicken works great. Just cut it into bite-sized pieces. Sauté it until it’s golden brown. Tofu is another awesome choice, especially if you want a plant-based meal. Use firm tofu for best results. Press it to remove extra water for a firmer texture. To make a vegan version, skip the shrimp and oyster sauce. Use soy sauce or a plant-based alternative instead. Add more veggies like bell peppers and zucchini. This keeps the dish colorful and tasty without any animal products. If you need a gluten-free meal, choose rice noodles or gluten-free lo mein. Check the labels to be sure. You can also swap regular soy sauce for tamari. This makes it safe for those with gluten allergies. Enjoy the same great taste without worry! Store your Spicy Shrimp Lo Mein in an airtight container. Let it cool down first. Place it in the fridge within two hours of cooking. It will stay fresh for up to three days. To prevent sogginess, keep the sauce separate if possible. For long-term storage, you can freeze this dish. Pack the lo mein in freezer-safe containers. It can last for about three months in the freezer. When ready to eat, thaw it in the fridge overnight before reheating. To reheat, use a skillet over medium heat. Add a splash of water or broth for moisture. Heat it for about five to seven minutes, stirring often. You can also microwave it in short bursts, stirring in between, until hot. Always check that the shrimp are heated through before serving. Lo mein is a Chinese dish made with stir-fried noodles. You usually use wheat noodles, and they are soft and chewy. The dish often includes vegetables and protein, like shrimp. It's popular for its rich flavors and quick cooking time. Yes, you can use other noodles! You can try egg noodles or rice noodles. Just make sure they cook well with the other ingredients. Adjust the cooking time based on the type you choose. To reduce spice, cut back on chili garlic sauce. You can also use less ginger and garlic. Another option is to add more vegetables or noodles to balance the heat. You can serve it with spring rolls or dumplings. A side salad with a light dressing pairs well too. If you like, some steamed broccoli adds color and nutrition. Shrimp cook very quickly. They usually take about 2-3 minutes in the pan. They turn pink when cooked. Be careful not to overcook them, or they will become tough. In this blog post, we covered how to make Spicy Shrimp Lo Mein. We detailed the key ingredients, step-by-step cooking methods, and helpful tips. You can adjust the recipe to fit your tastes by adding veggies or choosing different proteins. Remember, storing leftovers properly keeps them fresh. Cooking shrimp and noodles well can elevate your dish. With these insights, you can create a tasty meal that suits your needs. Enjoy experimenting with flavors and make this dish your own!

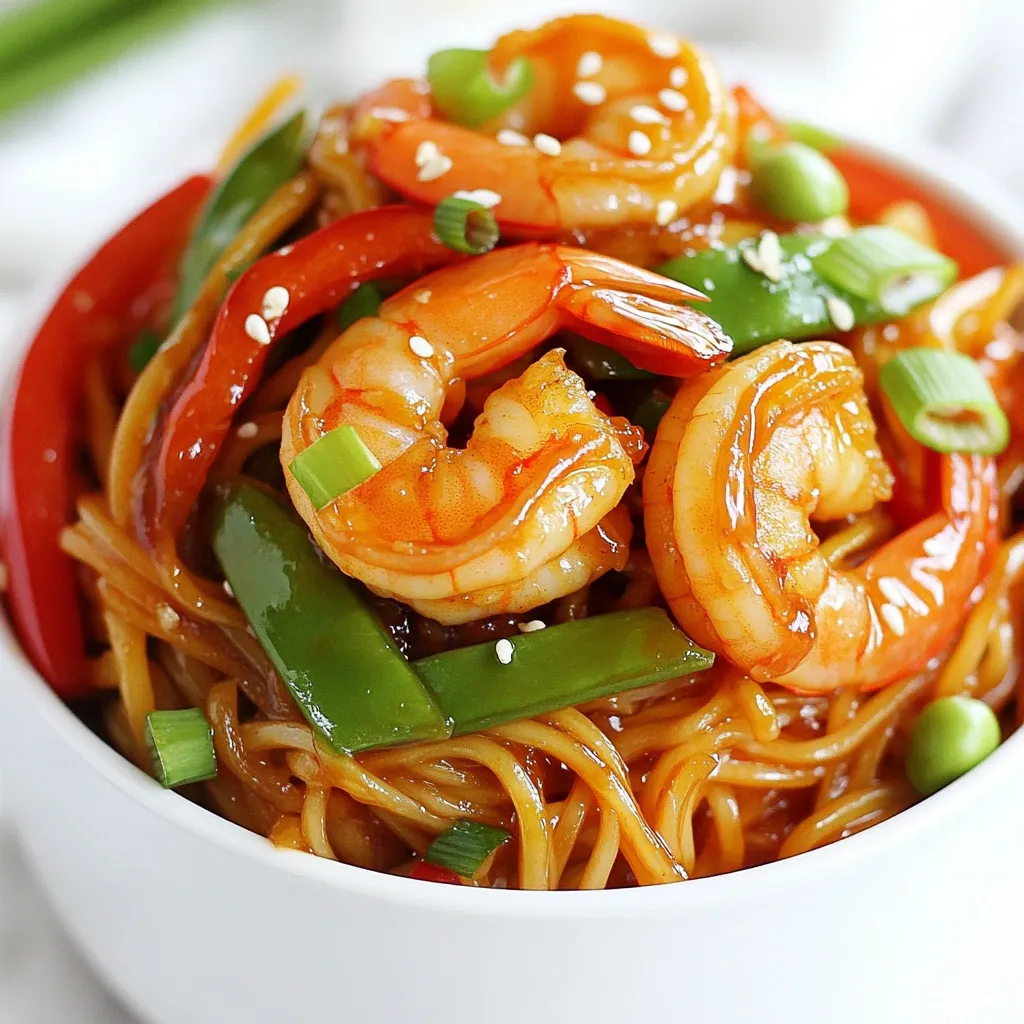
Spicy Shrimp Lo Mein Flavorful and Easy Recipe

Are you ready for a tasty twist on a classic meal? This Spicy Shrimp Lo Mein is loaded with flavor

- 1 pound Brussels sprouts - 3 tablespoons olive oil - 4 cloves garlic - 1/2 cup grated Parmesan cheese - 1 teaspoon salt - 1/2 teaspoon black pepper - 1/2 teaspoon red pepper flakes - 2 tablespoons balsamic vinegar - Fresh parsley for garnish To make Garlic Parmesan Brussels sprouts, you need a few key ingredients. Start with one pound of fresh Brussels sprouts. Look for sprouts that are firm and bright green. Next, gather three tablespoons of olive oil. This oil adds richness and helps with roasting. You will also need four cloves of garlic. Minced garlic gives a strong flavor that pairs well with the sprouts. For the cheese lover in you, grab half a cup of grated Parmesan cheese. This cheese melts beautifully and adds a salty touch. Season your dish with one teaspoon of salt and half a teaspoon of black pepper. These basic seasonings enhance the natural taste of the sprouts. If you want a bit of heat, include half a teaspoon of red pepper flakes. For a tangy finish, consider adding two tablespoons of balsamic vinegar. Finally, fresh parsley is perfect for garnish. It adds a pop of color and freshness. These ingredients come together to create a dish that is both flavorful and easy to make. Enjoy the cooking process and the delicious result! {{ingredient_image_1}} First, you need to trim and halve the Brussels sprouts. Cut off the stem end and slice each sprout in half. This step helps them cook evenly. Next, preheat your oven to 425°F (220°C). A hot oven is key for a crispy finish. In a large mixing bowl, combine the halved Brussels sprouts with olive oil, minced garlic, salt, black pepper, and red pepper flakes if you want some heat. Toss everything together until the Brussels sprouts are evenly coated. This mix adds great flavor. Now, transfer the Brussels sprouts to a baking sheet. Make sure they are in a single layer with the cut side down. This helps them caramelize better. Roast them in the preheated oven for 20 minutes. After that, take the baking sheet out and sprinkle the grated Parmesan cheese over the Brussels sprouts. This cheese melts and gets nice and golden. Return the sheet to the oven and roast for another 10 minutes. Check to see if the sprouts are tender and the cheese is bubbly. Enjoy the tasty aroma! To get that nice caramel color, place the Brussels sprouts cut-side down on the baking sheet. This helps them brown evenly. Roasting at 425°F (220°C) creates a hot environment. It helps the sprouts cook through while getting crispy. For a tangy twist, consider adding balsamic vinegar. Drizzle it over the sprouts just before serving. You can also try extra seasonings. A pinch of garlic powder or lemon zest can add depth. Serve the Brussels sprouts warm on a bright platter. Sprinkle more Parmesan and fresh parsley on top. This adds a pop of color and makes the dish inviting. Consider using a nice bowl to showcase them. It makes the meal feel special. Pro Tips Choose Fresh Brussels Sprouts: Look for firm, bright green Brussels sprouts with no yellow leaves for the best flavor and texture. Use High-Quality Olive Oil: A good quality extra virgin olive oil enhances the overall taste and provides a rich flavor to the dish. Don’t Overcrowd the Pan: Make sure the Brussels sprouts are in a single layer on the baking sheet to ensure even roasting and caramelization. Experiment with Cheese: Try different types of cheese, like Pecorino Romano or cheddar, for a unique twist on the classic recipe. {{image_2}} You can switch up the cheese in this dish. Try using asiago or pecorino for a different taste. If you want a creamy texture, feta works well too. For those who prefer a vegan option, there are great substitutes. Look for nut-based cheeses or vegan Parmesan. These options melt well and still provide great flavor. To make these Brussels sprouts pop, think about adding herbs and spices. A sprinkle of thyme or rosemary can uplift the dish. You could also add a hint of lemon zest for brightness. Want some crunch? Toss in some chopped nuts like walnuts or almonds. They add texture and flavor to your sprouts. Using an air fryer can give you crispy Brussels sprouts in less time. Set your air fryer to 400°F and cook for about 15 minutes. Shake the basket halfway through for even cooking. If you prefer stovetop cooking, sauté the Brussels sprouts in a pan with olive oil. Cook them over medium heat until they are tender and golden, about 10 minutes. Both methods offer tasty results! To store leftovers, let the sprouts cool. Place them in an airtight container. They will stay fresh in the fridge for up to four days. Use a glass or plastic container with a tight seal. This helps keep the flavor and texture intact. For the best taste, reheat in the oven. Preheat it to 350°F (175°C). Spread the sprouts on a baking sheet. Heat for about 10 minutes, or until warm. If you want to re-crisp them, set the oven to broil for 2 minutes. Watch closely to avoid burning. To freeze, let the Brussels sprouts cool completely. Place them in a freezer-safe bag or container. Remove as much air as possible to prevent freezer burn. They can last for up to three months in the freezer. When ready to cook, thaw them in the fridge overnight. For quick cooking, you can toss them straight into the oven. Just add a few extra minutes to the cooking time. Yes, you can use frozen Brussels sprouts. However, they may be softer and have less flavor. Fresh sprouts are best for crispness and taste. If you use frozen, roast them longer to help them get tender. These Brussels sprouts pair well with many dishes. Try them with roasted chicken or grilled steak. They also go great with pasta or as a side for fish. Adding these to a holiday meal adds a nice touch. Brussels sprouts are done when they are tender and slightly browned. You can test them with a fork. If they pierce easily, they are ready. Look for a golden color on the cheese for extra flavor. This blog post shows you how to make Garlic Parmesan Brussels sprouts. You learned the main ingredients and steps to prepare them perfectly. We covered tips for great flavor and different ways to cook them. Storing and reheating options help keep your leftovers fresh. Remember, you can customize these sprouts to suit your taste. Now, get cooking and enjoy these tasty, healthy bites!

Garlic Parmesan Brussels Sprouts Flavorful Side Dish

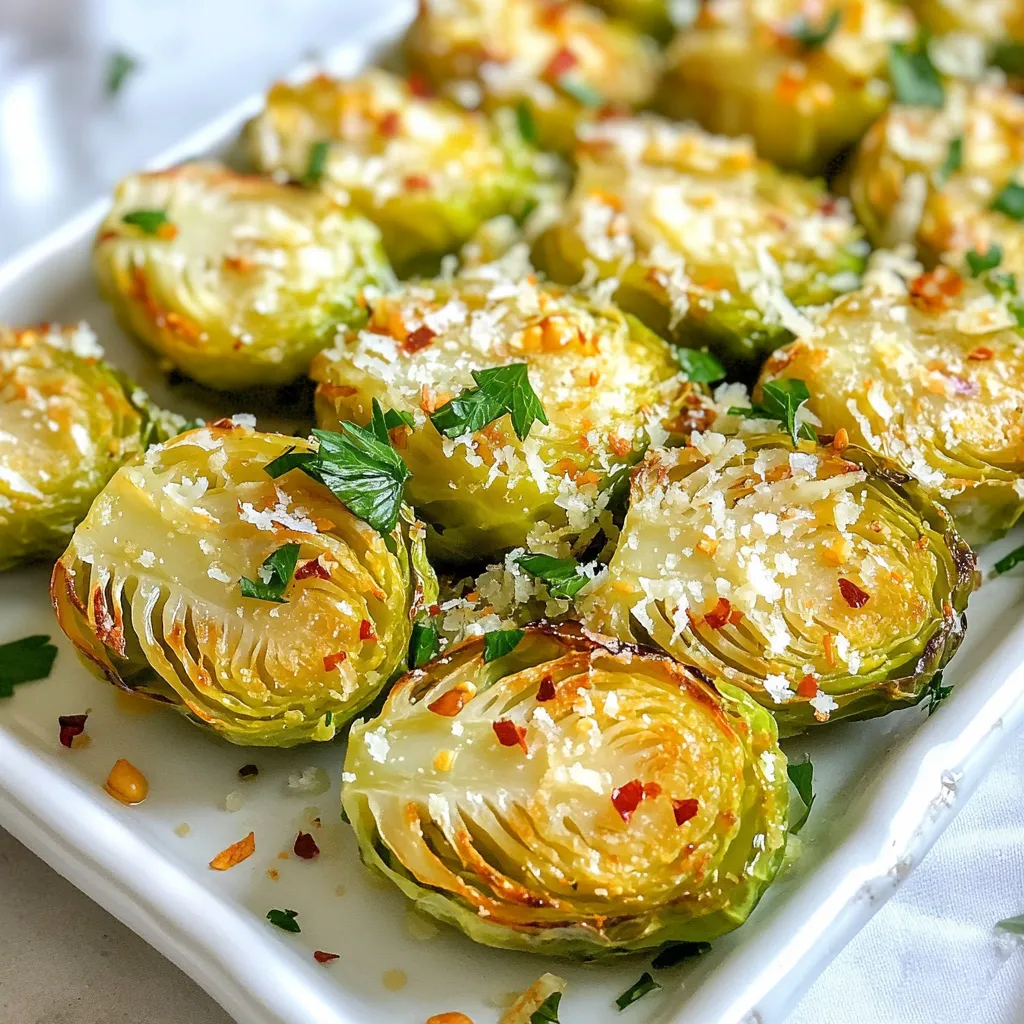
If you want a side dish that impresses, try Garlic Parmesan Brussels Sprouts. This recipe packs bold flavor and crispy

- Sirloin steak details: Use 1 lb of sirloin steak. Cut it into bite-sized cubes. Sirloin gives a nice flavor and texture. - Olive oil and garlic: You need 3 tablespoons of olive oil and 4 cloves of minced garlic. These add richness and depth. - Seasonings and cheese: Use 1 teaspoon of Italian seasoning, 1/2 teaspoon of paprika, salt, and pepper to taste. Also, have 1/2 cup of grated Parmesan cheese. This creates a savory crust. - Optional garnish: Fresh parsley, chopped, adds color and freshness. It's great for a final touch. These ingredients come together to make a delicious meal. They work well in an air fryer, keeping the steak bites juicy and flavorful. {{ingredient_image_1}} To start, I prepare the marinade. In a bowl, I mix three tablespoons of olive oil with four minced garlic cloves, one teaspoon of Italian seasoning, and half a teaspoon of paprika. I add salt and pepper to taste. This blend brings out rich flavors. Next, I toss the steak cubes into the marinade. I make sure each piece is well-coated. This helps the steak absorb those tasty flavors. I let the steak marinate for at least 30 minutes at room temperature. For even better results, I sometimes marinate it in the fridge for up to two hours. The longer it sits, the more flavor it gains. Now, I preheat my air fryer to 400°F (200°C). This step is key for cooking the steak evenly and getting that great texture. Once it’s hot, I place the marinated steak bites in a single layer in the air fryer basket. I leave some space between them to allow hot air to circulate. I air fry the steak bites for 8 to 10 minutes. Halfway through, I shake the basket to ensure even cooking. For a medium-rare finish, I aim for an internal temperature of about 135°F. When the steak bites are done, I take them out and immediately sprinkle half a cup of grated Parmesan cheese over them. The heat from the steak helps melt the cheese, creating a delicious layer on top. Finally, I garnish the steak bites with chopped fresh parsley. This adds a pop of color and freshness to the dish. Now, they are ready to serve! To really boost the flavor of your steak bites, marinate them for at least 30 minutes. For deeper flavor, let them sit in the fridge for up to 2 hours. The olive oil and garlic work wonders. When it comes to cooking, aim for your preferred doneness. For medium-rare, check for about 135°F. Use a meat thermometer for best results. To ensure even cooking in your air fryer, arrange the steak bites in a single layer. Leave some space between them. This helps hot air reach all sides. If you use different cuts of steak, adjust the cooking time. Thicker cuts will need more time, while thinner cuts cook faster. Keep an eye on them to avoid overcooking. Pair these steak bites with a fresh salad or roasted veggies. They also go well with mashed potatoes or rice. For a fun touch, serve with dipping sauces like garlic aioli or spicy ketchup. Add fresh parsley on top for a pop of color and flavor. Pro Tips Marinate for Flavor: Allowing the steak to marinate for at least 30 minutes enhances the flavor significantly; for best results, marinate it for up to 2 hours. Preheat the Air Fryer: Always preheat your air fryer to ensure that the steak bites cook evenly and develop a nice sear on the outside. Doneness Check: Use a meat thermometer to check the internal temperature; 135°F is ideal for medium-rare, but adjust according to your preference. Cheese Melting Tip: Sprinkle the Parmesan cheese immediately after cooking to allow the residual heat to melt it perfectly over the steak bites. {{image_2}} You can switch up the herbs and spices in this recipe. Instead of Italian seasoning, try a mix of rosemary and thyme for a fresh taste. You can also use cumin or chili powder for a spicy kick. Adding lemon zest gives a bright flavor. You can even use a dash of hot sauce in the marinade for some heat. While sirloin works great, you can use other cuts like ribeye or flank steak. Ribeye adds more fat and flavor but may need less cooking time. Flank steak is leaner and should be cut thin against the grain for tenderness. Adjust cooking times to keep the steak juicy and avoid overcooking. You can cook these steak bites in the oven if you don't have an air fryer. Preheat your oven to 400°F (200°C) and spread the steak bites on a baking sheet. Bake them for about 10-12 minutes. If you enjoy grilling, you can place them on skewers for easy handling. Grill over medium heat for a few minutes on each side. This adds a nice char and smoky flavor. To store your garlic Parmesan air fryer steak bites, first, let them cool. Place them in an airtight container. This method keeps them fresh and tasty. You can store them in the fridge for up to three days. If you have more, you can freeze them. Use a freezer-safe bag for the best results. Remove as much air as possible to avoid freezer burn. To reheat steak bites, the best method is using the air fryer. Set it to 350°F (175°C) and heat for about 5 minutes. This method keeps them crispy and delicious. You can also use a skillet. Heat on medium-low and stir gently until warm. Avoid using the microwave, as it makes the steak chewy. Always check the steak to ensure it’s heated through but not overcooked. Enjoy your tasty bites! Yes, you can use other cuts. Here are some good options: - Ribeye: This cut is rich and flavorful. - Flank steak: It has a nice texture and cooks quickly. - Tenderloin: This cut is very tender and lean. Check the steak with a meat thermometer. Here are the target temperatures: - Rare: 125°F - Medium-rare: 135°F - Medium: 145°F - Medium-well: 150°F - Well done: 160°F Yes, you can freeze them. Here’s how to do it: - Let the cooked steak bites cool down. - Place them in an airtight container. - They can last up to three months in the freezer. When you're ready to eat, thaw them in the fridge overnight and reheat in the air fryer. This keeps them juicy. You now know how to make delicious garlic Parmesan steak bites. We covered ingredients, marination, and air frying steps. I shared tips for the best flavor and variations to try. You can store leftovers and reheat them well without drying out. Follow the cooking guide to ensure your steak is just right. Remember, the key is in the marinade and cooking method. Enjoy your tasty creations!

Garlic Parmesan Air Fryer Steak Bites Delightful Recipe

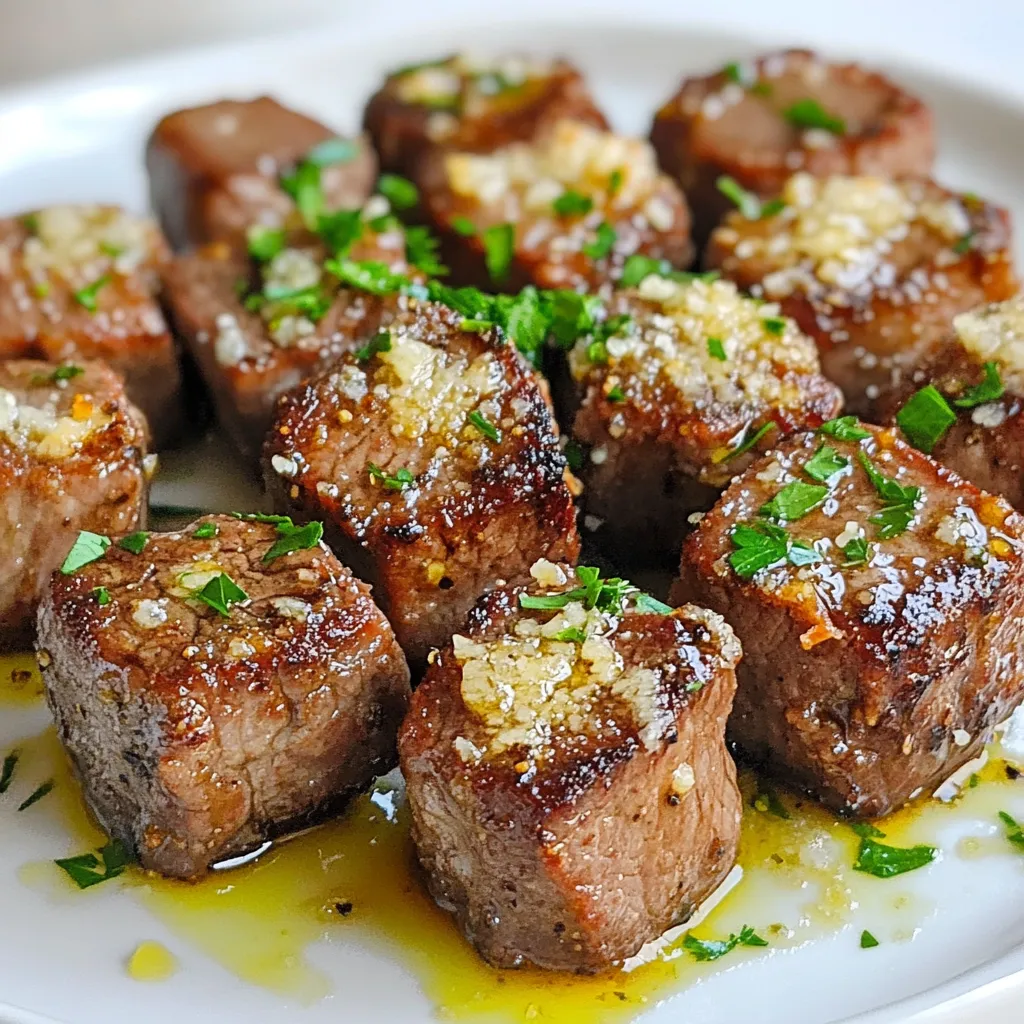
Looking for a quick, tasty meal? Try my Garlic Parmesan Air Fryer Steak Bites! You’ll find juicy steak, savory garlic,

- 1 head of cauliflower, cut into florets - 1 cup all-purpose flour - 1 cup buttermilk (or plant-based milk with 1 tbsp vinegar) - 1 cup breadcrumbs (preferably panko) - 1/2 cup buffalo sauce (store-bought or homemade) - 8 small corn or flour tortillas Cauliflower is the star of this dish. It soaks up the buffalo sauce and gives a great crunch. The buttermilk helps the flour stick, making a crispy coating. Breadcrumbs add even more texture for a satisfying bite. Tortillas hold everything together and create the perfect taco. - 1 teaspoon garlic powder - 1 teaspoon onion powder - 1 teaspoon smoked paprika - 1/2 teaspoon cayenne pepper (adjust for spice preference) - Salt and pepper to taste Spices bring life to the cauliflower. Garlic powder adds a savory kick. Onion powder gives depth. Smoked paprika adds a hint of sweetness and color. Cayenne pepper gives it heat, but you can adjust this based on your taste. Don't forget salt and pepper to enhance all flavors. - 1 avocado, sliced - 1 cup shredded red cabbage - Fresh cilantro, for garnish - Lime wedges, for serving Toppings take these tacos to the next level. Avocado adds creaminess. Shredded red cabbage gives crunch and color. Fresh cilantro adds brightness. Lime wedges add a zesty finish. Feel free to mix and match these toppings to suit your taste! {{ingredient_image_1}} 1. First, preheat your oven to 425°F (220°C). This helps the cauliflower cook evenly. 2. Next, line a baking sheet with parchment paper. This keeps the cauliflower from sticking. 3. In a large bowl, mix together the flour, garlic powder, onion powder, smoked paprika, cayenne pepper, salt, and pepper. This dry mix will give the cauliflower a nice flavor and crunch. 1. Take each cauliflower floret and dip it into the buttermilk. Make sure to let the excess drip off. This helps the coating stick better. 2. Now, coat the floret in the flour mixture. Make sure each piece is evenly covered. This will create a tasty crust when baked. 1. Place the coated cauliflower on the baking sheet. Bake in the oven for 20 minutes. Flip them halfway through. This makes them crispy on all sides. 2. After the first bake, take the cauliflower out. Toss it in buffalo sauce until well-coated. This adds that spicy kick. 3. Return the cauliflower to the oven for another 10 minutes. This final bake makes it even more delicious. To change the heat level of your tacos, adjust the cayenne pepper. If you want more spice, add more cayenne. If you prefer it mild, use less. You can also choose a buffalo sauce that fits your taste. Some brands are hotter than others. Look for sauces that say "extra hot" or "mild" on the label. Crispiness is key for buffalo cauliflower tacos. First, coat the cauliflower well with the flour mix. This helps create a nice crust. Bake it for 20 minutes at 425°F. Flip the florets halfway through for even cooking. After tossing them in buffalo sauce, bake for an extra 10 minutes. This step makes the cauliflower extra crispy and flavorful. For serving, use a bright platter to make your tacos pop. Place lime wedges on the side for color and taste. Add a sprinkle of fresh cilantro on top for an extra touch. You can even provide a small bowl of extra buffalo sauce for those who want more heat. This makes the meal look inviting and fun to eat! Pro Tips Adjusting Spice Level: If you prefer milder tacos, reduce the cayenne pepper or omit it altogether. You can also serve with a cooling side like yogurt or sour cream. Perfectly Crispy Cauliflower: Ensure the cauliflower florets are evenly coated and not overcrowded on the baking sheet for maximum crispiness. Homemade Buffalo Sauce: For a personalized touch, make your own buffalo sauce using hot sauce, melted butter, and a dash of garlic powder. Serving Suggestions: Pair these tacos with a side of fresh salsa or guacamole for added flavor and texture. {{image_2}} You can add shredded chicken or tofu to these tacos. Shredded chicken gives a nice texture and flavor. Tofu brings a great plant-based option. Just cook them as you like before adding. Mix them with the buffalo sauce for a spicy kick. This way, everyone can enjoy these tacos. Cheese can make these tacos even better. Try adding feta or cheddar for extra creaminess. Feta adds a tangy taste that pairs well with spicy cauliflower. Cheddar melts nicely and gives a rich, savory flavor. Sprinkle some cheese on top of your tacos for a delicious twist. Get creative with your taco fillings! Use different vegetables or sauces. You can add grilled peppers, corn, or even black beans. Each veggie brings its own flavor and crunch. Swap out the buffalo sauce for ranch or a spicy aioli for something new. The options are endless, so have fun experimenting! To store leftovers, let the tacos cool first. Place them in an airtight container. Make sure to keep the cauliflower and toppings separate to avoid sogginess. You can store them in the fridge for up to three days. For best results, eat them fresh. To reheat, use an oven or toaster oven. Preheat to 350°F (175°C). Place the tacos on a baking sheet. Heat them for about 10 minutes. This method helps keep the cauliflower crispy. You can also use an air fryer, which works great. You can freeze buffalo cauliflower, but it’s best to do so before adding sauce. After baking, let the cauliflower cool. Then, place it in a freezer-safe bag. Remove as much air as possible. It can stay in the freezer for up to a month. When ready to eat, thaw and bake again, then toss with the buffalo sauce. Yes, you can use frozen cauliflower for this recipe. Frozen cauliflower is convenient and time-saving. It offers a similar taste and texture to fresh cauliflower. Just make sure to thaw it first. Pat it dry to remove excess moisture. This helps the coating stick better and keeps your tacos crispy. To make these tacos gluten-free, swap out the all-purpose flour. Use gluten-free flour or almond flour instead. For breadcrumbs, opt for gluten-free panko or crushed gluten-free crackers. These changes allow everyone to enjoy the dish without gluten. Many sides complement buffalo cauliflower tacos. Here are some tasty options: - Corn on the cob: Sweet and juicy, it balances the heat. - Black bean salad: Adds protein and freshness. - Guacamole: Creamy and rich, it cools the spice. - Rice: Fluffy rice or cilantro lime rice is a great base. - Chips and salsa: Crunchy and zesty, they make a fun snack. These sides round out your meal and enhance the taco experience. You learned how to make buffalo cauliflower tacos, including the key ingredients and spices. I shared simple steps for preparation, coating, and baking the cauliflower for crispiness. Tips for adjusting spice levels and presentation enhance the tacos further. You can explore protein and cheese variations to suit your taste. Remember to store leftovers properly and enjoy them later. Use these insights to make a delicious dish that wows friends and family any day of the week. Enjoy your cooking!

Buffalo Cauliflower Tacos Spicy Flavorful Delight

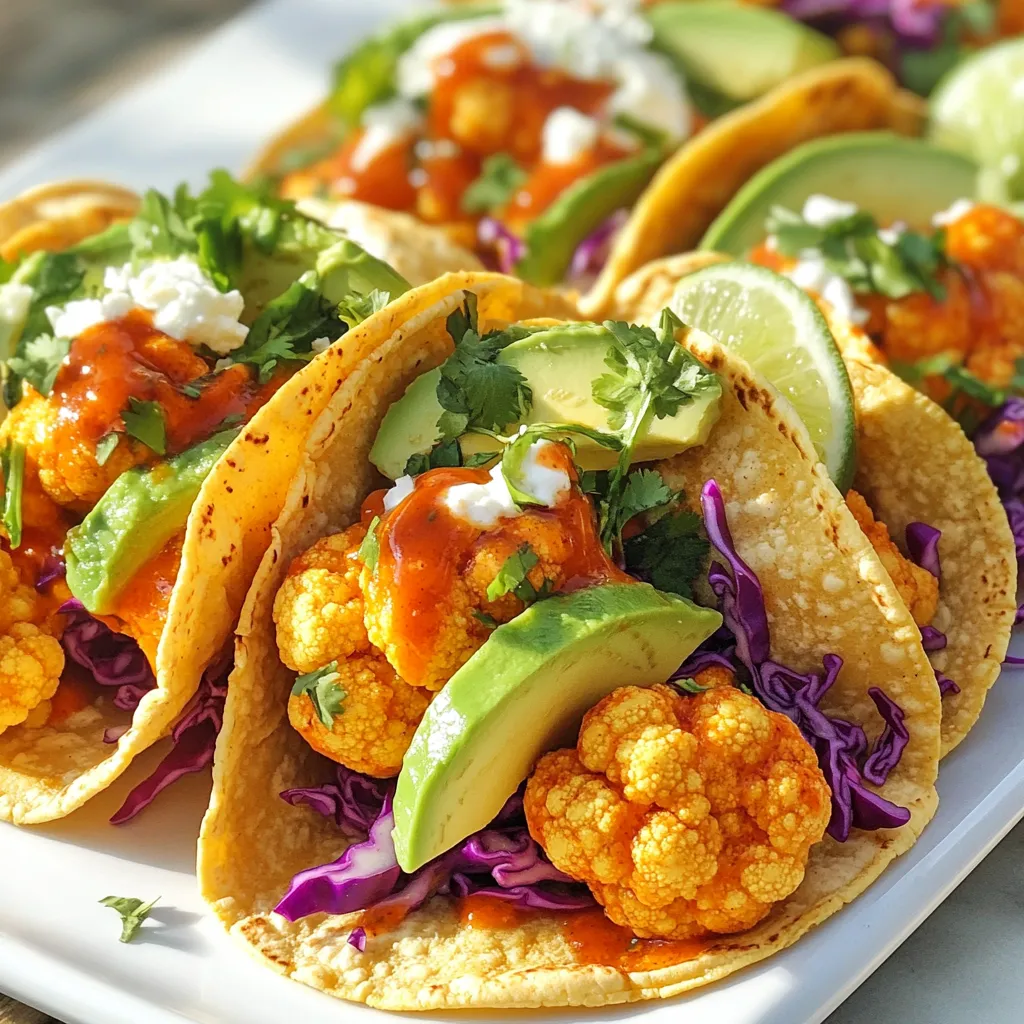
Do you crave a spicy and satisfying meal? Look no further! Buffalo Cauliflower Tacos bring bold flavor with a fun

To make your own delicious cinnamon sugar pretzel bites, gather these simple ingredients: - 1 cup warm water (110°F to 115°F) - 2 tablespoons granulated sugar - 1 packet (2 1/4 teaspoons) active dry yeast - 3 cups all-purpose flour - 1 teaspoon salt - 1/4 cup unsalted butter, melted - 1/4 cup baking soda - 1 large egg, beaten (for egg wash) - 1/2 cup granulated sugar (for cinnamon sugar) - 2 teaspoons ground cinnamon Each ingredient plays a key role. The warm water activates the yeast, making the dough rise. Sugar feeds the yeast, helping it grow. Flour gives structure to the pretzel bites. Salt adds flavor, while butter gives a rich taste. Baking soda helps create that classic pretzel crust. The egg wash gives a golden color as they bake. Finally, the cinnamon and sugar mixture coats the bites for that sweet finish. Gather these ingredients, and you'll be ready to create a tasty treat! {{ingredient_image_1}} To start, you will need to dissolve 2 tablespoons of sugar in 1 cup of warm water. Make sure the water is warm, around 110°F to 115°F. This warm water helps activate the yeast. Once the sugar is dissolved, add 1 packet of active dry yeast. Let it sit for about 5 to 10 minutes. You will see it foam up, which means the yeast is ready. In another bowl, combine 3 cups of all-purpose flour with 1 teaspoon of salt. Mix it well. Now, slowly add this flour mix to your yeast mixture. Stir until a dough starts to form. After that, add 1/4 cup of melted unsalted butter. Knead the dough on a floured surface for about 5 minutes. You want it to be smooth and elastic. Next, place the dough in a greased bowl. Cover it with a clean cloth. Let it rise in a warm spot for about 1 hour, or until it has doubled in size. This rising helps the pretzels become fluffy. Once your dough has risen, punch it down gently. Roll it into a long rope about 1 inch thick. Cut the rope into 1-inch pieces to create your pretzel bites. In a large pot, bring 8 cups of water and 1/4 cup of baking soda to a boil. Carefully add the pretzel bites in batches. Boil them for 30 seconds each. Use a slotted spoon to remove them and place them on a baking sheet lined with parchment paper. Next, brush each pretzel bite with a beaten egg. In a small bowl, mix 1/2 cup of granulated sugar with 2 teaspoons of ground cinnamon. Sprinkle this mix generously over the pretzel bites before baking. Preheat your oven to 425°F (220°C) and bake the bites for 10 to 12 minutes, or until they are golden brown. Enjoy your delicious cinnamon sugar pretzel bites! - Kneading tips: Knead the dough on a floured surface. Use the heel of your hand to push down. Then fold it back and give it a turn. Keep kneading until the dough feels smooth and springs back when pressed. This usually takes about 5 minutes. - Signs the dough is ready: The dough should feel soft and elastic. When you poke it, it should spring back quickly. If it sticks to your fingers, add a little flour. - Importance of baking soda bath: Boiling in a baking soda bath gives pretzel bites that classic crisp crust. The baking soda reacts with the dough. This reaction helps form a nice brown color and chewy texture. - Boiling timing for best results: Boil each batch for 30 seconds. This time is just right to achieve the perfect balance. Don’t skip this step; it’s key for flavor and texture. - Best dips and accompaniments: These pretzel bites taste great with melted chocolate or cream cheese dip. You can also try spicy mustard or a tangy cheese sauce. Each dip brings out a different flavor. - Presentation ideas for parties: Serve the pretzel bites warm in a basket lined with parchment paper. Add a small bowl of dip on the side. You can also sprinkle a bit of extra cinnamon sugar on top for a nice touch. Pro Tips Use Warm Water: Ensure your water is at the right temperature (110°F to 115°F) to activate the yeast effectively for a better rise. Kneading Technique: Knead the dough until it is smooth and elastic, which helps develop gluten for a chewier texture. Boiling Solution: The baking soda bath is crucial for achieving that classic pretzel flavor and glossy finish; don't skip this step! Cinnamon Sugar Ratio: Adjust the cinnamon and sugar to your taste preference; a little more cinnamon can add a nice warmth to the sweetness. {{image_2}} You can easily change up your pretzel bites by adding flavors. Try mixing in some shredded cheese. Cheddar or mozzarella works well. You can also add spices like garlic powder or onion powder for extra taste. For a sweet twist, use different sugar coatings. Instead of cinnamon sugar, try using vanilla sugar or a cocoa-sugar mix for a chocolatey kick. If you need a gluten-free version, substitute all-purpose flour with a gluten-free flour blend. Look for blends designed for baking. They usually work well in recipes like this. Add a bit of xanthan gum to help with texture. This helps your pretzel bites hold together nicely. Want smaller bites? Shape your dough into tiny balls. You can also stuff them with cheese or chocolate. Make sure to seal them well before boiling. This way, the filling stays inside. Mini pretzel bites are perfect for snacking or sharing at parties. To keep your cinnamon sugar pretzel bites fresh, store them in an airtight container. Wrap them tightly in plastic wrap or foil if you don't have a container. This helps prevent them from drying out. If you want to keep them longer, refrigerate them. They will last about 3 to 5 days in the fridge. You can also freeze pretzel bites. Place them in a freezer-safe bag, removing as much air as possible. They can stay fresh for up to 3 months this way. Refrigeration slows down spoilage but can change the texture. Freezing keeps them fresh for a long time but may alter their chewiness. Always let them cool completely before storing to avoid moisture build-up. For the best results when reheating, use an oven. Preheat it to 350°F (175°C). Place the pretzel bites on a baking sheet and cover them with foil. Heat for about 10-15 minutes. This helps keep them soft and warm. You can also use a microwave, but the texture may not be as good. Heat them for about 15-20 seconds. Check often to avoid making them tough. Enjoy your warm pretzel bites just like they were fresh out of the oven! To make these bites, follow this easy guide: 1. Mix warm water, sugar, and yeast in a bowl. Let it sit for 5-10 minutes until frothy. 2. Whisk flour and salt in another bowl. Add this mix to the yeast mixture until a dough forms. 3. Knead the dough on a floured surface for about 5 minutes. It should feel smooth and elastic. 4. Place dough in a greased bowl, cover it, and let it rise for about 1 hour until it doubles in size. 5. Preheat your oven to 425°F (220°C) and line a baking sheet with parchment paper. 6. Punch down the dough and roll it into a rope. Cut it into 1-inch pieces. 7. Boil water with baking soda in a pot. Add the pretzel bites in batches for 30 seconds, then place them on the sheet. 8. Brush with a beaten egg, then sprinkle cinnamon sugar on top. 9. Bake for 10-12 minutes until golden brown. If you don't have active dry yeast, try instant yeast. It works the same but doesn’t need proofing. You can also use baking powder for a quick dough. Use 1 tablespoon baking powder for every packet of yeast. The dough will not rise as much, but it will still taste good. Yes, you can freeze pretzel bites. After boiling and before baking, place them on a baking sheet in a single layer. Freeze until solid, then transfer to a freezer bag. To thaw, place them in the fridge overnight. Bake directly from frozen, adding a few extra minutes to the baking time. Cinnamon sugar pretzel bites last up to 2 days at room temperature. Store them in an airtight container. For longer storage, freeze them. When ready to eat, just reheat in the oven for a few minutes to regain that fresh-baked taste. Making cinnamon sugar pretzel bites is a fun and easy task. You learned how to prepare and shape the dough, boil it, and bake until golden. I shared tips to perfect your dough and ideas for storage and serving. Experimenting with flavors and variations makes these bites even more exciting. Enjoy these treats warm and fresh. With proper care, they will delight you and your guests time after time. Now, get in the kitchen and start your pretzel-making adventure!

Cinnamon Sugar Pretzel Bites Tasty Homemade Treat

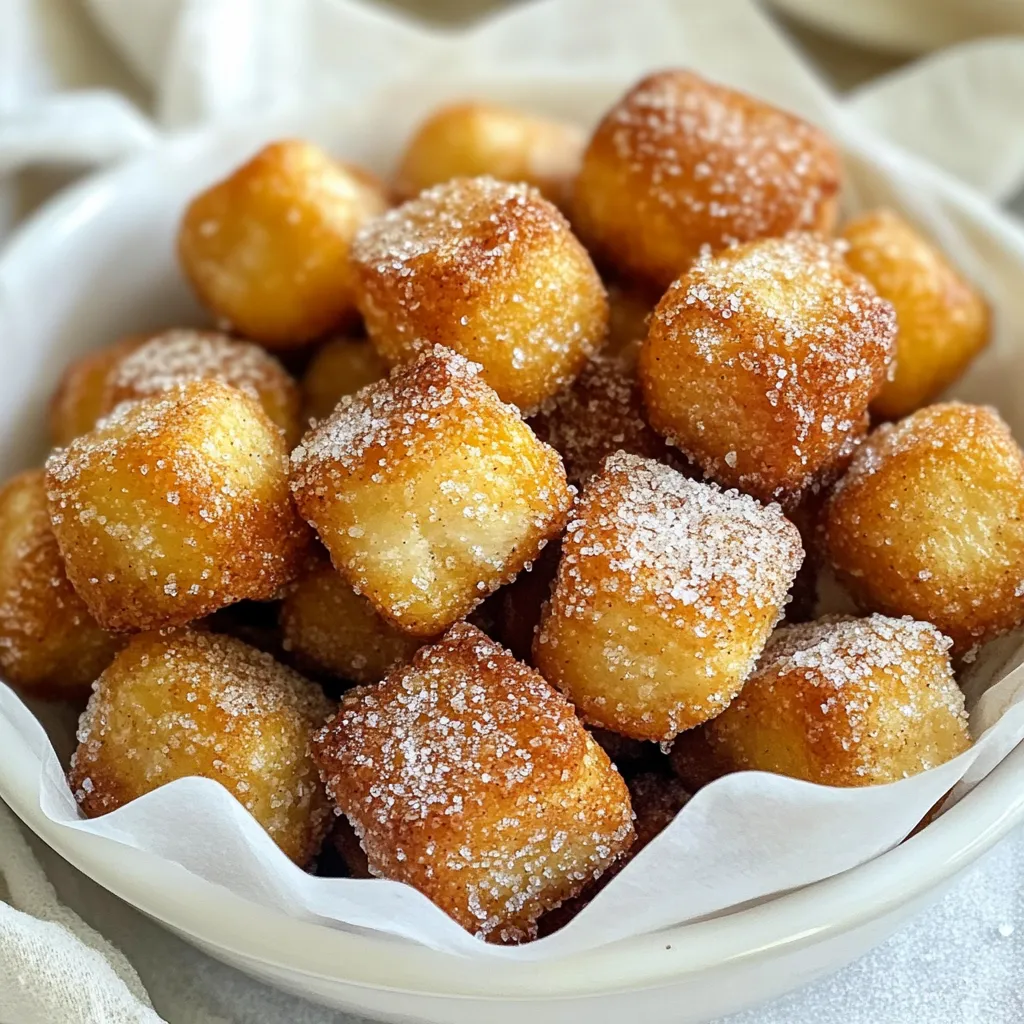
Craving a sweet and salty snack? Try making Cinnamon Sugar Pretzel Bites! These tasty bites are easy to make and

- 4 large bell peppers (any color) - 1 cup quinoa, rinsed and drained - 2 cups vegetable broth - 1 can (15 oz) chickpeas, rinsed and drained - 1 cup cherry tomatoes, halved - 1/2 cup Kalamata olives, sliced - 1/2 cup feta cheese, crumbled - 1/4 cup fresh parsley, chopped - 1 teaspoon oregano - 1 teaspoon smoked paprika - 2 tablespoons olive oil - Salt and pepper to taste When making Mediterranean stuffed peppers, you start with fresh bell peppers. Their bright colors add joy to any meal. I love using a mix of red, yellow, and green peppers for a colorful dish. Next, quinoa becomes the base of the filling. It’s packed with protein and adds a nice texture. Chickpeas bring a creamy flavor and help fill each pepper. Cherry tomatoes add a sweet burst. Kalamata olives give a briny touch, while feta cheese adds a tangy kick. Fresh parsley adds a pop of color and freshness. Oregano and smoked paprika deepen the flavor. A drizzle of olive oil ties everything together. - Ground turkey or beef - Spinach or kale - Zucchini or eggplant - Different cheeses like mozzarella or goat cheese You can easily customize your stuffed peppers. If you want more protein, add ground turkey or beef. Leafy greens like spinach or kale can boost nutrition. Diced zucchini or eggplant adds veggies to the mix. For cheese lovers, try melting mozzarella or crumbly goat cheese on top. Each serving of Mediterranean stuffed peppers is healthy and filling. They are high in fiber and protein. This recipe serves four, making it great for family meals. Each pepper is low in calories but rich in vitamins. Enjoy this hearty meal that also nourishes your body. {{ingredient_image_1}} First, preheat your oven to 375°F (190°C). This step warms the oven for even cooking. Next, take your bell peppers and cut off the tops. Remove the seeds and membranes inside. Brush the outside of each pepper with olive oil. This adds flavor and helps them brown nicely. Place the prepared peppers aside while you cook the filling. In a medium saucepan, combine 1 cup of rinsed quinoa with 2 cups of vegetable broth. Bring this mixture to a boil over medium heat. Once it boils, lower the heat and cover the pot. Let it simmer for about 15 minutes. After that time, check if the quinoa is fluffy and all the broth is absorbed. If so, remove it from heat and let it cool for a few minutes. In a large mixing bowl, combine the cooked quinoa, chickpeas, cherry tomatoes, Kalamata olives, feta cheese, parsley, oregano, and smoked paprika. Drizzle in a bit of olive oil. Stir it all together until well-mixed. Add salt and pepper to taste. Now, carefully stuff each bell pepper with this tasty filling. Press down lightly to pack it in. Arrange the stuffed peppers upright in a baking dish. If you want, pour a little vegetable broth at the bottom to keep them moist. Cover the dish with aluminum foil and bake for 30 minutes. After that, remove the foil and bake for another 10-15 minutes. This makes the peppers tender and gives them a golden top. Let them cool slightly before serving. To cook quinoa well, start with rinsing it. This removes any bitterness. Use a two-to-one ratio of broth to quinoa. Bring the broth to a boil, then reduce heat. Cover and let it simmer for about 15 minutes. The quinoa is done when it’s fluffy and the liquid is all absorbed. If you want to add more flavor, try cooking quinoa in vegetable broth instead of water. This small change makes a big difference. When choosing bell peppers, look for ones that are firm and shiny. They should feel heavy for their size. Avoid any with soft spots or wrinkles. Color can also affect taste. Red, yellow, and orange peppers are sweeter than green ones. If you want a colorful dish, mix different colors. This makes your meal look more inviting and appetizing. For a great presentation, place the stuffed peppers on a nice platter. Garnish with extra parsley for a fresh pop of color. Drizzle a bit of olive oil on top for shine. You can also add a side of tzatziki sauce. This cool dip complements the warm peppers well. A simple green salad on the side brightens up the meal. It adds a refreshing crunch that balances the hearty stuffed peppers. Pro Tips Choose Colorful Peppers: Using a mix of bell pepper colors not only enhances the visual appeal of the dish but also provides a range of flavors. Prep Ahead: You can prepare the quinoa filling a day in advance and store it in the fridge. This makes assembly quick and easy when you're ready to bake. Adjust Seasoning: Taste the filling before stuffing the peppers. Adjust the seasoning to your preference by adding more herbs or spices. Experiment with Fillings: Feel free to customize the stuffing by adding other ingredients like spinach, artichokes, or nuts for additional textures and flavors. {{image_2}} You can swap the chickpeas for different proteins. Ground turkey or chicken works well. If you prefer plant-based options, try lentils or black beans. Each choice brings its own flavor. These swaps keep the dish healthy and filling. Feel free to add more vegetables to the mix. Spinach, zucchini, or mushrooms add great taste and nutrients. You can even sneak in some finely chopped carrots or celery. These additions make your meal colorful and hearty. Plus, it’s a fun way to use leftovers! This recipe is already gluten-free thanks to quinoa. However, check your ingredients. Make sure the feta cheese and olives are gluten-free. If you want more variety, use rice or gluten-free grains. These options keep your meal safe for those with gluten sensitivities. Store your Mediterranean stuffed peppers in an airtight container. They last up to four days in the fridge. Make sure the peppers are cool before sealing them. If you leave them in the baking dish, cover it tightly with plastic wrap. This keeps the peppers fresh and tasty. To freeze, let the stuffed peppers cool completely. Wrap each pepper in plastic wrap, then place them in a freezer bag. They can stay in the freezer for up to three months. When ready to eat, you can thaw them in the fridge overnight. This keeps their flavor and texture. Reheat your stuffed peppers in the oven for the best results. Preheat the oven to 350°F (175°C). Place the peppers in a baking dish and cover with foil. Heat for about 20 minutes or until warm. You can also microwave them for quicker reheating. Just be sure to cover them to avoid drying out. Yes, you can use brown rice instead of quinoa. Brown rice will add a nice, chewy texture. Make sure to adjust the cooking time. Brown rice takes longer to cook than quinoa. It usually needs about 45 to 50 minutes to become tender. So, plan ahead if you choose this option. You can add many spices to boost your stuffed peppers. Consider adding cumin for warmth. A pinch of red pepper flakes can add heat. You might also enjoy some garlic powder for extra depth. Fresh herbs like basil or mint can brighten up the dish, too. Feel free to get creative with your spice choices! Stuffed peppers can last up to four days in the fridge. Make sure to store them in an airtight container. If you want to keep them longer, consider freezing them. They freeze well for up to three months. Just thaw and reheat before serving for a quick meal. This blog covered how to make stuffed peppers, from ingredients to cooking tips. We explored key ingredients like quinoa and optional add-ins. I shared step-by-step instructions to help you achieve tasty results. You learned about substitutions and storage for your leftovers. These stuffed peppers are easy and fun to make. With all the variations, you can keep it fresh each time. Enjoy making this healthy dish that fits your taste!

Mediterranean Stuffed Peppers Flavorful and Hearty Meal

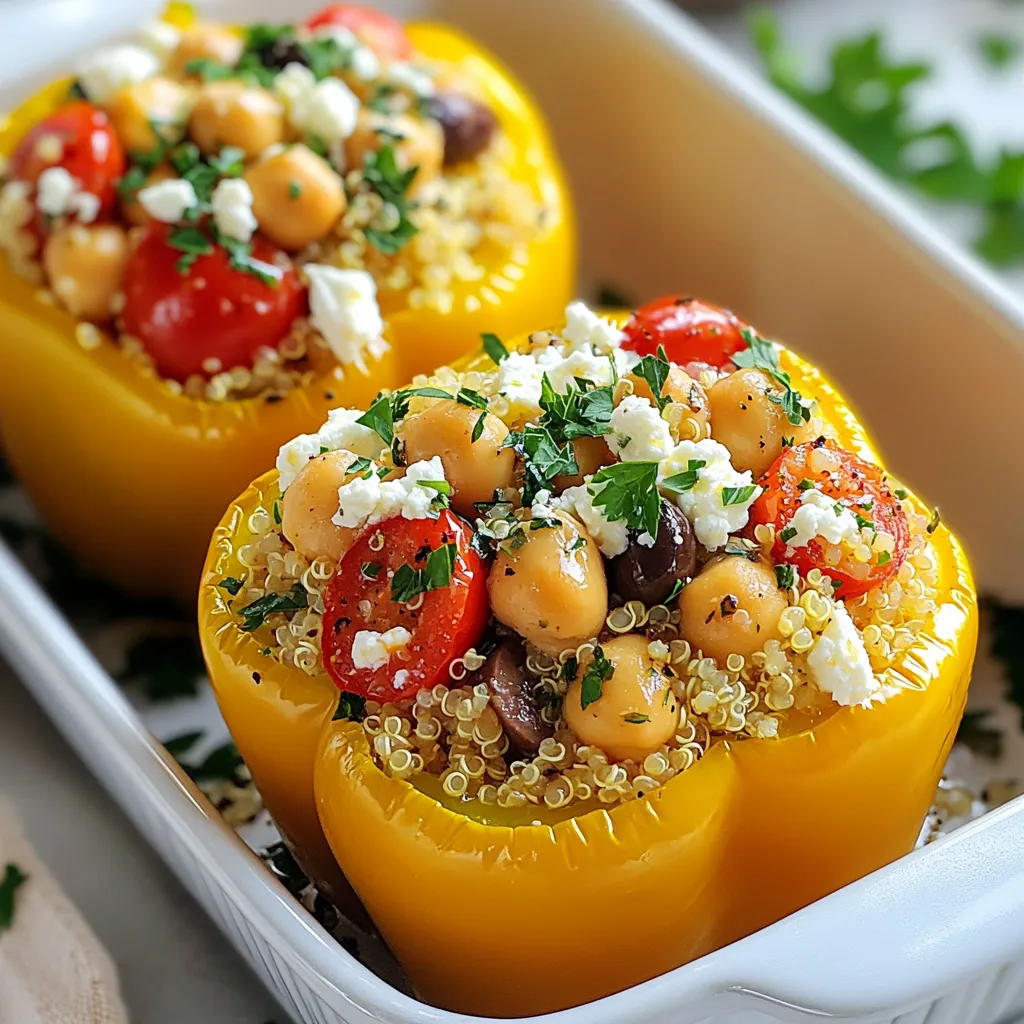
Are you ready to spice up your dinner routine? These Mediterranean stuffed peppers are a tasty and hearty meal that

- 2 cups all-purpose flour - 3 large eggs - 1 teaspoon salt - 1 tablespoon olive oil To make the dough, we need some basic items. The flour gives structure. The eggs add richness, and the olive oil keeps it smooth. Salt enhances the flavors. - 1 cup ricotta cheese - 2 cups fresh spinach, chopped - 1/2 cup grated Parmesan cheese - 1 teaspoon garlic powder - 1/2 teaspoon nutmeg - Salt and pepper to taste For the filling, ricotta cheese brings creaminess. Fresh spinach adds color and nutrients. Parmesan gives a savory kick. Garlic powder and nutmeg add depth. We season with salt and pepper to make it pop. - 1 cup heavy cream - Fresh basil leaves for garnish For the sauce, we use heavy cream for a rich base. It coats the ravioli beautifully. Fresh basil leaves add a bright touch on top. This sauce ties everything together. {{ingredient_image_1}} - First, combine 2 cups of all-purpose flour and 1 teaspoon of salt in a bowl. - Next, create a well in the middle and mix in 3 large eggs and 1 tablespoon of olive oil. - Use a fork to blend the mixture until it forms a ball. Then, knead it by hand for about 5 to 7 minutes. The dough should feel smooth and elastic. Wrap it in plastic wrap and let it rest for 30 minutes. - In a medium bowl, mix 1 cup of ricotta cheese with 2 cups of chopped spinach. - Add 1/2 cup of grated Parmesan cheese, 1 teaspoon of garlic powder, and 1/2 teaspoon of nutmeg. - Season with salt and pepper to your taste. This mix will give your ravioli a creamy and rich flavor. - After resting, divide the dough into four parts. - Roll out one piece at a time until it is thin. Use a pasta machine or a rolling pin, and dust with flour to prevent sticking. - Cut the rolled dough into long strips. Place teaspoons of the filling about 2 inches apart on one strip. - Moisten the edges with water, fold the dough over, and press to seal. Cut between each ravioli with a sharp knife. - Bring a large pot of salted water to a boil. - Carefully drop the ravioli into the water. Cook for 3 to 4 minutes. They are done when they float to the top. - Use a slotted spoon to remove the ravioli and place them on a plate. - In a saucepan, add 1 cup of heavy cream over medium heat. - Simmer for 3 to 5 minutes until the cream thickens slightly. - Season with salt and pepper to enhance the flavor. - Gently toss the cooked ravioli in the creamy sauce until they are well coated. - Serve on plates and garnish with fresh basil leaves. This adds a nice touch and flavor to the dish. To make great ravioli, the dough must have the right feel. It should be smooth and elastic. Here are some tips for perfecting it: - Use a scale to measure 2 cups of flour for accuracy. - Mix flour and salt well before adding eggs and oil. - Knead the dough for about 5-7 minutes. - Let it rest for 30 minutes. This step helps the gluten relax. Common mistakes include using too much flour or not kneading enough. If your dough is too dry, add a tiny bit of water. If too wet, sprinkle in more flour slowly. You can get creative with your filling! Here are some ideas to try: - Swap spinach for kale or arugula for a different taste. - Add mushrooms or ricotta for a richer flavor. - Toss in herbs like thyme or parsley for freshness. To customize your flavors, think about different cheeses. Feta adds a tangy kick, while mozzarella gives a classic taste. Cooking ravioli can be tricky, but here are best practices: - Always boil salted water. This adds flavor to your pasta. - Gently drop ravioli into the pot to avoid splashing. - Cook them for 3-4 minutes. They are done when they float. To avoid sticking, stir gently right after adding them to the water. Also, use a slotted spoon to remove them, letting excess water drain off. Pro Tips Use Fresh Ingredients: Always opt for fresh spinach and high-quality ricotta cheese for the best flavor and texture in your ravioli. Don’t Overfill: When forming the ravioli, be careful not to overfill them. Too much filling can cause the ravioli to burst while cooking. Seal Properly: Ensure the edges of the ravioli are sealed well to prevent the filling from leaking out during cooking. A little water on the edges can help with sealing. Cook in Batches: To avoid overcrowding the pot, cook the ravioli in batches. This ensures they cook evenly and don’t stick together. {{image_2}} You can change the taste of your ravioli by adding herbs. Try fresh basil or parsley for a bright flavor. Oregano gives a nice touch of warmth. You can also use thyme or rosemary for depth. Spices can bring out new flavors too. A pinch of red pepper flakes adds some heat. For a hint of sweetness, sprinkle in some cinnamon. Experimenting with herbs and spices can make your dish unique. While the creamy sauce is rich, you can switch it up. A garlic cream sauce pairs well with the ravioli. Add some lemon zest for a zingy twist. If you prefer tomato-based sauces, try marinara or a vodka sauce. These sauces can balance the richness of the filling. You can even add fresh vegetables to your sauce for extra flavor and nutrition. While spinach and ricotta are classic, you can try new fillings. Ground meat, like beef or chicken, adds heartiness. Mushroom fillings offer a unique earthy flavor. For vegetarian options, consider roasted red peppers or artichokes. You could also use a vegan filling with tofu and nutritional yeast. This makes the dish suitable for various diets. To store uncooked ravioli, place them in a single layer on a floured tray. This keeps them from sticking together. Once they dry for about 30 minutes, transfer them to an airtight container. They can last in the fridge for about two days. For cooked ravioli, let them cool down first. Then, place them in a container with a lid. They will stay fresh for up to three days. Reheat them gently to keep their shape. To freeze uncooked ravioli, follow the same steps as refrigerating. After drying, place them on a tray and freeze until solid. Then, transfer them to a freezer bag. They can last for up to three months. When you want to eat them, do not thaw. Just drop the frozen ravioli into boiling water. They will cook in about 5-6 minutes, a minute longer than fresh ravioli. To keep leftover sauce fresh, store it in a clean jar with a lid. It can last for up to a week in the fridge. Always check for signs of spoilage before using. For longer storage, you can freeze the sauce. Pour it into ice cube trays or freezer bags. This way, you can thaw only what you need. The sauce will last for up to three months in the freezer. It takes about 30 minutes to prep. Cooking adds another 3 to 4 minutes. So, total time is around 1 hour. This includes resting your dough, mixing the filling, and making the sauce. Yes, you can make ravioli in advance! Prepare the ravioli and place them on a baking sheet. Make sure they do not touch each other. Cover them with plastic wrap. You can keep them in the fridge for one day. For longer storage, freeze them. Just remember to cook them straight from frozen. You can serve this dish with a fresh salad. A simple arugula salad works great. Garlic bread also pairs well. For something warm, try sautéed veggies. These sides add color and balance to your meal. Yes, you can use gluten-free flour. Almond flour or a gluten-free blend works well. Just remember, the texture may change a bit. It's best to follow a specific gluten-free pasta recipe for the dough. Absolutely! Look for high-quality fresh or frozen ravioli. Opt for those with spinach and ricotta filling for the best match. This saves time and still tastes great. Just follow the cooking instructions on the package. Making Creamy Spinach Ricotta Ravioli is a rewarding process. You learned about the key ingredients, how to prepare the dough, and create a delicious filling. We explored different sauce options and variations to add flavor. Storing tips ensure your ravioli stays fresh for longer. Enjoy this comforting dish with your own twist. The joy of making ravioli yourself brings happiness to any meal. So, gather your ingredients and start your cooking adventure!

Creamy Spinach Ricotta Ravioli Tasty Meal Idea

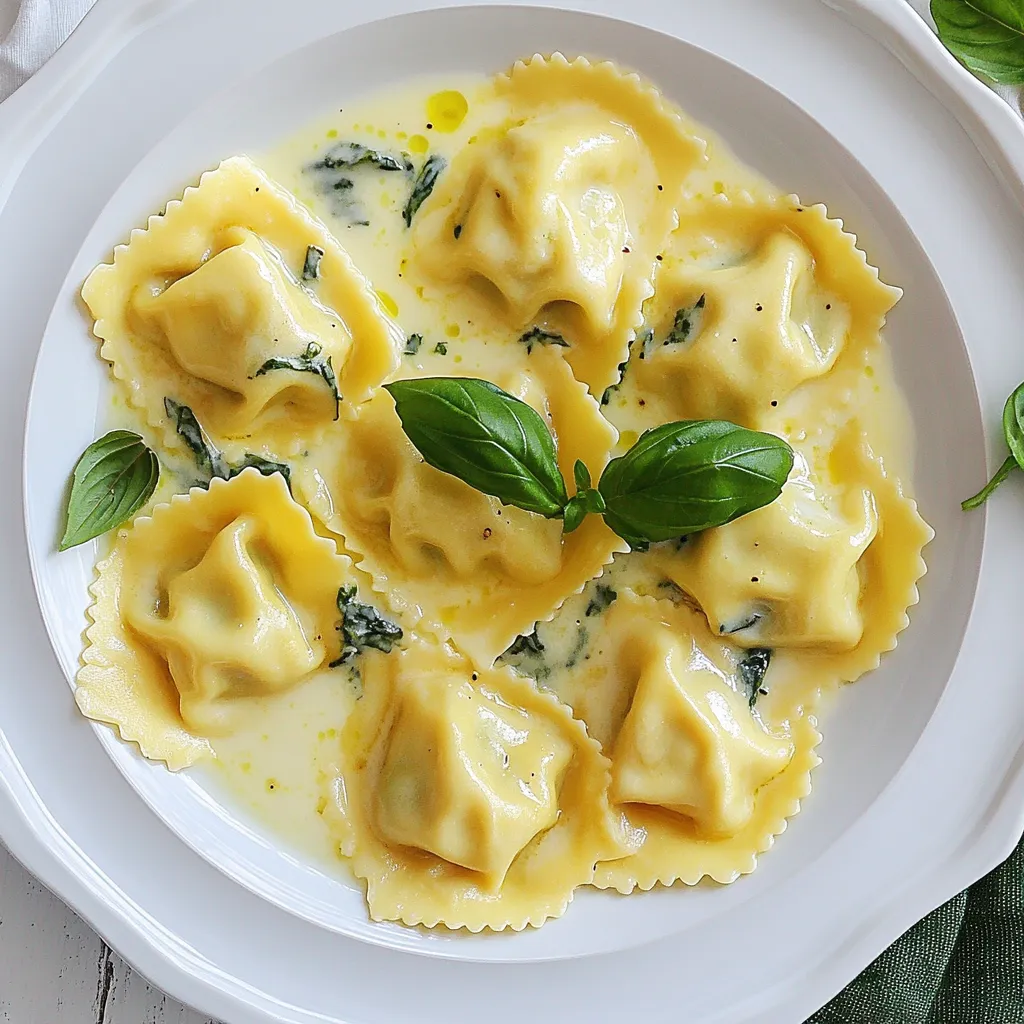
Looking for a delicious meal that’s both easy to make and full of flavor? Look no further! My Creamy Spinach

- 2 pounds baby potatoes, halved - 4 cloves garlic, minced - 1/4 cup grated Parmesan cheese - 3 tablespoons olive oil - 1 teaspoon dried oregano - 1 teaspoon dried thyme - Salt and pepper to taste - Fresh parsley, chopped for garnish To make Garlic Parmesan Roasted Potatoes, you need fresh and simple ingredients. Start with baby potatoes. They are sweet and tender. You'll use two pounds, and halving them helps them cook evenly. Next, garlic adds a bold, savory kick. You’ll need four cloves, minced finely. Parmesan cheese brings a rich, nutty flavor. Use a quarter cup for the best taste. Olive oil is crucial for roasting. Three tablespoons ensure the potatoes get crispy. Dried oregano and thyme bring warm, herbal notes. One teaspoon of each is just right. Don't forget salt and pepper. They enhance all the flavors. Lastly, fresh parsley adds a pop of color and fresh taste as a garnish. Gather these ingredients before you start cooking. It makes the process smooth and fun. Enjoy the simple joy of preparing this tasty dish! {{ingredient_image_1}} First, set your oven to 425°F (220°C). This high heat gets those potatoes nice and crispy. Next, grab a baking sheet and line it with parchment paper. This makes cleanup easy and helps the potatoes not stick. In a big bowl, combine the halved baby potatoes and minced garlic. Use fresh garlic for the best flavor. Then, drizzle the olive oil over the potatoes. Mix well so all the potatoes get coated in the oil. Now, it’s time to add flavor. Sprinkle the grated Parmesan cheese, dried oregano, dried thyme, salt, and pepper over the potatoes. Toss everything together until each potato piece is evenly coated with the seasonings. Spread the seasoned potatoes in a single layer on your prepared baking sheet. Make sure they aren’t crowded. Roast in the oven for about 25-30 minutes. Flip the potatoes halfway through to ensure they cook evenly and get golden brown. After roasting, take them out of the oven. Let the potatoes sit for a couple of minutes. This helps them firm up a bit. Before serving, garnish with chopped fresh parsley for a pop of color and flavor. To get those perfect crispy potatoes, you need a high oven temperature. Preheating your oven to 425°F (220°C) works wonders. This heat helps the outside crisp up nicely while keeping the inside soft. When roasting, flip the potatoes halfway through. This ensures every side gets that golden brown color. Use a spatula to turn them gently. You want them crispy but not smashed. Adding spices and herbs can boost the flavor of your potatoes. I love using dried oregano and thyme, as they pair well with garlic. You can also try adding a pinch of paprika or chili powder for some heat. Choosing the right Parmesan cheese matters too. Freshly grated cheese melts better and adds a richer taste. If you can't find that, look for high-quality pre-grated cheese, but avoid the powdered kind. It lacks flavor. Serve your Garlic Parmesan Roasted Potatoes in a rustic bowl. This adds charm to your meal. You can drizzle a little extra olive oil on top for shine and flavor. For a pop of color, try garnishing with fresh parsley. Chopped parsley adds a fresh look and a hint of herbal taste. A sprinkle of extra Parmesan on top will impress your guests and enhance the dish. Pro Tips Choose the Right Potatoes: Using baby or fingerling potatoes will yield the best results as they have a creamy texture and hold their shape well during roasting. Don't Skip the Garlic: For a more robust garlic flavor, consider roasting the garlic cloves along with the potatoes. This will mellow the flavor and add a delicious sweetness. Even Coating is Key: Make sure to toss the potatoes thoroughly with the olive oil and seasonings. This ensures every piece is well-coated and flavorful. Check for Crispiness: Every oven is different, so keep an eye on the potatoes as they roast. You want them to be golden brown and crispy, which may take a little longer or shorter depending on your oven. {{image_2}} You can boost the cheesy goodness of these potatoes in fun ways. Try adding different types of cheese. Cheddar, mozzarella, or even feta can bring new flavors. Mixing in garlic butter makes each bite rich and savory. It adds a creamy texture that pairs well with crispy potatoes. Fresh herbs bring a bright, fresh taste. You can use rosemary, basil, or chives. They help create a unique flavor for each batch. Seasonal vegetable additions can also make your dish more colorful. Think bell peppers, zucchini, or even cherry tomatoes. These veggies not only taste great but also add nutrition. Want a quicker way to cook? The air fryer method is perfect. It crisps the potatoes quickly and uses less oil. You can also try grilling these potatoes in the summer. Just toss them in a grill basket. The smoky flavor from the grill gives them a delicious twist. Store any leftover Garlic Parmesan Roasted Potatoes in the fridge. Use an airtight container to keep them fresh. Glass or plastic containers with tight-fitting lids work well. This helps reduce moisture loss and keeps the flavor intact. Try to eat them within three days for the best taste. You can reheat your potatoes in the oven or microwave. The oven gives the best crispiness. Preheat it to 400°F (200°C). Spread the potatoes on a baking sheet and heat for about 10-15 minutes. Flip them halfway to ensure even heating. If you choose the microwave, place them in a microwave-safe dish. Heat in short bursts, checking often. This method may make them softer, so use it only if you're in a hurry. You can freeze roasted potatoes, but they lose some texture. First, let them cool completely. Then, place them in a single layer on a baking sheet. Freeze until solid, about one hour. After that, transfer them to a freezer bag. Squeeze out as much air as possible to prevent freezer burn. To thaw, put them in the fridge overnight. Reheat in the oven to regain some crispness. You roast the potatoes for 25 to 30 minutes. This time gives you crispy and golden results. Flip the potatoes halfway through to ensure even cooking. Keep an eye on them in the last few minutes. You want them to be perfectly browned, not burnt. Yes, you can use larger potatoes, but you need to cut them smaller. Halve or quarter them to match the size of baby potatoes. This helps them cook evenly. Larger pieces will take longer to roast, so check for doneness after 30 minutes. These potatoes pair well with many dishes. Try serving them with grilled chicken or steak. They also go great with a fresh salad or steamed veggies. For a fun twist, serve them with a dipping sauce, like ranch or garlic aioli. Yes, you can make this dish dairy-free. Use a dairy-free cheese alternative instead of Parmesan. Nutritional yeast is a great option for a cheesy flavor. Another choice is to simply skip the cheese and add extra herbs for flavor. This blog post covered how to make delicious Garlic Parmesan Roasted Potatoes. We went through the ingredients, step-by-step instructions, and tips for perfecting your dish. You learned about variations and how to store leftovers effectively. Now, you can enjoy a tasty side dish that impresses everyone at your table. Get cooking and have fun experimenting with flavors! These potatoes are easy to make and always satisfying.

Garlic Parmesan Roasted Potatoes Flavorful Side Dish

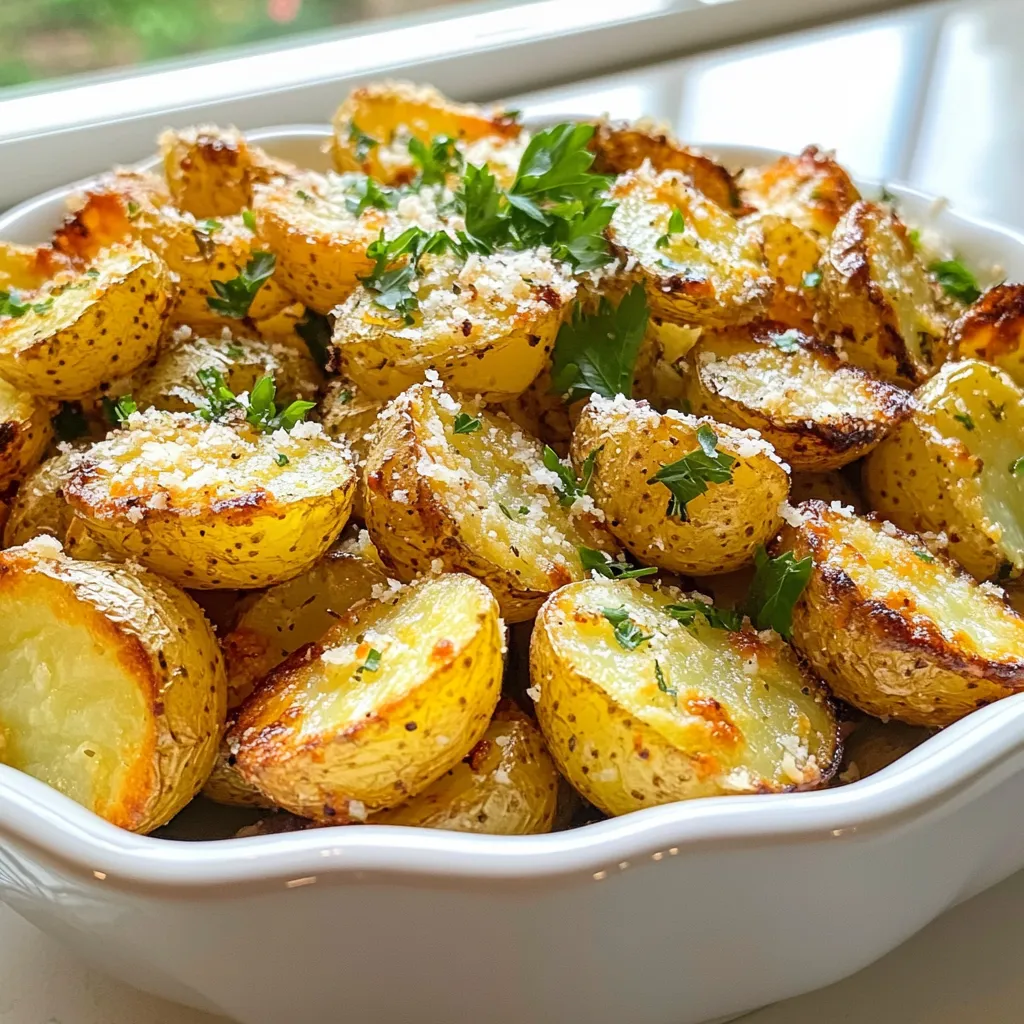
Looking for a tasty side dish? Garlic Parmesan Roasted Potatoes are your answer! These golden bites combine crispy potatoes with

To make Coconut Lime Chicken, you'll need the following main ingredients: - 4 boneless, skinless chicken breasts - 1 can (14 oz) coconut milk - 2 limes (zest and juice) - 3 tablespoons honey - 4 garlic cloves, minced - 1 teaspoon ground ginger - 1 teaspoon salt - ½ teaspoon black pepper - 1 tablespoon olive oil These ingredients come together to create a dish that is tasty and simple. The chicken is juicy, and the flavors are bright and fresh. The marinade is key to this dish. It features coconut milk, lime zest, lime juice, honey, minced garlic, ground ginger, salt, and black pepper. - Coconut milk adds creaminess and a slight sweetness. - Lime zest and juice provide a zesty kick and freshness. - Honey balances the tartness with a touch of sweetness. - Garlic and ginger add depth and warmth to the flavor. This marinade helps tenderize the chicken and infuses it with flavor. Marinating for at least one hour gives the best results. You can elevate your Coconut Lime Chicken with a few simple garnishes and sides: - Fresh cilantro, chopped (for garnish) - Lime wedges (for serving) - Fluffy jasmine rice (to soak up the sauce) Garnishing with cilantro adds color and freshness. Serving with rice makes each bite even more delightful. These options enhance the meal and make it visually appealing. {{ingredient_image_1}} To make the marinade, grab a mixing bowl. Whisk together these ingredients: - 1 can (14 oz) coconut milk - Zest and juice of 2 limes - 3 tablespoons honey - 4 minced garlic cloves - 1 teaspoon ground ginger - 1 teaspoon salt - ½ teaspoon black pepper Mix until smooth. This marinade brings out amazing flavors in the chicken. Now, take your four boneless, skinless chicken breasts. Place them in a large zip-top bag or a shallow dish. Pour half of your coconut lime marinade over the chicken. Seal the bag or cover the dish. Marinate in the fridge for at least 1 hour. For even more flavor, marinate overnight. You can cook the chicken in two ways: grilling or pan-searing. For grilling: 1. Preheat your grill to medium heat. 2. Remove the chicken from the marinade and toss the used marinade. 3. Grill each piece for about 6-7 minutes on each side. 4. Check that the internal temperature reaches 165°F. You want nice grill marks! For pan-searing: 1. Heat a skillet over medium heat. 2. Add 1 tablespoon of olive oil. 3. Sear the chicken for 6-7 minutes on each side. 4. Again, check that the chicken hits 165°F. Either method works great. I love grilling for those smoky flavors, but pan-searing is quick and easy too. To get the best flavor, start with fresh ingredients. Use ripe limes for juice and zest. The honey adds a nice sweetness. Let the chicken marinate for at least one hour. For more flavor, marinate it overnight. This lets the chicken absorb the tasty coconut lime mix. Make sure your grill or skillet is hot before adding the chicken. This helps create a nice crust. Cook the chicken for about 6-7 minutes on each side. Use a meat thermometer to check the temperature. The chicken should reach 165°F. Let it rest for a few minutes after cooking. This keeps the chicken juicy and flavorful. Serve the chicken on a big platter. Drizzle the thickened sauce all over the top. Garnish with fresh cilantro for a pop of color. Add lime wedges for extra zing. Pair it with fluffy jasmine rice. The rice soaks up the coconut lime sauce perfectly. You can also add a side of steamed veggies for a complete meal. Pro Tips Marinate Longer for Flavor: For the best flavor, marinate the chicken overnight. This allows the flavors to penetrate deeper into the meat, resulting in a more flavorful dish. Use Fresh Ingredients: Always opt for fresh limes and garlic for a brighter, more vibrant taste. Fresh ingredients can elevate the overall flavor profile of the dish. Check Chicken Temperature: Ensure the chicken is fully cooked by using a meat thermometer. The internal temperature should reach 165°F for safe consumption. Garnish for Presentation: Garnish with additional lime wedges and cilantro right before serving. This adds a pop of color and enhances the visual appeal of the dish. {{image_2}} You can easily add vegetables to your Coconut Lime Chicken. I like to use bell peppers, zucchini, and snap peas. They add color and crunch. Start by slicing the veggies into bite-sized pieces. Toss them with the remaining marinade. When the chicken is almost done cooking, add the veggies to the grill or skillet. Cook them until they are tender and bright. This makes a complete meal that is tasty and healthy. If you want to switch things up, try other proteins. Shrimp or tofu work great with this recipe. For shrimp, marinate them just like the chicken. Cook them for about 3-4 minutes on each side. Tofu can be cubed and marinated. Grill or pan-sear until golden brown. Both options soak up the coconut lime flavor well. You can enjoy a new twist on this dish! For those who love heat, you can make Spicy Coconut Lime Chicken. Add red pepper flakes or diced jalapeños to the marinade. This gives a kick to the dish. When the chicken cooks, it will have a nice spicy flavor. You can also serve it with a side of cooling yogurt sauce. This balance makes every bite exciting and flavorful. To store leftover Coconut Lime Chicken, let it cool first. Place the chicken in an airtight container. Make sure to cover it well. Store it in the fridge for up to three days. This keeps the chicken fresh and tasty. Always label the container with the date for easy tracking. When you're ready to enjoy leftovers, you can reheat the chicken. The best way is in the oven or on the stove. For oven reheating, preheat to 350°F. Place the chicken on a baking dish and cover it with foil. Heat for about 15-20 minutes. If using the stove, warm the chicken in a skillet over medium heat. Add a splash of coconut milk to keep it moist. Always check that the chicken reaches 165°F before eating. You can freeze Coconut Lime Chicken for later. First, let it cool completely. Wrap each piece tightly in plastic wrap, then place them in a freezer bag. Remove as much air as possible. Label the bag with the date. This chicken can last up to three months in the freezer. To thaw, place it in the fridge overnight before reheating. Yes, you can use frozen chicken breasts. Just remember to thaw them first. Thawing helps the marinade soak in better. You can leave them in the fridge overnight. If you are in a hurry, place them in cold water for faster thawing. Coconut Lime Chicken pairs well with many sides. Here are some options: - Jasmine rice to soak up the sauce - Steamed broccoli for a green touch - Grilled veggies for a colorful plate - Quinoa for a healthy grain choice - A fresh salad with lime vinaigrette To check if the chicken is done, use a meat thermometer. The internal temperature should reach 165°F. If you don’t have a thermometer, cut into the thickest part. The meat should be white, not pink. Juices should run clear, not red. Yes, this recipe is already dairy-free! It uses coconut milk, which adds creaminess without dairy. This makes it a great option for lactose-free diets. Enjoy the rich flavor without any concerns! Coconut lime chicken is a tasty dish full of flavor. We discussed key ingredients and how to marinate the meat. You learned two cooking methods: grilling and pan-searing. I shared tips for juicy chicken, serving ideas, and even ways to store leftovers. You can mix it up with veggies or spice it up. This dish fits every taste and is easy to make. Enjoy this delicious recipe anytime!

Coconut Lime Chicken Flavorful and Easy Recipe Guide

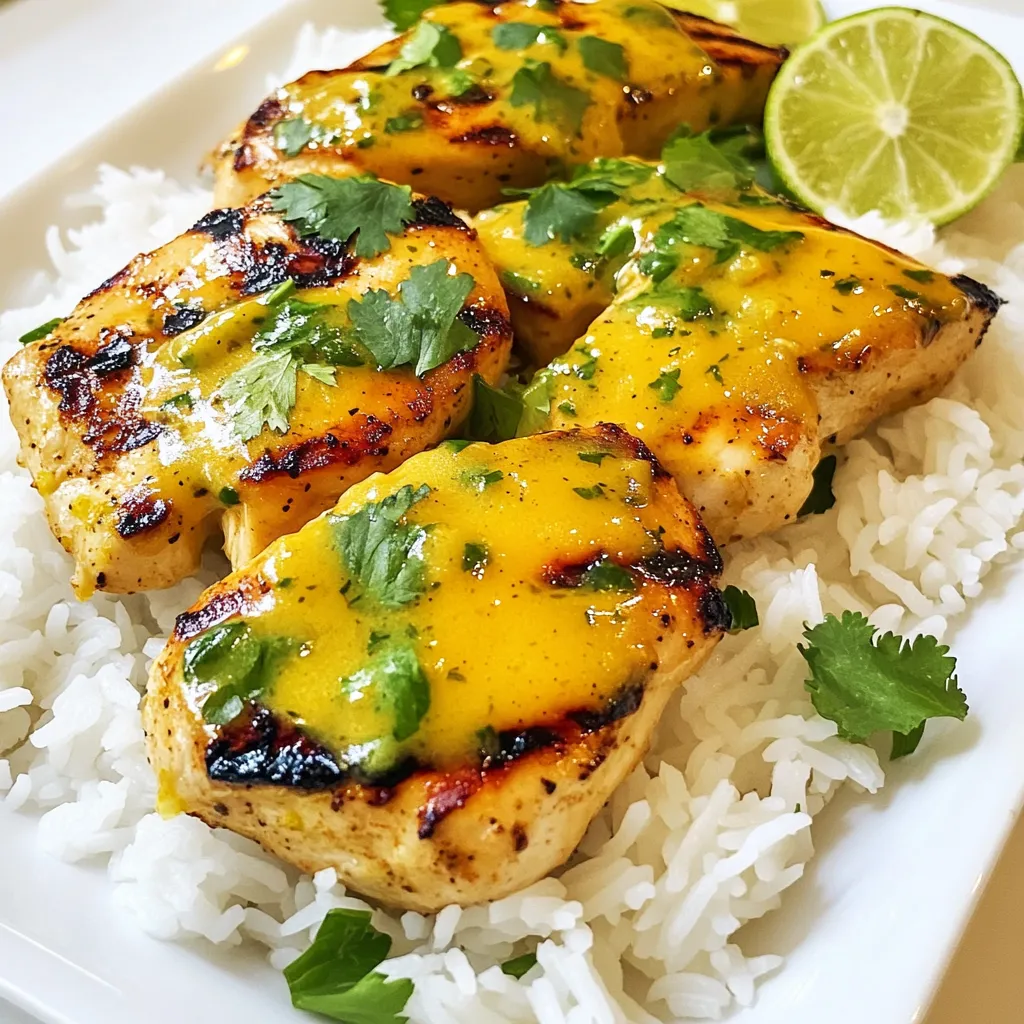
Are you ready to enjoy a burst of tropical flavor? This Coconut Lime Chicken recipe is simple yet packed with

- 200g (7 oz) feta cheese - 300g (10.5 oz) penne pasta - 2 cups cherry tomatoes, halved - 1/4 cup olive oil - 4 cloves garlic, minced - 1 teaspoon dried oregano - 1/2 teaspoon red pepper flakes (adjust to taste) - Salt and pepper to taste - Fresh basil leaves for garnish - Grated Parmesan cheese for serving These ingredients create a simple yet delicious dish. The feta cheese adds creaminess. The cherry tomatoes burst with flavor after baking. Olive oil and garlic bring richness and depth. You can add a few optional ingredients to enhance the taste. Try adding: - Spinach for a boost of greens - Kalamata olives for a salty kick - Lemon zest for brightness - Pine nuts for crunch These additions can change the dish's flavor profile. Feel free to mix and match based on your taste. Baked Feta Pasta is not just tasty; it's also filling. Here’s a simple breakdown of the nutrition per serving: - Calories: Roughly 400 - Protein: 15g - Carbohydrates: 50g - Fat: 18g - Fiber: 3g This dish provides a good balance of carbs and fats. It can be part of a healthy meal plan. Adjust portions based on your dietary needs. {{ingredient_image_1}} First, gather your ingredients. You will need feta cheese, penne pasta, cherry tomatoes, and some spices. This dish is simple yet packed with flavor. Preheat your oven to 400°F (200°C) to get started. In a large baking dish, add the halved cherry tomatoes. Next, mix in minced garlic, olive oil, dried oregano, and red pepper flakes. Toss everything well. This helps the tomatoes soak in all that flavor. Place the block of feta cheese in the center. Drizzle some olive oil on top of the feta for extra richness. Bake this in the oven for about 25 minutes. The feta will soften, and the tomatoes will burst. While the feta and tomatoes bake, bring a pot of salted water to a boil. Add the penne pasta and cook it until it is al dente. This usually takes about 8 to 10 minutes, but check the package for exact times. Once cooked, drain the pasta and set it aside. When the feta and tomatoes are done, take them out of the oven. Use a fork to mash the feta and tomatoes together. This creates a creamy sauce. Add the cooked pasta to the dish and toss everything together. Make sure the pasta is well coated. Adjust the seasoning with more salt and pepper if desired. Serve warm with fresh basil and grated Parmesan on top. Enjoy your creamy baked feta pasta! To get a creamy sauce, start with high-quality feta cheese. Use a block of feta instead of crumbled. Block feta melts better and gives a smoother texture. When you mash the baked feta and tomatoes together, be gentle. This helps blend the flavors without losing the creaminess. Adding a splash of pasta water can also help. The starchy water mixes well and makes the sauce even creamier. When baking feta, ensure the oven is hot. Preheat to 400°F (200°C) for best results. Place the feta in the center of the dish, surrounded by tomatoes. This allows the cheese to soak in all the flavors. Drizzle olive oil over the top to keep it moist. Bake until the feta is soft and the tomatoes burst. This creates a rich, flavorful base for your pasta. You can easily swap out some ingredients. If you don't have penne, use any pasta you love. Bowtie or rotini work well too. For garlic lovers, add more minced garlic for a stronger flavor. Don't have cherry tomatoes? You can use diced regular tomatoes instead. If you want a twist, try adding olives or capers for a Mediterranean touch. Pro Tips Use High-Quality Feta: Opt for a block of high-quality feta cheese to achieve the creamiest texture and best flavor when baked. Customize Your Veggies: Feel free to add other vegetables like bell peppers or zucchini to the baking dish for extra flavor and nutrition. Reserve Pasta Water: Save a cup of pasta cooking water before draining; you can use it to adjust the sauce's consistency if needed. Garnish for Flavor: Top the dish with toasted pine nuts or a drizzle of balsamic glaze for an added layer of flavor and texture. {{image_2}} For a touch of the Mediterranean, consider adding olives and artichokes. Kalamata olives bring a salty burst. Artichokes add a nice texture. You can also include roasted red peppers for sweetness. These extras enhance the flavor and make your dish more colorful. Penne is great, but you can use other pasta types. Fusilli or farfalle work well, too. If you want a lighter option, try zucchini noodles or spaghetti squash. These choices keep the dish fresh and fun. You can even use whole wheat pasta for added fiber. To make this dish vegetarian, simply skip the cheese or replace it with a plant-based feta. Cashew cheese is a tasty alternative. If you're vegan, use nutritional yeast for a cheesy flavor. Adding more vegetables, like spinach or bell peppers, boosts nutrition and flavor. You can adjust the spices to keep the dish exciting. To store your baked feta pasta, let it cool down first. Use an airtight container. This helps keep the dish fresh. You can store it in the fridge for up to four days. If you want to keep it longer, consider freezing it. Use a freezer-safe container and make sure to label it. When you are ready to eat, reheat the pasta gently. Use a microwave-safe bowl and cover it with a damp paper towel. Heat in short intervals, stirring in between. You can also reheat it on the stove. Add a splash of water or olive oil to keep it moist. Stir until it is warmed through. Baked feta pasta lasts about four days in the fridge. If you freeze it, it can last up to three months. However, the texture may change after freezing. For best flavor and texture, eat it within a month of freezing. Always check for any signs of spoilage before eating. Baked feta pasta is a creamy dish made with feta cheese and pasta. You bake feta with cherry tomatoes, garlic, and spices. Once baked, it turns into a rich sauce. You mix this with cooked pasta for a delicious meal. Yes, you can prepare Baked Feta Pasta ahead of time. Cook the pasta and bake the feta and tomatoes. Let them cool and store them in the fridge. When ready to eat, warm it up in the oven. Baked feta pasta can be a healthy choice. It includes tomatoes, which are rich in vitamins. Feta cheese provides protein and calcium. You can adjust oil and cheese to make it lighter. You can use other cheeses if you prefer. Goat cheese or cream cheese work well. They will change the flavor but still create a creamy dish. To make Baked Feta Pasta gluten-free, use gluten-free pasta. Many types are available, like rice or corn-based pasta. Follow the same steps in the recipe for a tasty dish. Baked Feta Pasta is easy to make and full of flavor. We covered key ingredients and optional ones for extra taste. Step-by-step, I showed you how to bake feta, cook pasta, and achieve a creamy sauce. You learned about storage, reheating, and even variations like vegetarian options. Now, you can try this dish any way you like. Enjoy creating your own version of this tasty meal!

Baked Feta Pasta Creamy and Simple Dinner Recipe

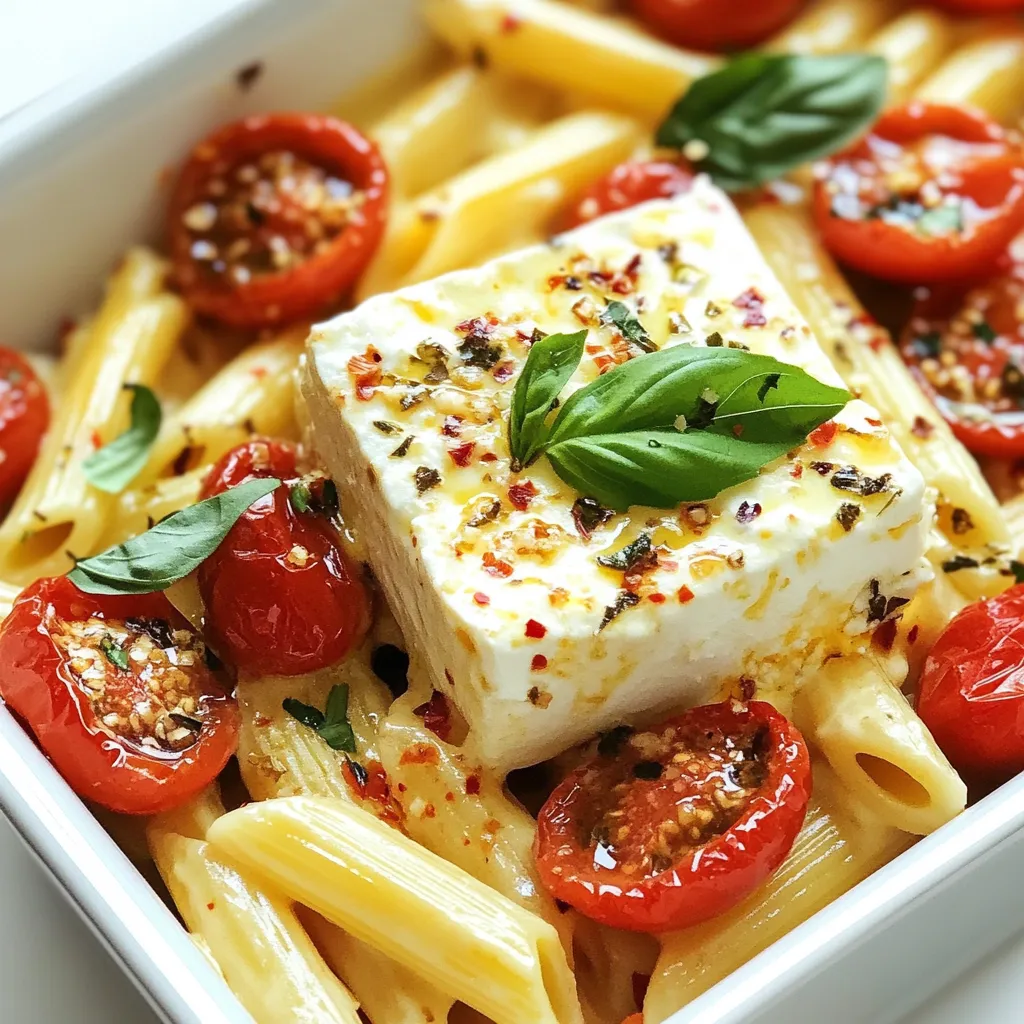
If you’re seeking a quick and creamy dinner that packs a punch, Baked Feta Pasta is your answer. This simple

Older posts
Newer posts
← Previous Page1 … Page128 Page129 Page130 Next →
© 2025 My Cooking Cast • Built with GeneratePress

Our Policies

  • Privacy Policy
  • GDPR Policy
  • Terms Of Use
  • Copyright Policy
  • Cookie Policy
  • Disclaimer

More Information​

  • Home
  • Contact
  • About
  • Dinner
  • Appetizers
  • Dessert
©2025, My Cooking Cast About Privacy Policy Back To Top