Skip to content
DisclaimerTerms Of UseGDPR PolicyCookie Policy

My Cooking Cast

  • Home
  • Drinks
  • Appetizers
  • Dinner
  • Dessert
  • About
  • Contact
  • Privacy Policy
DisclaimerTerms Of UseGDPR PolicyCookie Policy

Emma

- 2 lbs ripe tomatoes, halved - 1 medium onion, quartered - 4 cloves garlic, unpeeled - 2 tablespoons olive oil - Salt and pepper to taste - 1 teaspoon sugar (optional, to balance acidity) - 4 cups vegetable broth - 1 cup fresh basil leaves, chopped - 1/2 cup heavy cream (optional for creaminess) These ingredients form the base of a great soup. The ripe tomatoes give a sweet and fresh flavor. The onion adds depth, while garlic brings a nice aroma. Olive oil helps with roasting. You can play with amounts to fit your taste. - Fresh herbs like thyme or parsley - A pinch of red pepper flakes for heat - A squeeze of lemon juice for brightness Adding these optional items can take your soup to the next level. Fresh herbs add layers of flavor. Red pepper flakes give a hint of spice. Lemon juice brightens the taste, balancing the sweetness. Fresh tomatoes are the best choice for this soup. They add bright, vibrant flavors. When tomatoes are in season, they are juicy and full of taste. However, canned tomatoes can work well too. They are convenient and often cheaper. Choose whole, peeled tomatoes for great results. If using canned, look for options with no added salt or sugar. {{ingredient_image_1}} Start by gathering all your ingredients. You need 2 pounds of ripe tomatoes, 1 medium onion, and 4 cloves of garlic. Halve the tomatoes and quarter the onion. Leave the garlic unpeeled for now. Place them on a large baking sheet. Drizzle 2 tablespoons of olive oil over them. Sprinkle salt and pepper to taste. If you want to balance the soup's acidity, add 1 teaspoon of sugar. This step sets the stage for rich flavors. Preheat your oven to 400°F (200°C). Once it’s ready, place the baking sheet in the oven. Roast the veggies for about 30 to 35 minutes. You want the tomatoes to become soft and caramelized. This roasting brings out their sweetness. When done, take the sheet out and let the vegetables cool a bit. Squeeze the garlic from its skins and discard the skins. This process adds depth to the soup. In a large pot, combine the roasted tomatoes, onion, and garlic with 4 cups of vegetable broth. If you added sugar, toss it in now. Heat the pot over medium until it boils. Once boiling, reduce the heat and let it simmer for 10 to 15 minutes. This step allows the flavors to mingle. After simmering, use an immersion blender to puree the soup until it’s smooth. If you don’t have an immersion blender, carefully transfer the soup to a regular blender. Stir in 1 cup of chopped fresh basil leaves. If you want a creamy texture, add 1/2 cup of heavy cream. Let it simmer for another 5 minutes. Taste your soup and adjust the seasoning with salt and pepper as needed. Enjoy your flavorful creation! Tomatoes can be very acidic. To balance this, I suggest adding sugar. Just one teaspoon can help. You can also add a pinch of baking soda. This changes the soup’s pH and lessens the acidity. Taste as you go to find what you like best. For a creamy soup, use heavy cream. Add it near the end. If you prefer a thinner soup, add more vegetable broth. If it's too thick, just blend in more broth until you reach your desired thickness. Always blend until smooth for the best texture. You can change the flavor with different herbs. Try thyme or oregano for a new twist. A splash of balsamic vinegar adds depth. For a spicy kick, add red pepper flakes. Experiment to find what you love. Pro Tips Choose the Right Tomatoes: Use ripe, flavorful tomatoes for the best taste. Heirloom or vine-ripened varieties work wonderfully in this recipe. Don't Skip the Garlic: Roasting the garlic unpeeled enhances its sweetness and mellows the flavor, adding depth to your soup. Adjust Acidity: If your tomatoes are particularly acidic, a teaspoon of sugar can help balance the flavors without making the soup sweet. Garnish Creatively: Elevate your presentation with garnishes like croutons, a sprinkle of parmesan cheese, or a drizzle of balsamic reduction for added flavor and visual appeal. {{image_2}} You can easily make this soup vegan. Omit the heavy cream and use vegetable broth. The fresh tomatoes and basil bring a burst of flavor. You can also add a splash of coconut milk for creaminess. This option keeps the soup rich without dairy. This soup is naturally gluten-free! All the basic ingredients are safe. Just be sure to check your broth. Some brands may add gluten. Stick with a certified gluten-free vegetable broth for safety. Want to make your soup heartier? Add protein! You can mix in shredded chicken. It adds flavor and makes the soup filling. If you prefer a plant-based option, try beans. Cannellini or chickpeas work well. Just stir them in before blending. They'll add texture and nutrients. To store leftover soup, let it cool first. Once cooled, pour it into an airtight container. Make sure to seal it well. Store the soup in the fridge for up to five days. Label the container with the date to keep track of freshness. You can freeze this soup for later. Use freezer-safe containers or bags. Leave some space at the top, as the soup will expand when frozen. It can last in the freezer for up to three months. When you are ready to eat, thaw it in the fridge overnight. Reheat the soup gently to keep its taste. Use a pot on low heat, stirring often. You can also use a microwave if you’re short on time. Add a splash of water or broth to keep it from being too thick. Taste and adjust the seasoning before serving. Yes, you can use dried basil. It has a stronger taste than fresh. Use about one tablespoon of dried basil for each cup of fresh. Add it when you blend the soup. This way, it can mix well with the other flavors. Dried basil works great, but the soup will taste best with fresh basil. Fresh basil adds a bright, herby taste that dried basil cannot match. Roasted tomato basil soup can last for about four to five days in the fridge. Make sure to store it in an airtight container. This keeps it fresh and tasty. If you notice any sour smell or change in color, it’s best to toss it out. Reheating the soup is easy. Just warm it on the stove or in the microwave until hot. Absolutely! You can make roasted tomato basil soup ahead of time. Just let it cool completely before you store it. Then, put it in the fridge or freezer. If you freeze it, it can last for up to three months. When you’re ready to eat, thaw it overnight in the fridge. Then, reheat it gently on the stove. You might want to add a splash of cream or a bit more basil when you serve it. Roasted tomato basil soup is easy and rewarding to make. We covered key ingredients, cooking steps, and helpful tips. You learned how to choose between fresh and canned tomatoes. We also explored tasty variations and storage methods. In the end, making this soup brings warmth and comfort. Enjoy experimenting with flavors and share your love for this dish!

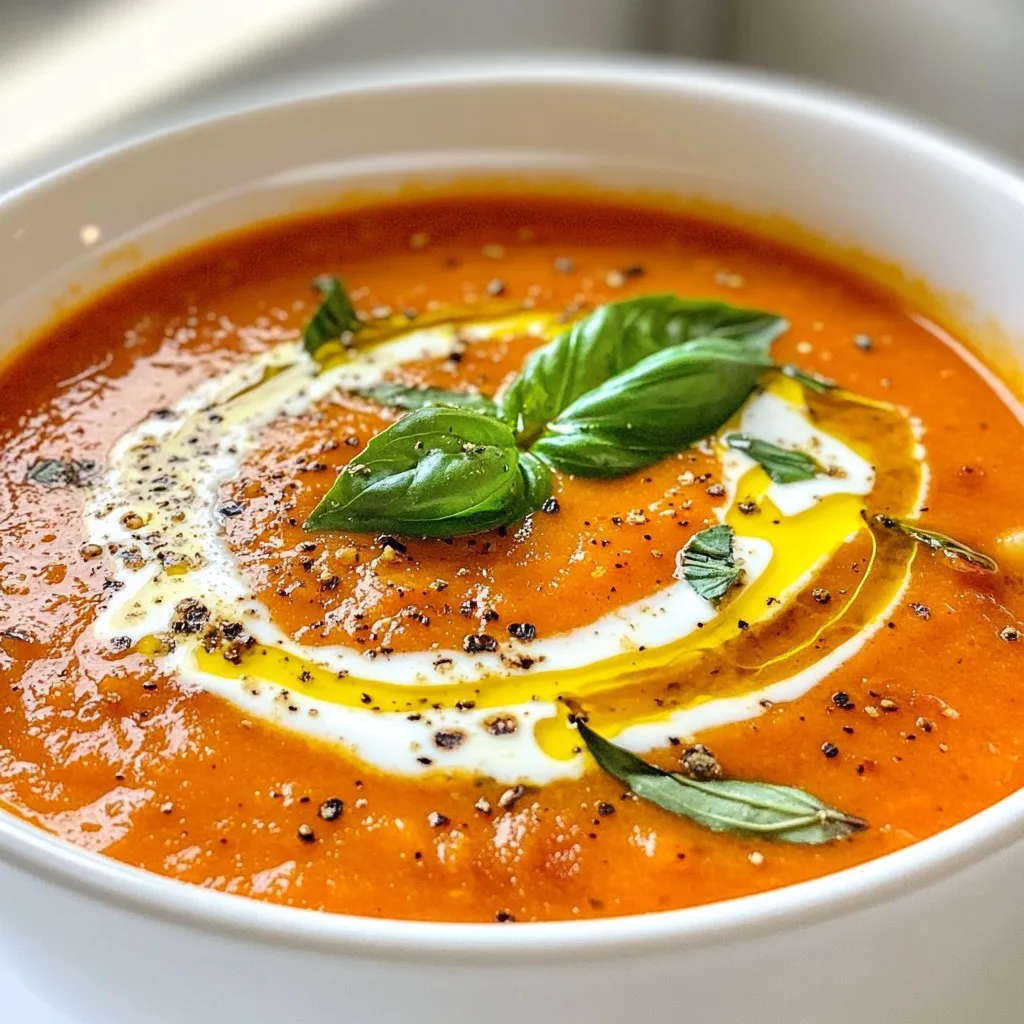
Roasted Tomato Basil Soup Tasty and Simple Recipe

If you crave a warm bowl of comfort, look no further than this Roasted Tomato Basil Soup. It’s simple, tasty,

- 12 oz cream cheese, softened - 1/2 cup pumpkin puree - 2 large eggs - 1/4 cup granulated sugar (for crust) - 1/2 cup granulated sugar - 1 teaspoon ground cinnamon - 1/2 teaspoon ground nutmeg - 1/4 teaspoon ground ginger - 1/4 teaspoon salt These ingredients create a smooth, creamy texture. The cream cheese and pumpkin puree blend well. The eggs help set the filling. The granulated sugar adds sweetness. The spices bring warmth and flavor to each bite. - 1 cup graham cracker crumbs - 1/4 cup unsalted butter, melted The graham cracker crumbs give a crunchy base. The melted butter binds the crumbs together. This combination makes a perfect crust that holds up well. - Whipped cream - Ground cinnamon Whipped cream adds a light touch. It contrasts the dense filling. A sprinkle of ground cinnamon enhances the fall flavors. Together, they create a delightful finish to each mini cheesecake. {{ingredient_image_1}} - Preheat your oven to 325°F (160°C). This helps the cheesecakes bake evenly. - Line a 12-cup muffin tin with paper liners. This step makes removing the cheesecakes simple. - In a medium bowl, combine 1 cup of graham cracker crumbs with 1/4 cup of sugar. This mixture gives a sweet base. - Add 1/4 cup of melted unsalted butter. Mix well until everything combines smoothly. - Press about 1 tablespoon of the crumb mixture firmly into the bottom of each muffin liner. This creates a solid crust. - In a large bowl, beat 12 oz of softened cream cheese until smooth. This step ensures a creamy filling. - Add 1/2 cup of pumpkin puree, 1/2 cup of sugar, and 2 large eggs. Then mix in 1 teaspoon of vanilla extract, 1 teaspoon of ground cinnamon, 1/2 teaspoon of ground nutmeg, 1/4 teaspoon of ground ginger, and 1/4 teaspoon of salt. Beat on low speed until everything is well combined and smooth. - Carefully scoop the pumpkin cheesecake filling into each crust. Fill them about 3/4 full to allow for rising. - Bake the cheesecakes in your preheated oven for 18 to 20 minutes. The centers should be set but still slightly jiggly. - When time is up, turn off the oven and crack the door open. Let the cheesecakes cool in the oven for about 10 minutes. This helps prevent cracks. - After cooling in the oven, remove the cheesecakes and let them cool completely at room temperature. - Once cool, refrigerate them for at least 2 hours or until chilled. This step makes them firm and tasty. - Before serving, top each cheesecake with whipped cream and a sprinkle of ground cinnamon. Enjoy these mini treats! To get the best texture for your mini pumpkin cheesecakes, follow these tips: - Cream Cheese: Make sure the cream cheese is very soft. It should be at room temperature. This helps it mix well and become smooth. - Mixing: Beat the cream cheese well before adding other ingredients. This helps avoid lumps. - Baking Time: Keep an eye on them while they bake. The centers should be set but still slightly jiggly. - Cooling: After baking, let them cool in the oven for a bit. This helps prevent cracks on top. Your mini cheesecakes can look even better with some fun touches: - Serving Plate: Use a colorful or patterned plate. A lovely platter makes them pop. - Toppings: Top with whipped cream for a creamy finish. Add a sprinkle of cinnamon or nutmeg for extra flair. - Drizzle: Try drizzling caramel sauce over them. It adds a sweet touch and looks fancy! - Garnish: A small cinnamon stick on top makes for a lovely decoration. You can swap ingredients if you need to: - Cream Cheese Alternatives: Use mascarpone or a dairy-free cream cheese for a different flavor or for dietary needs. - Sugar Substitutes: For a healthier option, consider using honey or maple syrup. These can add a nice twist to the sweetness. These tips will help you create mini pumpkin cheesecakes that not only taste great but also look amazing! Pro Tips Chill Before Serving: Allow the mini cheesecakes to chill in the refrigerator for at least 2 hours. This helps them firm up and enhances the flavor. Use Room Temperature Ingredients: Ensure your cream cheese and eggs are at room temperature for a smoother batter and better incorporation of ingredients. Don’t Overmix: When combining the filling ingredients, mix just until combined to avoid incorporating too much air, which can lead to cracks. Creative Toppings: Experiment with different toppings like crushed gingersnap cookies or a drizzle of chocolate for a unique flavor twist. {{image_2}} You can easily change up the taste of mini pumpkin cheesecakes. Adding chocolate chips or a drizzle of caramel can make them even more special. If you love nuts, sprinkle some chopped pecans or walnuts on top. Dried fruits like cranberries or raisins also add a fun twist. These small changes can create a new experience each time you bake. Want a gluten-free option? Swap the graham cracker crumbs for crushed gluten-free cookies. This keeps the crust tasty without the gluten. For a vegan version, use dairy-free cream cheese and replace the eggs with flaxseed meal mixed with water. These options let everyone enjoy these treats, no matter their dietary needs. You can make these cheesecakes festive for any holiday. For Halloween, add spooky decorations like candy eyes on top. During Thanksgiving, try adding a sprinkle of nutmeg or a mini pumpkin on each cheesecake. You can also use special toppings like crushed candy canes for Christmas. Each season brings new chances to make these desserts fun and exciting! To store leftovers, place the mini pumpkin cheesecakes in an airtight container. You can layer them with parchment paper to avoid sticking. Keep them in the fridge for up to five days. The flavors will deepen as they chill. This makes each bite even more delightful! For long-term storage, you can freeze these mini cheesecakes. First, let them chill in the fridge for at least two hours. Then, wrap each cheesecake in plastic wrap. Place them in a freezer-safe bag or container. They can stay frozen for up to three months. When you're ready to enjoy, thaw them in the fridge overnight. This helps maintain their smooth texture. These mini cheesecakes are perfect for portion control. Each cheesecake is a single serving, making them easy to share. If you serve a large group, consider making a double batch. You can present them on a large platter for a stunning display. Drizzling caramel sauce on top adds a fun touch! Yes, you can prepare mini pumpkin cheesecakes a few days ahead. Just follow the recipe and chill them in the fridge. They keep well for about three days. This makes them a great choice for busy days or holiday gatherings. Absolutely! Fresh pumpkin can add a nice flavor. Start with a small pumpkin. Roast it until soft, then scoop out the flesh. Blend it smooth to use as pumpkin puree. This fresh touch can elevate your cheesecakes even more. Mini cheesecakes pair well with many drinks. Serve them with coffee, hot cider, or tea. You can also offer a side of chocolate sauce or caramel to drizzle. For a fun twist, add a scoop of vanilla ice cream. To avoid cracks, mix the filling gently. Do not overbeat the eggs. After baking, let the cheesecakes cool in the oven with the door ajar. This slow cooling helps prevent sudden temperature changes that cause cracks. Yes, you can! Simply double all the ingredients. Use a springform pan instead of muffin tins. Bake for 40-50 minutes, or until the center is set. Remember to watch the time closely, as baking longer may dry it out. You learned how to make delicious mini pumpkin cheesecakes from scratch. We covered all the main ingredients, including cream cheese and spices. The step-by-step instructions guided you from preparing the crust to serving with toppings. I also shared tips for baking and storing. Feel free to experiment with flavors and variations to make it your own. Now, it's time to impress your friends and family with your tasty creations! Enjoy every bite of your homemade cheesecake.

Mini Pumpkin Cheesecakes Delightful Fall Dessert Recipe

If you’re craving a sweet treat that captures the essence of fall, look no further! These Mini Pumpkin Cheesecakes are

For this hearty soup, you need the following: - 1 can (15 oz) cannellini beans, drained and rinsed - 1 tablespoon olive oil - 1 onion, finely chopped - 3 cloves garlic, minced - 2 large carrots, diced - 2 celery stalks, diced - 1 teaspoon dried thyme - 1 teaspoon dried rosemary - 4 cups vegetable broth - 1 cup diced tomatoes (canned or fresh) - 2 cups kale, chopped (stems removed) - Salt and pepper, to taste - Fresh basil leaves, for garnish These simple, fresh ingredients create a rich flavor. The cannellini beans provide creaminess. The veggies add color and nutrition. You can customize your soup with these options: - Grated Parmesan cheese - Croutons for crunch - Extra herbs like parsley or oregano - A splash of lemon juice for brightness These garnishes enhance the look and taste of your dish. They also add your personal touch. If you lack some ingredients, don't worry! Here are swaps you can use: - Use navy beans or chickpeas instead of cannellini beans. - Swap olive oil for avocado oil. - Replace kale with spinach or Swiss chard. - Use chicken broth instead of vegetable broth. These substitutions keep the soup tasty while accommodating what you have on hand. You can still enjoy the essence of Tuscan white bean soup. {{ingredient_image_1}} To make your Tuscan white bean soup, start by getting your ingredients ready. Here’s what you need: - 1 can (15 oz) cannellini beans, drained and rinsed - 1 tablespoon olive oil - 1 onion, finely chopped - 3 cloves garlic, minced - 2 large carrots, diced - 2 celery stalks, diced - 1 teaspoon dried thyme - 1 teaspoon dried rosemary - 4 cups vegetable broth - 1 cup diced tomatoes (canned or fresh) - 2 cups kale, chopped (stems removed) - Salt and pepper, to taste - Fresh basil leaves, for garnish Chop the onion, garlic, carrots, and celery. Rinse the beans and chop the kale. This makes cooking easier and faster. Now let’s cook! First, heat the olive oil in a large pot over medium heat. Once hot, add the chopped onion. Sauté for about 5 minutes. You want it soft and clear. Next, stir in the minced garlic, diced carrots, and celery. Cook for another 5 minutes. You’ll love the smell! Now, sprinkle in the dried thyme and rosemary. Mix everything well. This adds great flavor. Add the cannellini beans and diced tomatoes to the pot. Stir to combine. Then, pour in the vegetable broth. Turn the heat high until it boils. Once it boils, turn the heat low and let it simmer for 15 to 20 minutes. This lets the flavors mix. After that, stir in the chopped kale. Let it simmer for another 5 minutes. This makes the kale tender and bright green. Finally, season with salt and pepper according to your taste. Your soup is ready! Serve it hot in bowls. Garnish with fresh basil leaves for a lovely touch. This soup pairs well with crusty bread. Enjoy every bite of your delicious Tuscan white bean soup! To make this soup really shine, use fresh herbs. Fresh thyme and rosemary add depth. You can also add a splash of lemon juice for a bright taste. A pinch of red pepper flakes gives a bit of heat. When you sauté the onions and garlic, let them cook slowly. This will release their sweet flavors into the soup. One mistake is not rinsing the beans. Rinsing removes excess salt and keeps the soup fresh. Another error is overcooking the kale. Add it near the end of cooking for a bright green color. Don’t skip seasoning. Taste the soup before serving to adjust salt and pepper. This step ensures a well-balanced flavor. Serve your soup with crusty bread. A good sourdough or ciabatta pairs well. You can also offer a green salad on the side. A simple salad with olive oil and vinegar is perfect. For a heartier meal, add some grilled chicken or sausage. This soup makes a great base for many toppings, so feel free to get creative! Pro Tips Use Fresh Herbs: For an extra burst of flavor, consider using fresh thyme and rosemary instead of dried; add them towards the end of cooking to preserve their aroma. Make It Creamy: For a creamier texture, blend half of the soup using an immersion blender and then stir it back into the pot. Customize Your Greens: Feel free to substitute kale with other greens like spinach or Swiss chard, depending on your preference or what you have on hand. Enhance the Flavor: Add a splash of lemon juice or a pinch of red pepper flakes just before serving to brighten the flavors and add a bit of heat. {{image_2}} You can easily make this soup vegetarian or vegan. The base already uses vegetable broth. To keep it vegan, just skip any cheese garnishes. You can add more vegetables to boost flavor and nutrition. Try adding mushrooms for depth or sweet potatoes for creaminess. Both options work well with the beans and kale. Different areas in Tuscany have their own take on this soup. In some regions, you might find pancetta or bacon added for a smoky taste. Other places may include different greens, like Swiss chard or spinach. You can also find variations that use different beans, like Borlotti beans. Each twist brings a unique flavor while keeping the heart of the dish intact. If you want to add protein, consider chicken or turkey. These meats cook well in the broth and soak up flavors. For a plant-based protein boost, toss in some quinoa or lentils. Both options add hearty texture while keeping the soup healthy. You can mix and match based on what you enjoy. To store leftover soup, let it cool first. Pour it into an airtight container. Be sure to leave some space at the top. This helps prevent spills as the soup expands. You can keep it in the fridge for up to five days. If you want to keep it longer, freezing is a great option. When you're ready to eat, take the soup out of the fridge. Heat it in a pot over medium heat. Stir often to warm it evenly. If the soup seems thick, add a splash of water or broth. You can also use a microwave. Just heat it in a bowl, stirring halfway through. Make sure it’s hot all the way through. To freeze the soup, use freezer-safe containers. Pour the soup in, leaving space at the top. You can also use freezer bags. Squeeze out the air before sealing. Label the bags with the date. This way, you know when to use them. The soup can last up to three months in the freezer. When you’re ready to eat, thaw it overnight in the fridge before reheating. The best type of bean for Tuscan white bean soup is cannellini beans. They have a creamy texture and a mild taste. You can also use great northern beans or navy beans. Both options work well but may change the soup's flavor slightly. Cannellini beans are often canned, which makes them easy to find. Just drain and rinse them before adding to your soup. This small step helps remove excess salt and improves the flavor. Yes, you can make Tuscan white bean soup in a slow cooker! Start by sautéing the onion, garlic, carrots, and celery in olive oil. This step adds flavor. After that, transfer everything to the slow cooker. Add the remaining ingredients, except for the kale, and cook on low for 6 to 8 hours. About 30 minutes before serving, stir in the chopped kale. This keeps it fresh and bright. You can also season the soup with salt and pepper just before you serve. Tuscan white bean soup lasts in the fridge for about 3 to 4 days. Store it in an airtight container to keep it fresh. You can also freeze the soup for up to 3 months. Just let it cool completely before placing it in freezer-safe bags or containers. To reheat, simply thaw it in the fridge overnight. Then, heat it on the stove or in the microwave until it's hot. Enjoy your soup again without losing flavor! Tuscan white bean soup is a simple dish with rich flavors. We covered essential ingredients and fun garnishes. I shared tips for cooking and serving to make it perfect. You also learned about variations, storage, and common questions. Now, you can enjoy this comforting soup in many ways. Embrace your creativity and make it your own. Enjoy every spoonful, and share it with others. Happy cooking!

Tuscan White Bean Soup Delicious and Hearty Recipe

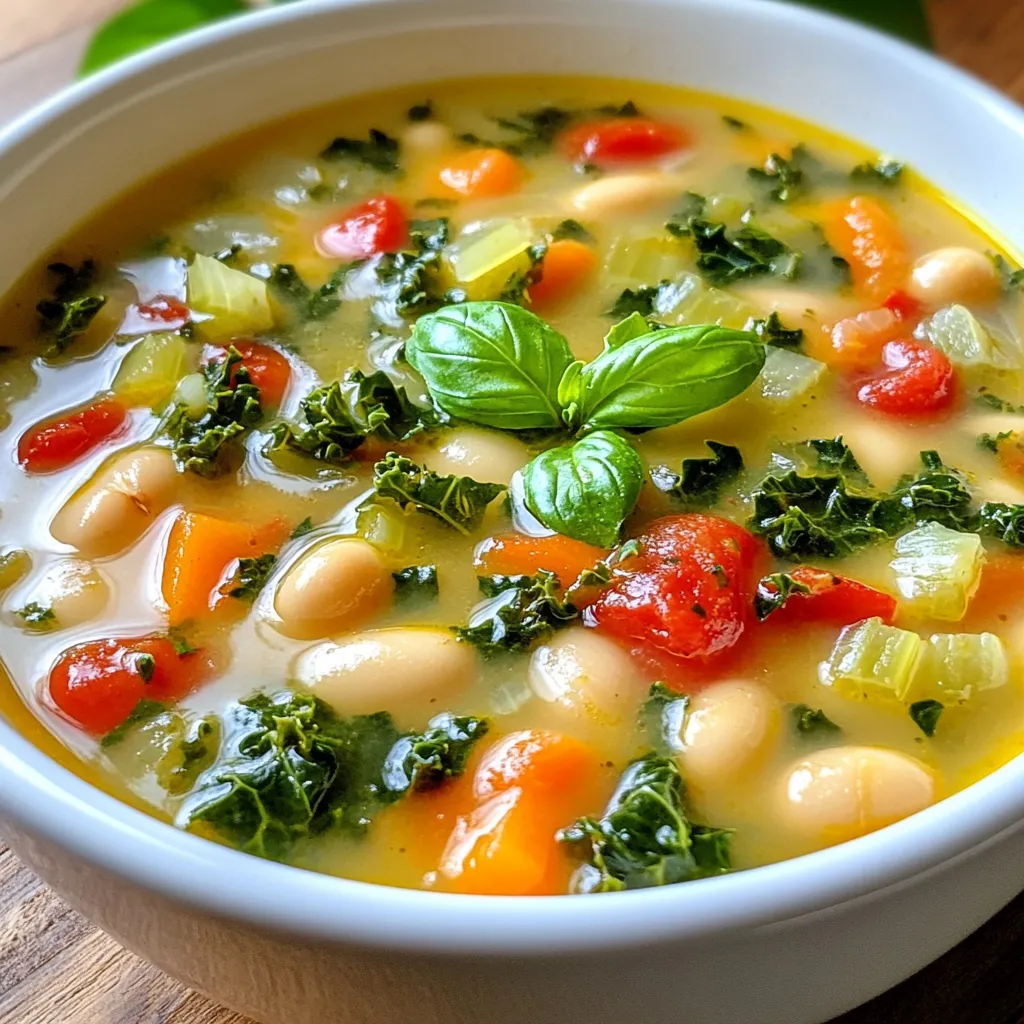
Welcome to a taste of Italy with my Tuscan White Bean Soup recipe! This soup is both delicious and hearty,

- 1 lb ground beef (or chicken/turkey) - 1/2 cup breadcrumbs - 1/4 cup grated Parmesan cheese - 1/4 cup fresh parsley, chopped - 1 large egg - 2 cloves garlic, minced To make the meatballs, you need some key ingredients. Start with a pound of ground meat. I often use beef, but chicken or turkey works great too. Then, add half a cup of breadcrumbs. This helps the meatballs hold their shape. Next, mix in a quarter cup of grated Parmesan cheese for that savory flavor. Finely chop a quarter cup of fresh parsley. This adds a nice color and taste. You will also need one large egg. It binds everything together. Lastly, two cloves of minced garlic give an extra kick. - 1/2 cup honey - 1/4 cup soy sauce - 2 tablespoons rice vinegar - 1 tablespoon cornstarch mixed with 2 tablespoons water (slurry) The sauce is what makes these meatballs sticky and sweet. You will need half a cup of honey. This is the main sweetener. Then, add a quarter cup of soy sauce for saltiness and depth. Next, mix in two tablespoons of rice vinegar. This adds a bit of tang. For thickening, use one tablespoon of cornstarch mixed with two tablespoons of water. This slurry will help your sauce become smooth and sticky. - Sesame seeds - Sliced green onions For garnish, sprinkle sesame seeds on top. They add crunch and look nice. You can also add sliced green onions for color and a fresh bite. These small details make your dish pop! {{ingredient_image_1}} - Preheat your oven to 400°F (200°C). This heats the oven for perfect cooking. - In a large bowl, combine the ground meat, breadcrumbs, Parmesan cheese, parsley, egg, minced garlic, salt, black pepper, and red pepper flakes. Mix until just combined. Don't overmix; you want tender meatballs. - Shape the mixture into 1-inch meatballs. This size cooks evenly and is easy to eat. - Place the meatballs on a lined baking sheet. Make sure they have space between them to cook well. Bake in the preheated oven for 20-25 minutes. Look for a golden brown color. - While the meatballs bake, make the sticky sauce. In a small saucepan, combine honey, soy sauce, and rice vinegar over medium heat. Stir until it simmers. - Gradually add the cornstarch slurry to the sauce. Stir continuously until it thickens, about 2-3 minutes. Remove from heat. The sauce should be thick and glossy, ready to coat the meatballs. To make the best meatballs, start with cold ingredients. When you use cold meat and eggs, it helps keep the meatballs firm. This way, they won’t fall apart when cooking. Be careful not to over-mix the meatball ingredients. Mixing too much makes the meatballs tough. Just combine everything gently until it is mixed. This keeps them soft and juicy. To thicken your sauce, use a cornstarch slurry. Mix one tablespoon of cornstarch with two tablespoons of water. If the sauce is too thin, add more of this mixture slowly. Stir as you add it, and watch it thicken. If you don’t have cornstarch, you can use flour instead. Mix a tablespoon of flour with some water to make a slurry. It works just as well and gives a nice texture. These meatballs are great with rice, noodles, or steamed veggies. They soak up the sauce and make a filling meal. For a finishing touch, garnish with sesame seeds and sliced green onions. This adds color and crunch to your dish. It makes it look and taste even better! Pro Tips Choose Your Meat Wisely: Opt for ground beef for a rich flavor, but chicken or turkey can be a lighter alternative. Perfectly Baked Meatballs: Ensure even cooking by spacing the meatballs apart on the baking sheet. Thicken Your Sauce: Stir continuously when adding the cornstarch slurry to prevent lumps and achieve a smooth sauce. Garnishing for Flavor: Don't skip the sesame seeds and green onions; they add crunch and freshness to the dish. {{image_2}} You can switch up the meat in this recipe. I often use ground chicken or turkey instead of beef. This change makes meatballs lighter but still tasty. If you want a vegetarian or vegan option, try using lentils or chickpeas. Both options give a good texture and flavor. To add more flavor, try different spices or herbs. You can mix in Italian herbs like oregano or basil. For a kick, add smoked paprika or cumin. Experimenting with sauces is fun too! Instead of honey garlic, try sweet chili sauce or teriyaki sauce. Each will give the meatballs a unique twist. If you need gluten-free meatballs, use gluten-free breadcrumbs. They work just as well and keep the meatballs moist. For those watching their sugar, use a low-sugar sweetener. You can try agave syrup or a sugar substitute in the sauce. These changes help everyone enjoy this dish! To store sticky honey garlic meatballs, first cool them to room temperature. Place the meatballs in an airtight container. They will last up to four days in the fridge. If you want to freeze them, line a baking sheet with parchment paper. Arrange the meatballs in a single layer and freeze until solid. Once frozen, transfer them to a freezer bag. They can stay fresh for up to three months. To reheat meatballs, use the oven or microwave. In the oven, preheat to 350°F (175°C). Place the meatballs on a baking sheet and cover with foil. Heat for about 15 minutes until warm. In the microwave, place meatballs in a bowl and cover with a damp paper towel. Heat in 30-second intervals. Avoid overcooking, as this can make them dry. To make meal prep easy, you can prepare the meatballs ahead of time. Mix and shape them in advance, then store them in the fridge. This saves time on busy nights. Portion the meatballs into servings. You can pair them with rice or noodles for quick meals. This way, you can enjoy tasty, homemade dinners without stress during the week. Sticky honey garlic meatballs can last up to four days in the fridge. To store them, place the meatballs in an airtight container. This keeps them fresh and safe to eat. If you want to keep them longer, consider freezing them. Just make sure to separate layers with parchment paper. This way, they won’t stick together. Yes, you can make these meatballs ahead of time. You can prepare the meatball mixture and form the meatballs. Then, store them in the fridge for up to two days before baking. You can also bake them and store in the fridge. Just reheat them when you are ready to eat. This saves time on busy nights. Absolutely! If you want to replace honey, you can use maple syrup or agave nectar. Both options add sweetness and flavor. You can also try brown sugar mixed with water. This creates a similar sweet taste. Adjust the amount to match your preferred sweetness level. In this article, I shared how to make sticky honey garlic meatballs with simple ingredients. You learned the key steps to mix, bake, and sauce your meatballs. I also covered tips for the best results and ways to customize your dish. Whether you prefer beef, chicken, or a vegan option, you can enjoy these flavorful bites. Remember to store your leftovers properly to keep them tasty. Now, you have all the tools to impress friends and family with this satisfying meal. Enjoy cooking and savor every bite!

Sticky Honey Garlic Meatballs Easy and Flavorful Recipe

Looking for a tasty dish that impresses without a hassle? My Sticky Honey Garlic Meatballs are packed with flavor and

To make this tasty one-pot lasagna soup, you will need: - 1 tablespoon olive oil - 1 pound ground beef or ground turkey - 1 onion, finely chopped - 2 cloves garlic, minced - 1 teaspoon dried oregano - 1 teaspoon dried basil - 1/2 teaspoon red pepper flakes (optional) - 1 can (28 ounces) crushed tomatoes - 4 cups vegetable or chicken broth - 8-10 lasagna noodles, broken into bite-sized pieces - 1 cup ricotta cheese - 1 cup shredded mozzarella cheese - 1/2 cup grated Parmesan cheese - Salt and pepper to taste - Fresh basil or parsley for garnish You can swap ground beef for ground turkey if you want a leaner option. Ricotta cheese can be replaced with cottage cheese for a different taste. If you prefer a meatless dish, try using lentils or mushrooms instead of meat. You can also use gluten-free lasagna noodles for those with dietary needs. Fresh basil adds a bright flavor. Parsley gives a nice touch of color. You can also sprinkle extra cheese on top for more richness. For those who like a kick, consider adding some crushed red pepper flakes as a garnish. This soup is all about personal taste, so mix and match to find your favorite! {{ingredient_image_1}} 1. Heat the Olive Oil: Start by heating 1 tablespoon of olive oil in a large pot over medium heat. This oil helps to cook the meat and adds flavor. 2. Brown the Meat: Add 1 pound of ground beef or ground turkey. Cook the meat until it turns brown. Drain any extra fat. 3. Add Onion and Garlic: Stir in 1 finely chopped onion and 2 minced garlic cloves. Cook for 3-4 minutes. You want the onion to look soft and shiny. 4. Mix in the Spices: Sprinkle in 1 teaspoon of dried oregano, 1 teaspoon of dried basil, and 1/2 teaspoon of red pepper flakes if you like heat. Stir for another minute to wake up the spices. 5. Pour in Tomatoes and Broth: Add 1 can of crushed tomatoes and 4 cups of vegetable or chicken broth. Bring this mix to a boil. 6. Add the Noodles: Once boiling, toss in 8-10 broken lasagna noodles. Lower the heat and let it simmer for 15-20 minutes until the noodles are tender. 7. Mix in Ricotta: Stir in 1 cup of ricotta cheese. This adds creaminess to your soup. 8. Add Cheese: Next, add 1 cup of shredded mozzarella and 1/2 cup of grated Parmesan cheese. Stir until they melt and blend into the soup. 9. Season the Soup: Taste your soup and add salt and pepper as needed. 10. Serve and Garnish: Serve the soup hot, garnished with fresh basil or parsley for extra flavor and color. - Use High Heat: Start with medium-high heat to get a good brown. - Don't Overcrowd the Pan: If you add too much meat, it will steam instead of brown. Cook in batches if needed. - Let it Sit: After adding the meat, let it sit for a minute before stirring. This helps build a nice crust. - Check the Package: Different noodles cook differently. Follow the time on the package for best results. - Stir Occasionally: Stir the soup occasionally while the noodles cook. This prevents them from sticking together. - Taste Test: About a minute before the time is up, taste a noodle. It should be tender but still have a slight bite. By following these steps and tips, your One-Pot Lasagna Soup will be both delicious and easy to make! When making One-Pot Lasagna Soup, a few mistakes can ruin your dish. First, don’t skip browning the meat. This step adds deep flavor. If you rush it, the taste will be bland. Second, avoid overcooking the noodles. If you cook them too long, they turn mushy. Lastly, don’t forget to season. A pinch of salt and pepper can make a big difference. To boost flavor, use fresh herbs whenever you can. Fresh basil or parsley adds a bright touch. If you want a richer taste, try adding a splash of red wine. Another great tip is to let the soup sit for a few minutes after cooking. This helps the flavors blend together. Experiment with spices like smoked paprika for a unique twist. Having the right tools makes cooking easier. A large pot is key for this recipe. Make sure it has a heavy bottom to prevent burning. A wooden spoon is great for stirring and won’t damage your pot. An onion chopper can save time when prepping your ingredients. Lastly, keep measuring cups handy for accurate ingredient amounts. This ensures your soup turns out perfect every time. Pro Tips Use Fresh Herbs: Fresh basil or parsley can elevate the flavor of your soup significantly compared to dried herbs. Adjust the Thickness: If you prefer a thicker soup, reduce the amount of broth or add more lasagna noodles. Make It Vegetarian: Substitute ground meat with lentils or mushrooms for a delicious vegetarian version. Leftover Storage: Store leftovers in an airtight container in the fridge for up to 3 days. Reheat gently on the stove. {{image_2}} You can easily make this soup vegetarian. Swap the ground meat for a mix of veggies. Use chopped mushrooms, zucchini, and bell peppers. These add great flavor and texture. You can also add canned beans for protein. A can of chickpeas or white beans works well. Use vegetable broth instead of chicken broth. This keeps it rich and tasty. If you need a gluten-free option, switch the lasagna noodles. Use gluten-free pasta instead. Many brands offer gluten-free lasagna noodles. Check the package for cooking times. You can also use spiralized vegetables like zucchini. This adds a fresh twist and keeps it light. Make sure your broth and any canned goods are gluten-free. For a spicy kick, add more red pepper flakes. You can also include diced jalapeños or hot sausage. Cook these with the meat for more flavor. If you like it very hot, try adding a splash of hot sauce. Adjust the spice to fit your taste. This makes the dish fun and exciting. After you enjoy your One-Pot Lasagna Soup, let it cool. Use an airtight container for storage. This keeps the soup fresh for up to three days in the fridge. If you plan to eat it later, avoid adding cheese until you reheat it. This keeps the texture smooth and tasty. When you’re ready to enjoy your soup again, heat it gently. Pour the soup into a pot over low heat. Stir it often to prevent sticking. If the soup seems thick, add a splash of broth or water. This helps restore the creamy texture. You can also microwave it in a safe bowl. Cover it loosely with a lid or plastic wrap, leaving a small gap to let steam escape. If you want to save the soup for later, freezing is a great option. Use a freezer-safe container or heavy-duty freezer bags. Leave some space at the top as the soup will expand when frozen. It can last up to three months in the freezer. When you’re ready to eat it, thaw it overnight in the fridge. Reheat it on the stove or in the microwave, adding a bit of liquid if needed. Enjoy your homemade soup even when it's cold outside! Yes, you can make One-Pot Lasagna Soup in a slow cooker. First, brown the meat in a pan. Then, add all the ingredients to your slow cooker. Cook on low for 6 hours or on high for 3 hours. This method lets the flavors blend well. You still add the cheeses at the end. Stir in the ricotta, mozzarella, and Parmesan when ready to serve. To boost nutrition, add veggies like spinach or zucchini. You can also use whole grain lasagna noodles. Beans, such as cannellini or kidney beans, add protein and fiber. Try adding chopped carrots or bell peppers for extra color and vitamins. These additions make the soup heartier and healthier. To serve fewer people, simply halve the recipe. Use half a pound of meat and cut the broth and tomatoes in half. Adjust the noodles too; use 4-5 broken pieces. Always taste as you go. This way, you can adjust the seasonings to your liking. If you want to save some, store leftovers in the fridge for later. In this article, we explored the tasty world of One-Pot Lasagna Soup. I shared key ingredients, helpful cooking steps, and tips to avoid mistakes. You learned about dish variations and how to store leftovers properly. Remember, cooking should be fun. Feel free to make adjustments based on your tastes. Enjoy your delicious soup and share it with family and friends! Cook with joy and creativity.

One-Pot Lasagna Soup Flavorful and Simple Recipe

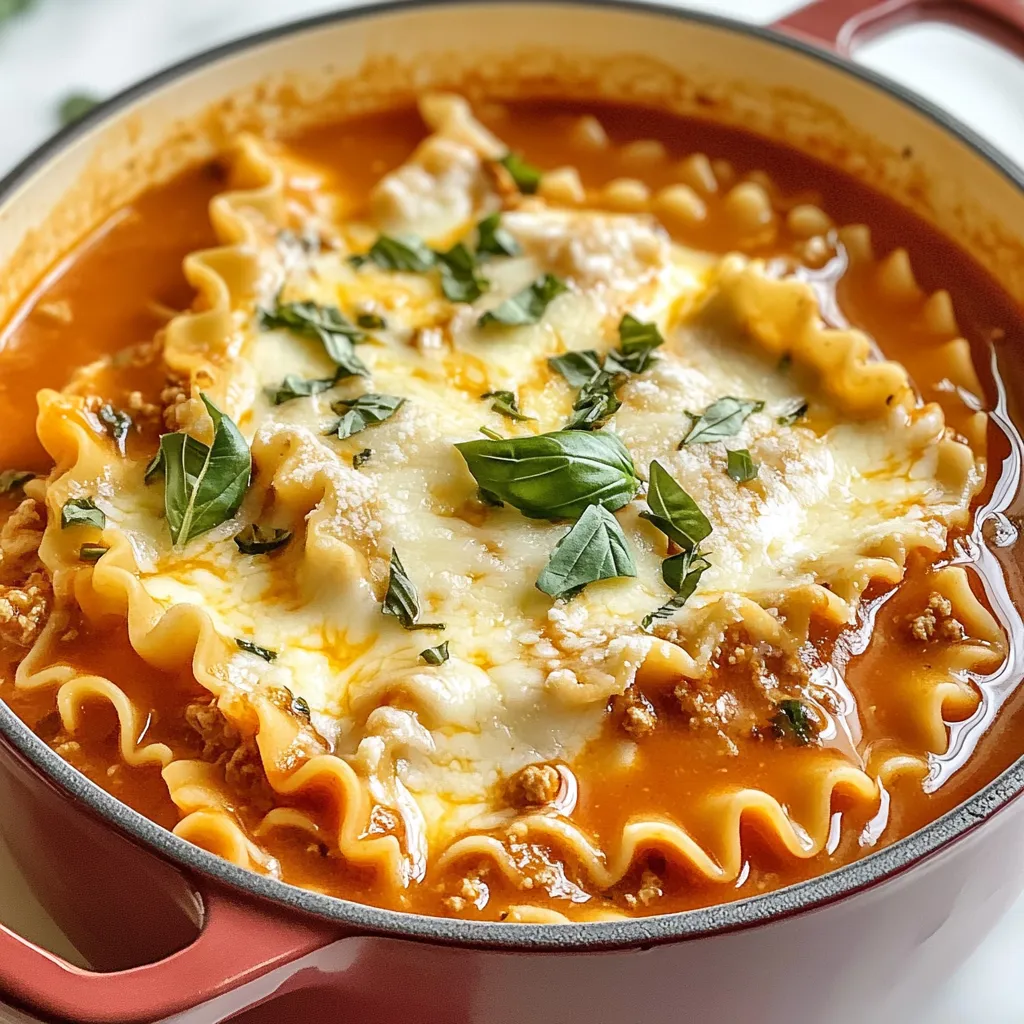
Craving comfort food that’s both flavorful and easy to make? This One-Pot Lasagna Soup is your answer! In just a

To make Garlic Parmesan Roasted Potatoes, you need a few key ingredients. These ingredients create the perfect blend of flavor and crispiness. Here’s what you will need: - 2 pounds baby potatoes, halved - 4 tablespoons olive oil - 4 cloves garlic, minced - 1 teaspoon dried rosemary - 1 teaspoon dried thyme - 1 teaspoon paprika - ½ cup grated Parmesan cheese - Salt and pepper to taste - Fresh parsley, chopped (for garnish) Knowing how much of each ingredient to use is key to a great dish. Here’s a simple guide: - Baby potatoes: Use 2 pounds. Halve them for even cooking. - Olive oil: 4 tablespoons will coat the potatoes well. - Garlic: 4 cloves of minced garlic give a strong flavor. - Dried rosemary: 1 teaspoon adds a lovely herbal note. - Dried thyme: 1 teaspoon brings warmth to the dish. - Paprika: 1 teaspoon adds a nice color and taste. - Parmesan cheese: ½ cup gives a rich, cheesy crust. - Salt and pepper: Add to taste for the right seasoning. - Fresh parsley: Use it for garnish, which adds color. You can also customize your potatoes with some fun extras. Here are a few ideas: - Chili flakes: For a bit of heat, sprinkle some on before baking. - Lemon zest: A little zest can brighten the flavor. - Other herbs: Try fresh basil or chives for a different taste. - Extra cheese: Mix in a different cheese like cheddar for a twist. Feel free to mix and match these ingredients to suit your taste! {{ingredient_image_1}} Start with 2 pounds of baby potatoes. Rinse them well under cold water. This removes dirt and grit. Next, cut the potatoes in half. Make sure all pieces are about the same size. This helps them cook evenly. Place the halved potatoes in a large bowl. Now, let’s add flavor! Pour 4 tablespoons of olive oil over the potatoes. Add 4 cloves of minced garlic for a strong taste. Sprinkle in 1 teaspoon each of dried rosemary and dried thyme. Don’t forget 1 teaspoon of paprika for color. Season with salt and pepper to taste. Mix everything well until the potatoes are fully coated. This step is key for great flavor. Preheat your oven to 425°F (220°C). Line a baking sheet with parchment paper for easy cleanup. Spread the seasoned potatoes cut side down on the sheet. Make sure they are in a single layer. This helps them get crispy. Roast for about 25 minutes, turning them halfway. Look for a golden color and tender texture. After roasting, sprinkle ½ cup of grated Parmesan cheese on top. Return the baking sheet to the oven for 5 more minutes. You want the cheese to melt and become slightly crispy. Let the potatoes cool for a few minutes before serving. Garnish with chopped parsley for a fresh touch. To get the best flavor from your garlic and herbs, use fresh garlic. Fresh garlic gives a strong taste. You can also roast it to bring out sweetness. For herbs, dried rosemary and thyme work well. Mix them with the olive oil before adding to the potatoes. This helps the oils soak into the potatoes. You can add a pinch of red pepper flakes for a kick. For even cooking and nice browning, cut the baby potatoes in half. This exposes more surface area. Place them cut side down on the baking sheet. Use a large baking sheet to avoid crowding. If the potatoes touch, they won’t brown well. Flip the potatoes halfway through roasting. This helps them cook evenly and get crispy all over. Serve your garlic Parmesan roasted potatoes warm. A rustic bowl adds charm. Drizzle extra olive oil on top for a glossy finish. Sprinkle more Parmesan for extra flavor. These potatoes pair well with grilled chicken or fish. You can also serve them with a fresh salad. Add a squeeze of lemon for brightness. Enjoy your meal with family and friends! Pro Tips Cut Uniformly: Ensure that all potato halves are cut to a similar size for even cooking and browning. Use Fresh Herbs: For a more vibrant flavor, consider using fresh rosemary and thyme instead of dried. Adjust Cooking Time: Depending on your oven, you may need to adjust the roasting time. Keep an eye on the potatoes to prevent burning. Experiment with Cheese: Try adding a mix of cheeses like mozzarella or cheddar for a different flavor profile. {{image_2}} You can easily change the taste of Garlic Parmesan Roasted Potatoes. If you want heat, add red pepper flakes. A pinch of cayenne pepper gives a nice kick. For a smoky flavor, use smoked paprika instead of regular paprika. You can also swap in your favorite herbs. Try oregano or basil for a twist. Mixing in some lemon zest adds brightness, too. While Parmesan shines in this dish, you can use other cheeses. Grated Pecorino Romano gives a sharper taste. For a creamier texture, try mozzarella or fontina. If you want something strong, blue cheese crumbles add great flavor. Nutritional yeast is a great dairy-free option, giving a cheesy taste without the cheese. Add different veggies for a colorful dish. Carrots, bell peppers, or zucchini work well. Just cut them to the same size as the potatoes. Toss them in the same seasoning mix to keep flavors balanced. You can even throw in some green beans or asparagus for a fresh crunch. Mixing vegetables makes this dish more fun and nutritious. To store your garlic Parmesan roasted potatoes, let them cool first. Place them in an airtight container. Make sure to keep them in the fridge. They will stay fresh for up to three days. If you want to keep them longer, consider freezing them. To reheat your roasted potatoes, I recommend using an oven. Preheat your oven to 400°F (200°C). Spread the potatoes on a baking sheet. Heat them for about 10 to 15 minutes. This keeps them crispy. You can also use a microwave, but the texture may change. If you use a microwave, heat them for about 1 to 2 minutes. Yes, you can freeze garlic Parmesan roasted potatoes! First, let them cool completely. Then, place them in a freezer-safe bag or container. They will stay good for up to two months. When you’re ready to eat, thaw them in the fridge overnight. Reheat them in the oven for the best taste and texture. Yes, you can use regular potatoes. Just cut them into smaller pieces. Aim for similar sizes to ensure even cooking. I suggest using Yukon Gold or Russet potatoes for the best flavor. These types will give you a great texture and taste. You can use dairy-free cheese as a substitute for Parmesan. Nutritional yeast also adds a cheesy flavor without dairy. You could also skip the cheese altogether and add more herbs or spices for flavor. Experimenting with different toppings can make this dish just as tasty! If you don’t have fresh garlic, garlic powder works well. Use about 1 teaspoon of garlic powder for every clove of fresh garlic. This swap will still give you that great garlic flavor. You can also try onion powder for a different twist. We’ve explored how to make tasty Garlic Parmesan Roasted Potatoes. First, we covered essential ingredients and measurements. Then, I shared step-by-step instructions, from prepping to roasting. I also offered tips for maximum flavor and even cooking. You can mix in different spices, cheeses, or veggies to customize your dish. Lastly, I provided storage tips to keep leftovers fresh. Remember, cooking is fun! Enjoy experimenting with flavors and techniques. Your perfect roasted potatoes await!

Garlic Parmesan Roasted Potatoes Crispy and Flavorful

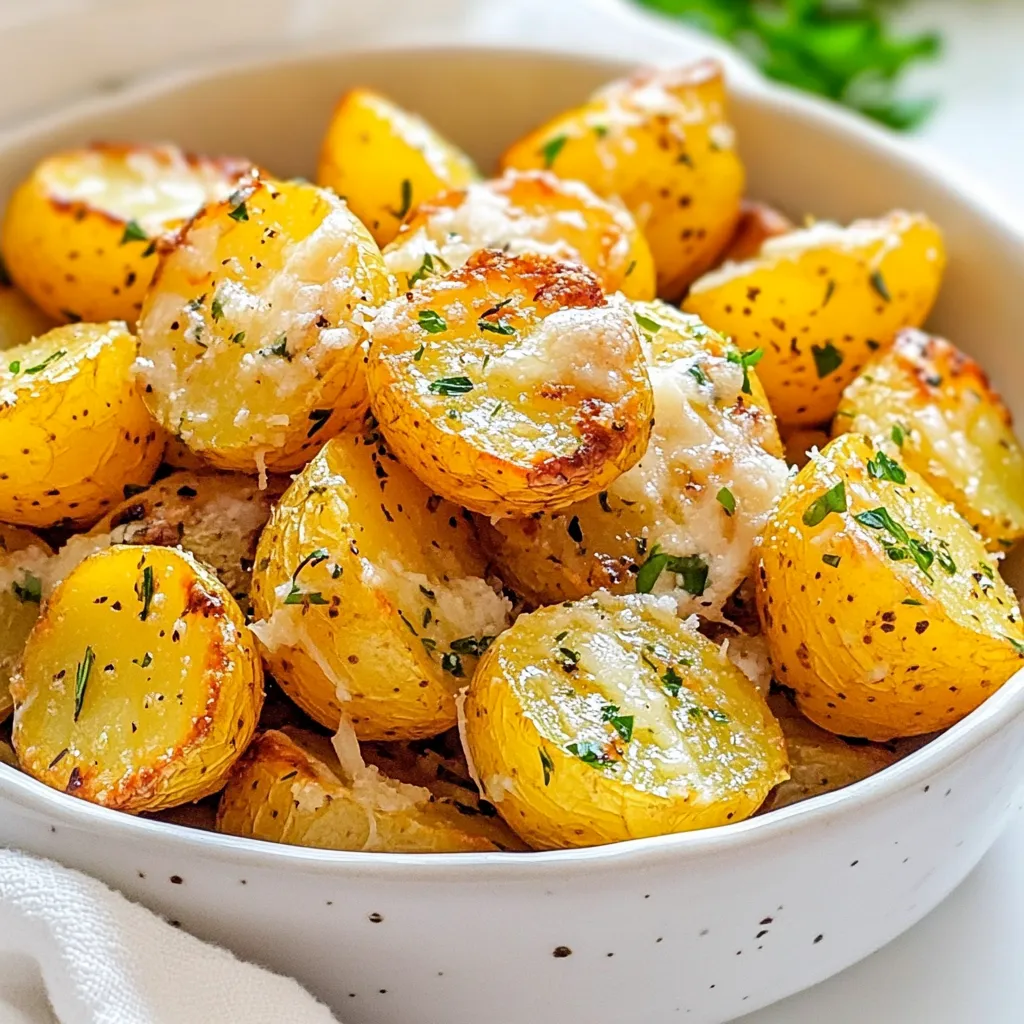
If you’re craving a side dish that’s both crispy and packed with flavor, you’ve found it! Garlic Parmesan Roasted Potatoes

To make tasty honey garlic glazed meatballs, you need these main ingredients: - 1 lb ground beef (or ground turkey) - 1/2 cup breadcrumbs - 1/4 cup grated Parmesan cheese - 1 large egg - 3 cloves garlic, minced - 1 teaspoon salt - 1/2 teaspoon black pepper - 1/4 teaspoon red pepper flakes (optional for heat) - 1/4 cup honey - 1/4 cup soy sauce (or tamari for gluten-free) - 2 tablespoons rice vinegar - 1 tablespoon cornstarch mixed with 2 tablespoons water (optional for thickening) - Chopped green onions for garnish You can change a few ingredients to suit your taste. Here are some options: - Use ground turkey instead of beef for a leaner meatball. - Swap breadcrumbs with crushed crackers or oats. - Replace honey with maple syrup for a different sweet flavor. - Use coconut aminos in place of soy sauce for a gluten-free option. - Add finely chopped veggies, like bell peppers or carrots, for extra nutrition. Gather these tools before you start cooking: - Large mixing bowl - Baking sheet - Parchment paper - Small saucepan - Whisk or spoon for mixing - Spoon for shaping meatballs - Knife for chopping green onions These ingredients and tools will help you create delicious honey garlic glazed meatballs. Enjoy the cooking process! {{ingredient_image_1}} First, you need to preheat your oven. Set it to 400°F (200°C). This step warms up the oven so your meatballs bake evenly. While it heats, line a baking sheet with parchment paper. This paper keeps the meatballs from sticking. Next, we prepare the meatball mixture. In a large bowl, combine these ingredients: - 1 lb ground beef (or turkey) - 1/2 cup breadcrumbs - 1/4 cup grated Parmesan cheese - 1 large egg - 3 cloves garlic, minced - 1 teaspoon salt - 1/2 teaspoon black pepper - 1/4 teaspoon red pepper flakes (optional) Mix these well until they just come together. Don't overmix, or your meatballs may be tough. Now, shape the mixture into small meatballs. Aim for about 1 inch in diameter. Place them on the lined baking sheet. Once you have them all shaped, bake them in the preheated oven. Let them bake for 20 minutes, or until they turn golden brown and are cooked through. While the meatballs bake, let's make the honey garlic glaze. In a small saucepan, combine: - 1/4 cup honey - 1/4 cup soy sauce (or tamari) - 2 tablespoons rice vinegar Heat this over medium heat. You want it to simmer gently. If you like a thicker sauce, mix 1 tablespoon cornstarch with 2 tablespoons water. Add this to the sauce while whisking until it thickens to your liking. When the meatballs are done, transfer them to a large mixing bowl. Pour the honey garlic glaze over them. Toss gently to coat each meatball evenly. This step makes them shiny and full of flavor. Enjoy your delicious honey garlic glazed meatballs! To make the best honey garlic glazed meatballs, focus on a few key points. - Use Fresh Ingredients: Fresh garlic and quality meat make a big difference. - Don't Overmix: Mix the meatball mixture just enough to combine. Overmixing can make them tough. - Uniform Size: Shape meatballs to be the same size. This helps them cook evenly. - Baking: Bake meatballs on parchment paper. This keeps them from sticking and helps with cleanup. A thick glaze adds richness to the meatballs. Here’s how to get that perfect texture: - Cornstarch Slurry: Mix cornstarch with water. This helps to thicken the sauce quickly. - Simmer the Glaze: Heat the honey, soy sauce, and vinegar until it simmers. This reduces the liquid and thickens it naturally. - Adjust Consistency: If the glaze is too thin, add more cornstarch slurry until you reach the desired thickness. Honey garlic glazed meatballs are versatile. Here are some fun ways to serve them: - As an Appetizer: Serve them on toothpicks for easy snacking at parties. - Over Rice or Noodles: Pair with steamed rice or noodles to make a hearty meal. - In a Wrap: Place them in a tortilla with veggies for a tasty wrap. - Garnish: Sprinkle chopped green onions on top for a fresh touch. These tips will help you create delicious, eye-catching meals that everyone will love! Pro Tips Use Fresh Garlic: Freshly minced garlic adds a robust flavor to the meatballs that pre-minced garlic cannot replicate. Chill the Mixture: Letting the meatball mixture chill in the refrigerator for about 30 minutes helps them hold their shape while baking. Adjust Sweetness: Feel free to adjust the amount of honey to suit your taste. Add more for a sweeter glaze or less for a savory kick. Serve with Skewers: For a fun presentation, serve the glazed meatballs on skewers as appetizers at your next gathering! {{image_2}} You can easily switch some ingredients to change the flavor of your meatballs. Instead of ground beef, use ground turkey for a leaner option. If you're vegan, substitute the meat with lentils or mushrooms. For the breadcrumbs, try crushed crackers or oats. This choice can add a nice crunch. Instead of Parmesan cheese, you can use nutritional yeast for a savory taste. If you want to reduce sodium, use low-sodium soy sauce or tamari. If you love heat, try making spicy honey garlic meatballs. Add more red pepper flakes to the meatball mix for extra kick. You can also mix in some sriracha or chili paste into the honey garlic glaze. This will give your sauce a nice balance of sweet and spicy. Adjust the spice level to your taste. Your guests will love this bold twist! You don’t have to bake these meatballs! You can also cook them on the stovetop or in a slow cooker. For stovetop cooking, brown the meatballs in a skillet first. Then, pour the honey garlic glaze over them and let it simmer for 10 minutes. This method gives a nice crust on the outside. If you use a slow cooker, place the meatballs in with the glaze and cook on low for 4 hours. This method makes them super tender and flavorful. To store leftover honey garlic glazed meatballs, let them cool first. Place them in an airtight container. They can stay fresh in the fridge for up to four days. Label the container with the date you made them. This way, you’ll know when to eat them. If you want to keep meatballs longer, freezing is a great option. First, let them cool completely. Then, place them in a freezer-safe bag or container. Be sure to remove as much air as possible. Label the bag with the date. Frozen meatballs can last for up to three months. To enjoy your meatballs again, you can reheat them easily. For the best results, use the oven. Preheat it to 350°F (175°C). Place the meatballs in a baking dish and cover with foil. Heat for about 15-20 minutes or until warmed through. You can also use a microwave. Just place them on a plate and heat for 1-2 minutes. Make sure they are hot all the way through before serving. You can serve honey garlic glazed meatballs with rice or noodles. They pair well with steamed veggies, like broccoli or snap peas. A fresh salad also adds a nice crunch. If you want more flavor, try serving them with a sweet chili sauce. Yes, you can make these meatballs ahead of time. Prepare the meatballs and bake them. After baking, let them cool. Then, store them in the fridge for up to three days. You can also freeze them for up to three months. Just reheat them in the oven or microwave when ready to serve. To keep meatballs moist, don’t overmix the meat mixture. Use breadcrumbs to help hold moisture. Adding an egg binds the mixture and keeps it tender. Baking at the right temperature also helps. Avoid overcooking them to keep them juicy. Yes, you can use ground turkey or chicken instead of beef. They will still turn out tasty. Just be aware that lean meats may need more moisture. You can add a bit of olive oil if needed. In this post, we covered how to make honey garlic glazed meatballs. You learned about the main ingredients, optional swaps, and tools needed. We also outlined clear steps for preparation, cooking, and glazing the meatballs. Key tips showed you how to achieve the best flavor and texture. Finally, we explored variations you can try and how to store leftovers. Now you can enjoy tasty meatballs anytime. Use these tips and enjoy cooking!

Honey Garlic Glazed Meatballs Simple and Tasty Recipe

Looking for a tasty dish that’s easy to make? Try my Honey Garlic Glazed Meatballs! This simple recipe combines savory

To make Honey Lemon Garlic Salmon, you need fresh ingredients that bring flavor and health. Here’s a simple list: - 4 salmon fillets (about 6 oz each) - 1/4 cup honey - 1/4 cup fresh lemon juice - 2 tablespoons soy sauce - 3 cloves garlic, minced - 2 tablespoons olive oil - Salt and pepper to taste - Lemon slices for garnish - Fresh parsley, chopped for garnish Each ingredient plays a key role in making this dish tasty and bright. The salmon provides healthy fats and protein. Honey adds sweetness, while lemon juice gives it a tangy kick. Soy sauce adds depth, and garlic brings in a warm, savory note. Olive oil helps the salmon stay moist during cooking. Finally, the garnishes make your dish look great and add fresh flavor. Using fresh ingredients ensures the best taste. I recommend using wild-caught salmon for more flavor and health benefits. Make sure to have everything ready before you start cooking. This way, you can enjoy the process and have fun in the kitchen! {{ingredient_image_1}} To start, grab a small bowl. In it, whisk together the following: - 1/4 cup honey - 1/4 cup fresh lemon juice - 2 tablespoons soy sauce - 3 cloves garlic, minced - 2 tablespoons olive oil Whisk until the mix is smooth and well combined. This step is key for great flavor. Next, take your four salmon fillets and place them in a shallow dish. Pour the marinade over the fillets. Make sure each piece is fully coated. Cover the dish with plastic wrap. Place it in the fridge for at least 30 minutes. This time lets the salmon soak up the flavors. Now, let’s get the oven ready. Preheat it to 400°F (200°C). While it heats up, take the marinated salmon from the fridge. Move the fillets to a baking dish with the skin side down. Don’t forget to save some marinade for later. Season the salmon with salt and pepper to taste. Pour the remaining marinade over the top. Once your oven is hot, bake the salmon for about 12-15 minutes. You’ll know it’s done when it flakes easily with a fork. Halfway through, baste the salmon with the saved marinade for that extra zing. After baking, take the salmon out of the oven. Let it rest for a couple of minutes. This helps keep it juicy. When you’re ready to serve, garnish with lemon slices and chopped parsley. For a nice touch, serve the salmon on a platter lined with fresh greens. Drizzle any extra sauce over the top for a glossy look. Enjoy! To make your honey lemon garlic salmon truly amazing, basting is key. Basting means brushing the salmon with the marinade while it cooks. This adds moisture and flavor. I recommend basting halfway through cooking. Use a spoon to drizzle some marinade over the top. You can also use a brush for this step. If you want to adjust the taste, think about your ingredients. Add more honey for sweetness or more lemon juice for zest. You can even try adding fresh herbs like thyme or dill. This gives your dish a fresh twist. Experiment and find your perfect blend. You can cook honey lemon garlic salmon in different ways. Grilling is a great option. It gives the fish a smoky flavor. Just prepare your grill and keep it at medium heat. Cook the salmon for 4-5 minutes on each side. Pan-searing is another method. Heat some olive oil in a pan. Place the salmon skin side down. Cook for 5-6 minutes, then flip and cook for 4-5 more minutes. Both methods keep the salmon juicy and tender. Choose your favorite! Pro Tips Marinate Longer for Depth: The longer you marinate the salmon, the more flavorful it will be. If time allows, marinate for 1-2 hours for a richer taste. Use Fresh Ingredients: Opt for fresh garlic and freshly squeezed lemon juice to enhance the overall flavor of the dish. Check for Doneness: To ensure your salmon is perfectly cooked, use a fork to gently flake the thickest part. It should be opaque and flake easily. Adjust Sweetness: If you prefer a less sweet sauce, reduce the amount of honey or add a bit more soy sauce for a balanced flavor. {{image_2}} You can easily swap ingredients in this honey lemon garlic salmon recipe. If you want a different sweetness, try maple syrup or agave nectar. Both add a nice touch. For a citrus twist, use lime juice instead of lemon. The taste will change, but it will still be fresh and bright. When it comes to fish, salmon is great, but other options work too. Trout is a tasty choice and cooks similarly. If you prefer a lighter fish, use cod or tilapia. Both will soak up the marinade well and taste delicious. To up the flavor, consider adding herbs and spices. Fresh dill or thyme pairs well with lemon and garlic. Just sprinkle them on before baking. You can also add red pepper flakes if you like some heat. This small change can make a big difference. Serving the salmon with sauces can enhance the meal. A yogurt sauce made with fresh herbs adds creaminess. Or, try a tangy balsamic glaze for some depth. Both can complement the sweet and savory notes of the salmon, making each bite even better. To store leftover honey lemon garlic salmon, first let it cool. Place the salmon in an airtight container. This keeps the fish fresh and prevents odors. It is best to refrigerate the salmon within two hours of cooking. The salmon lasts about three days in the fridge. You can freeze cooked salmon for up to three months. Wrap each fillet tightly in plastic wrap. Then place the wrapped fillets in a freezer-safe bag. Remove as much air as possible to prevent freezer burn. When ready to eat, thaw the salmon overnight in the fridge. This keeps its taste and texture. For quick thawing, you can place the sealed bag in cold water for about an hour. I recommend marinating salmon for at least 30 minutes. This time allows the flavors to soak in. If you have more time, you can marinate it for 1 to 2 hours. Just be careful not to go too long, as the acid in the lemon juice can change the fish's texture. Several sides go well with honey lemon garlic salmon. Here are my favorites: - Steamed broccoli - Garlic mashed potatoes - Quinoa salad - Roasted asparagus - Mixed green salad with vinaigrette These sides balance the sweet and tangy flavors of the salmon. Yes, you can use other fish for this recipe. Some great alternatives include: - Trout: It has a similar texture and flavor. - Cod: This fish is mild and flaky. - Mahi-mahi: It holds up well to baking. These options will still taste great with the honey lemon garlic marinade. This blog post covered everything you need for cooking delicious honey lemon garlic salmon. We discussed ingredients, marinade prep, and baking instructions. You learned tips for perfect flavor and different cooking methods. We also explored ingredient swaps and how to store leftovers. In conclusion, enjoy experimenting with this dish. Don’t hesitate to make it your own, and share it with family and friends. Happy cooking!

Honey Lemon Garlic Salmon Flavorful and Easy Recipe

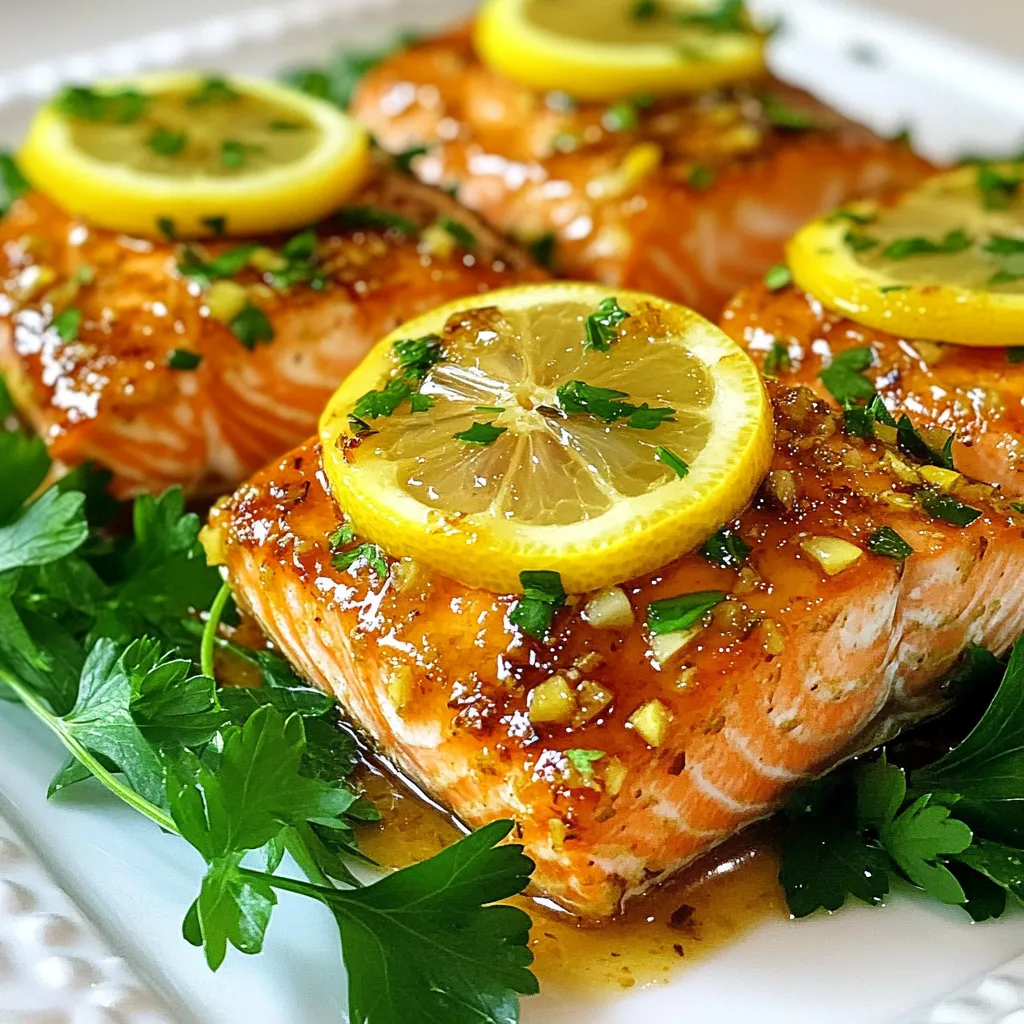
Are you ready to make a delicious meal that impresses everyone? This Honey Lemon Garlic Salmon recipe is not only

- Pretzel Sticks: You will need 2 cups of pretzel sticks. Choose the regular kind for crunch and saltiness. They add a nice texture to the bark. - Chocolate Chips: Use 1 cup of semi-sweet chocolate chips. They melt well and offer a rich taste. You can try dark chocolate for a more intense flavor. - Caramel Sauce: You can use 1 cup of store-bought caramel sauce for ease. If you like to cook, make your own for a special touch. Homemade caramel can add a unique flavor. - Nuts: Optional nuts include 1/2 cup of chopped pecans or walnuts. They give extra crunch and flavor. If you want a nut-free version, just skip this step. - Sea Salt: A sprinkle of sea salt is key. It enhances the sweet flavors and balances the taste. Just a pinch makes a big difference. {{ingredient_image_1}} - Preheat Oven and Prepare Baking Sheet Start by setting your oven to 350°F (175°C). Line a baking sheet with parchment paper. This keeps your bark from sticking. - Bake Pretzels for Crispness Spread 2 cups of pretzel sticks on your baking sheet in a single layer. Bake them for 5-7 minutes. This will make them crisp and ready for the sweet toppings. - Melt Chocolate Safely In a microwave-safe bowl, add 1 cup of semi-sweet chocolate chips. Heat in the microwave for 30 seconds at a time. Stir after each interval until the chocolate melts and looks smooth. - Layering Chocolate on Pretzels Once the pretzels cool, drizzle half of your melted chocolate over them. Make sure to cover them evenly for the best taste. - Applying Caramel Sauce Evenly Pour 1 cup of caramel sauce over the pretzels and chocolate. Use a spatula to spread it out. This gives each bite a sweet kick. - Final Chocolate Layering Technique Now, pour the rest of the melted chocolate over the caramel. This layer is key for holding everything together. - Chilling Time Importance Place your baking sheet in the refrigerator for 1-2 hours. This helps the chocolate and caramel set properly. - How to Break Bark into Pieces Once set, break the bark into pieces. You can use your hands or a knife. Enjoy your sweet, crunchy treat! - Ensuring Even Coverage: To cover the pretzels well, drizzle the chocolate in a zig-zag pattern. This helps spread the chocolate evenly. Use a spatula to smooth it out if needed. When adding the caramel, make sure to cover all the pretzels. This way, each bite has that sweet, gooey goodness. - Avoiding Chocolate Seizing: Chocolate can seize if it gets too hot or if water gets in it. Always microwave chocolate in short bursts of 30 seconds. Stir between each round until it melts smoothly. If you see any lumps, don’t panic! Just stir a bit longer, and it should come together. - Best Practices for Layering: Start with a layer of chocolate, then add caramel, and finish with more chocolate. This order keeps the caramel from sliding off. If using nuts, sprinkle them on top before the final chocolate layer. This way, they stick well. - Optimal Storage Containers: Keep your bark in an airtight container. This keeps it fresh and prevents moisture. Use a container that fits your bark pieces snugly, but not too tight. You want some air circulation to avoid sogginess. - How Long It Lasts: When stored properly, your chocolate caramel pretzel bark can last up to two weeks. But, let’s be real, it usually disappears much faster! - Signs of Spoilage: Check for any strange smells or changes in texture. If the chocolate looks dull or has white spots, it may have gone bad. If it feels sticky, that’s also a sign. When in doubt, throw it out! Pro Tips Use Quality Chocolate: For the best flavor, opt for high-quality semi-sweet chocolate chips. They melt better and enhance the overall taste of the bark. Let the Caramel Cool: Ensure the caramel sauce is slightly cooled before drizzling it over the pretzels. This helps it set better when combined with the chocolate. Add a Flavor Twist: Experiment with different nuts or add a sprinkle of cinnamon or cayenne pepper for a spicy kick to the bark. Storage Tips: Store the bark in an airtight container in the refrigerator to keep it fresh and crunchy for up to two weeks. {{image_2}} Using Different Types of Nuts You can change the nuts in your bark. Pecans or walnuts add a nice crunch. Try cashews for a softer bite. Almonds bring a rich flavor. Each nut gives a unique twist. You can even skip the nuts if you prefer. The bark will still taste great without them. Incorporating Seasonal Flavors (e.g., peppermint) Add seasonal flavors to your bark for fun. During the holidays, peppermint bits work well. Just crush candy canes and sprinkle them on top. You can also use orange zest for a fresh twist. Seasonal flavors make your treat special and fun. Gluten-Free Options To make your bark gluten-free, use gluten-free pretzel sticks. Many brands offer this option. Just check the label to be sure. This way, everyone can enjoy this snack without worry. Vegan Variants You can also create a vegan version. Use dairy-free chocolate chips and vegan caramel sauce. Many store brands make these options easy to find. This change keeps the treat tasty while meeting dietary needs. Plating for Parties For a fun party treat, use a large platter. Cut the bark into big pieces. Arrange them in a colorful way. You can add some pretzel sticks around the edges. This makes it look inviting. Use small bowls for dipping sauces, like chocolate or caramel. Your guests will love it! Gift Packaging Tips If you want to give this as a gift, consider using clear bags. Fill them with pieces of bark. Tie them with a festive ribbon for flair. You can also use small boxes. Add a note with the recipe. It shows you care and share the love of this treat. Best Drinks to Accompany Chocolate caramel pretzel bark pairs well with milk. You can also try coffee for a rich taste. A sweet hot chocolate makes it extra cozy. For adults, a nice red wine complements the flavors well. Think about a fruity or spicy option. Dessert Table Combinations This bark shines at dessert tables. Pair it with brownies or cookies for variety. Add some fresh fruit, like strawberries or apples. It adds a nice balance to the sweetness. You could even include some ice cream. This creates a fun sundae bar for everyone! Can I use white chocolate? Yes, you can use white chocolate. It gives a sweet taste. The look will be lighter too. Just melt it the same way as dark chocolate. How can I make it less sweet? To cut the sweetness, use dark chocolate instead of semi-sweet. You can also use less caramel sauce. Adding a sprinkle of sea salt helps balance the flavors. Is there a nut-free version? Yes, you can leave out the nuts. The bark will still be tasty. You can add more pretzels for crunch instead of nuts. What to do if it doesn't set? If your bark doesn’t set, chill it longer. It might need more time in the fridge. If it’s still soft, try a colder spot. How to melt chocolate without a microwave? Melt chocolate on the stove using a double boiler. Place a bowl over simmering water. Stir until smooth. This method prevents burning and gives you control. This blog post covered how to make delicious pretzel bark. We discussed the ingredients, from pretzel sticks to sea salt. You learned step-by-step how to bake, melt, and layer your treats. I shared tips for perfecting your bark and storing leftovers. You also explored variations and serving suggestions for every occasion. Enjoy creating this tasty snack. With practice, you’ll master it and impress everyone!

Chocolate Caramel Pretzel Bark Irresistible Snack Treat

Are you ready to dive into a delicious treat that combines salty and sweet? Chocolate Caramel Pretzel Bark is the

For making Cilantro Lime Shrimp Bowls, you need fresh and simple ingredients. Here’s what I use: - 1 lb large shrimp, peeled and deveined - 1 cup quinoa, rinsed - 2 cups vegetable broth or water - 1 cup corn, canned or frozen - 1 cup cherry tomatoes, halved - 1 avocado, sliced - 1/2 cup fresh cilantro, chopped Seasonings bring this dish to life. The key flavors come from: - 2 tablespoons olive oil - 3 cloves garlic, minced - Juice and zest of 2 limes - 1 teaspoon ground cumin - 1 teaspoon chili powder - Salt and pepper to taste Marinating the shrimp in these ingredients adds depth and zest. The garlic pairs well with lime. It makes the shrimp shine. Adding toppings can enhance flavor and texture. Some great options include: - Sliced jalapeños for heat - Lime wedges for extra zesty flavor - Radish for crunch These toppings add a fresh twist. Feel free to mix and match based on your tastes! {{ingredient_image_1}} Start by gathering a large bowl. Add the shrimp, olive oil, minced garlic, lime juice, lime zest, ground cumin, chili powder, salt, and pepper. Toss everything together until the shrimp are well-coated. Let them sit for 10 to 15 minutes. This step adds great flavor to the shrimp. While the shrimp marinates, it's time to cook the quinoa. Grab a medium saucepan and pour in the vegetable broth or water. Bring it to a boil. Next, add the rinsed quinoa. Cover the pan and lower the heat. Let it simmer for about 15 minutes. Check to see if all the liquid is absorbed. The quinoa should be fluffy and ready to use. Heat a large skillet over medium-high heat. Once it's hot, add the marinated shrimp. Cook them for 2 to 3 minutes on each side. You will know they are done when the shrimp turn pink and opaque. Remove them from the heat to keep them juicy. Grab a large serving bowl and layer the quinoa as the base. Top it with the cooked shrimp, corn, halved cherry tomatoes, sliced avocado, and chopped cilantro. Drizzle some extra lime juice over the top. Add salt and pepper if needed. For a fun twist, you can garnish with sliced jalapeños, lime wedges, or radish. Each bite offers a burst of flavor! To make shrimp just right, you need to watch the cooking time. Cook them for 2-3 minutes on each side. When they turn pink and opaque, they are done. Overcooking makes them tough. Remember, they cook fast, so stay close. Taste is personal. If you like more heat, add extra chili powder or sliced jalapeños. For a zesty kick, squeeze more lime juice over the shrimp. If you prefer milder flavors, skip the chili powder. Always taste as you go to find your perfect mix. Meal prep makes cooking easy. You can marinate the shrimp up to 24 hours ahead. This lets the flavors soak in. Cook the quinoa in advance and store it in the fridge. When it’s time to eat, reheat the quinoa and quickly cook the shrimp. It’s a fast meal that feels fresh. Pro Tips Marinate for Maximum Flavor: Allowing the shrimp to marinate for at least 15 minutes helps to infuse the flavors deeply, making each bite more delicious. Perfectly Cooked Quinoa: To achieve fluffy quinoa, make sure to rinse it thoroughly before cooking to remove any bitterness from the saponins. Customize Your Toppings: Feel free to add other fresh toppings like diced red onion, cucumber, or even a dollop of Greek yogurt for extra creaminess. Keep it Fresh: Use fresh lime juice and zest for the best flavor; bottled lime juice can be too acidic and lacks the bright flavor of fresh limes. {{image_2}} You can easily swap shrimp for other proteins. Chicken breast is a great choice. Simply marinate it like you do the shrimp. Cook it until it reaches 165°F for safety. Tofu is another option that works well. Use firm tofu for the best texture. Marinade it the same way and then sauté until golden. Also, fish like salmon or tilapia can shine in these bowls. Cook fish for about 3-4 minutes per side. To make this dish vegetarian or vegan, skip the shrimp. You can use chickpeas instead. They add protein and pair well with the same spices. Just drain and rinse canned chickpeas, then sauté them with the marinade. Another option is to use grilled vegetables, like zucchini and bell peppers. These bring flavor and texture. You can also add black beans for extra protein. Changing spices can make your shrimp bowls unique. For a kick, try adding smoked paprika. It gives a nice, smoky flavor. You can also add curry powder for a warm taste. Mixing in fresh herbs like basil or dill can bring freshness. If you want more heat, add cayenne pepper. Just a pinch can go a long way. Don't hesitate to experiment with your favorite spices! To keep your cilantro lime shrimp bowls fresh, store leftovers in an airtight container. Allow the dish to cool down before sealing. Place the container in the fridge. The shrimp bowls will stay fresh for 2-3 days. If you notice any off smells or changes in texture, discard them. When reheating, keep it simple. Use a microwave-safe plate. Cover the bowl with a damp paper towel to keep it moist. Heat in short bursts of 30 seconds. Stir in between to avoid hot spots. Check for a uniform temperature before serving. Enjoy them warm but not overcooked. If you want to freeze the shrimp bowls, it’s best to do so without toppings. Freeze the shrimp and quinoa separately for the best results. Use freezer-safe bags or containers. Remove as much air as possible to prevent freezer burn. They can last up to 2 months in the freezer. When ready to eat, thaw in the fridge overnight, then reheat as mentioned before. Yes, you can use frozen shrimp. Just make sure to thaw it first. Place the shrimp in the fridge overnight or run it under cold water. Pat the shrimp dry before marinating. This helps the flavors stick better. If you want a substitute for quinoa, try brown rice or couscous. Both cook easily and have a nice texture. You can also use farro or bulgur if you like. Each option brings a different taste and feel to the dish. To keep this dish gluten-free, check your broth. Use vegetable broth labeled gluten-free. Quinoa is naturally gluten-free, so you’re good there. Avoid any sauces or toppings that may contain gluten. Great side dishes include a fresh salad or grilled veggies. You can also serve tortilla chips with salsa. For a light option, try a fruit salad or guacamole. These sides complement the shrimp bowls well. This post outlined how to make tasty cilantro lime shrimp bowls. You learned about the main ingredients, seasonings, and optional toppings. I provided clear steps to marinate, cook, and assemble your dish. Remember the tips for perfect shrimp and easy meal prep. Variations, like using different proteins or spices, keep it fresh and fun. Finally, I shared storage tips to help you enjoy leftovers. With these insights, you can create a delicious meal that suits your taste any day!

Cilantro Lime Shrimp Bowls Fresh and Flavorful Meal

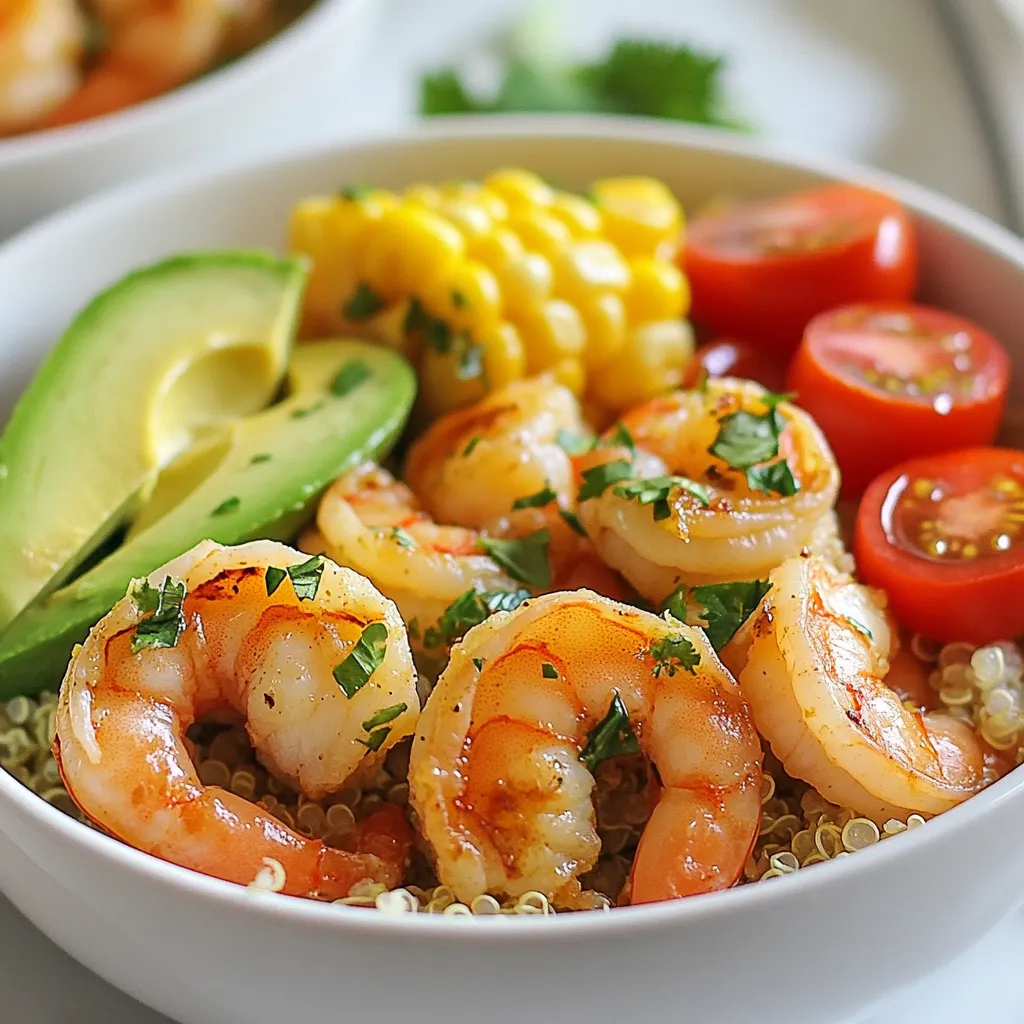
Looking for a fresh and tasty meal? My Cilantro Lime Shrimp Bowls are the answer! Packed with flavor, they combine

Older posts
Newer posts
← Previous Page1 … Page122 Page123 Page124 … Page130 Next →
© 2025 My Cooking Cast • Built with GeneratePress

Our Policies

  • Privacy Policy
  • GDPR Policy
  • Terms Of Use
  • Copyright Policy
  • Cookie Policy
  • Disclaimer

More Information​

  • Home
  • Contact
  • About
  • Dinner
  • Appetizers
  • Dessert
©2025, My Cooking Cast About Privacy Policy Back To Top