
Air Fryer Garlic Parmesan Shrimp Skewers Delight
Are you ready to impress at your next dinner? Air Fryer Garlic Parmesan Shrimp Skewers are easy, tasty, and quick
Are you ready to impress at your next dinner? Air Fryer Garlic Parmesan Shrimp Skewers are easy, tasty, and quick

If you’re looking for an easy and delicious weeknight meal, this Slow Cooker Chili Mac and Cheese is a winner.

Looking for a quick and tasty meal? This Chicken Fajita Rice Skillet is the answer! With juicy chicken, colorful veggies,

Get ready for a comforting meal with my Beef & Mushroom Bourguignon Slow Cooker Delight! This dish combines tender beef,

Craving a sweet treat that feels like a bakery hug? My Cinnamon Apple Streusel Muffins bring warm, cozy flavors right

Get ready to indulge in a crispy, flavorful treat with my Air Fryer Crispy Onion Rings and zesty Garlic Dip!
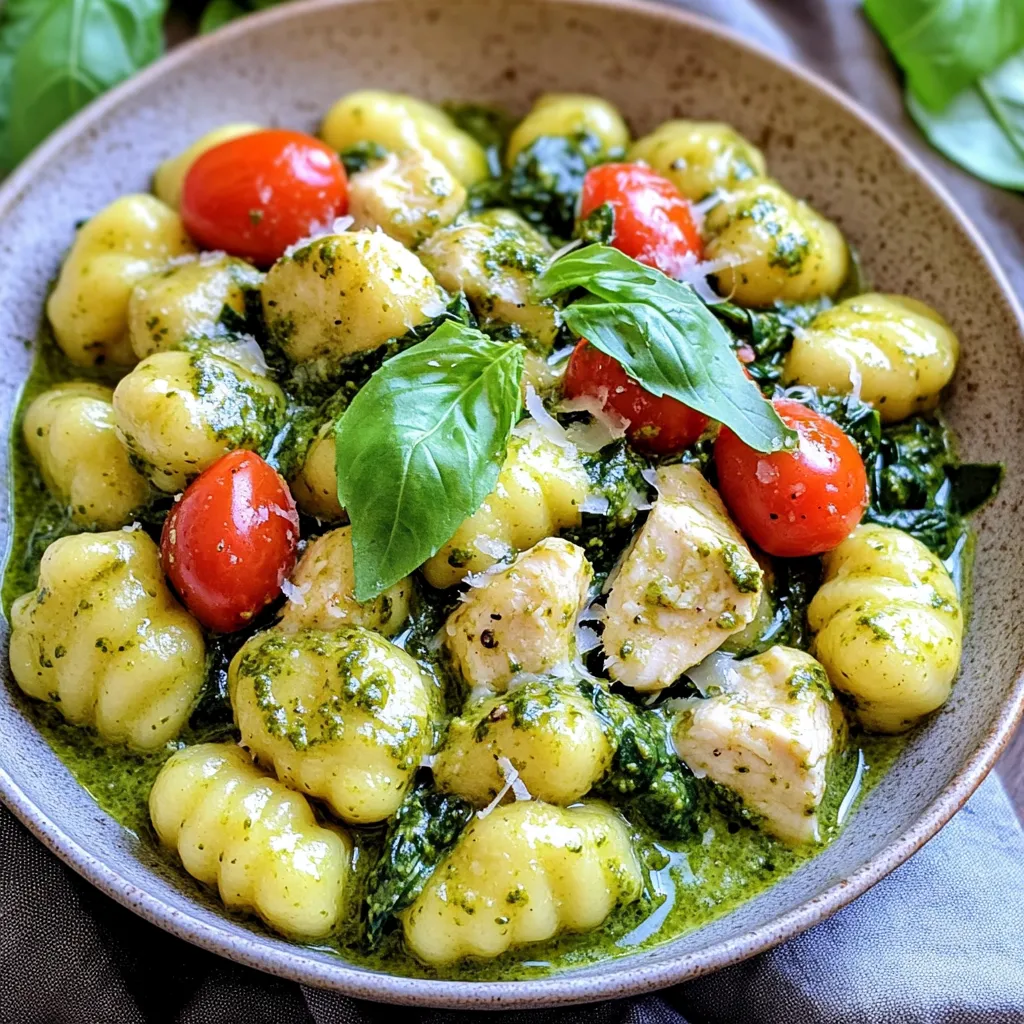
If you’re craving a quick and delicious meal, I have just the recipe for you: Creamy Pesto Chicken Gnocchi One
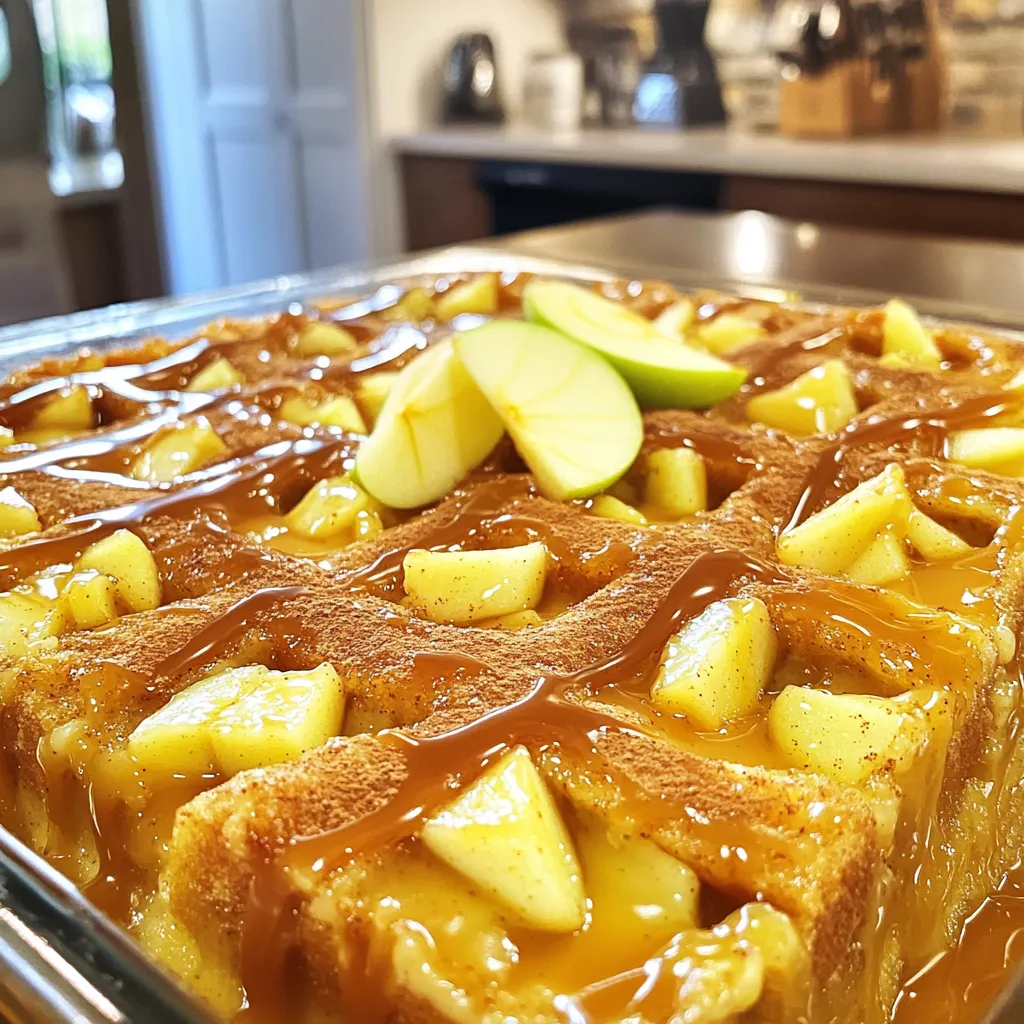
Welcome to the world of comfort desserts! Today, I’m excited to share my recipe for Caramel Apple Bread Pudding with

Craving a comforting meal that warms both body and soul? Look no further! These Roasted Veggie Lasagna Roll-Ups combine fresh
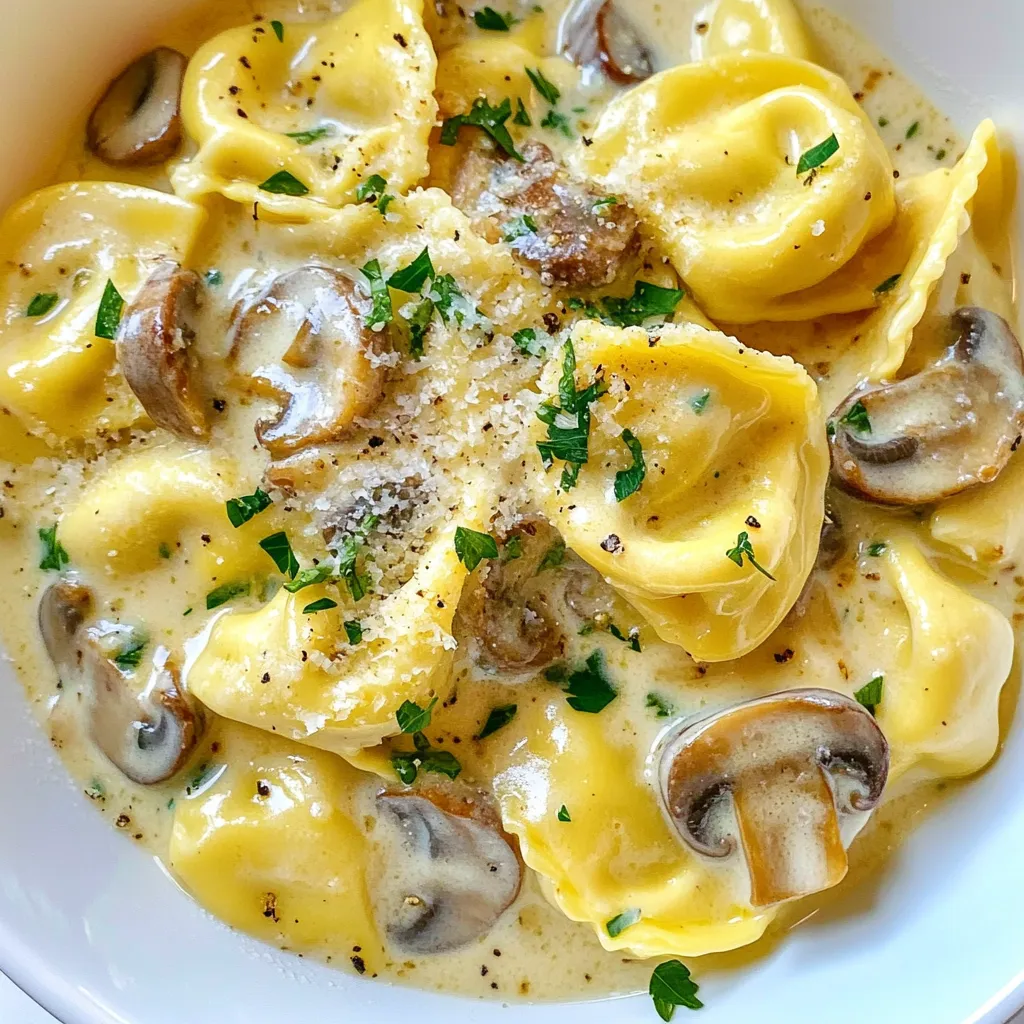
Looking for a quick, tasty meal? Creamy Garlic Mushroom Tortellini is just the thing. This dish is packed with flavors
