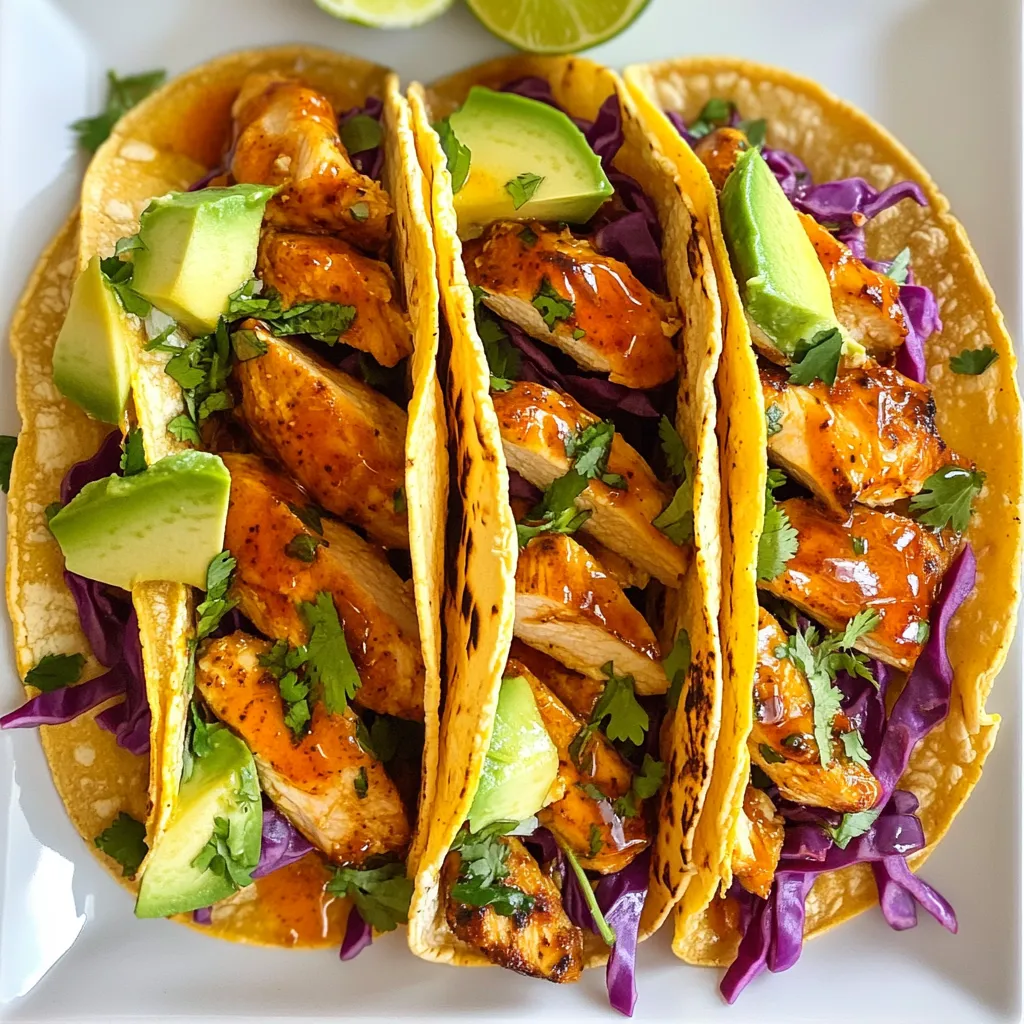
Honey Sriracha Chicken Tacos Flavorful and Easy Meal
Get ready to spice up your dinner with Honey Sriracha Chicken Tacos! This fun and tasty meal packs a punch
Get ready to spice up your dinner with Honey Sriracha Chicken Tacos! This fun and tasty meal packs a punch
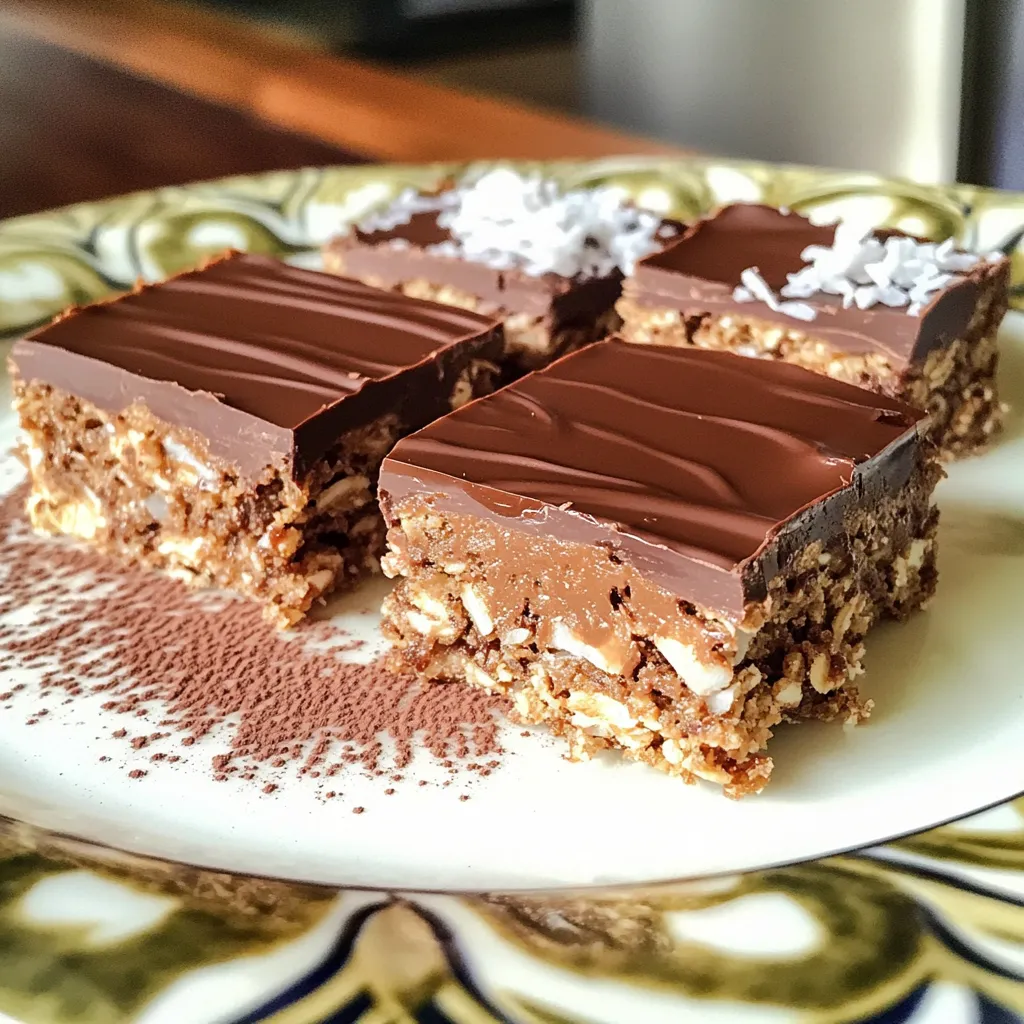
Are you craving a sweet treat but short on time? You’ll love these No-Bake Chocolate Coconut Bars! They are quick
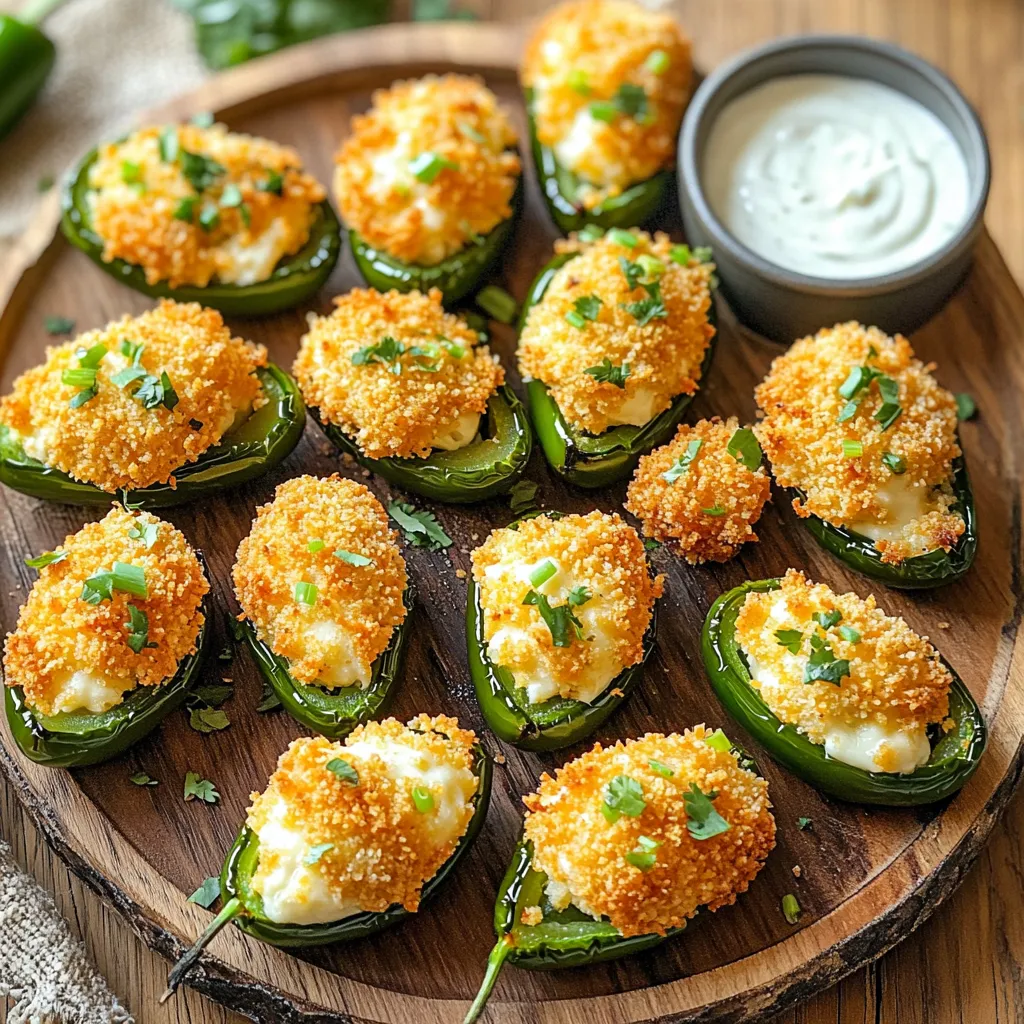
Looking for a snack that packs a punch? You’ll love these Air Fryer Jalapeño Cheese Bites! They’re crispy, cheesy, and

If you need a quick meal full of flavor, you’ve found it! Minute Garlic Chili Rice Bowls are simple to

Get ready to indulge in the ultimate fall treat: Pumpkin Cream Cheese Streusel Muffins! These moist muffins combine the warm,

Warm up your kitchen and your heart with my Slow Cooker Italian Sausage Soup. This hearty dish combines savory Italian
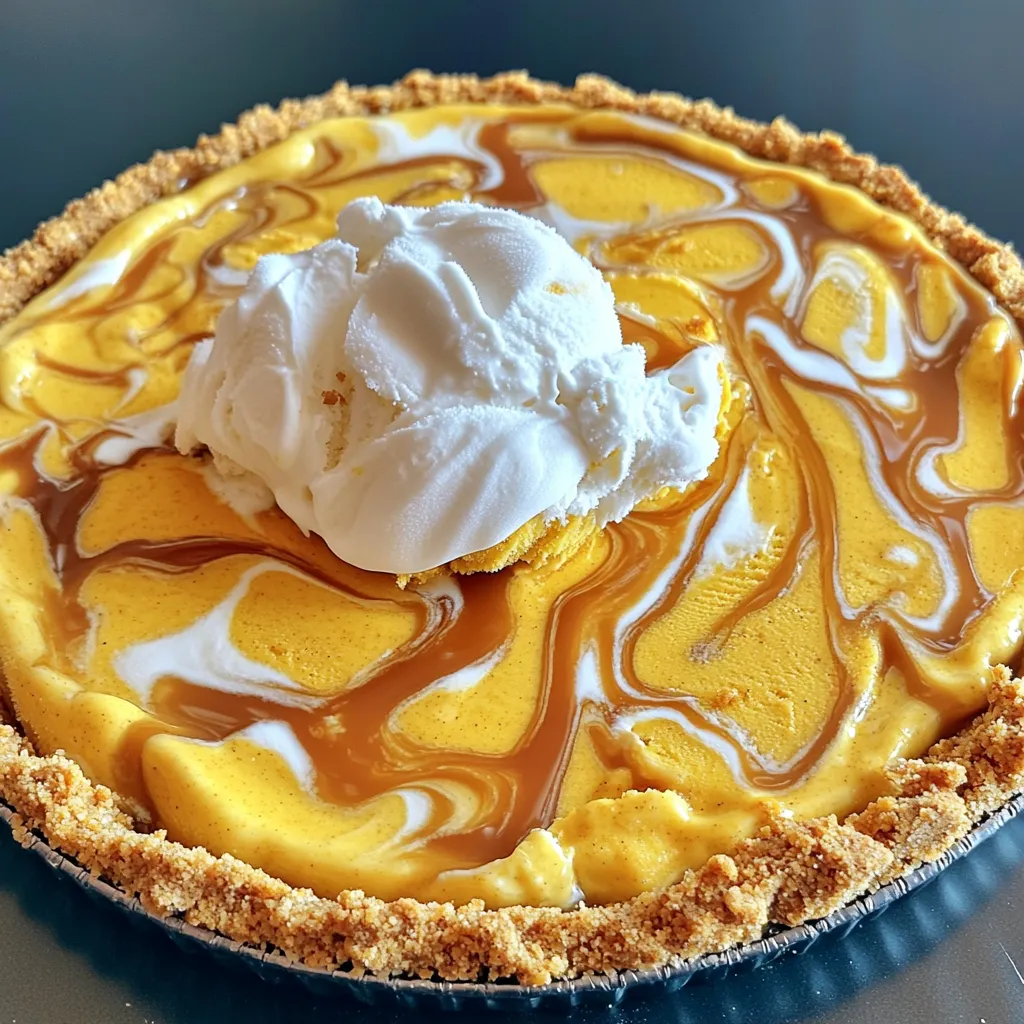
Are you ready to elevate dessert time with a treat that’s a favorite for fall? Meet the Pumpkin Cheesecake Ice
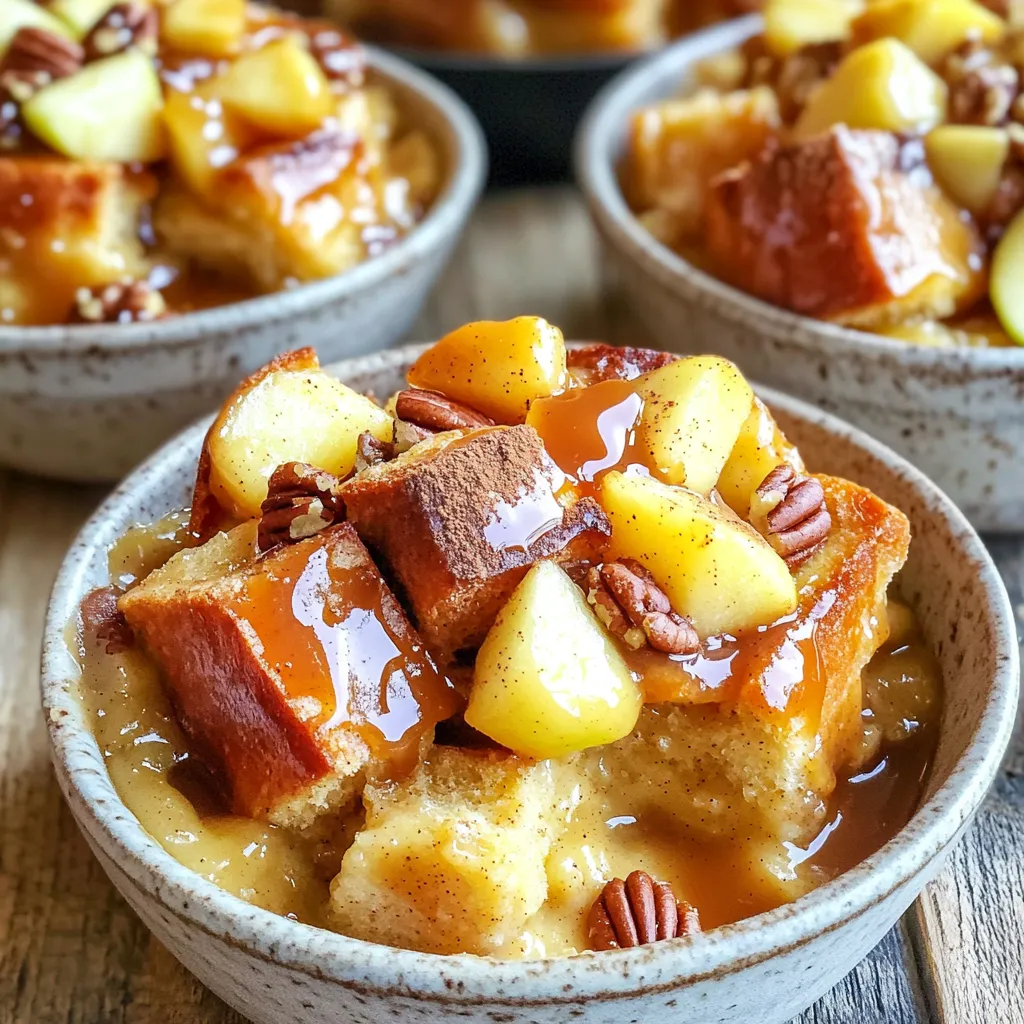
If you’re craving a warm and cozy dessert, look no further! My Caramel Apple Cinnamon Bread Pudding blends sweet apples
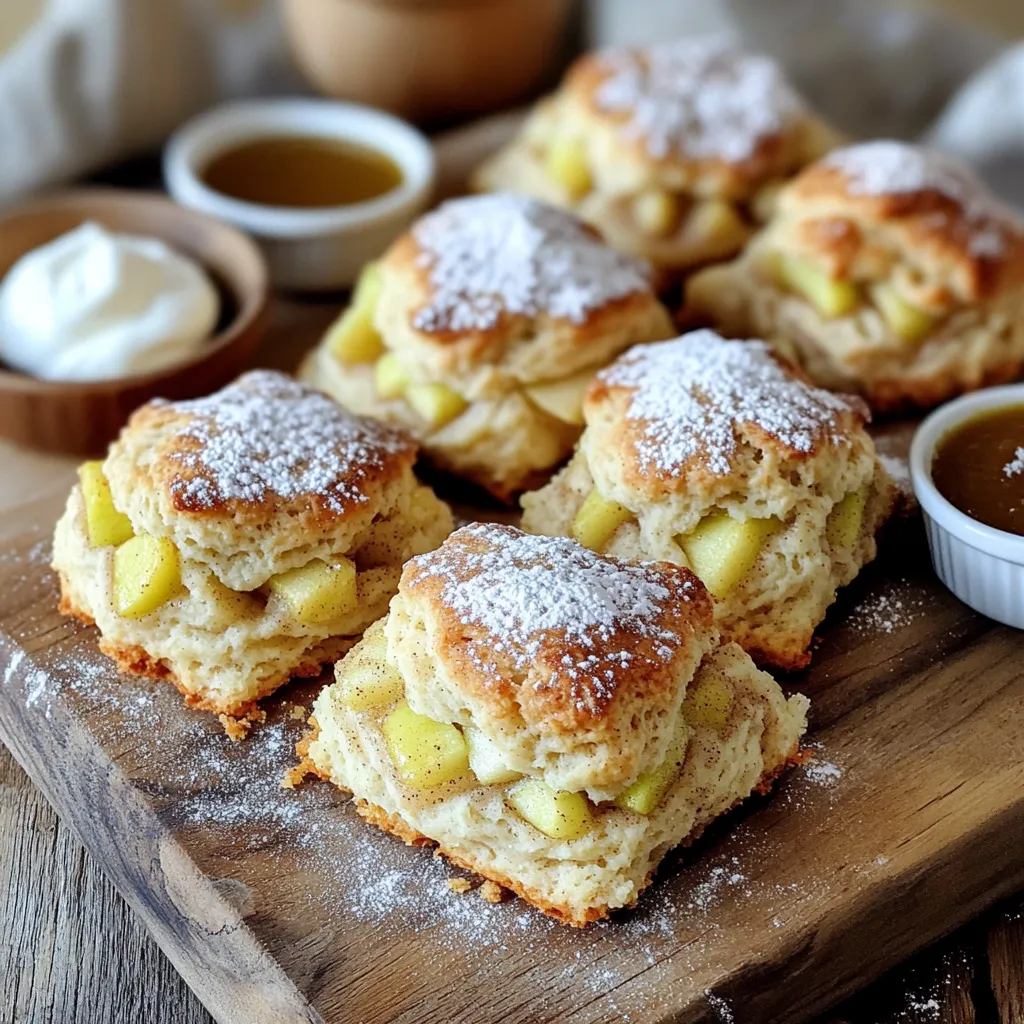
Get ready to enjoy warm, bakery-style apple cinnamon scones! This delightful recipe combines the sweet taste of apples and cinnamon
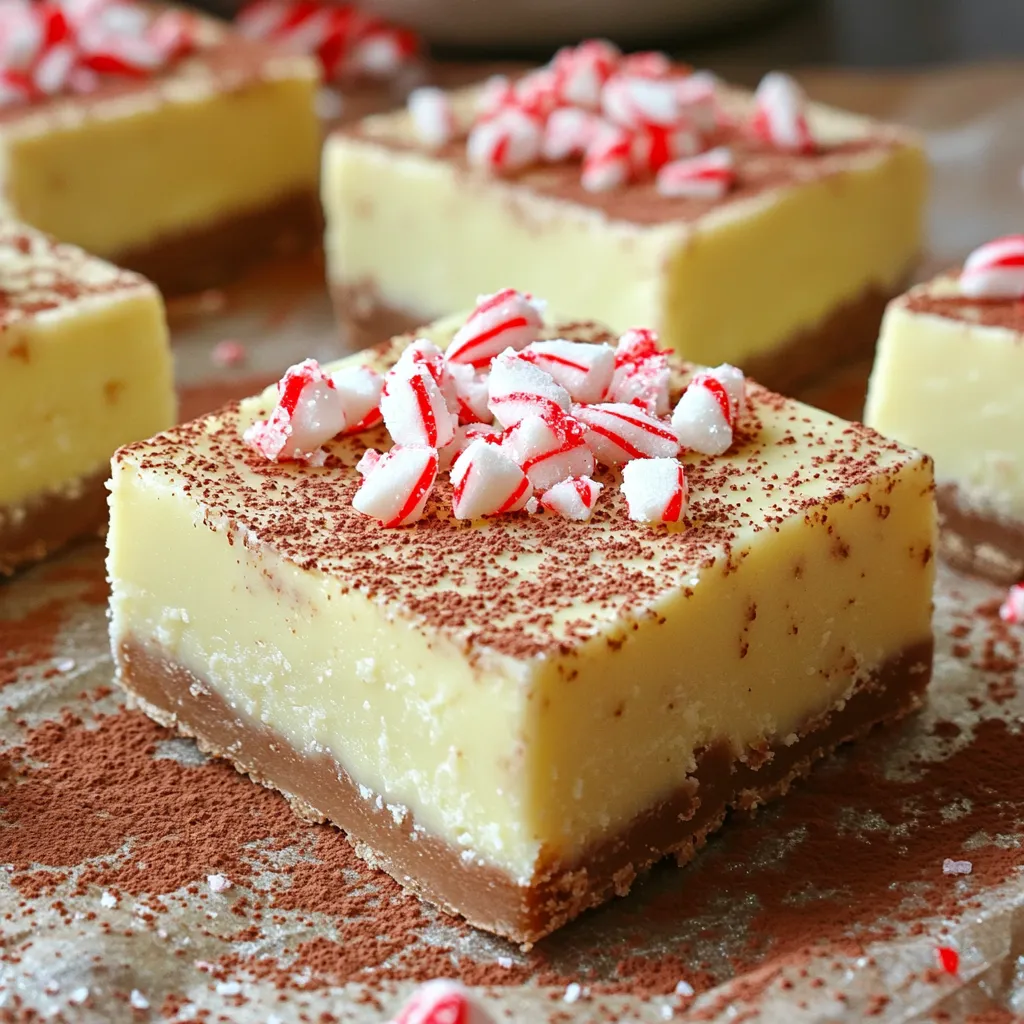
Get ready to make a sweet treat with my No-Bake White Chocolate Peppermint Fudge Delight! This easy recipe combines creamy
