Skip to content
DisclaimerTerms Of UseGDPR PolicyCookie Policy

My Cooking Cast

  • Home
  • Drinks
  • Appetizers
  • Dinner
  • Dessert
  • About
  • Contact
  • Privacy Policy
DisclaimerTerms Of UseGDPR PolicyCookie Policy

Emma

- 1 pound boneless, skinless chicken breasts, cut into 1-inch cubes - 1/4 cup honey - 1/4 cup Dijon mustard - 2 tablespoons olive oil - 1 tablespoon apple cider vinegar - 1 teaspoon garlic powder - 1 teaspoon onion powder - Salt and pepper to taste - 1 bell pepper, cut into 1-inch pieces (any color) - 1 medium red onion, cut into wedges The heart of this dish is the chicken. I prefer using boneless, skinless chicken breasts for their tenderness. The marinade shines with honey and Dijon mustard, giving a sweet and tangy flavor. Olive oil helps keep the chicken moist, while apple cider vinegar adds a bit of brightness. Garlic and onion powder enhance the taste without overpowering the dish. For veggies, I love using bell peppers and red onions. They add color and crunch. You can choose any color of bell pepper. This way, your skewers look vibrant and inviting. - Grill Types: Gas or charcoal grills work well. I find charcoal adds a nice smoky flavor. - Types of Skewers: Wooden skewers need to soak in water first. This stops them from burning. Metal skewers are great for reusing, but they can get hot! With these ingredients and tools, you will create a dish that is both simple and packed with flavor. For the full recipe, check out the detailed instructions provided. Mixing Ingredients To make the marinade, grab a medium bowl. Add 1/4 cup honey and 1/4 cup Dijon mustard. Next, pour in 2 tablespoons of olive oil and 1 tablespoon of apple cider vinegar. Sprinkle in 1 teaspoon of garlic powder and 1 teaspoon of onion powder. Don’t forget some salt and pepper! Whisk everything together until it’s smooth and well mixed. Marinating Time Now, take your chicken. Use 1 pound of boneless, skinless chicken breasts, cut into 1-inch cubes. Add the chicken to the marinade. Make sure each piece is well coated. Cover the bowl and place it in the fridge. Let it marinate for at least 30 minutes. For the best flavor, try to marinate for up to 2 hours. How to Thread Chicken and Vegetables Once the chicken is marinated, it’s time to assemble your skewers. Grab your wooden or metal skewers. If you use wooden ones, soak them in water for 15-20 minutes to prevent burning. Start by threading the marinated chicken onto the skewer. Alternate between the chicken and pieces of bell pepper and red onion. Cut the bell pepper and onion into 1-inch pieces. This adds color and flavor! Tips for Even Cooking Make sure to leave a little space between each piece. This helps the heat circulate around the food, ensuring even cooking. Aim for a good mix of chicken and veggies on each skewer to get all those flavors together. Preheating the Grill Before you grill, preheat your grill to medium-high heat. This step is key for getting nice grill marks and juicy chicken. If you’re using a charcoal grill, let the coals turn white before cooking. Cooking Time and Techniques Place the skewers on the grill. Cook them for about 10-12 minutes. Make sure to turn them occasionally. Check the chicken’s internal temperature; it should reach 165°F (75°C). In the last few minutes, brush the skewers with any leftover marinade for extra flavor. Once done, let them rest for a couple of minutes before serving. For the full recipe, you can refer to the main article. Enjoy your delicious honey mustard chicken skewers! How Long to Marinate for Best Flavor Marinating chicken is key for great flavor. I recommend marinating for at least 30 minutes. If you have time, go for 2 hours. This longer time allows the flavors to soak into the chicken. It makes a big difference in taste. Adjusting Ingredients for Heat or Sweetness You can change the taste by adding more honey for sweetness or more mustard for heat. If you want spice, try adding a pinch of cayenne pepper. Taste the marinade before you add the chicken. Adjust it to fit your preferences. Indirect vs Direct Heat When grilling, use direct heat for quick cooking. Place the skewers over hot coals or flames. If you need to cook slowly, use indirect heat. This method cooks the chicken evenly without burning. Avoiding Common Grilling Mistakes Don't crowd the skewers on the grill. Leave space so heat can circulate. Always preheat your grill. This helps get nice grill marks. Avoid flipping too often; let them cook for a few minutes on each side. Garnishing Suggestions For a beautiful plate, sprinkle fresh parsley or cilantro on top. It adds color and freshness. You can also drizzle a bit of extra honey mustard on the skewers for a nice touch. Side Dishes That Pair Well Serve these skewers with a side salad or grilled veggies. They go well with rice or couscous, too. A light yogurt dip can add a cool contrast to the dish. These sides make your meal more complete and fun! {{image_2}} You can switch up the main protein in this recipe. Shrimp is an excellent choice. It cooks quickly and adds a nice texture. Just be sure to marinate it for only 15-20 minutes. This way, you keep it tender and juicy. Tofu is another great option for a vegetarian twist. Use firm tofu for better skewering. Press it to remove extra moisture, then cut it into cubes. Marinate the tofu just like the chicken. This helps the flavors soak in well. If you like a kick in your dish, add some heat. You can mix in sriracha or cayenne pepper with the marinade. Start with just a teaspoon. Taste the marinade before adding more heat. You can also add chopped jalapeños or red pepper flakes. This gives the chicken a nice spicy touch without overpowering the honey and mustard. You can make a great vegetarian version too. Use an array of colorful veggies like zucchini, mushrooms, or cherry tomatoes. Cut them into bite-sized pieces. Toss them in the same honey mustard marinade to enhance their flavor. Thread the veggies onto skewers and grill them just like the chicken. This way, everyone can enjoy a tasty meal, regardless of their diet. You can find the full recipe above to guide you through these variations. Store any leftover honey mustard chicken skewers in an airtight container. This keeps them fresh and tasty. Make sure to let them cool down first. Place them in the fridge within two hours of cooking. They will stay good for up to three days. To reheat the skewers, use the oven or a skillet. Preheat the oven to 350°F (175°C). Place the skewers on a baking sheet. Cover them with foil to keep moisture in. Heat for about 10-15 minutes. If you use a skillet, heat it on medium. Add a splash of water and cover the pan. This method helps keep them juicy. To freeze honey mustard chicken skewers, wrap them tightly in plastic wrap. Then, place them in a freezer bag. Remove as much air as you can. They will stay good for up to three months. When ready to eat, thaw them in the fridge overnight before reheating. You can serve many tasty sides with Honey Mustard Chicken Skewers. Here are some ideas: - Mixed greens salad: A light salad adds freshness. - Rice or quinoa: These grains soak up flavors well. - Grilled vegetables: Add color and nutrients to your plate. - Garlic bread: This pairs nicely with the skewers. - Potato wedges: Crispy potatoes are always a hit. These sides make your meal more enjoyable and balanced. Yes, you can use different mustards for flavor. Dijon gives a tangy taste. Yellow mustard is milder and sweeter. Honey mustard adds extra sweetness. Spicy brown mustard adds a kick. Experiment with your favorite types. Each will change the taste of your skewers in a unique way. Don’t be afraid to try new flavors! Grilling chicken skewers at medium-high heat works best. This temperature allows the chicken to cook evenly. Aim for about 375°F to 400°F (190°C to 200°C). This heat helps achieve a nice char while keeping the chicken juicy. Always check the internal temperature. It should reach 165°F (75°C) for safety. Using a grill thermometer can help you get it right. Honey mustard chicken skewers are easy and fun to make. Start with good chicken, a flavorful marinade, and fresh veggies. Use the right tools and follow the steps for grilling. Remember to marinate for great flavor and avoid common grilling mistakes. Try variations like shrimp or veggie options for new tastes. Store leftovers properly and enjoy them later. This dish is a crowd-pleaser, perfect for any meal. Enjoy experimenting with flavors to find your favorite combo!

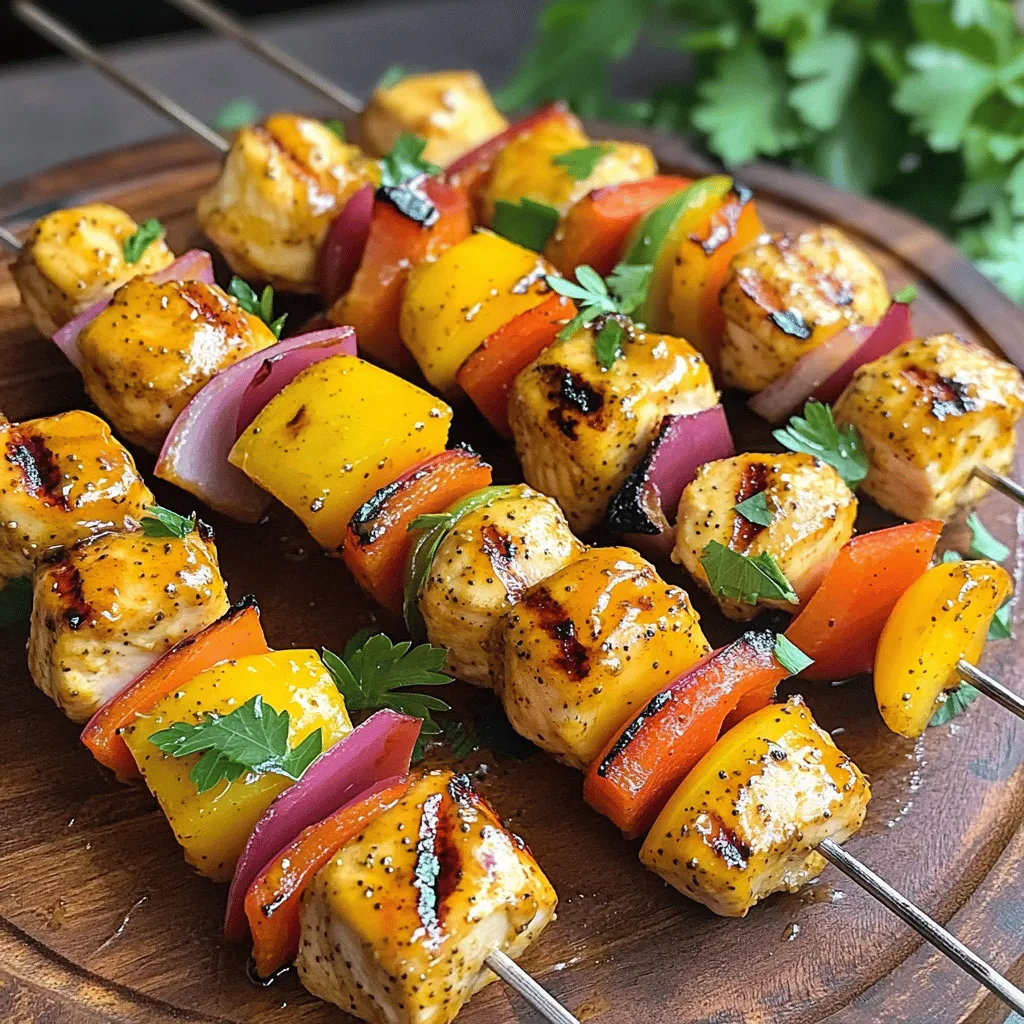
Honey Mustard Chicken Skewers Flavorful and Simple Meal

If you’re looking for a tasty, easy meal, you’ll love these Honey Mustard Chicken Skewers! This dish combines juicy chicken,

- Boneless, skinless chicken breasts - Bell peppers (red and yellow) - Red onion - Garlic For this dish, I prefer using boneless, skinless chicken breasts. They cook evenly and stay juicy. Slice them into thin strips for quick cooking. I love adding colorful bell peppers, both red and yellow. They add sweetness and crunch. A large red onion also brings great flavor. Don’t forget the garlic! It adds a nice depth to the dish. - Olive oil - Ground cumin - Smoked paprika - Chili powder - Lime juice The right spices make a big difference. I use olive oil to help the spices stick. Ground cumin adds warmth and earthiness. Smoked paprika gives a subtle smokiness that is hard to beat. Chili powder brings a bit of heat and flavor. A splash of fresh lime juice brightens everything up. This mix makes the chicken taste amazing. - Flour or corn tortillas - Fresh cilantro for garnish - Optional toppings like salsa and guacamole To serve, I recommend warm flour or corn tortillas. They hold everything together nicely. Fresh cilantro adds a pop of color and flavor. You can also add toppings like salsa and guacamole for extra taste. These make the meal even more fun and tasty. For the full recipe, you can check the [Full Recipe]. - Slice chicken, vegetables, and mince garlic. - Season the chicken with spices and lime juice. Start by slicing 1 pound of boneless, skinless chicken breasts into thin strips. Next, slice 2 bell peppers and 1 large red onion. Mince 3 cloves of garlic and keep them aside. This step is key for even cooking and great flavor. In a large bowl, combine the chicken with 2 tablespoons of olive oil, 1 teaspoon of ground cumin, 1 teaspoon of smoked paprika, 1 teaspoon of chili powder, ½ teaspoon of salt, and ½ teaspoon of black pepper. Squeeze the juice of 1 lime over the mixture. Toss until the chicken gets a nice coat of spices. - Cook seasoned chicken in a skillet. - Add vegetables and sauté until tender. Heat a large non-stick skillet or cast-iron pan over medium-high heat. Once hot, add the seasoned chicken strips. Cook for about 5 to 7 minutes. Stir occasionally until the chicken is browned and cooked through. Now, it's time to add the vegetables. Toss in the sliced bell peppers, red onion, and minced garlic. Stir everything together. Cook for another 5 to 8 minutes. You want the veggies tender but still crisp. - Adjust seasoning and add optional heat. - Serve with tortillas and garnish. Taste your dish and adjust the seasoning if needed. If you enjoy heat, sprinkle in some crushed red pepper flakes. Remove the skillet from heat and let it rest for a few minutes. Serve warm with tortillas on the side to build your fajitas. Garnish with fresh chopped cilantro. For the full recipe, check out the details above. Enjoy your meal! To achieve the perfect sauté, heat your skillet well. A hot skillet helps the chicken brown nicely. I use a non-stick or cast-iron skillet for best results. Add the chicken strips and let them cook without stirring for a few minutes. This creates a nice sear. Stir occasionally to cook evenly. Ensure your chicken is thoroughly cooked by checking its internal temperature. Use a meat thermometer; it should reach 165°F (75°C). This keeps the chicken safe to eat and juicy. If you don't have a thermometer, cut a piece open. The meat should be white, not pink. For seasoning adjustments, taste your dish as you cook. If you like it spicier, add more chili powder or crushed red pepper. You can also add a pinch of salt to enhance flavors. Fresh lime juice brightens the dish. Serve your One-Pan Chicken Fajitas with sides like rice or beans. A fresh salad pairs well too. Guacamole and salsa bring extra flavor and texture. These sides make the meal feel complete and satisfying. A large non-stick skillet is best for even cooking. It allows the chicken and veggies to brown nicely without sticking. A cast-iron skillet also works well, giving a great char. Utilize kitchen tools like a sharp knife for slicing ingredients. A cutting board helps keep your counter clean. Use measuring spoons for spices to ensure balanced flavor. Preparations become easier with the right tools at hand. {{image_2}} You can swap chicken for shrimp or beef. Shrimp cooks fast, making it a great choice. Just adjust cooking time to avoid overcooking. Beef adds a rich taste. Use flank steak or sirloin for the best flavor. For a vegetarian twist, try plant-based proteins like tofu or tempeh. They soak up flavors well and offer a hearty bite. Want more veggies? Add zucchini, mushrooms, or spinach. These options enhance color and nutrition. You can also use roasted corn for sweetness. For homemade fajita seasonings, mix chili powder, cumin, and paprika. Add onion powder or oregano for extra depth. Make a big batch and store it for later. Fajita bowls are fun! Use rice or quinoa as a base. Layer with your cooked chicken and veggies, then top with salsa or avocado. You can also make fajita salads. Toss the chicken and veggies on a bed of greens. Drizzle with a lime vinaigrette for a fresh kick. Experiment with different sauces like chipotle mayo or creamy ranch. The options are endless! For the full recipe, check out the details above. To store your One-Pan Chicken Fajitas, first let them cool down. Place leftovers in a tight container. I recommend using glass containers or BPA-free plastic ones. These keep the flavors fresh. You can store them for up to four days in the fridge. If you want to save some for later, freezing works well. Pack the cooked fajitas in freezer bags. Remove as much air as you can. They will stay good for about three months. When you are ready to eat, thaw them in the fridge overnight. Reheat them in a skillet or microwave until hot. In the fridge, your fajitas last about four days. Be sure to check for signs of spoilage. If you see any mold or notice a bad smell, toss them out. Fresh food is key to a great meal! Enjoy your delightful one-pan chicken fajitas! For the full recipe, check out the earlier section. Making One-Pan Chicken Fajitas is quick. It takes about 10 minutes to prep. Cooking takes around 10 minutes, making the total time 20 minutes. You can enjoy a tasty meal in no time! Yes, you can prepare One-Pan Chicken Fajitas ahead. Cook them fully, let them cool, and store in an airtight container. They last in the fridge for up to three days. To reheat, warm them in a skillet over low heat. Stir often to heat evenly. You can serve One-Pan Chicken Fajitas with many sides. Here are a few ideas: - Rice or quinoa for a filling base. - Black beans for added protein. - Fresh salsa for a zesty kick. - Guacamole for creaminess. - Sour cream for a cool touch. Check out the Full Recipe for more ways to enjoy these fajitas! In this blog post, I shared a simple recipe for One-Pan Chicken Fajitas. We covered the main ingredients, step-by-step instructions, and tips for storing leftovers. I also explored variations like different proteins and serving styles. These fajitas are easy to make and full of flavor. Whether you use chicken or try new veggies, you can enjoy them your way. Now, grab your skillet and get cooking! Enjoy your tasty meal.

One-Pan Chicken Fajitas Simple and Flavorful Meal

Are you looking for a quick, tasty meal that’s easy to clean up? One-Pan Chicken Fajitas are perfect for you!

To make this dish, you need a few key items. The main star is a whole chicken, weighing around 4-5 lbs. This size will give you juicy meat and crispy skin. You also need: - 1 whole chicken (about 4-5 lbs) - 4 lemons (2 sliced, 2 juiced) - 8 cloves garlic, minced These ingredients form the base of the meal. The lemon adds a fresh zing, and garlic brings rich flavor. Next, you’ll want to gather some seasoning. The right herbs and spices make all the difference. For this recipe, have on hand: - 1/4 cup olive oil - 1 tablespoon fresh rosemary, chopped (or 1 teaspoon dried) - 1 tablespoon fresh thyme, chopped (or 1 teaspoon dried) - 1 tablespoon salt - 1 teaspoon black pepper - 1 teaspoon paprika These seasonings will give your chicken a wonderful taste. The olive oil helps to keep the meat moist, while the herbs add depth. Finally, let’s talk about the tools you need. You will need: - A roasting pan - A small bowl for mixing the marinade - A meat thermometer - Paper towels for drying the chicken These items will help you prepare and cook your chicken perfectly. Having the right tools makes cooking easier and more fun! For the full recipe, check out the Lemon Garlic Roasted Chicken 🧄. To start, you need a whole chicken, about 4 to 5 pounds. First, I like to pat the chicken dry with paper towels. This step is key for getting that crispy skin. Make sure to dry it well. Then, place the chicken in a roasting pan. Next, it’s time to make the marinade. In a small bowl, combine these ingredients: - 8 cloves garlic, minced - 1/4 cup olive oil - Juice from 2 lemons - 1 tablespoon fresh rosemary, chopped (or 1 teaspoon dried) - 1 tablespoon fresh thyme, chopped (or 1 teaspoon dried) - 1 tablespoon salt - 1 teaspoon black pepper - 1 teaspoon paprika Mix everything well. This flavorful mix will make the chicken taste amazing. Now, rub the marinade generously all over the chicken. Make sure to get it under the skin for extra flavor. Next, stuff the chicken with sliced lemons. This adds even more taste while roasting. Pour 1 cup of low-sodium chicken broth into the roasting pan. This keeps the chicken moist and helps make gravy. Preheat your oven to 425°F (220°C). Place the chicken breast-side up in the pan. Roast it for about 1 hour and 20 minutes. You want the internal temperature to reach 165°F (75°C). Baste the chicken with broth every 30 minutes to help it brown. Once done, let the chicken rest for 15 minutes. This helps keep it juicy. Now, you can carve and serve it! Don’t forget to drizzle some pan juices over the chicken for extra flavor. If you want, garnish with fresh parsley for a nice touch. For the complete process, check out the Full Recipe. To get that golden, crispy skin, start with a dry chicken. Pat it dry with paper towels. This helps the skin crisp up nicely. Next, rub olive oil all over. The oil creates a barrier, helping the skin brown. Season well with salt and paprika. Salt pulls moisture from the skin, improving the crispiness. Roast at a high temperature, like 425°F (220°C). This ensures a crunchy exterior while keeping the inside juicy. For juicy meat, consider the cooking time. Use a meat thermometer to check the doneness. Aim for an internal temperature of 165°F (75°C). This ensures the chicken cooks through without drying out. Basting the chicken with its juices adds flavor and moisture. Stuffing the chicken with lemon slices adds a zesty taste. The lemons release juices that flavor the meat from the inside. Basting during roasting is a game-changer. It keeps the chicken moist and adds flavor. Every 30 minutes, spoon some broth over the chicken. This helps the skin stay crisp and prevents dryness. The broth collects at the bottom of the pan, making a great base for gravy. This simple step transforms your meal into a gourmet experience. Try it with the full recipe for the best results. {{image_2}} You can change up the flavors of your lemon garlic roasted chicken easily. Try different herbs like sage or oregano. These add unique tastes that brighten your dish. You can also use other citrus fruits. Limes or oranges work well too. Their juices give a fresh twist that you will love. If you want to cook this chicken differently, you have options. A slow cooker is a great choice. It makes the chicken tender and juicy. Simply follow the same steps for seasoning. Then cook on low for 6-8 hours. Grilling is another fun way to prepare this dish. It gives the chicken a nice smoky flavor. Just marinate it as usual and grill over medium heat until cooked through. You can pair your chicken with many sides. Fresh salads, roasted veggies, or mashed potatoes all work great. Try a simple green salad with lemon vinaigrette. It complements the chicken well. For a hearty meal, serve with roasted root veggies. They add color and taste to your plate. You can even serve it over rice or quinoa. This creates a filling and balanced meal. Check out the Full Recipe for more ideas and tips! To keep your leftover chicken fresh, let it cool first. Once it's cool, wrap it tightly in plastic wrap or foil. You can also place it in an airtight container. Store it in the fridge for up to four days. This helps keep the chicken juicy and full of flavor. When it's time to eat the leftovers, preheat your oven to 350°F (175°C). Place the chicken in an oven-safe dish. Cover it with foil to prevent it from drying out. Heat it for about 20 to 25 minutes. You can use a meat thermometer to check if it reaches 165°F (75°C) before serving. If you want to keep the chicken longer, freezing is a great option. After cooling, portion the chicken into smaller pieces. Wrap each piece in plastic wrap, then place them in a freezer bag. Make sure to remove as much air as possible. You can freeze the chicken for up to three months. When ready to eat, thaw it in the fridge overnight before reheating. For more details, check out the Full Recipe for Lemon Garlic Roasted Chicken. To check if the chicken is done, use a meat thermometer. Insert it into the thickest part of the thigh. The temperature should reach 165°F (75°C). If you don’t have a thermometer, cut into the thigh. The juices should run clear, not pink. Yes, you can use chicken parts. Just adjust the cooking time. Chicken breasts and thighs cook faster than a whole chicken. Cook breasts for about 25-30 minutes and thighs for about 40-45 minutes. Always check for that safe 165°F (75°C) mark. To reheat, place the chicken in an oven at 350°F (175°C). Cover it with foil to keep it moist. Heat for about 20-25 minutes or until warm. You can also use a microwave but be careful not to dry it out. To serve more people, increase the number of chickens. For a crowd, two whole chickens work well. Simply double all ingredients. Make sure your roasting pan can hold them both. Adjust cooking time if needed, checking each chicken’s temperature. Yes, marinating overnight is a great idea! It allows the flavors to soak in deeply. Just keep the chicken in the fridge while it marinates. Make sure to cover it well to avoid any cross-contamination with other foods. You can try other herbs like oregano, sage, or basil. Each herb brings unique flavors. Feel free to mix and match based on your taste. Fresh herbs usually pack more flavor than dried ones, so keep that in mind. For the full details, check the Full Recipe. Lemon garlic roasted chicken is a simple dish that packs a punch. We covered essential ingredients, easy steps, and helpful tips. Each step helps you achieve crispy skin and juicy meat. Feel free to explore variations with herbs or different sides. Remember, proper storage keeps leftovers tasty. With these tools and tricks, you can enjoy this meal any time. Try it out and share your results!

Lemon Garlic Roasted Chicken Flavorful and Simple Meal

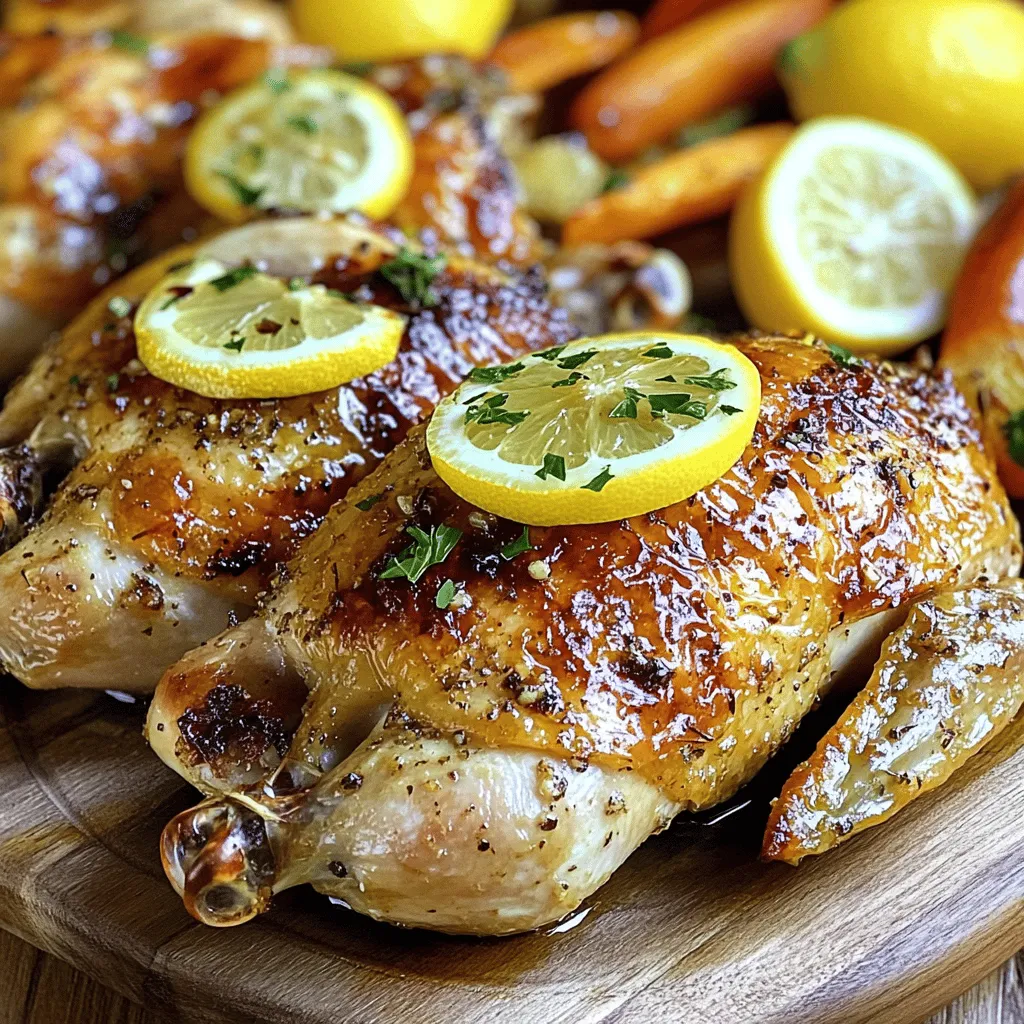
Looking for a tasty and easy meal? Lemon Garlic Roasted Chicken is the answer! This dish is full of flavor

To make a tasty zucchini noodle stir fry, you need these simple ingredients: - 2 medium zucchinis (spiralized) - 1 bell pepper (thinly sliced) - 1 cup snap peas (trimmed) - 1 carrot (julienned) - 3 cloves garlic (minced) - 1 tablespoon fresh ginger (grated) - 2 tablespoons soy sauce (or tamari) - 1 tablespoon sesame oil - 1 teaspoon chili paste - 1 tablespoon sesame seeds (for garnish) - Chopped green onions (for garnish) - Salt and pepper (to taste) These ingredients bring a burst of flavor and crunch to the dish. The spiralized zucchini acts as a low-carb base, while the veggies add color and nutrition. Garlic and ginger provide great flavor, and soy sauce adds saltiness. The chili paste gives a little kick, making every bite exciting. This recipe is not only quick to make but also healthy. You can enjoy it as a main dish or a side. For the full recipe, you can check the details above. - Spiralizing zucchinis: Use a spiralizer to turn the zucchinis into noodles. This tool makes it easy. Aim for thin strands to cook quickly. - Julienne the carrot: Take a sharp knife and cut the carrot into thin strips. This will help it cook evenly. - Slicing the bell pepper: Cut the bell pepper into thin slices. Any color works well and adds a pop of color. - Heating the skillet with sesame oil: Heat a large skillet over medium-high heat. Add sesame oil and let it warm up. This oil adds a nutty flavor. - Sautéing garlic and ginger: Once the oil is hot, add minced garlic and grated ginger. Cook for about 30 seconds. The aroma will fill your kitchen! - Adding vegetables and stirring: Toss in the bell pepper, carrot, and snap peas. Stir-fry for 3-4 minutes. You want them to be crisp and bright. - Incorporating zucchini noodles and sauces: Gently add the zucchini noodles to the pan. Pour in soy sauce and chili paste. Mix well to coat everything. - Tossing ingredients together: Stir everything for 2-3 minutes. Be careful not to overcook the zucchini. You want them tender but not mushy. - Final seasoning adjustments: Taste and add salt and pepper as needed. This is your chance to fine-tune the flavors. Enjoy your fresh, vibrant dish! For the full recipe, check out the details above. When you sauté vegetables, heat the pan first. Use medium-high heat for the best results. Add sesame oil and let it shimmer. This step helps seal in the flavors. To avoid mushy zucchini noodles, be quick. Add them last and cook for just a few minutes. They need to stay firm. Overcooking makes them watery. Keep an eye on them, and stir gently. For a tasty stir fry, use soy sauce and sesame oil. They bring depth to your dish. Fresh ginger and garlic add a kick. If you want to change things up, try different sauces. Teriyaki or sweet chili sauce can add a new twist. You can also use coconut aminos for a gluten-free option. Garnish your dish with sesame seeds and chopped green onions. They add color and texture. A sprinkle of sesame seeds makes it look gourmet. Serve your stir fry in a big bowl. This makes it inviting. Pair it with rice or quinoa for a fuller meal. For the full recipe, check out the Zesty Zucchini Noodle Stir Fry. {{image_2}} You can easily add protein to your zucchini noodle stir fry. Chicken and tofu are great options. For chicken, use thin strips and cook them first. Add them back when the veggies are nearly done. For tofu, press it to remove water, then cut it into cubes. Sauté it until golden brown before mixing in the veggies. This gives a nice texture and flavor. You can also try shrimp or tempeh for different tastes. Feel free to customize based on what you like or have at home. Zucchini noodles are just the start. You can include other veggies to make it colorful and nutritious. Bell peppers, carrots, and snap peas work well. But don’t stop there! Use broccoli, mushrooms, or bok choy. Seasonal choices like asparagus in spring or sweet corn in summer add freshness. The more variety, the more fun your dish will be. You can twist your stir fry with different cuisines. For an Asian flair, add soy sauce, sesame oil, and a bit of chili paste. Try adding peanuts or cashews for crunch. For a Mediterranean style, swap soy sauce for olive oil and lemon juice. Add olives and artichokes for a tasty twist. Both styles keep it exciting and flavorful. For the complete recipe, check out the [Full Recipe]. To keep your zucchini noodle stir fry fresh, store leftovers in airtight containers. Glass containers work well as they keep food safe and fresh. Make sure to cool the stir fry before sealing. This helps prevent moisture buildup, which can make your dish soggy. Yes, you can freeze zucchini noodles! However, it’s best to freeze them raw. Cooked noodles can lose their texture. To freeze, place the raw noodles in freezer bags, removing as much air as possible. When you’re ready to use them, thaw in the fridge overnight. Reheat them in a skillet over medium heat for the best results. Zucchini noodle stir fry lasts about three to four days in the fridge. Always check for signs of spoilage. If you see any mold or off smells, it’s best to throw it out. Fresh ingredients lead to a better tasting dish, so always prioritize quality. To make zucchini noodles, you need to spiralize the zucchini. This turns it into thin strands, much like spaghetti. You can easily do this with a spiralizer. They come in different styles, from handheld to countertop models. You can also use a vegetable peeler or knife, but that takes more time. Zucchini noodle stir fry is low in calories and high in nutrients. On average, one serving has around 100-150 calories. Zucchini is rich in vitamins A and C, potassium, and fiber. This dish is a great alternative to regular noodles, which can be high in carbs. Zucchini noodles have fewer carbs and more vitamins. Yes, you can prepare some ingredients ahead of time. Spiralize the zucchinis and chop other veggies a day before. Store them in airtight containers in the fridge. When you’re ready to cook, just heat up your pan and add everything. If you reheat it, do so gently to keep the noodles from getting mushy. This will help maintain their texture and flavor. For the full recipe, check out the Zesty Zucchini Noodle Stir Fry 🥒. Zucchini noodle stir fry is simple and fun to make. You saw how to prepare colorful veggies and add flavor with soy sauce and sesame oil. Remember, you can customize this dish with different proteins and spices. Storage tips help you enjoy leftovers or make meals ahead of time. In the end, this dish is fresh, healthy, and tasty. Give it a try, and you’ll find it's full of flavor and good for you!

Zucchini Noodle Stir Fry Flavorful and Healthy Meal

Looking for a quick and healthy meal? Try this Zucchini Noodle Stir Fry! It’s packed with colorful veggies and bold

- Main ingredients: - 12 oz pasta (penne or fettuccine works best) - 2 cups cherry tomatoes, halved - 1 cup heavy cream - Fresh herbs: - 1 cup fresh basil leaves, chopped (plus extra for garnish) - Basil adds a sweet and aromatic taste. It brightens the dish. - Additional components: - 3 cloves garlic, minced - 2 tablespoons olive oil - 1/2 cup grated Parmesan cheese - 1 teaspoon red pepper flakes (optional) - Salt and pepper to taste Gather these ingredients before you start cooking. Each one plays a key role in making this creamy tomato basil pasta rich and flavorful. The tomatoes bring sweetness, while basil adds freshness. Parmesan gives a nice cheesy touch, and garlic adds depth. The heavy cream makes it all creamy and delicious! For the full recipe, check out the details above. To cook perfect al dente pasta, bring a large pot of salted water to a boil. Add the pasta and cook it as directed on the package. You want the pasta firm but not hard. This usually takes about 8-10 minutes. Once done, drain the pasta but save one cup of the pasta water. This water helps to make the sauce creamy later. For great garlic flavor, heat olive oil in a large skillet over medium heat. Once hot, add the minced garlic. Sauté it for 1-2 minutes until it smells amazing. Be careful not to burn the garlic. Burnt garlic tastes bitter and ruins the dish. Now, add the halved cherry tomatoes and red pepper flakes to the skillet. Cook them for about 5-7 minutes. Stir occasionally. You want the tomatoes to soften and release their juices. After that, lower the heat and pour in the heavy cream. Stir well and let it simmer for 2-3 minutes. This thickens the sauce just right. Time to combine everything! Add the grated Parmesan cheese and chopped basil to the skillet. Then, toss in the cooked pasta. Mix it all well so the pasta is coated in the creamy sauce. If it feels too thick, add a splash of the reserved pasta water. Finally, season with salt and pepper to taste. Toss one more time to blend all the flavors. Enjoy your creamy tomato basil pasta! For the full recipe, check out the complete guide. To make your sauce rich, follow these best practices: - Use heavy cream. It gives a smooth texture. - Simmer the cream gently. This helps it thicken without burning. - Stir frequently. This keeps the sauce from sticking. - Add a splash of pasta water. It helps blend the sauce and pasta. By using these tips, your sauce will be velvety and delicious. You can add herbs and spices to make your dish shine. Here are some ideas: - Fresh basil is key. Add it at the end for bright flavor. - Oregano and thyme work well too. They add depth to the dish. - For heat, add red pepper flakes. Use them when you sauté the garlic. Start with a little, then taste. You can always add more. These additions can suit your taste and make the dish stand out. A beautiful plate makes food even more enjoyable. Here are some garnishing ideas: - Top with extra fresh basil. It adds color and freshness. - Sprinkle more grated Parmesan on top. It gives a nice finish. - Serve in a big bowl or individual plates. This adds elegance. These simple tips will make your creamy tomato basil pasta look as good as it tastes. For the full recipe, check out the details above. {{image_2}} You can easily change this recipe to fit your needs. For a gluten-free version, use gluten-free pasta. Many brands make pasta from rice or lentils. They taste great and cook well. For a vegan twist, switch heavy cream with coconut milk or cashew cream. This keeps the dish creamy and rich. You can also skip the Parmesan cheese or use a vegan substitute. Want to add some protein? You have options! Grilled chicken is a favorite. It adds flavor and makes the meal heartier. Shrimp is another great choice. Just sauté it with the garlic until it's pink and cooked through. You can also use cooked sausage for a spicy kick. Mixing in these proteins makes the dish more filling and tasty. Make this dish shine with seasonal ingredients. In spring, add fresh asparagus or peas for a pop of color. In summer, zucchini or bell peppers work well. They add a nice crunch and flavor. In the fall, consider adding roasted butternut squash for sweetness. For winter, use hearty greens like kale or spinach. Incorporating seasonal veggies and herbs keeps your dish fresh and exciting. For a complete guide, check out the Full Recipe. To keep your creamy tomato basil pasta fresh, store it in an airtight container. Refrigerate it right after it cools down. It will stay tasty for about three to four days. If you want to keep it longer, freeze it. Use a freezer-safe container and try to remove as much air as possible. This will help avoid freezer burn. When you freeze it, aim to use it within three months. When you reheat this dish, do it gently. The best way is to use a skillet. Add a splash of water or extra cream to help it stay creamy. Heat it over low to medium heat. Stir often to mix the sauce back in with the pasta. You can also use the microwave. Place it in a microwave-safe bowl, cover it, and heat in short bursts. Stir in between to keep it even. Avoid high heat, as it can make the pasta tough. Creamy tomato basil pasta lasts well in the fridge for about four days. If frozen, it can last for three months. However, the texture may change after thawing. The sauce may separate slightly. Still, it will taste great. Just remember to check for any signs of spoilage before eating. Always trust your senses—if it smells or looks off, it’s best to toss it. Making creamy tomato basil pasta is quick and easy. Here’s the breakdown: - Prep Time: 10 minutes - Cook Time: 15 minutes - Total Time: 25 minutes You can enjoy a delicious meal in half an hour! Yes, you can use canned tomatoes. They save time and are convenient. Here are some pros and cons: - Pros: - Canned tomatoes are often juicier. - They have a longer shelf life. - Cons: - Fresh tomatoes provide a brighter flavor. - Canned tomatoes may alter the texture. If you use canned tomatoes, drain some juice to avoid a watery sauce. Cook them the same way as fresh ones! You can use many pasta types. Here are some popular choices: - Penne: Holds sauce well. - Fettuccine: Great for creamy sauces. - Spaghetti: Classic for any sauce. Choose your favorite! Just remember to cook it al dente for the best texture. Yes, this recipe is excellent for meal prep! Here are some tips: - Make Ahead: Cook the pasta and sauce separately. Store them in airtight containers. - Reheat: When ready to eat, combine them in a skillet. Add a splash of water to revive the sauce. This makes for an easy and quick meal during busy days! You learned how to make creamy tomato basil pasta from scratch. We covered the key ingredients, like pasta, tomatoes, and cream. I shared tips for cooking, flavoring, and presenting your dish. You can even adapt the recipe to fit your diet or season. Remember, good practice in storing and reheating is key to enjoying leftovers. With these steps, you can impress anyone with a simple yet delicious meal. Enjoy your cooking journey!

Creamy Tomato Basil Pasta Rich and Flavorful Delight

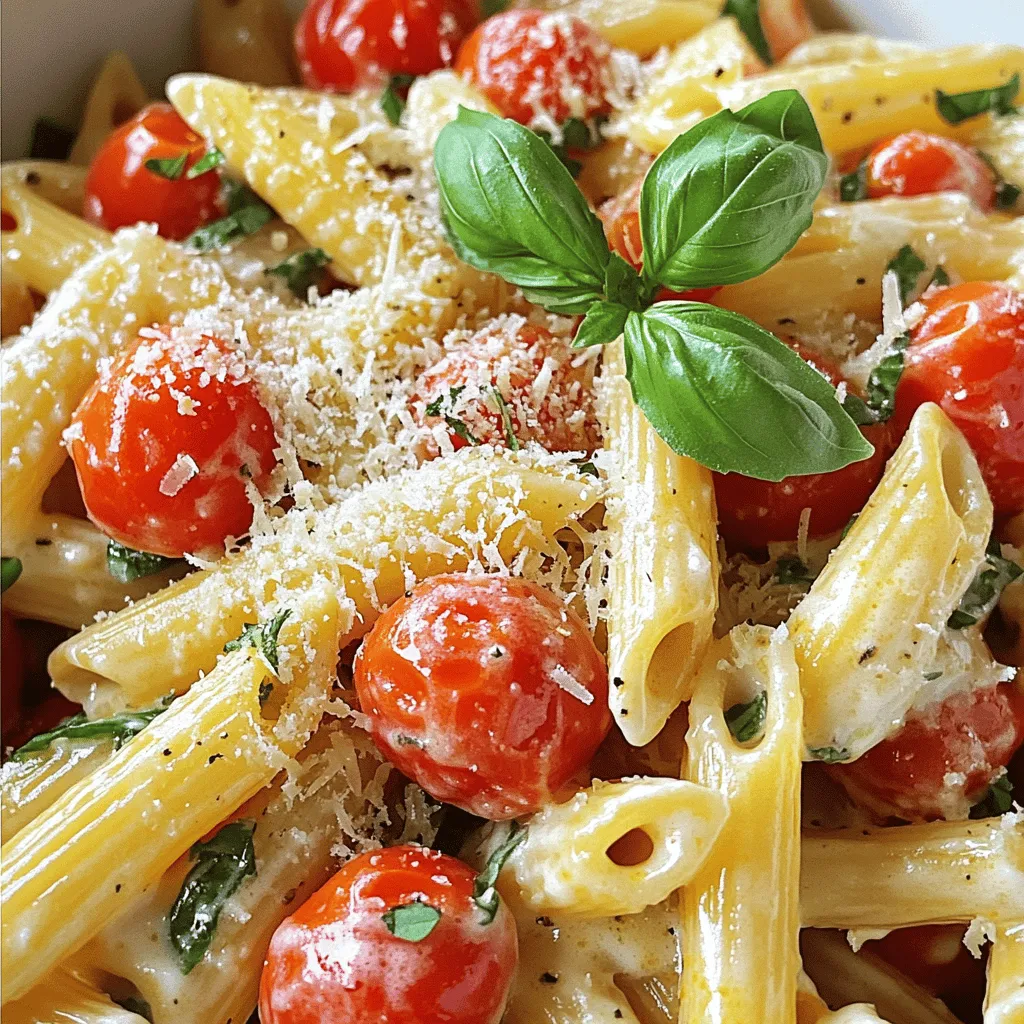
Looking for a delicious dish that bursts with flavor? Try my Creamy Tomato Basil Pasta! With fresh cherry tomatoes, herbal

To make Asian Beef with Mushrooms, gather these key ingredients: - 1 lb (450g) flank steak, thinly sliced - 1 cup shiitake mushrooms, sliced - 1 red bell pepper, sliced - 1 cup broccoli florets - 3 cloves garlic, minced - 1 inch fresh ginger, grated - 2 tablespoons soy sauce - 1 tablespoon hoisin sauce - 1 tablespoon sesame oil - 1 teaspoon sugar - Salt and pepper, to taste - 2 tablespoons vegetable oil - 2 teaspoons sesame seeds, for garnish - 2 green onions, chopped, for garnish This dish shines due to its rich flavors. The flank steak offers a tender bite. Shiitake mushrooms add earthy depth. Red bell pepper gives sweetness, while broccoli brings a fresh crunch. Garlic and ginger boost the dish with aromatic warmth. Soy sauce and hoisin sauce provide that essential umami taste. Sesame oil adds a nutty finish, while sugar balances the flavors. Salt and pepper round out the seasoning, ensuring every bite is full of taste. For the best flavor, always choose fresh ingredients. Look for flank steak that is bright red with minimal fat. Your shiitake mushrooms should be firm and smooth. Avoid slimy or dark spots. Select bell peppers that are shiny and firm to the touch. Fresh broccoli should be vibrant green with tight florets. Always check the expiry dates on sauces. Using high-quality ingredients makes a big difference in your meal’s taste. Start by preparing the marinade. In a bowl, mix the soy sauce, hoisin sauce, sesame oil, sugar, and a pinch of salt and pepper. This blend gives the beef a rich flavor. Next, add the thinly sliced flank steak to the bowl. Make sure each piece is well-coated. Let it marinate for 15 to 20 minutes. This step helps the beef soak up all the tasty flavors. After marinating, heat a large skillet or wok over medium-high heat. Add vegetable oil and let it heat up. Once hot, add the marinated beef to the skillet. Cook for about 3 to 4 minutes. You want the beef to turn a nice brown color. When it’s done, remove the beef from the pan and set it aside. This keeps it juicy and prevents overcooking. In the same skillet, add minced garlic and grated ginger. Stir them for about 30 seconds until they smell great. Then, add the sliced shiitake mushrooms. Cook them for 3 minutes until they start to soften. After that, toss in the broccoli florets and sliced red bell pepper. Stir-fry these for 4 to 5 minutes. You want the veggies to be tender but still crisp. Now it’s time to bring everything together. Return the cooked beef to the skillet. Toss all the ingredients together for about 2 minutes. This allows the flavors to meld. Make sure to check the seasoning and adjust if needed. Serve hot and garnish with sesame seeds and chopped green onions. For a complete meal, serve over steamed rice or noodles. For the full recipe, check the recipe section above. To get the best stir-fry, heat is key. Use a large skillet or wok. Preheat it over medium-high heat. This helps cook the beef quickly. When the pan is hot, add oil right before the meat. This prevents sticking and burning. Cook the beef in small batches. Crowding the pan will steam the meat instead of browning it. You can easily change the flavors to fit your taste. Want it spicier? Add some red pepper flakes or sriracha. If you like it sweeter, increase the sugar a bit. Always taste as you cook. This helps you find the perfect balance. If it’s too salty, add a splash of water. If it needs more umami, add more soy sauce. Garnishes make your dish look fancy and tasty. Here are some ideas: - Sprinkle sesame seeds on top for crunch. - Chop green onions and scatter them for freshness. - Add a few slices of lime or lemon for a zesty kick. - Fresh cilantro or basil will add a bright flavor. These simple touches will elevate your Asian Beef with Mushrooms. For detailed cooking steps, check out the Full Recipe. {{image_2}} You can swap beef for chicken or tofu. Chicken gives a lighter taste. Use boneless chicken thighs or breasts for best results. Tofu is great for a plant-based meal. Choose firm tofu, and press it to remove excess water. Marinate it just like the beef, then cook it until golden. Feel free to mix different veggies in your dish. Snap peas, carrots, or baby corn add crunch. You can also use bok choy for a unique flavor. Try zucchini for a fresh twist. Just make sure to cut the vegetables into uniform pieces for even cooking. For a spicy kick, add red pepper flakes or sriracha. This will wake up your taste buds! If you prefer a sweeter taste, drizzle more hoisin sauce over your dish. You can also toss in some pineapple chunks for a fruity twist. Adjust these flavors to fit your mood and taste. Feel free to explore these variations to make your Asian Beef with Mushrooms even more delightful. For the full recipe, check out the details above. After enjoying Asian Beef with Mushrooms, you may have leftovers. To store them well, let the dish cool to room temperature. Transfer it to an airtight container. Make sure to seal it tight to keep moisture out. Store it in the fridge. It should stay fresh for up to three days. When you want to eat your leftovers, reheating them properly is key. Use a skillet over low heat. Add a splash of water or broth to keep it moist. Stir often to heat evenly. You can also use a microwave. Place the food in a microwave-safe dish. Cover it with a damp paper towel to trap steam. Heat in short bursts, stirring in between, until warm. If you want to save the dish for later, freezing is a great option. Let the beef and veggies cool completely first. Place them in a freezer-safe container. Label it with the date for easy tracking. This dish can last for up to three months in the freezer. To enjoy later, thaw it in the fridge overnight before reheating. For the full recipe and more tips, check out the Full Recipe section. To make a gluten-free Asian Beef with Mushrooms, swap out soy sauce for gluten-free tamari. This sauce gives the same salty flavor without gluten. Check your hoisin sauce too; some brands are not gluten-free. You can also make hoisin sauce at home using gluten-free ingredients. You can serve Asian Beef with Mushrooms over steamed rice or noodles. Fried rice is another great choice. For a fresh touch, add a side salad with a soy-ginger dressing. You can also pair it with spring rolls for a fun meal. Asian Beef with Mushrooms can last in the fridge for up to three days. Make sure to store it in an airtight container. If you want to eat it later, reheat it in a pan over low heat. This keeps the flavors fresh and the beef tender. Yes, you can use dried mushrooms instead of fresh. However, you must rehydrate them first. Soak dried shiitake mushrooms in warm water for about 30 minutes. Once they are soft, slice them and use them just like fresh ones in the recipe. This blog post covered everything you need for Asian Beef with Mushrooms. We explored must-have ingredients, marinating tips, and how to perfect your stir-fry. You learned variations for different proteins and veggies, plus how to store leftovers. In closing, trying this dish is worth it. Ready your kitchen, gather your ingredients, and enjoy a delicious meal tonight!

Asian Beef with Mushrooms Flavorful Dinner Delight

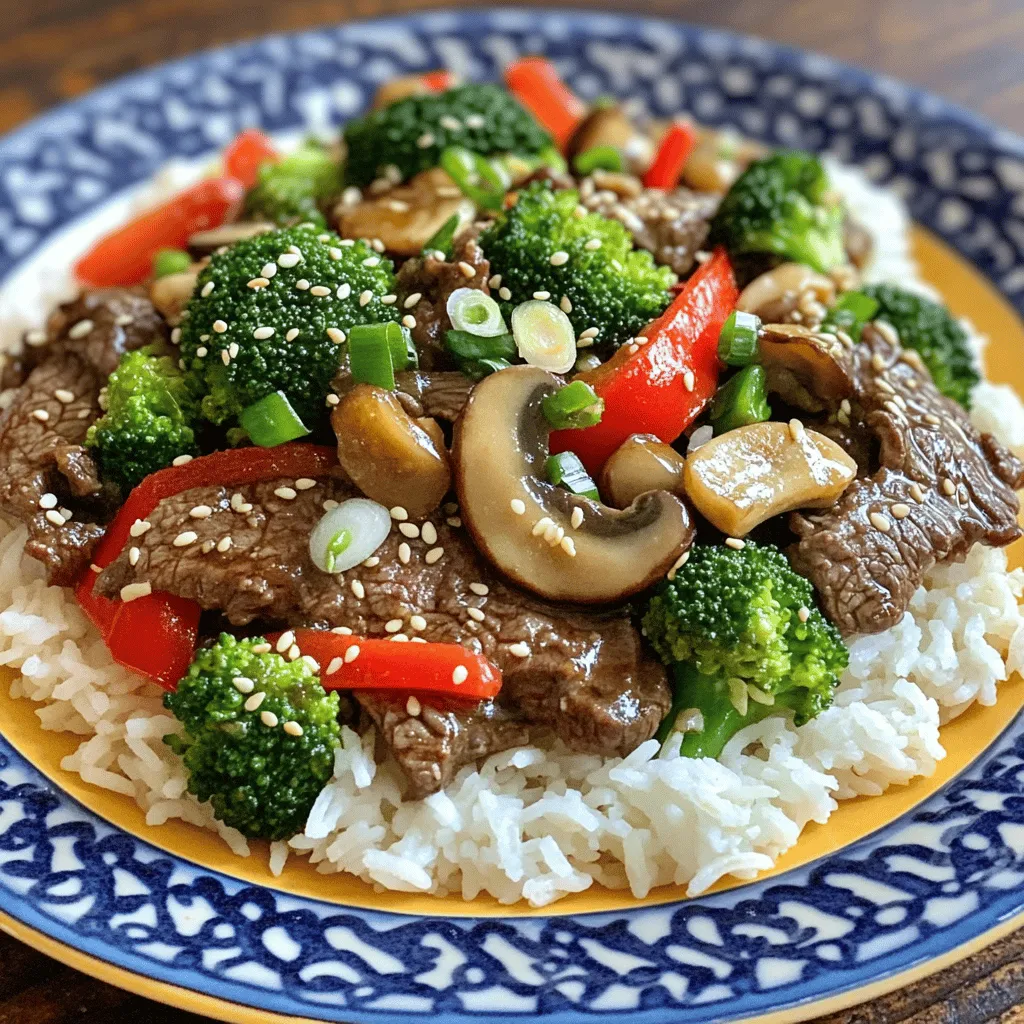
If you’re craving a flavorful dinner that’s simple to make, Asian Beef with Mushrooms is the answer! With tender beef

For a delicious Snickerdoodle Cream Cheese Apple Pie, gather these key ingredients: - 1 ½ cups all-purpose flour - ½ cup unsalted butter, softened - ¼ cup granulated sugar - 1 egg yolk - 1 teaspoon vanilla extract - ½ teaspoon salt - 1 cup cream cheese, softened - 1/3 cup granulated sugar - 1 teaspoon cinnamon - 1 teaspoon vanilla extract - 1 egg - 3 cups Granny Smith apples, peeled and sliced - 1 tablespoon lemon juice - ½ cup brown sugar - 1 teaspoon cinnamon - 1 tablespoon cornstarch - 1 tablespoon unsalted butter, melted - 2 tablespoons granulated sugar - 1 teaspoon cinnamon - 2 tablespoons unsalted butter, melted With these ingredients, you can create a pie that balances creamy and spiced flavors. The tart apples blend perfectly with rich cream cheese and snickerdoodle spices. For the full recipe, check out the detailed instructions provided earlier. Each bite of this pie offers a delightful experience that’s hard to resist! Mixing the Ingredients To start, grab a mixing bowl. Combine 1 ½ cups of flour, ½ cup of softened butter, and ¼ cup of sugar. Add 1 egg yolk, 1 teaspoon of vanilla extract, and ½ teaspoon of salt. Use a fork or pastry cutter to mix until you see a dough form. Chilling the Dough Next, press the dough into a 9-inch pie plate. Make sure to cover the bottom and sides evenly. Prick the bottom with a fork to prevent bubbling. Now, chill the crust in the refrigerator for 30 minutes. Shaping the Crust After chilling, remove the crust from the fridge. If needed, gently reshape the edges. This helps to make the crust look nice and neat. Blending Cream Cheese Mixture In a separate bowl, add 1 cup of softened cream cheese. Then, combine it with ⅓ cup of sugar, 1 teaspoon of cinnamon, 1 teaspoon of vanilla extract, and 1 egg. Mix until the cream cheese is smooth and creamy. Achieving Smooth Consistency Make sure there are no lumps in the cream cheese mixture. A smooth layer will blend well with the apples. Tossing Apples with Spices Grab 3 cups of peeled and sliced Granny Smith apples. In a large bowl, toss these apples with ½ cup of brown sugar, 1 tablespoon of cornstarch, and 1 teaspoon of cinnamon. This gives the apples a sweet and spicy flavor. Combining with Lemon Juice Add 1 tablespoon of lemon juice to the apples. This will keep them fresh and add a nice zing. Layering Techniques Preheat your oven to 350°F (175°C). Once the crust has chilled, spread the cream cheese mixture evenly over the crust. Then, layer the spiced apple mixture on top. Adding the Topping In a small bowl, mix 2 tablespoons of sugar with 1 teaspoon of cinnamon. Drizzle 2 tablespoons of melted butter over the apple filling. Sprinkle the cinnamon sugar mixture on top. Oven Temperature and Time Bake the pie in the preheated oven for 45-50 minutes. The apples should become tender, and the crust should turn golden brown. Checking for Doneness Keep an eye on the pie. If the crust starts to brown too much, cover the edges with foil. Recommended Cooling Time After baking, let the pie cool for at least 30 minutes. This cooling time helps the filling set up nicely. Presentation Suggestions Serve the pie warm or at room temperature. You can top each slice with whipped cream or vanilla ice cream. A sprinkle of cinnamon adds a lovely touch. For the complete recipe, check out the Full Recipe section. - Blind Baking Techniques: Blind baking helps set the crust. After chilling the dough, line it with parchment paper. Fill with pie weights. Bake at 350°F (175°C) for 10-15 minutes. This prevents sogginess when adding filling. - Cooling Tips: Let the pie cool for 30 minutes after baking. This allows the filling to set. If you cut it too early, the bottom can become wet. - Spice Options: You can add more warmth with nutmeg or ginger. A dash of allspice can also enhance the flavor. Experiment to find your favorite mix! - Extract Variations: Vanilla is classic, but almond extract adds a unique twist. Try maple extract for a sweet depth. Just a little goes a long way. - Cream Cheese Consistency Tips: Always soften the cream cheese before mixing. Cold cream cheese will not blend well. Aim for a smooth, creamy texture to make the layer rich. - Whisking Techniques: Use a hand mixer for smooth results. Start slow to avoid splatter. Increase speed once mixed well. This ensures no lumps remain for a perfect snickerdoodle layer. For full details on creating this mouthwatering pie, check out the Full Recipe. {{image_2}} For a different taste, try using a gluten-free crust. You can mix gluten-free flour with cold butter. This gives you a nice base for your pie. Another fun option is to use biscuit or graham cracker crusts. Crush the crackers and mix them with melted butter. Press this into your pie dish. This adds a sweet crunch that pairs well with the filling. While Granny Smith apples are great, you can experiment with other apple types. Try Honeycrisp or Fuji apples for a sweeter taste. Each apple brings its unique flavor to the pie. You can also add pears or berries for a twist. Pears add a soft texture, while berries give a burst of flavor. Mix these fruits with the apples for a colorful filling. If you're dairy-free, you can use dairy-free cream cheese. This works well and still keeps the creamy texture. Look for brands that mimic regular cream cheese for the best result. You can also swap out regular sugar for alternatives like coconut sugar or honey. These options can add a new depth of flavor to your pie. Just adjust the amount to taste. For the full recipe, check the detailed steps and ingredient usage to create your own Snickerdoodle Cream Cheese Apple Pie. When you have leftover Snickerdoodle Cream Cheese Apple Pie, store it in the fridge. Place it in an airtight container for best results. If you don’t have a container, cover it tightly with plastic wrap. This keeps the pie fresh and prevents it from drying out. You can freeze this pie, but decide when to do it. If you freeze before baking, wrap it well in plastic wrap and foil. Make sure it is sealed tight. If you want to freeze after baking, let it cool first. Then, wrap it in plastic wrap and foil. When you are ready to eat it, follow these thawing guidelines. For a pie frozen before baking, thaw it in the fridge overnight. For a baked pie, let it sit at room temperature for a few hours. To reheat your pie, use an oven for the best taste. Preheat your oven to 350°F (175°C). Place the pie on a baking sheet and heat for about 15-20 minutes. This helps keep the crust crisp. If you’re short on time, use the microwave. Heat a slice for 30-45 seconds. Check to see if it is warm enough. If not, heat it in small increments. However, this method may soften the crust. Enjoy your Snickerdoodle Cream Cheese Apple Pie fresh and warm! Yes, you can use store-bought pie crust for this recipe. It saves time and effort. Just make sure it fits your pie plate. Follow the package instructions for baking times. The pie is done when the apples are tender and the crust is golden. You can check the apples with a fork. If they are soft, the pie is ready. Absolutely! You can prepare the pie a day in advance. Just store it in the fridge after cooling. Reheat it before serving for the best taste. Serve it warm or at room temperature. Add whipped cream or vanilla ice cream on top. A sprinkle of cinnamon adds a nice touch. Yes, you can skip the cream cheese. Use a mix of sour cream and sugar instead. This will change the flavor but still keep it tasty. To create a Snickerdoodle Cream Cheese Apple Pie, you need to follow some easy steps. Each layer adds a unique flavor and texture, making this pie a delightful treat. Detailed Steps and Ingredient Usage: 1. Prepare the Pie Crust: - Combine these ingredients in a bowl: - 1 ½ cups all-purpose flour - ½ cup unsalted butter, softened - ¼ cup granulated sugar - 1 egg yolk - 1 teaspoon vanilla extract - ½ teaspoon salt - Mix until a dough forms. Press this dough into a 9-inch pie plate. Prick the bottom and chill it for 30 minutes. 2. Make the Snickerdoodle Layer: - In another bowl, beat together: - 1 cup cream cheese, softened - 1/3 cup granulated sugar - 1 teaspoon cinnamon - 1 teaspoon vanilla extract - 1 egg - Mix until it's smooth and creamy. 3. Prepare the Apple Filling: - Toss 3 cups of peeled and sliced Granny Smith apples with: - 1 tablespoon lemon juice - ½ cup brown sugar - 1 teaspoon cinnamon - 1 tablespoon cornstarch - Ensure all apples are coated well. 4. Assemble the Pie: - Preheat the oven to 350°F (175°C). - Spread the snickerdoodle cream cheese mixture over the chilled crust. - Layer the apple mixture on top of the cream cheese. 5. Add the Topping: - Mix 2 tablespoons of granulated sugar with 1 teaspoon of cinnamon in a small bowl. - Drizzle 2 tablespoons of melted butter over the apple filling and sprinkle the cinnamon-sugar mix on top. 6. Bake the Pie: - Bake for 45-50 minutes. The pie is done when the apples are tender and the crust is golden. 7. Cool and Serve: - Let the pie cool for at least 30 minutes before slicing. This helps the filling set. Summary of Preparation Techniques: This pie blends the rich taste of cream cheese and the warm spices of cinnamon. Chilling the crust helps prevent sogginess. Layering the cream cheese and apples creates a delightful texture. Baking brings all the flavors together, making every bite a flavorful delight. Enjoy your slice with whipped cream or ice cream for extra joy! This blog post covered the tasty Snickerdoodle Cream Cheese Apple Pie. We explored each step, from making the perfect crust to creating a delicious apple filling. I shared tips to avoid a soggy bottom and suggested fun variations. Remember, this pie is all about balance—sweet cream cheese, spiced apples, and a crisp crust. Use this guidance to impress your family and friends. Enjoy the baking journey!

Snickerdoodle Cream Cheese Apple Pie Flavorful Delight

Are you ready to bake a pie that combines creamy delight with spiced goodness? My Snickerdoodle Cream Cheese Apple Pie

Here’s what you need to make these tasty breakfast burritos. Gather all your ingredients before you start cooking. This makes the process smooth and fun. - 4 large flour tortillas - 6 large eggs - 1 cup black beans, drained and rinsed - 1 cup cherry tomatoes, halved - 1 cup cheddar cheese, shredded - 1 avocado, diced - 1/2 cup bell pepper, finely chopped (red or green) - 1/4 cup red onion, finely chopped - 1 teaspoon ground cumin - 1 teaspoon paprika - Salt and pepper to taste - 2 tablespoons olive oil - Fresh cilantro, chopped (for garnish) - Salsa (for serving) This list ensures you have bright flavors and good textures in each bite. Each ingredient plays a role in making your burrito delicious. For the full recipe, check the other sections. Start by cracking six large eggs into a bowl. Whisk them well until they blend into a smooth mix. Add one teaspoon of ground cumin and one teaspoon of paprika. Sprinkle in salt and pepper to taste. This mix will give your eggs a rich flavor. Next, heat two tablespoons of olive oil in a large skillet over medium heat. Once hot, add half a cup of finely chopped bell pepper and a quarter cup of finely chopped red onion. Sauté these for about three to four minutes until they soften. The smell will make you hungry! Now, pour the egg mixture into the skillet with the vegetables. Stir gently as the eggs begin to cook. This should take about three to five minutes. You want to form soft curds, not dry eggs. Keep an eye on them. When the eggs are nearly done but still fluffy, fold in one cup of drained black beans and one cup of halved cherry tomatoes. Mix gently and let them heat for two to three more minutes. This adds more flavor and texture to your filling. Grab four large flour tortillas. Place some of the egg and vegetable mixture in the center of each tortilla. Be generous! Top it with one cup of shredded cheddar cheese and some diced avocado. This makes each bite creamy and delicious. To wrap, fold the sides of the tortilla in first, then roll it from the bottom up. Make sure the filling stays inside. Now, return the skillet to medium heat. Place the wrapped burritos seam-side down in the skillet. Toast for about two to three minutes on each side until they turn golden brown and crispy. Now you have a tasty breakfast burrito ready to enjoy! For the full recipe, check out the details above. Achieving the Right Egg Consistency For the best texture, whisk the eggs well. This adds air and makes them fluffy. Cook the eggs on medium heat. Stir gently to form soft curds. Remove them from heat when they are still slightly runny. They will continue to cook after you take them off the stove. Getting a Golden Brown Exterior To achieve a perfect golden brown crust, use enough olive oil when toasting. Heat the skillet well before adding the burritos. Place them seam-side down first. Cook for 2-3 minutes on each side until crispy. This gives your burrito a nice crunch. Recommended Spices and Seasonings Spices boost the flavor of your burrito. I suggest using ground cumin and paprika for warmth. You can also try chili powder for extra heat. A pinch of salt and pepper enhances all the flavors. Additional Toppings to Consider Toppings can take your burrito to the next level. Fresh ingredients like diced avocado and cherry tomatoes add creaminess and brightness. You can also add sour cream or Greek yogurt for a tangy touch. Don't forget chopped cilantro for a fresh finish. Pairing Ideas with Salsa Salsa is a perfect side. It adds spice and freshness. I love to use a fresh pico de gallo or a smooth salsa verde. Either choice adds a burst of flavor that complements the burrito well. Presentation Tips To make your dish look great, cut the burrito in half diagonally. This shows off the colorful filling. Serve it on a plate with a scoop of salsa on the side. Garnish with a sprinkle of cilantro for a pop of color. If you want to try making these delightful burritos, check out the Full Recipe for all the details! {{image_2}} For a tasty vegetarian burrito, you can use a mix of fresh vegetables. Try adding spinach, zucchini, or mushrooms. These veggies add great flavor and color to the filling. You could even toss in some sweet corn for a touch of sweetness. When it comes to protein, beans are a great choice. You can use black beans, pinto beans, or chickpeas. They provide a hearty texture and boost the protein level. Tofu is another option. It absorbs flavors well and can be cooked until golden. If you enjoy meat, bacon or sausage brings great flavor to your burrito. Cook the bacon until crisp and crumble it into the egg mixture. For sausage, cook it in the skillet first. Then add the eggs and veggies. This makes the filling rich and savory. For chicken or beef burritos, use cooked shredded chicken or ground beef. Season them with spices that match the burrito flavor. You can even use leftover grilled meats for a quick and tasty meal. If you need a gluten-free option, look for gluten-free tortillas. Many brands offer tasty alternatives made from rice or corn. These work well for wraps and taste great. For low-carb options, try using lettuce leaves instead of tortillas. This gives you a fresh crunch and cuts down on carbs. You can wrap the filling in large leaves, like romaine or butter lettuce. This is a fun and light way to enjoy your burrito! These variations let you create a breakfast burrito that suits your taste and diet. You can explore different flavors and make it your own! Check out the Full Recipe for more ideas on making these delicious burritos. To keep your burritos fresh, store them right away. Wrap each burrito in plastic wrap or foil. Place them in an airtight container. - Refrigeration Guidelines: You can store burritos in the fridge for up to three days. Make sure they cool to room temperature before storing. This helps prevent sogginess. - Freezing Burritos for Later: For longer storage, freeze the burritos. Wrap them tightly in plastic wrap and then foil. Label them with the date. They can last up to three months in the freezer. To enjoy your leftovers, you’ll need to reheat them well. - Best Methods for Softness: The microwave is quick and easy. Unwrap the burrito and place it on a plate. Heat for 1-2 minutes, flipping halfway. For a crispier option, use an oven or skillet. Preheat the oven to 350°F (175°C) and bake for 15-20 minutes. - Avoiding Sogginess: If using a microwave, cover the burrito with a damp paper towel. This keeps moisture in but avoids sogginess. If you use a skillet, keep the heat moderate. This helps the outside stay crispy while heating the inside. For the full recipe, check out the Savory Breakfast Burritos. You can use corn tortillas if you want a gluten-free option. They are smaller, but they hold up well. You can also try whole wheat tortillas for a healthier choice. Lettuce wraps are great for low-carb diets. Yes, you can make burritos ahead of time. Just prepare the filling and wrap them in tortillas. Then, store them in the fridge for up to three days. You can also freeze them for up to three months. Just let them cool completely before wrapping. To make burritos spicy, add jalapeños or diced green chilies to the filling. You can also use spicy salsa or hot sauce when serving. For an extra kick, sprinkle in some cayenne pepper or crushed red pepper flakes during cooking. Many fillings work well in burritos. You can use cooked chicken, beef, or pork for protein. Try sautéed mushrooms, zucchini, or spinach for added veggies. Cheese types like pepper jack or feta can also add great flavor. Yes, you can bake burritos instead of toasting them. Preheat your oven to 375°F (190°C). Place the wrapped burritos seam-side down on a baking sheet. Bake for about 20 minutes until they are golden brown and hot. This method is great for making multiple burritos at once. For the full recipe, check out the Savory Breakfast Burritos section. You’ve learned how to make delicious burritos packed with tasty ingredients. We covered everything from the filling to wrapping techniques. Don’t forget to explore variations to fit your taste and dietary needs. With the tips provided, you can enjoy perfect burritos every time. Have fun with different flavors! Try new ingredients and impress your friends and family. Happy cooking, and enjoy your culinary creations!

Savory Breakfast Burritos Easy and Flavorful Recipe

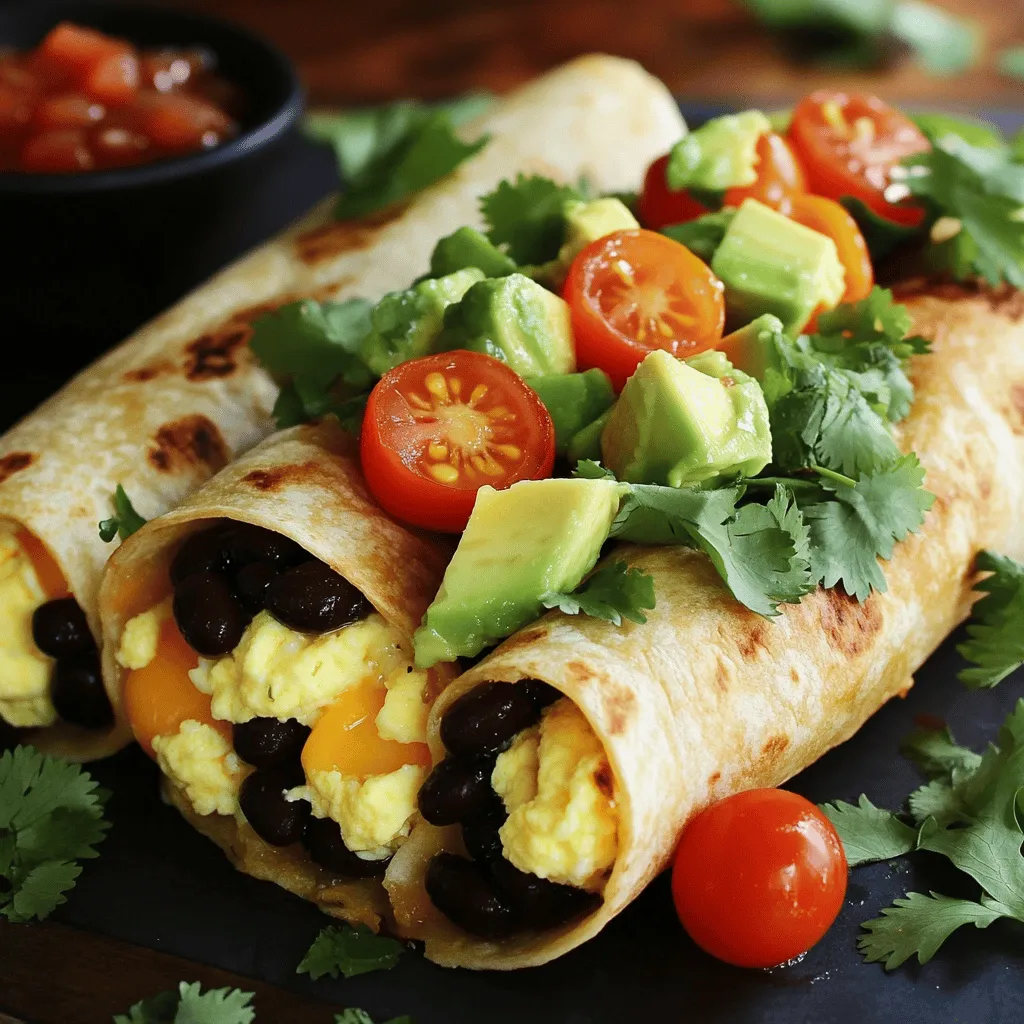
Breakfast should be exciting, and savory breakfast burritos are the perfect way to start your day! In just a few

- 2 slices of sourdough bread - 1 ripe avocado - 2 large eggs - 1 tablespoon lemon juice - 1 teaspoon chili flakes - 1 tablespoon olive oil - Salt and pepper to taste - Fresh microgreens or herbs (like cilantro or basil) Creating this dish is simple yet rewarding. First, I choose fresh sourdough bread. It gives a perfect crunch and a nice base. The avocado should be ripe but not too soft. This ensures a creamy texture without being mushy. For flavor, I always add a splash of lemon juice. It brightens up the dish and keeps the avocado green. A sprinkle of chili flakes adds a gentle heat that contrasts with the smooth avocado. I finish it with olive oil, salt, and pepper for a balanced taste. Don't forget the garnishes! Fresh microgreens or herbs can elevate the dish. They add a pop of color and freshness. This recipe is not just about taste; it's about presentation too. You can find the full recipe linked above to guide you through each step. Enjoy making this delightful meal! - Toast the sourdough bread: Start by toasting two slices of sourdough. Toast them until they are golden brown and crispy. This gives a crunchy base for your dish. - Mash the avocado with seasoning: While the bread toasts, cut a ripe avocado in half. Take out the pit and scoop the green flesh into a bowl. Add one tablespoon of lemon juice, salt, and pepper to taste. Use a fork to mash the avocado lightly. You want it creamy but still chunky. - Instructions for creating a whirlpool: Fill a saucepan with about three inches of water. Bring it to a gentle simmer on the stove. Crack one egg into a small bowl. Stir the simmering water to create a gentle whirlpool. This will help the egg white wrap around the yolk. - Timing for achieving the perfect runny yolk: Gently slide the egg into the center of the whirlpool. Poach it for about three to four minutes. This time gives you a nice runny yolk. Use a slotted spoon to remove it from the water and set it on a plate. Repeat for the second egg. - Spreading avocado on toast: Once the bread is toasted, take each slice and spread a generous amount of mashed avocado on top. Make sure to cover the bread well. - Drizzling olive oil and adding chili flakes: Take one tablespoon of olive oil and drizzle it over the avocado. Sprinkle one teaspoon of chili flakes on top for a bit of heat. - Adding the poached egg and garnishing: Carefully place one poached egg on each slice of avocado toast. If you like, add more salt and pepper to taste. Finish with a sprinkle of fresh microgreens or herbs. This adds color and freshness to your dish. For the full recipe, check the details above! To make a perfect poached egg, start with fresh eggs. Fresh eggs hold their shape better. Here are some best practices: - Use a small pot with about three inches of water. - Heat the water until it's just simmering, not boiling. - Crack the egg into a bowl before adding it to the water. - Create a gentle whirlpool with a spoon before sliding in the egg. Common mistakes include using boiling water or not using fresh eggs. Boiling water can make the egg break apart. If the egg spreads too much, it won't look nice on your toast. To boost the flavor of your avocado toast, try these seasonings: - A pinch of salt and freshly cracked pepper - A squeeze of lemon juice for brightness - Chili flakes for a bit of heat You can also add creative toppings like: - Feta cheese for a salty bite - Sliced radishes for crunch - A drizzle of balsamic glaze for sweetness To make your dish look stunning, focus on plating: - Use a vibrant plate to make the colors pop. - Place the avocado toast slightly off-center for a casual look. - Top the poached egg with fresh microgreens or herbs. For complementary sides, consider serving: - A small fruit salad for freshness - A light green salad to balance the meal For more details, check the Full Recipe. {{image_2}} For a lighter take on avocado toast, consider using whole grain or gluten-free bread. These options pack more fiber and nutrients. You can also add toppings like sliced tomatoes or radishes for extra crunch. If you're watching your fat intake, try a low-fat Greek yogurt instead of an egg. It adds creaminess without the extra calories. To switch things up, try a Mediterranean twist. Add crumbled feta and sliced olives on top of your avocado spread. This mix gives a salty burst of flavor. If you love heat, drizzle sriracha or add sliced jalapeños. These will spice up your toast and take it to another level. Fresh herbs can brighten your dish. Try adding basil or cilantro for a pop of flavor. You can also toss in seasonal veggies like arugula or spinach. For a sweet touch, consider thinly sliced strawberries or peaches when they’re in season. These fruits add a delightful contrast to the creamy avocado. For the full recipe, check the details above. To keep your avocado fresh, store it in an airtight container. Always add a splash of lemon juice. This helps slow down browning. You can keep mashed avocado in the fridge for up to two days. For reheating toast, use a toaster or oven. This keeps it crispy. Avoid microwaving, as it can make the bread soggy. For the poached eggs, gently warm them in hot water. Serve the leftovers with fresh herbs for added flavor. When it comes to food safety, always check the eggs. Ensure they are fresh and stored in the fridge. Avocado should also be ripe but not overripe. Discard any avocado that looks brown or mushy. Follow these steps to enjoy safe and tasty meals! You can poach eggs without vinegar by using a few different methods. One option is to use a non-stick pan and plenty of water. Heat the water to a gentle simmer. Create a whirlpool, then add the egg. This helps keep the egg white together. Another method is to use silicone molds. Place the molds in simmering water and crack the eggs inside. This helps the eggs hold their shape. Yes, you can make avocado toast ahead of time, but it’s best to prep wisely. Toast your bread and prepare the avocado mixture separately. Store the avocado in an airtight container. Add lemon juice to slow browning. Assemble the toast just before serving to keep it fresh and tasty. Sourdough bread is a top choice for avocado toast. Its crusty outside and soft inside make a great base. Whole grain bread adds fiber and flavor. You can also try rye or gluten-free bread if you prefer. Choose a bread that you enjoy for the best taste. To keep your avocado fresh, add lemon or lime juice right after cutting. The acid slows down browning. Store the avocado in an airtight container. You can also place the pit in the container with the avocado. This can help keep it green longer. If you cover it with plastic wrap, press it tightly against the surface. Avocado toast with a poached egg is simple but delicious. We explored ingredients, from ripe avocados to sourdough bread. You learned steps for perfect poached eggs and creative ways to enhance flavor. Remember, mastering techniques and presentation makes your dish shine. Try different toppings and seasonal ingredients to keep it fresh. Enjoy your tasty creation, and don’t forget to share your twists with others!

Savory Avocado Toast with Poached Egg Delight

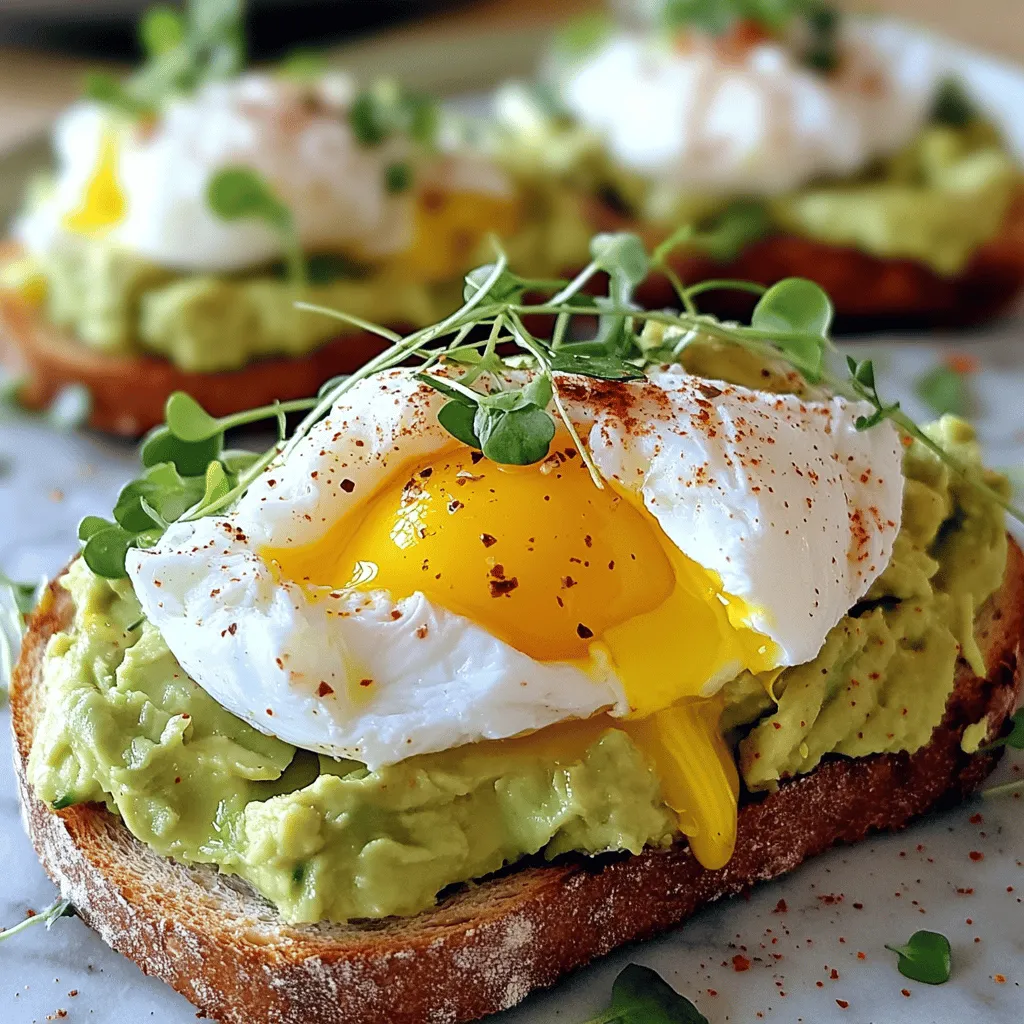
Looking for a hearty yet simple meal? This Savory Avocado Toast with Poached Egg Delight is just what you need!

- 1 can (15 oz) chickpeas, drained and rinsed - 2 tablespoons olive oil - 1 teaspoon garlic powder - 1 teaspoon smoked paprika - 1/2 teaspoon cayenne pepper (adjust to taste) - 1 teaspoon sea salt - 1/2 teaspoon black pepper - 1 teaspoon lemon zest To make spicy garlic roasted chickpeas, you need a few key items. First, get a can of chickpeas. They are the main star of this snack. You will also need olive oil to help the spices stick and add flavor. Next, gather the spices and seasonings. Garlic powder gives a great taste. Smoked paprika adds a nice depth. Adjust the cayenne pepper for heat based on your preference. Sea salt and black pepper will enhance the overall flavor. Finally, lemon zest brings a fresh kick that ties it all together. - Fresh parsley - Lemon wedges For garnishes, I recommend using fresh parsley. It adds color and brightness to the dish. Lemon wedges also make a great addition. They can add a zesty squeeze right before eating. These small touches can elevate your snack and make it look even more appealing. You can find the full recipe in the earlier part of this article. Rinsing and drying the chickpeas is very important. This step removes the canning liquid and makes them less soggy. Proper drying helps them get that great crunch. After rinsing, pat them dry using a paper towel. You want to absorb as much moisture as possible. Next, it's time to season. In a large bowl, mix the dried chickpeas with olive oil, garlic powder, smoked paprika, cayenne pepper, sea salt, and black pepper. Make sure every chickpea gets coated well. This mix gives your snack a burst of flavor. Preheat your oven to 400°F (200°C). This is key for cooking them evenly. A hot oven helps create a crunchy texture that you will love. While the oven heats, spread the seasoned chickpeas on a baking sheet. Use parchment paper to help with easy cleanup. Make sure the chickpeas are in a single layer. If they are piled on top of each other, they won’t roast well. Even spreading allows for proper air circulation and crispiness. Roast the chickpeas in the preheated oven for 25-30 minutes. This time frame is perfect for getting them golden and crunchy. Halfway through roasting, give the pan a shake. This helps them cook evenly and prevents sticking. When they look golden brown, take them out. Right after roasting, sprinkle lemon zest on top. This adds a fresh zing that wakes up the flavors. Let them cool for a few minutes before serving. Enjoy your spicy garlic roasted chickpeas as a tasty snack or a crunchy salad topping. To make your spicy garlic roasted chickpeas crunchy, start by drying them well. After rinsing the chickpeas, spread them on a clean kitchen towel. Pat them gently with another towel. Make sure they are as dry as possible. This step is key for crispiness. Common mistakes include not drying the chickpeas enough. If they are wet, they won't crisp up. Another mistake is overcrowding the baking sheet. Spread them out in a single layer. This ensures even roasting and helps them become golden and crunchy. Enhancing flavor is easy. You can try adding different spices. For example, cumin adds warmth. Curry powder gives a unique twist. If you want more heat, add more cayenne pepper or some chili powder. Adjusting heat levels can change the dish. If you like it mild, cut back on spicy ingredients. For those who love heat, double the cayenne. Taste as you go to find the perfect balance for your palate. Serving your spicy garlic roasted chickpeas can be fun. Use a bright bowl or a stylish platter. Garnish with fresh parsley to add color. Lemon wedges on the side also brighten up the dish. For a fun twist, consider serving them as a topping. They make a great crunchy addition to salads. Just sprinkle them on top for extra flavor and texture. Enjoy these tasty bites while sharing with friends or family! {{image_2}} You can change the flavor of roasted chickpeas easily. Try different spice blends for fun. For a sweet twist, add cinnamon and a bit of sugar. If you like a kick, mix in chili powder or curry powder. Want a cheesy touch? Sprinkle in some grated Parmesan cheese after roasting. Nuts, like almonds or walnuts, add crunch and flavor too. Roasted chickpeas fit many diets. They are vegan, so you can enjoy them without worry. If you want a gluten-free snack, these fit the bill perfectly. Just check your spices to make sure they are gluten-free. You can replace olive oil with coconut oil for a different taste if you prefer. When it comes to drinks, pair your spicy garlic roasted chickpeas with a light beer or sparkling water. Both help balance the spice. For a tasty meal, serve them with a fresh salad or your favorite dip, like hummus or yogurt sauce. They make a great crunchy topping too! For the full recipe, check out Spicy Garlic Roasted Chickpeas. After making spicy garlic roasted chickpeas, let them cool down. Use an airtight container to keep them fresh. Glass or plastic containers work well. Store them in a cool, dry place. Keep them away from heat and moisture. This helps maintain their crunchy texture. To reheat, use the oven or an air fryer. Preheat your oven to 350°F (175°C). Spread them out on a baking sheet. Heat for about 10 minutes. This keeps them crispy. If using an air fryer, heat at 325°F (160°C) for 5-7 minutes. Yes, you can freeze roasted chickpeas. Place them in a freezer-safe bag. Remove as much air as possible. They can last up to three months in the freezer. To thaw, leave them in the fridge overnight. For quick thawing, use the microwave. Once thawed, reheat them using the methods above to regain their crunch. Enjoy your flavorful snack anytime! Roasted chickpeas can last up to one week. Store them in an airtight container. Keep them in a cool, dry place. They may lose crispiness over time. For the best taste, enjoy them fresh! Yes, you can use dried chickpeas. However, you need to soak and cook them first. Soak them overnight in water. Then, boil them until soft. After that, you can follow the same steps for roasting. If your chickpeas are too soft, they may not crisp well. Ensure you dry them completely after rinsing. You can also roast them longer. Check them every few minutes to avoid burning. Yes, roasted chickpeas are a healthy snack. They are high in protein and fiber. They also provide essential vitamins and minerals. This makes them a great alternative to chips or crackers. Enjoy them guilt-free! Roasted chickpeas are a tasty and healthy snack. We covered everything from essential ingredients to easy cooking steps. Remember to rinse and dry the chickpeas for a crisp finish. Try different spices for fun flavor twists, and don't forget to serve with garnishes like parsley or lemon wedges. You can even freeze them for later! Enjoy exploring the many ways to make roasted chickpeas your go-to snack.

Spicy Garlic Roasted Chickpeas Crunchy Snack Idea

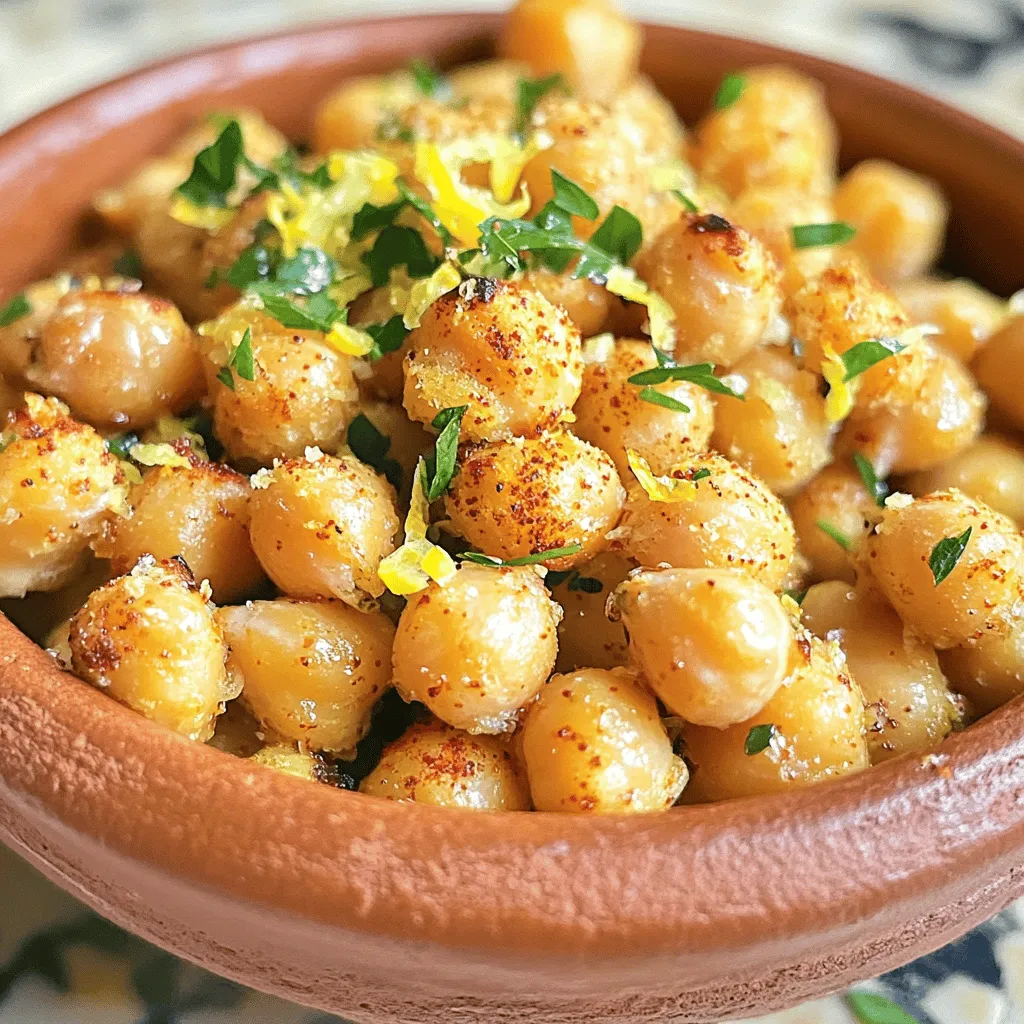
Looking for a snack that’s both crunchy and packed with flavor? Try my Spicy Garlic Roasted Chickpeas! These little bites

Older posts
Newer posts
← Previous Page1 … Page99 Page100 Page101 … Page105 Next →
© 2025 My Cooking Cast • Built with GeneratePress

Our Policies

  • Privacy Policy
  • GDPR Policy
  • Terms Of Use
  • Copyright Policy
  • Cookie Policy
  • Disclaimer

More Information​

  • Home
  • Contact
  • About
  • Dinner
  • Appetizers
  • Dessert
©2025, My Cooking Cast About Privacy Policy Back To Top